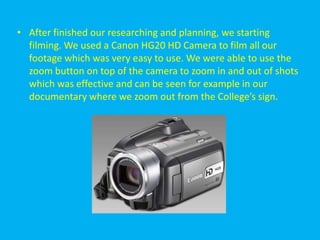
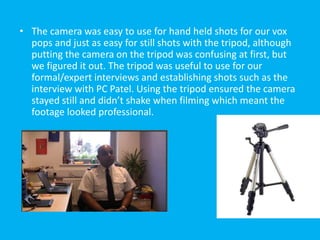
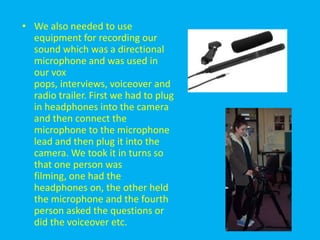
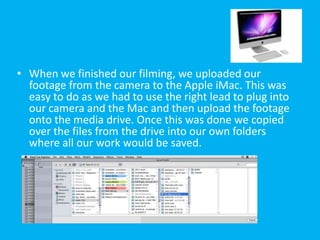
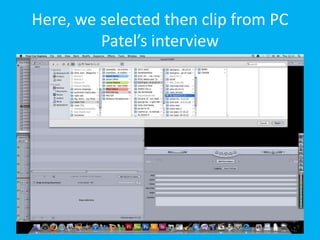
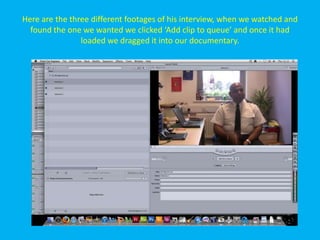
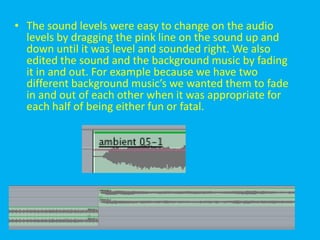
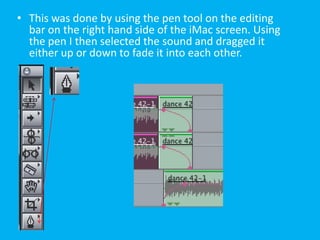
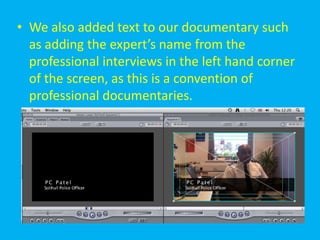
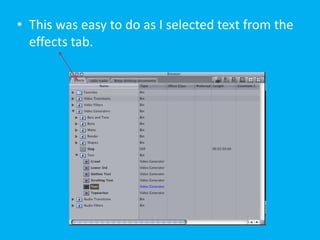
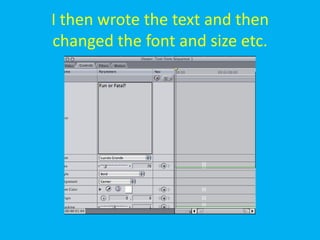
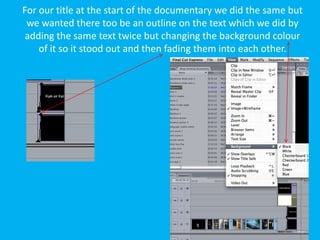
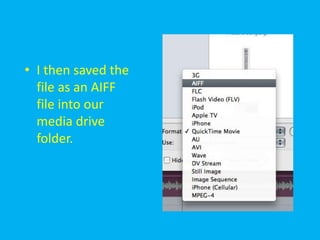
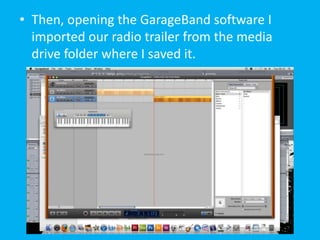
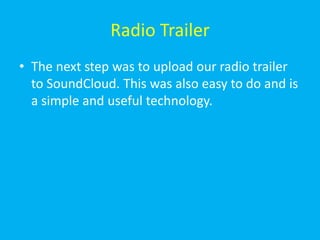
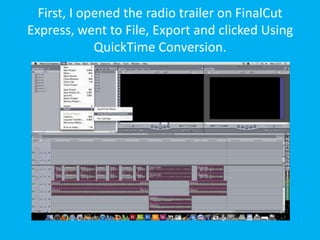
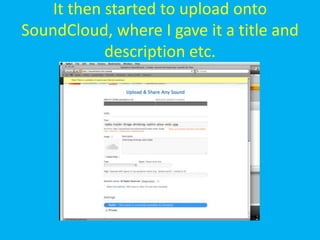
4. How did you use media
technologies in the construction and
 research, planning and evaluation
               stages?
             Caitlin Hulse
Research and Planning
• Researching and planning our documentary was very
  important so that we produced it well and to a
  professional standard.
• We separated tasks between the four of us in our
  group in order to get everything done efficiently and so
  I mainly focused on researching into the topic of binge
  drinking so that our facts and statistics were valid and
  could be used in the documentary.
• For this research I used software such as the
  internet, and to ensure it was true and accurate I found
  three sources to validate the information I had found.
• This meant that we could confidently use the
  information in our documentary because it
  was true and therefore makes our
  documentary appear professional.
• Examples of these websites include the NHS
  website and BBC News which are well known
  and official websites and will mean that the
  research I found is correct.
• I also researched into what channel our documentary would
  be showed on and what radio station it would be aired on and
  therefore had to look on the Channel4 website and Capital FM
  radio website.
• Doing this meant we found a suitable channel and station that
  our documentary would appeal to the audience that
  watched/listened to it.
• While researching a suitable channel for our documentary it
  was important we researched similar documentaries to ours
  such as ‘Ready, Steady Drink’ and ‘Party Paramedics’.
• We did this in order to make sure our documentary
  conformed to the conventions of professional documentaries.
  To do this I used software on the internet such as YouTube
  and 4oD to watch the documentaries online.
• Other research and planning we did was
  hand and paper based, such as creating
  storyboards and transfer and logging
  sheets.
• The first task was to research and analyse
  TV Documentaries such as different
  documentary types and modes.
• I scanned and uploaded my written class
  work to blogger.com on our blog where I
  had researched TV documentary styles and
  influences and types of narrative structure
  which could assist in the production of our
  documentary.
• Task two was then the initial planning and final
  proposal of our documentary.
• We did a mind map on paper as a group of
  different ideas that we could do and I then used
  the software Microsoft Word to write these
  up, as well as creating tables of the strengths and
  weaknesses of our top three documentary topic
  choices.
• I then wrote about our final choice and included
  information such as the time, channel and
  influences of our documentary.
• Other paper work included our
  storyboards which we discussed
  as a group and the best person at
  drawing sketched out.
• We decided to sketch the opening
  sequence of our documentary first
  as this is the first footage our
  audience will see and so needs to
  be the most dramatic and
  appealing.
• All of the research that we have
  done at this stage was uploaded
  to our blog to show the
  development of our project which
  is a useful technology to use
  because it meant we could upload
  our work that we did
  independently and as a group.
Filming
• After finished our researching and planning, we starting
  filming. We used a Canon HG20 HD Camera to film all our
  footage which was very easy to use. We were able to use the
  zoom button on top of the camera to zoom in and out of shots
  which was effective and can be seen for example in our
  documentary where we zoom out from the College’s sign.
• The camera was easy to use for hand held shots for our vox
  pops and just as easy for still shots with the tripod, although
  putting the camera on the tripod was confusing at first, but
  we figured it out. The tripod was useful to use for our
  formal/expert interviews and establishing shots such as the
  interview with PC Patel. Using the tripod ensured the camera
  stayed still and didn’t shake when filming which meant the
  footage looked professional.
• We also needed to use
  equipment for recording our
  sound which was a directional
  microphone and was used in
  our vox
  pops, interviews, voiceover and
  radio trailer. First we had to plug
  in headphones into the camera
  and then connect the
  microphone to the microphone
  lead and then plug it into the
  camera. We took it in turns so
  that one person was
  filming, one had the
  headphones on, the other held
  the microphone and the fourth
  person asked the questions or
  did the voiceover etc.
• Before we started recording sound we had to
  make sure the sound levels were right so that
  there was no background noise being picked
  up that wasn’t needed and that it would
  sound right on the Apple iMac when we
  uploaded it. In our vox pops, background
  noise wasn’t a major problem but for our
  expert interviews, voiceover and radio trailer
  we went into a quiet, empty room to make
  sure no background noise was picked up.
Editing
• When we finished our filming, we uploaded our
  footage from the camera to the Apple iMac. This was
  easy to do as we had to use the right lead to plug into
  our camera and the Mac and then upload the footage
  onto the media drive. Once this was done we copied
  over the files from the drive into our own folders
  where all our work would be saved.
• Then using Final Cut Express
  which is software on the
  Apple iMac we were able to
  edit our whole documentary.
  The first step was log and
  transferring all the clips that
  we possibly wanted in our
  documentary. Using the log
  sheets we organised and
  named the clips and then
  said if we wanted to
  add/transfer them or not.
  Once the clips we wanted to
  use were imported into Final
  Cut Express with the correct
  label so we could find them
  easily, we started editing.
Here, we selected then clip from PC
         Patel’s interview
Here are the three different footages of his interview, when we watched and
  found the one we wanted we clicked ‘Add clip to queue’ and once it had
                loaded we dragged it into our documentary.
• We decided we didn’t want to over edit the documentary because
  it is quite a strong and interesting topic anyway and therefore
  used simple yet effective edits and effects. We changed the speed
  on a few clips so that the footage was fast paced, an example of
  this is in the opening sequence as its visibly quicker than the rest
  of the footage, which was done to mimic a fast paced and exciting
  ‘night out’. We did this by selecting Modify from the tool
  bar, selecting speed and then typing in the speed we wanted it to
  go at.
• The sound levels were easy to change on the audio
  levels by dragging the pink line on the sound up and
  down until it was level and sounded right. We also
  edited the sound and the background music by fading
  it in and out. For example because we have two
  different background music’s we wanted them to fade
  in and out of each other when it was appropriate for
  each half of being either fun or fatal.
• This was done by using the pen tool on the editing
  bar on the right hand side of the iMac screen. Using
  the pen I then selected the sound and dragged it
  either up or down to fade it into each other.
• We also added text to our documentary such
  as adding the expert’s name from the
  professional interviews in the left hand corner
  of the screen, as this is a convention of
  professional documentaries.
• This was easy to do as I selected text from the
  effects tab.
I then wrote the text and then
changed the font and size etc.
For our title at the start of the documentary we did the same but
 we wanted there too be an outline on the text which we did by
 adding the same text twice but changing the background colour
    of it so it stood out and then fading them into each other.
• Once we finished the
  editing the footage, we
  recorded the voiceover
  using the
  camera, microphone and
  headphones. We had
  written a script for our
  voiceover and had
  separated it into parts so
  we could record each
  part instead of recording
  one whole take. By doing
  this it meant we could
  just re-record a part if it
  was said wrong, instead
  of having to re-record
  the whole thing again.
• This was useful when recording the voiceover but
  also when it came to putting it on Final Cut
  Express and editing it onto the documentary we
  could just import and edit each individual clip
  instead of one whole voiceover. This also meant
  that it was easier to move around, adjust and
  match other footage around the voiceover.
• We then chose our
  background music for our
  documentary. We had to
  ensure we used non
  copyright music and so we
  selected music off a website
  given to us by the College
  which had music we could
  use that wasn’t copyrighted.
  We chose two different types
  of music, one that was
  upbeat and had a dance vibe
  for the fun half of the
  documentary called ‘dance
  42-1’ and the other that was
  slower and sadder for the
  fatal half called ‘ambient 05-
  1’.
Radio Trailer
• For our radio trailer we completed it in Final Cut
  Express. We wanted to use clips from our
  documentary so that listeners would be intrigued
  and want to watch the documentary if they hear
  teasers from it. So in the same way we created
  our documentary, we added the clips we wanted
  into Final Cut Express but deleted the visual
  footage and just keeping the sound. We then
  recorded our voiceover which we followed from a
  script again, using the camera, headphones and
  microphone and then uploaded it in the same
  way onto Final Cut Express.
• We then selected the voiceover clips, deleting the
  visual footage and just keeping the sound and added it
  our trailer. We also used the same background music
  from our documentary, keeping our unique brand
  identity of having a fun half and a fatal half. Like our
  documentary, our radio trailer followed the story of
  binge drinking being either fun or fatal and so using the
  ‘fun’ background music first we had the voiceover ask a
  rhetorical question of, “A night to remember?” this was
  answered by a vox pop from the documentary
  saying, “You’ll probably forget the night your
  experiencing”. These contrasting question and answers
  continued and the ‘fatal’ music then fading in and back
  out again for the serious half, like our documentary.
• Once our trailer was completed we had to
  export it into GarageBand. This software was
  easy to use and meant we could upload our
  radio trailer to SoundCloud easier.
• Firstly I highlighted the trailer and then
  selected File from the top menu and then
  Export and then Using quick time conversion.
• I then saved the
  file as an AIFF
  file into our
  media drive
  folder.
• Then, opening the GarageBand software I
  imported our radio trailer from the media
  drive folder where I saved it.
TV listing magazine
• To produce our magazine article we used the
  software Adobe InDesign to create a double
  page spread, in which we added our article I
  had written on Microsoft Word. We divided
  tasks between each other to create the
  magazine article, so while I wrote the
  article, someone else was creating the layout
  etc. We all discussed what we wanted the
  layout to look like and then it was created in
  Adobe InDesign.
• I suggested we made a
  few changes to the
  magazine layout, as at
  first we decided to create
  it in the style of Radio
  Times magazine but our
  magazine looked more
  like something off What’s
  on TV. I then started to
  change the magazine to
  look more like a
  professional one from
  What’s on TV.
• Firstly I created a banner/header which is a
  convention of What’s on TV where the name
  of the documentary, time and channel is. I did
  this by creating a rectangle using the shape
  tool and then adding text onto it using the
  text tool.
• The colour scheme of our magazine is red,
  blue and white as it’s a simple and effective
  and also relates to the colours of the British
  flag as our article and documentary focuses on
  teenagers in Britain.
• When creating this banner/header it was
  important that it matched the other colours in
  the magazine, so I used to the eyedropper
  tool. I selected the tool and then clicked on
  the colour I wanted from somewhere else on
  the magazine and then clicked on where I
  wanted that colour to be on the
  header/banner.
• I also added captions to the pictures in the
  magazines as they weren’t there before and
  because they are a convention, it was
  important to add them in. I did this by
  selecting the text tool and writing the text into
  the box, in the same way I did for the banner.
• When I uploaded the article to blogger.com I noticed
  there was a thick line around the caption so the box
  around text was more prominent. To get rid of this I
  clicked the text, clicked the Stroke tab and changed
  the Weight of the outline to 0pt so there was no
  outline on the article.
• The circle with the information regarding hospital
  admissions was blue at first but we decided it would
  look better red as it would stand out more on the
  page. I did this by using the eyedropper tool
  again, by selecting the colour red already used on the
  article and dropping it onto the bubble. Red is also
  the colour of danger and relates to the information
  inside the bubble.
• I also added a drop cap to the start of the text
  which is another convention of magazine
  articles by changing the percentage of the size
  of the letter, as shown below.
• I also made sure the text was un-hyphenated
  by highlighting the text and un-ticking the
  Hyphenate button.
Final products
• In order for our final products to be available
  on the blog to see, I had to upload the
  documentary to YouTube, the radio trailer to
  SoundCloud and the magazine article to
  Blogger.com.
Documentary
• To get the documentary onto the Blog I had to
  upload it onto YouTube. This was very easy to
  use and YouTube is a very useful technology.
Firstly I logged onto YouTube using the Google username and
           password our group has used for everything.
(a2columnd12@gmail.com). I then clicked the Upload button
                 and was brought to this screen.
Once I had clicked ‘Select files to upload’ I browsed for
  our documentary and once I had found it I clicked
                        Choose.
The documentary then uploaded to
YouTube where I renamed it and wrote
          a description etc.
Our documentary can be found on
     YouTube on the link below.

• http://www.youtube.com/watch?v=EQd-
  Fitee2w&feature=youtu.be
Radio Trailer
• The next step was to upload our radio trailer
  to SoundCloud. This was also easy to do and is
  a simple and useful technology.
First, I opened the radio trailer on FinalCut
Express, went to File, Export and clicked Using
             QuickTime Conversion.
I then saved the file as a AIFF file and
  clicked save, where it saved to our
                 folder.
Next I opened GarageBand’08.
I found our radio trailer and opened it.
Here it is in GarageBand.
I then Exported the trailer. By doing this is
    saves into music format so it can be
  uploaded as a ‘song’ onto SoundCloud.
I then went to SoundCloud and logged
                  in.
I clicked the Upload button.
I then found our radio trailer and
           opened it.
It then started to upload onto
SoundCloud, where I gave it a title and
            description etc.
Magazine article
• Firstly I went to File and clicked Export.
• I then saved the article as a JPEG and clicked
  Save.
I then made sure I clicked Spreads. This was to ensure
the article came out as two spreads in one picture and
     not two separate images of each spread side.
Once I had done this, I went onto
Blogger.com and made a New Post.
I then clicked Browse to look for the
   article, I then looked through my
folder till I found it and clicked open.
I then waited for it too load and then
  clicked Add selected. The article is
      then uploaded to our blog.

Question 4

  • 1.
    4. How didyou use media technologies in the construction and research, planning and evaluation stages? Caitlin Hulse
  • 2.
  • 3.
    • Researching andplanning our documentary was very important so that we produced it well and to a professional standard. • We separated tasks between the four of us in our group in order to get everything done efficiently and so I mainly focused on researching into the topic of binge drinking so that our facts and statistics were valid and could be used in the documentary. • For this research I used software such as the internet, and to ensure it was true and accurate I found three sources to validate the information I had found.
  • 4.
    • This meantthat we could confidently use the information in our documentary because it was true and therefore makes our documentary appear professional. • Examples of these websites include the NHS website and BBC News which are well known and official websites and will mean that the research I found is correct.
  • 5.
    • I alsoresearched into what channel our documentary would be showed on and what radio station it would be aired on and therefore had to look on the Channel4 website and Capital FM radio website. • Doing this meant we found a suitable channel and station that our documentary would appeal to the audience that watched/listened to it. • While researching a suitable channel for our documentary it was important we researched similar documentaries to ours such as ‘Ready, Steady Drink’ and ‘Party Paramedics’. • We did this in order to make sure our documentary conformed to the conventions of professional documentaries. To do this I used software on the internet such as YouTube and 4oD to watch the documentaries online.
  • 6.
    • Other researchand planning we did was hand and paper based, such as creating storyboards and transfer and logging sheets. • The first task was to research and analyse TV Documentaries such as different documentary types and modes. • I scanned and uploaded my written class work to blogger.com on our blog where I had researched TV documentary styles and influences and types of narrative structure which could assist in the production of our documentary.
  • 8.
    • Task twowas then the initial planning and final proposal of our documentary. • We did a mind map on paper as a group of different ideas that we could do and I then used the software Microsoft Word to write these up, as well as creating tables of the strengths and weaknesses of our top three documentary topic choices. • I then wrote about our final choice and included information such as the time, channel and influences of our documentary.
  • 10.
    • Other paperwork included our storyboards which we discussed as a group and the best person at drawing sketched out. • We decided to sketch the opening sequence of our documentary first as this is the first footage our audience will see and so needs to be the most dramatic and appealing. • All of the research that we have done at this stage was uploaded to our blog to show the development of our project which is a useful technology to use because it meant we could upload our work that we did independently and as a group.
  • 11.
  • 12.
    • After finishedour researching and planning, we starting filming. We used a Canon HG20 HD Camera to film all our footage which was very easy to use. We were able to use the zoom button on top of the camera to zoom in and out of shots which was effective and can be seen for example in our documentary where we zoom out from the College’s sign.
  • 13.
    • The camerawas easy to use for hand held shots for our vox pops and just as easy for still shots with the tripod, although putting the camera on the tripod was confusing at first, but we figured it out. The tripod was useful to use for our formal/expert interviews and establishing shots such as the interview with PC Patel. Using the tripod ensured the camera stayed still and didn’t shake when filming which meant the footage looked professional.
  • 14.
    • We alsoneeded to use equipment for recording our sound which was a directional microphone and was used in our vox pops, interviews, voiceover and radio trailer. First we had to plug in headphones into the camera and then connect the microphone to the microphone lead and then plug it into the camera. We took it in turns so that one person was filming, one had the headphones on, the other held the microphone and the fourth person asked the questions or did the voiceover etc.
  • 15.
    • Before westarted recording sound we had to make sure the sound levels were right so that there was no background noise being picked up that wasn’t needed and that it would sound right on the Apple iMac when we uploaded it. In our vox pops, background noise wasn’t a major problem but for our expert interviews, voiceover and radio trailer we went into a quiet, empty room to make sure no background noise was picked up.
  • 16.
  • 17.
    • When wefinished our filming, we uploaded our footage from the camera to the Apple iMac. This was easy to do as we had to use the right lead to plug into our camera and the Mac and then upload the footage onto the media drive. Once this was done we copied over the files from the drive into our own folders where all our work would be saved.
  • 18.
    • Then usingFinal Cut Express which is software on the Apple iMac we were able to edit our whole documentary. The first step was log and transferring all the clips that we possibly wanted in our documentary. Using the log sheets we organised and named the clips and then said if we wanted to add/transfer them or not. Once the clips we wanted to use were imported into Final Cut Express with the correct label so we could find them easily, we started editing.
  • 19.
    Here, we selectedthen clip from PC Patel’s interview
  • 20.
    Here are thethree different footages of his interview, when we watched and found the one we wanted we clicked ‘Add clip to queue’ and once it had loaded we dragged it into our documentary.
  • 21.
    • We decidedwe didn’t want to over edit the documentary because it is quite a strong and interesting topic anyway and therefore used simple yet effective edits and effects. We changed the speed on a few clips so that the footage was fast paced, an example of this is in the opening sequence as its visibly quicker than the rest of the footage, which was done to mimic a fast paced and exciting ‘night out’. We did this by selecting Modify from the tool bar, selecting speed and then typing in the speed we wanted it to go at.
  • 22.
    • The soundlevels were easy to change on the audio levels by dragging the pink line on the sound up and down until it was level and sounded right. We also edited the sound and the background music by fading it in and out. For example because we have two different background music’s we wanted them to fade in and out of each other when it was appropriate for each half of being either fun or fatal.
  • 23.
    • This wasdone by using the pen tool on the editing bar on the right hand side of the iMac screen. Using the pen I then selected the sound and dragged it either up or down to fade it into each other.
  • 24.
    • We alsoadded text to our documentary such as adding the expert’s name from the professional interviews in the left hand corner of the screen, as this is a convention of professional documentaries.
  • 25.
    • This waseasy to do as I selected text from the effects tab.
  • 26.
    I then wrotethe text and then changed the font and size etc.
  • 27.
    For our titleat the start of the documentary we did the same but we wanted there too be an outline on the text which we did by adding the same text twice but changing the background colour of it so it stood out and then fading them into each other.
  • 28.
    • Once wefinished the editing the footage, we recorded the voiceover using the camera, microphone and headphones. We had written a script for our voiceover and had separated it into parts so we could record each part instead of recording one whole take. By doing this it meant we could just re-record a part if it was said wrong, instead of having to re-record the whole thing again.
  • 29.
    • This wasuseful when recording the voiceover but also when it came to putting it on Final Cut Express and editing it onto the documentary we could just import and edit each individual clip instead of one whole voiceover. This also meant that it was easier to move around, adjust and match other footage around the voiceover.
  • 30.
    • We thenchose our background music for our documentary. We had to ensure we used non copyright music and so we selected music off a website given to us by the College which had music we could use that wasn’t copyrighted. We chose two different types of music, one that was upbeat and had a dance vibe for the fun half of the documentary called ‘dance 42-1’ and the other that was slower and sadder for the fatal half called ‘ambient 05- 1’.
  • 31.
  • 32.
    • For ourradio trailer we completed it in Final Cut Express. We wanted to use clips from our documentary so that listeners would be intrigued and want to watch the documentary if they hear teasers from it. So in the same way we created our documentary, we added the clips we wanted into Final Cut Express but deleted the visual footage and just keeping the sound. We then recorded our voiceover which we followed from a script again, using the camera, headphones and microphone and then uploaded it in the same way onto Final Cut Express.
  • 33.
    • We thenselected the voiceover clips, deleting the visual footage and just keeping the sound and added it our trailer. We also used the same background music from our documentary, keeping our unique brand identity of having a fun half and a fatal half. Like our documentary, our radio trailer followed the story of binge drinking being either fun or fatal and so using the ‘fun’ background music first we had the voiceover ask a rhetorical question of, “A night to remember?” this was answered by a vox pop from the documentary saying, “You’ll probably forget the night your experiencing”. These contrasting question and answers continued and the ‘fatal’ music then fading in and back out again for the serious half, like our documentary.
  • 34.
    • Once ourtrailer was completed we had to export it into GarageBand. This software was easy to use and meant we could upload our radio trailer to SoundCloud easier.
  • 35.
    • Firstly Ihighlighted the trailer and then selected File from the top menu and then Export and then Using quick time conversion.
  • 36.
    • I thensaved the file as an AIFF file into our media drive folder.
  • 37.
    • Then, openingthe GarageBand software I imported our radio trailer from the media drive folder where I saved it.
  • 38.
  • 39.
    • To produceour magazine article we used the software Adobe InDesign to create a double page spread, in which we added our article I had written on Microsoft Word. We divided tasks between each other to create the magazine article, so while I wrote the article, someone else was creating the layout etc. We all discussed what we wanted the layout to look like and then it was created in Adobe InDesign.
  • 40.
    • I suggestedwe made a few changes to the magazine layout, as at first we decided to create it in the style of Radio Times magazine but our magazine looked more like something off What’s on TV. I then started to change the magazine to look more like a professional one from What’s on TV.
  • 41.
    • Firstly Icreated a banner/header which is a convention of What’s on TV where the name of the documentary, time and channel is. I did this by creating a rectangle using the shape tool and then adding text onto it using the text tool.
  • 42.
    • The colourscheme of our magazine is red, blue and white as it’s a simple and effective and also relates to the colours of the British flag as our article and documentary focuses on teenagers in Britain.
  • 43.
    • When creatingthis banner/header it was important that it matched the other colours in the magazine, so I used to the eyedropper tool. I selected the tool and then clicked on the colour I wanted from somewhere else on the magazine and then clicked on where I wanted that colour to be on the header/banner.
  • 44.
    • I alsoadded captions to the pictures in the magazines as they weren’t there before and because they are a convention, it was important to add them in. I did this by selecting the text tool and writing the text into the box, in the same way I did for the banner.
  • 45.
    • When Iuploaded the article to blogger.com I noticed there was a thick line around the caption so the box around text was more prominent. To get rid of this I clicked the text, clicked the Stroke tab and changed the Weight of the outline to 0pt so there was no outline on the article.
  • 46.
    • The circlewith the information regarding hospital admissions was blue at first but we decided it would look better red as it would stand out more on the page. I did this by using the eyedropper tool again, by selecting the colour red already used on the article and dropping it onto the bubble. Red is also the colour of danger and relates to the information inside the bubble.
  • 47.
    • I alsoadded a drop cap to the start of the text which is another convention of magazine articles by changing the percentage of the size of the letter, as shown below.
  • 48.
    • I alsomade sure the text was un-hyphenated by highlighting the text and un-ticking the Hyphenate button.
  • 49.
  • 50.
    • In orderfor our final products to be available on the blog to see, I had to upload the documentary to YouTube, the radio trailer to SoundCloud and the magazine article to Blogger.com.
  • 51.
    Documentary • To getthe documentary onto the Blog I had to upload it onto YouTube. This was very easy to use and YouTube is a very useful technology.
  • 52.
    Firstly I loggedonto YouTube using the Google username and password our group has used for everything. (a2columnd12@gmail.com). I then clicked the Upload button and was brought to this screen.
  • 53.
    Once I hadclicked ‘Select files to upload’ I browsed for our documentary and once I had found it I clicked Choose.
  • 54.
    The documentary thenuploaded to YouTube where I renamed it and wrote a description etc.
  • 55.
    Our documentary canbe found on YouTube on the link below. • http://www.youtube.com/watch?v=EQd- Fitee2w&feature=youtu.be
  • 56.
    Radio Trailer • Thenext step was to upload our radio trailer to SoundCloud. This was also easy to do and is a simple and useful technology.
  • 57.
    First, I openedthe radio trailer on FinalCut Express, went to File, Export and clicked Using QuickTime Conversion.
  • 58.
    I then savedthe file as a AIFF file and clicked save, where it saved to our folder.
  • 59.
    Next I openedGarageBand’08.
  • 60.
    I found ourradio trailer and opened it.
  • 61.
    Here it isin GarageBand.
  • 62.
    I then Exportedthe trailer. By doing this is saves into music format so it can be uploaded as a ‘song’ onto SoundCloud.
  • 63.
    I then wentto SoundCloud and logged in.
  • 64.
    I clicked theUpload button.
  • 65.
    I then foundour radio trailer and opened it.
  • 66.
    It then startedto upload onto SoundCloud, where I gave it a title and description etc.
  • 67.
    Magazine article • FirstlyI went to File and clicked Export.
  • 68.
    • I thensaved the article as a JPEG and clicked Save.
  • 69.
    I then madesure I clicked Spreads. This was to ensure the article came out as two spreads in one picture and not two separate images of each spread side.
  • 70.
    Once I haddone this, I went onto Blogger.com and made a New Post.
  • 71.
    I then clickedBrowse to look for the article, I then looked through my folder till I found it and clicked open.
  • 72.
    I then waitedfor it too load and then clicked Add selected. The article is then uploaded to our blog.