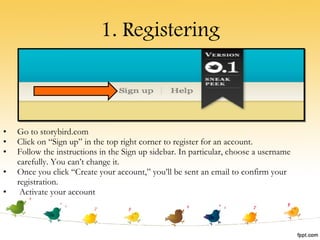
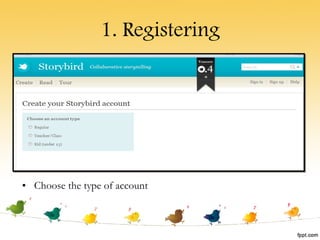
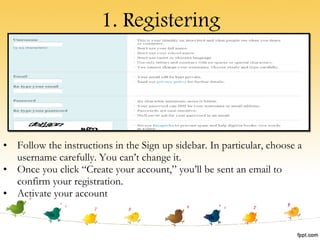
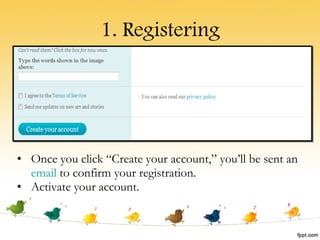
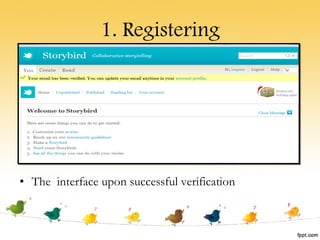
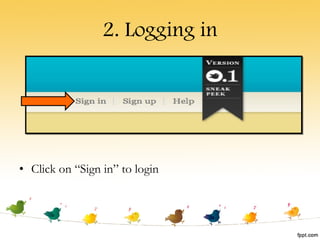
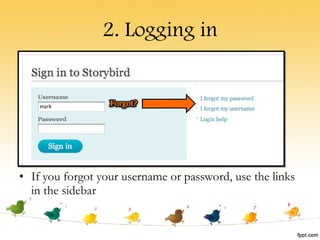
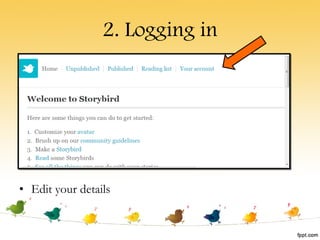
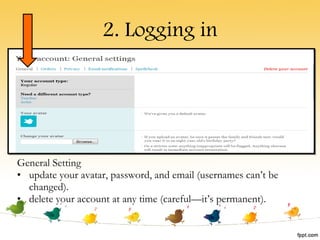
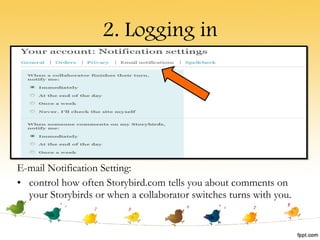
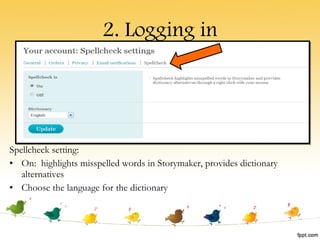
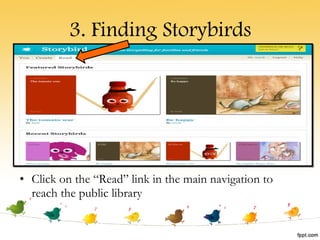
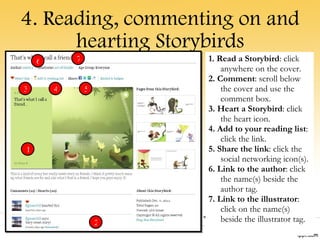
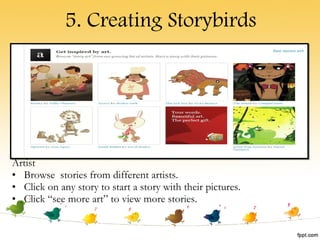
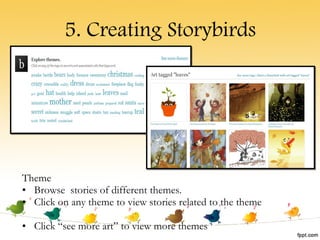
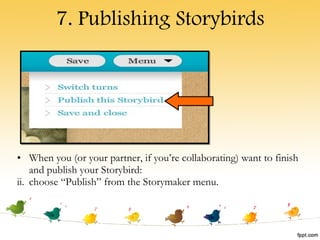
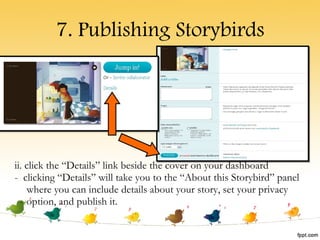
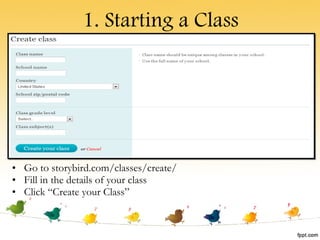
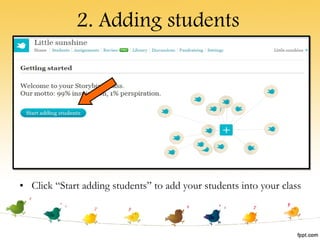
Title
1. Registering Go to storybird.com Click on “Sign up” in the top right corner to register for an account. Follow the instructions in the Sign up sidebar. In particular, choose a username carefully. You can’t change it. Once you click “Create your account,” you’ll be sent an email to confirm your registration.  Activate your account
1. Registering Choose the type of account
1. Registering Follow the instructions in the Sign up sidebar. In particular, choose a username carefully. You can’t change it. Once you click “Create your account,” you’ll be sent an email to confirm your registration.  Activate your account
1. Registering Once you click “Create your account,” you’ll be sent an  email  to confirm your registration.  Ac tivate your account.
1. Registering The  interface upon successful verification
2. Logging in Click on “Sign in” to login
2. Logging in If you forgot your username or password, use the links in the sidebar
2. Logging in Edit your details
2. Logging in General Setting update your avatar, password, and email (usernames can’t be changed).  delete your account at any time (careful—it’s permanent).
2. Logging in Privacy Setting: change your privacy settings Default- private (Storybirds will not show up in library) Public- all Storybirds are made public
2. Logging in E-mail Notification Setting: control how often Storybird.com tells you about comments on your Storybirds or when a collaborator switches turns with you.
2. Logging in Spellcheck setting: On:  highlights misspelled words in Storymaker, provides dictionary alternatives Choose the language for the dictionary
3. Finding Storybirds Click on the “Read” link in the main navigation to reach the public library
4. Reading, commenting on and hearting Storybirds 1. Read a Storybird : click anywhere on the cover. 2. Comment : scroll below the cover and use the comment box. 3. Heart a Storybird : click the heart icon. 4. Add to your reading list : click the link. 5. Share the link : click the social networking icon(s). 6. Link to the author : click the name(s) beside the author tag. 7. Link to the illustrator : click on the name(s) beside the illustrator tag. 1 2 3 4 5 6 7
5. Creating Storybirds Click on the “Create” link in the main navigation to start creating your own Storybird.
5. Creating Storybirds Artist Browse  stories from different artists. Click on any story to start a story with their pictures. Click “see more art” to view more stories.
5. Creating Storybirds Theme Browse  stories of different themes. Click on any theme to view stories related to the theme Click “see more art” to view more themes
5. Creating Storybirds 1. Pictures : drag art thumbnails onto the page. 2. Words : mouse over the white page and start writing. 3. Pages : add or delete pages using these controls. 4. Menu : invite a collaborator, publish, or save and close. 5. Clear thumbnails : removes all thumbnails but leaves pages. 6. Start over : removes all pages and thumbnails.
5. Creating Storybirds Making a cover Write a title in this area. Insert the author’s name (your name). Use this image, or replace it with another art thumbnail as the cover picture. Choose a colour for the cover. 1 2 3 4
5. Creating Storybirds Creating a page Drag a art thumbnail into the page (it can be on the left, right, top or bottom). Type your words into the box provided. 1 2
5. Creating Storybirds Adding a new page Click “Add a Page” to create a new page in your Storybird
5. Creating Storybirds Removing a page Click “Remove a Page” to delete a previously-created page in your Storybird.
5. Creating Storybirds You can invite a collaborator in two places. From the menu inside Storymaker From the dashboard i ii
6. Inviting a Collaborator Fill in the invitation form. Your collaborator will get an email that looks like  this When your collaborator clicks on the link they’ll be taken to an invite landing page where they can jump in and start playing
Taking turns You can jump in and make changes to a Storybird anytime you want. Storybird.com assigns turns and notify you on your dashboard and by email when your partner has taken their turn or is switching turns with you. 6. Inviting a Collaborator
7. Publishing Storybirds When you (or your partner, if you’re collaborating) want to finish and publish your Storybird: choose “Publish” from the Storymaker menu.
7. Publishing Storybirds ii. click the “Details” link beside the cover on your dashboard -  clicking “Details” will take you to the “About this Storybird” panel where you can include details about your story, set your privacy option, and publish it.
 
1. Starting a Class Go to storybird.com/classes/create/ Fill in the details of your class Click “Create your Class”
2. Adding students Click “Start adding students” to add your students into your class
2. Adding students Last name: key in your student’s last name First name: key in your student’s first name Username: Choose a username for your student Add: After filling  in the details, click “Add” to add the student into your class. Repeat the same steps to add more students. 1 2 3 4
2. Adding students Student log in After you add students to your class, you'll give them their USERNAME (not student name) and the INITIAL ACTIVATION PASSWORD.  They'll use that to login. When they do, they'll create a NEW password (for safety reasons).
3. Giving an assignment Click “Assignments” on the dashboard Then, click “Create an assignment” to assign tasks for your students.
3. Giving an assignment Choose a title for the assignment Describe the assignment Use a Storybird or photo to inspire your students Choose ON if you want students to be able to use spellcheck while writing their Storybirds. This is the due date for the assignment. Due dates appear in the student’s dashboard as a gentle reminder to complete the theme/assignment. Click “Save assignment” 1 2 3 4 5 6
4. Viewing students’ stories Click “Library” on the dashboard to view all your students’ stories (assignments and own stories)
4. Viewing students’ stories You can view your students’ stories if they have published any.
 
E-mail
Invitation e-mail

Presentation storybird

  • 1.
  • 2.
    1. Registering Goto storybird.com Click on “Sign up” in the top right corner to register for an account. Follow the instructions in the Sign up sidebar. In particular, choose a username carefully. You can’t change it. Once you click “Create your account,” you’ll be sent an email to confirm your registration. Activate your account
  • 3.
    1. Registering Choosethe type of account
  • 4.
    1. Registering Followthe instructions in the Sign up sidebar. In particular, choose a username carefully. You can’t change it. Once you click “Create your account,” you’ll be sent an email to confirm your registration. Activate your account
  • 5.
    1. Registering Onceyou click “Create your account,” you’ll be sent an email to confirm your registration. Ac tivate your account.
  • 6.
    1. Registering The interface upon successful verification
  • 7.
    2. Logging inClick on “Sign in” to login
  • 8.
    2. Logging inIf you forgot your username or password, use the links in the sidebar
  • 9.
    2. Logging inEdit your details
  • 10.
    2. Logging inGeneral Setting update your avatar, password, and email (usernames can’t be changed). delete your account at any time (careful—it’s permanent).
  • 11.
    2. Logging inPrivacy Setting: change your privacy settings Default- private (Storybirds will not show up in library) Public- all Storybirds are made public
  • 12.
    2. Logging inE-mail Notification Setting: control how often Storybird.com tells you about comments on your Storybirds or when a collaborator switches turns with you.
  • 13.
    2. Logging inSpellcheck setting: On: highlights misspelled words in Storymaker, provides dictionary alternatives Choose the language for the dictionary
  • 14.
    3. Finding StorybirdsClick on the “Read” link in the main navigation to reach the public library
  • 15.
    4. Reading, commentingon and hearting Storybirds 1. Read a Storybird : click anywhere on the cover. 2. Comment : scroll below the cover and use the comment box. 3. Heart a Storybird : click the heart icon. 4. Add to your reading list : click the link. 5. Share the link : click the social networking icon(s). 6. Link to the author : click the name(s) beside the author tag. 7. Link to the illustrator : click on the name(s) beside the illustrator tag. 1 2 3 4 5 6 7
  • 16.
    5. Creating StorybirdsClick on the “Create” link in the main navigation to start creating your own Storybird.
  • 17.
    5. Creating StorybirdsArtist Browse stories from different artists. Click on any story to start a story with their pictures. Click “see more art” to view more stories.
  • 18.
    5. Creating StorybirdsTheme Browse stories of different themes. Click on any theme to view stories related to the theme Click “see more art” to view more themes
  • 19.
    5. Creating Storybirds1. Pictures : drag art thumbnails onto the page. 2. Words : mouse over the white page and start writing. 3. Pages : add or delete pages using these controls. 4. Menu : invite a collaborator, publish, or save and close. 5. Clear thumbnails : removes all thumbnails but leaves pages. 6. Start over : removes all pages and thumbnails.
  • 20.
    5. Creating StorybirdsMaking a cover Write a title in this area. Insert the author’s name (your name). Use this image, or replace it with another art thumbnail as the cover picture. Choose a colour for the cover. 1 2 3 4
  • 21.
    5. Creating StorybirdsCreating a page Drag a art thumbnail into the page (it can be on the left, right, top or bottom). Type your words into the box provided. 1 2
  • 22.
    5. Creating StorybirdsAdding a new page Click “Add a Page” to create a new page in your Storybird
  • 23.
    5. Creating StorybirdsRemoving a page Click “Remove a Page” to delete a previously-created page in your Storybird.
  • 24.
    5. Creating StorybirdsYou can invite a collaborator in two places. From the menu inside Storymaker From the dashboard i ii
  • 25.
    6. Inviting aCollaborator Fill in the invitation form. Your collaborator will get an email that looks like this When your collaborator clicks on the link they’ll be taken to an invite landing page where they can jump in and start playing
  • 26.
    Taking turns Youcan jump in and make changes to a Storybird anytime you want. Storybird.com assigns turns and notify you on your dashboard and by email when your partner has taken their turn or is switching turns with you. 6. Inviting a Collaborator
  • 27.
    7. Publishing StorybirdsWhen you (or your partner, if you’re collaborating) want to finish and publish your Storybird: choose “Publish” from the Storymaker menu.
  • 28.
    7. Publishing Storybirdsii. click the “Details” link beside the cover on your dashboard - clicking “Details” will take you to the “About this Storybird” panel where you can include details about your story, set your privacy option, and publish it.
  • 29.
  • 30.
    1. Starting aClass Go to storybird.com/classes/create/ Fill in the details of your class Click “Create your Class”
  • 31.
    2. Adding studentsClick “Start adding students” to add your students into your class
  • 32.
    2. Adding studentsLast name: key in your student’s last name First name: key in your student’s first name Username: Choose a username for your student Add: After filling in the details, click “Add” to add the student into your class. Repeat the same steps to add more students. 1 2 3 4
  • 33.
    2. Adding studentsStudent log in After you add students to your class, you'll give them their USERNAME (not student name) and the INITIAL ACTIVATION PASSWORD. They'll use that to login. When they do, they'll create a NEW password (for safety reasons).
  • 34.
    3. Giving anassignment Click “Assignments” on the dashboard Then, click “Create an assignment” to assign tasks for your students.
  • 35.
    3. Giving anassignment Choose a title for the assignment Describe the assignment Use a Storybird or photo to inspire your students Choose ON if you want students to be able to use spellcheck while writing their Storybirds. This is the due date for the assignment. Due dates appear in the student’s dashboard as a gentle reminder to complete the theme/assignment. Click “Save assignment” 1 2 3 4 5 6
  • 36.
    4. Viewing students’stories Click “Library” on the dashboard to view all your students’ stories (assignments and own stories)
  • 37.
    4. Viewing students’stories You can view your students’ stories if they have published any.
  • 38.
  • 39.
  • 40.