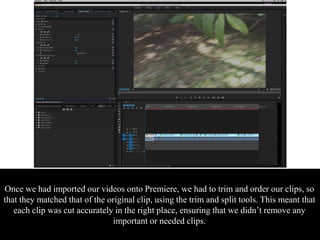
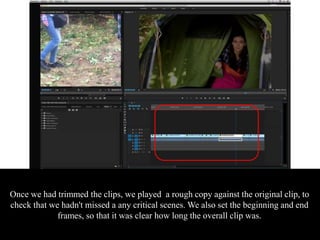
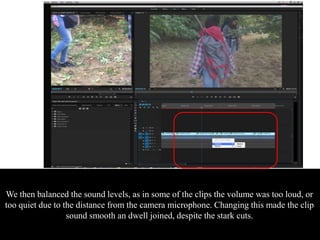
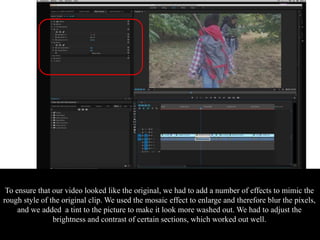
Prelim: Construction & Editing
Once we had imported our videos onto Premiere, we had to trim and order our clips, so
that they matched that of the original clip, using the trim and split tools. This meant that
each clip was cut accurately in the right place, ensuring that we didn’t remove any
important or needed clips.
Once we had trimmed the clips, we played a rough copy against the original clip, to
check that we hadn't missed a any critical scenes. We also set the beginning and end
frames, so that it was clear how long the overall clip was.
Whilst comparing our version to the final, we saw that our edit was too fast paced, so we reduced
the speed of the edit. This worked well as were able to balance the speed without altering the
sound. This also changed the tone of the clip, which was what we had hoped, so that it could be as
similar to the original as possible.
We then balanced the sound levels, as in some of the clips the volume was too loud, or
too quiet due to the distance from the camera microphone. Changing this made the clip
sound smooth an dwell joined, despite the stark cuts.
To ensure that our video looked like the original, we had to add a number of effects to mimic the
rough style of the original clip. We used the mosaic effect to enlarge and therefore blur the pixels,
and we added a tint to the picture to make it look more washed out. We had to adjust the
brightness and contrast of certain sections, which worked out well.

PRELIM: Construction & Editing

  • 1.
  • 2.
    Once we hadimported our videos onto Premiere, we had to trim and order our clips, so that they matched that of the original clip, using the trim and split tools. This meant that each clip was cut accurately in the right place, ensuring that we didn’t remove any important or needed clips.
  • 3.
    Once we hadtrimmed the clips, we played a rough copy against the original clip, to check that we hadn't missed a any critical scenes. We also set the beginning and end frames, so that it was clear how long the overall clip was.
  • 4.
    Whilst comparing ourversion to the final, we saw that our edit was too fast paced, so we reduced the speed of the edit. This worked well as were able to balance the speed without altering the sound. This also changed the tone of the clip, which was what we had hoped, so that it could be as similar to the original as possible.
  • 5.
    We then balancedthe sound levels, as in some of the clips the volume was too loud, or too quiet due to the distance from the camera microphone. Changing this made the clip sound smooth an dwell joined, despite the stark cuts.
  • 6.
    To ensure thatour video looked like the original, we had to add a number of effects to mimic the rough style of the original clip. We used the mosaic effect to enlarge and therefore blur the pixels, and we added a tint to the picture to make it look more washed out. We had to adjust the brightness and contrast of certain sections, which worked out well.

Editor's Notes