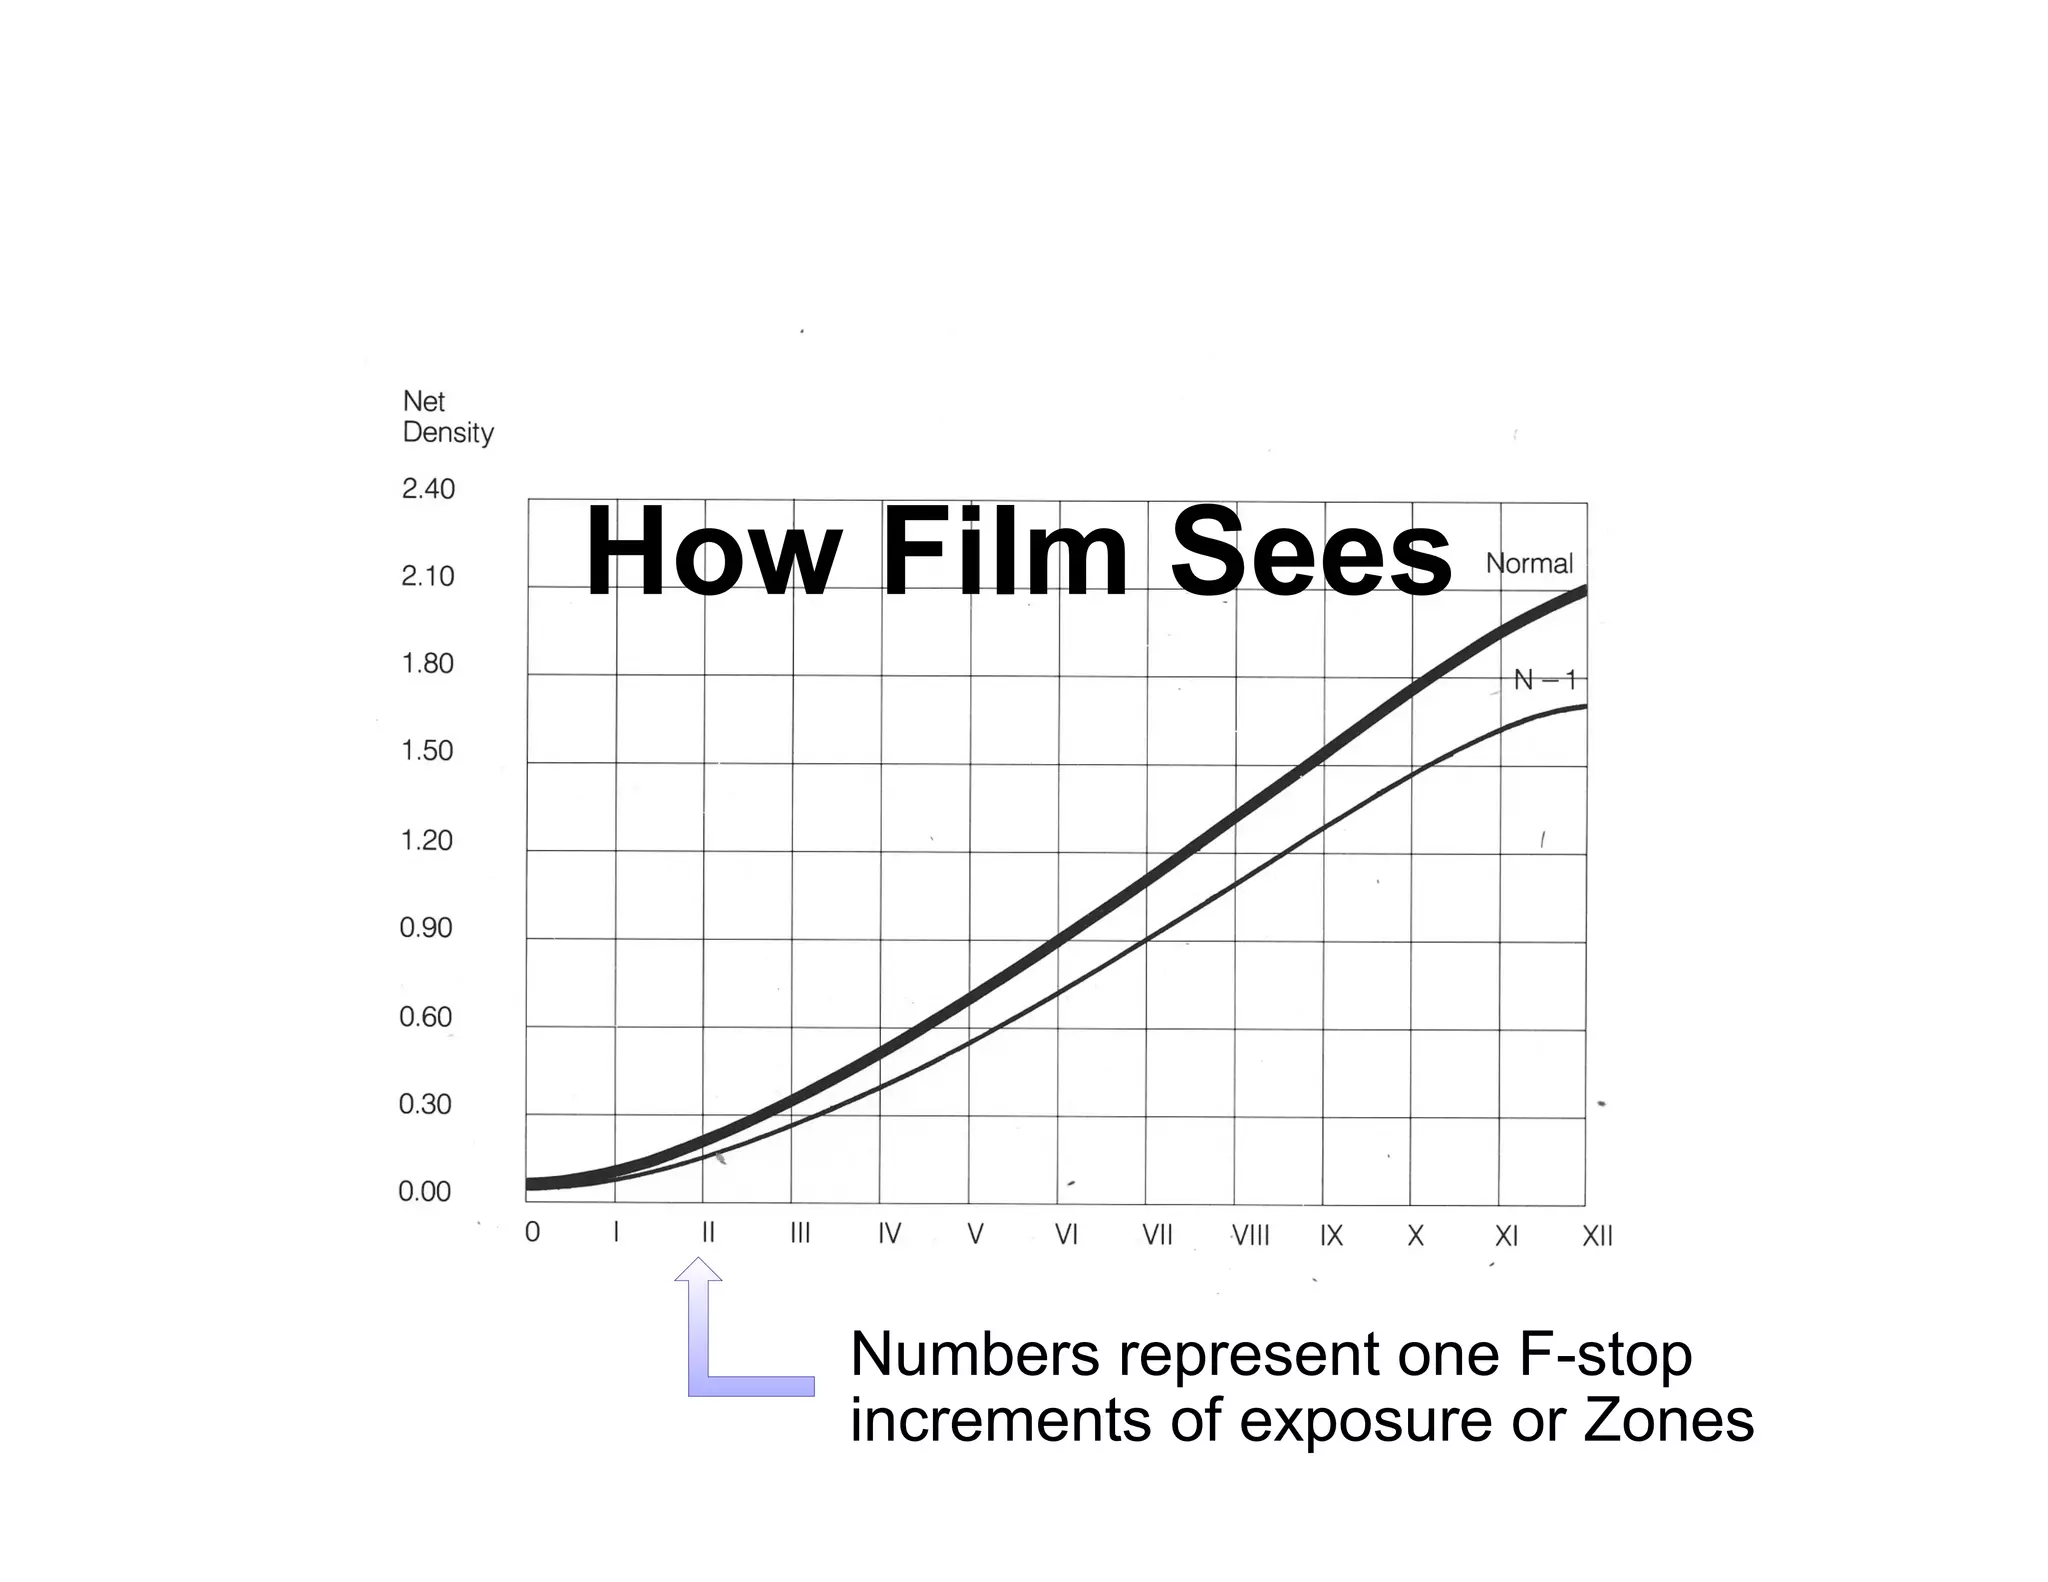
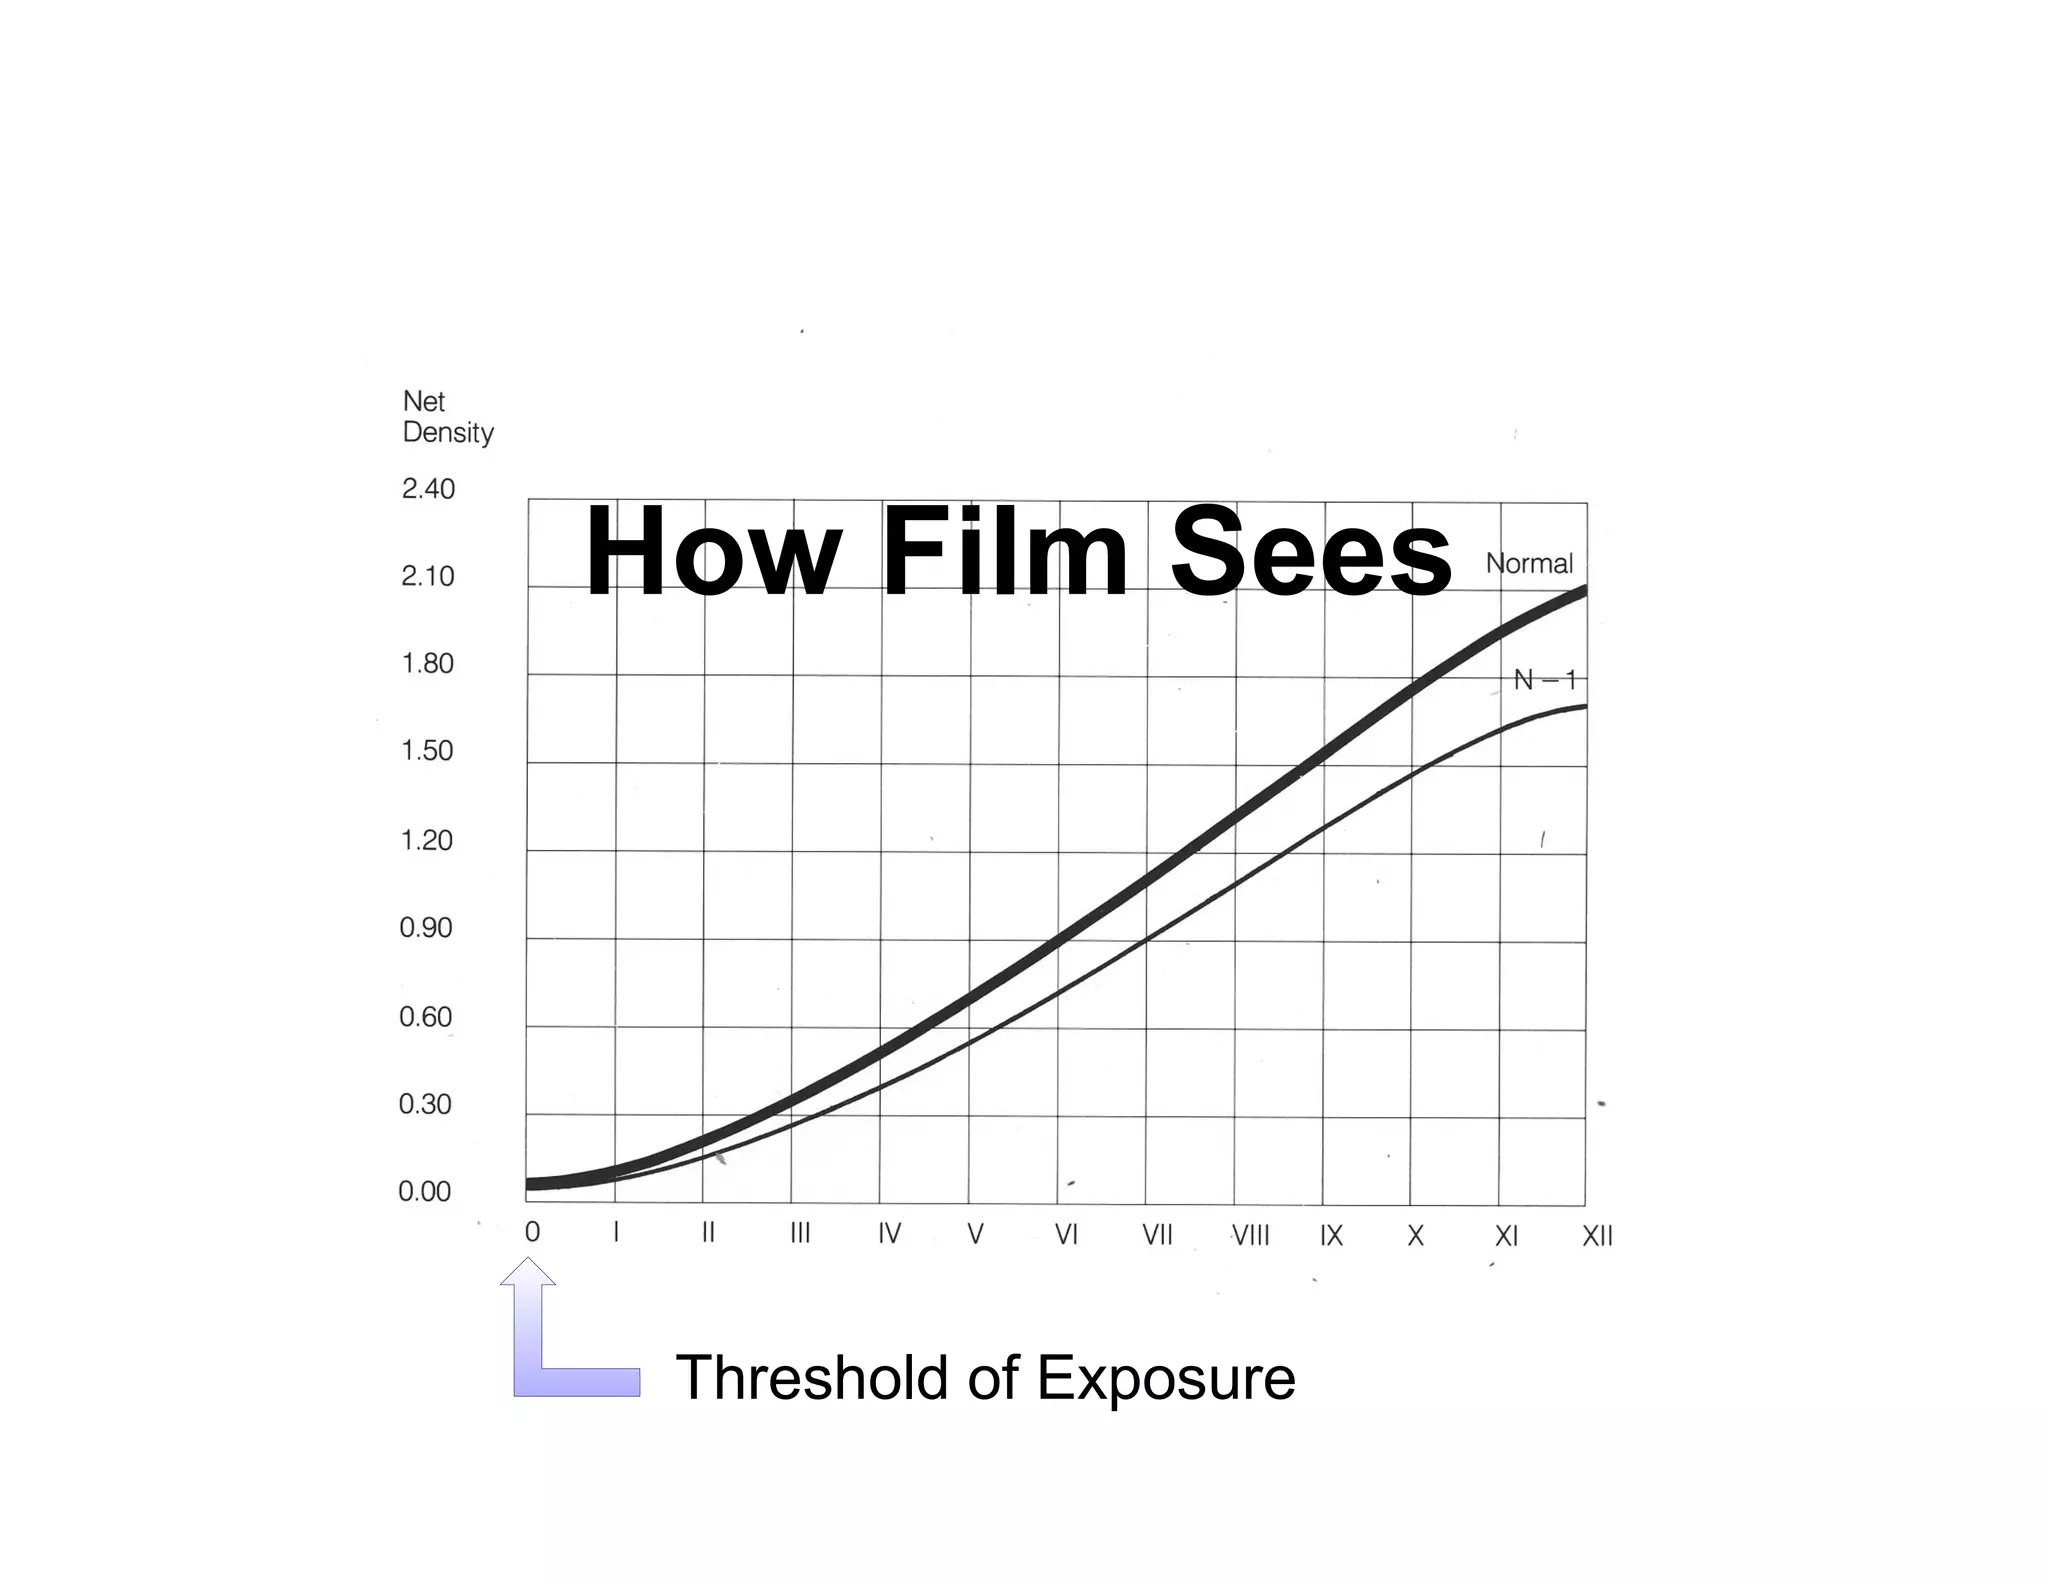
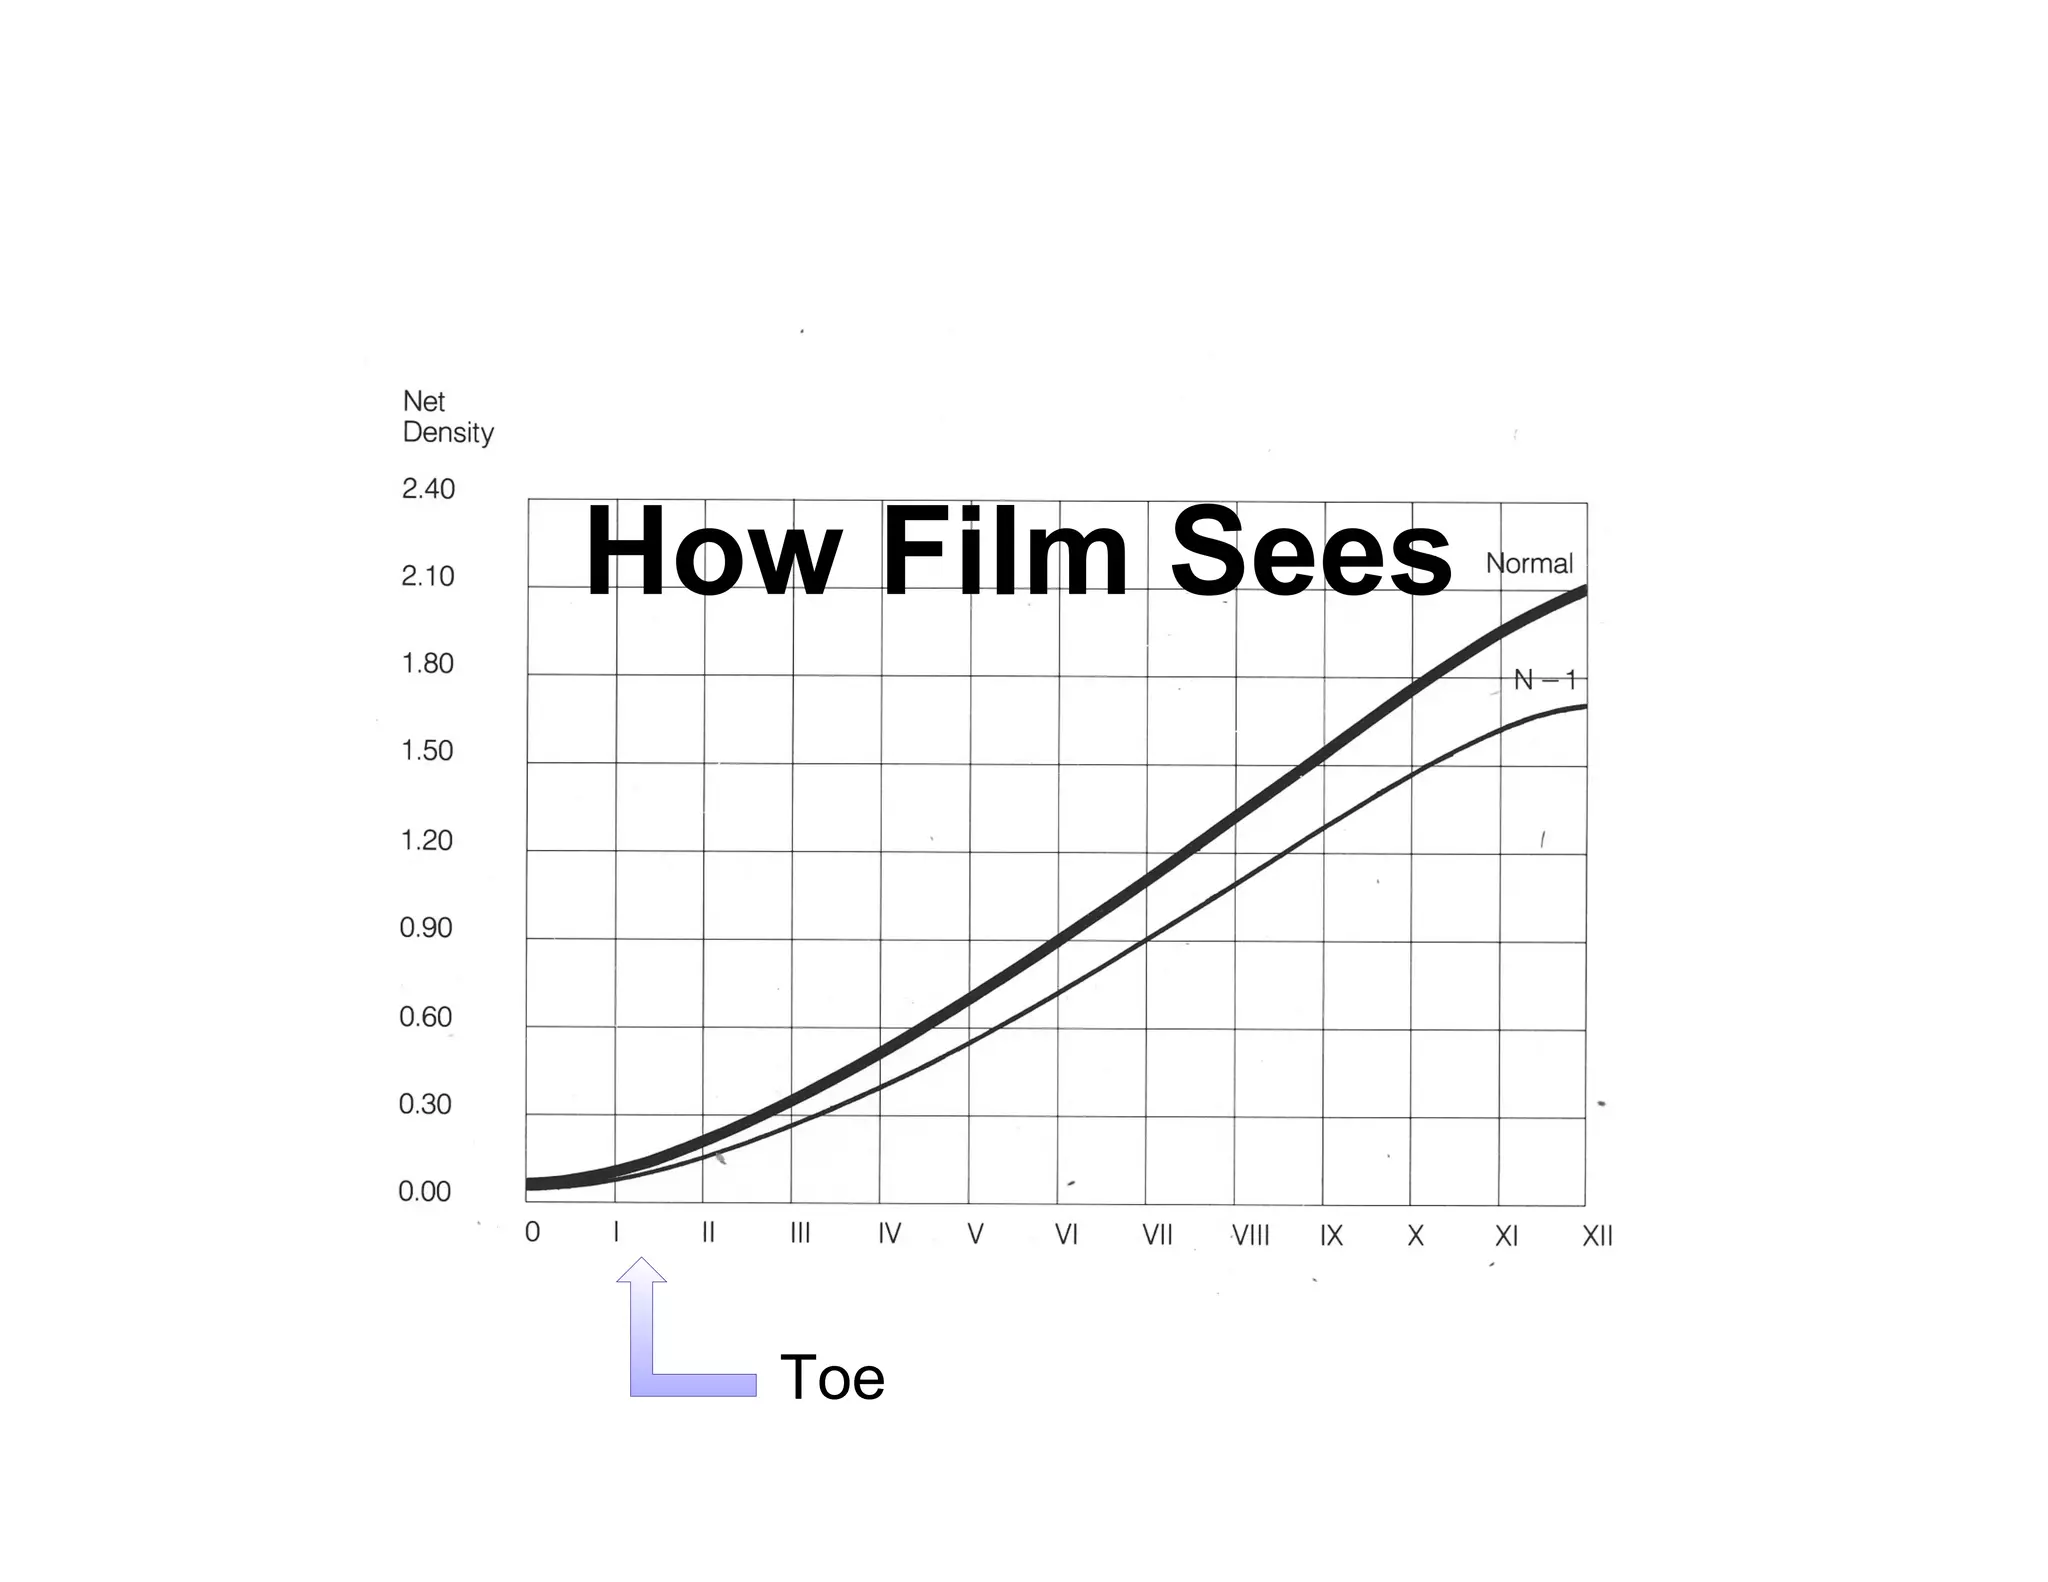
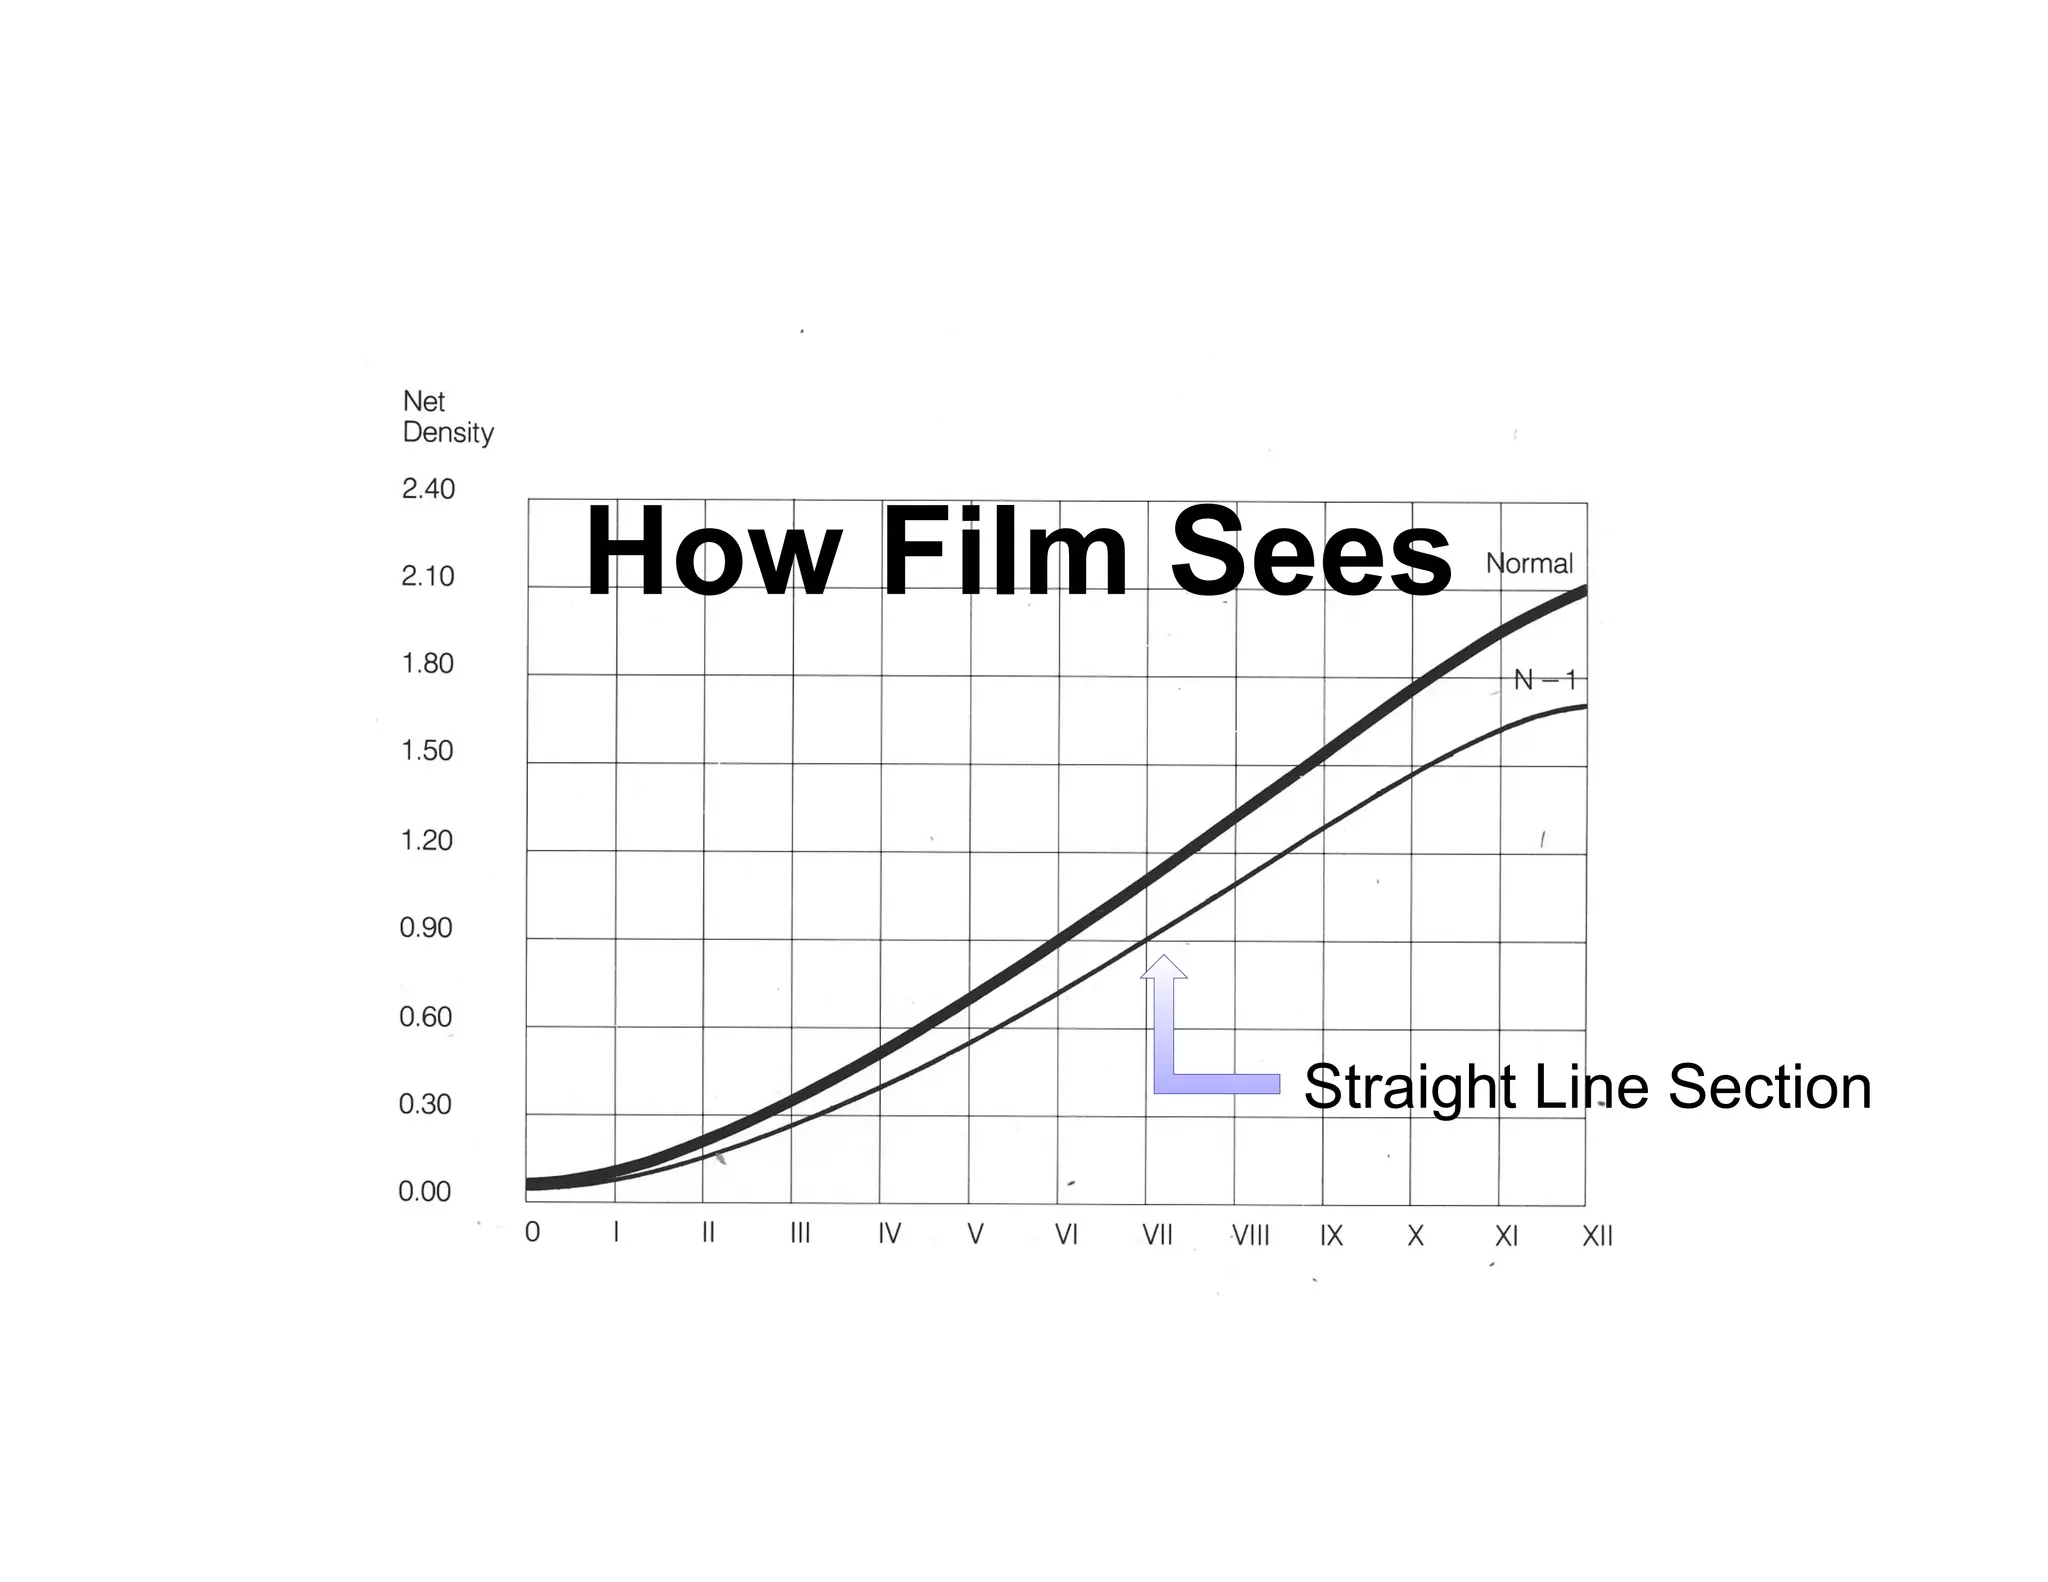
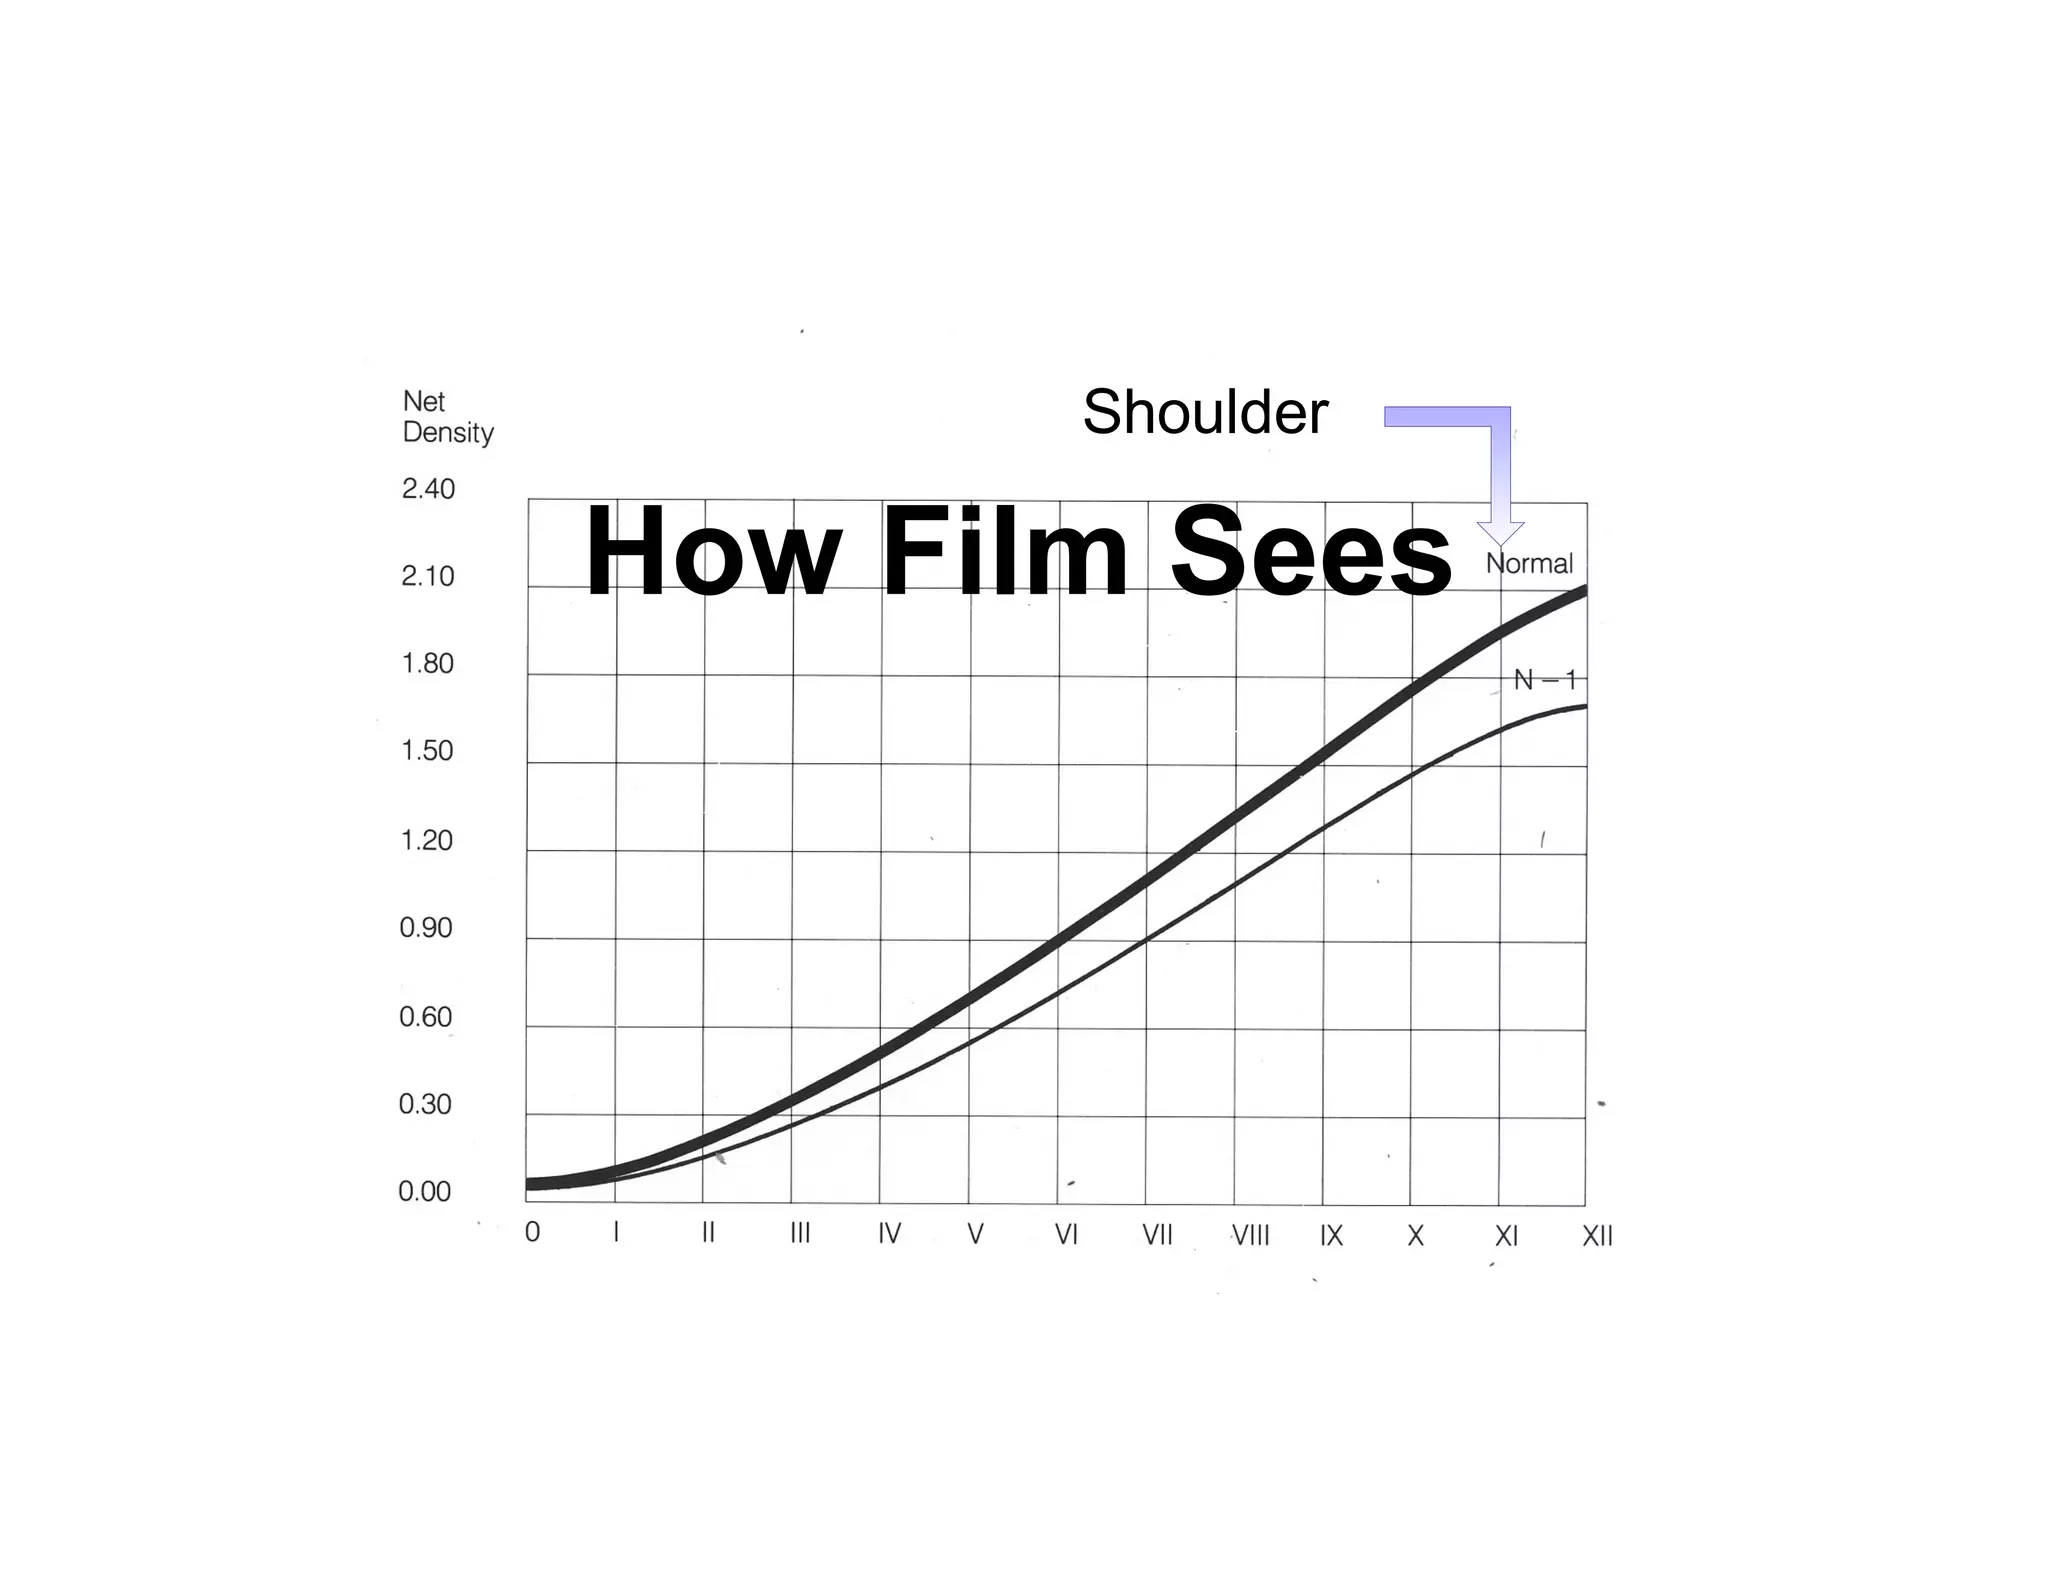
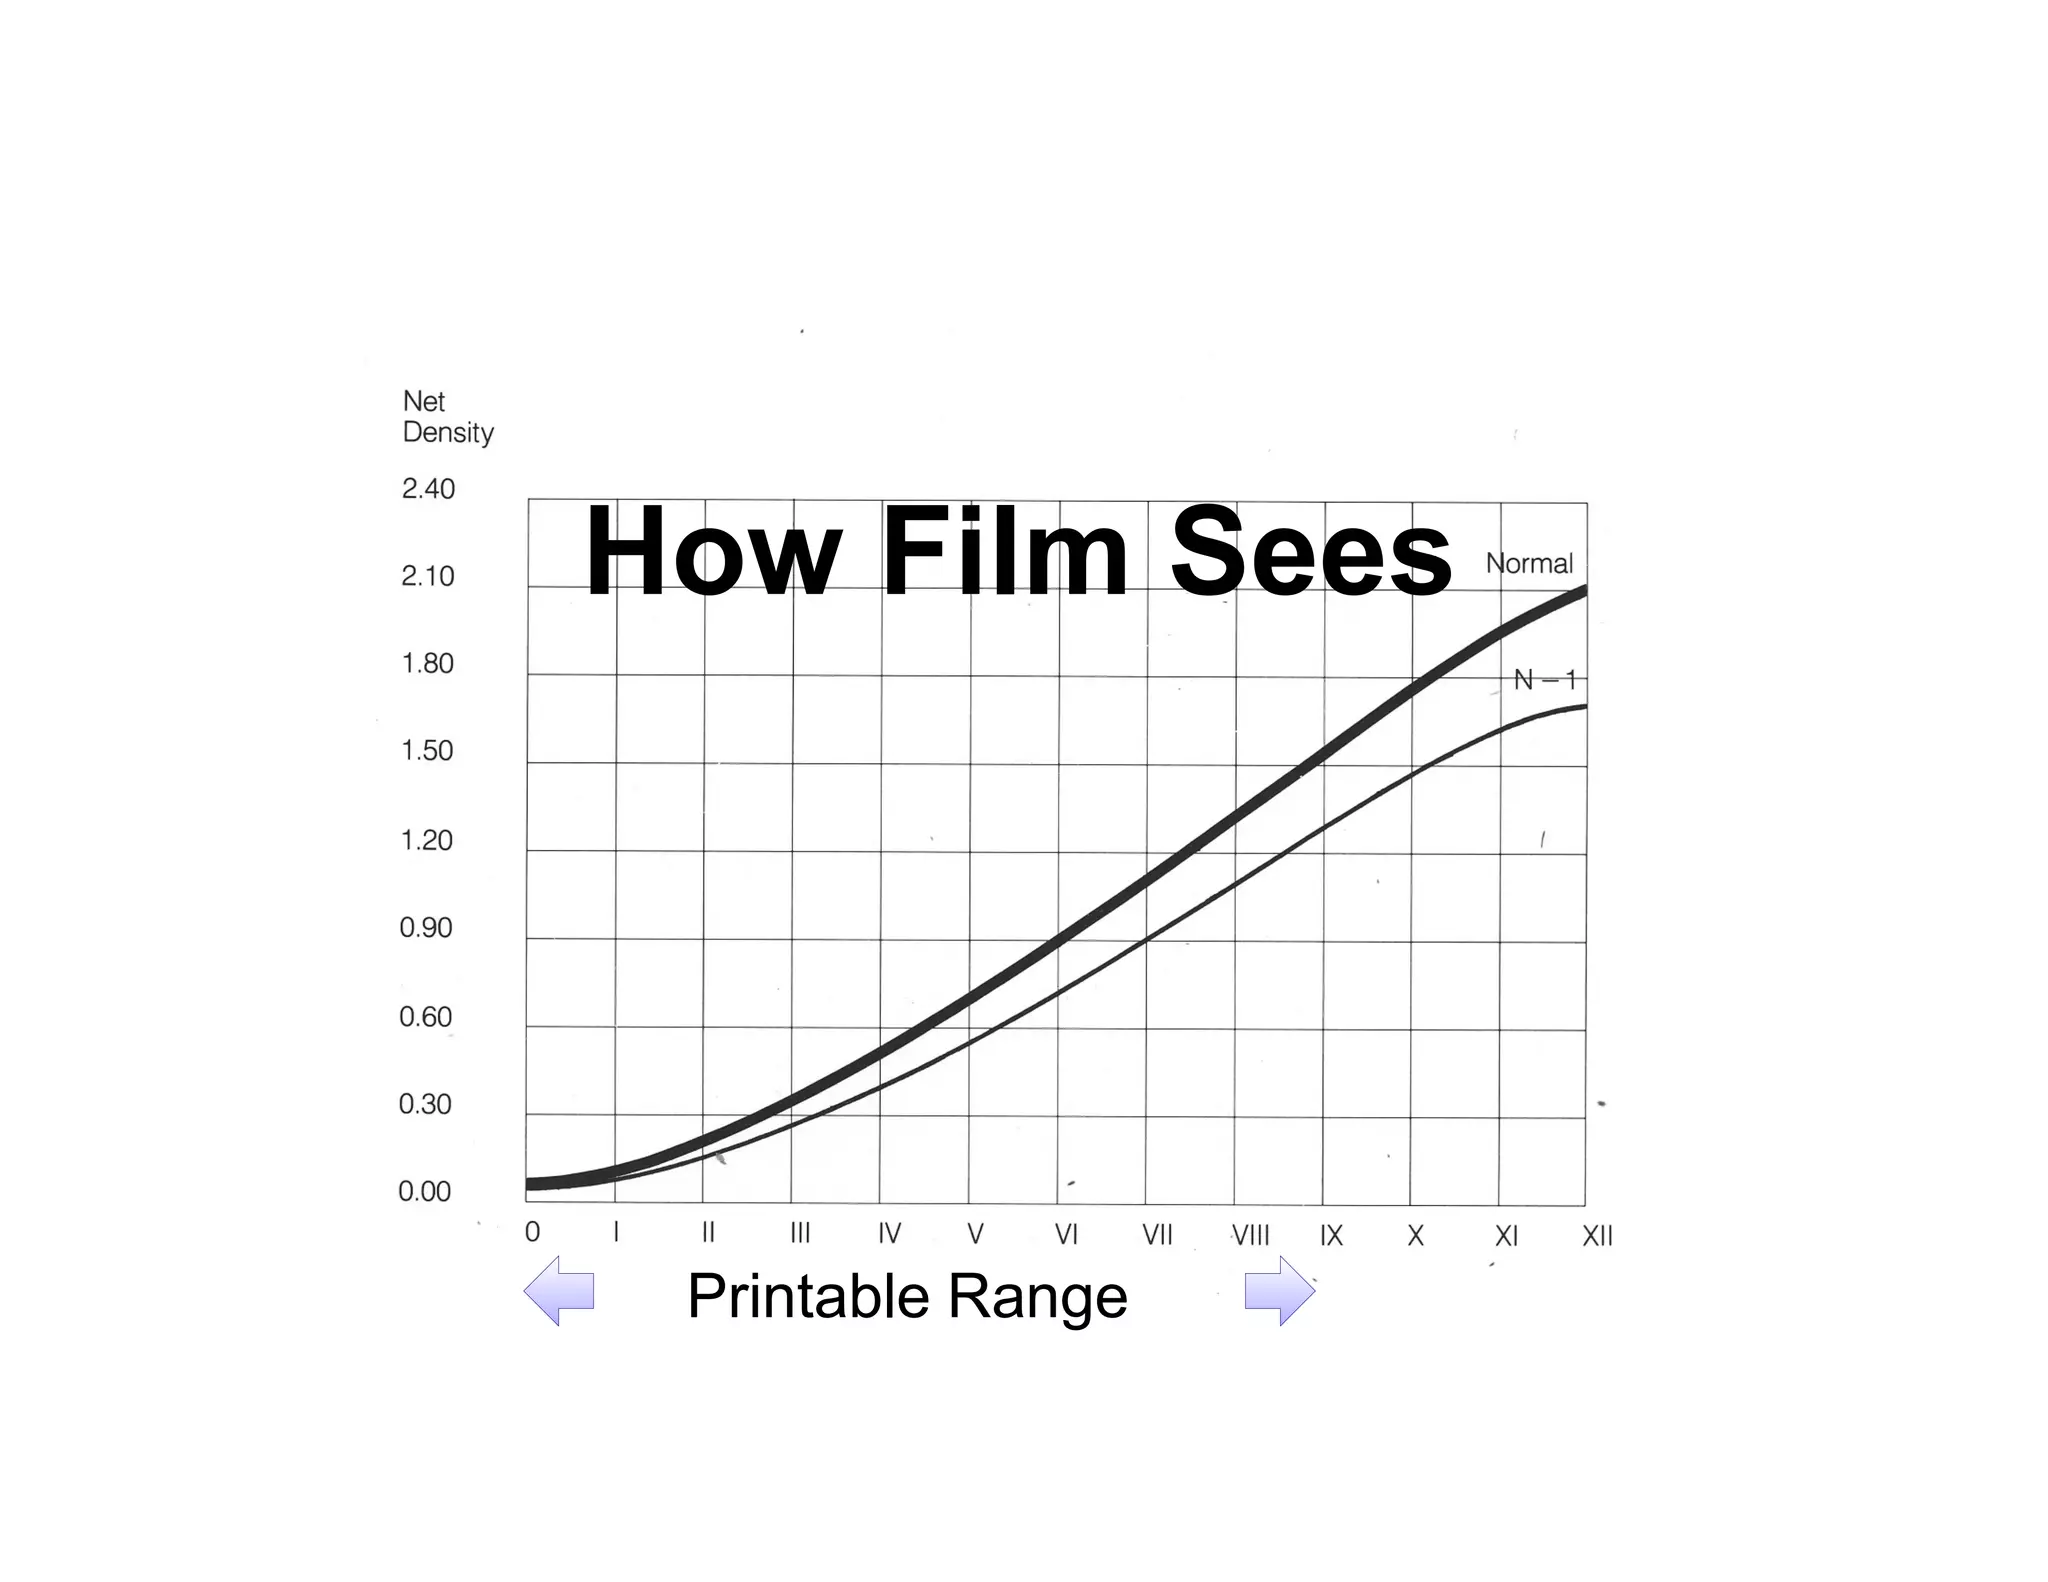
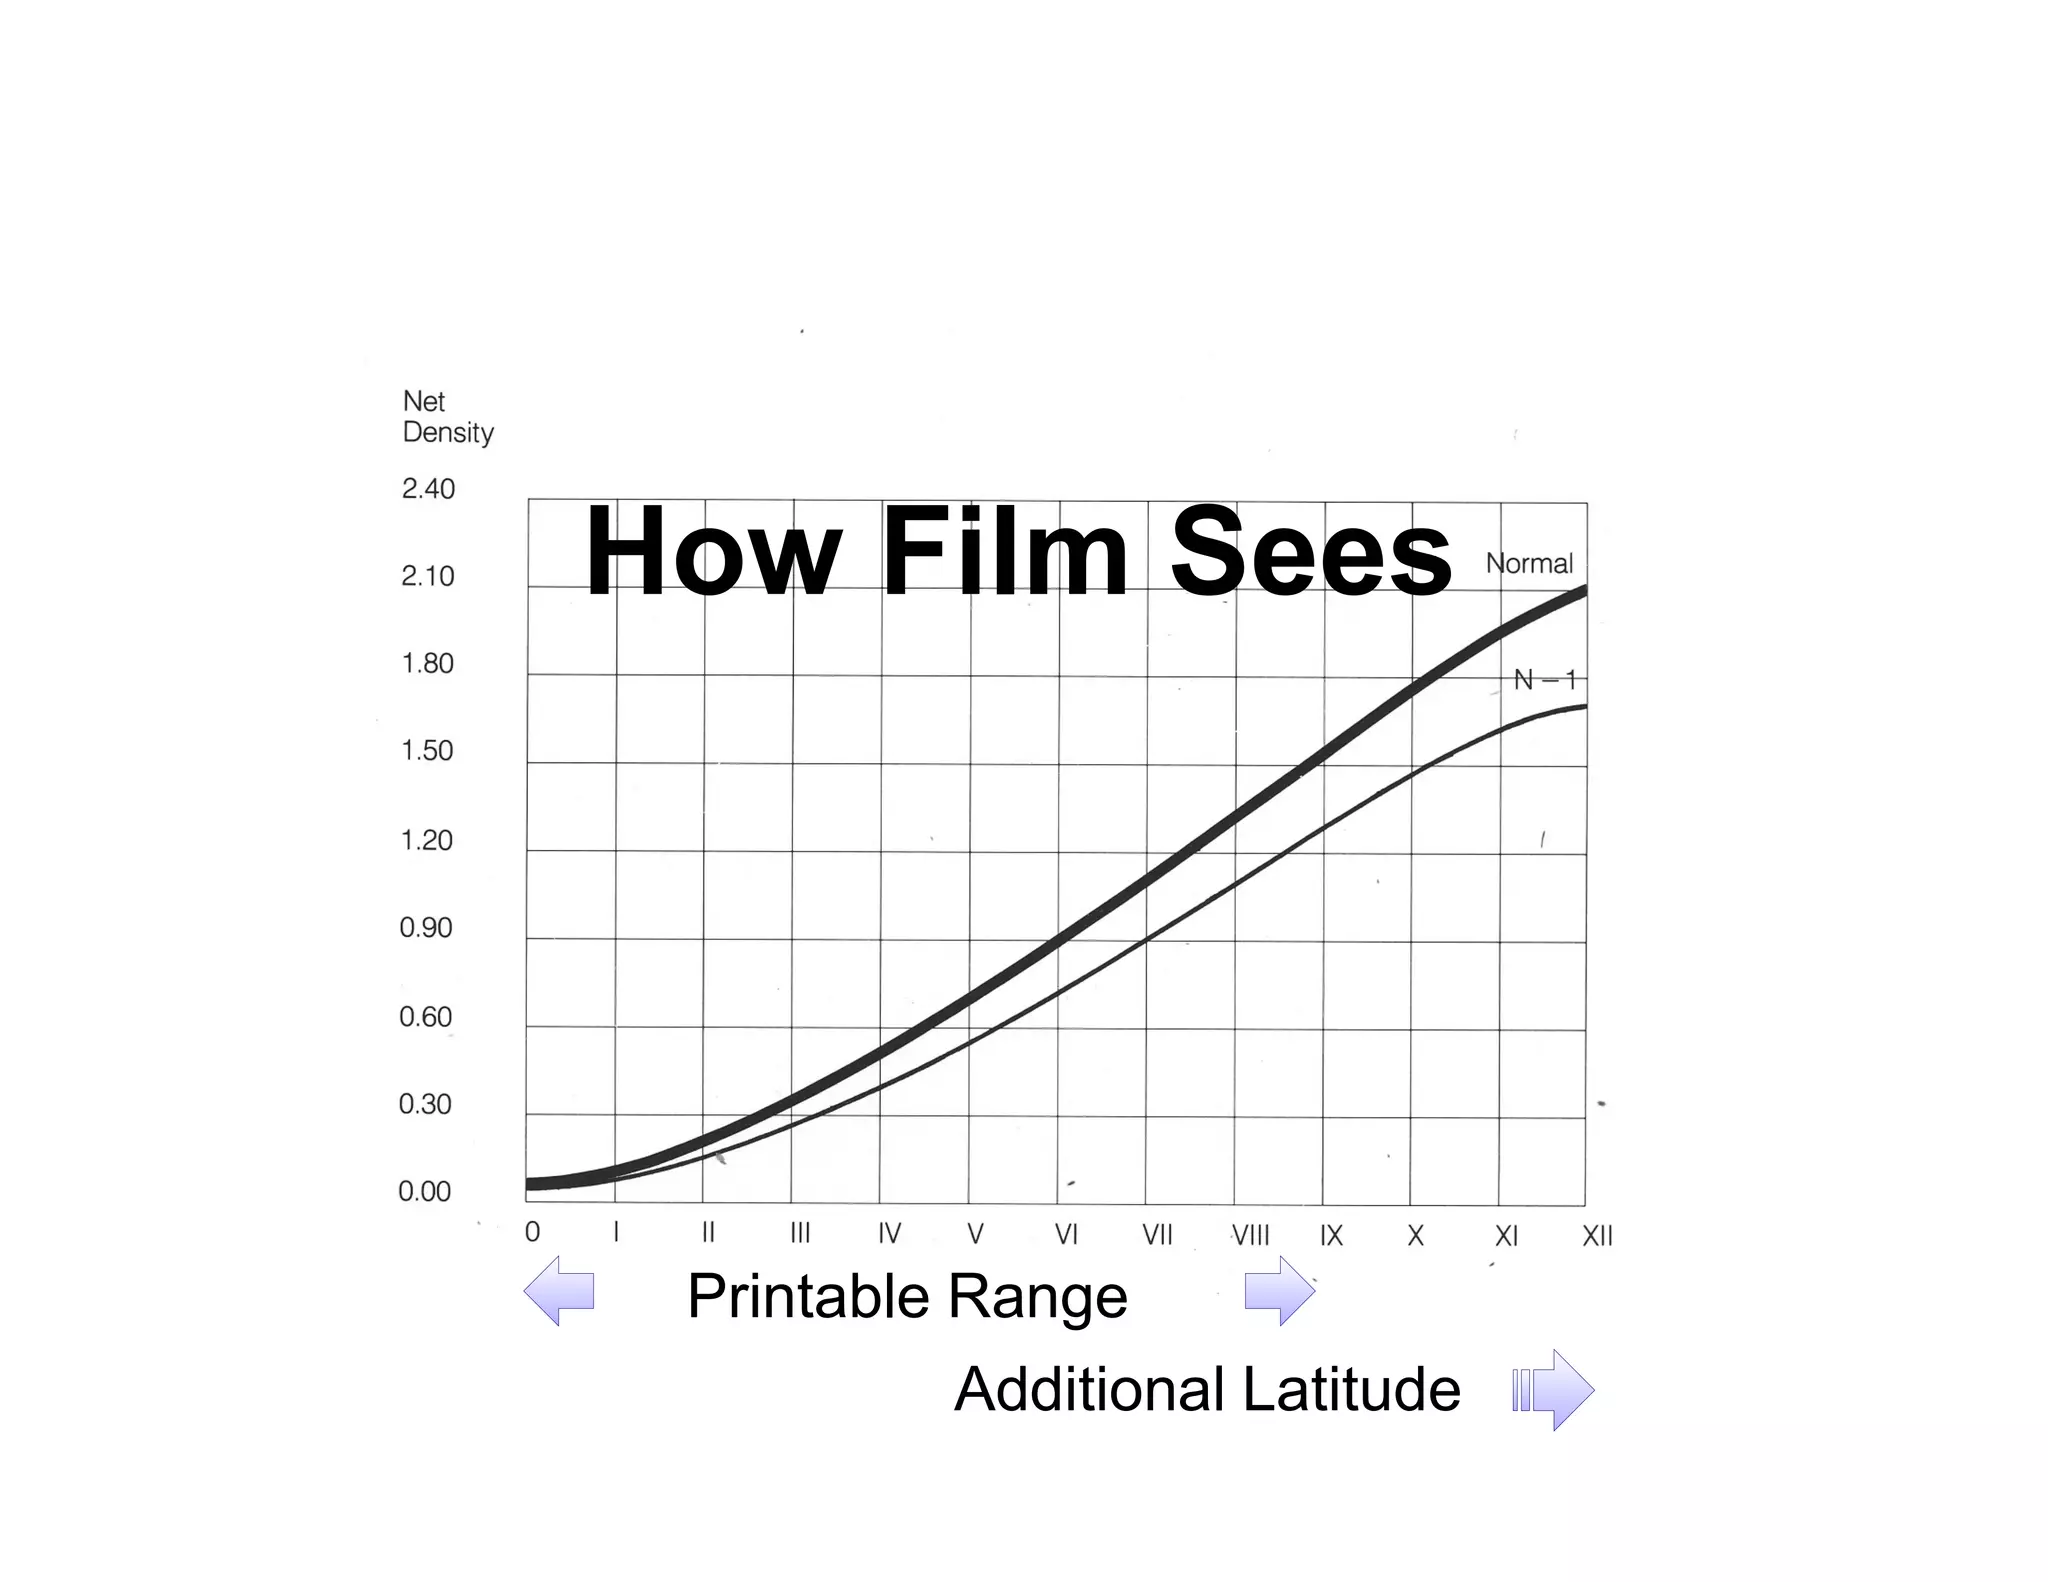
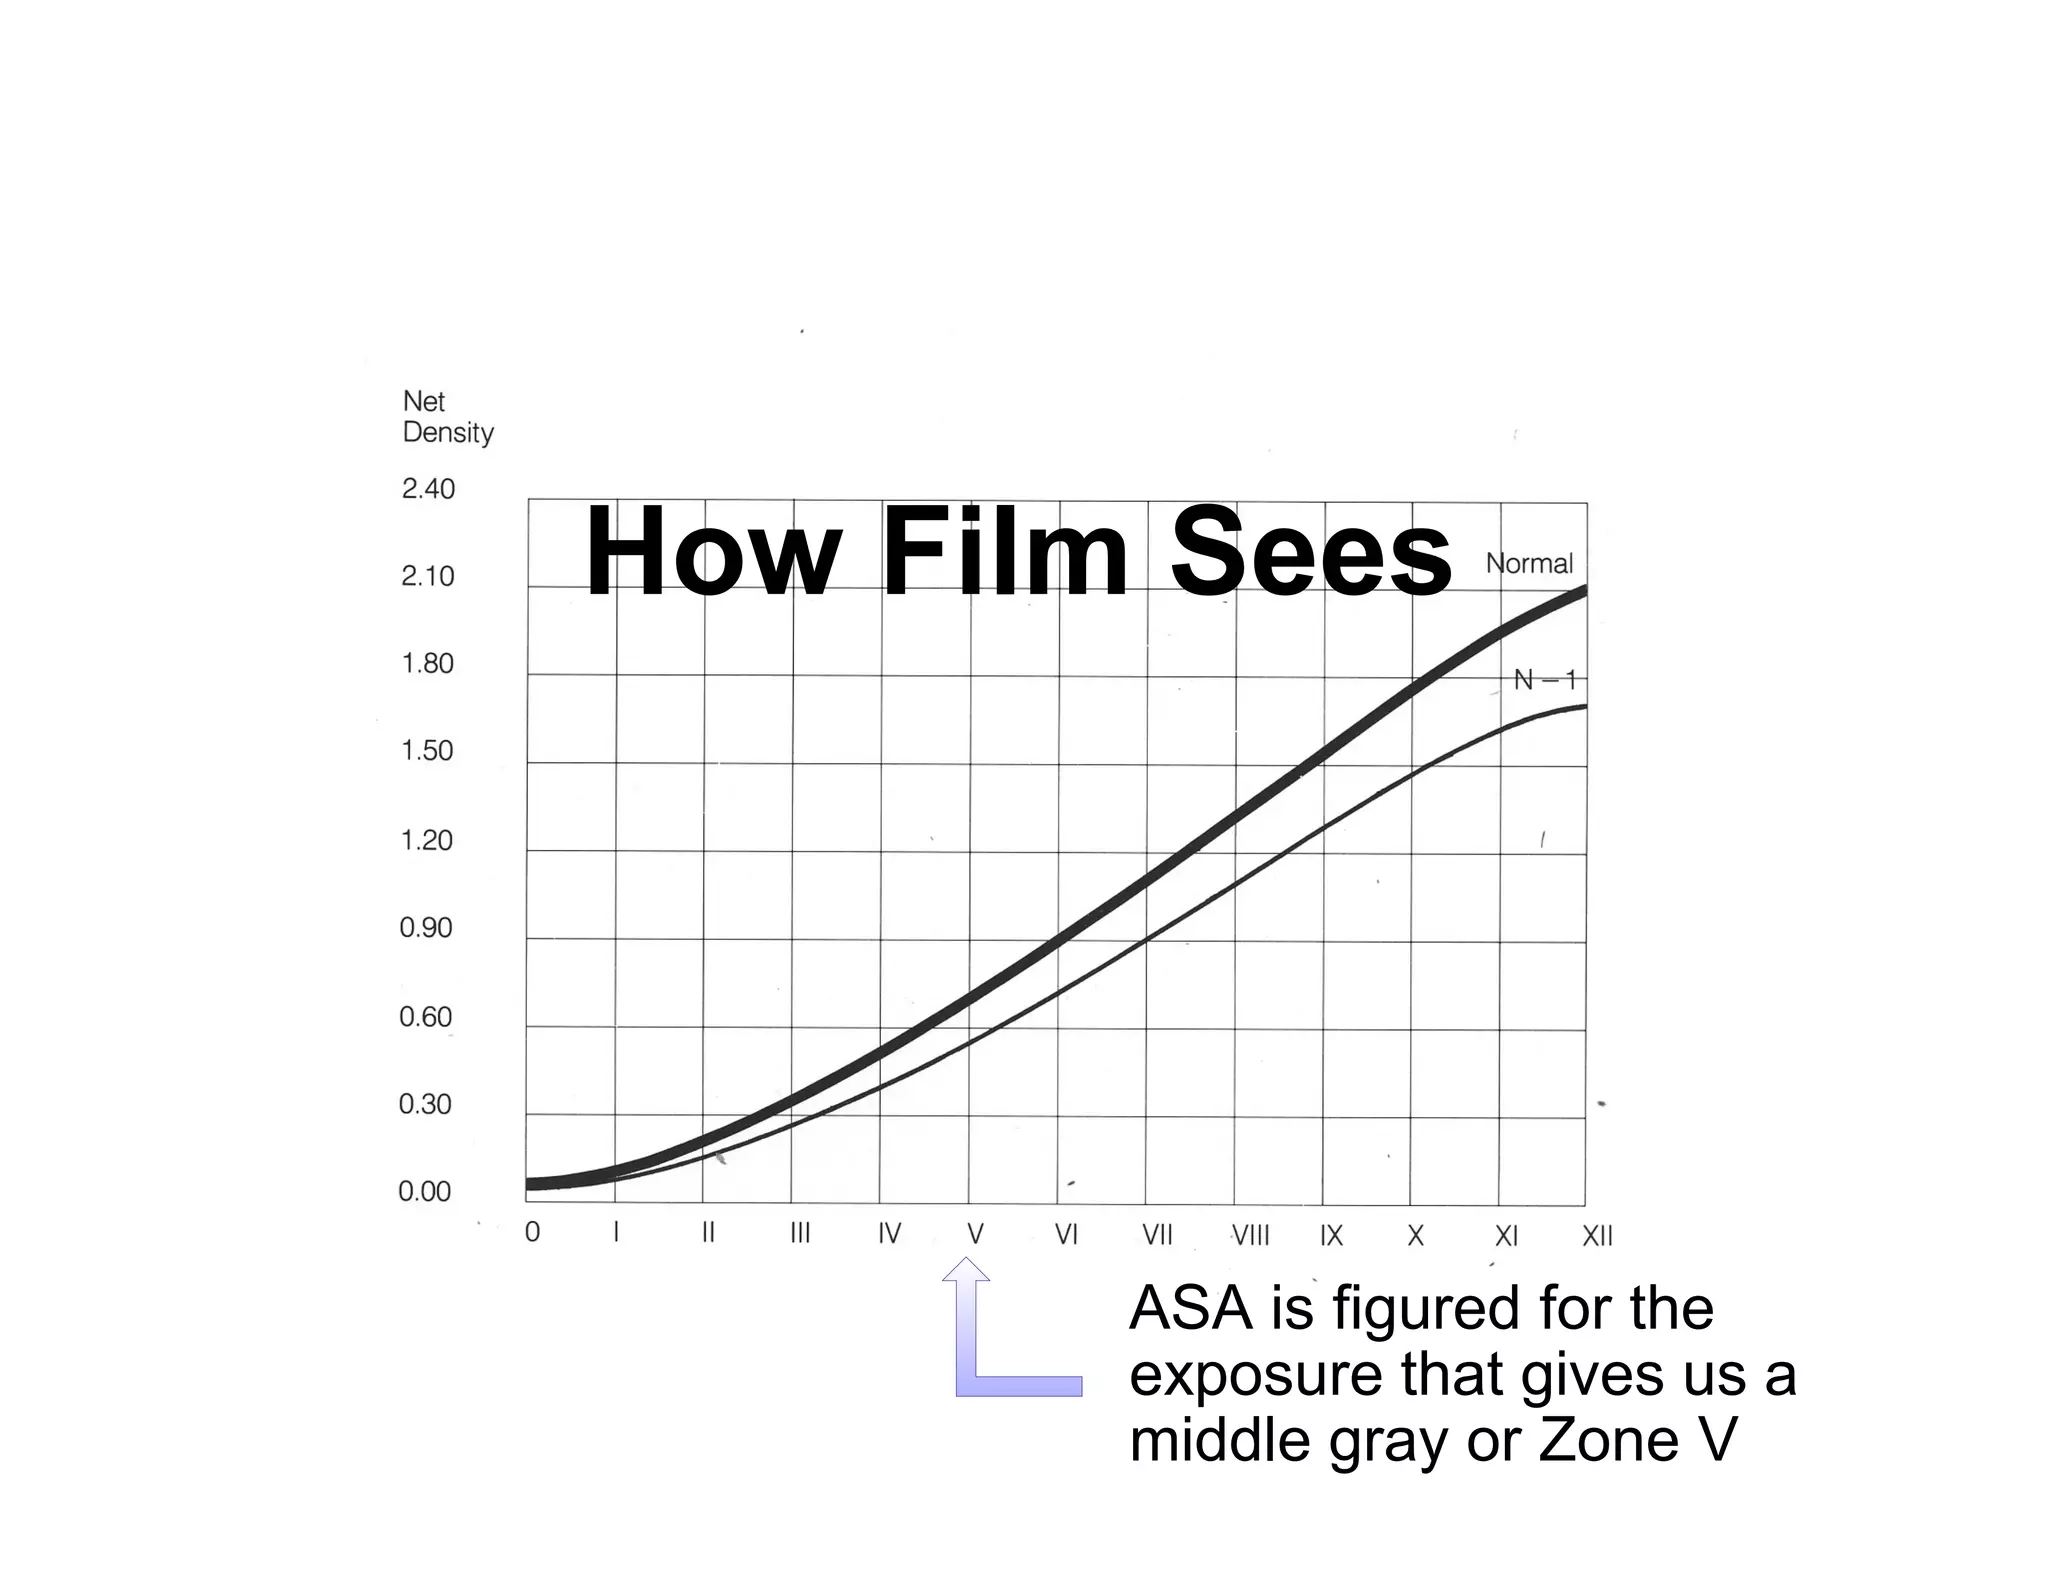
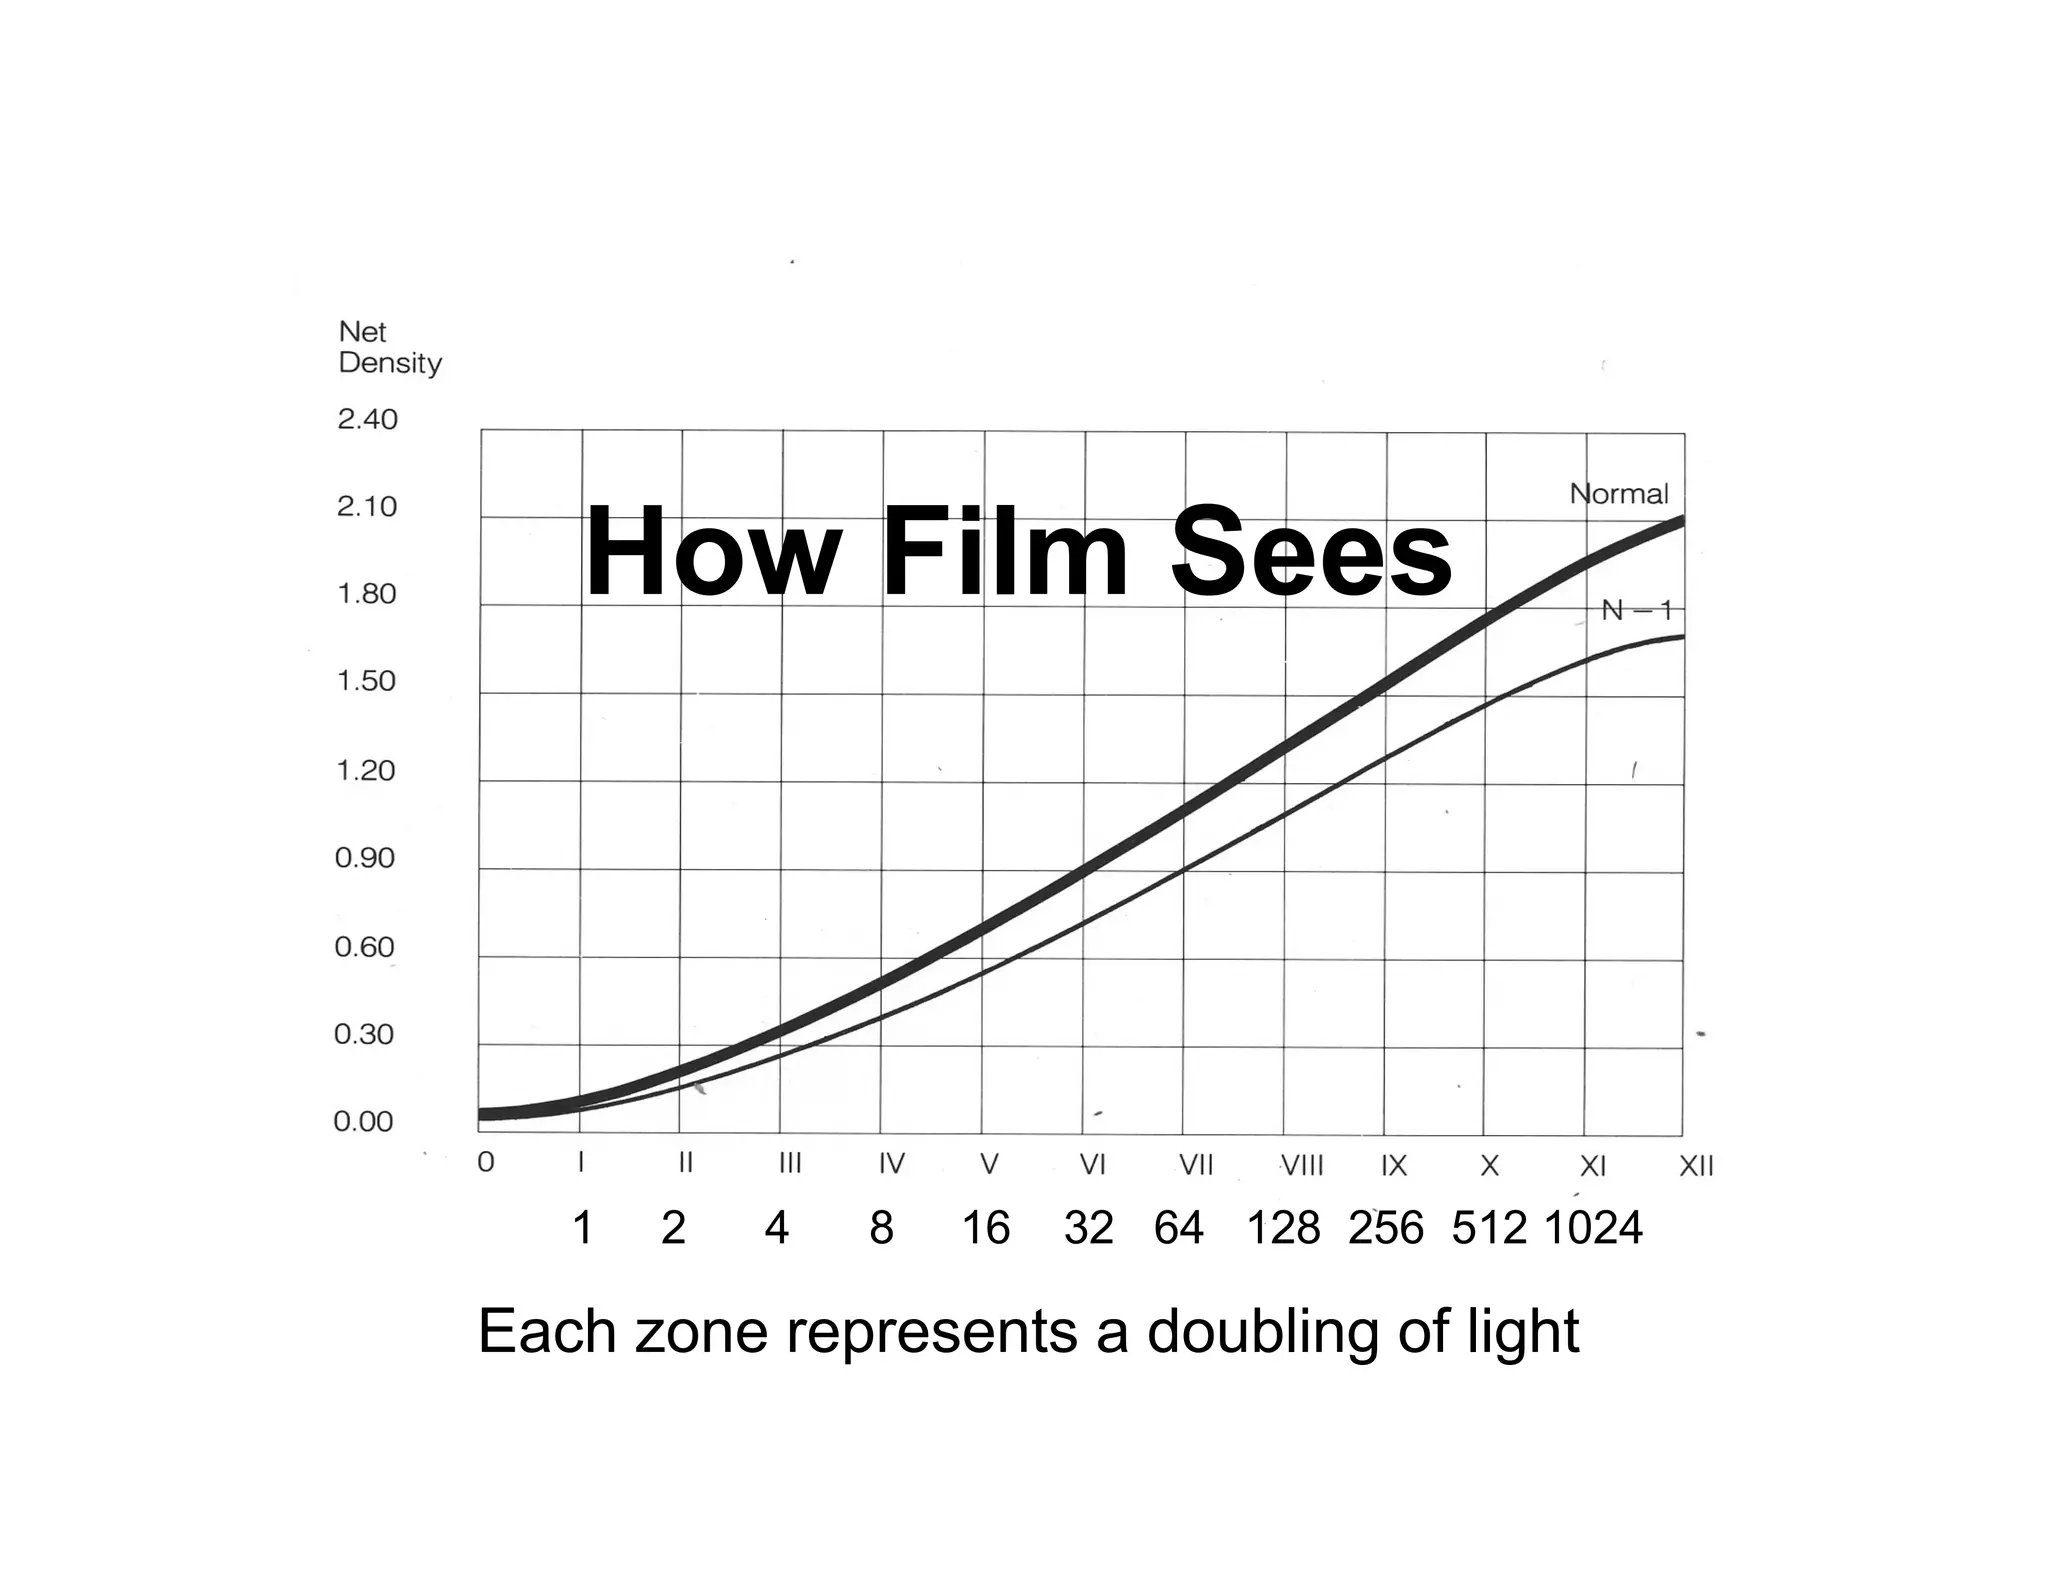
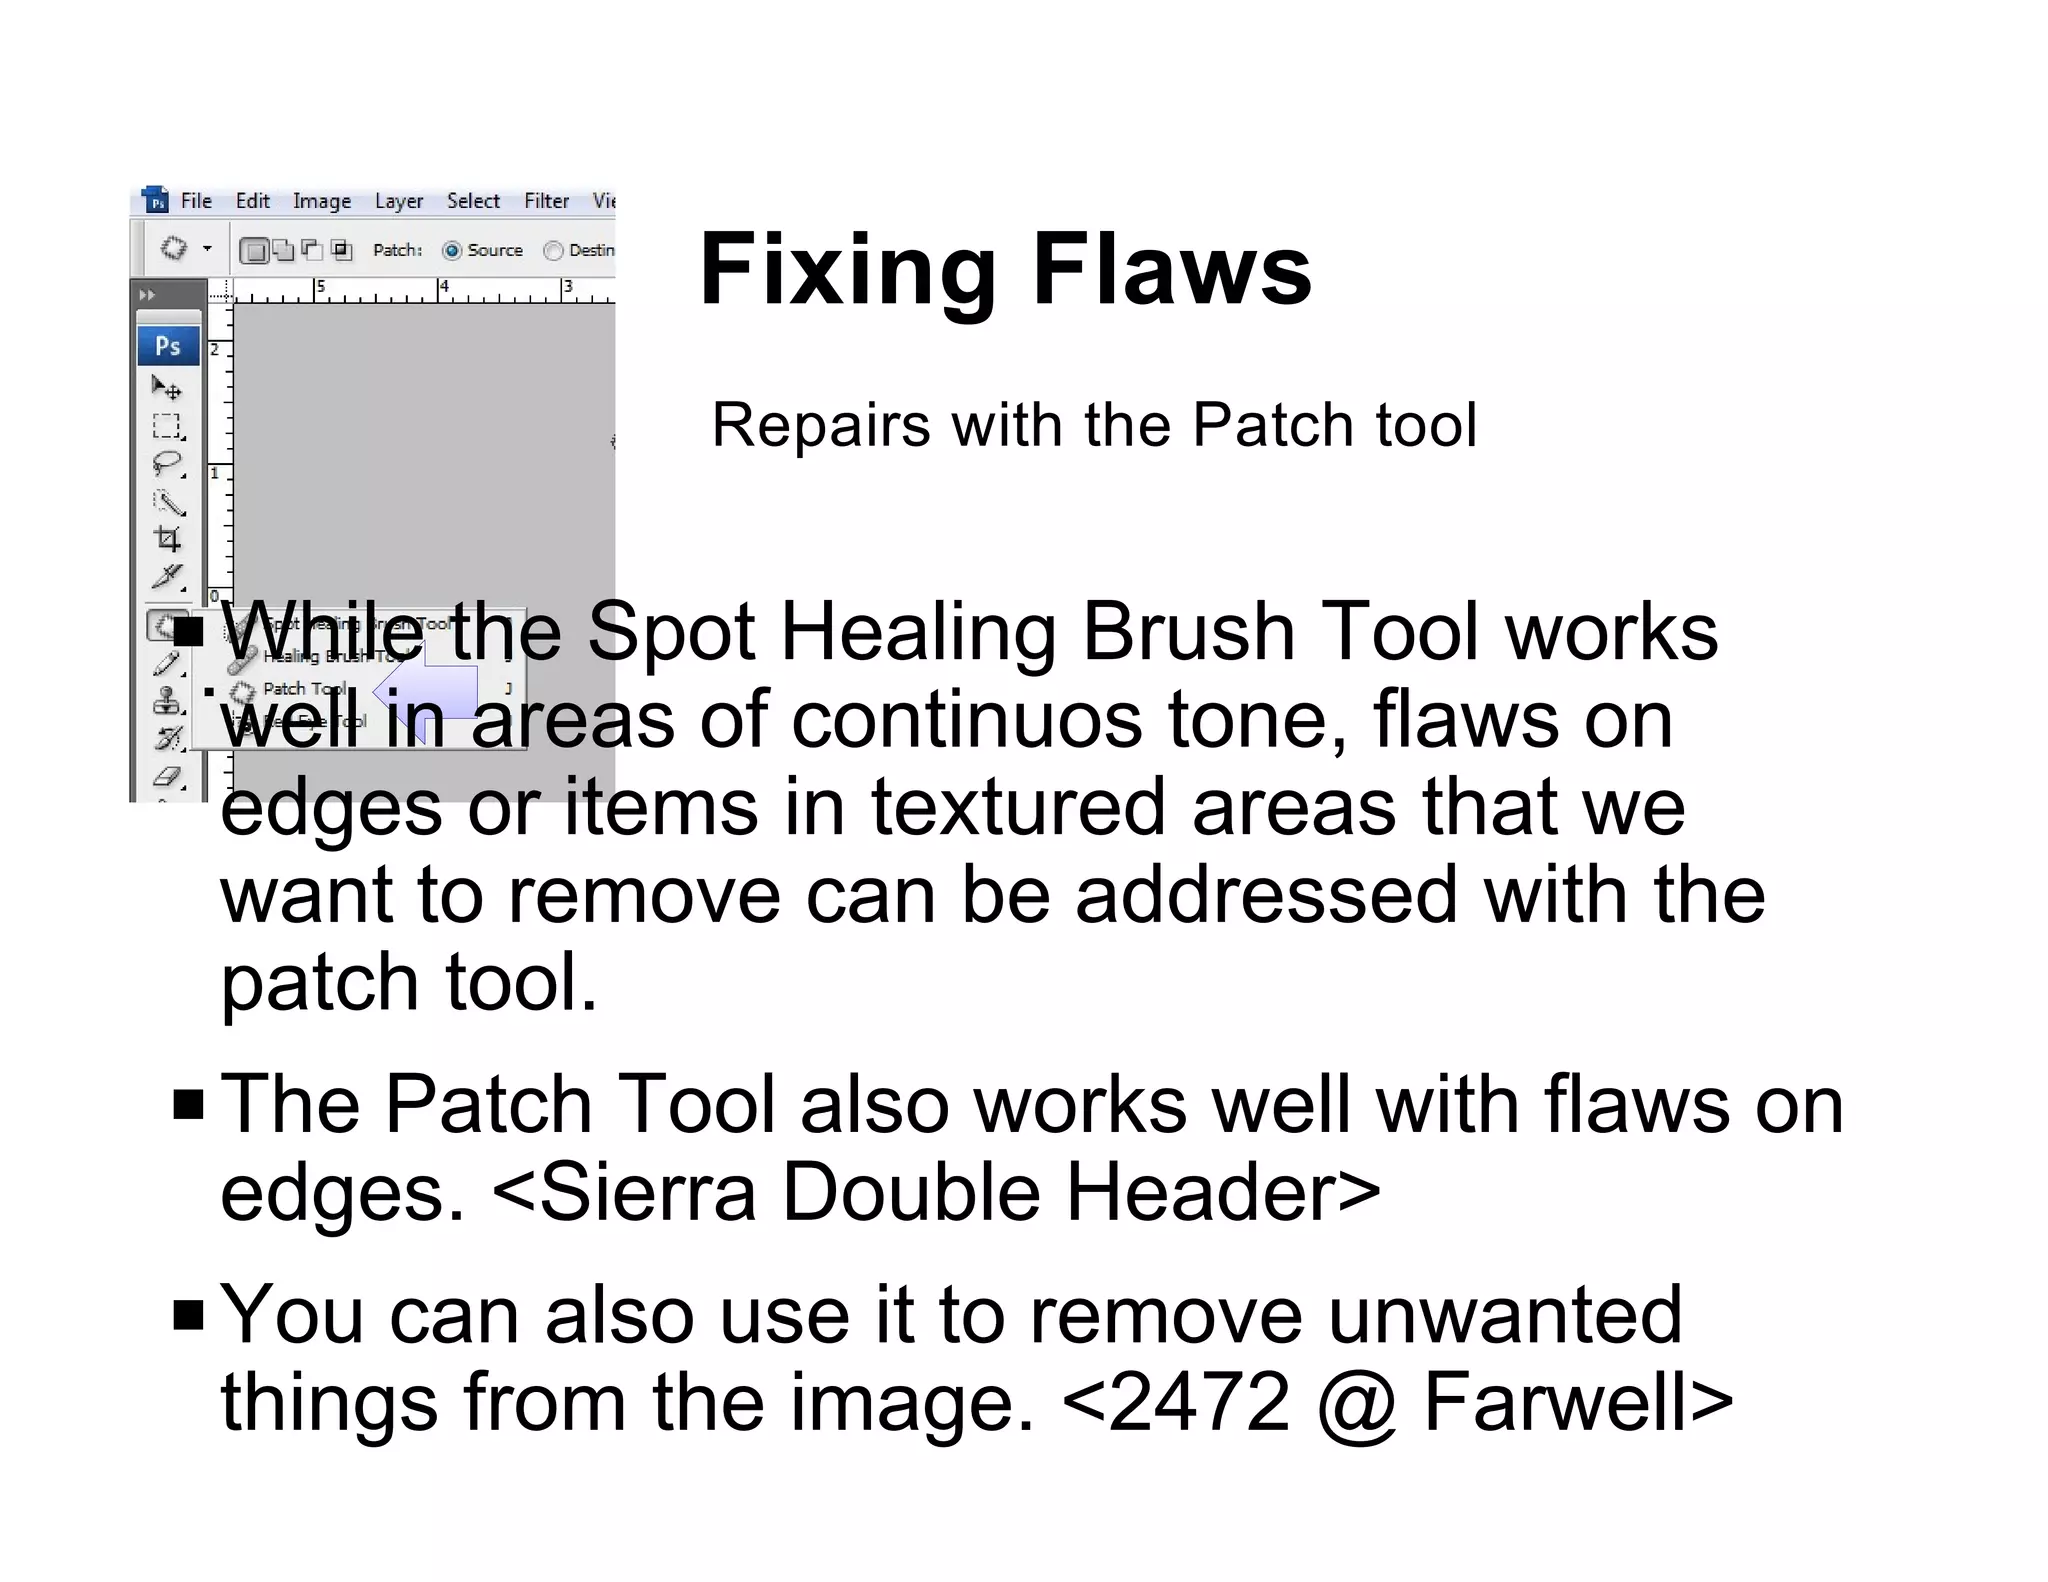
This document discusses various Photoshop techniques focused on image selection and interpretation, particularly how light and exposure affect photography. It covers film exposure systems, histogram usage, digital capture, and scanning negatives, along with detailed editing processes in Photoshop such as alignment, cleaning, and sharpening images. The content serves as a practical guide for photographers looking to enhance their images through mechanical adjustments and digital processing techniques.


![Now into Photoshop
First step is to rotate (if needed), trim, align, correct
perspective, clean and sharpen our images.
P Rotate the image if vertical or horizontal
alignment needs to be changed. [Image >
Rotate Canvas> . . . ]
P Trim anything extraneous in the scan by
selecting the desired area using the
Rectangular Marque Tool.
P Use [Edit > Copy] to save. Open a new file
[File > New], select OK in the diolog box,
Paste your selection into the new window.
[Edit > Paste]<Crosshead 8444>](https://image.slidesharecdn.com/osmundson1-111003133529-phpapp01/75/Photoshop-Techniques-Part-I-40-2048.jpg)
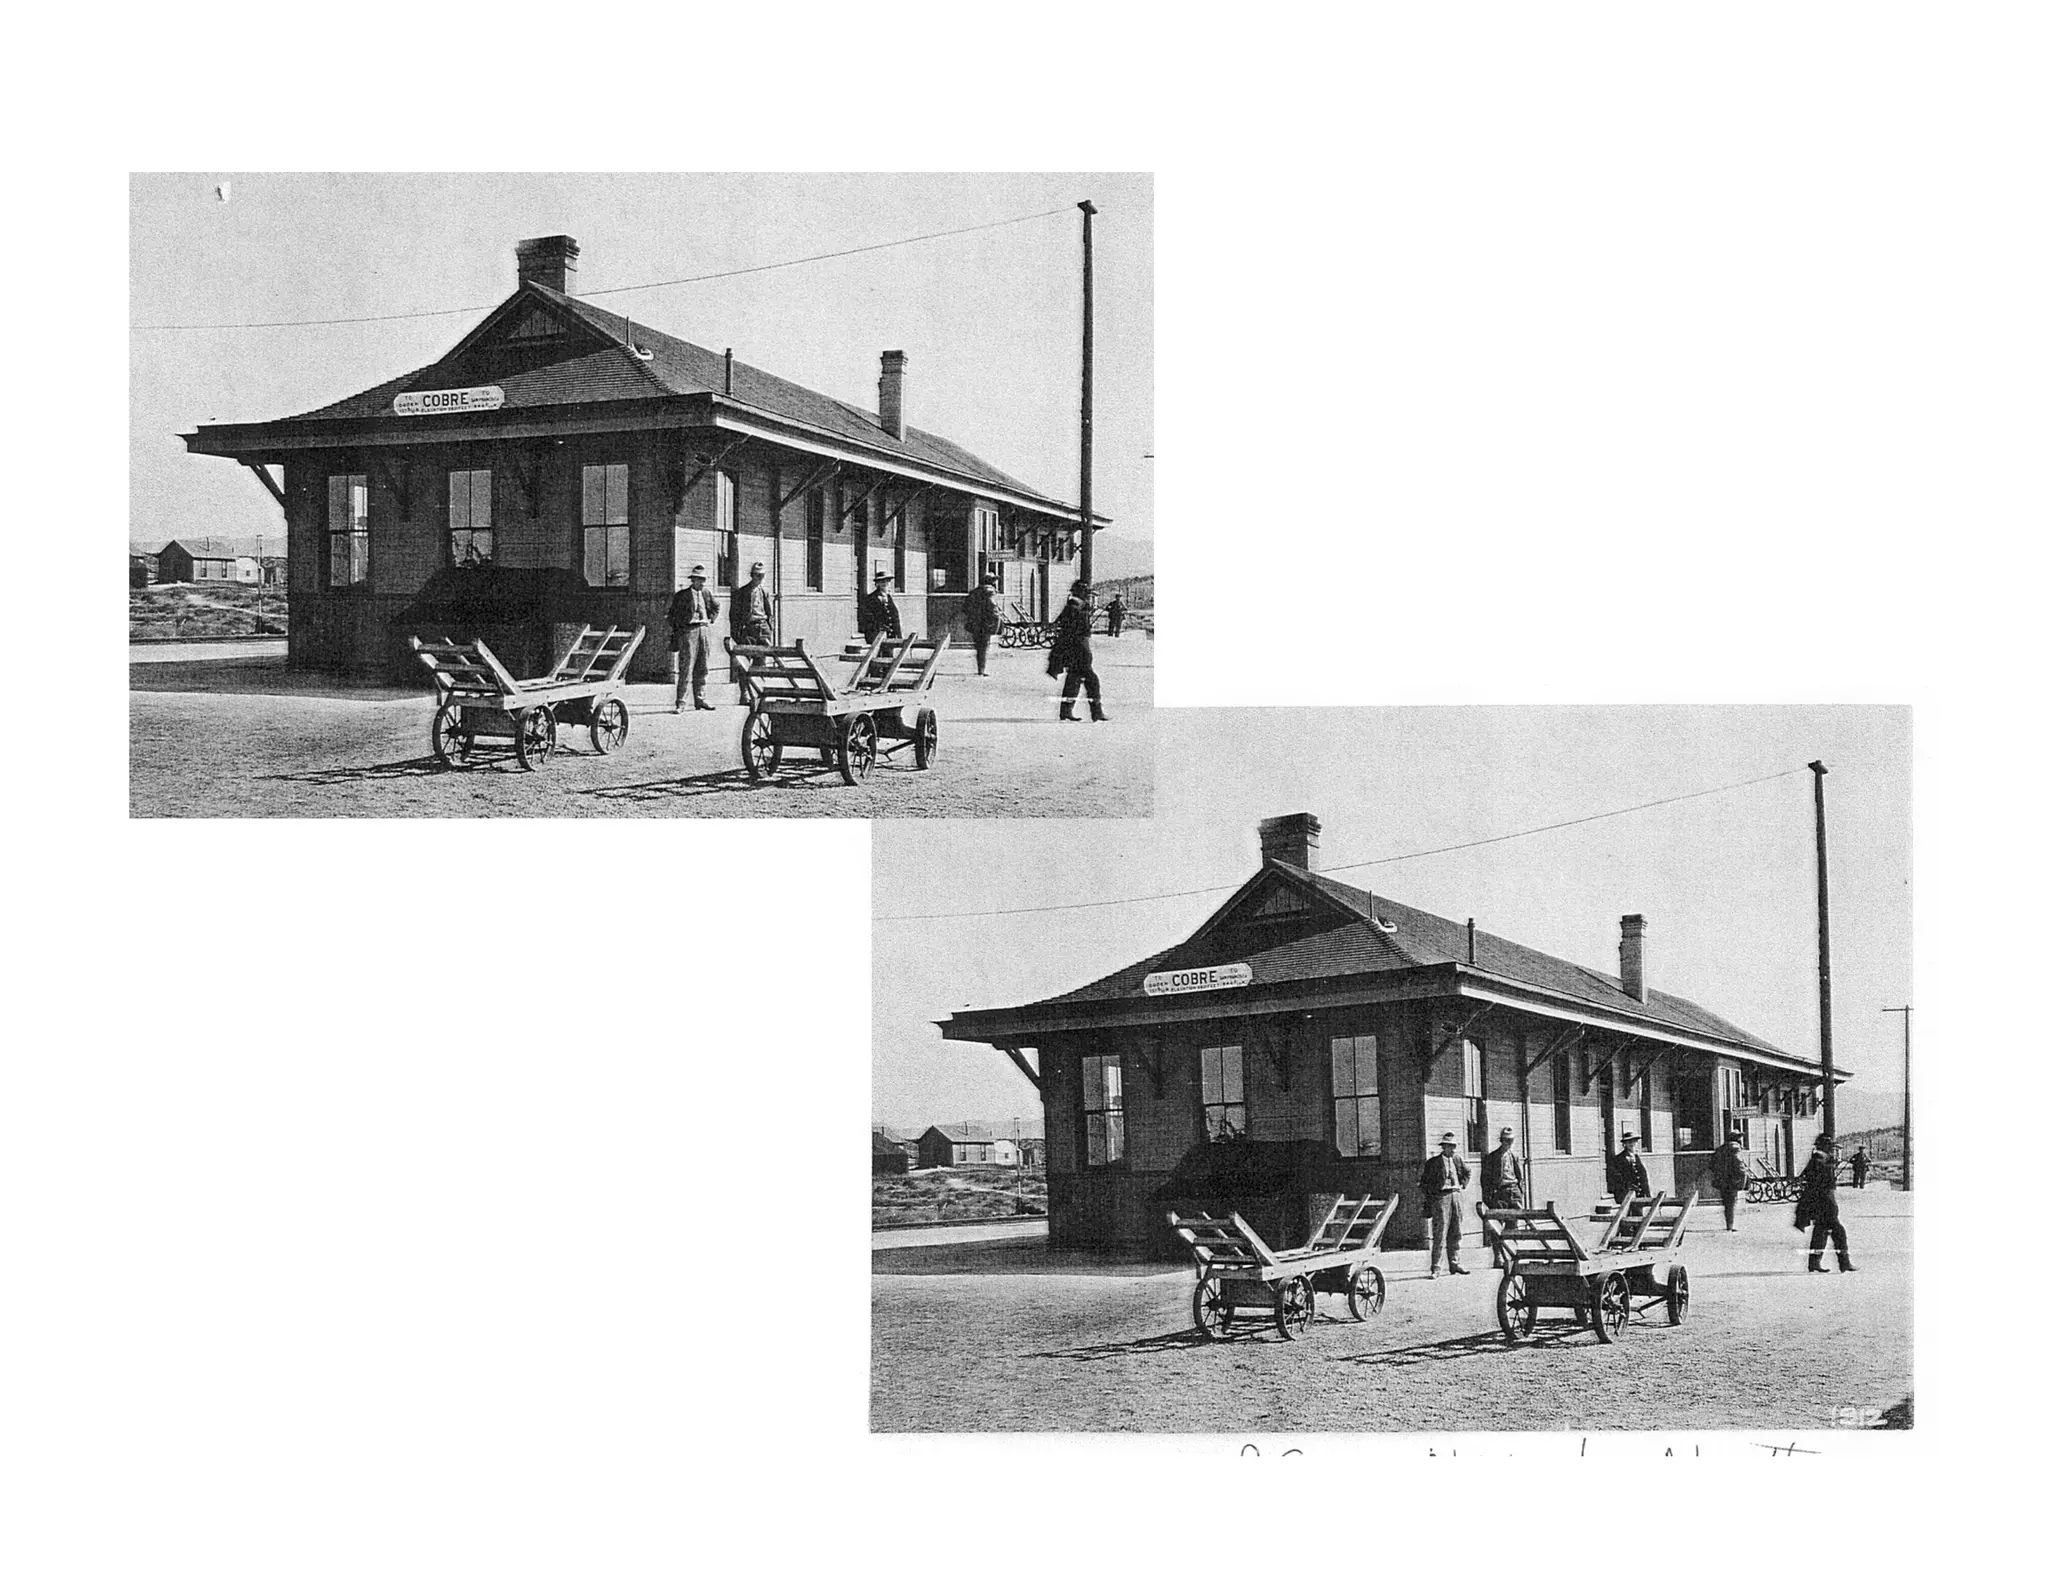
![Aligment
P One of the reasons that I like to use a view
camera is that it allows you to control
aligment & perspective in camera. Very
useful in the days of the traditional darkroom,
but still nice to do even with Photoshop.
P Many hand held images can benifit from
aligment & perspective correction. <Cobre
Photo>
P Turn on Grid. [View > Show > Grid]
P Select All. [Select > All]](https://image.slidesharecdn.com/osmundson1-111003133529-phpapp01/75/Photoshop-Techniques-Part-I-41-2048.jpg)
![Perspective
P If the horizon is in the center of the image,
there should be no need for perspective
adjustments.
P If the camera was pointed up (or down) there
will be vertical perspective convergence.
P To correct, turn on Grid. [View > Show >
Grid]
P Select All. [Select > All]
P Now pick a vertical line at or near the edge of](https://image.slidesharecdn.com/osmundson1-111003133529-phpapp01/75/Photoshop-Techniques-Part-I-43-2048.jpg)
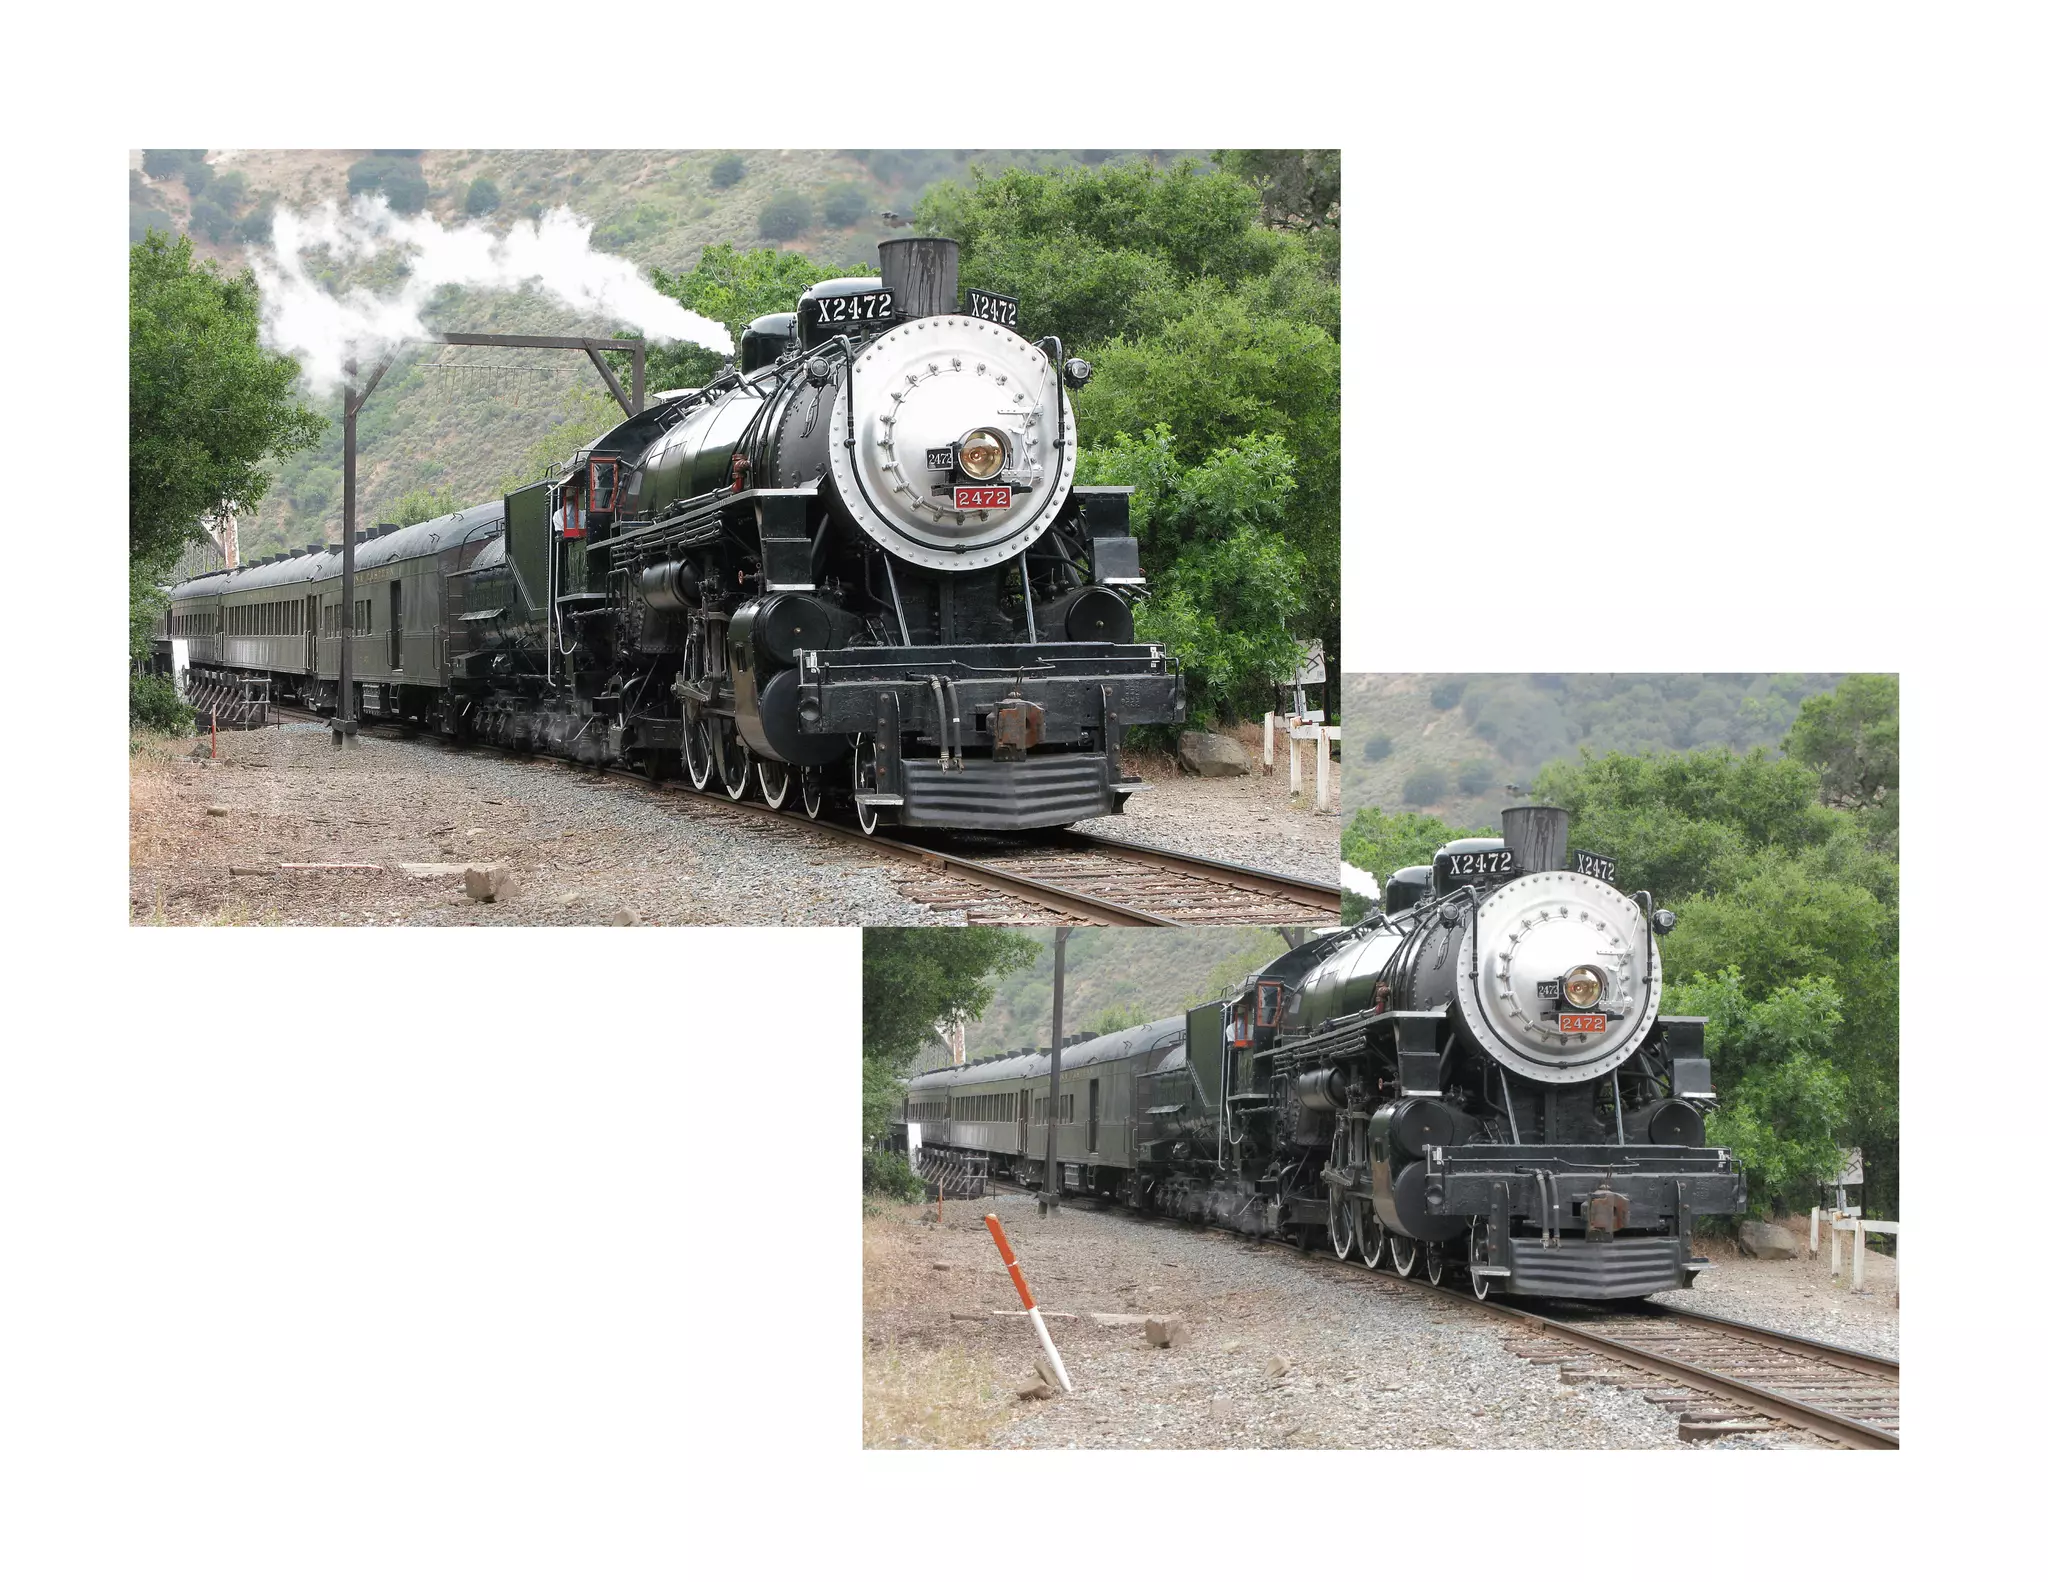
![Perspective, Cont.
P If important items in your composition fall off
the edge of the image as you adjust
perspective, the canvas size my need to be
enlarged.
P To enlarge the canvas, select Enlarge
canvas. [Image > Canvas Size]
P Adjust Box size by inserting new dimensions.
P Click OK.
P We will look at how to repair any left over](https://image.slidesharecdn.com/osmundson1-111003133529-phpapp01/75/Photoshop-Techniques-Part-I-44-2048.jpg)
![Perspective Continued
P To enlage the canvas select Enlarge canvas.
[Image > Canvas Size]
P Delete bottom arrow in dialog box.
P Adjust note size by
Also, you willBox that there inserting new dimensions.
is some vertical distortion
P Click OK.
when you adjust the
perspective. You can fix [Select > All]
P Now Select All. this
by stretching the image at the
P This distort to adjust the aspect ratio. [Edit >
top.Use also requires
changing the canvas size.
Transform > Distort]
P Pull the top to adjust the aspect ratio.](https://image.slidesharecdn.com/osmundson1-111003133529-phpapp01/75/Photoshop-Techniques-Part-I-45-2048.jpg)


![Sharpening, cont.
P Photoshop offers several sharpening tools.
The one I use most is called unsharp
masking. [Filter > Sharpen > Unsharp Mask]
P With the size files that I like to work with,
settings of 50 to 100 in Amount seem to work
well with most images. I leave Radius at 1
and Threshhold at 0.
P If your image is slightly out of focus, it can
sometimes be made acceptable by using a
higher number in Amount.](https://image.slidesharecdn.com/osmundson1-111003133529-phpapp01/75/Photoshop-Techniques-Part-I-51-2048.jpg)