Downloaded 129 times
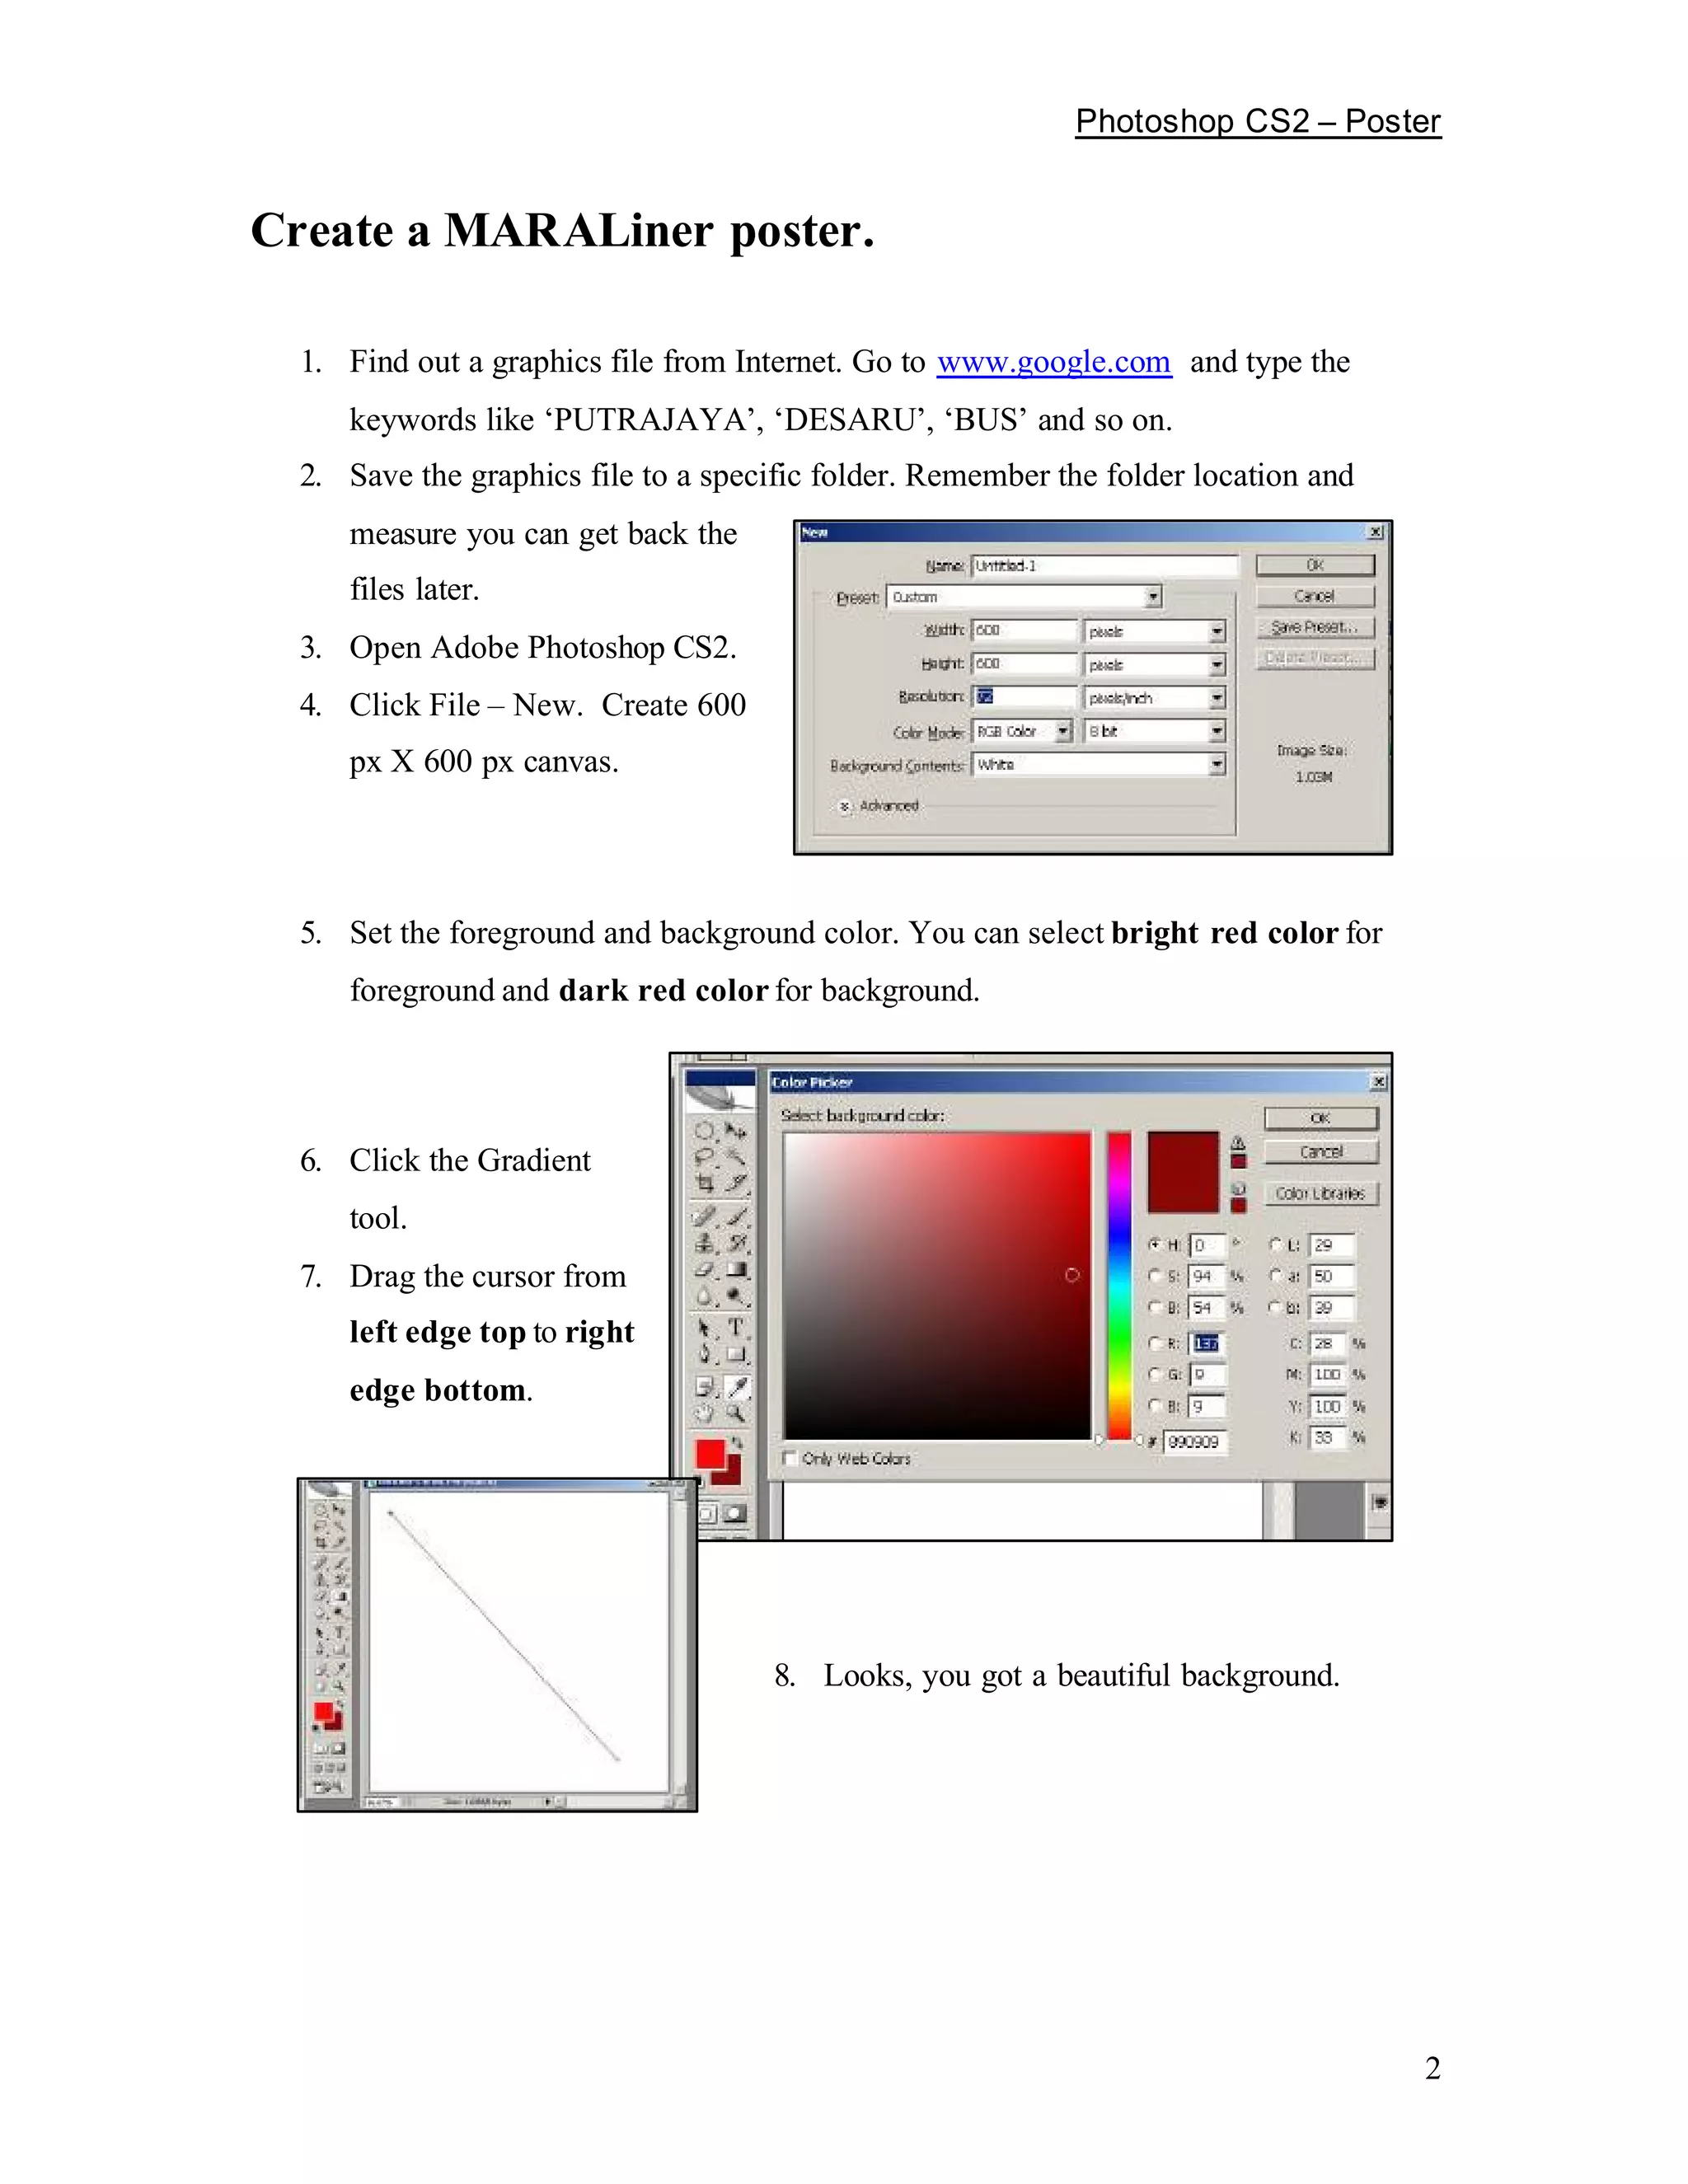
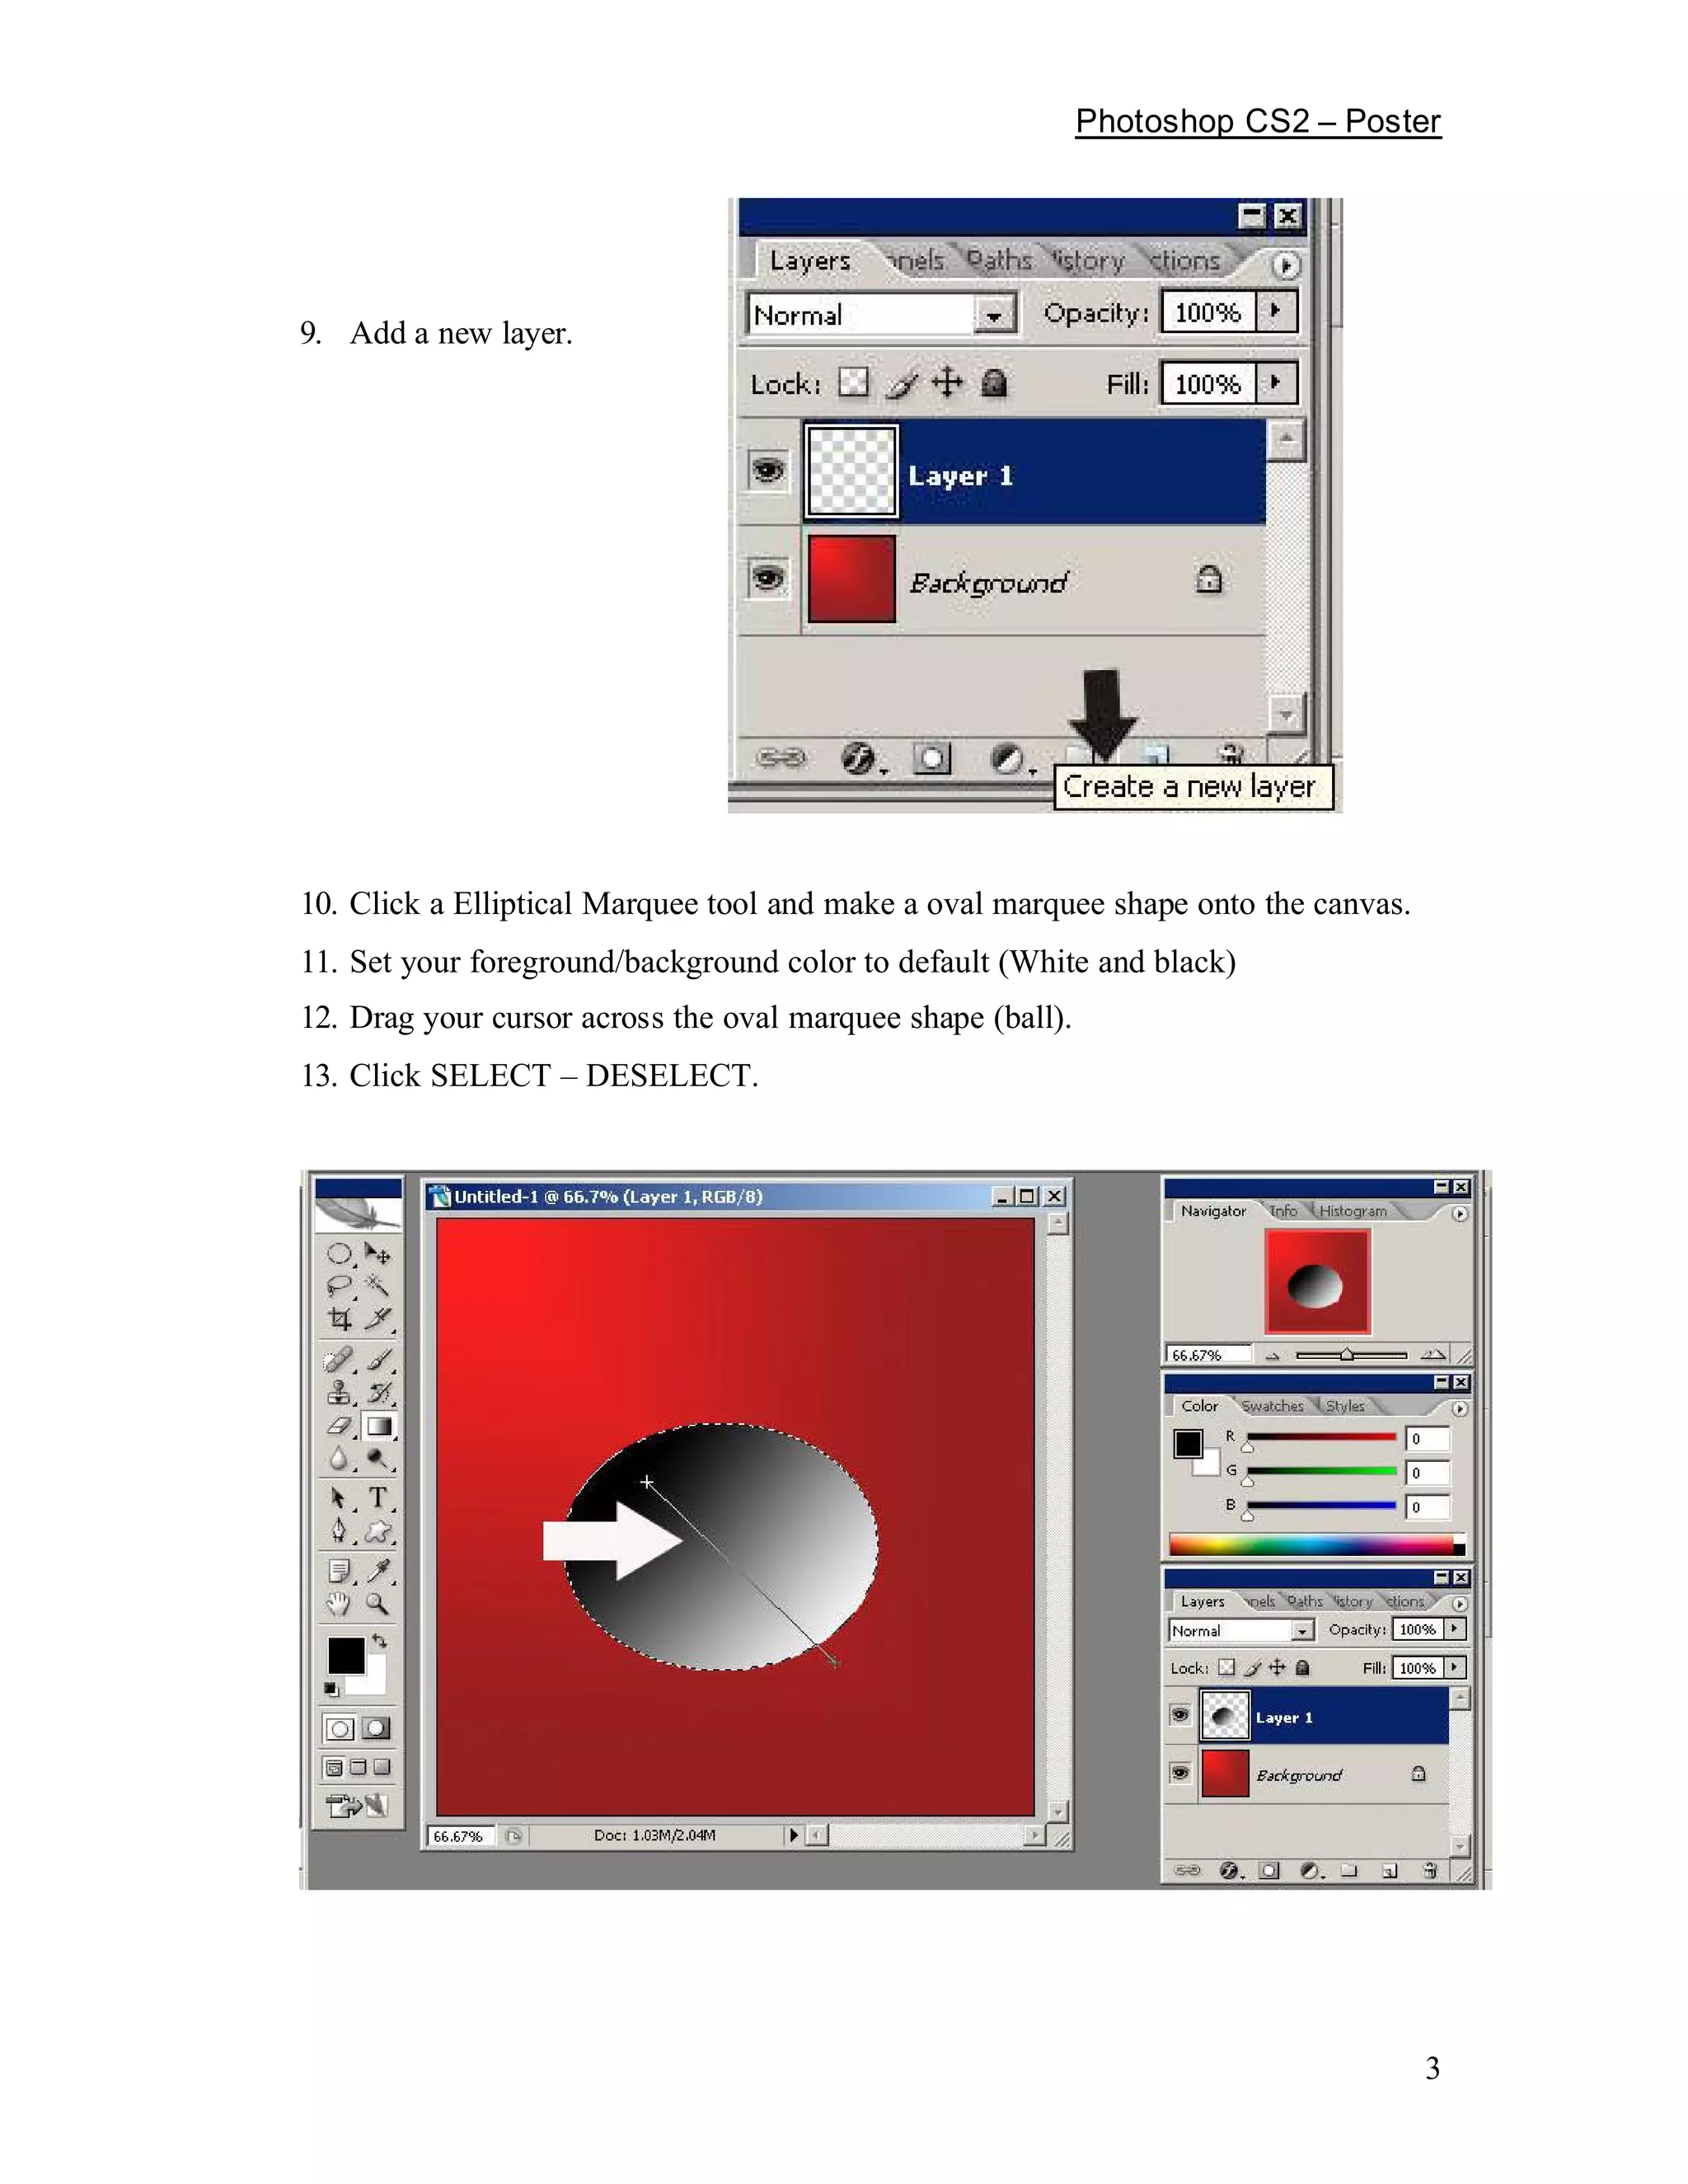
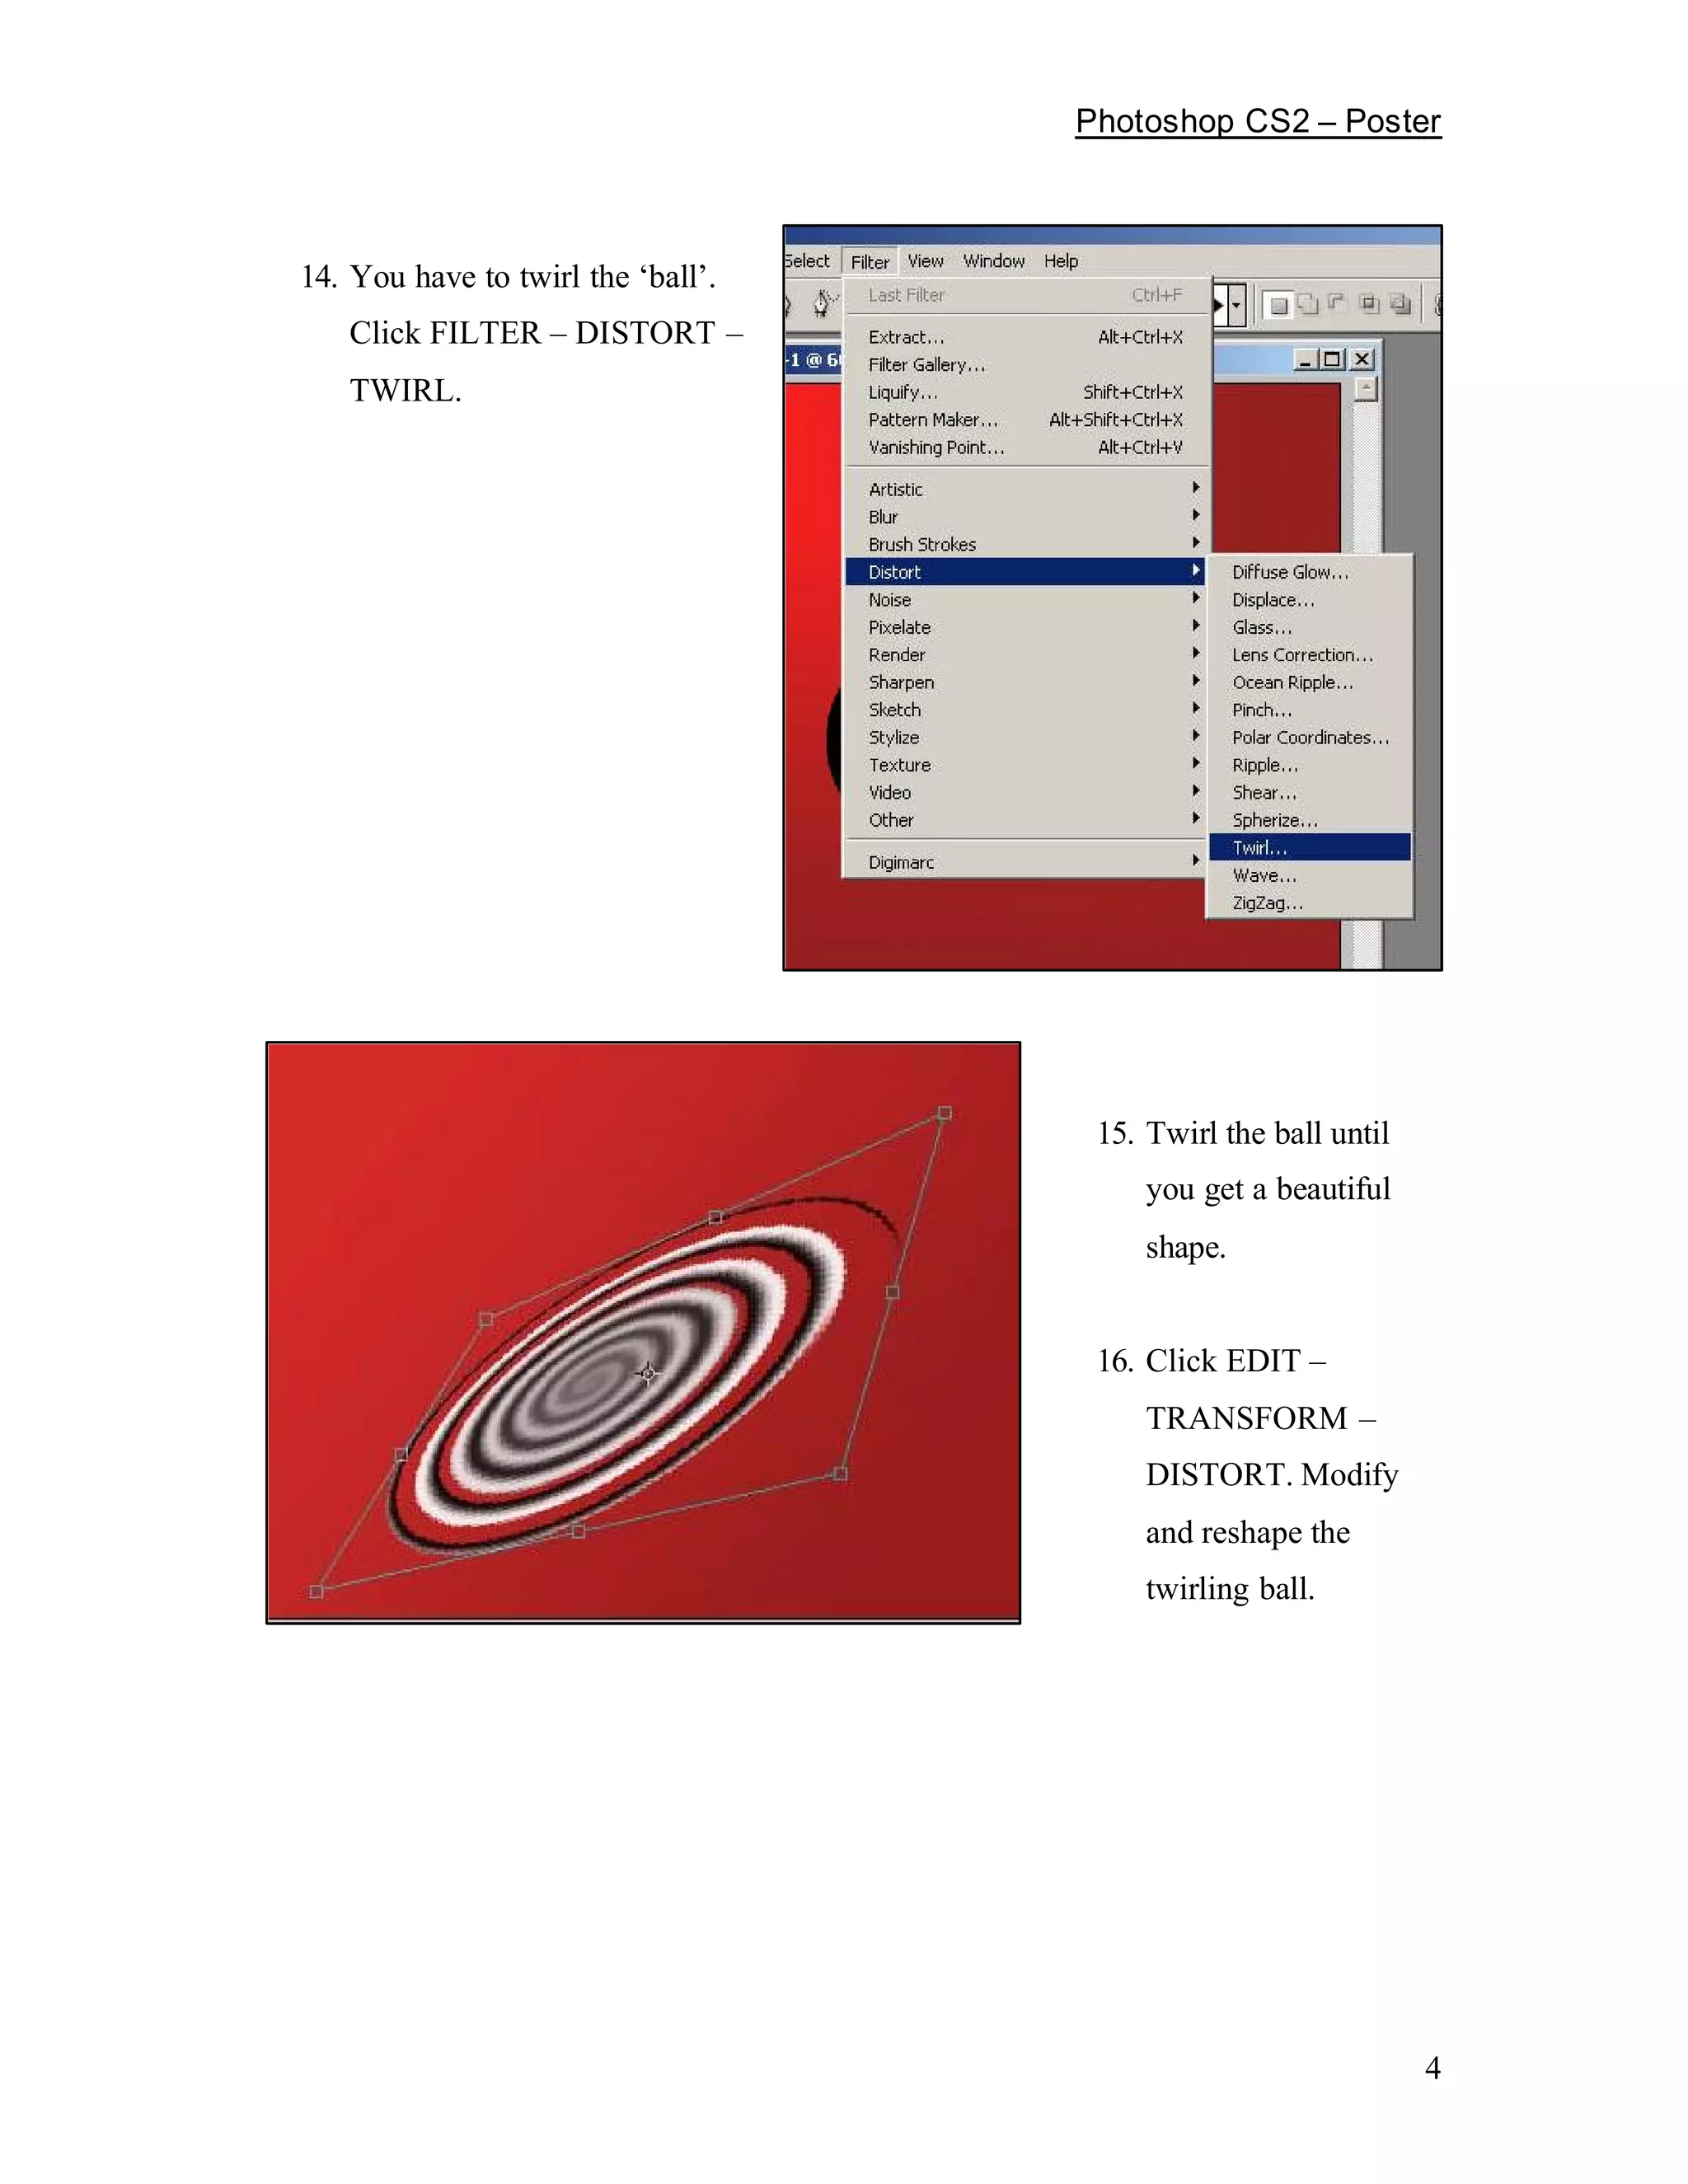
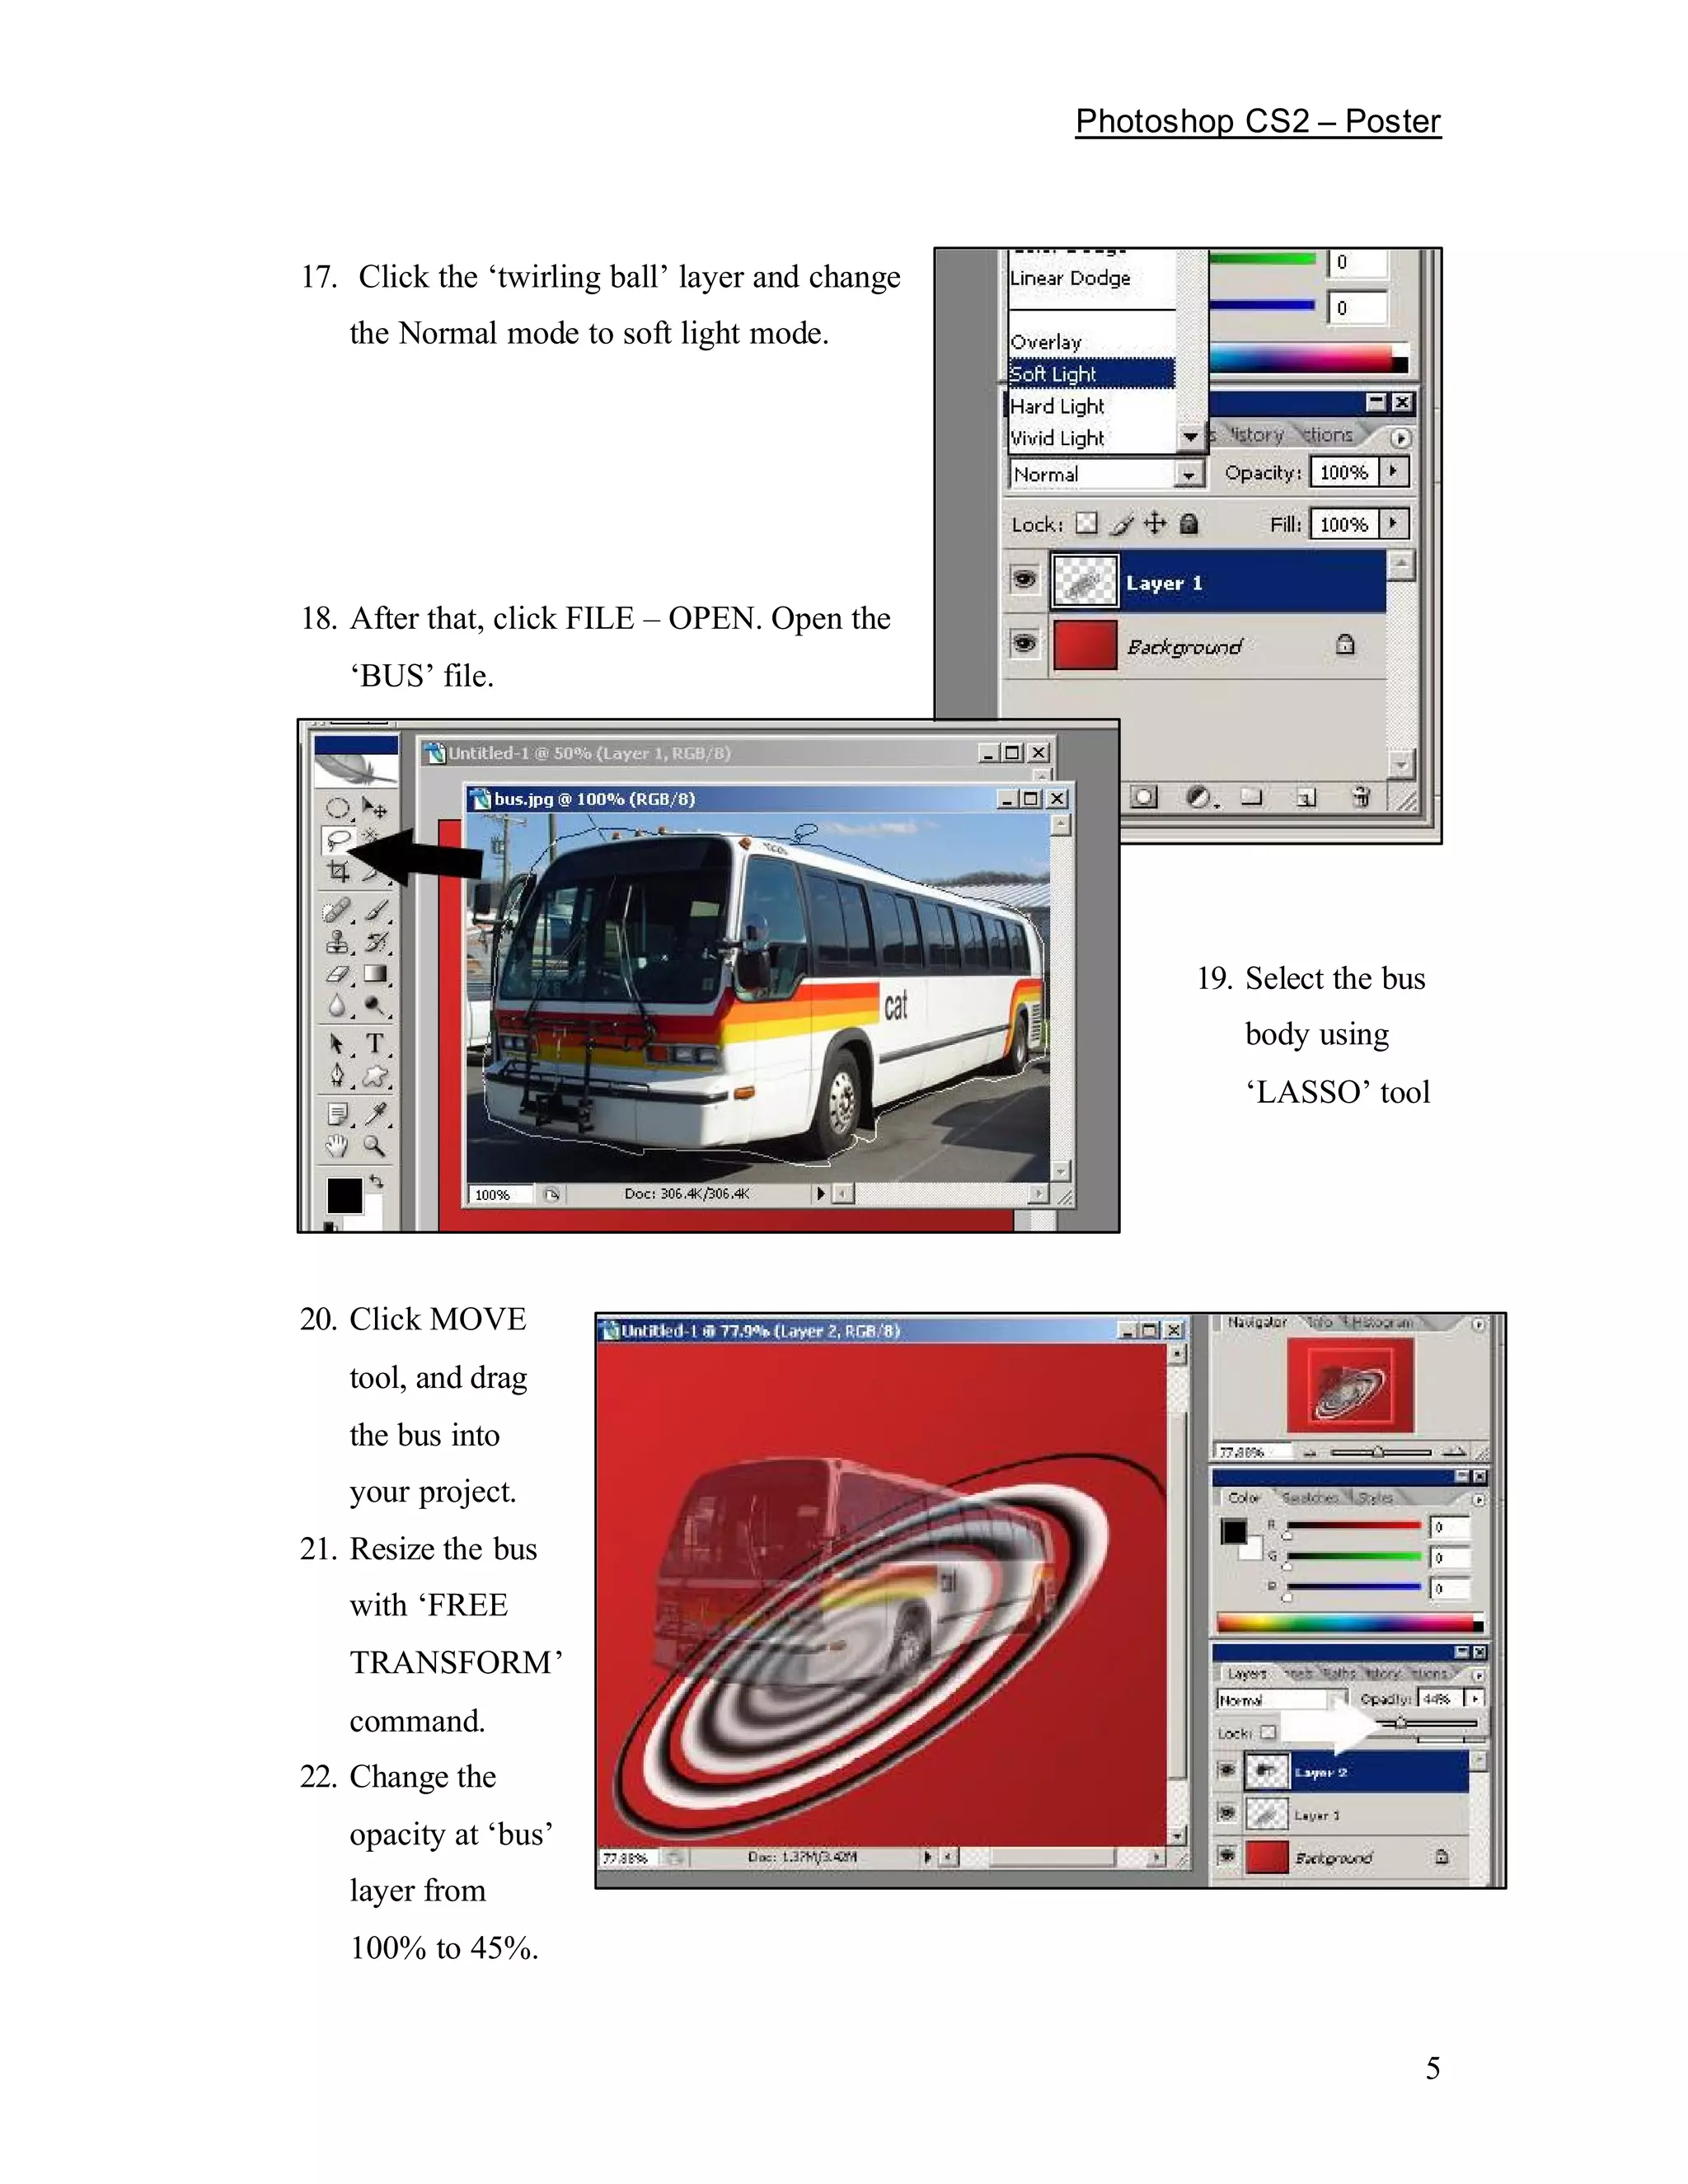
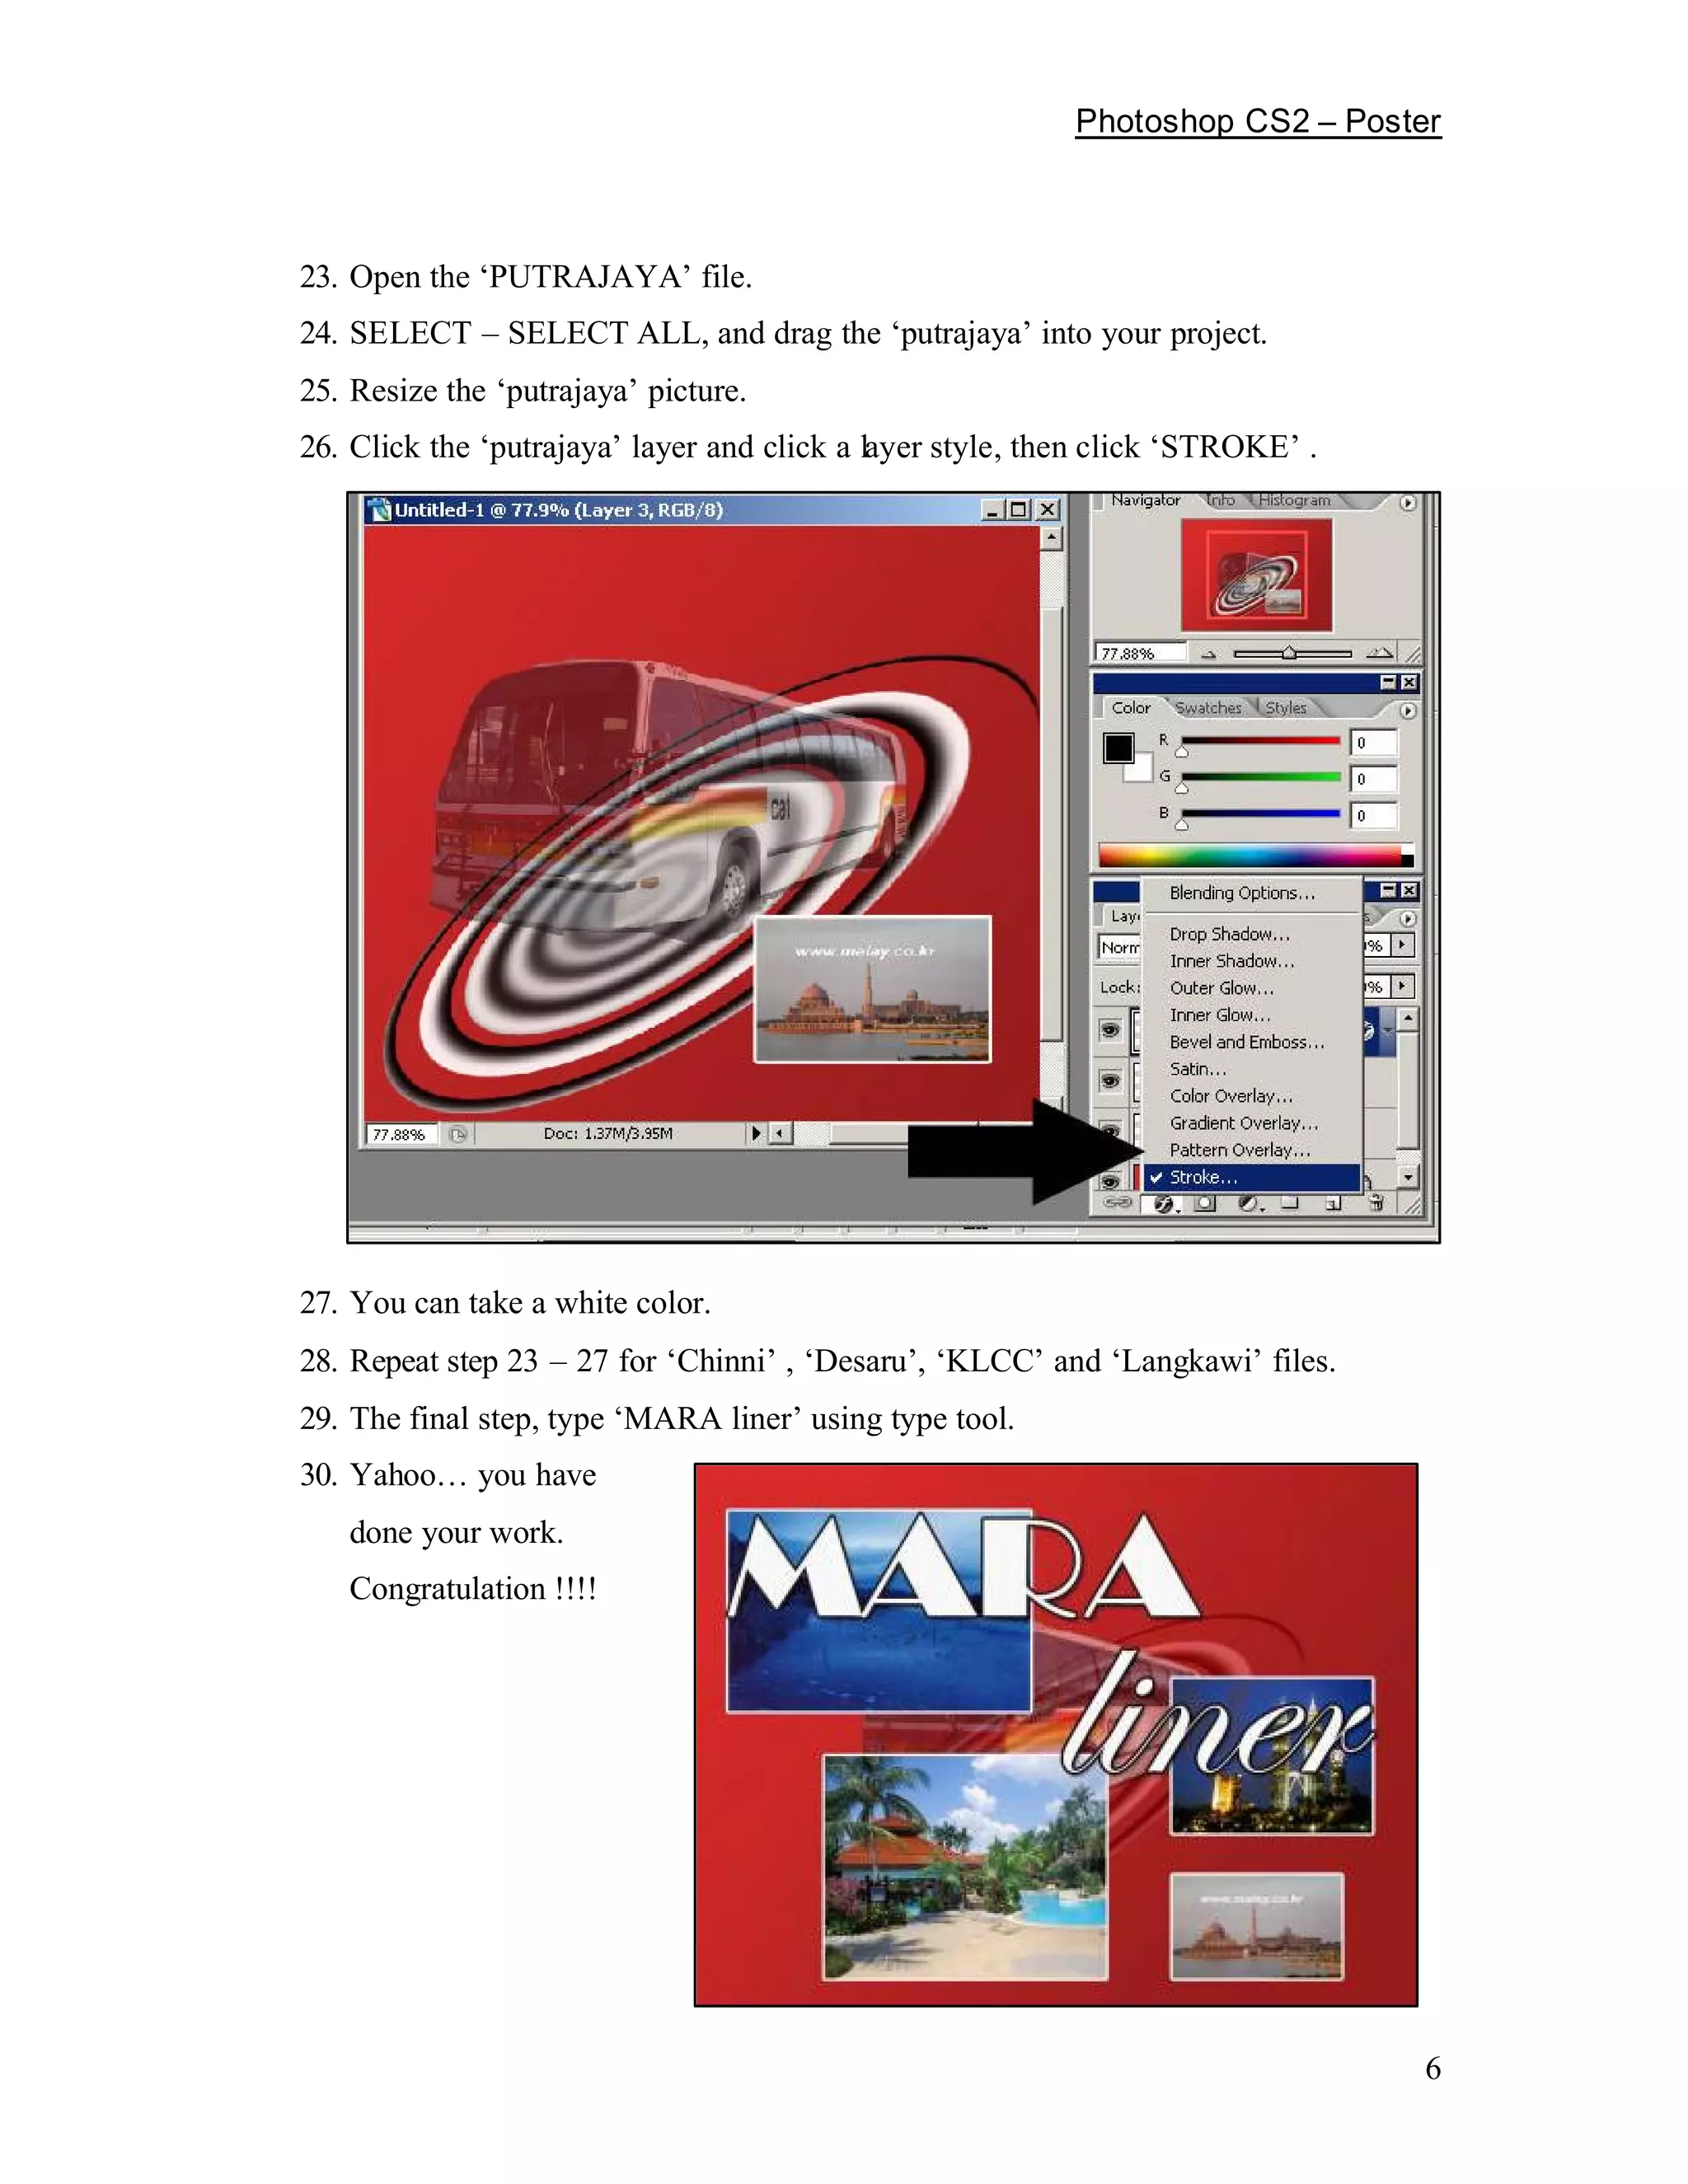

The document provides instructions for creating a MARA Liner poster in Photoshop CS2 over 80 minutes. The objectives are to get practical skills creating the poster. The steps include finding graphics online, creating a 600x600 canvas, adding a gradient background, inserting an oval "ball" shape, twirling and modifying the ball, opening bus and location image files, selecting and arranging the elements, adding a stroke to location images, and typing the text "MARA liner".