Downloaded 107 times
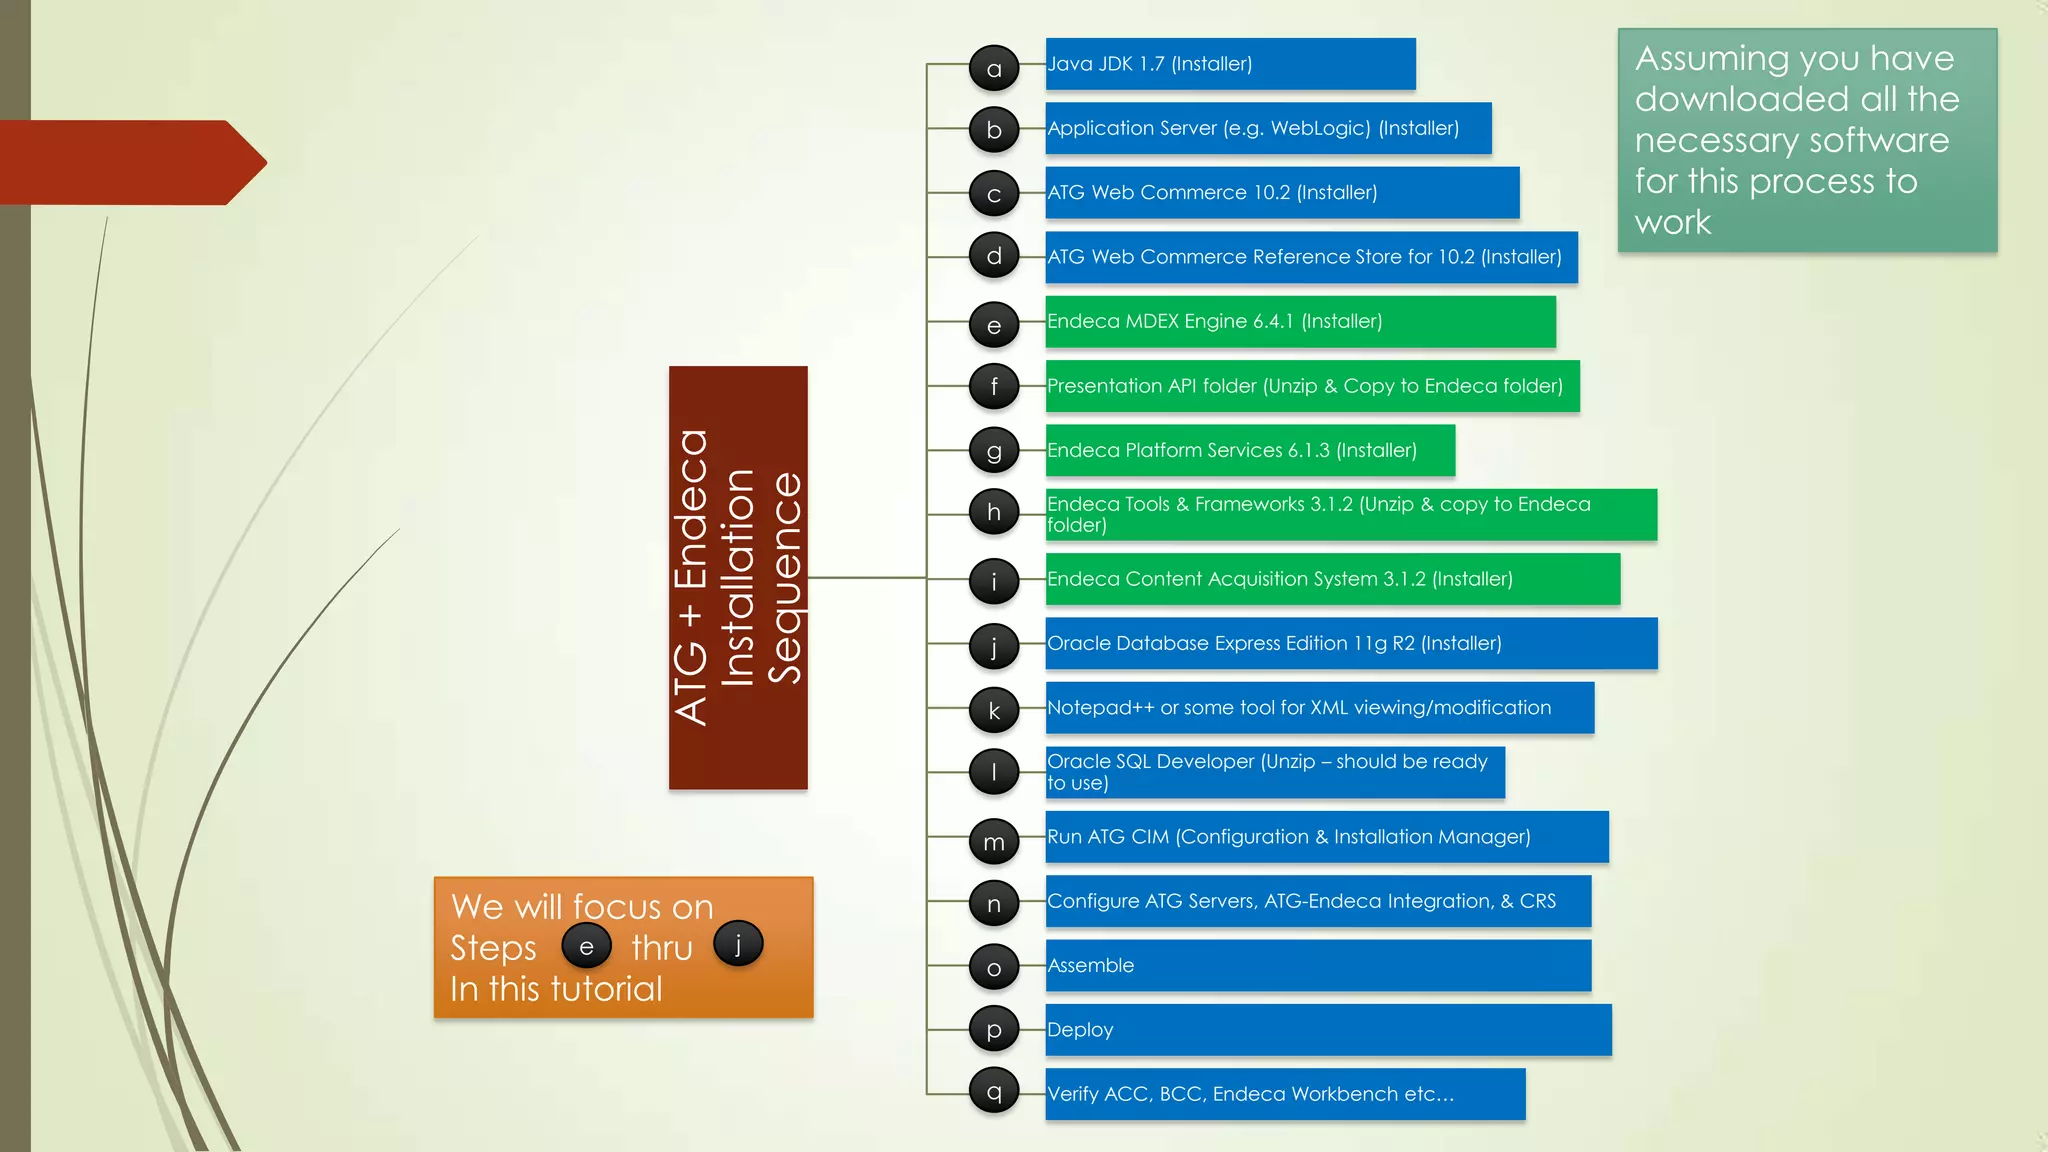
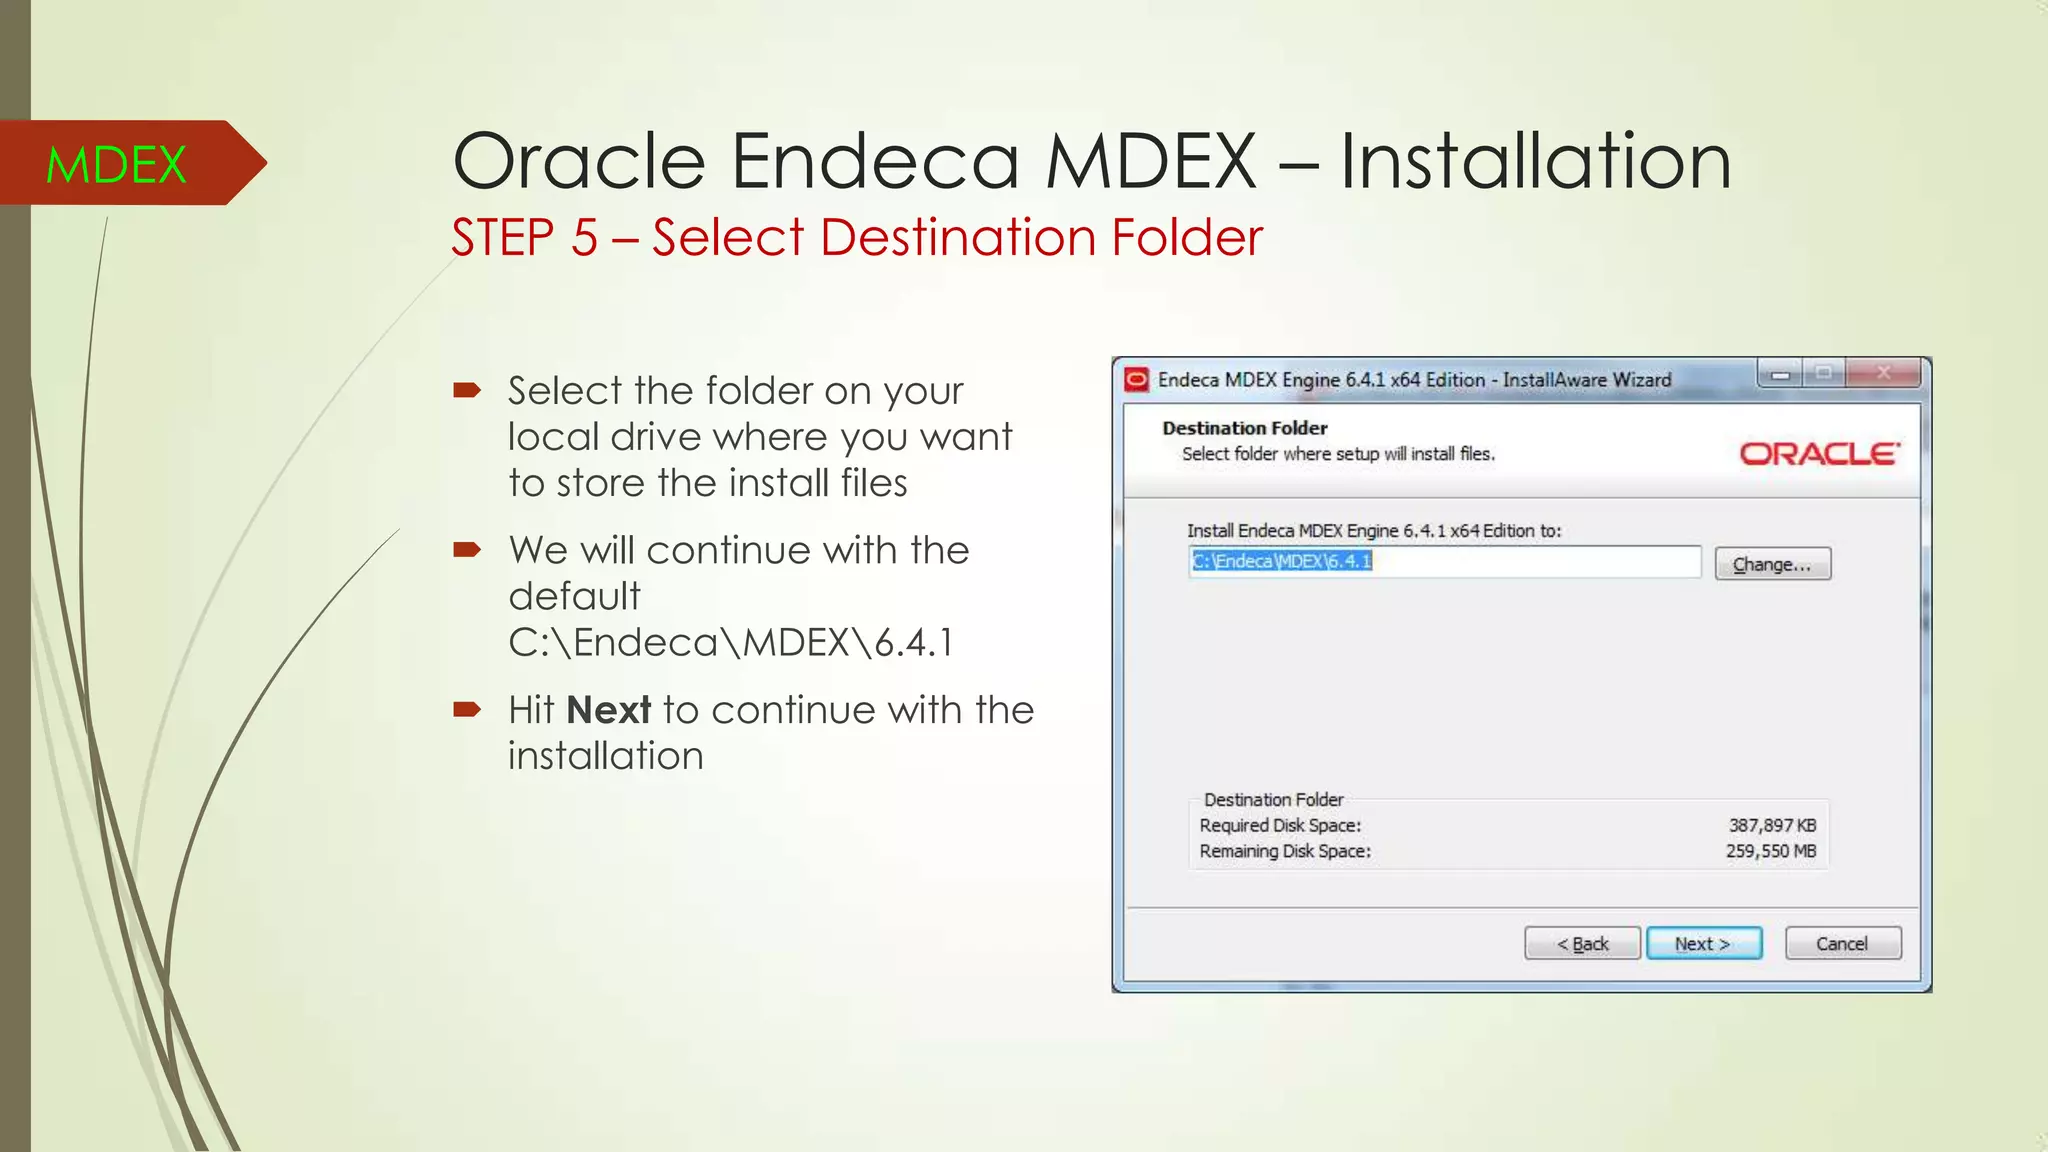
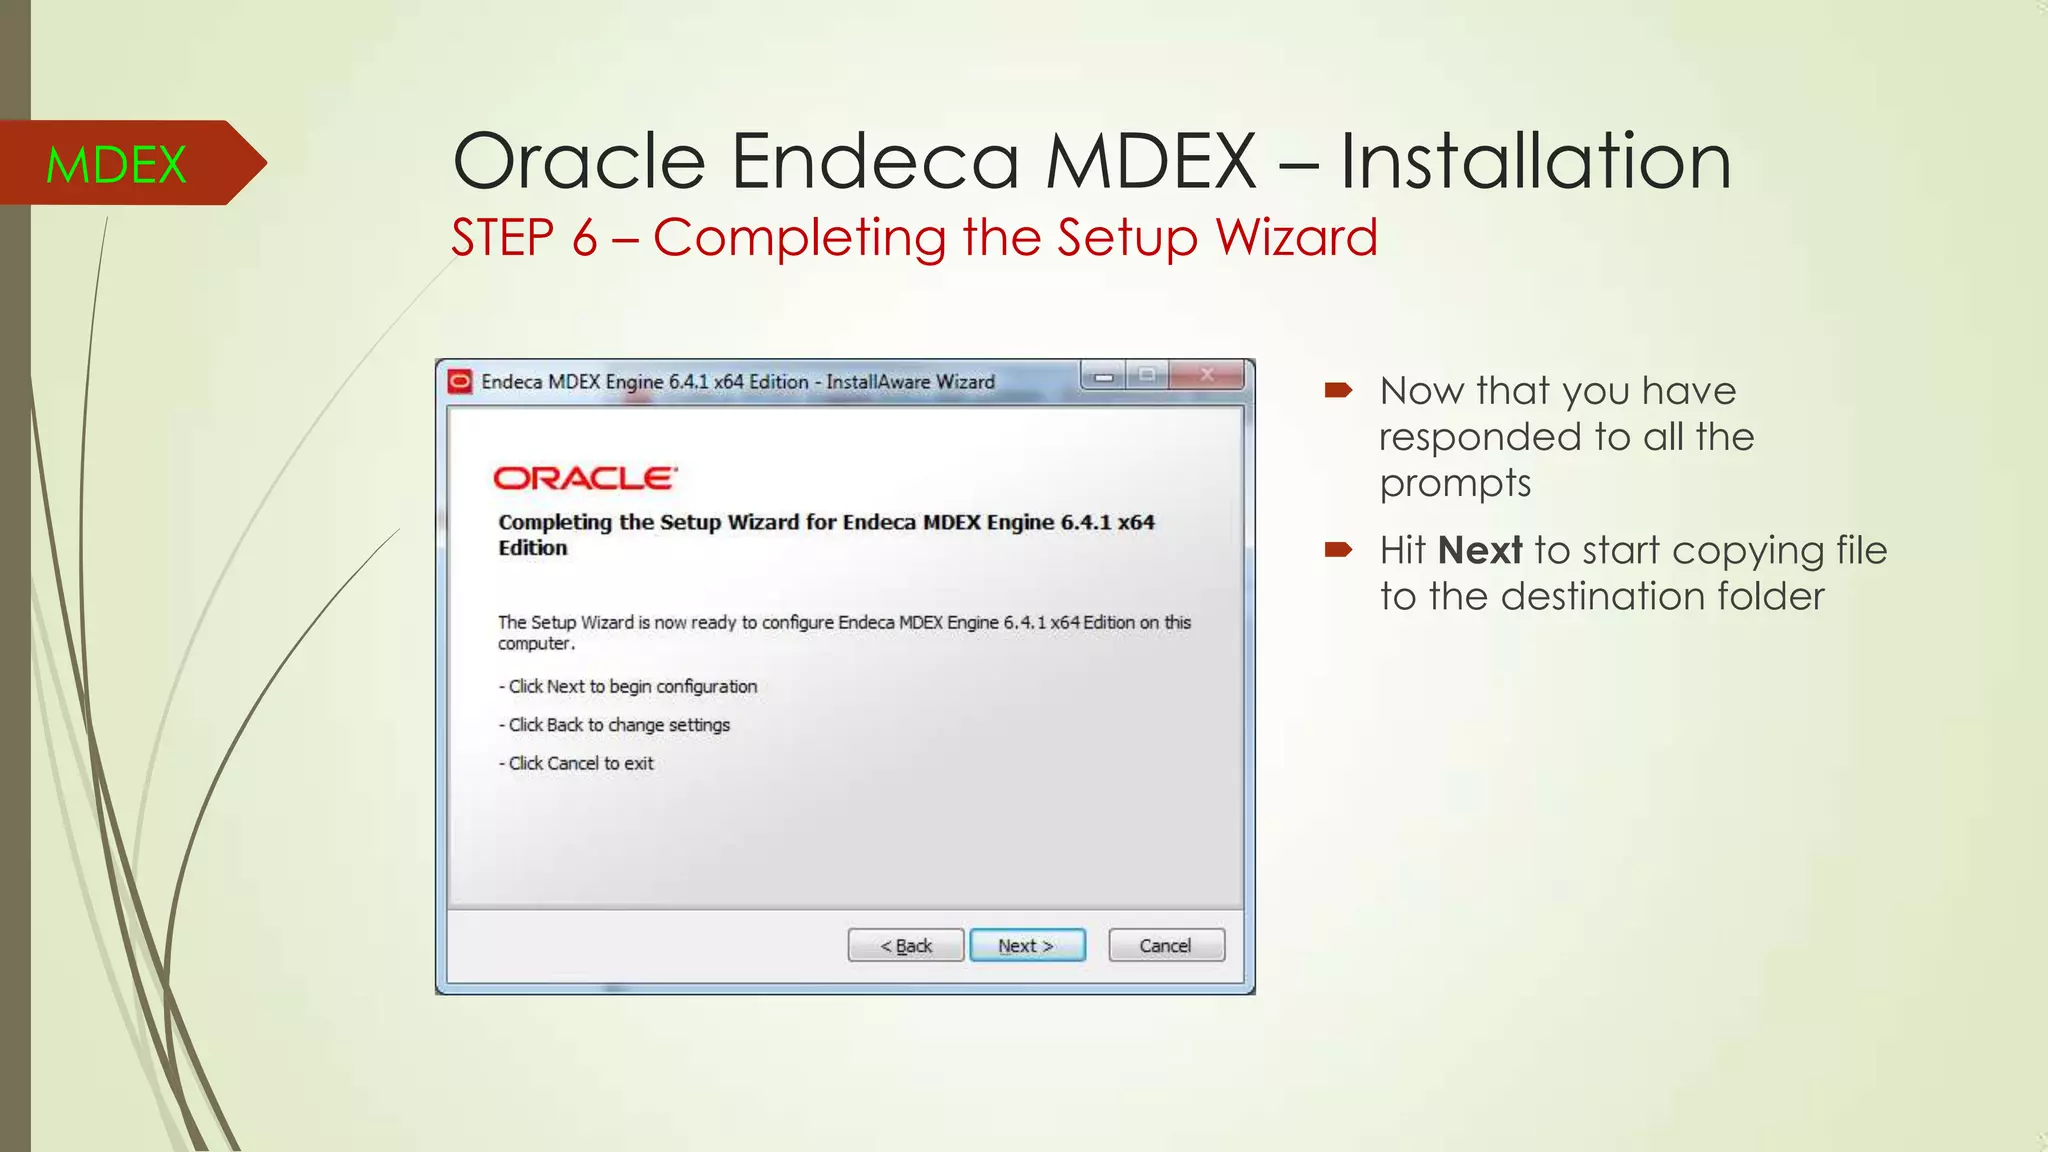
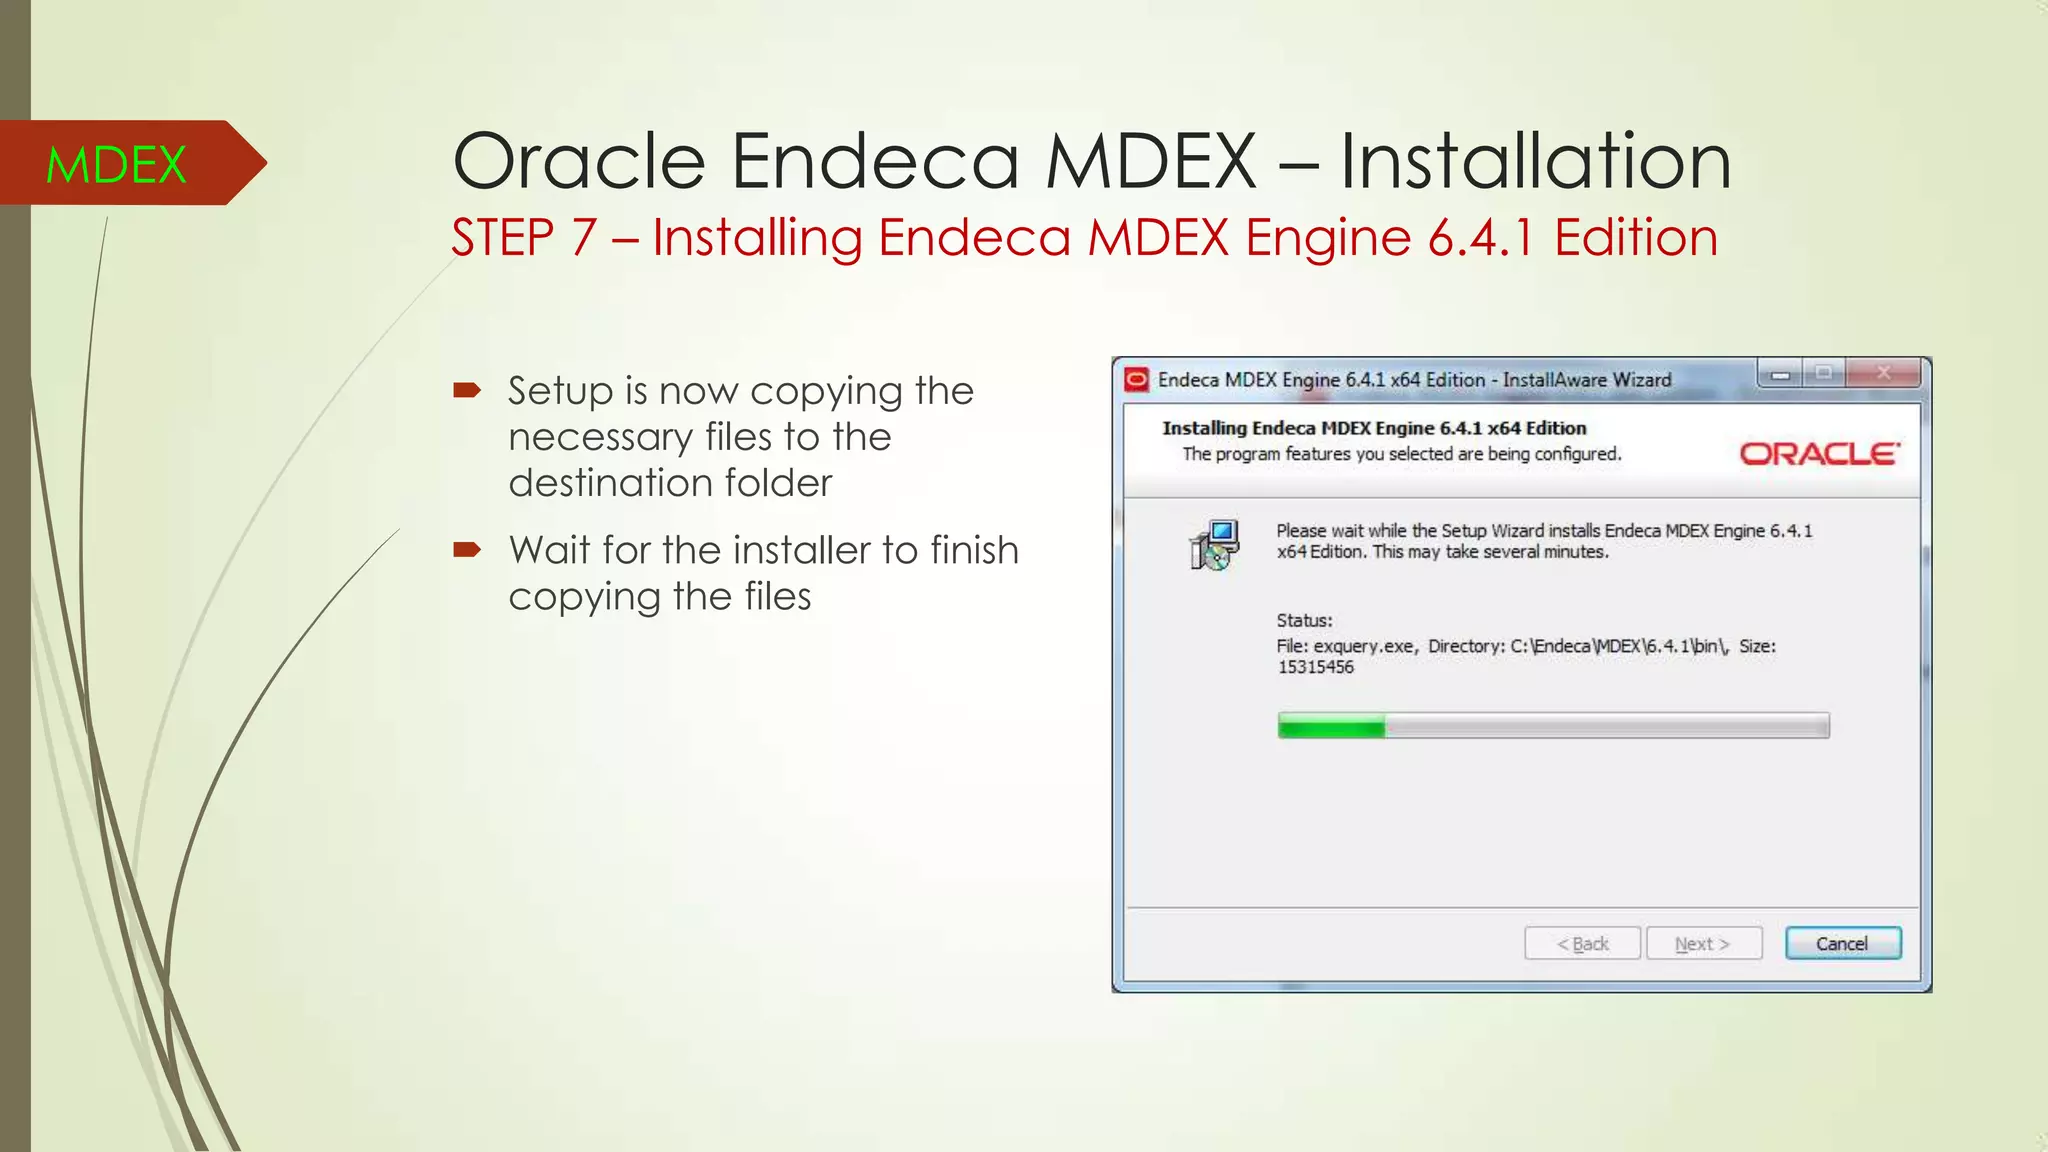
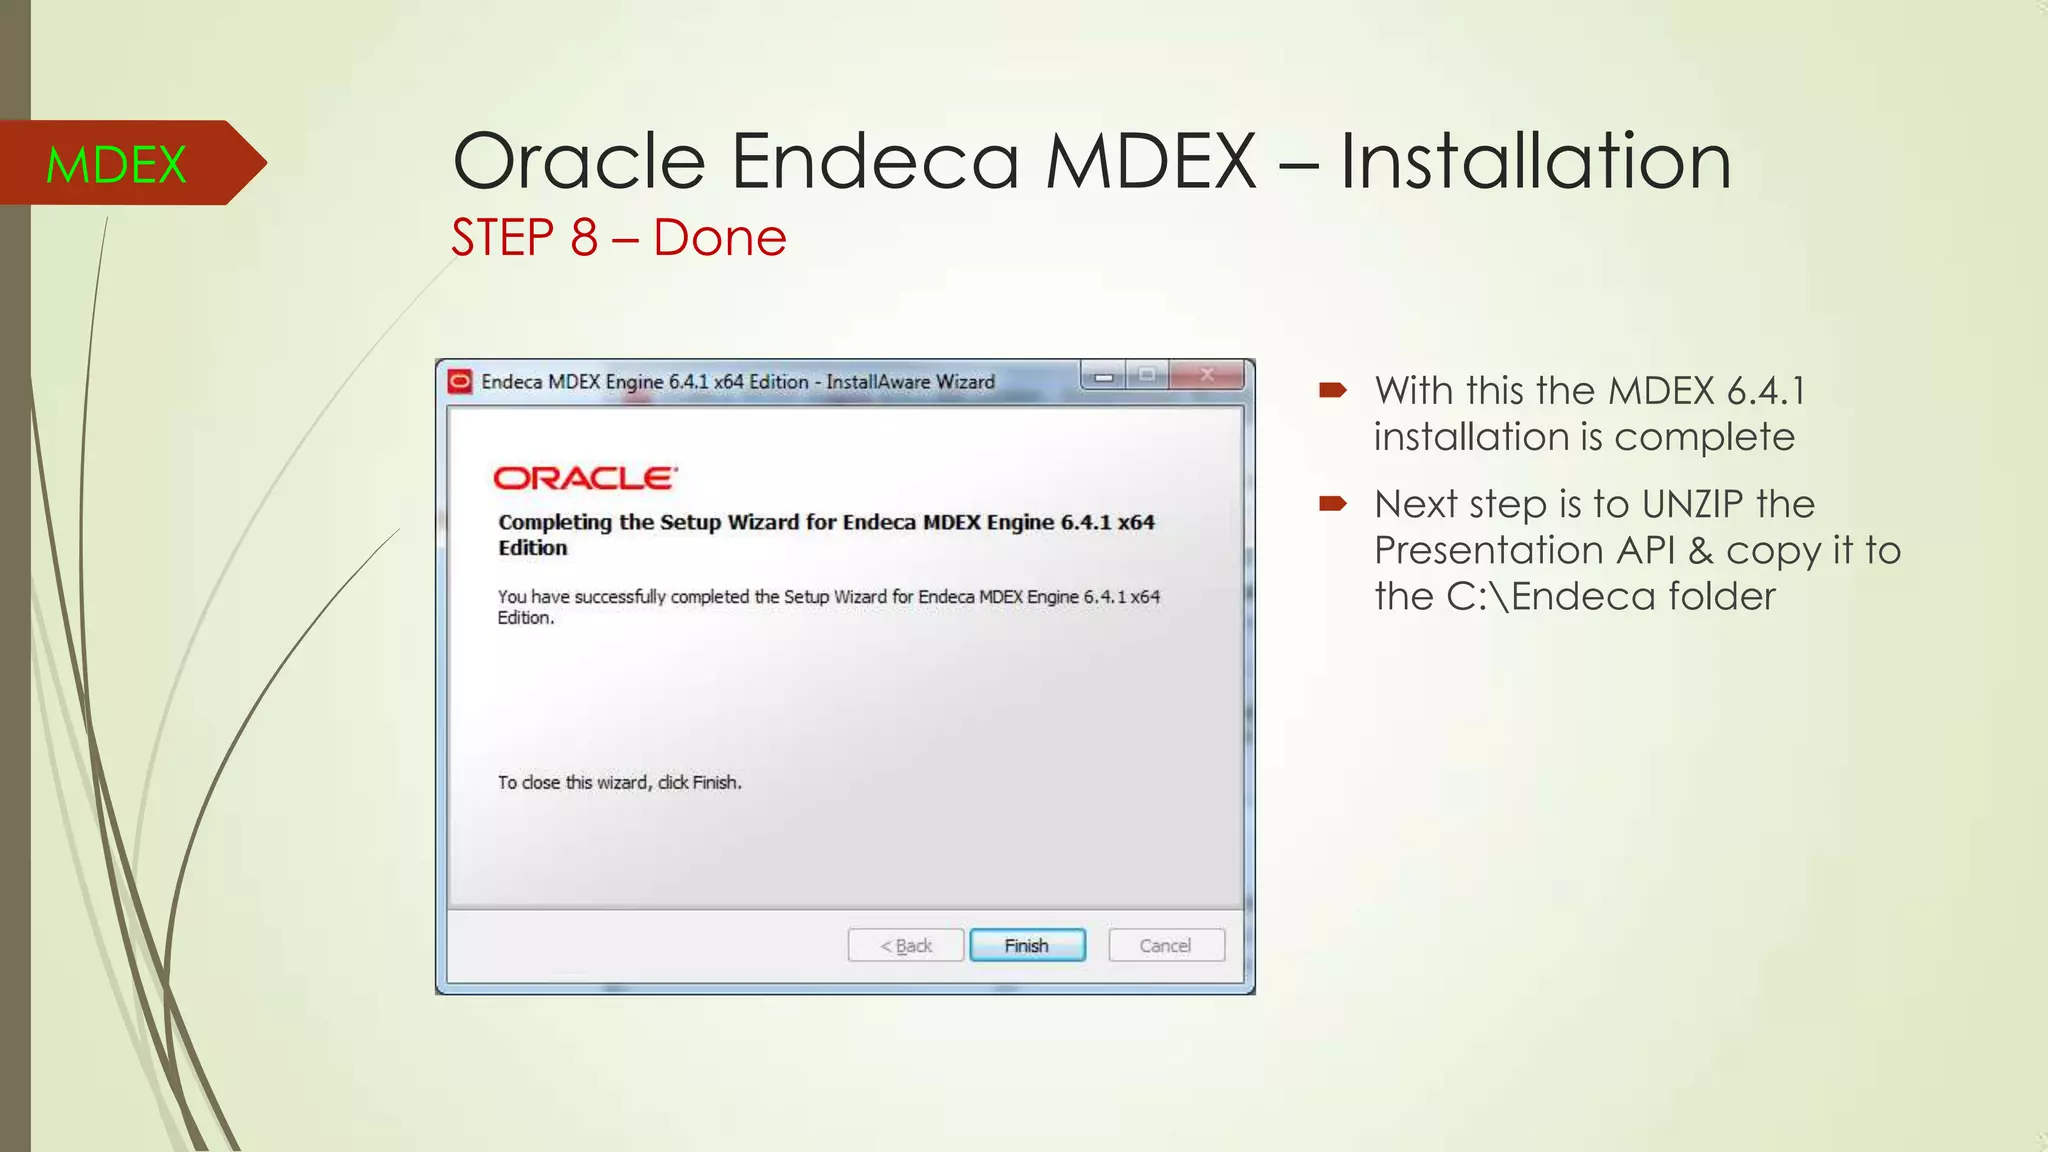
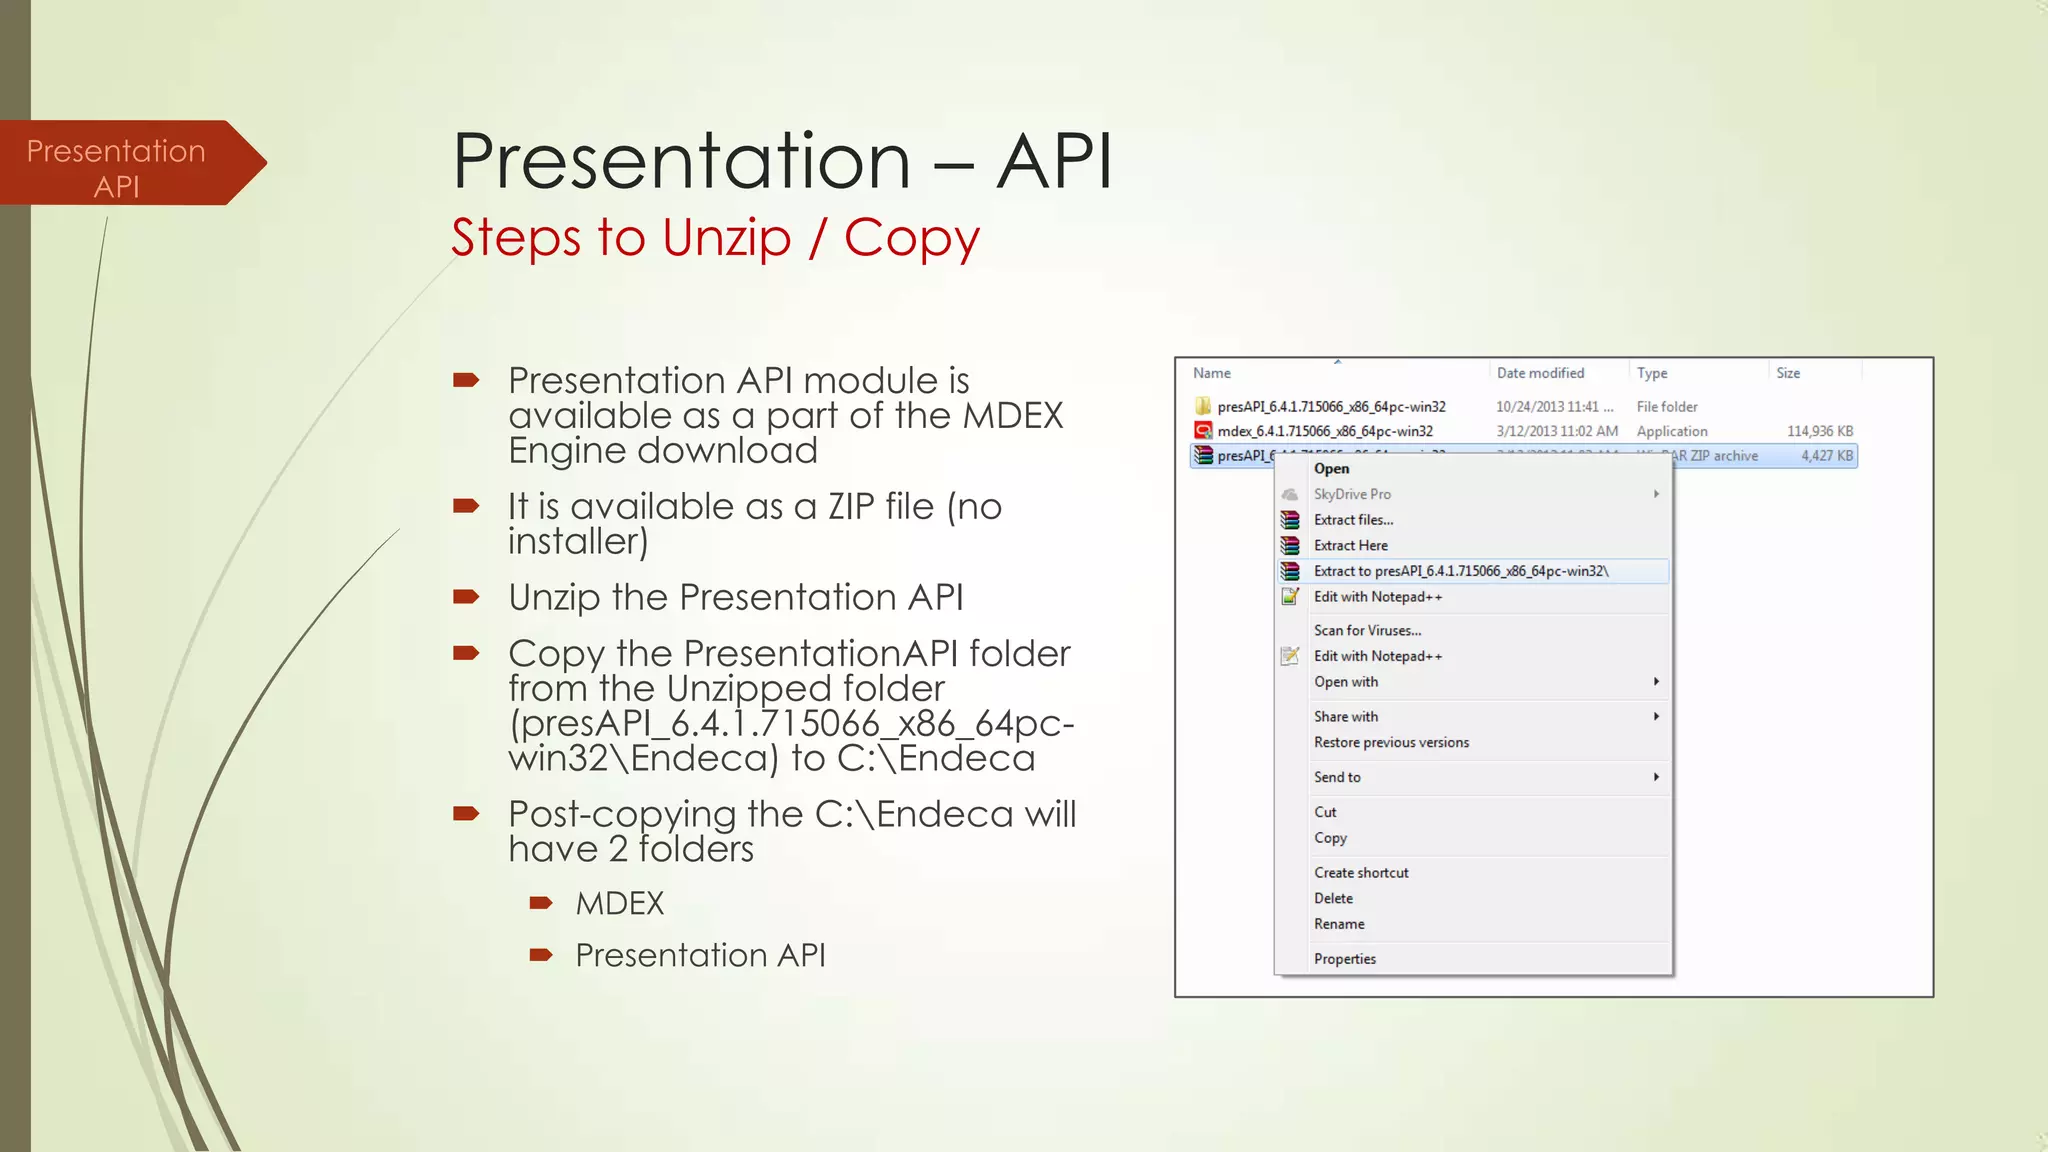

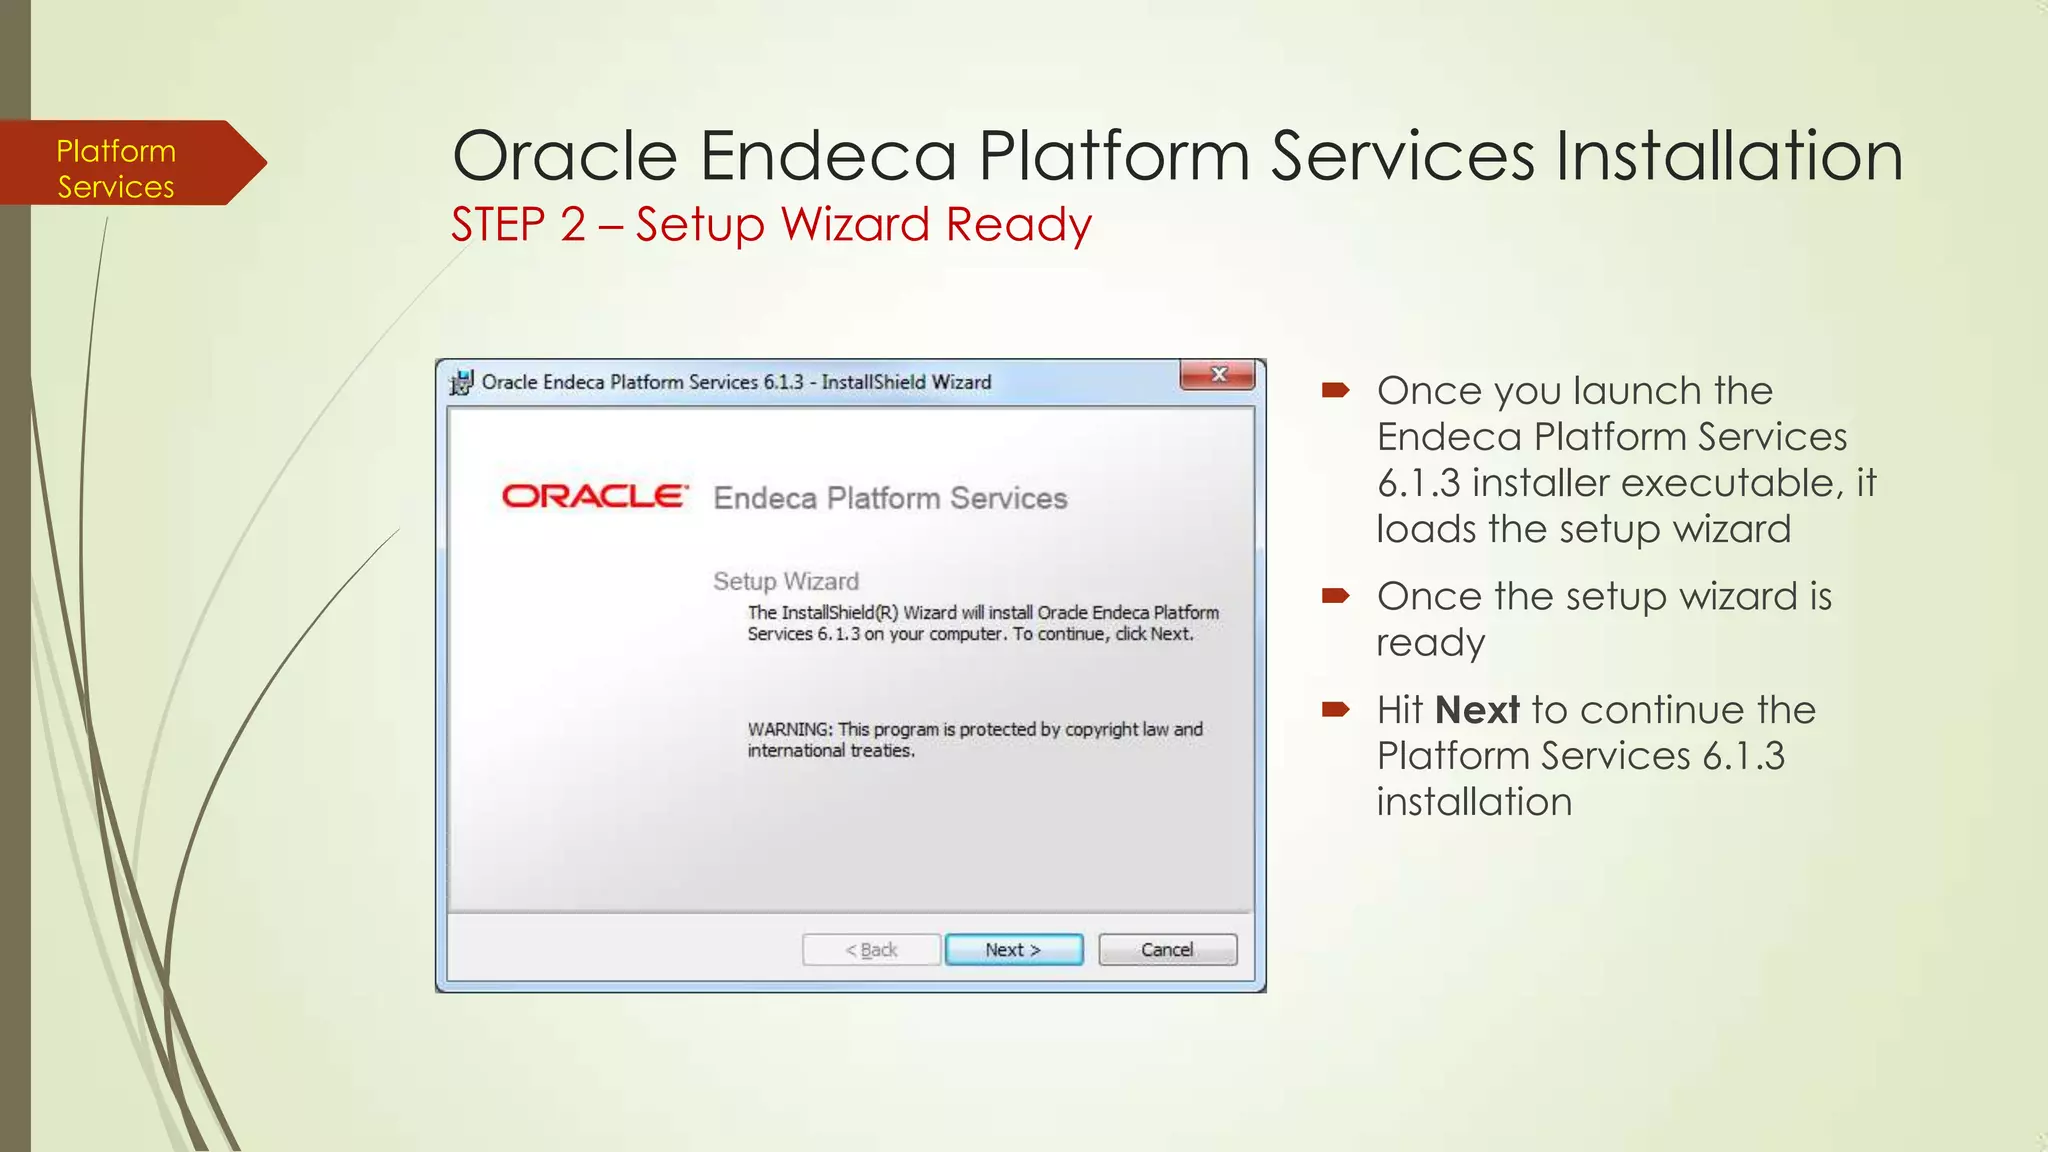

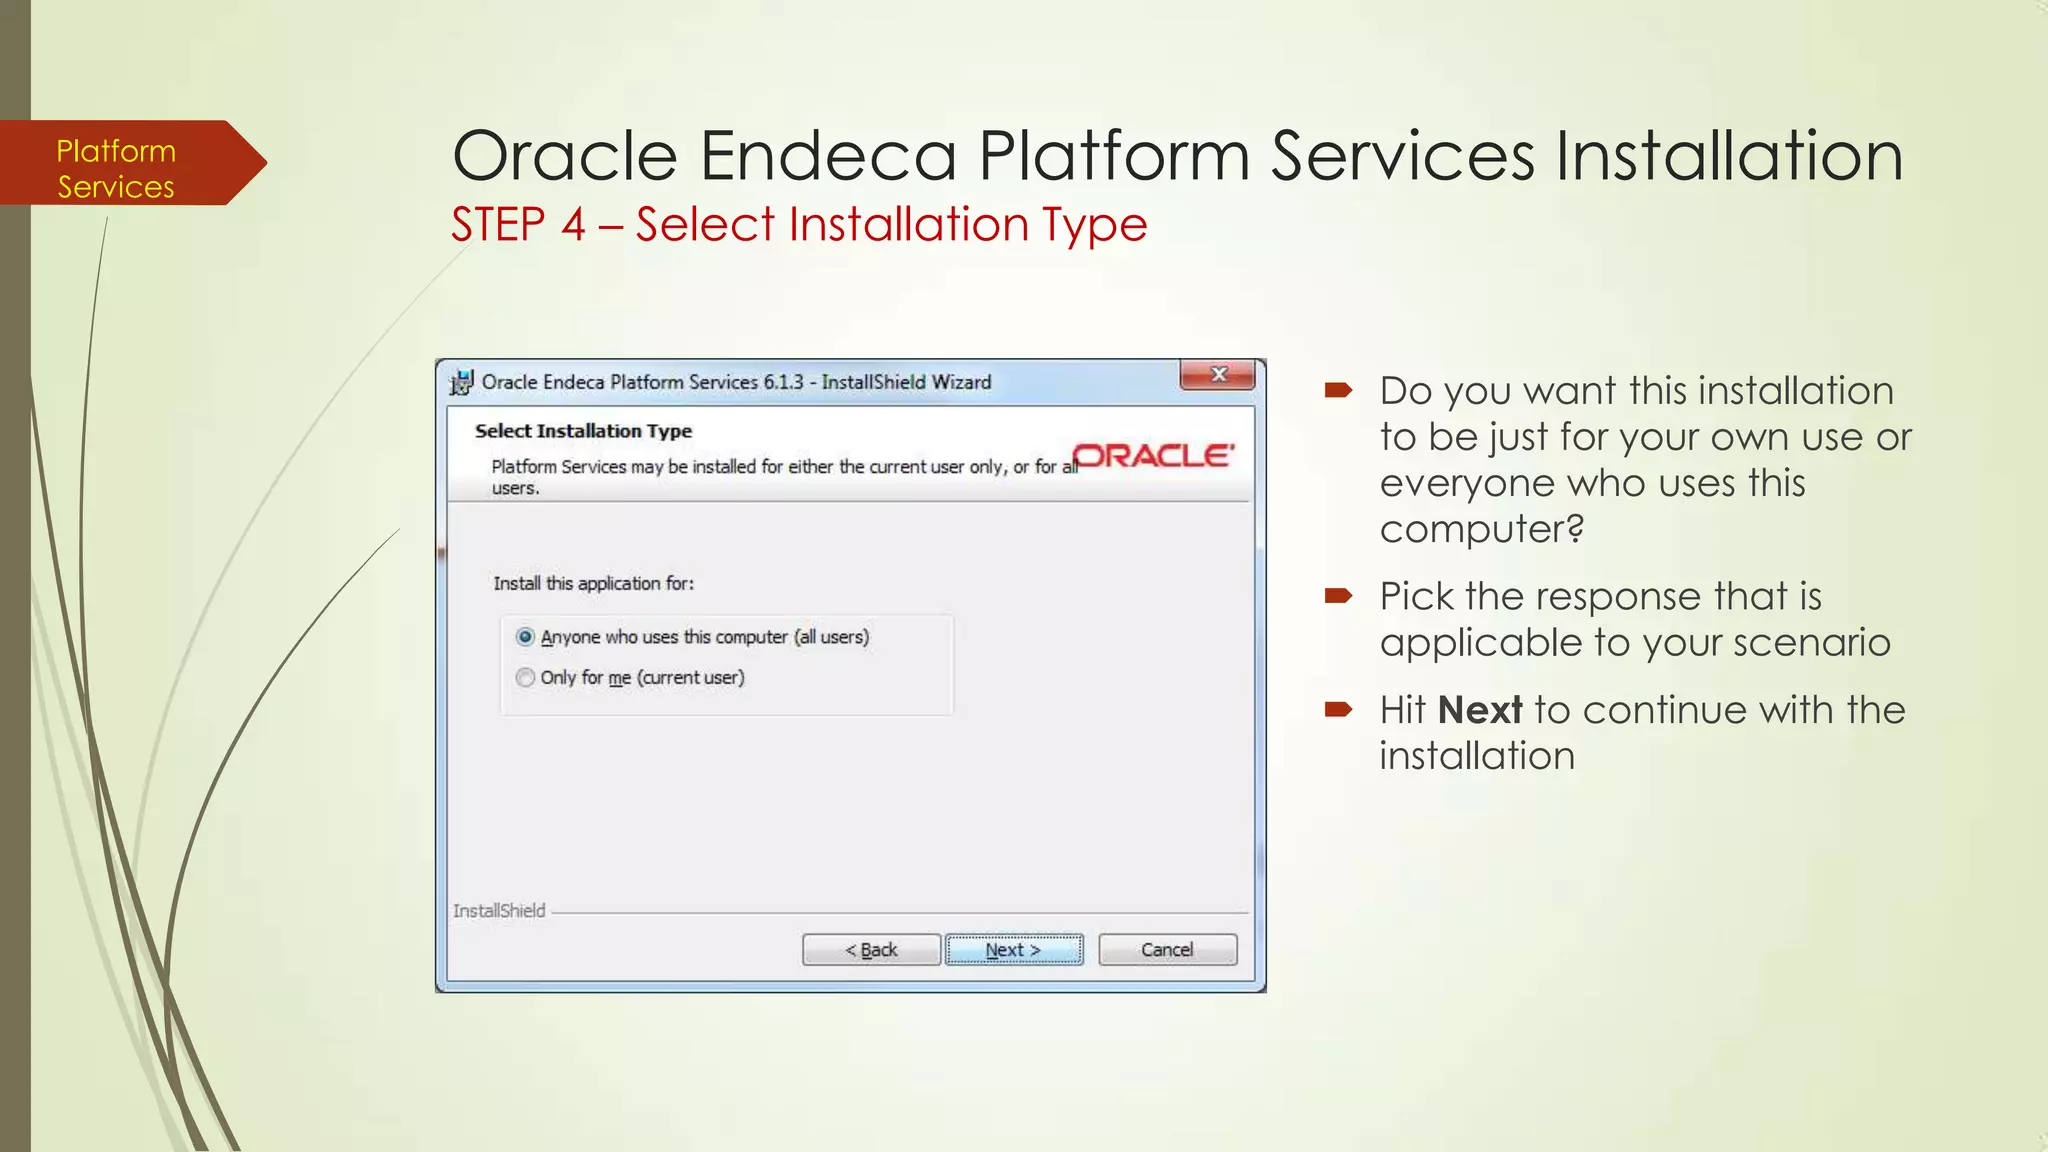
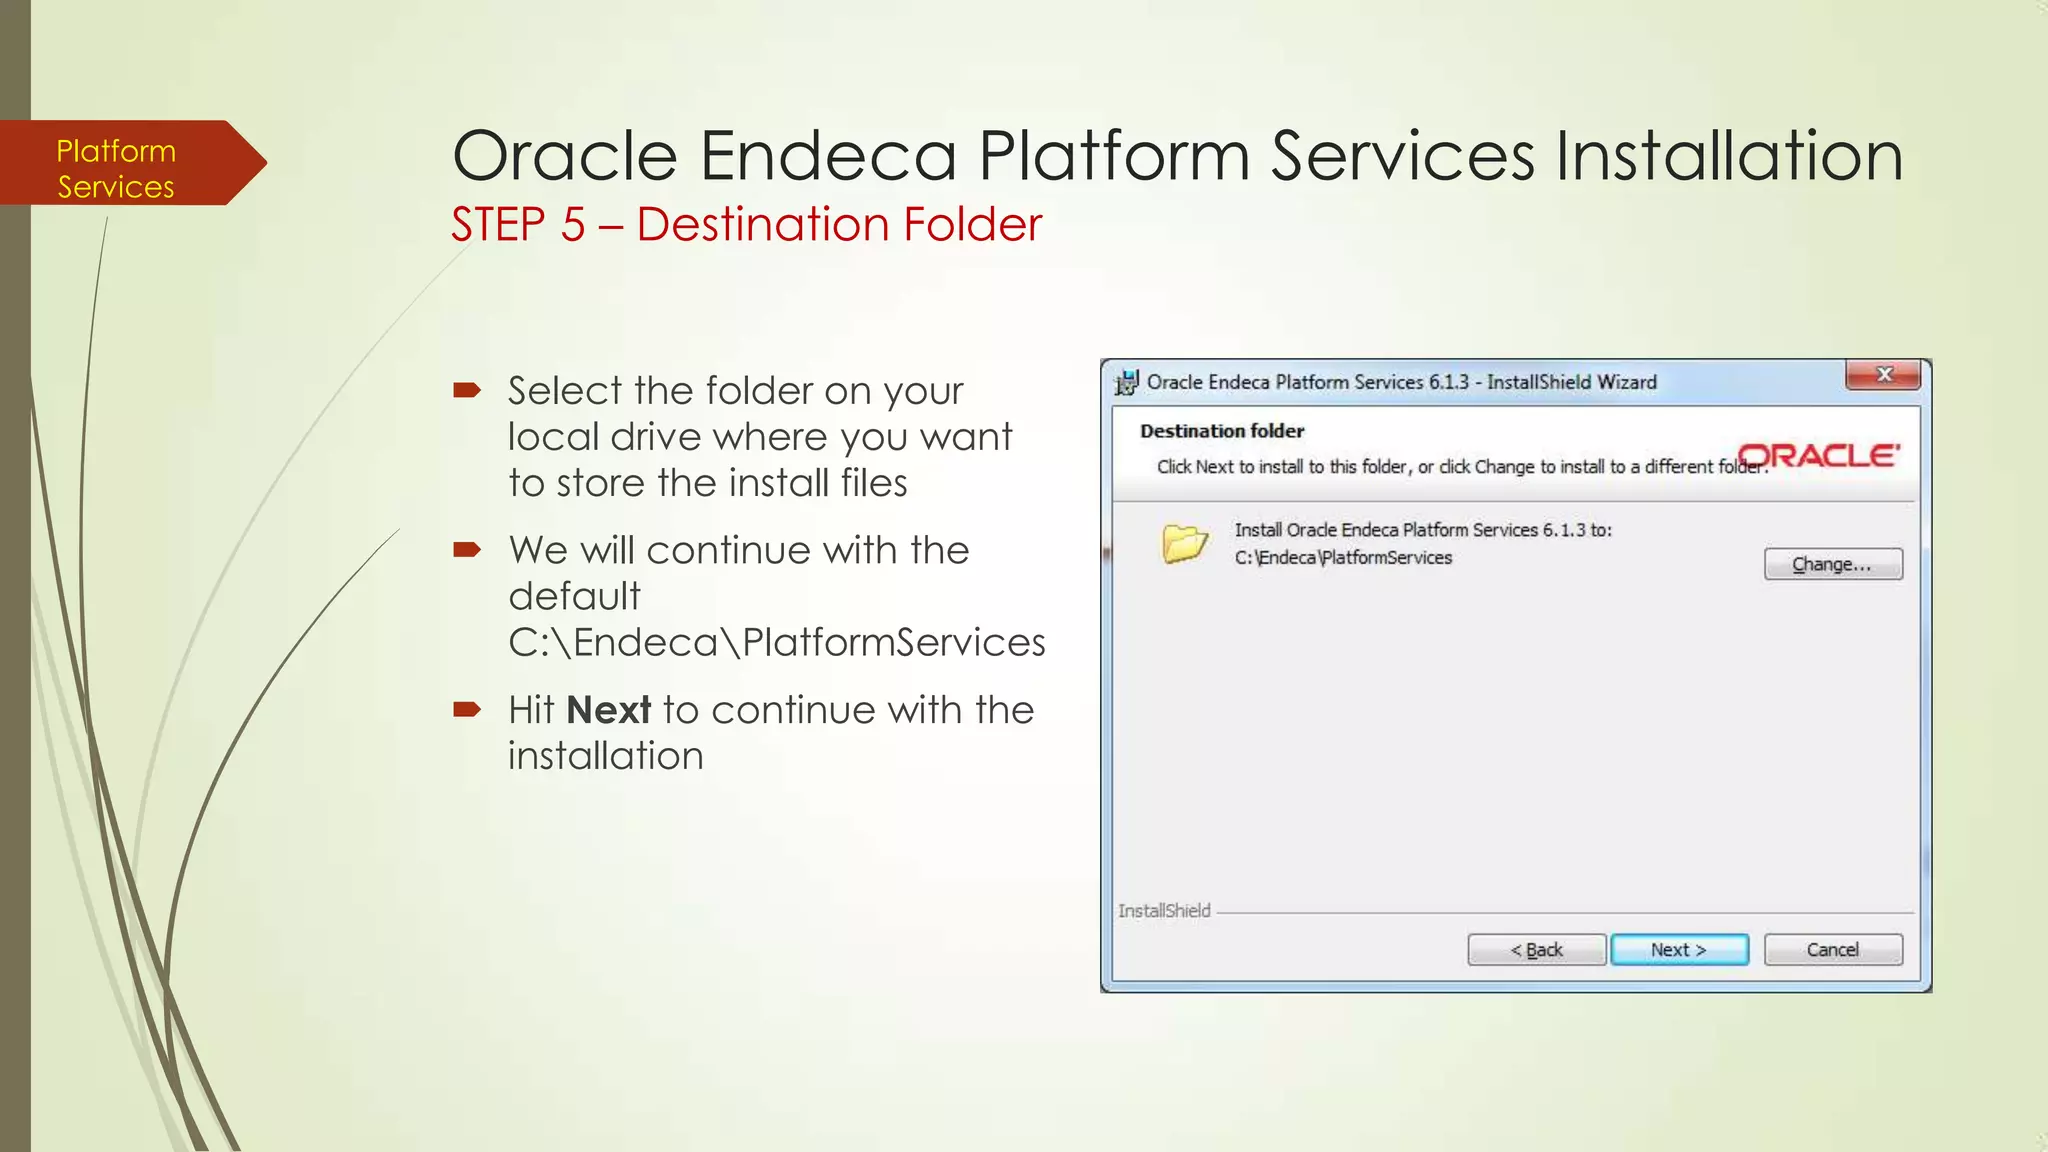
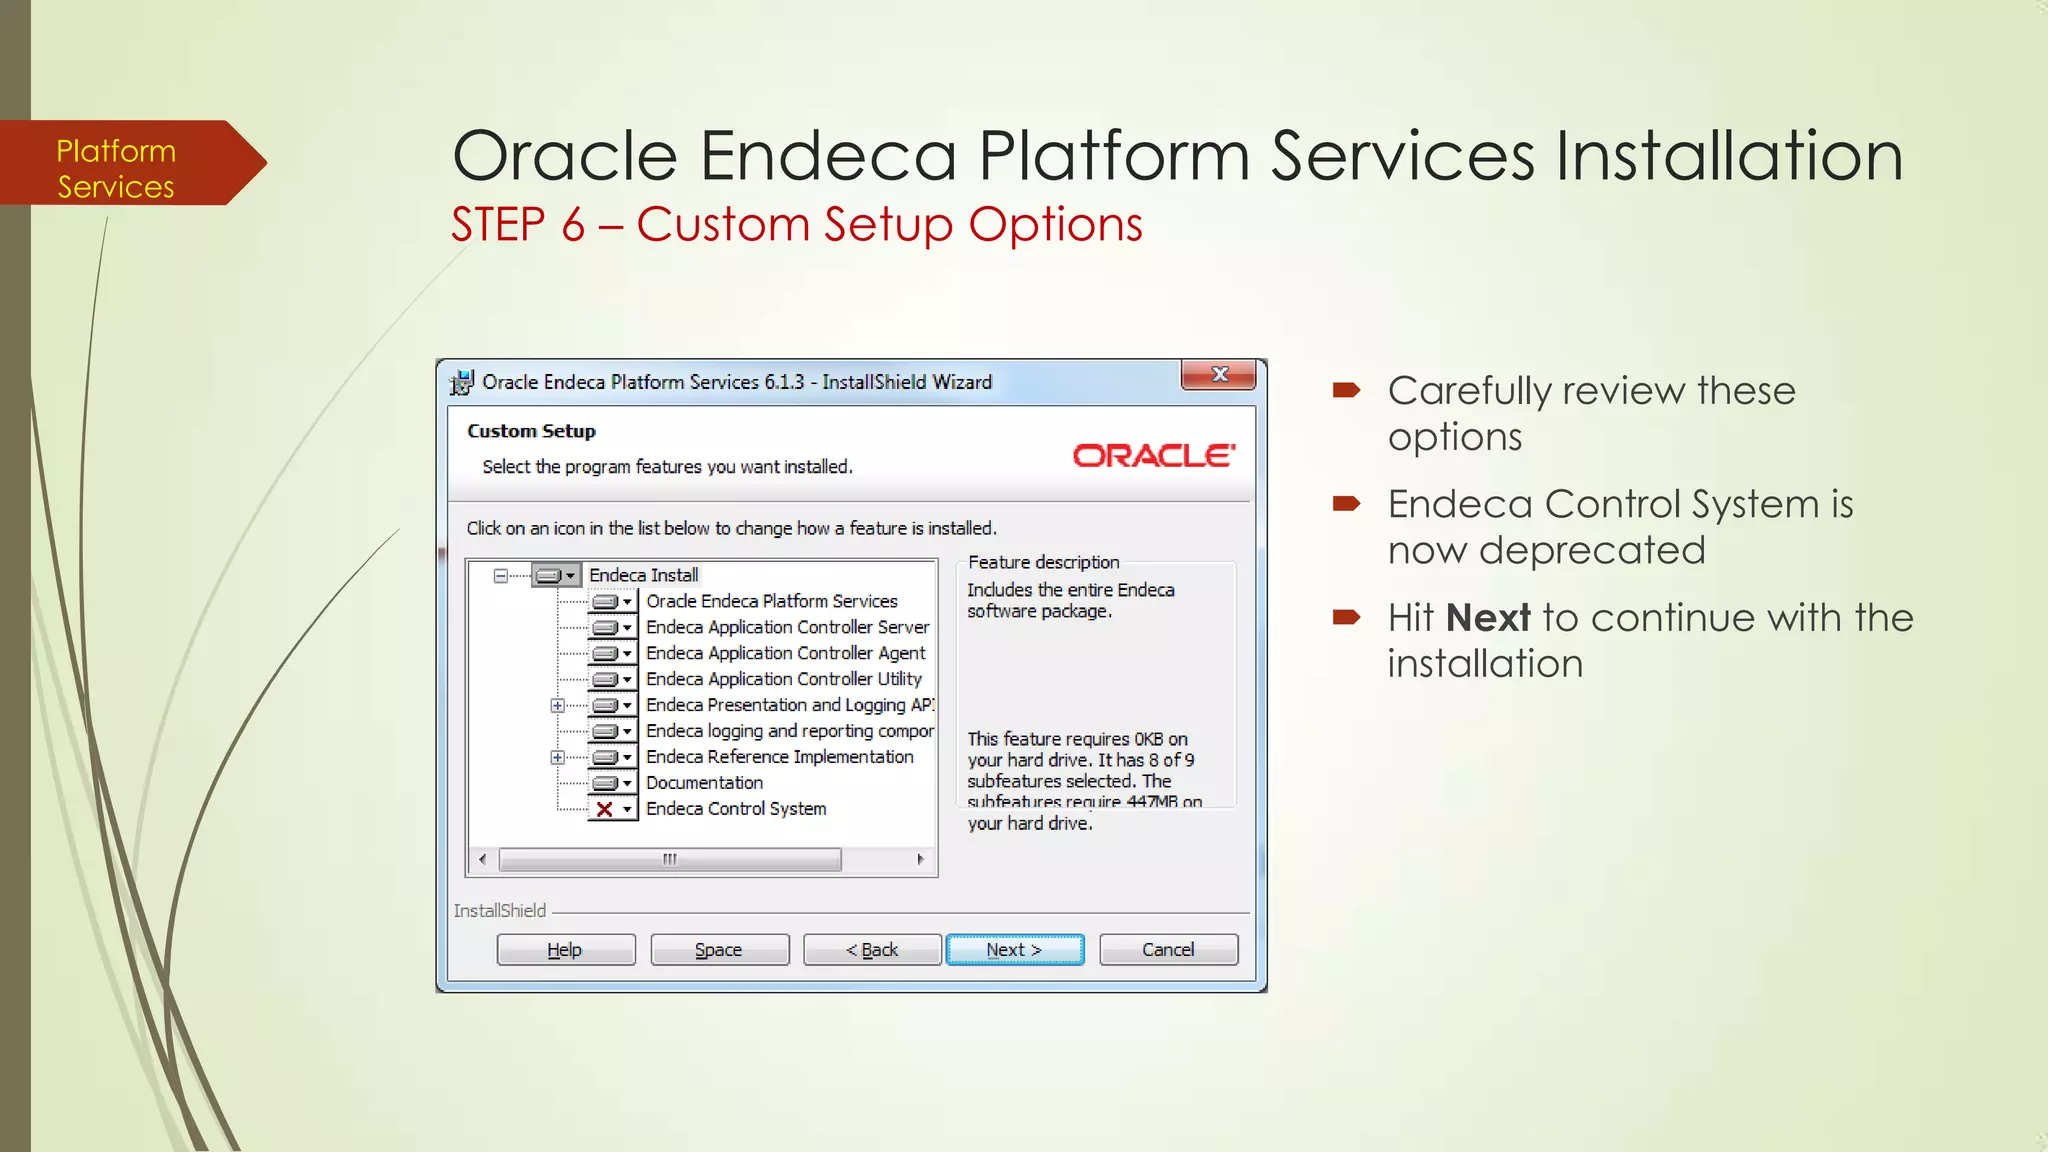
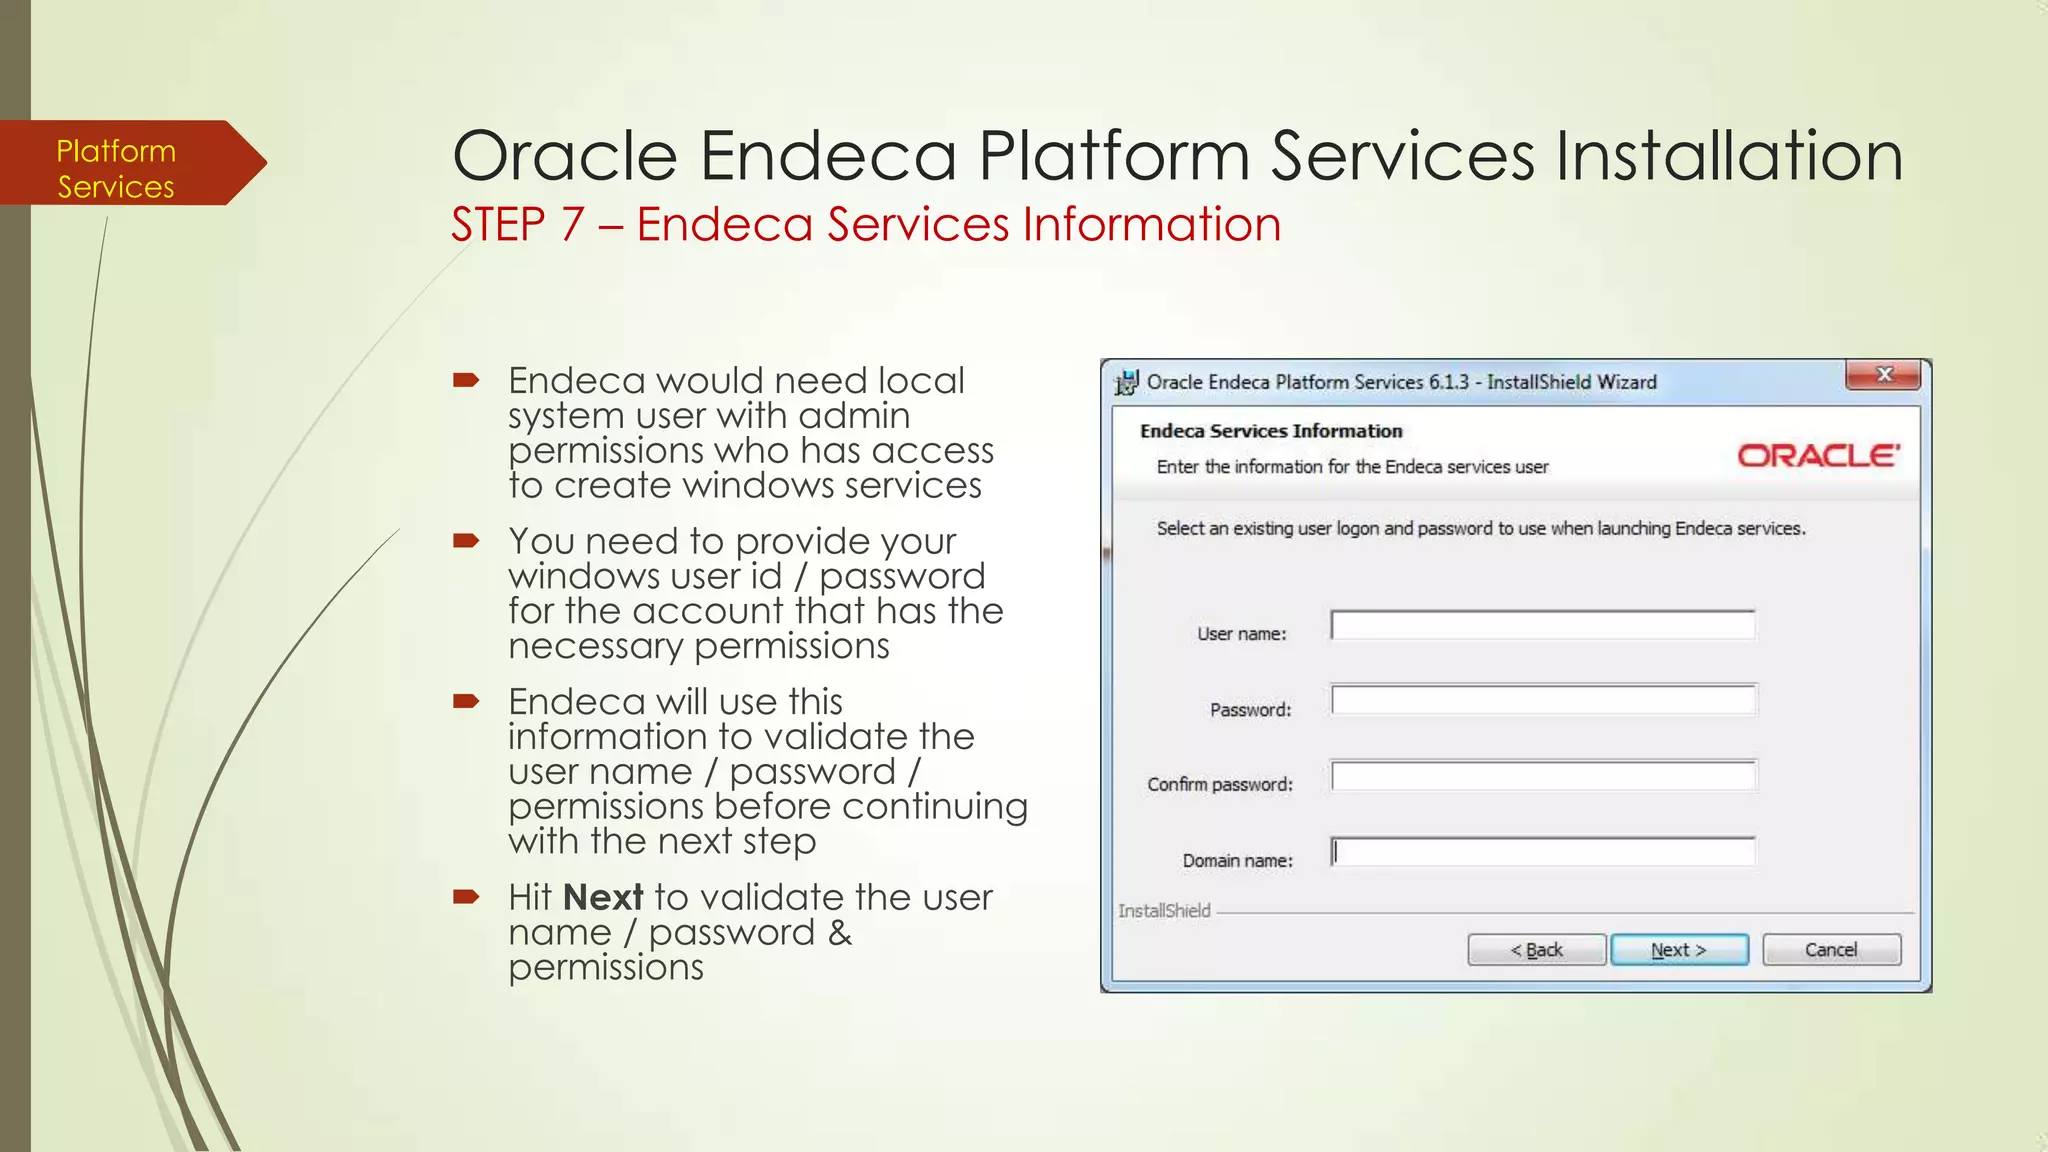
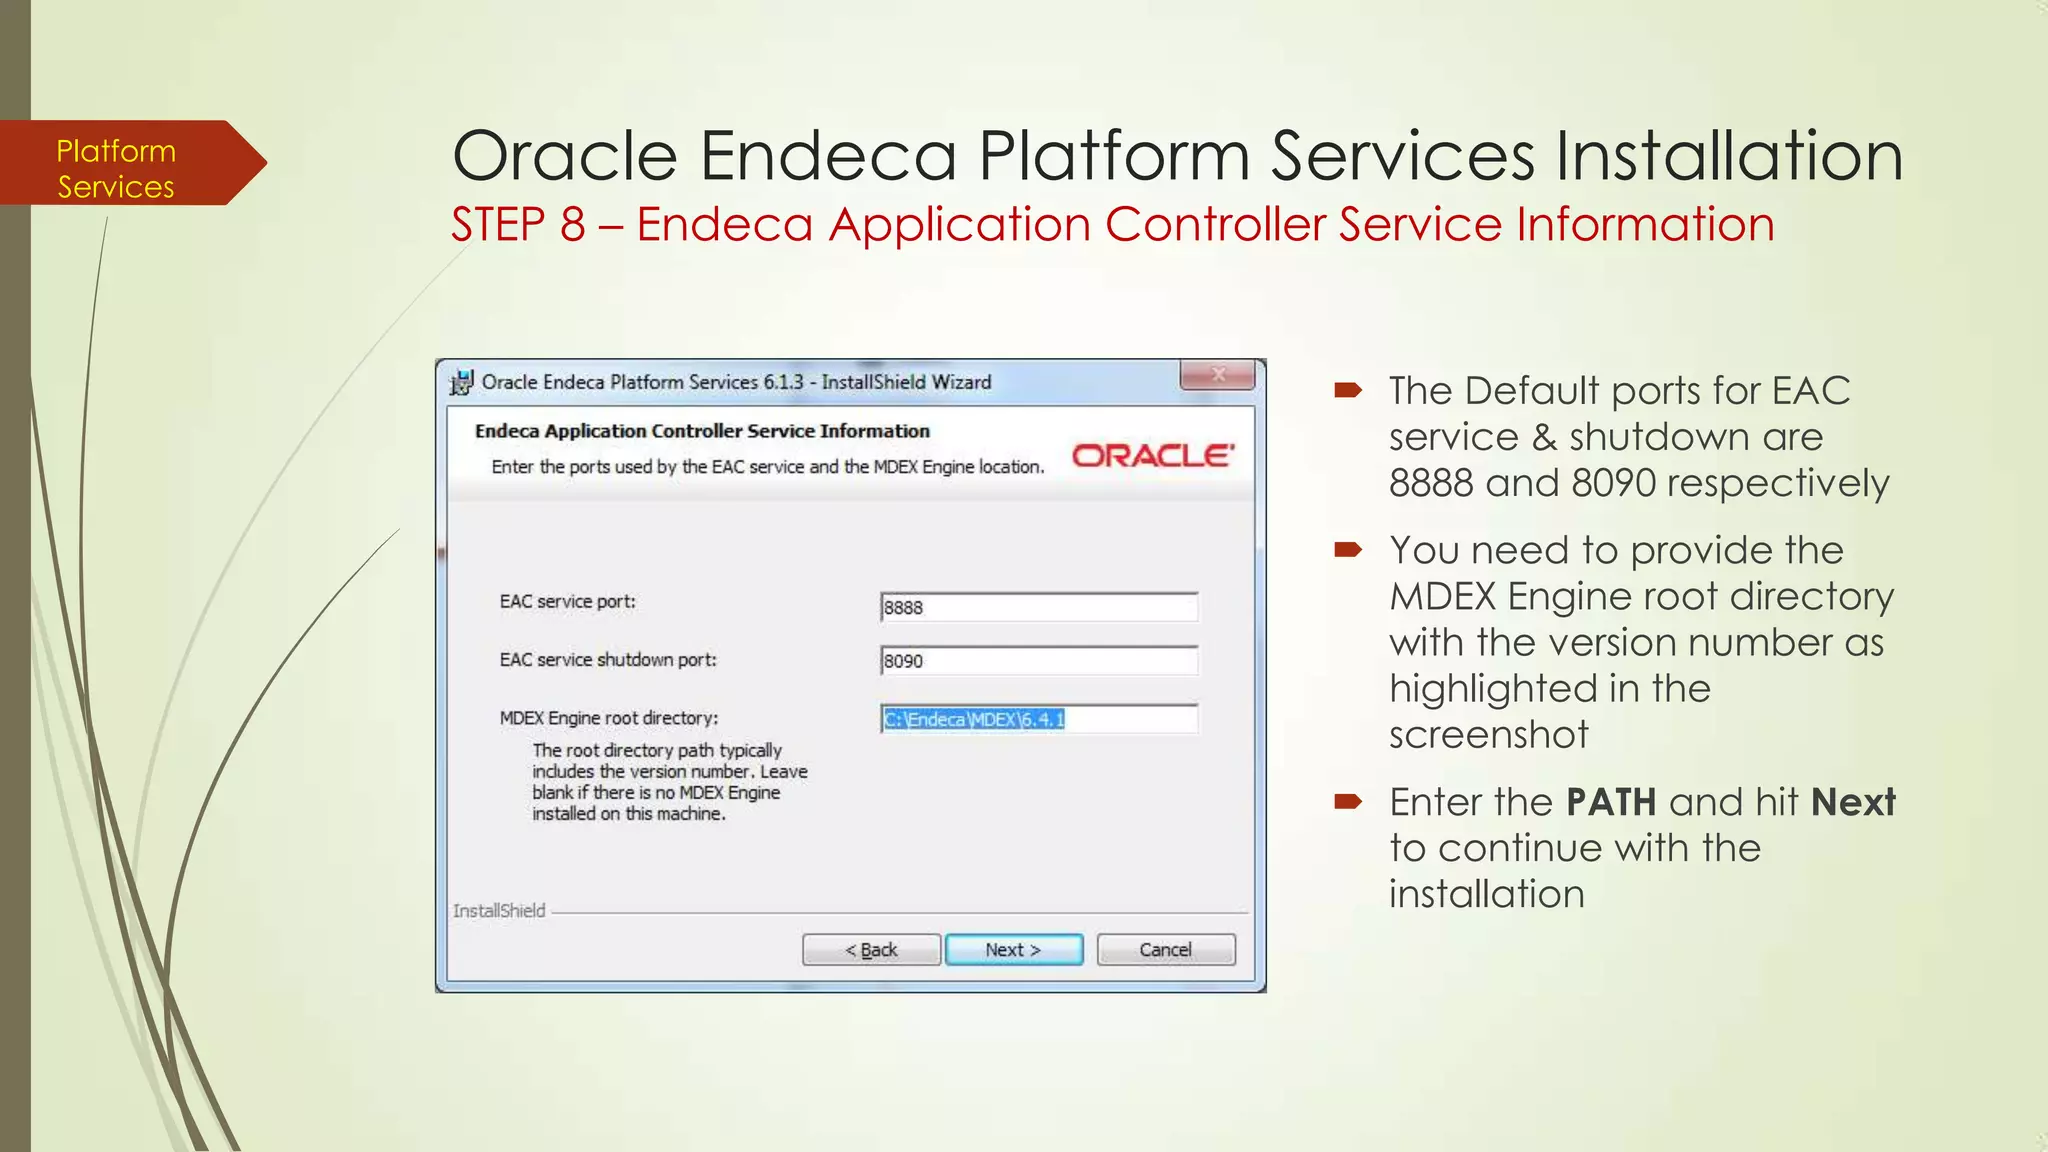

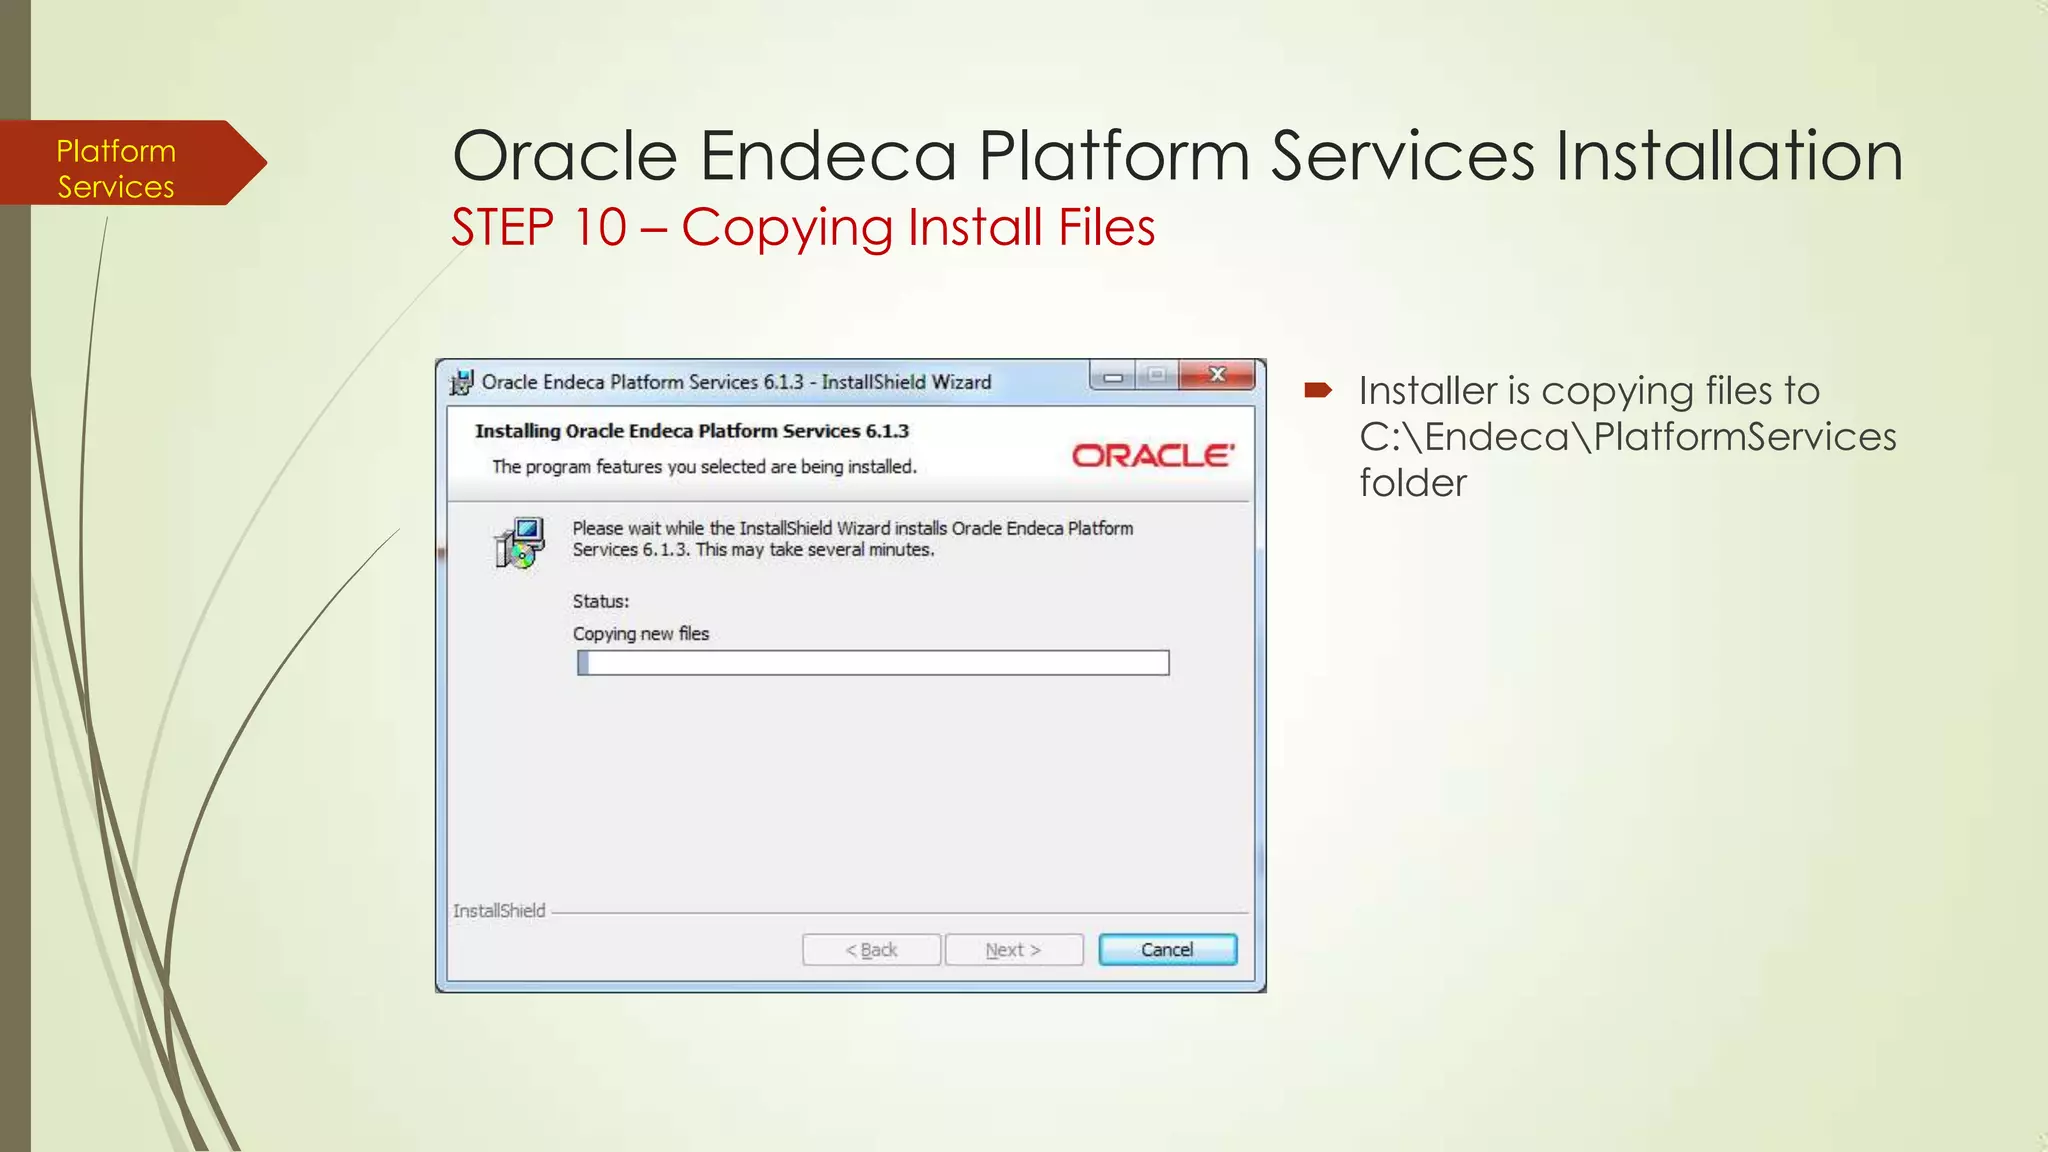
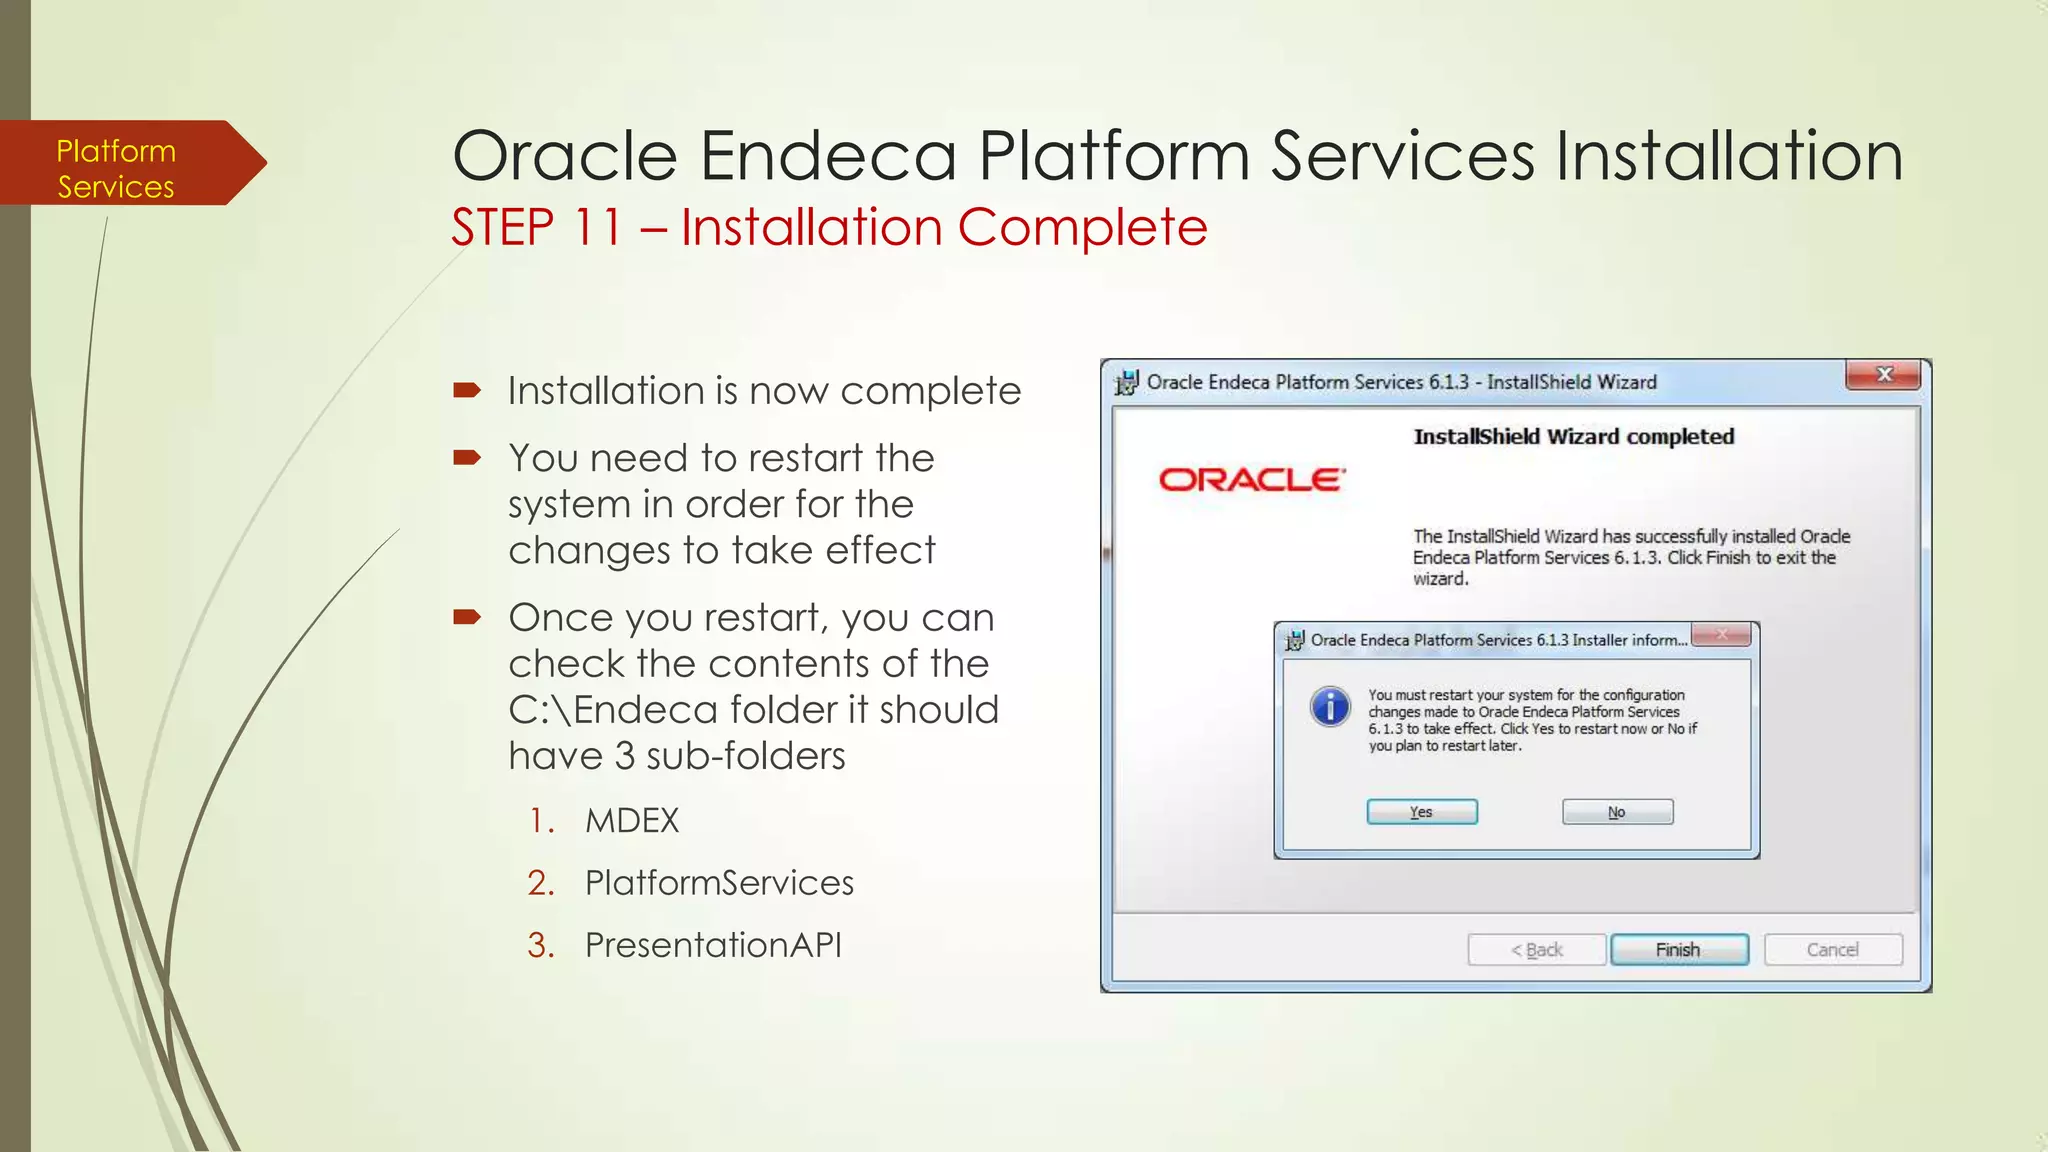
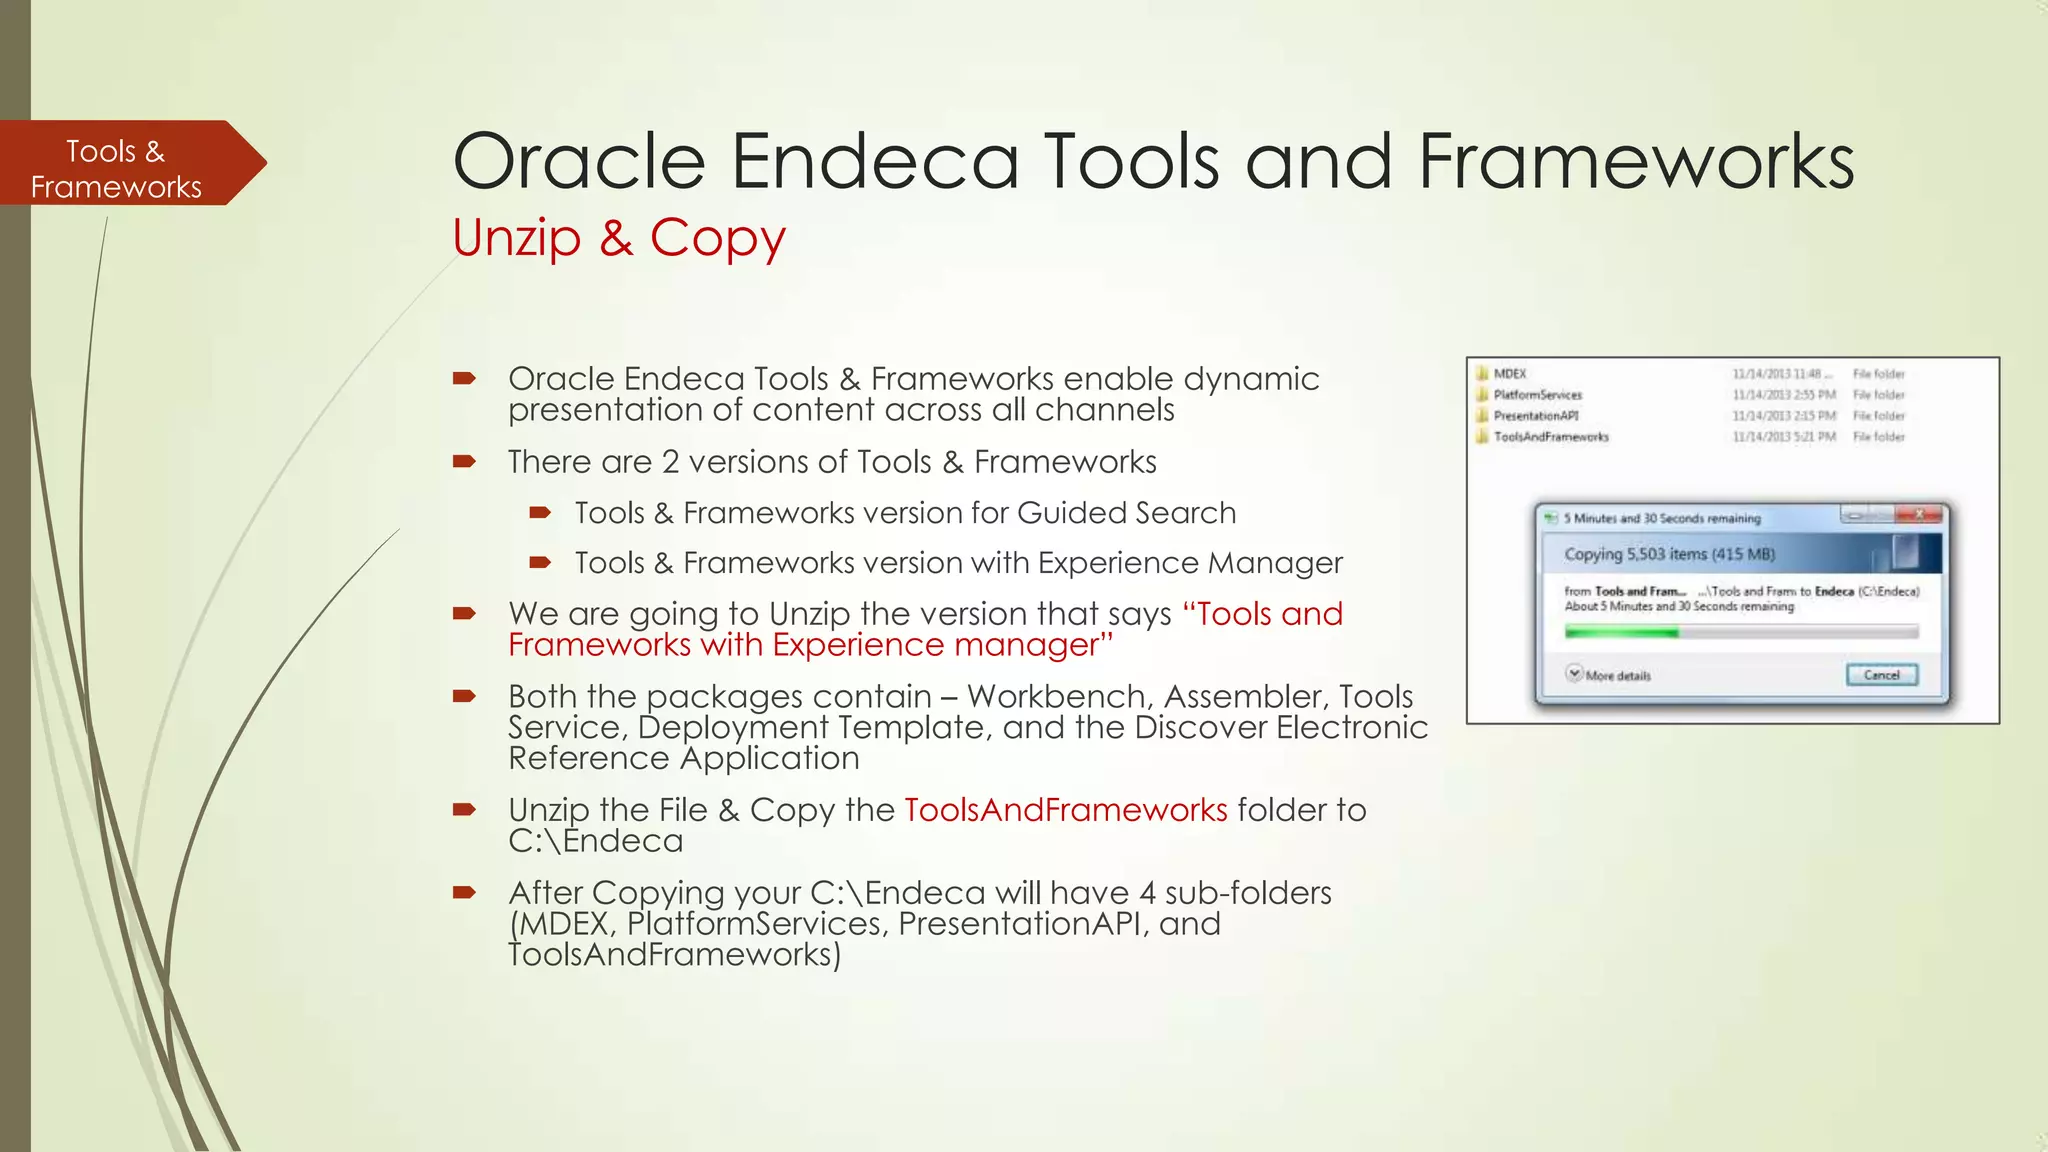
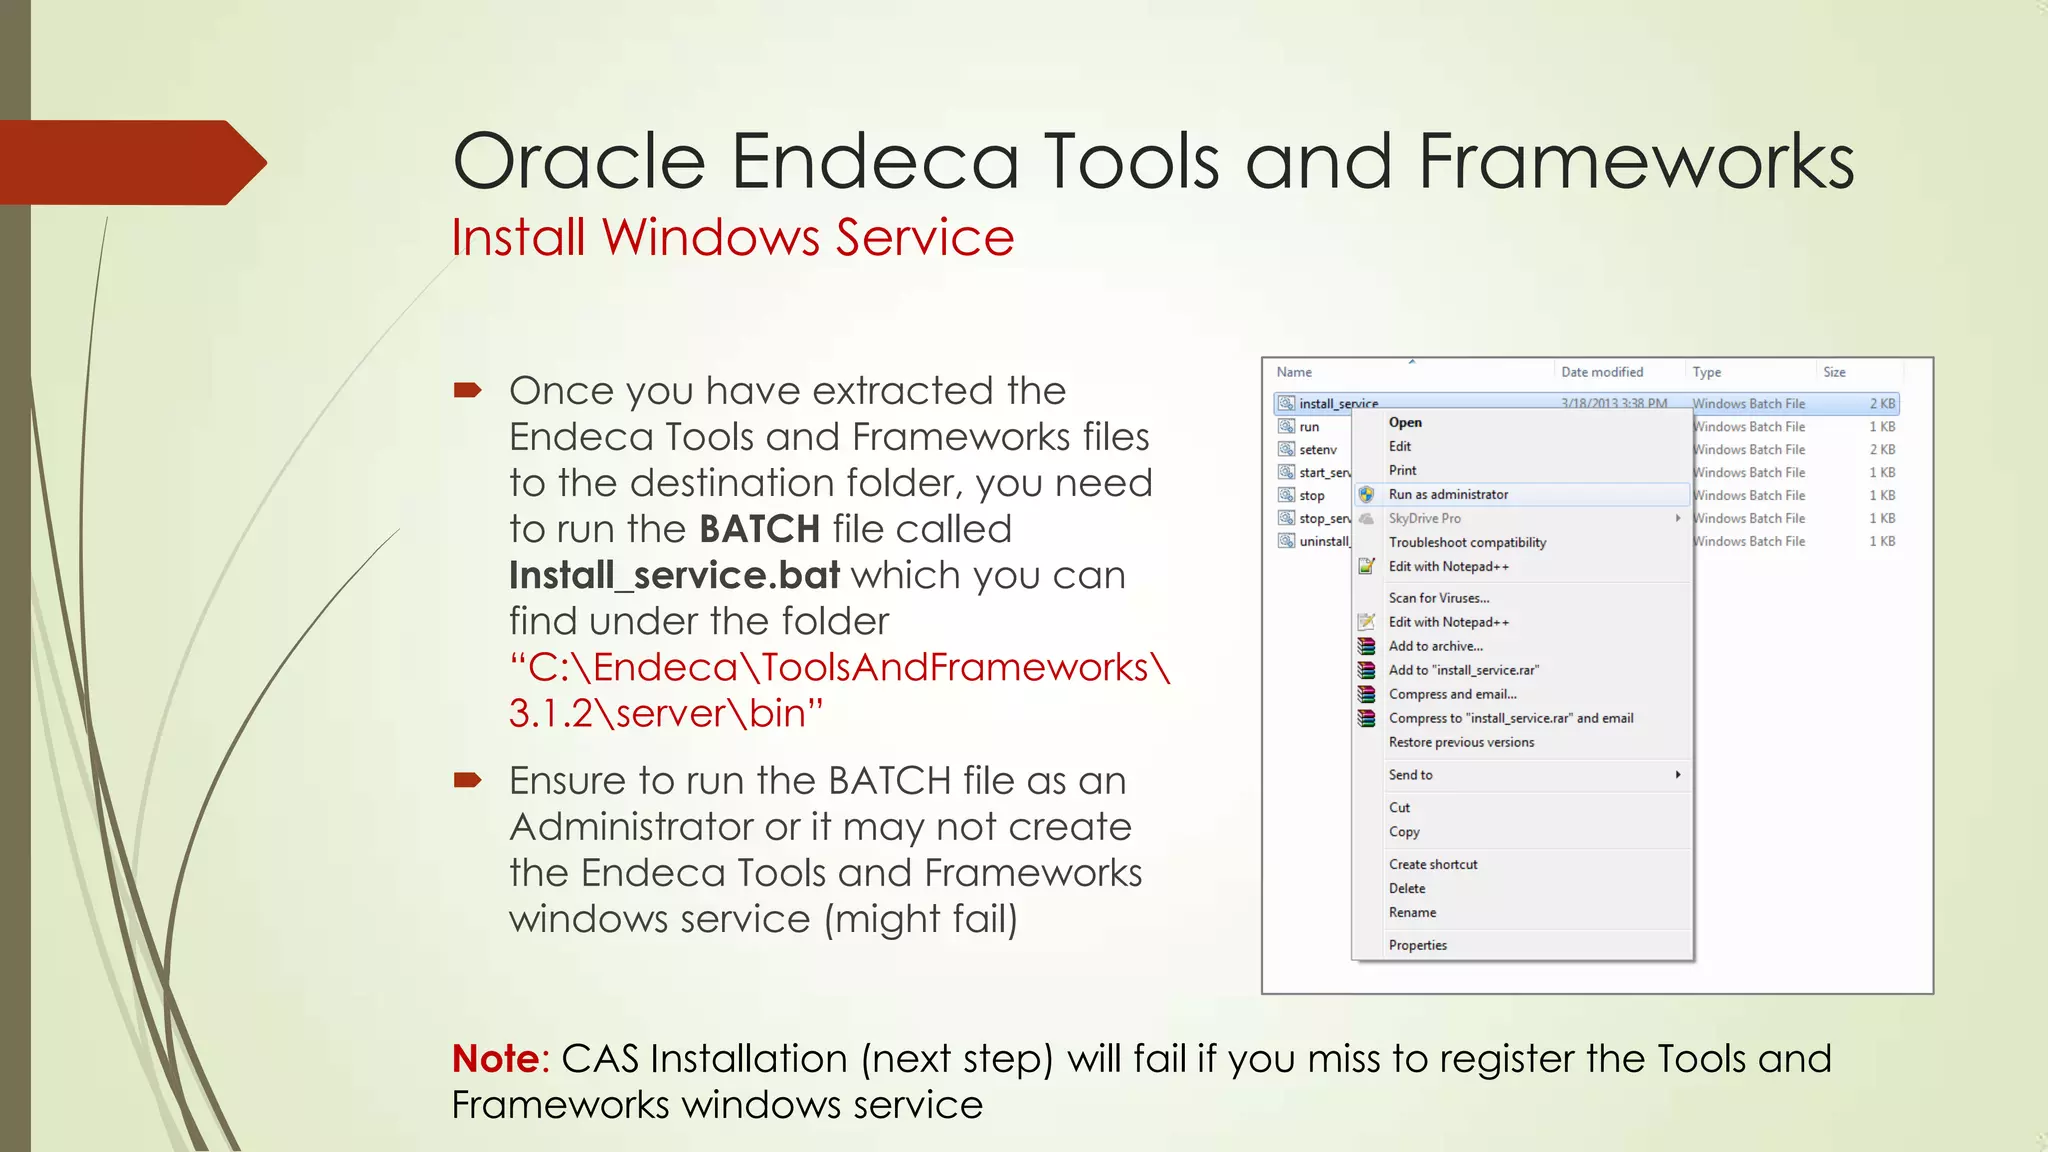
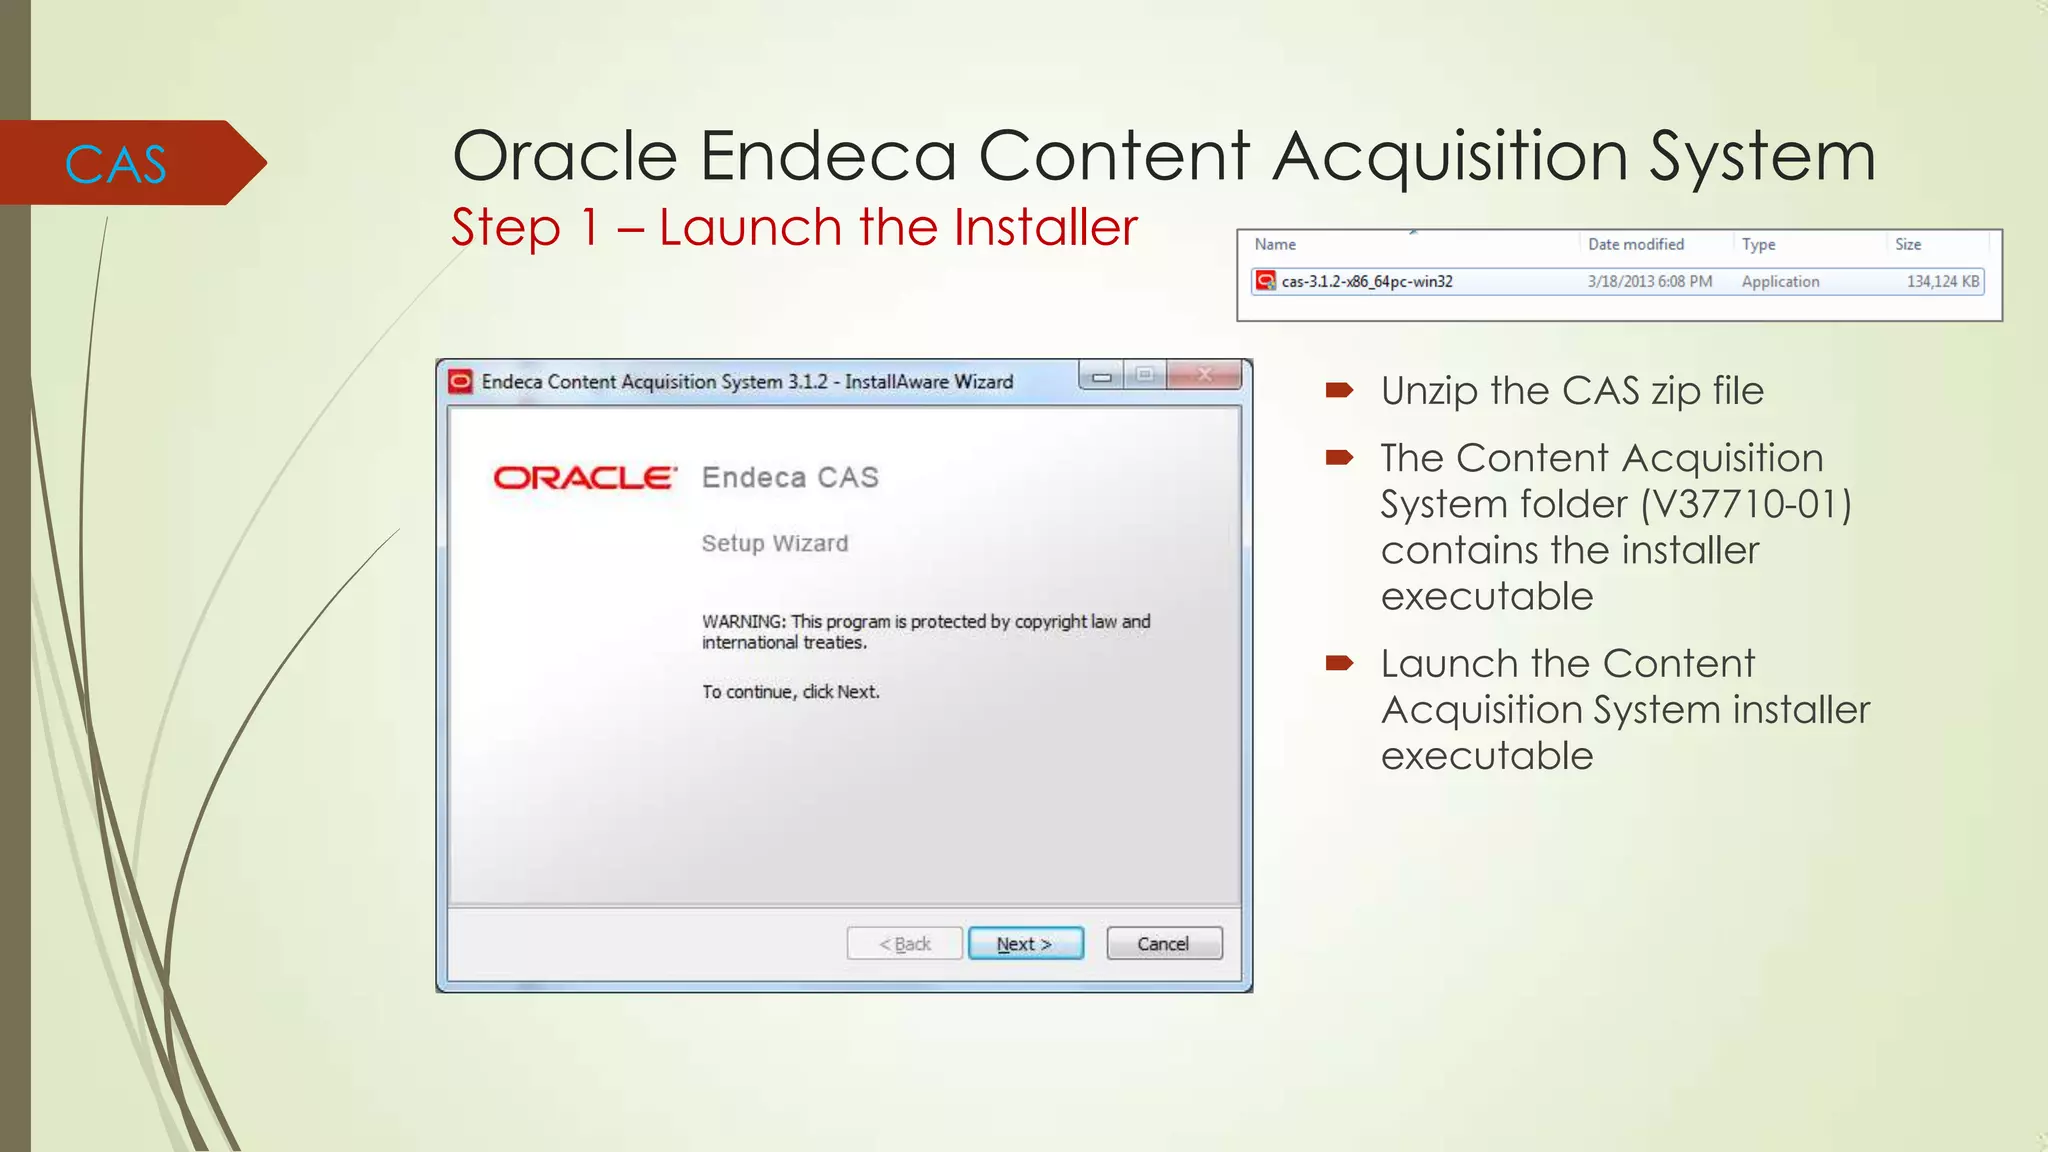
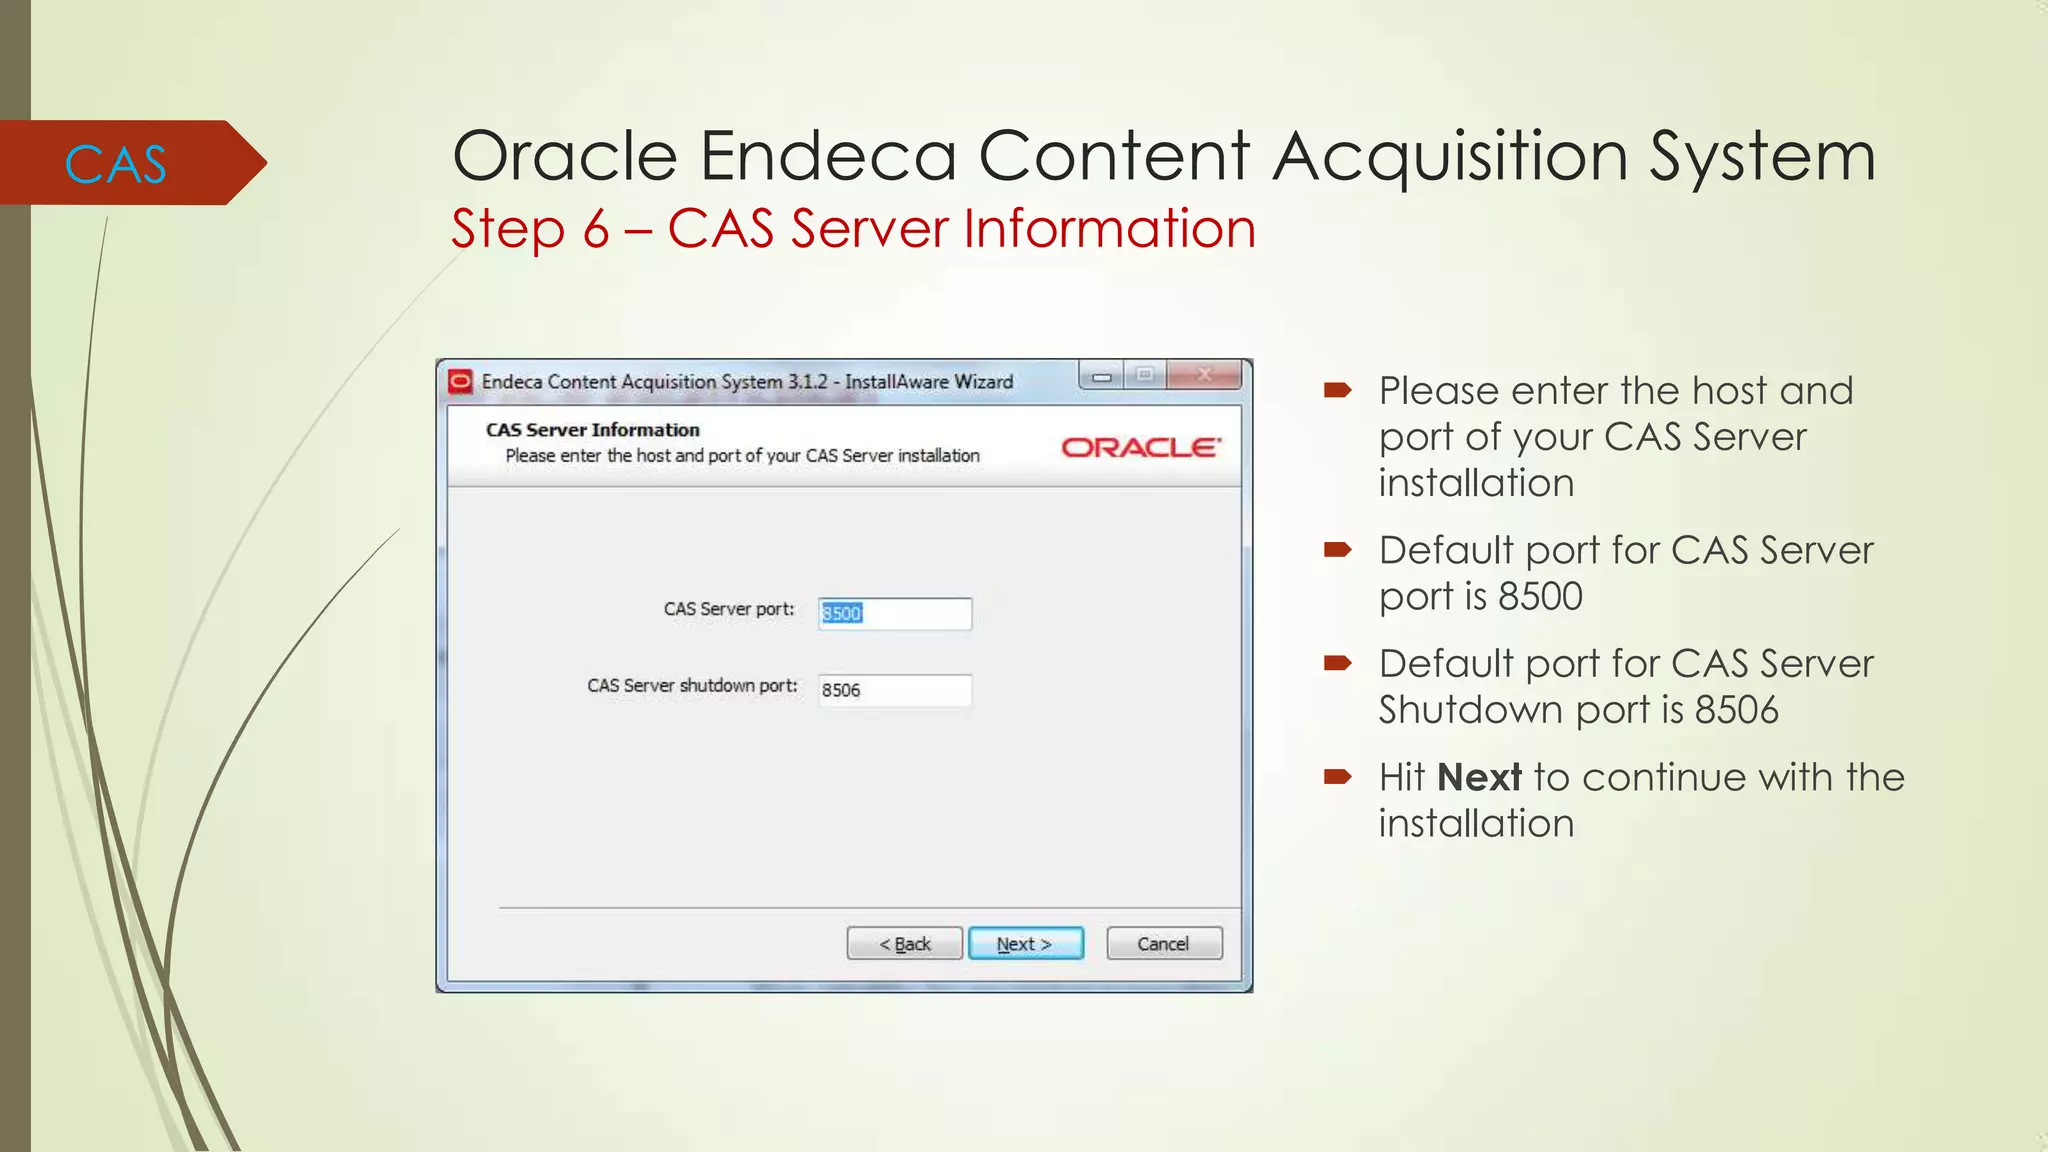
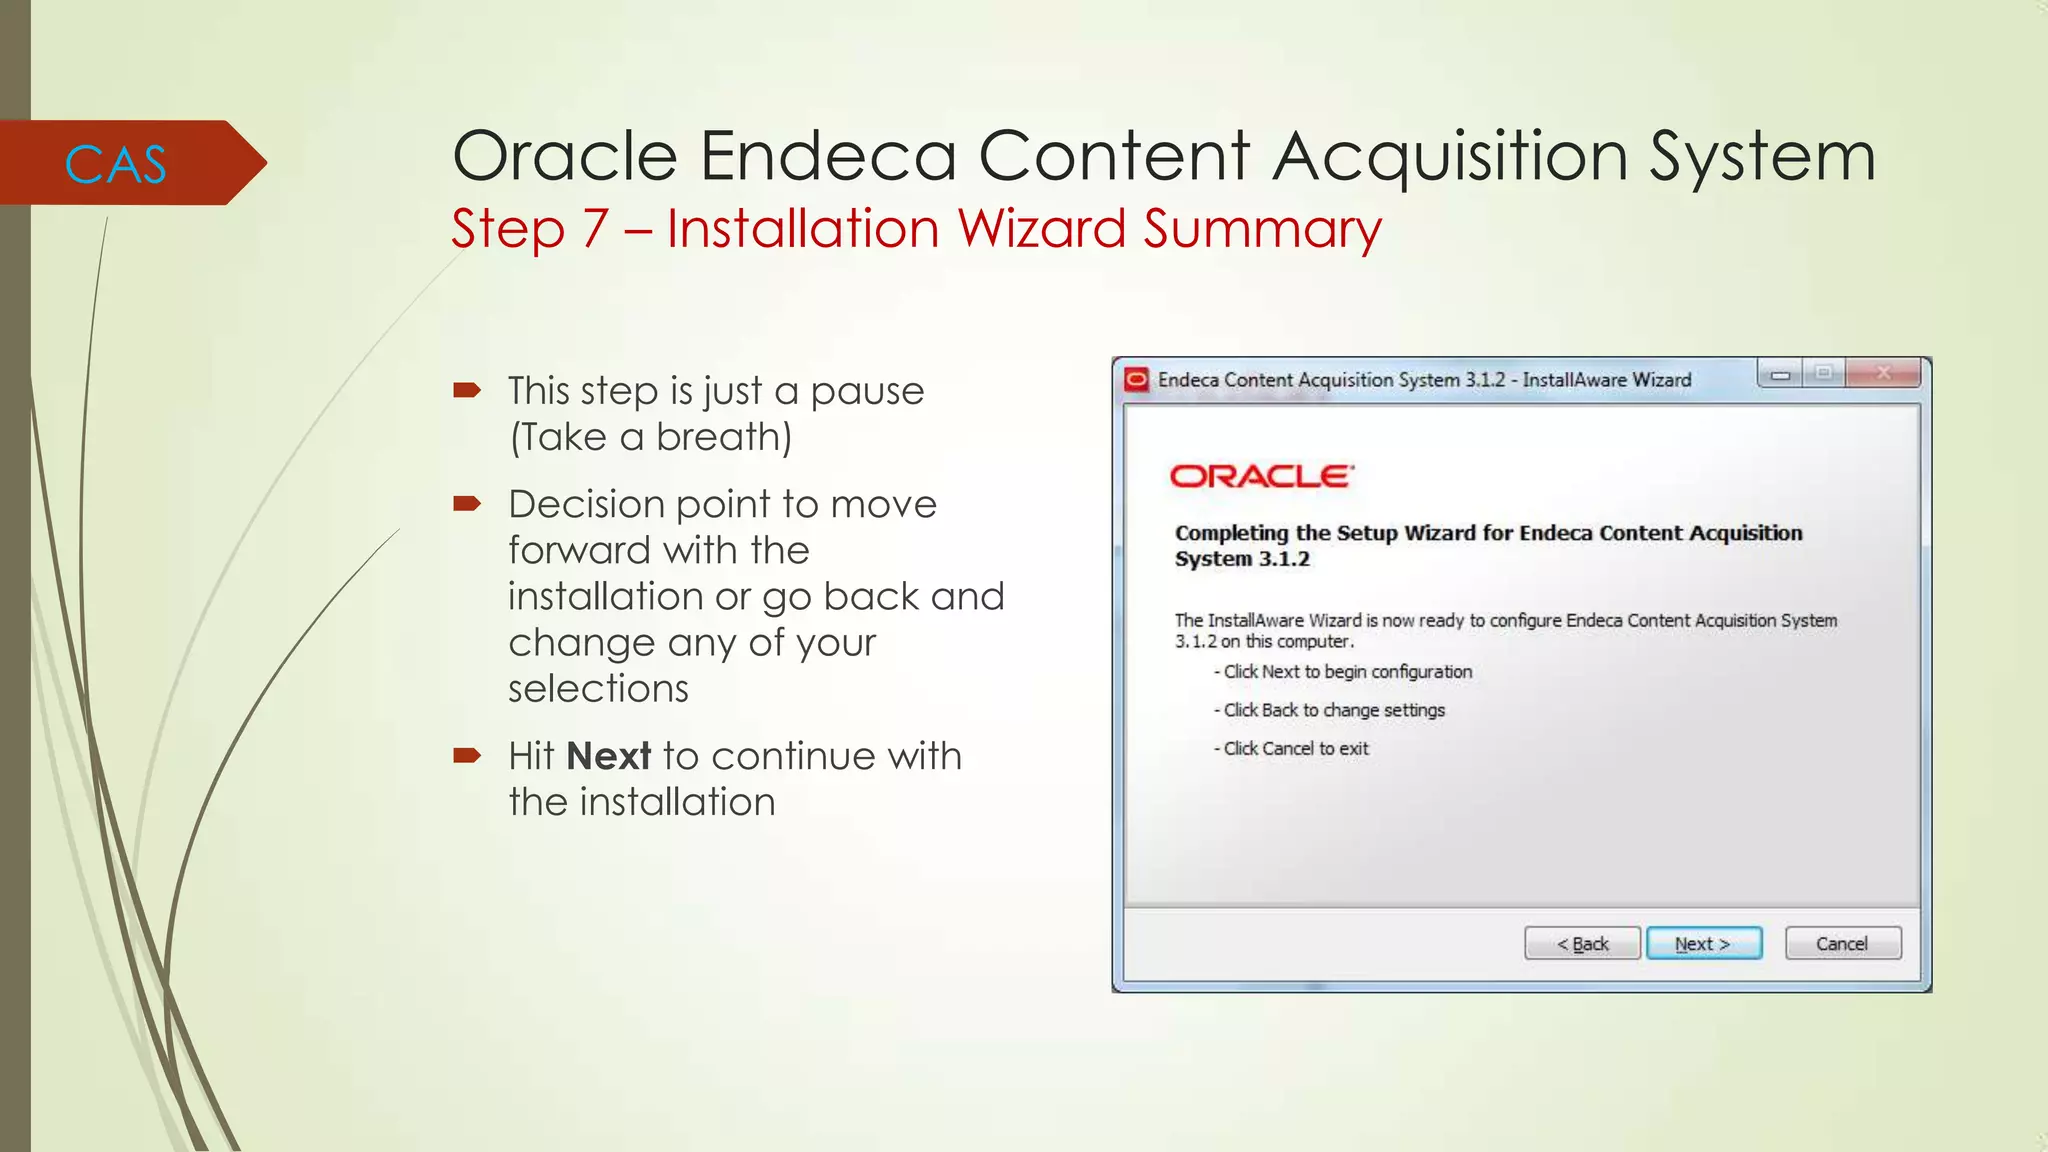
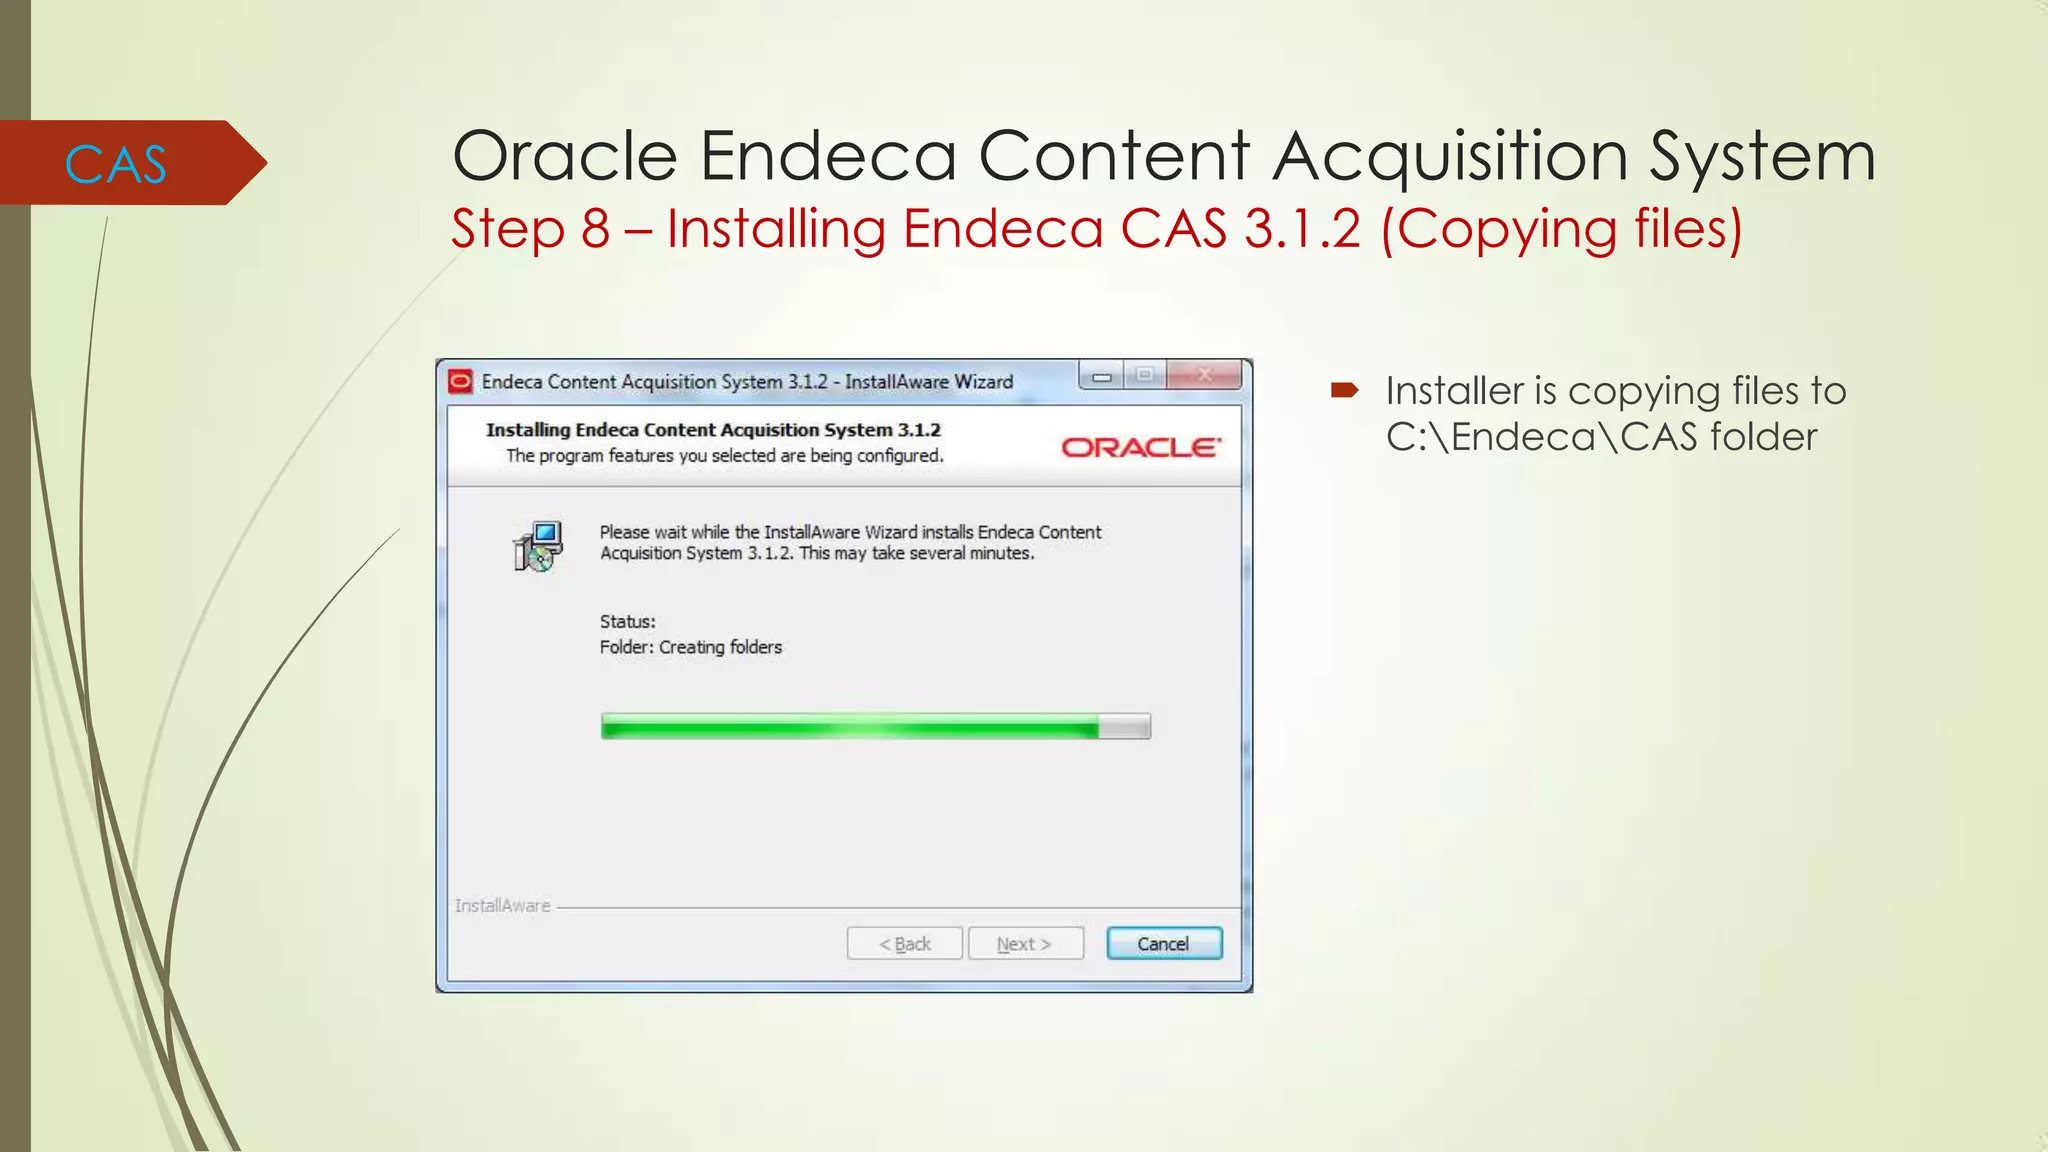
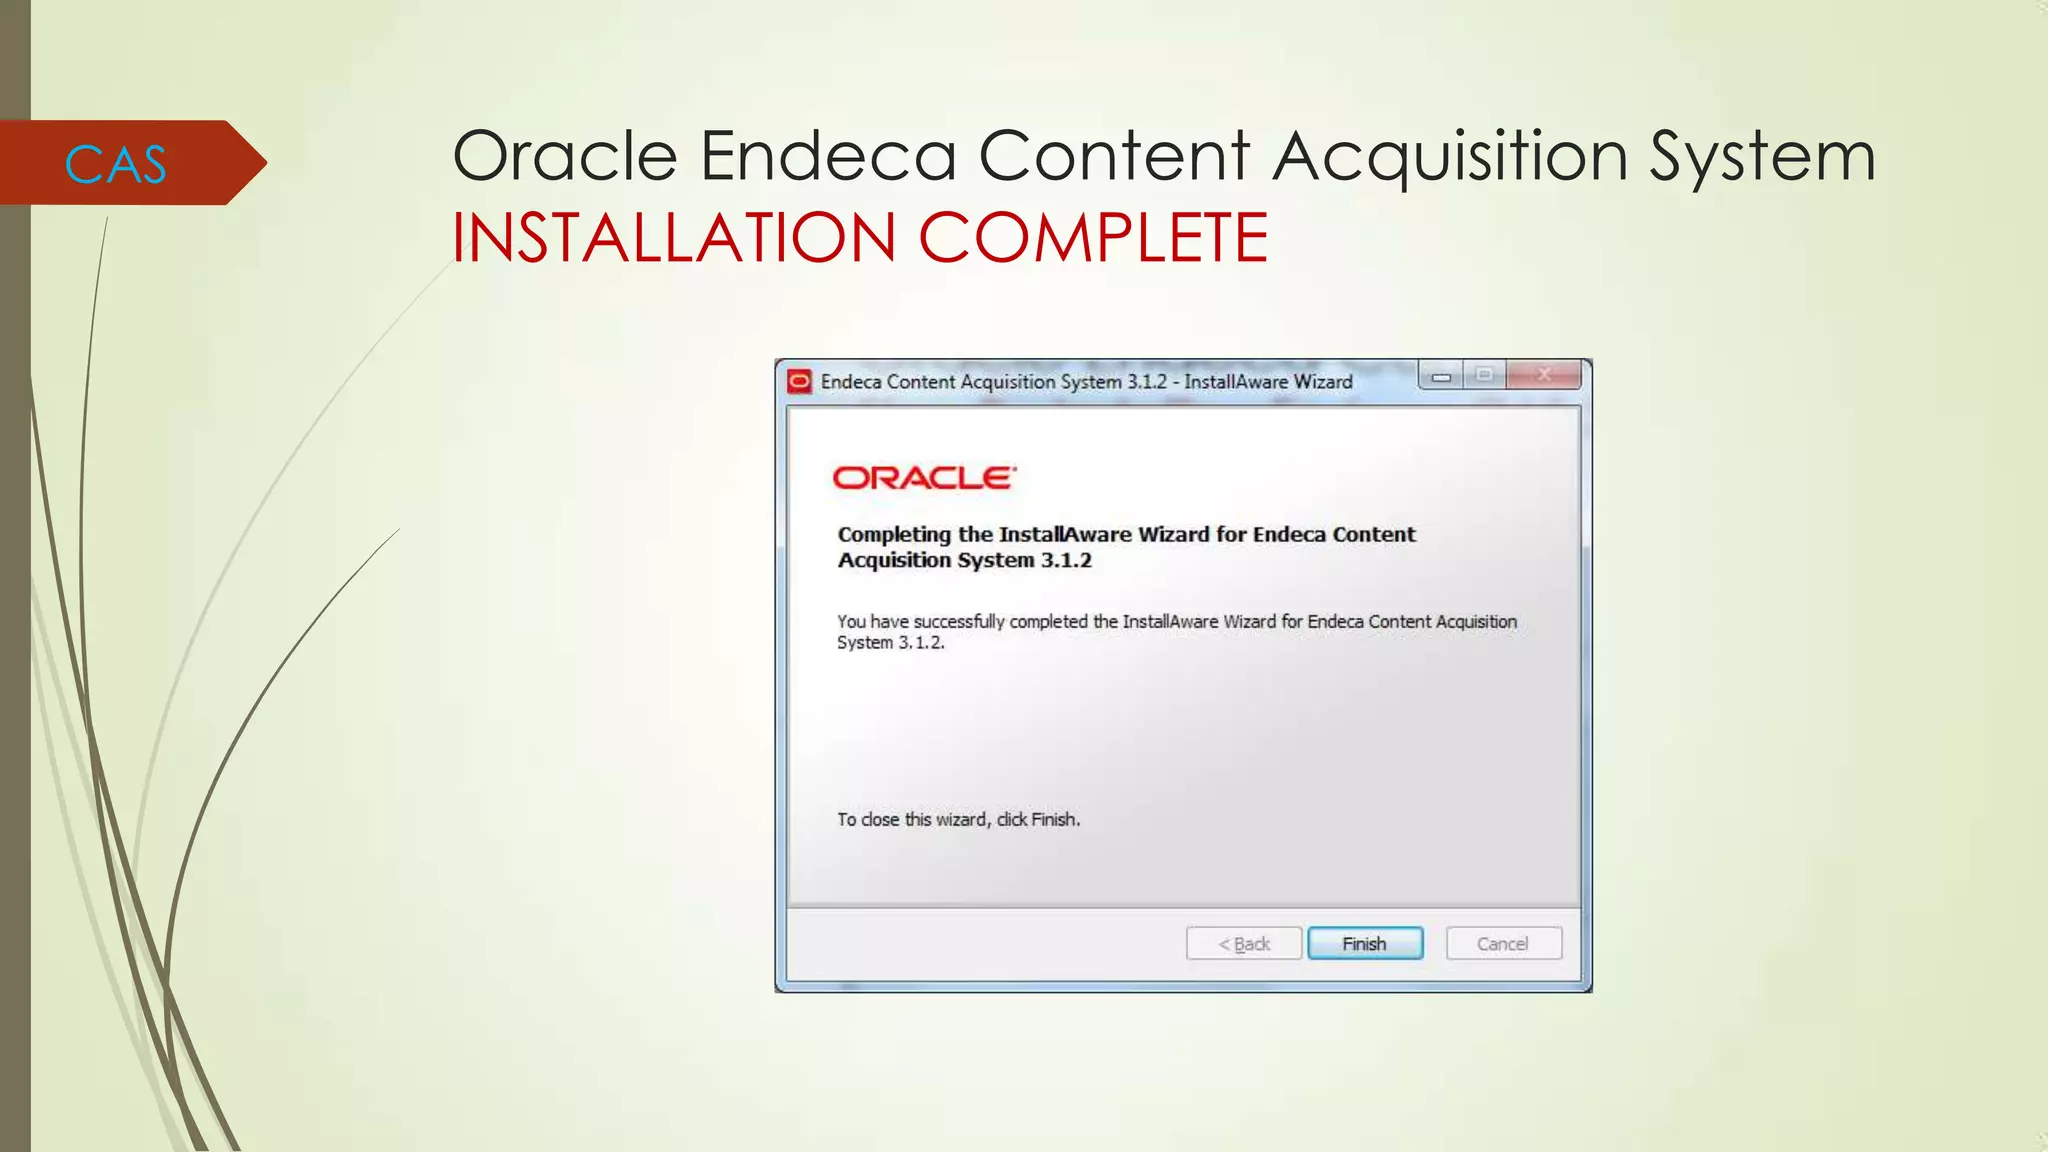

The document provides a step-by-step guide for installing various Oracle Endeca components including the MDEX engine, Presentation API, Platform Services, and Content Acquisition System, along with required software and settings. It outlines the installation procedures, selecting appropriate folders, and configuring user permissions needed for successful setup. Additionally, it emphasizes the importance of certain prerequisites and system permissions during the installation process.


![ATG Product Modules [INTERESTING VIEW]](https://cdn.slidesharecdn.com/ss_thumbnails/atg-140214001952-phpapp01-thumbnail.jpg?width=640&height=640&fit=bounds)