


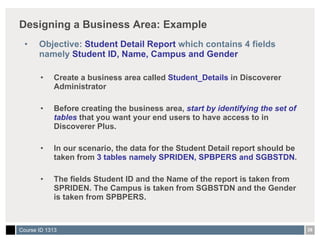
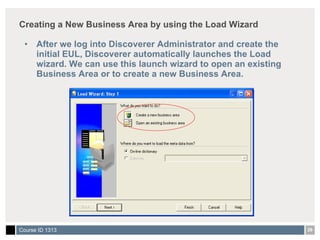

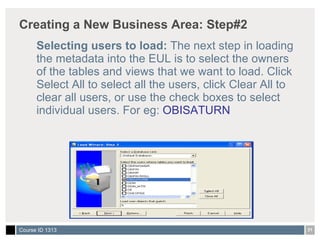
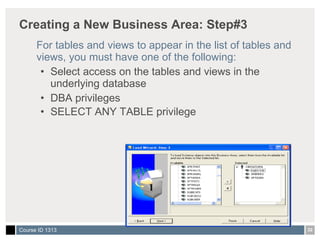


![Thank you and email if you need help! Khalid M. Tariq Supervisor, Student Record Systems Higher Colleges of Technology Abu Dhabi, UAE [email_address] http://www.hct.ac.ae Please complete the online class evaluation form Course ID 1313 SunGard, the SunGard logo, Banner, Campus Pipeline, Luminis, PowerCAMPUS, Matrix, and Plus are trademarks or registered trademarks of SunGard Data Systems Inc. or its subsidiaries in the U.S. and other countries. Third-party names and marks referenced herein are trademarks or registered trademarks of their respective owners. © 2006 SunGard. All rights reserved.](https://image.slidesharecdn.com/1313-12963826423779-phpapp01/85/Oracle-Discoverer-Reports-via-BSS-62-320.jpg)

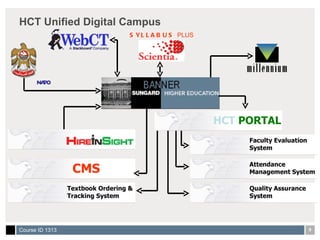
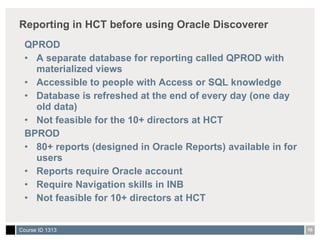
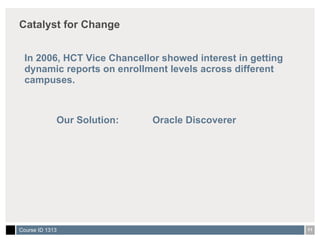
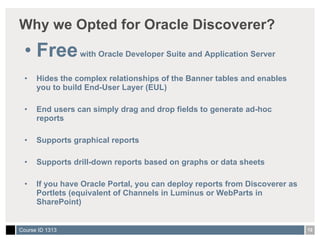
This document discusses how Oracle Discoverer reports were deployed in the Banner Student System (BSS) at Higher Colleges of Technology (HCT) in the United Arab Emirates. It provides an overview of HCT and the history of management reporting there. It then covers the basic concepts of Oracle Discoverer, how to create an End User Layer and build reports using Discoverer. Sample reports deployed in BSS via Discoverer are also discussed.