Downloaded 11 times


![10 Add the highlighted lines to your “php.ini” file , after [PHP] and make sure to save the file and then
stop and restart “Apache” server to allow the changes to affect](https://image.slidesharecdn.com/moodleinstallationguide-200601145807/75/Moodle-installation-guide-13-2048.jpg)
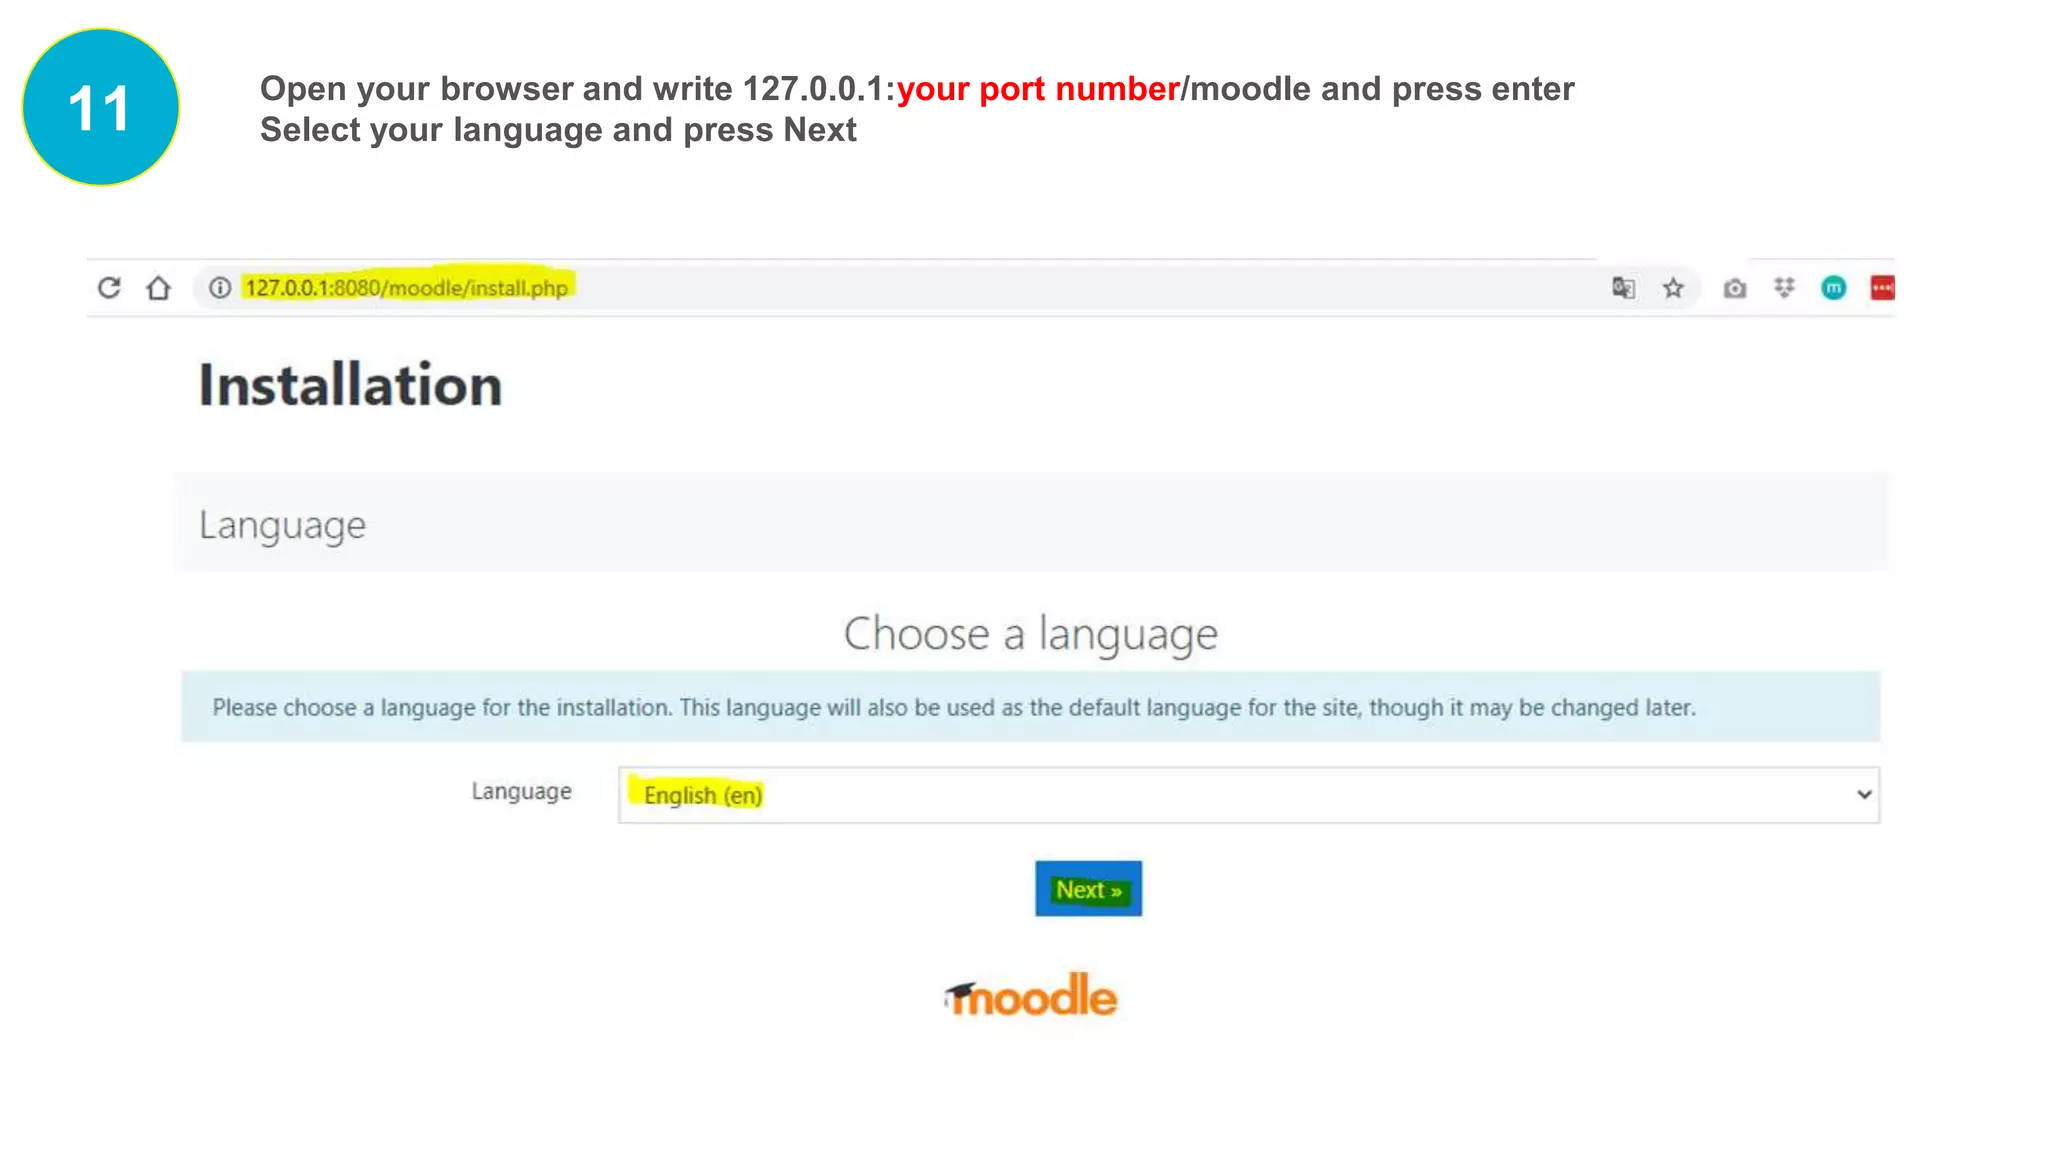
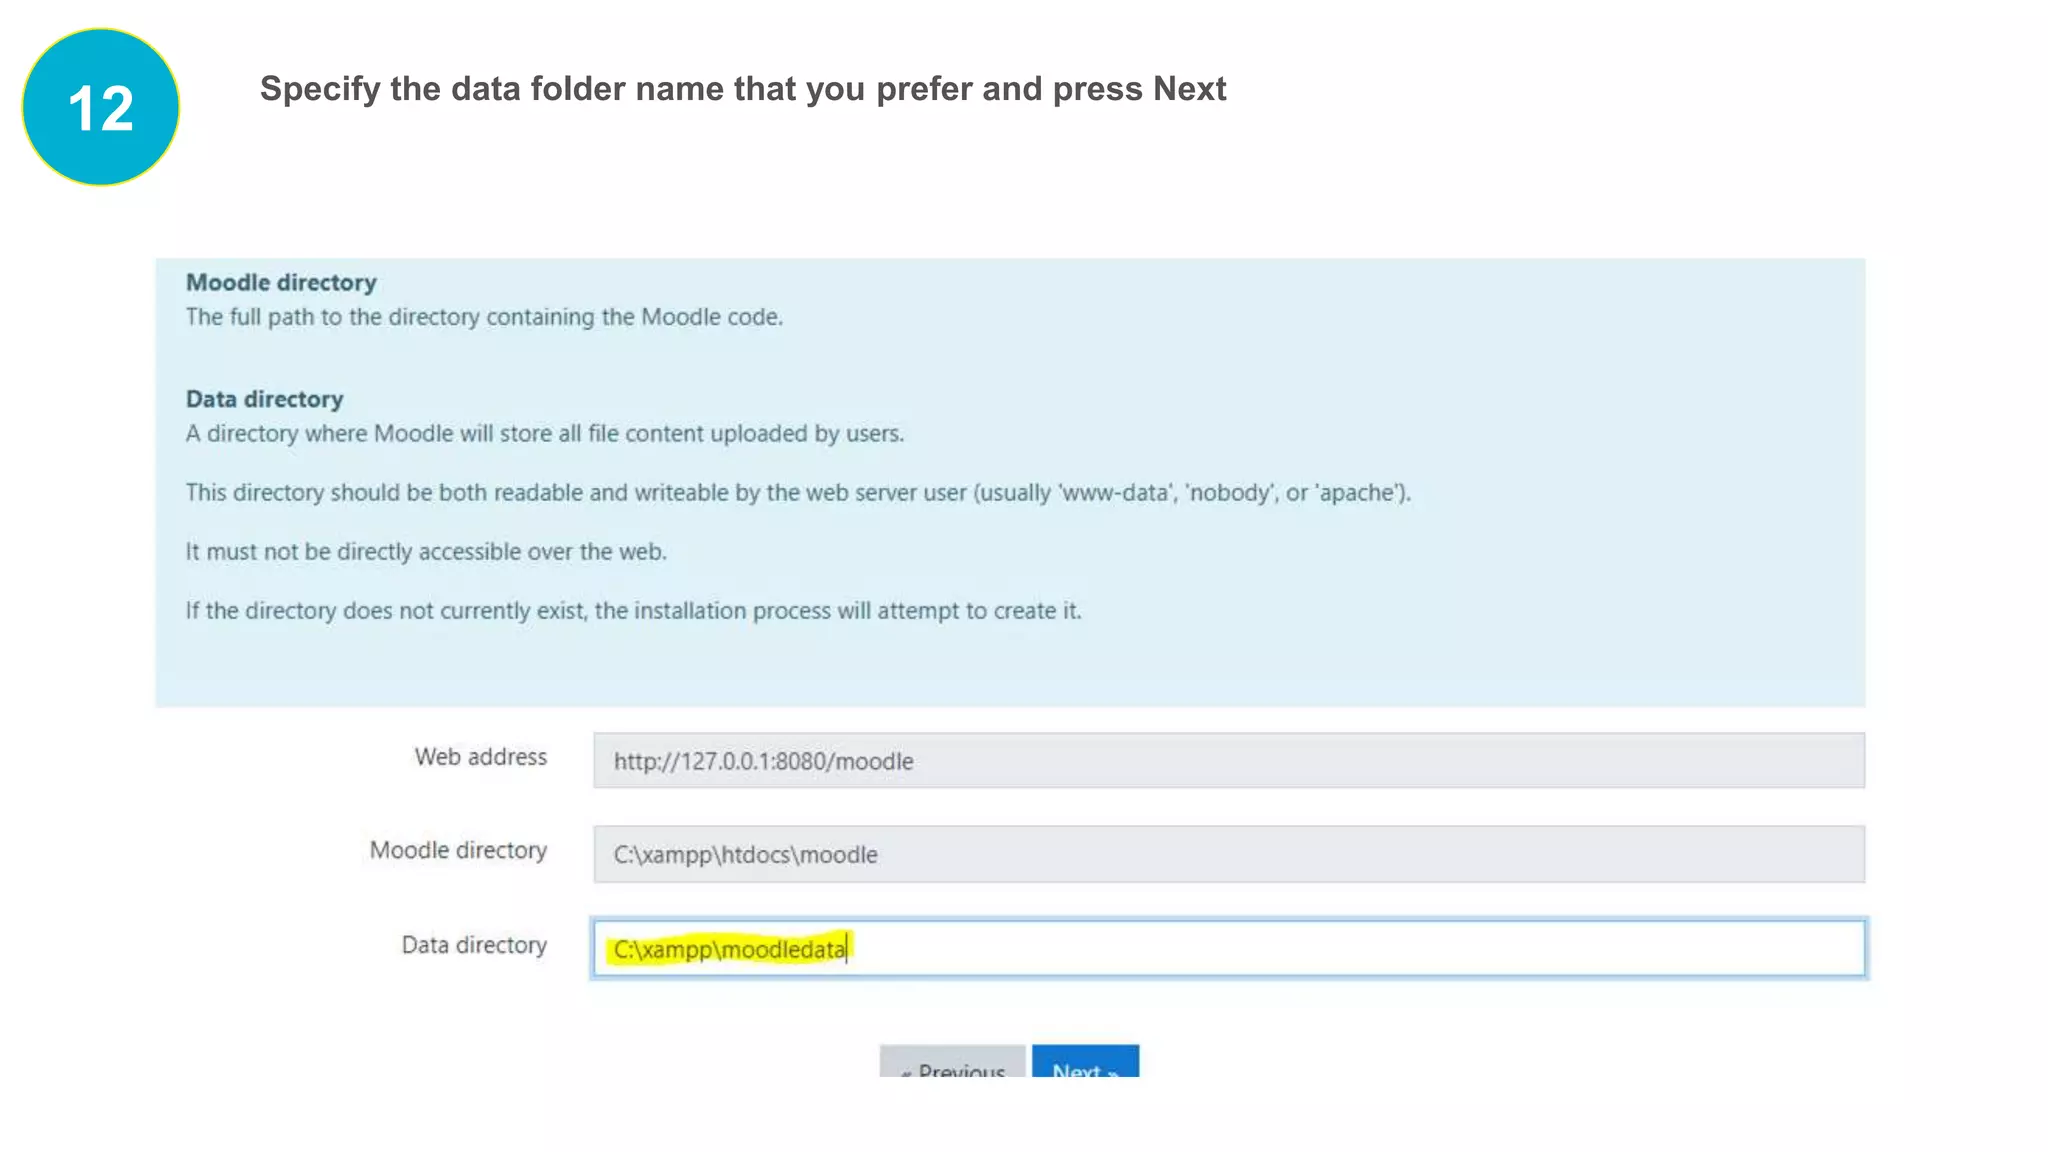
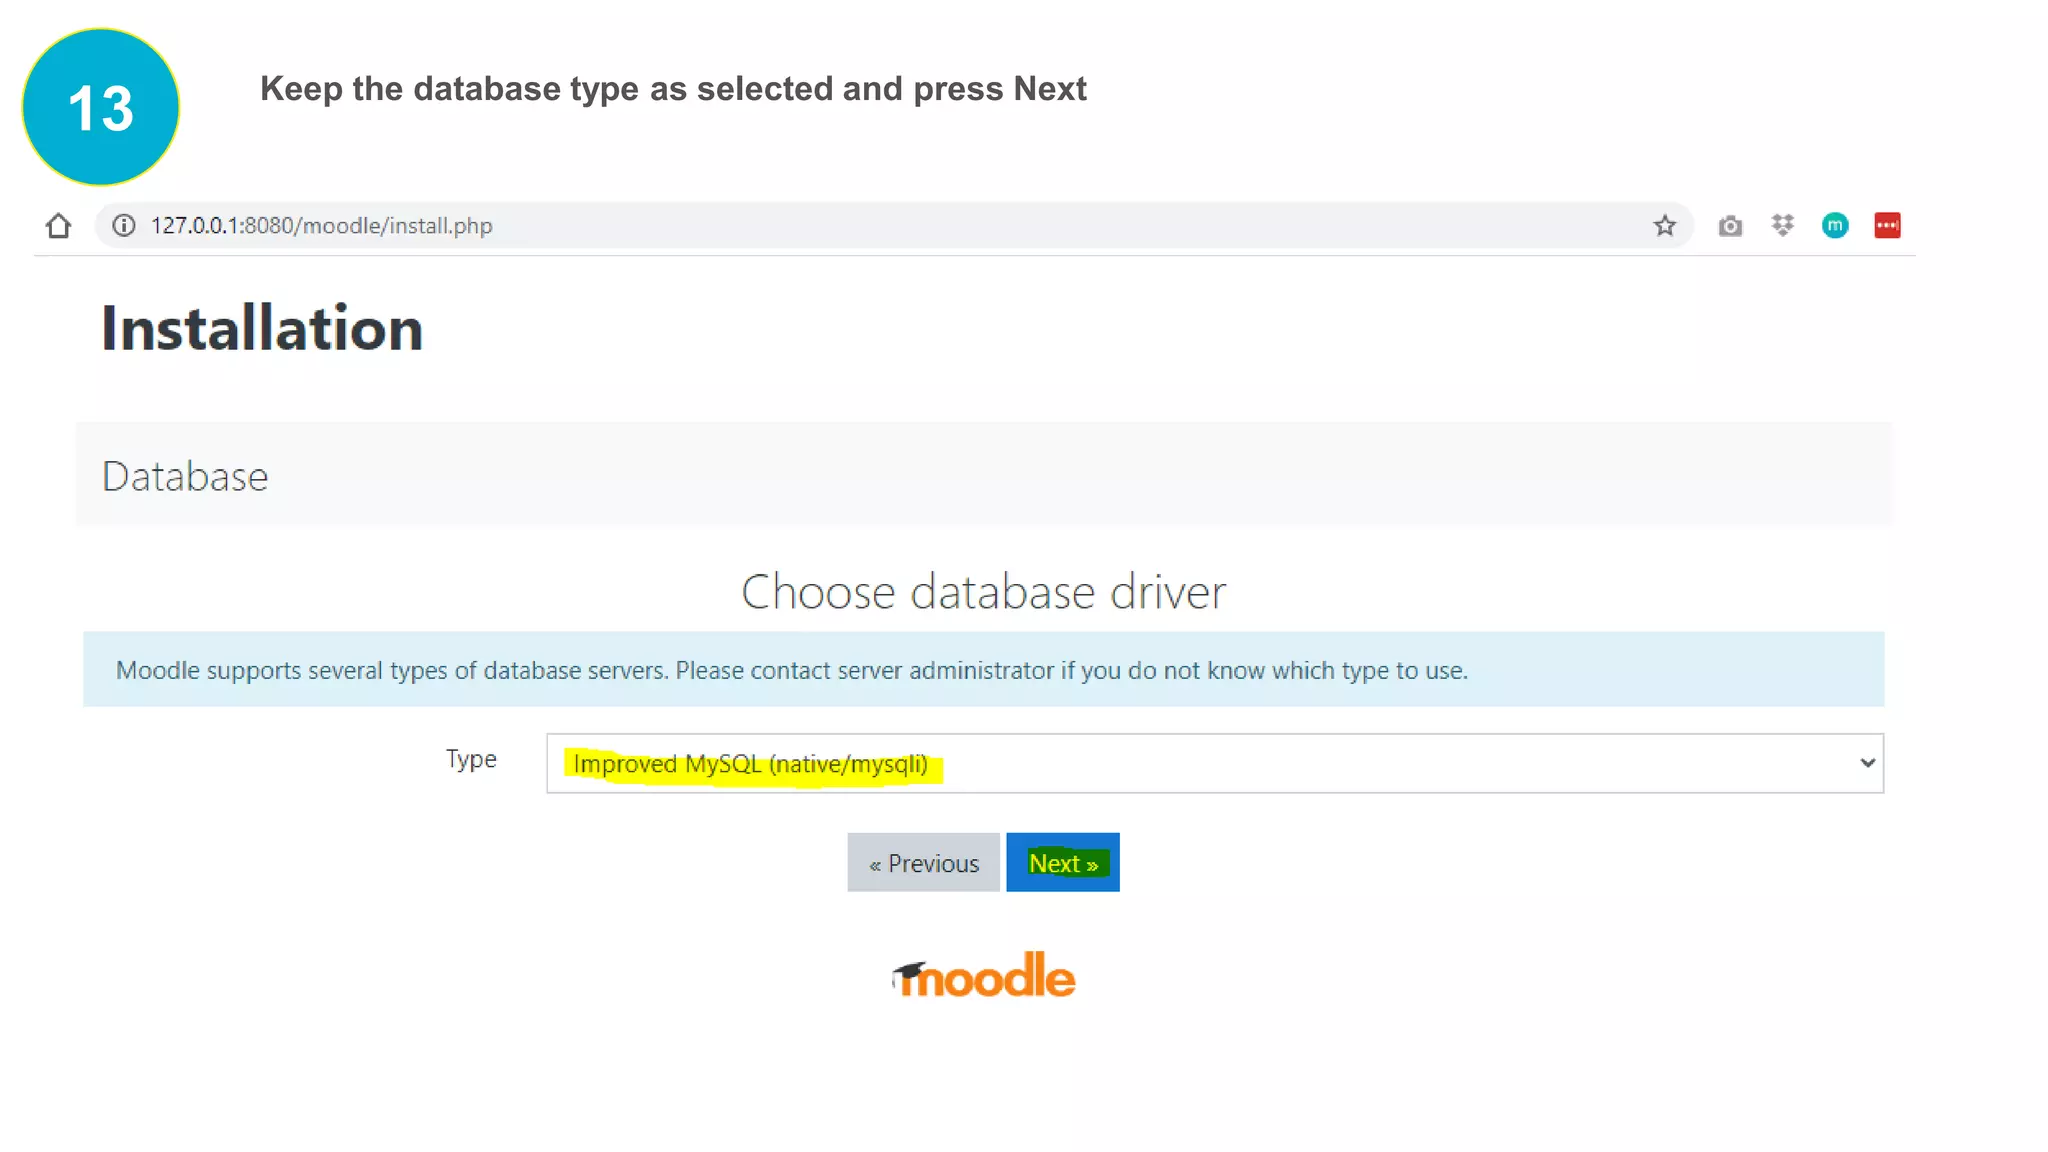
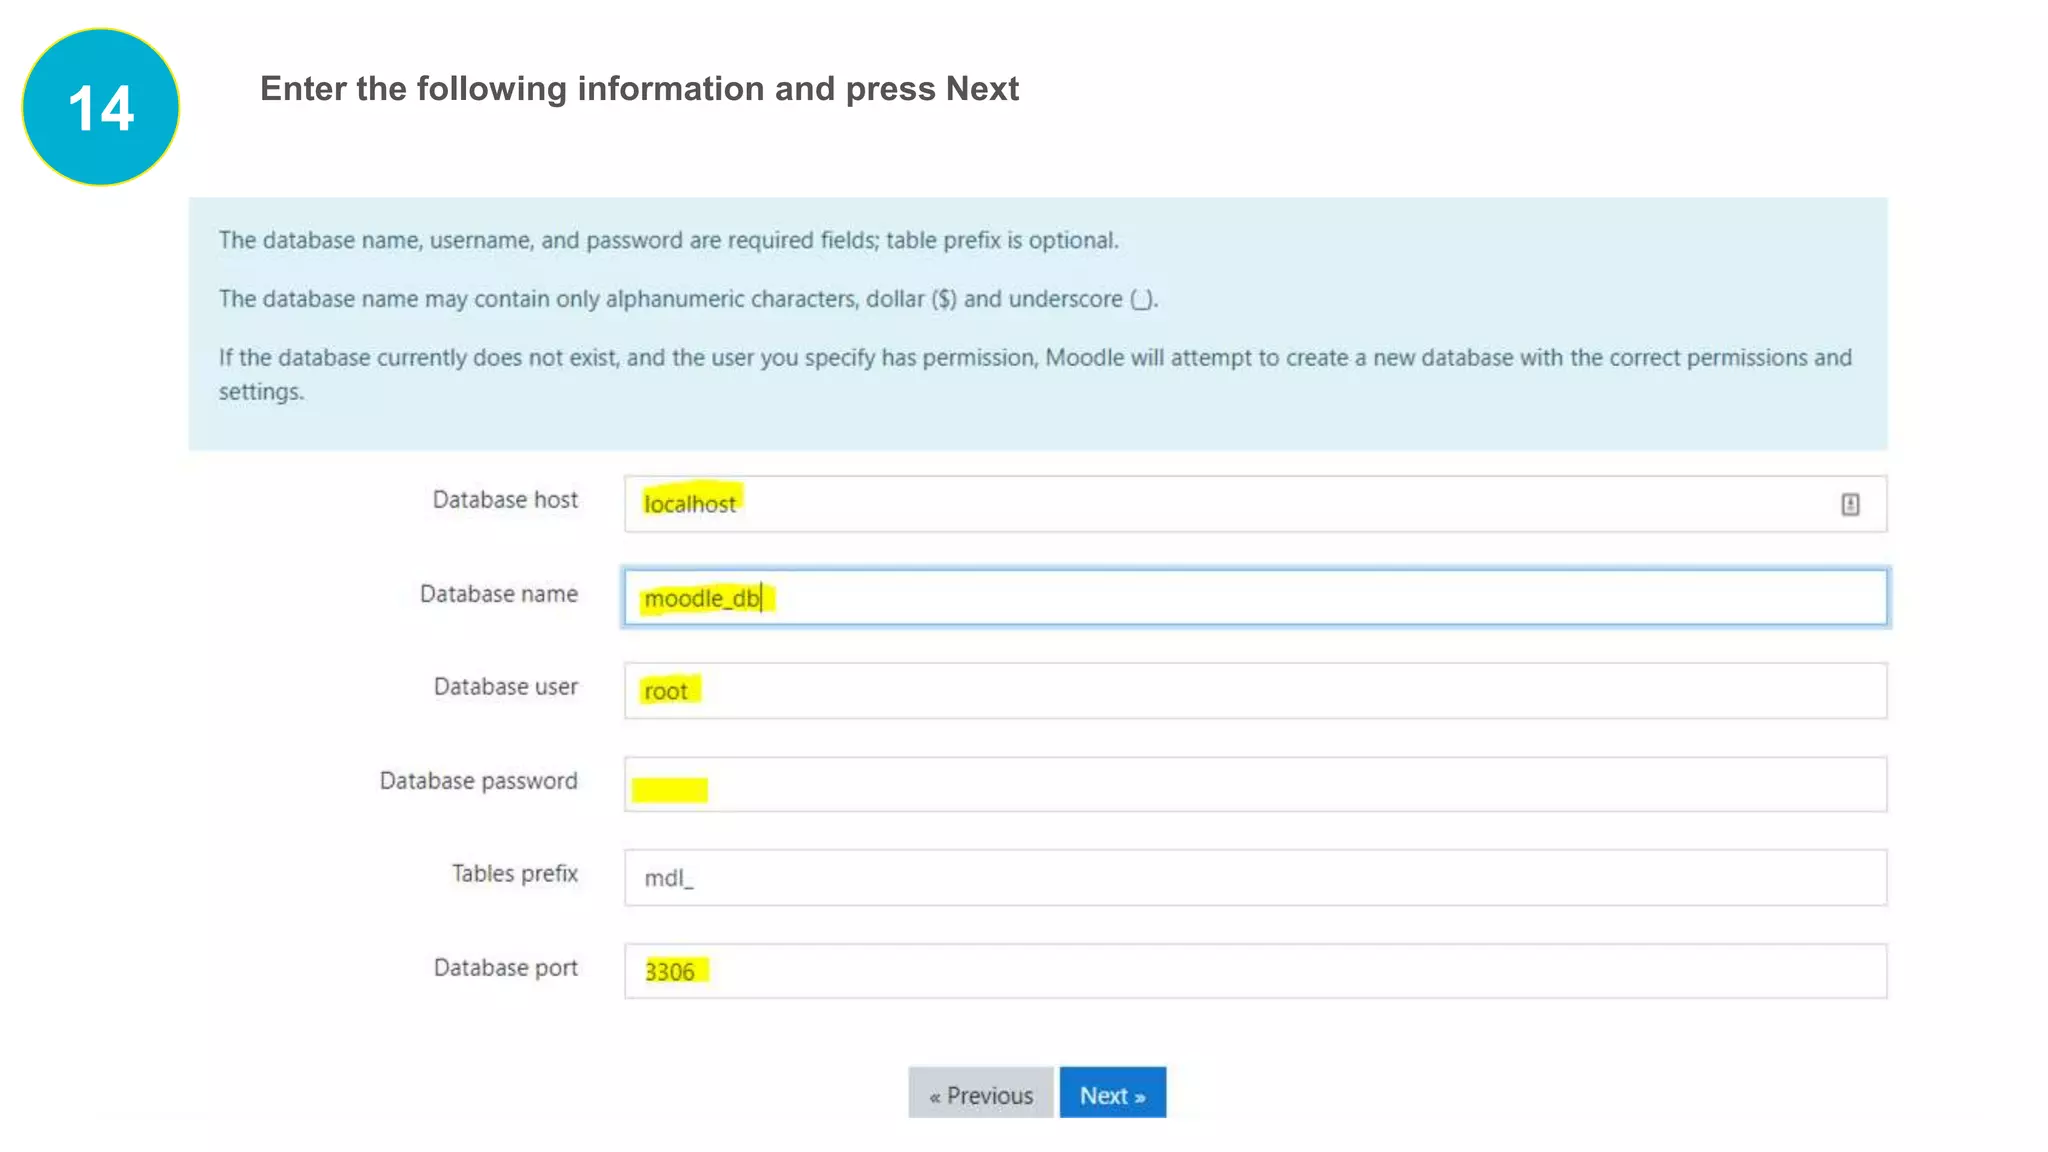
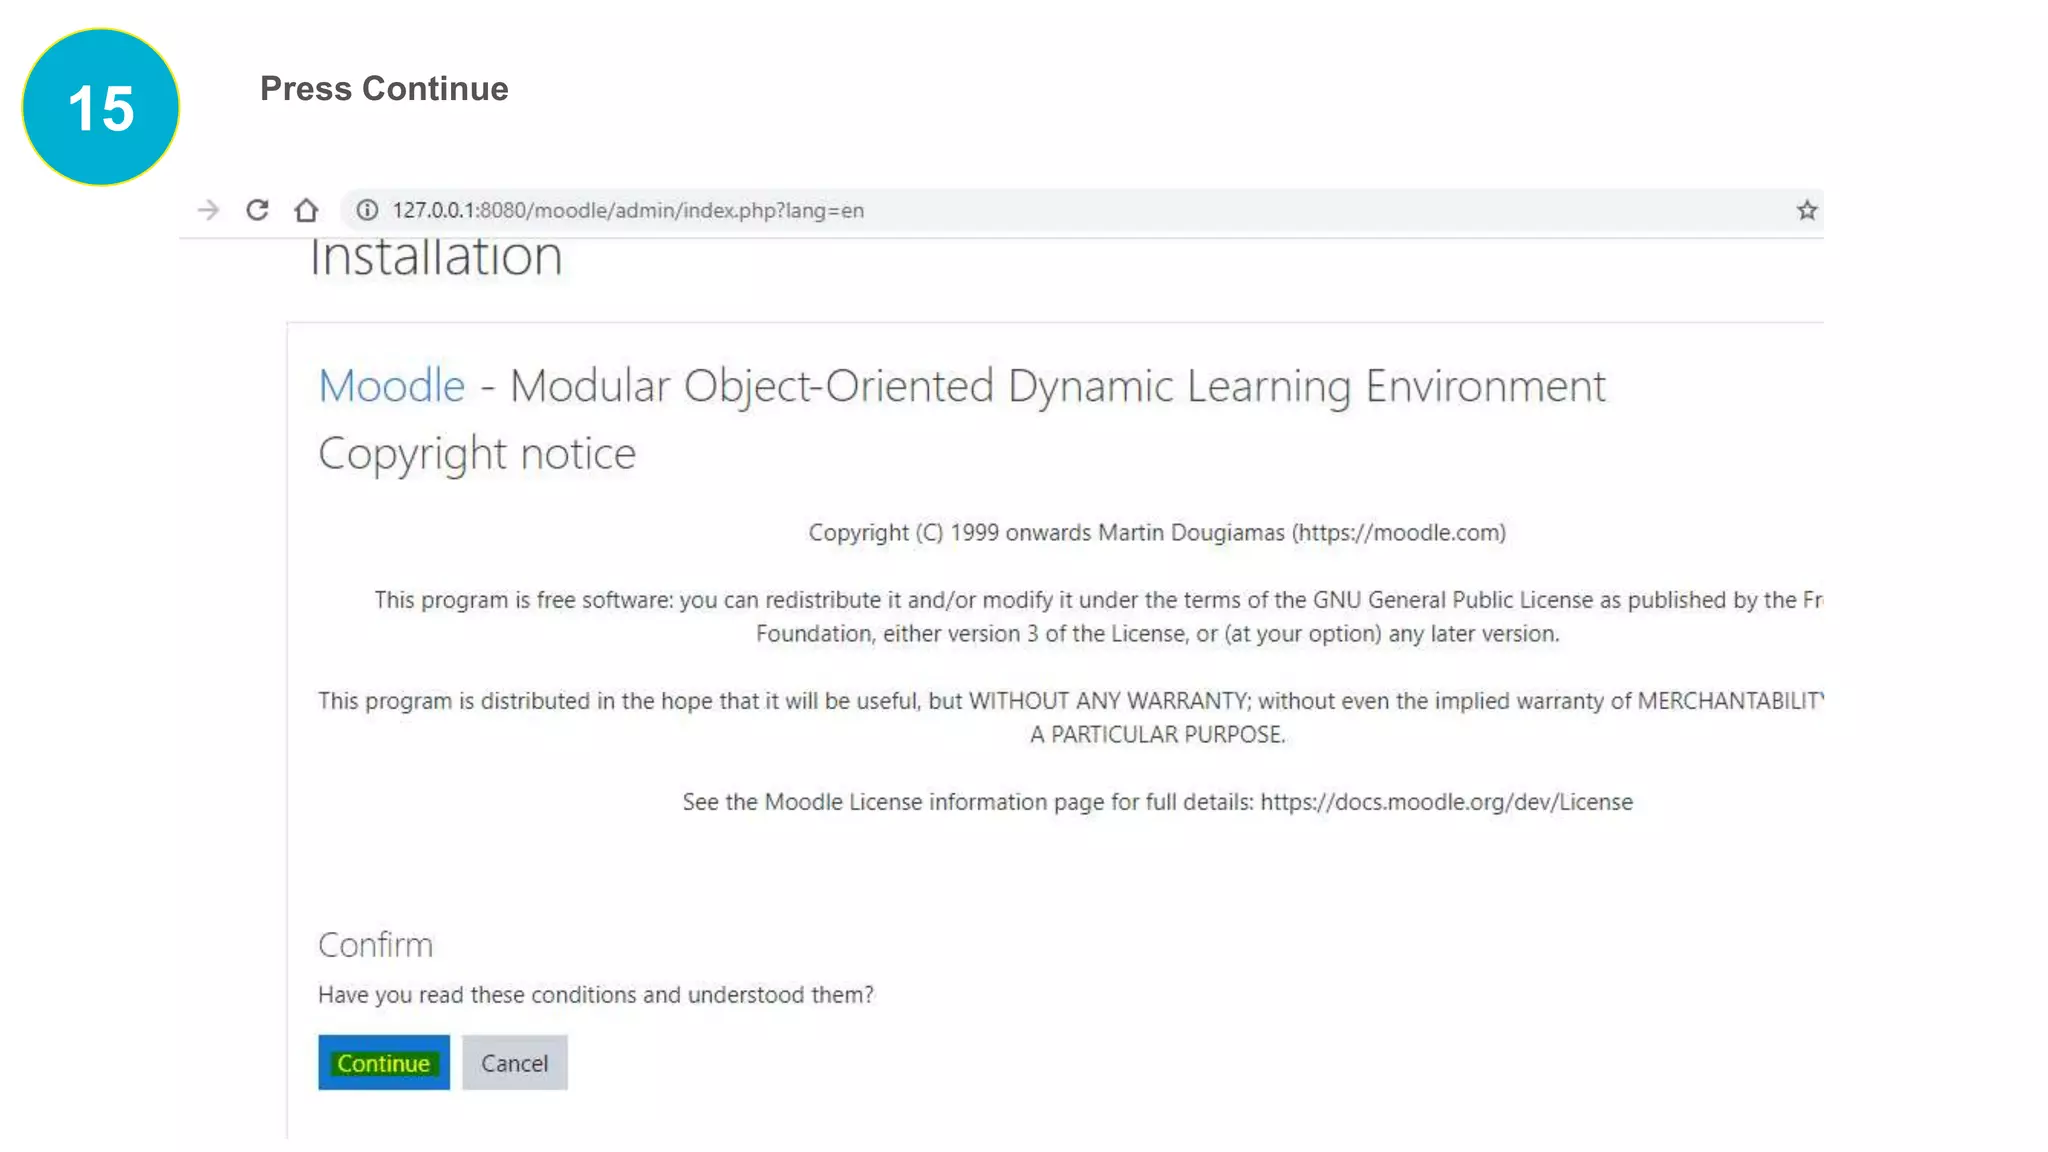
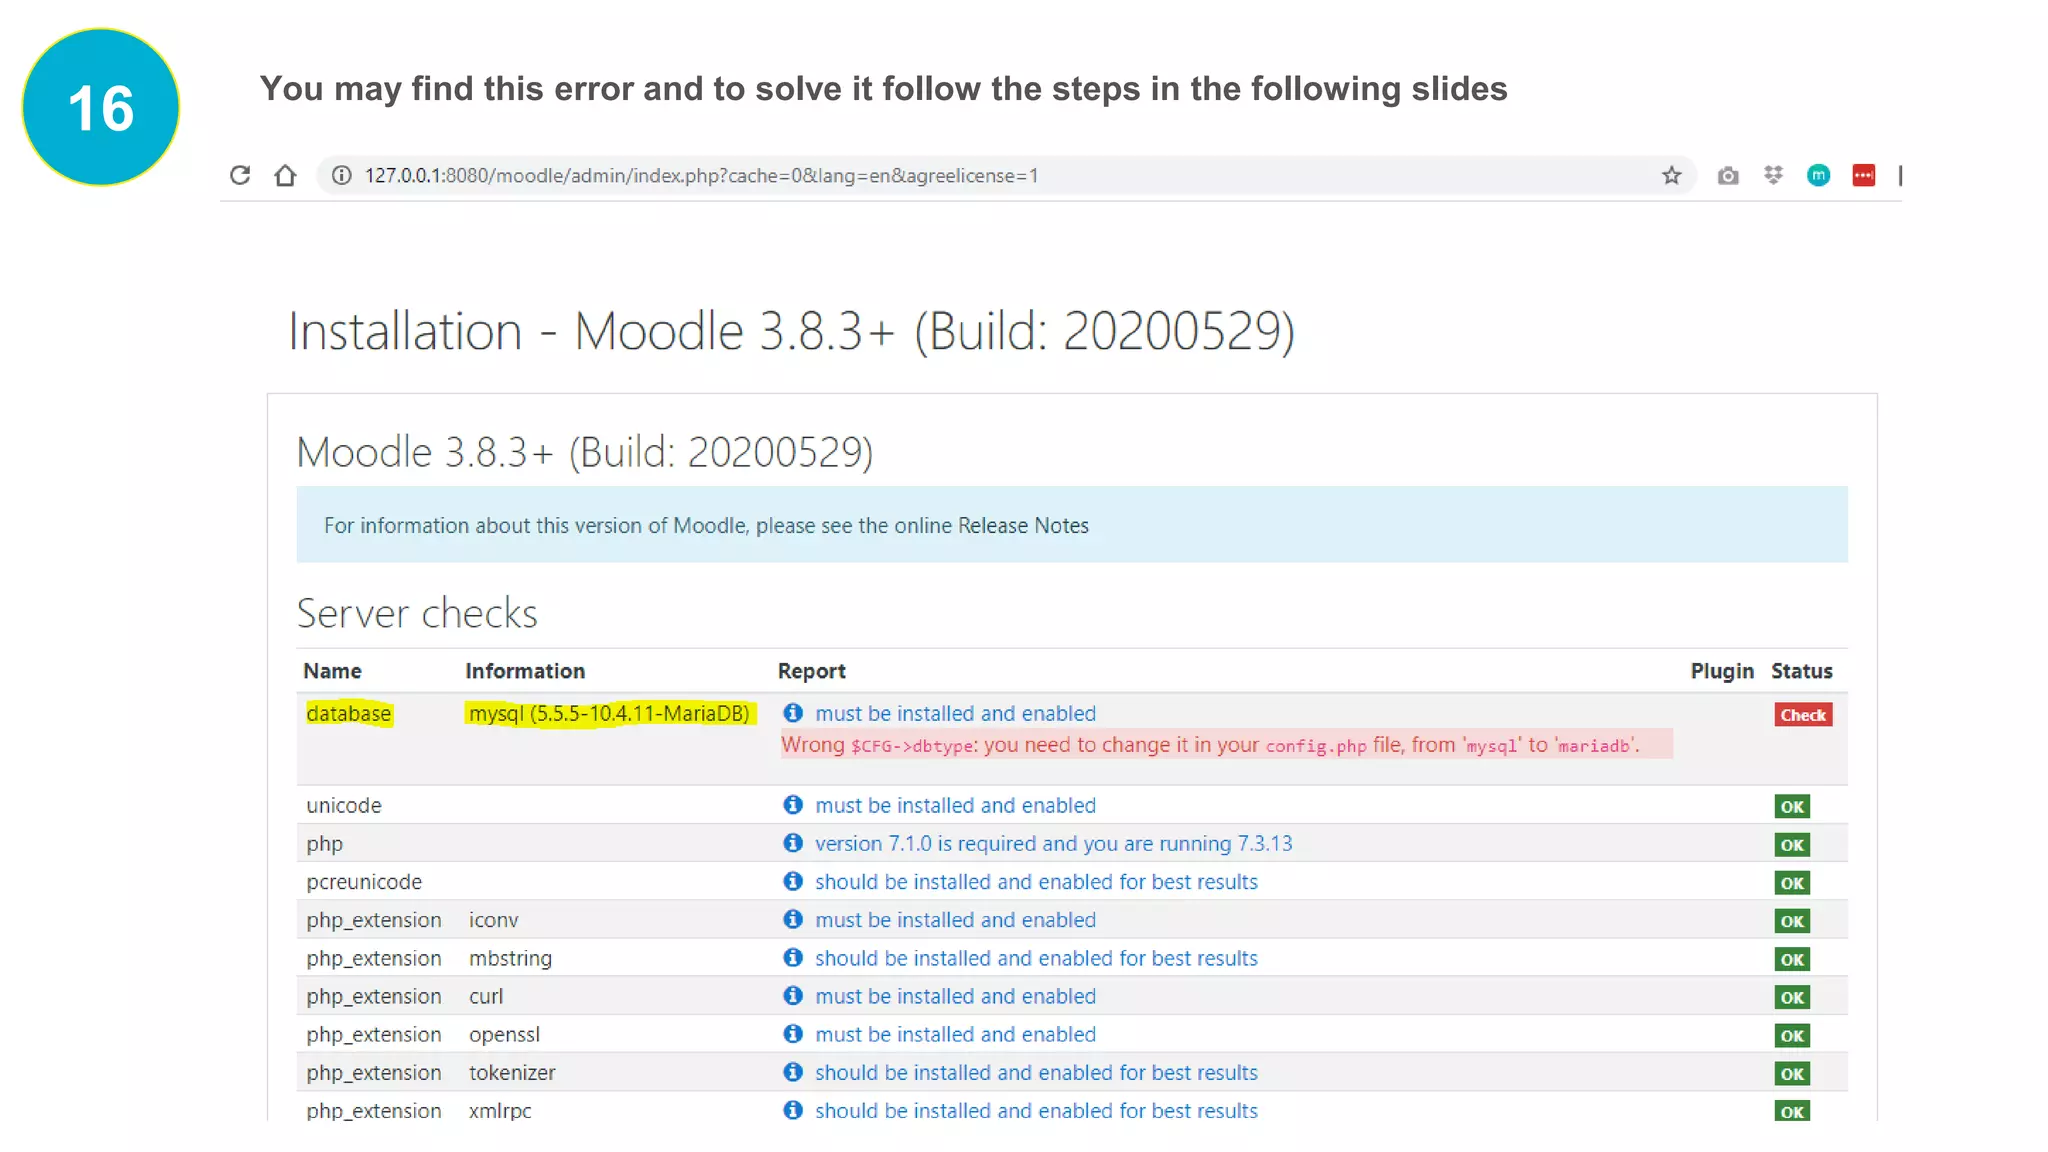
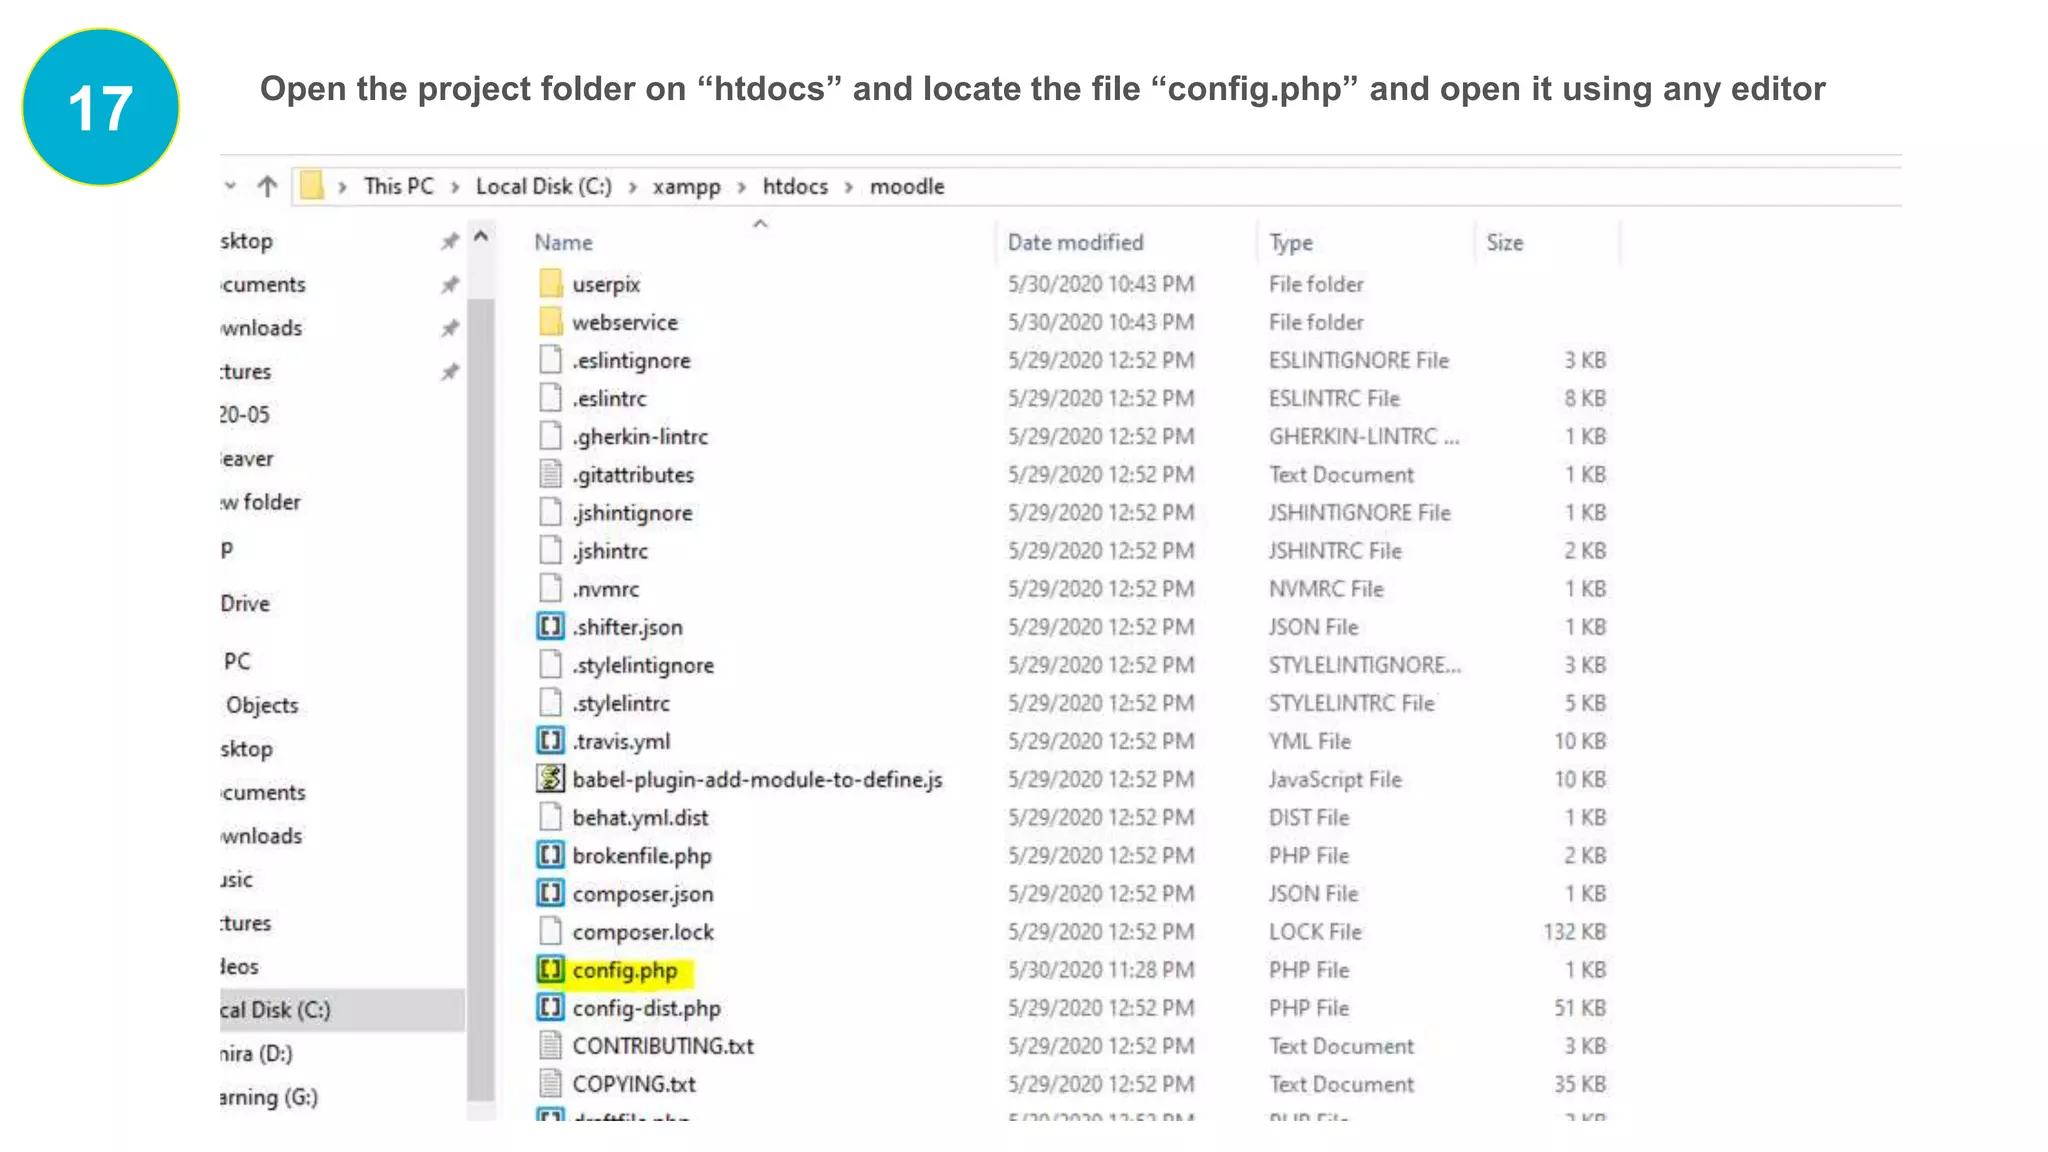
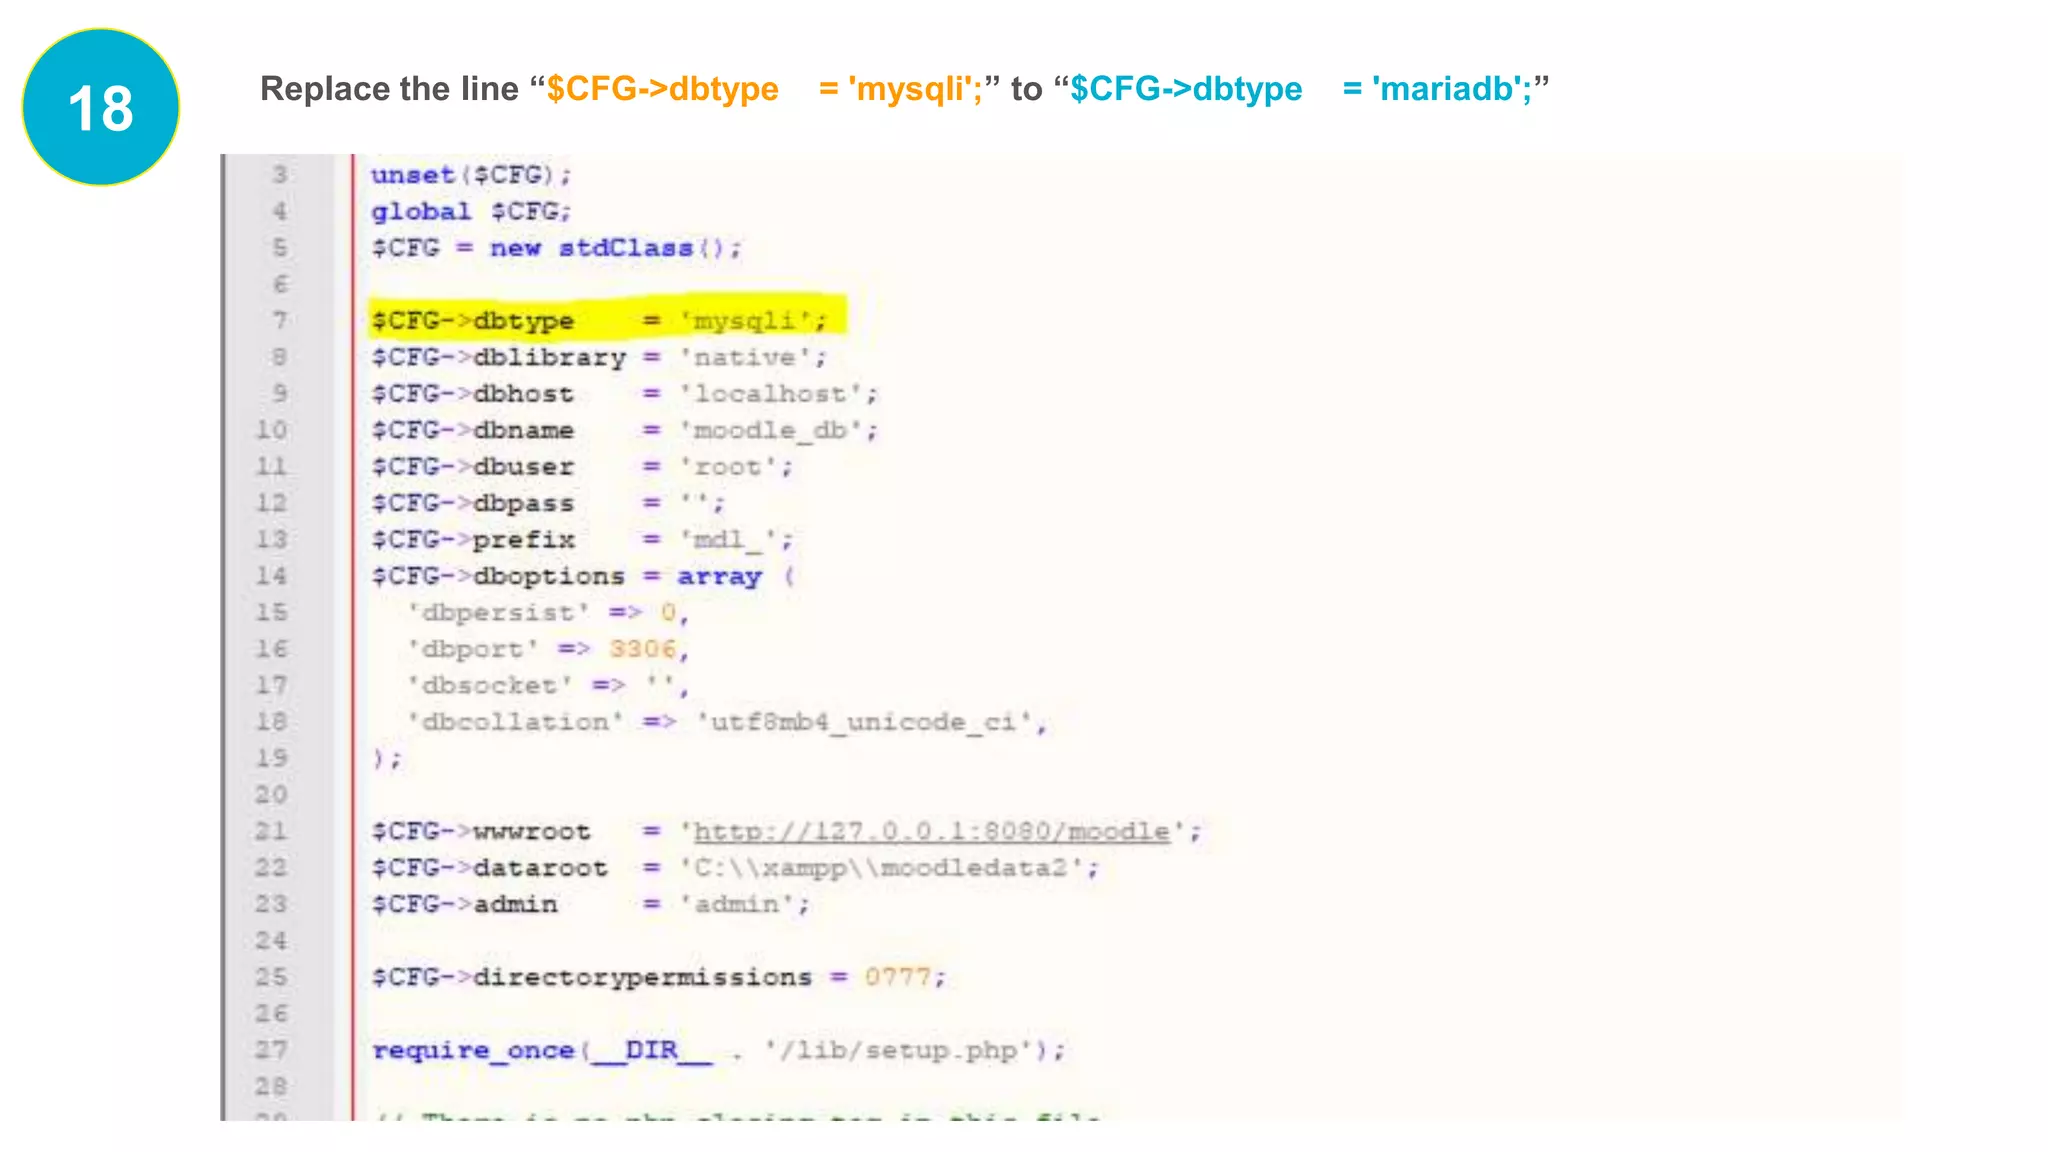
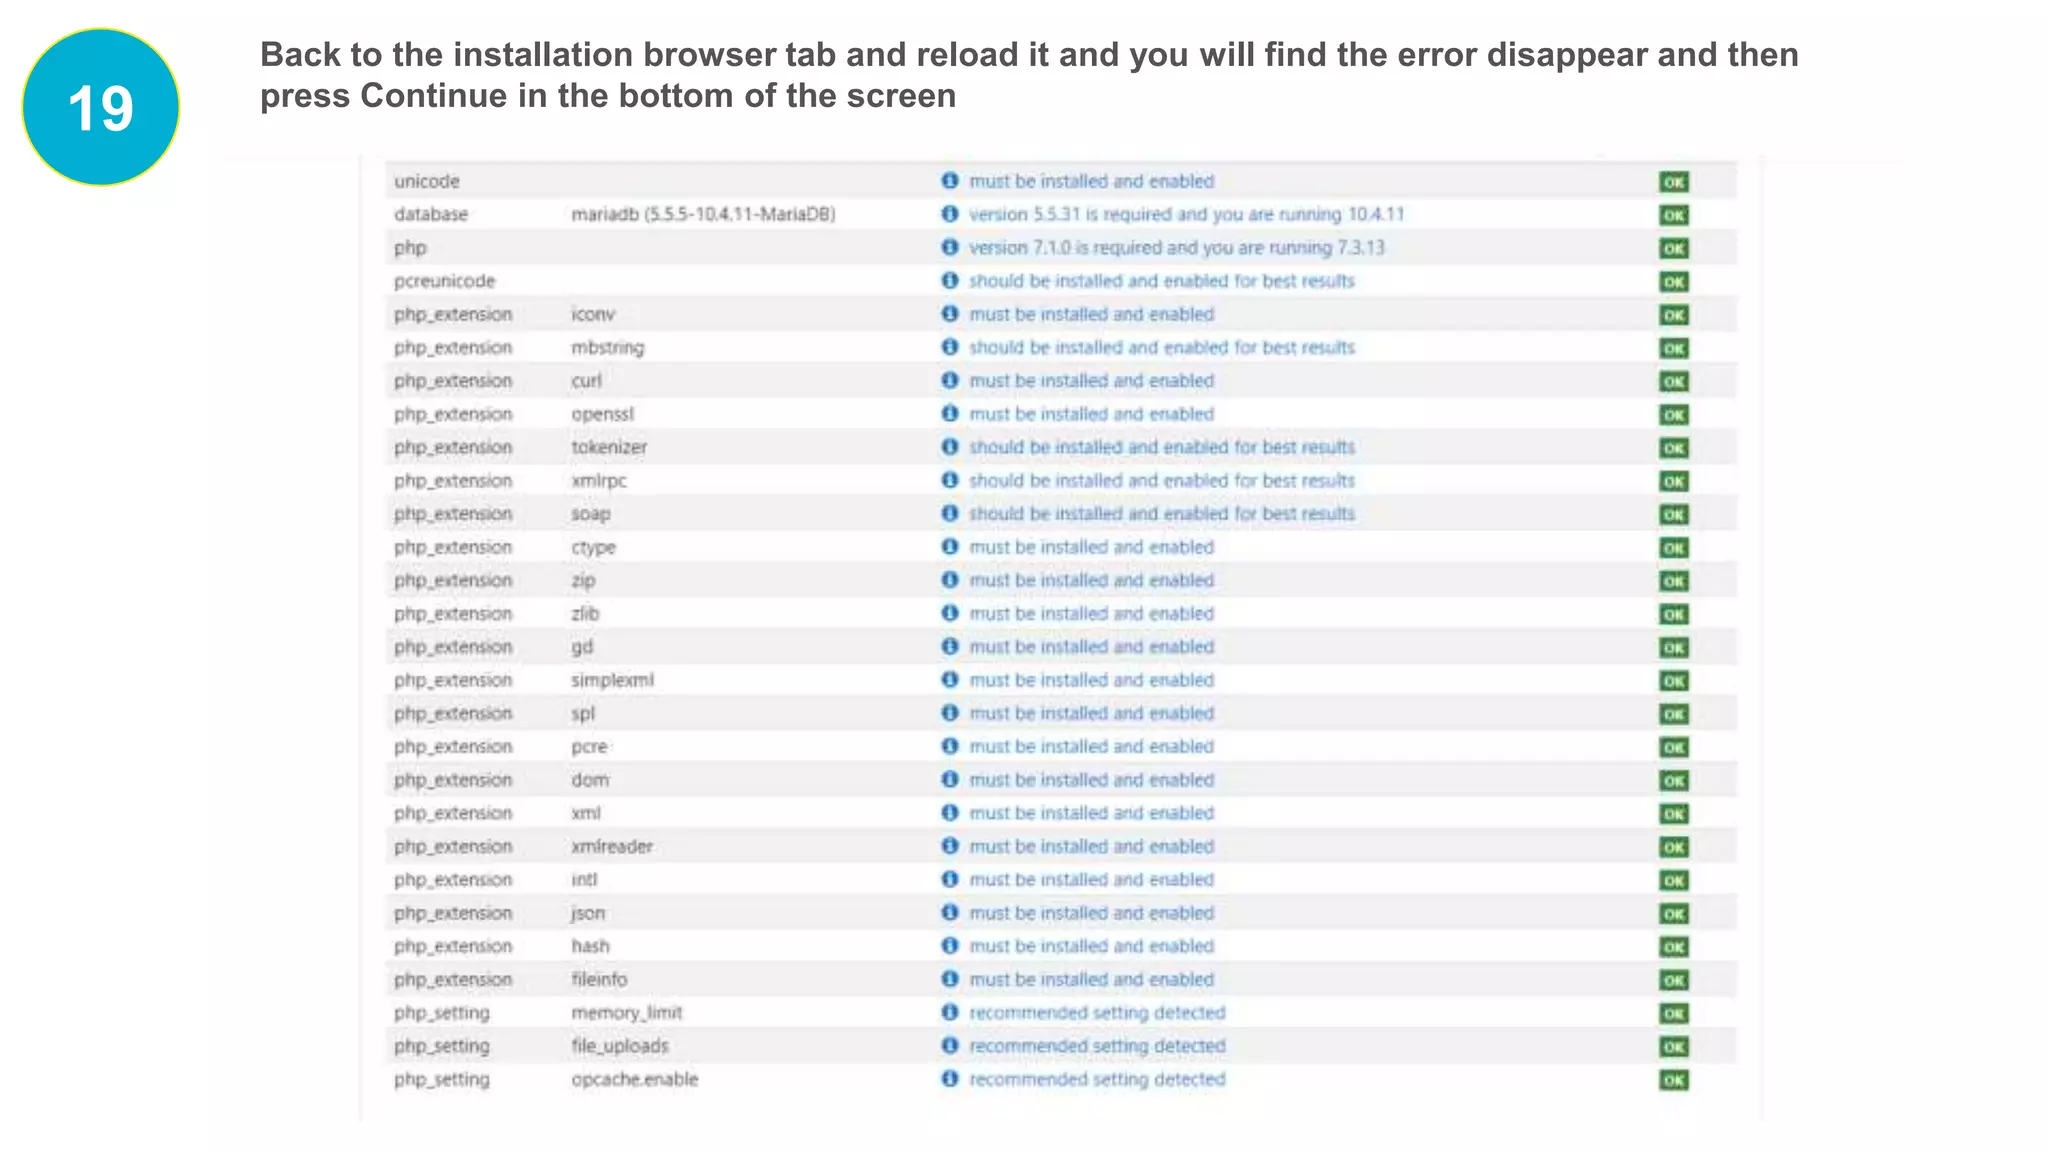
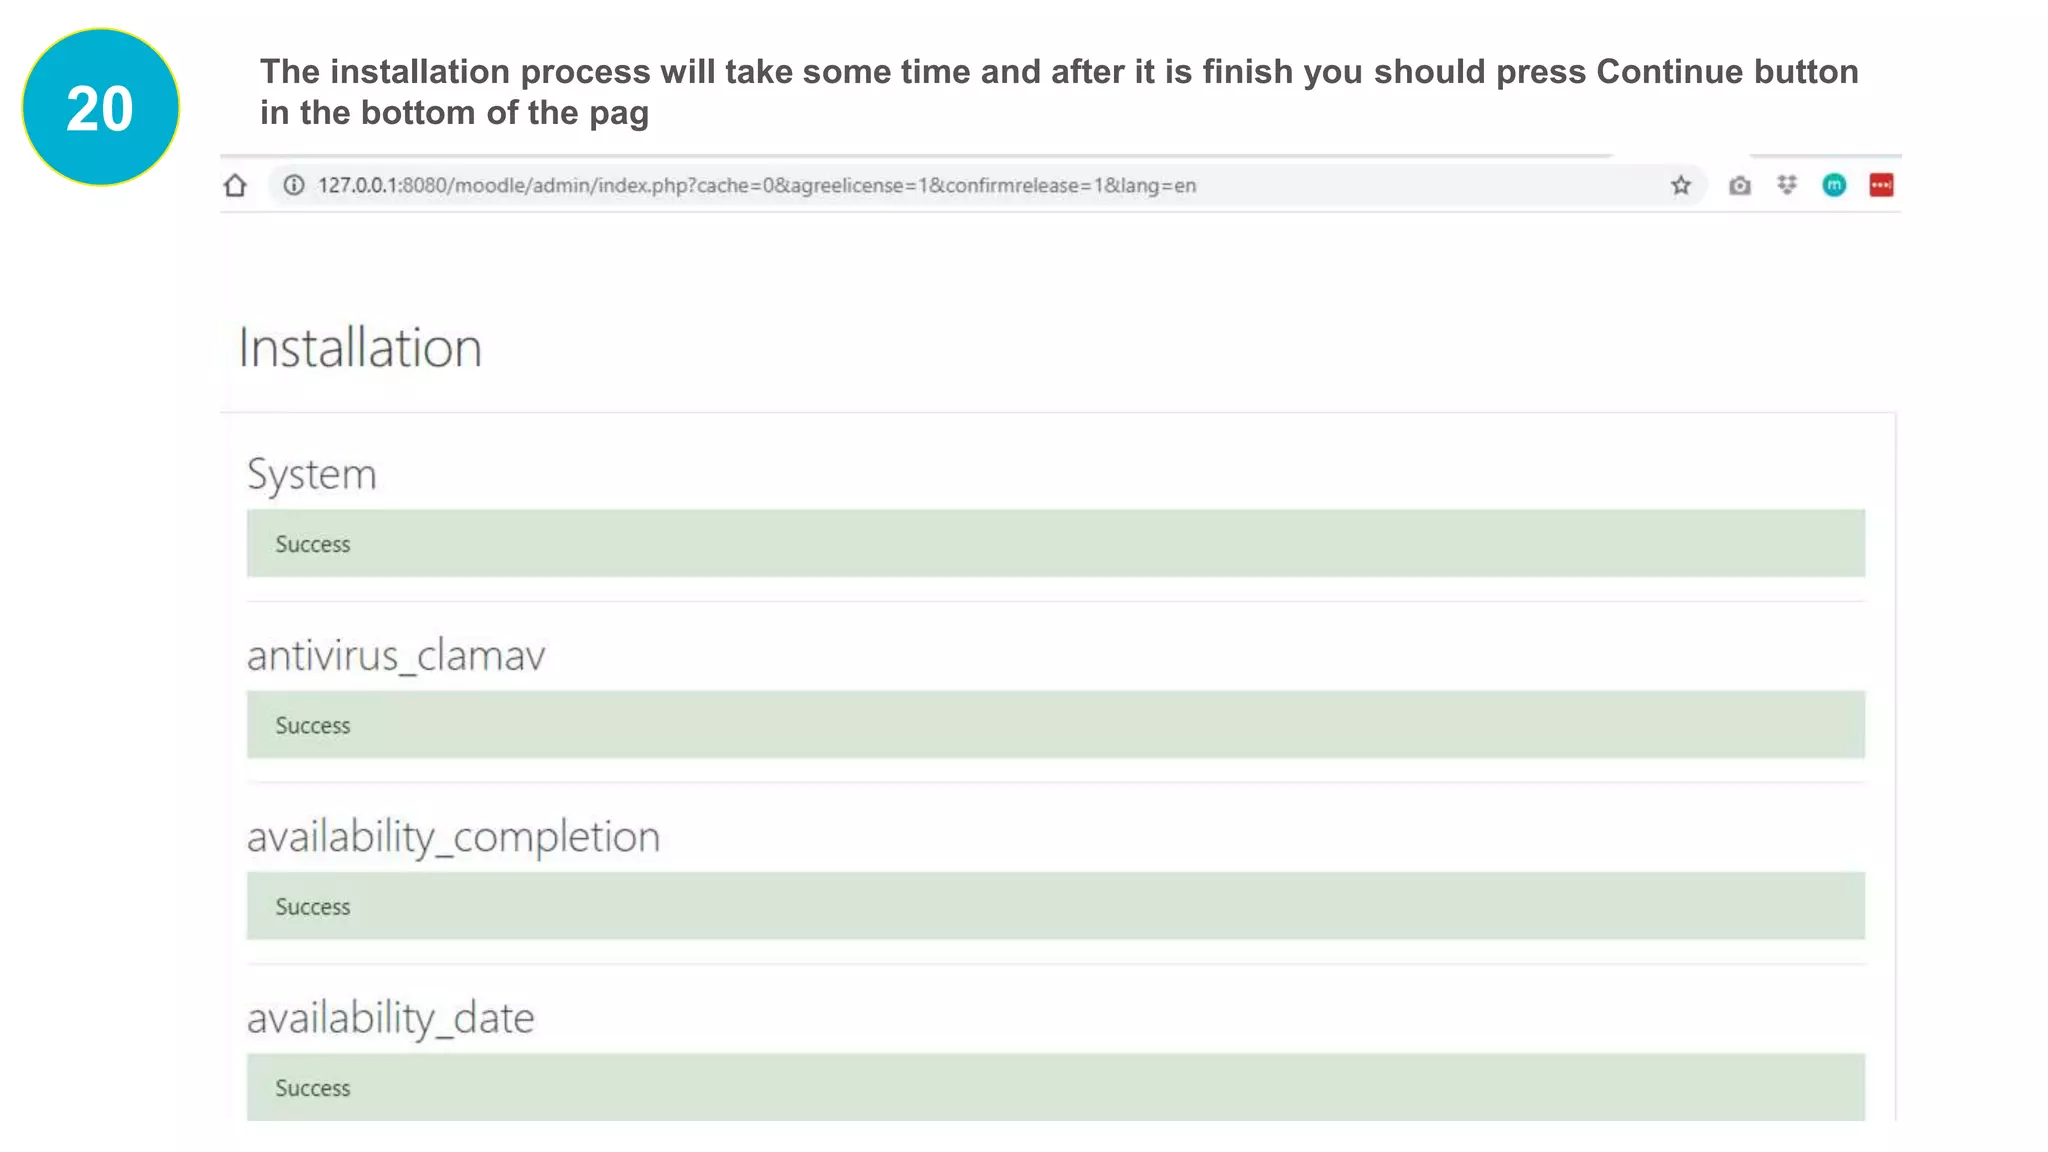
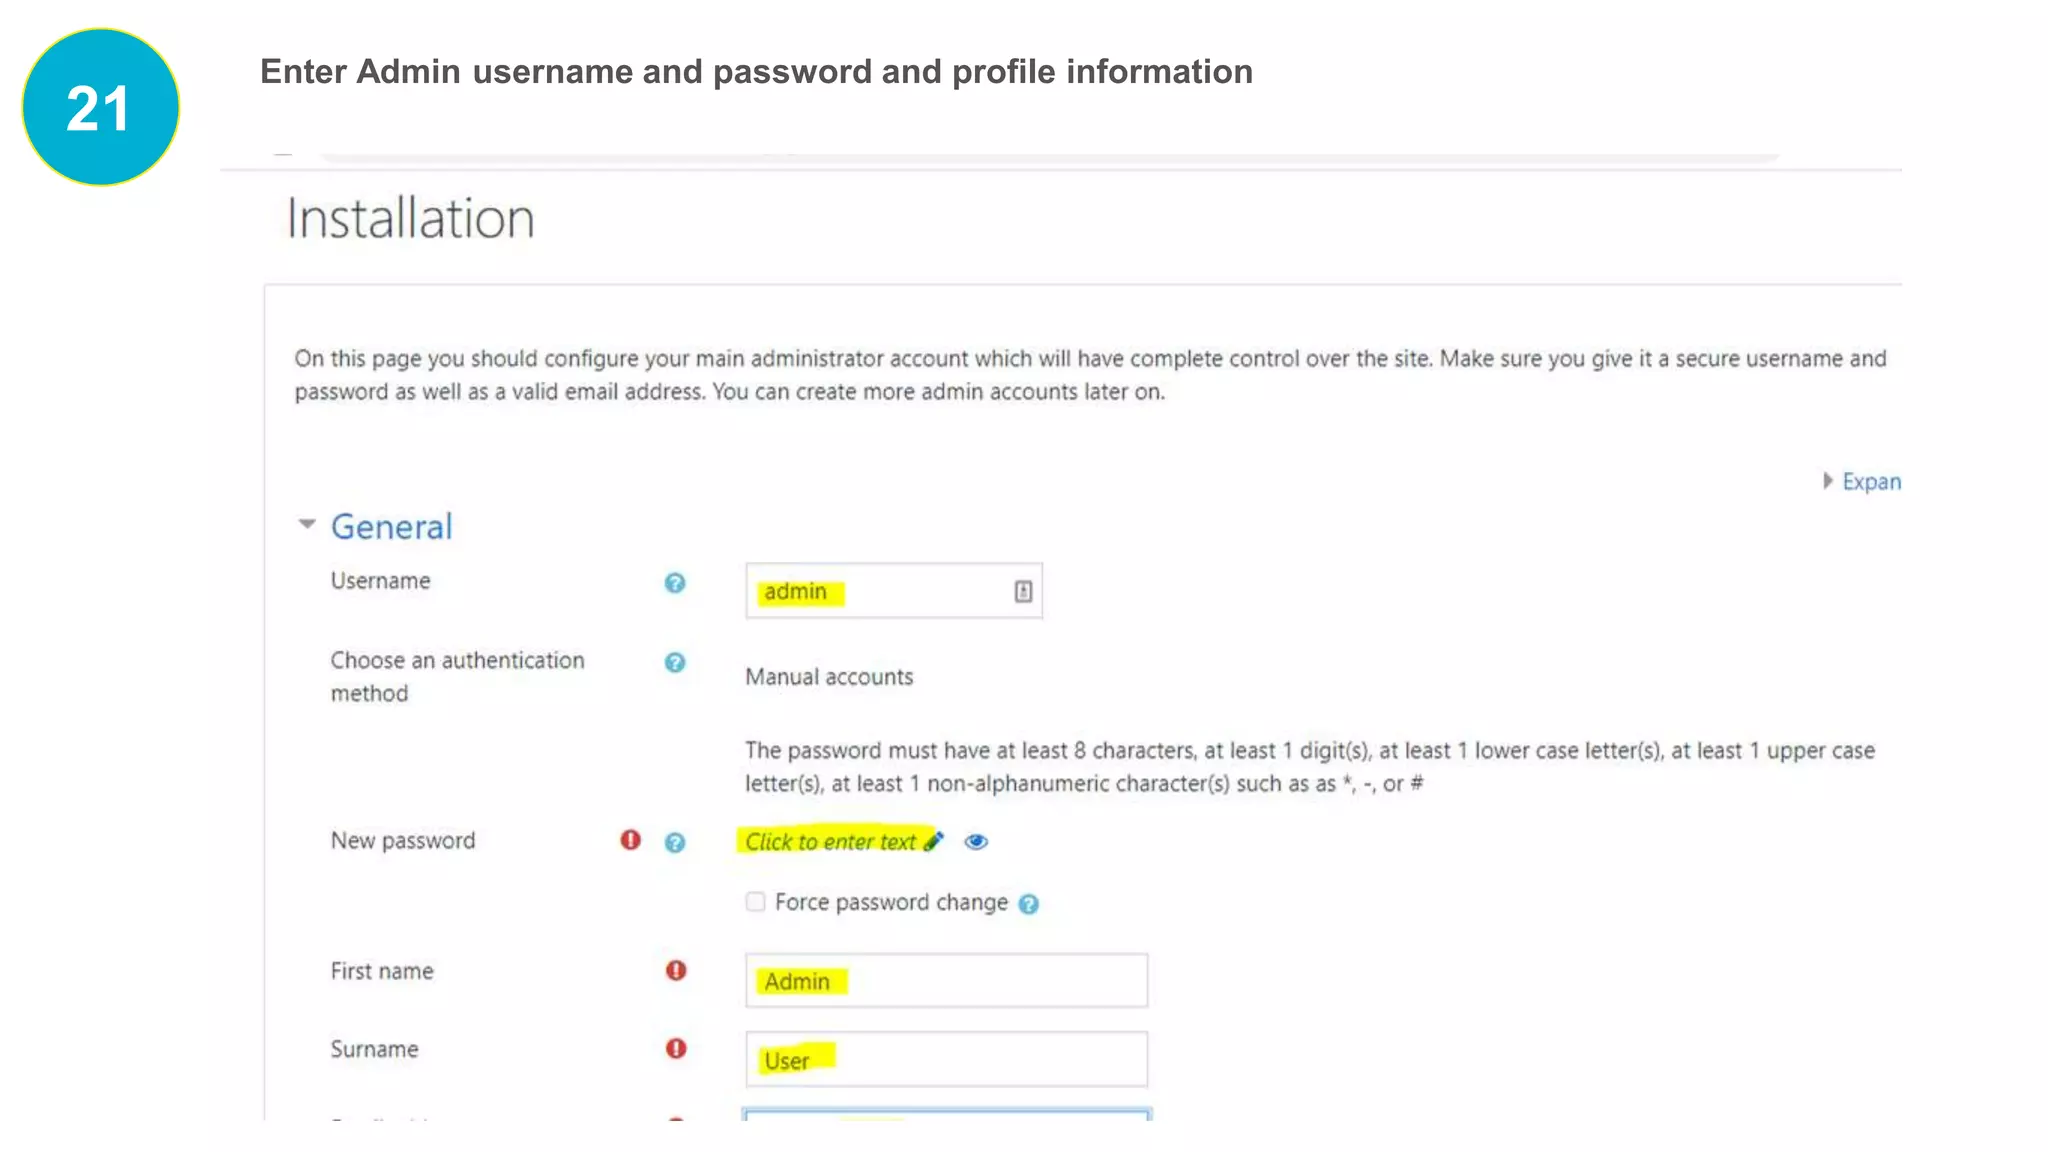


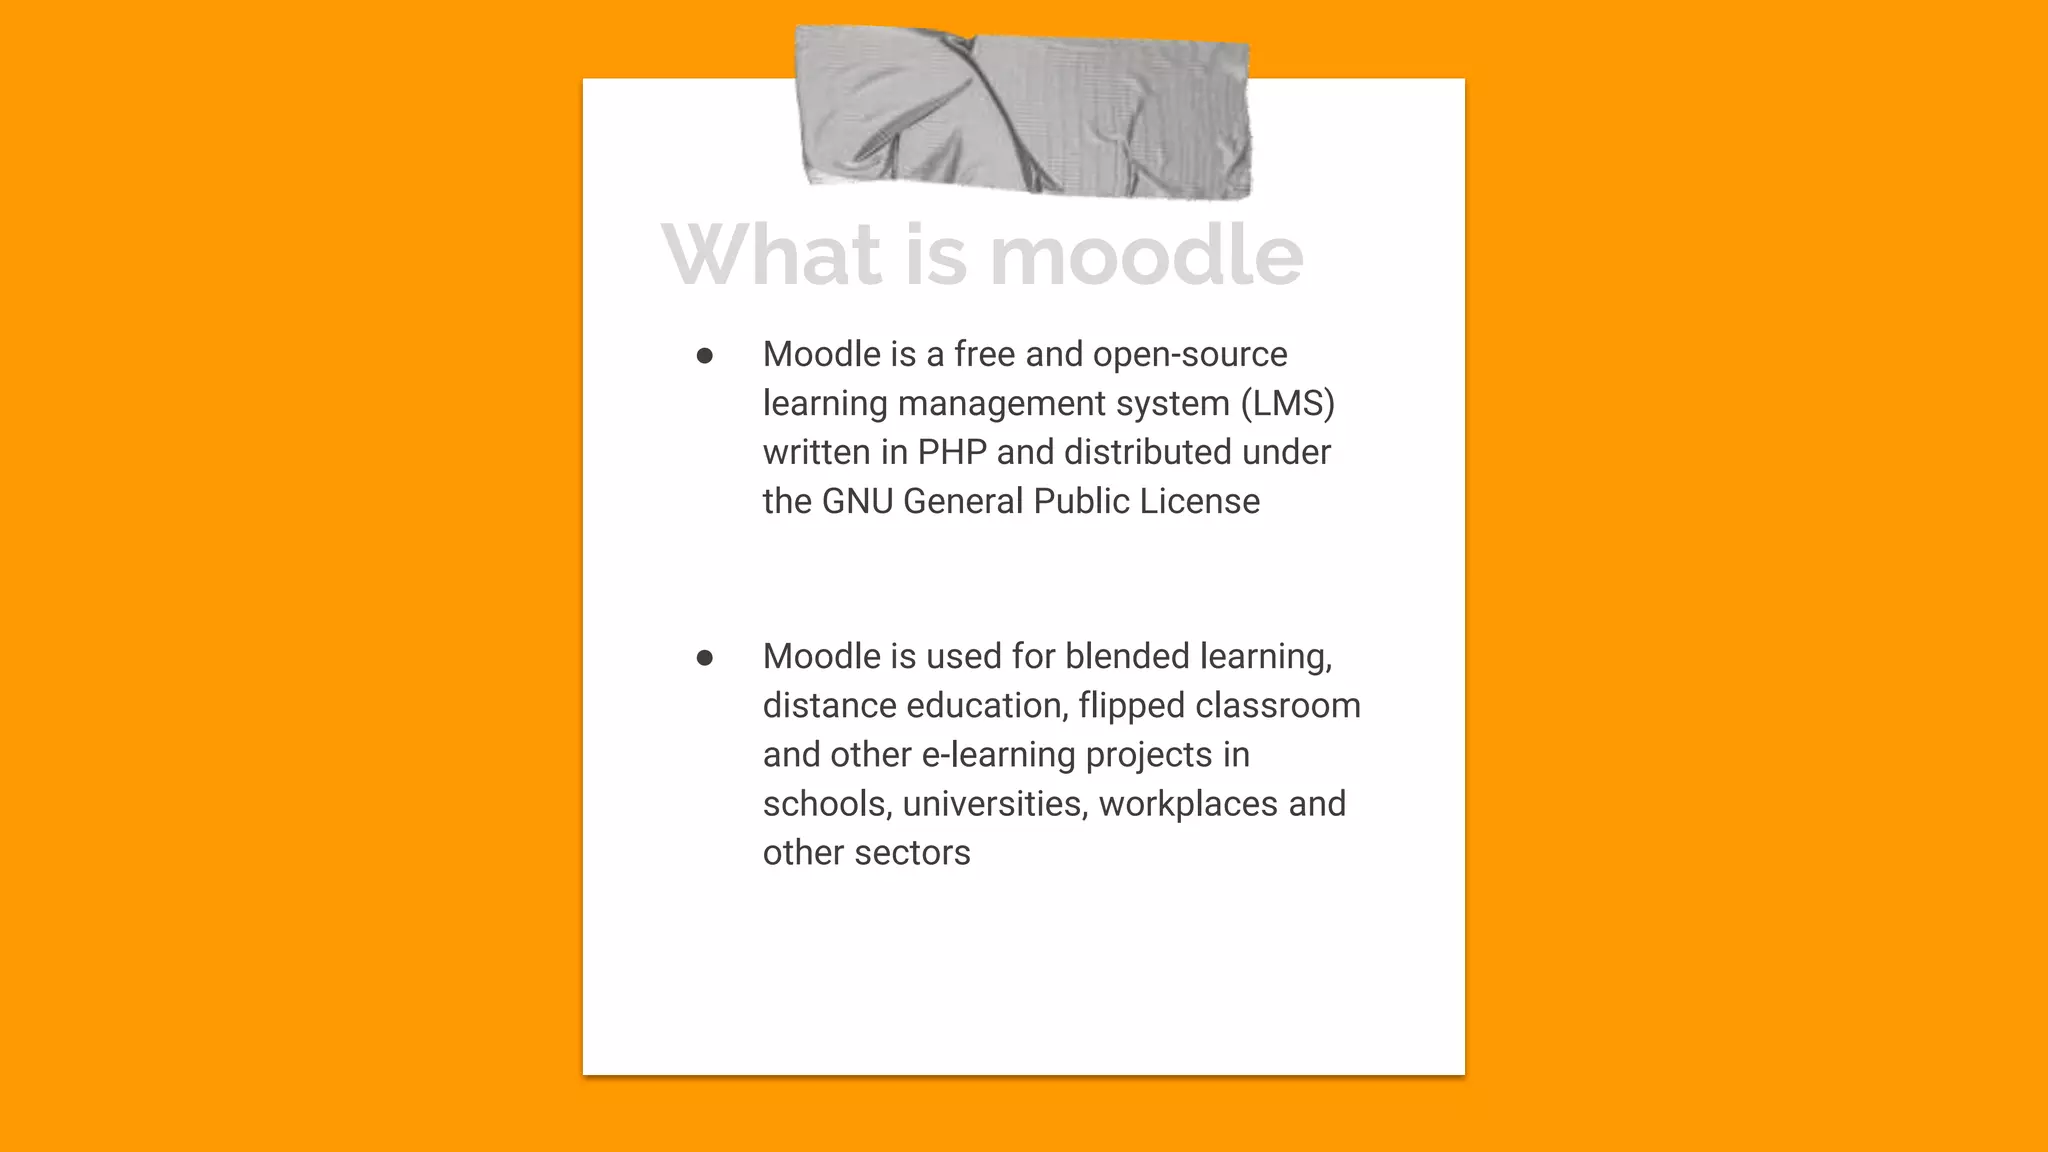
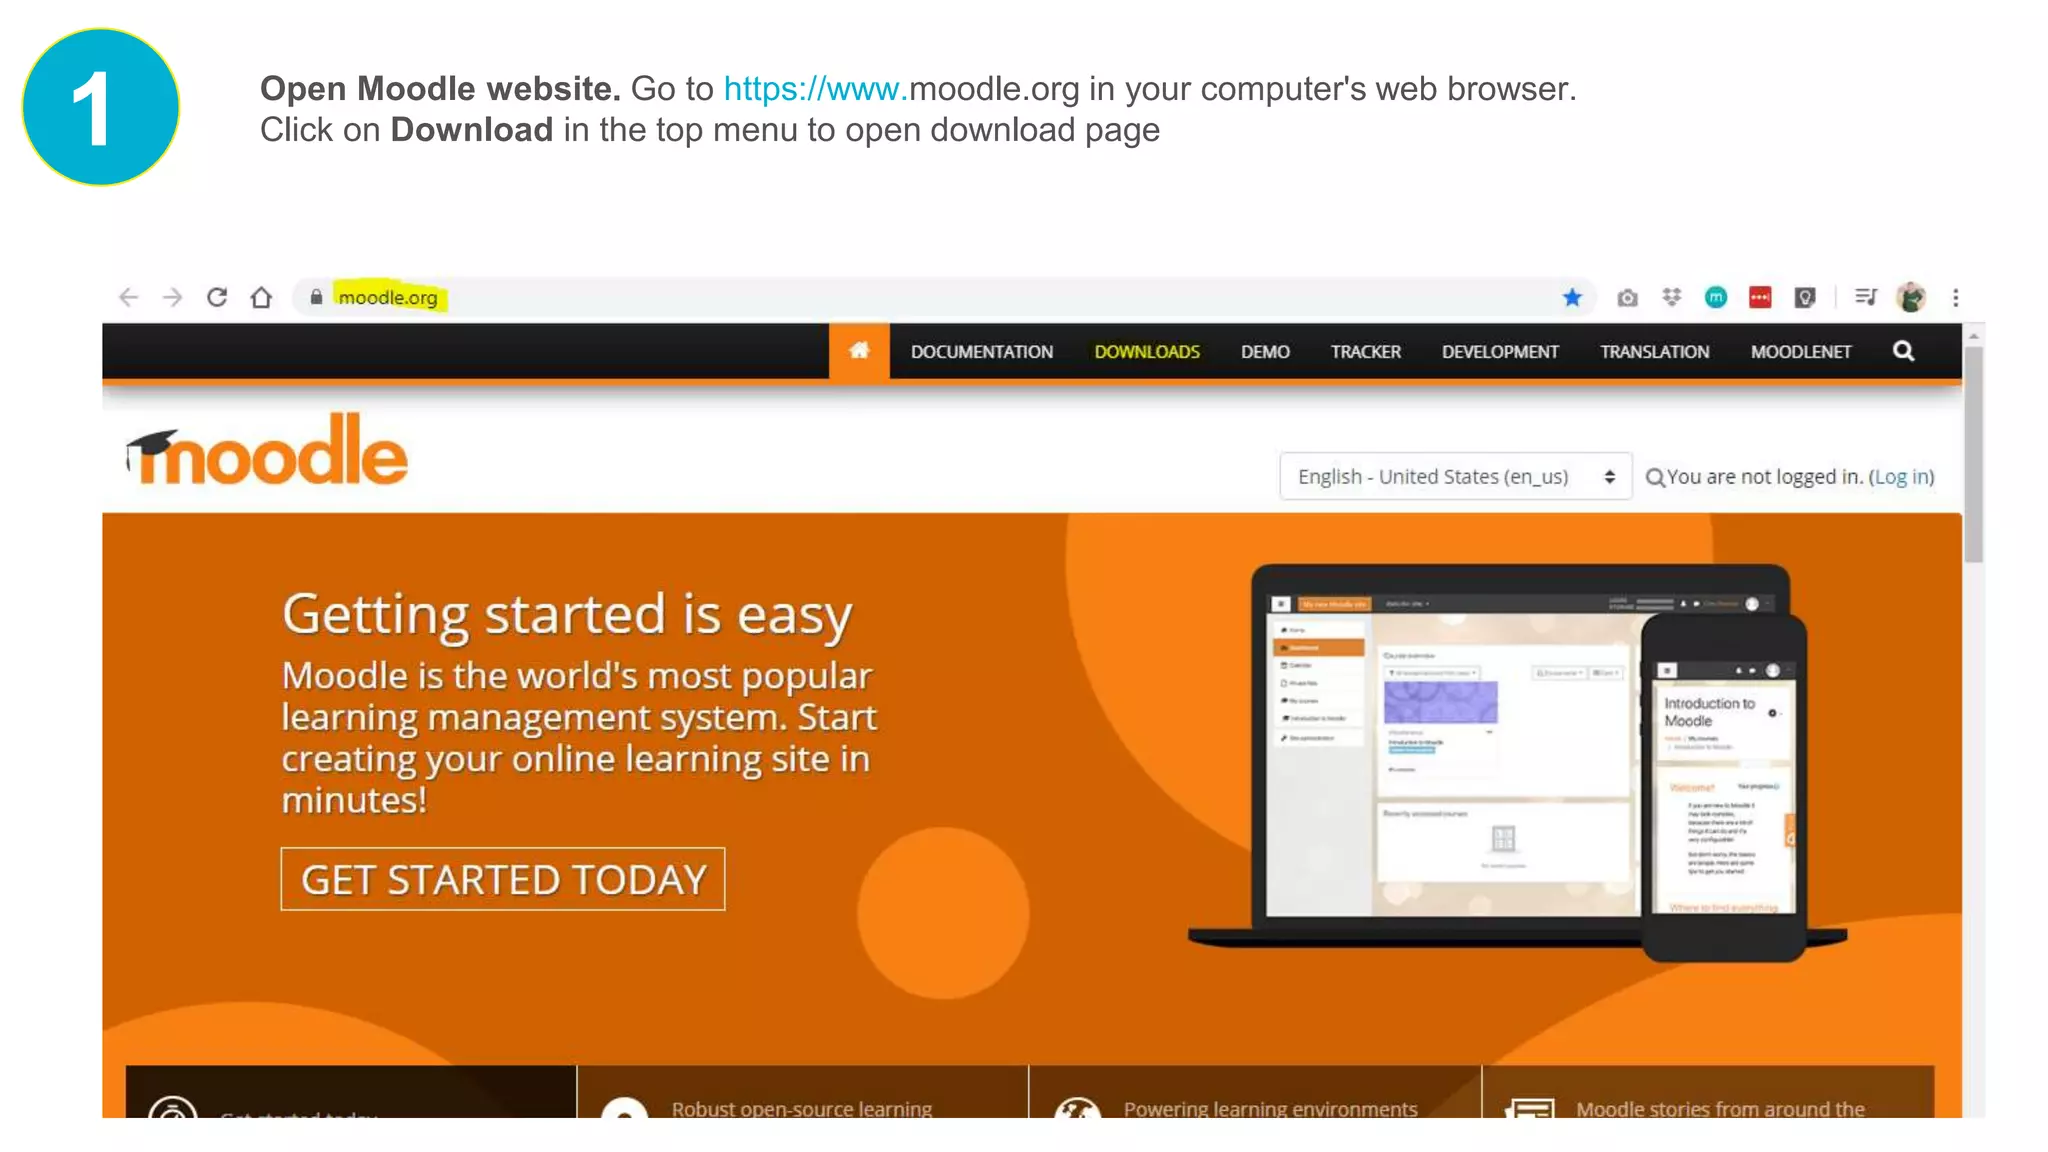
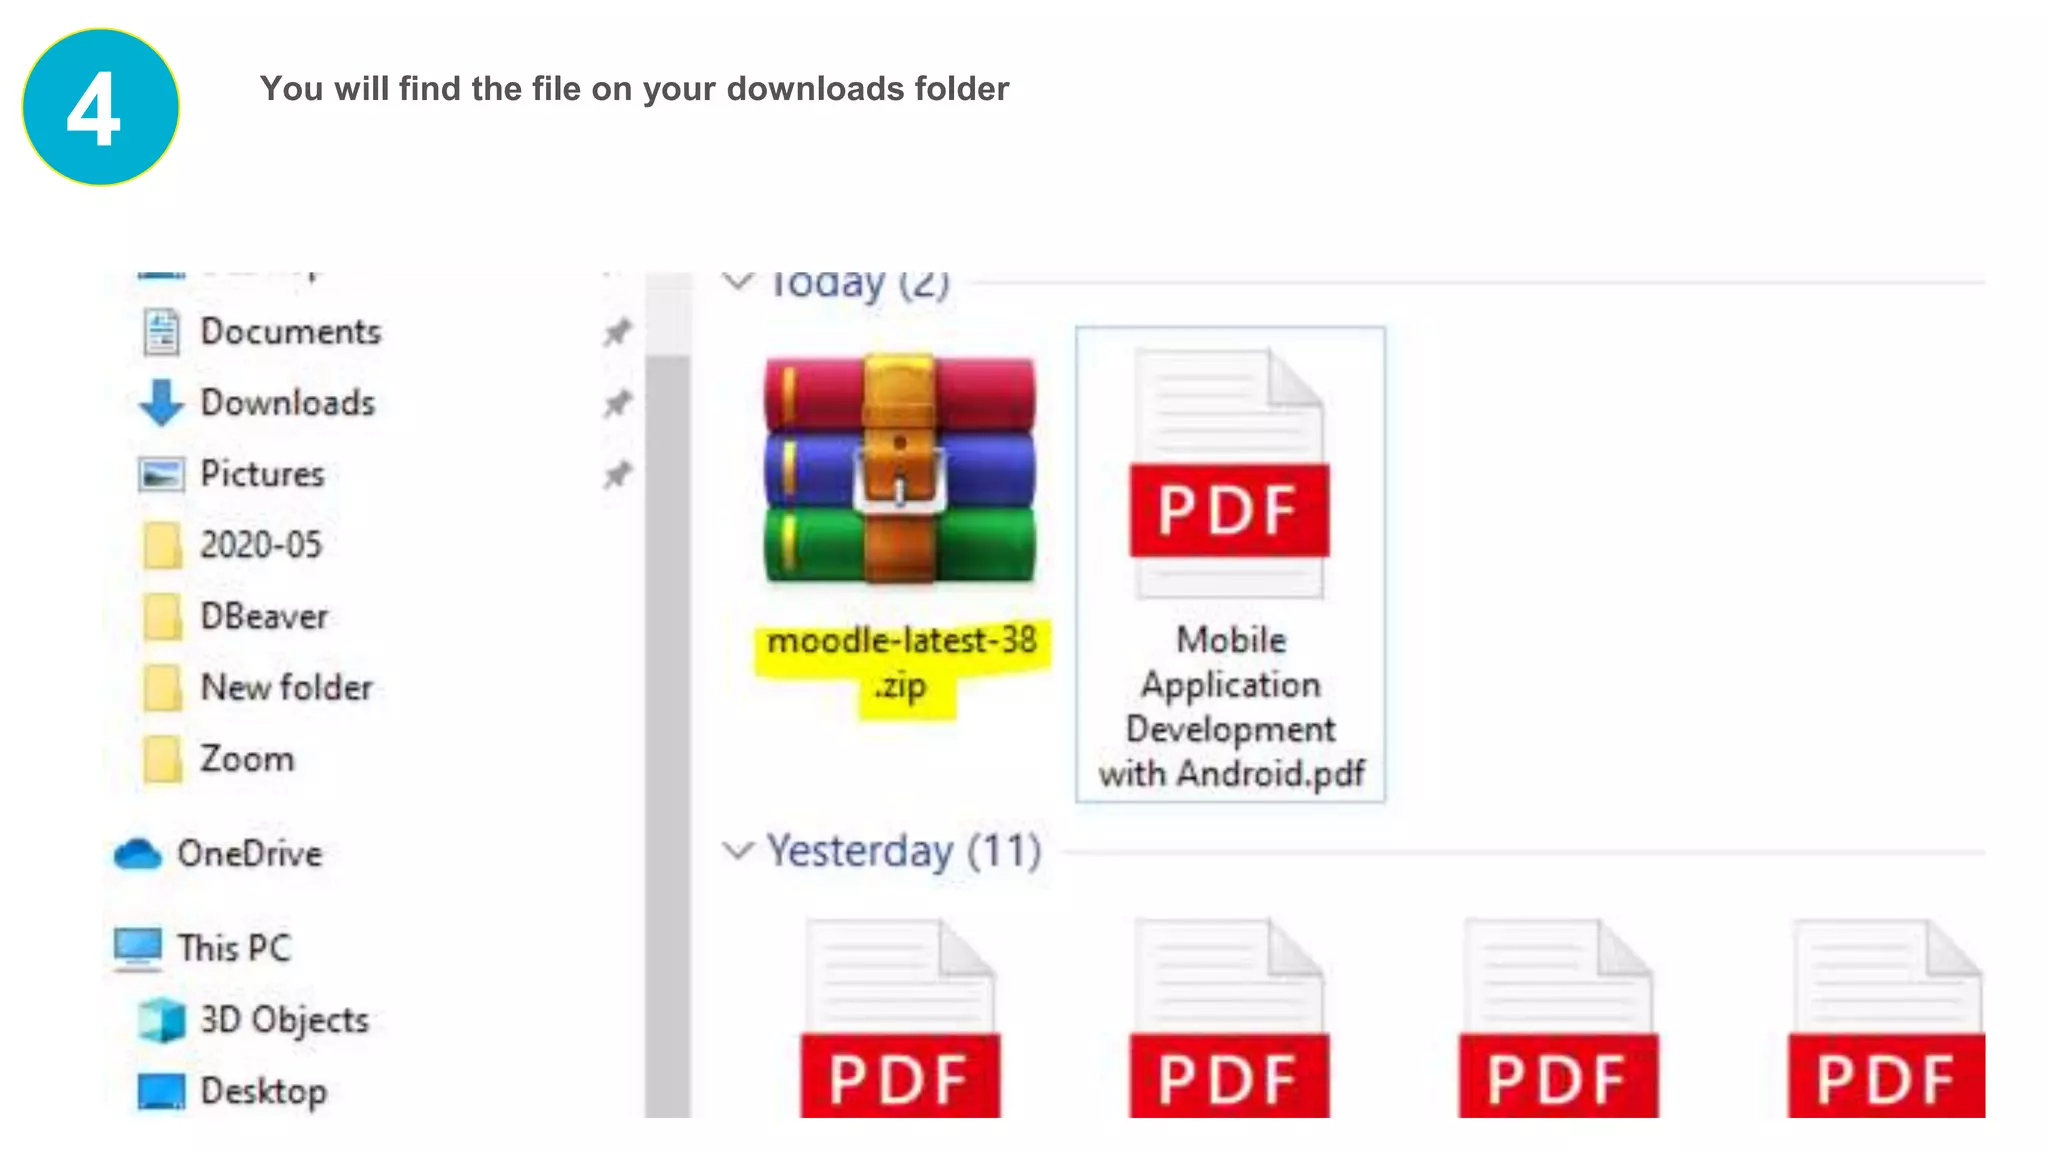
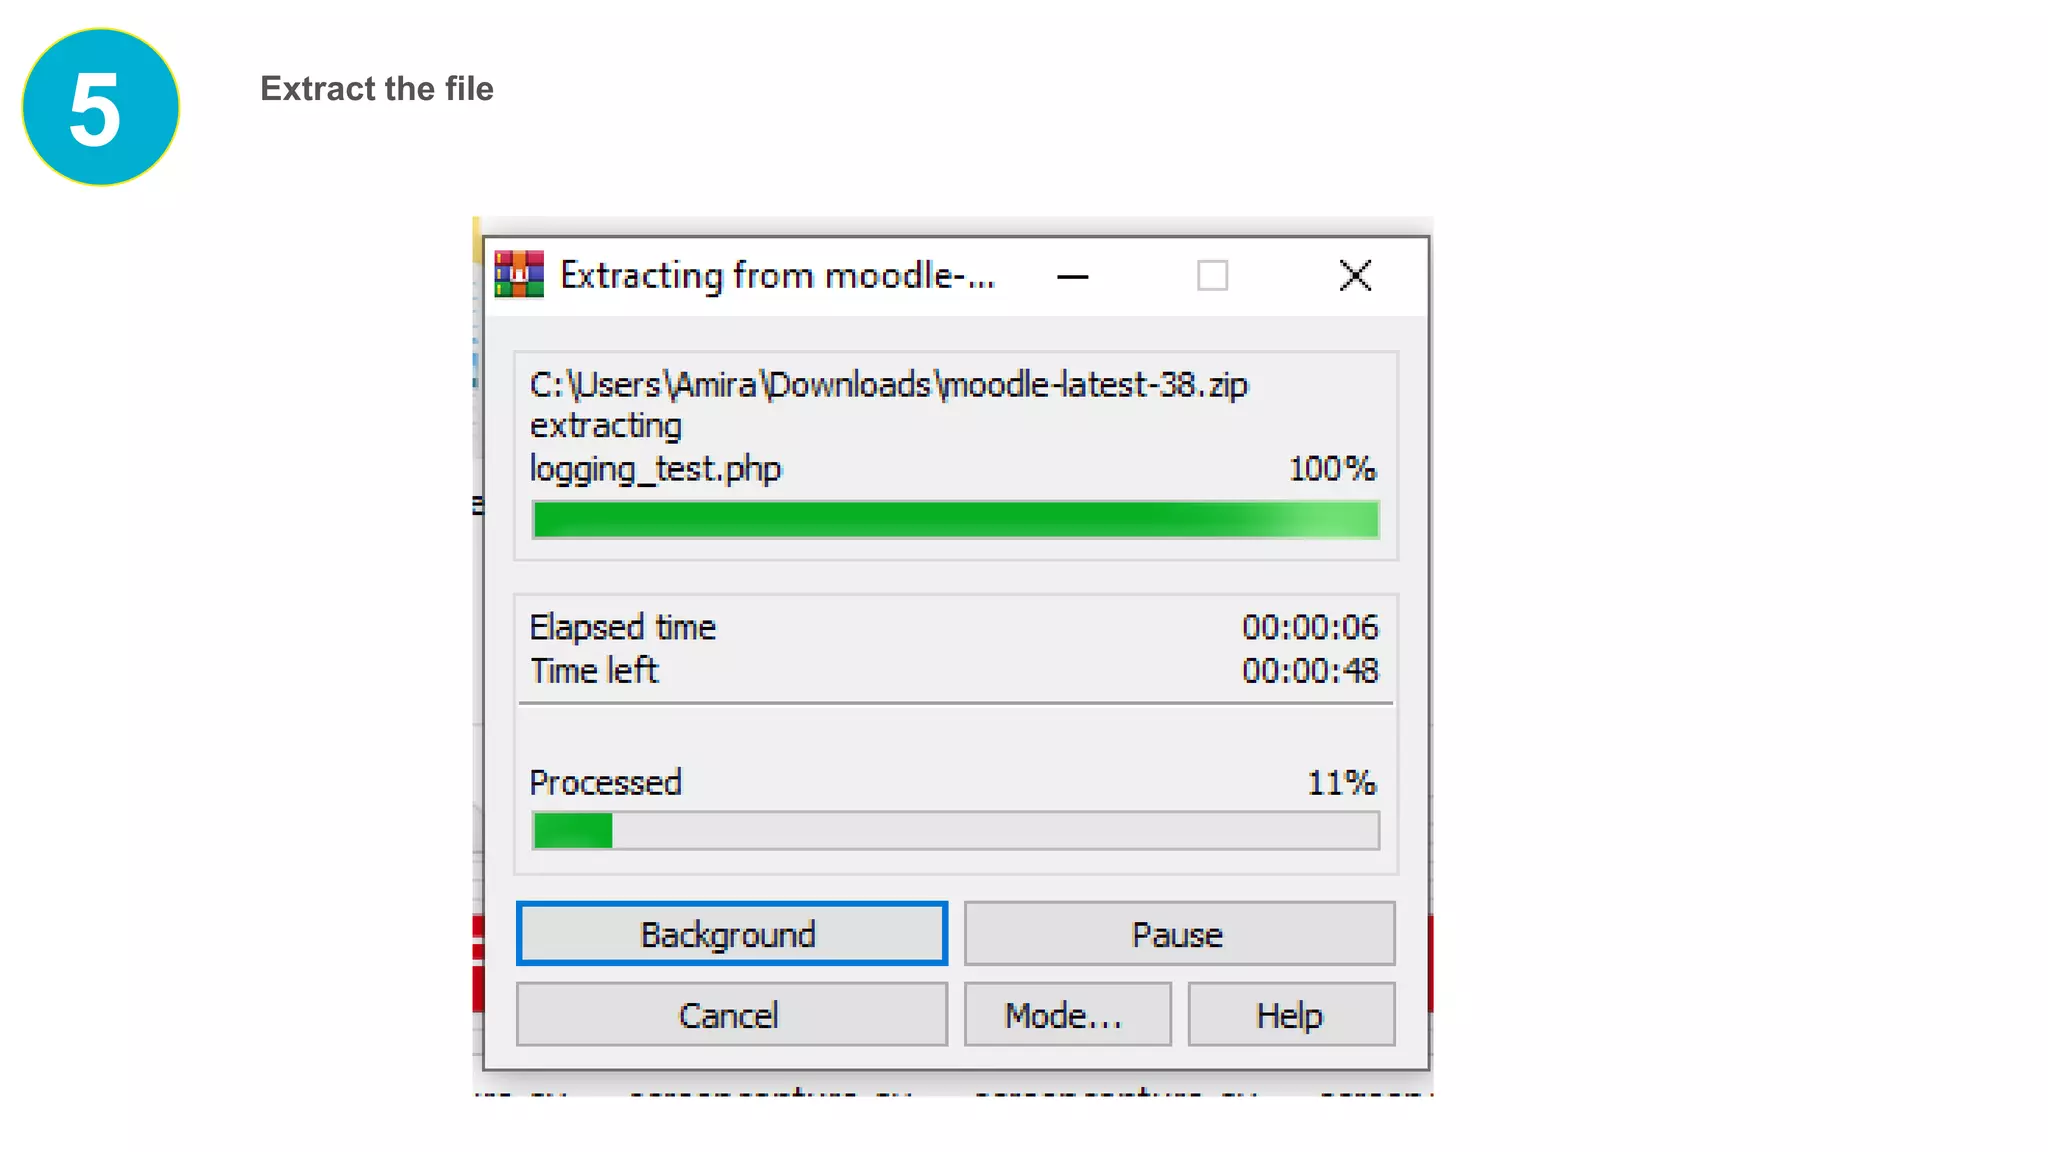
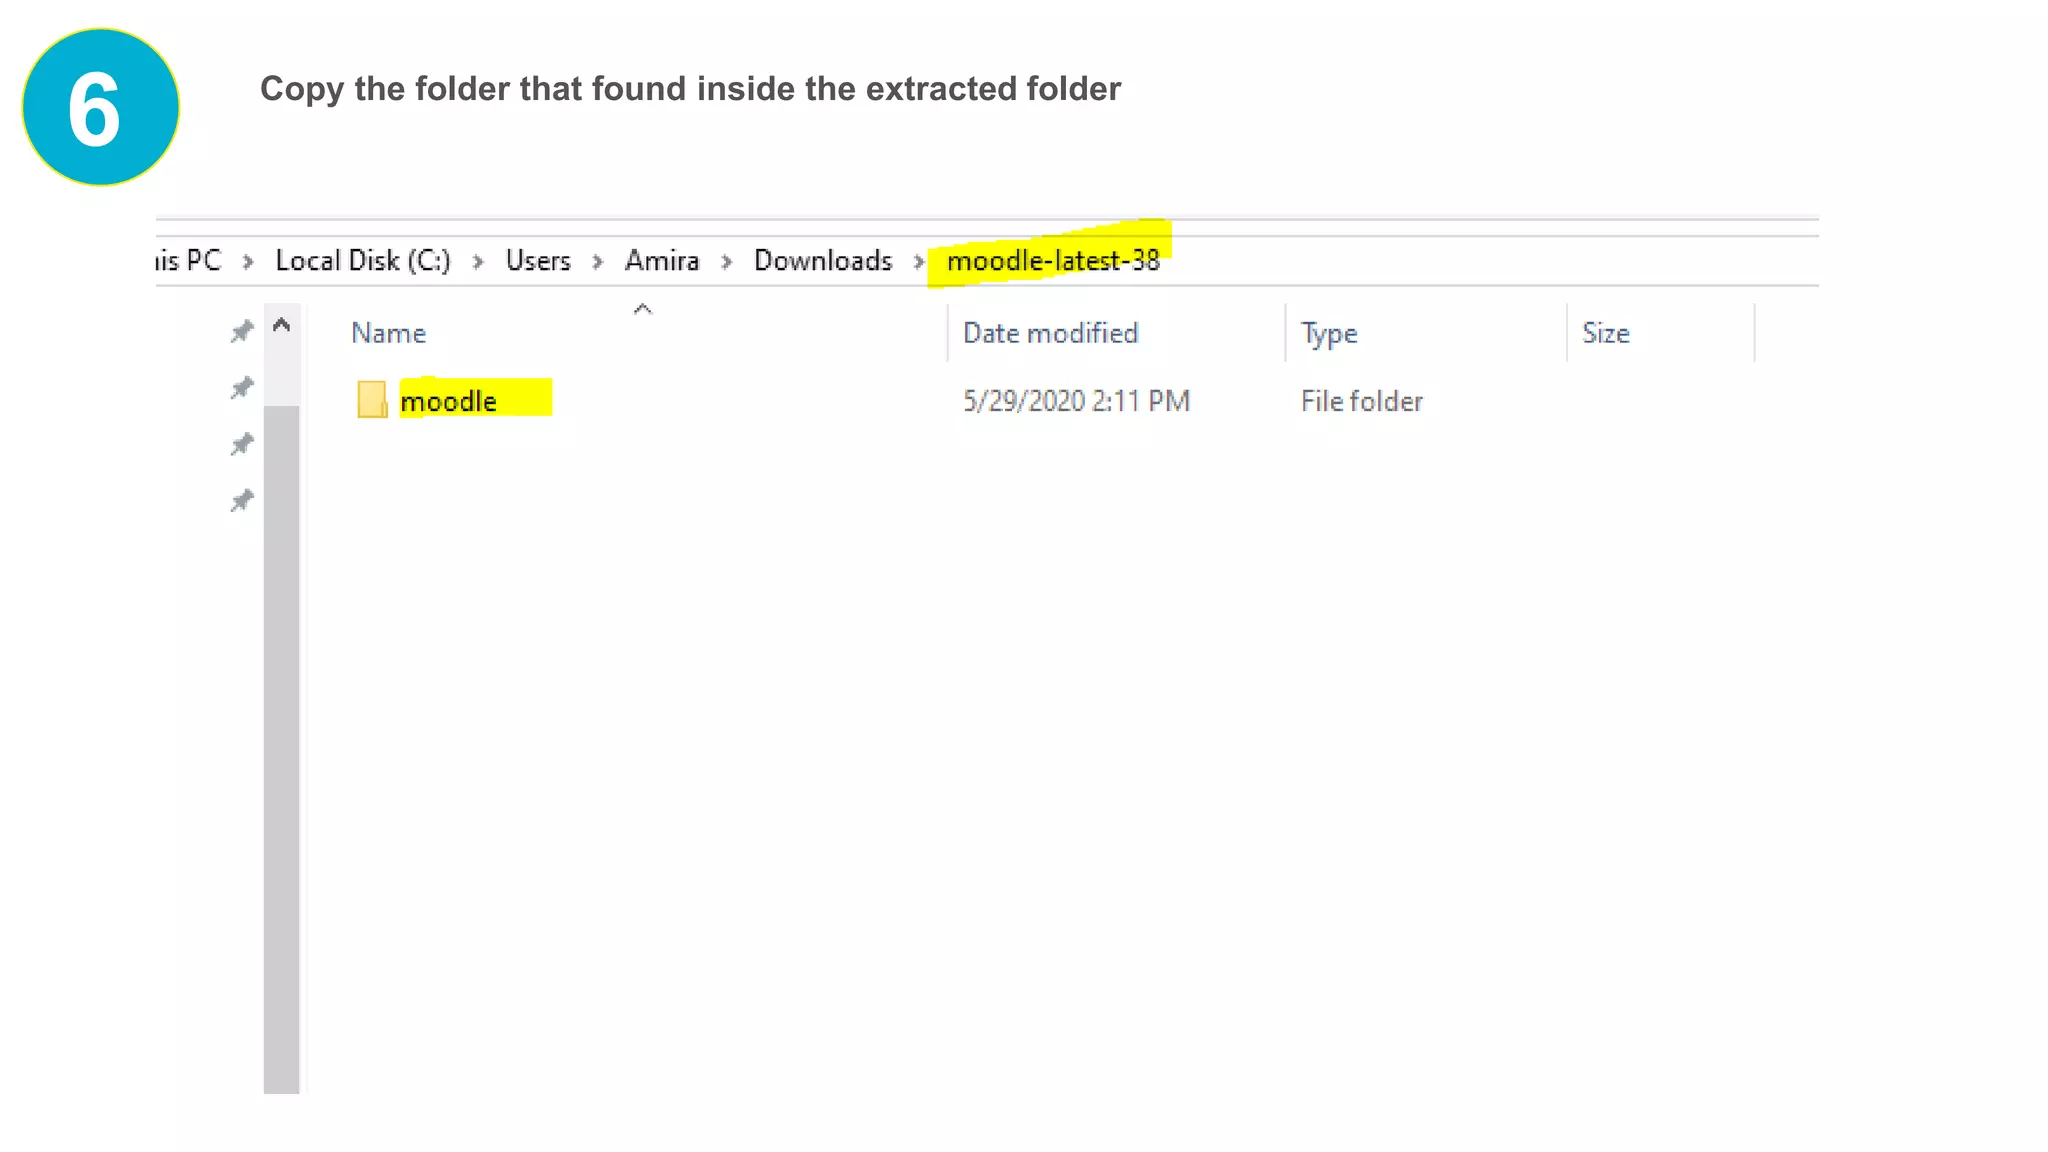
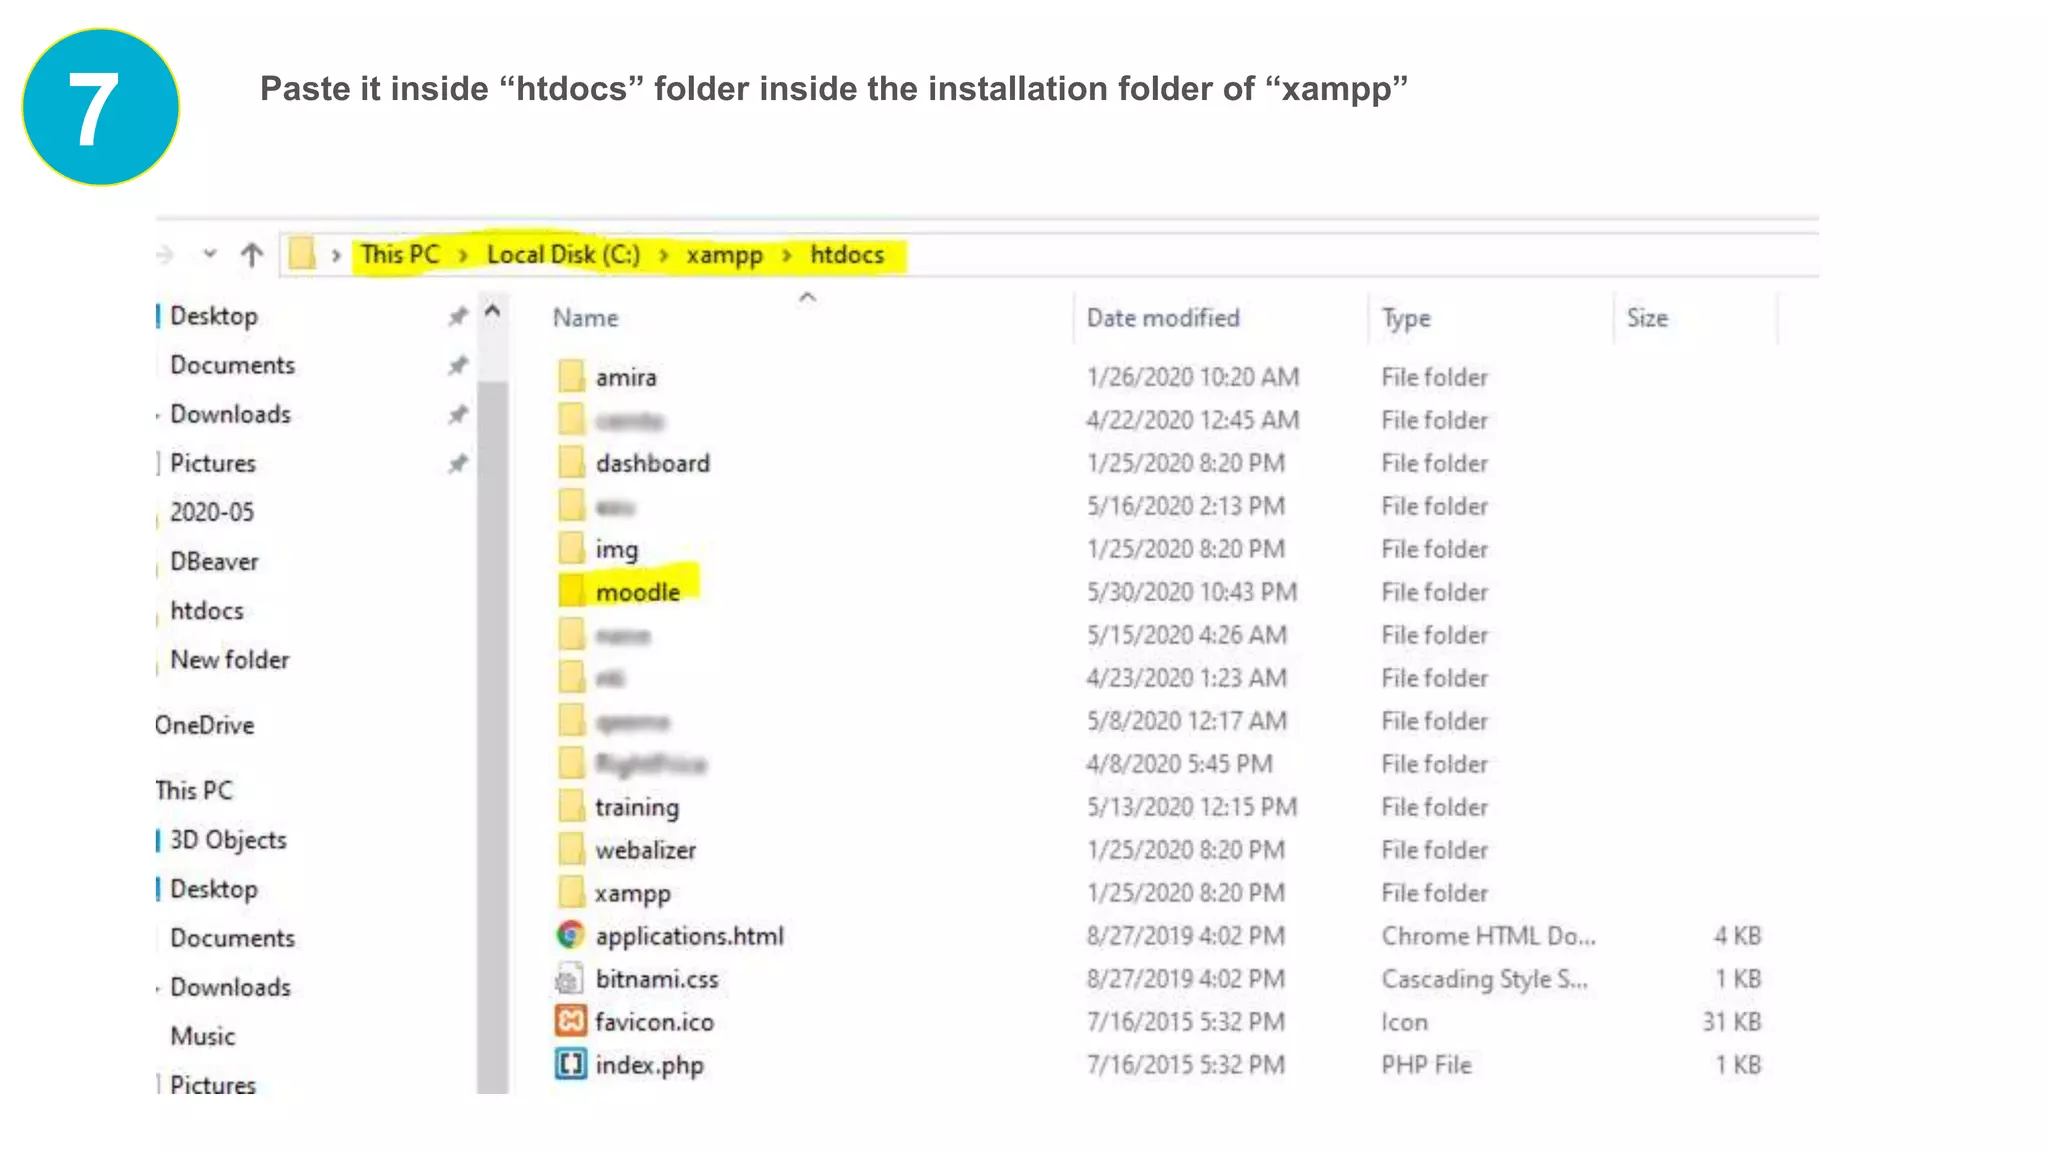
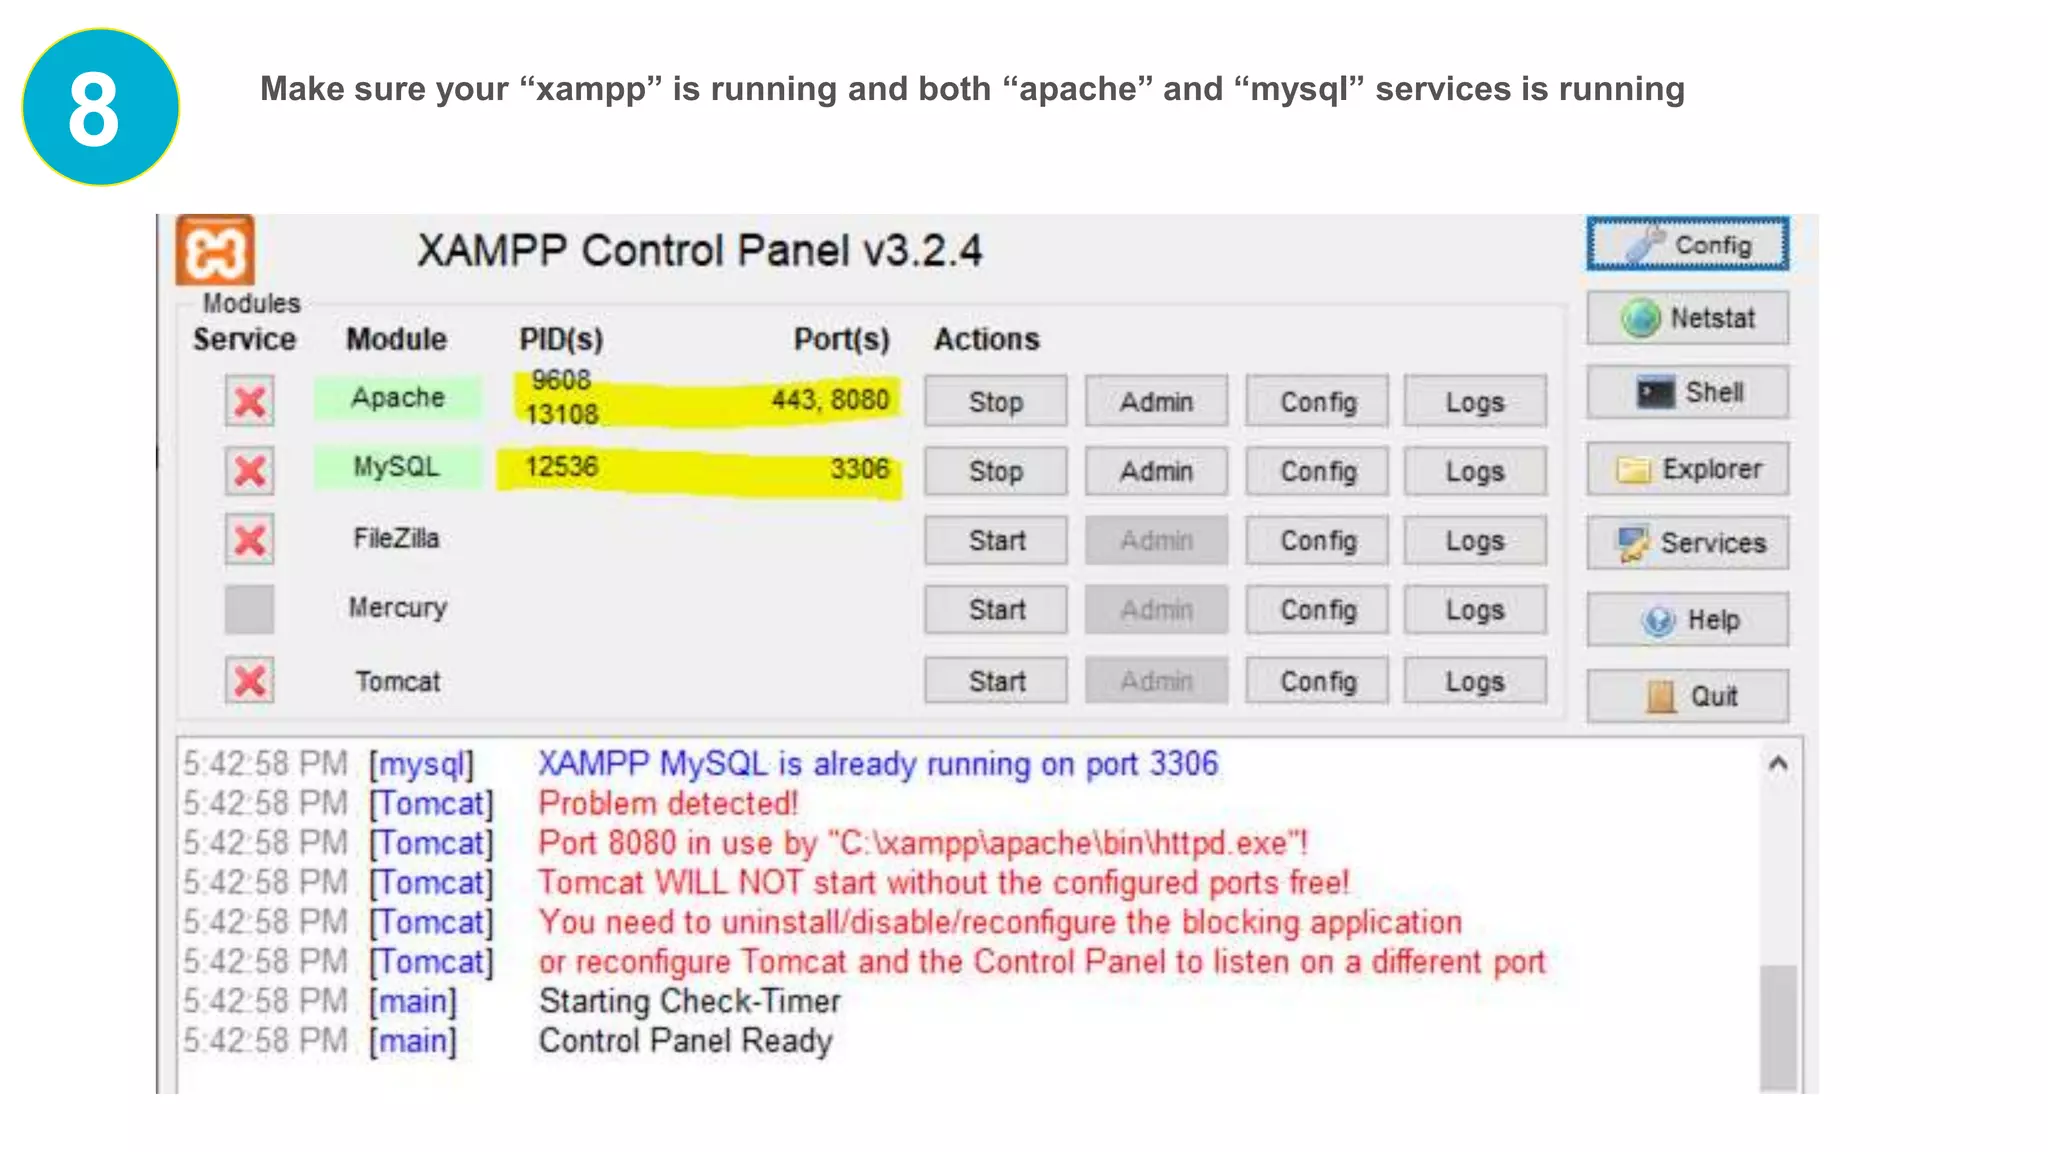
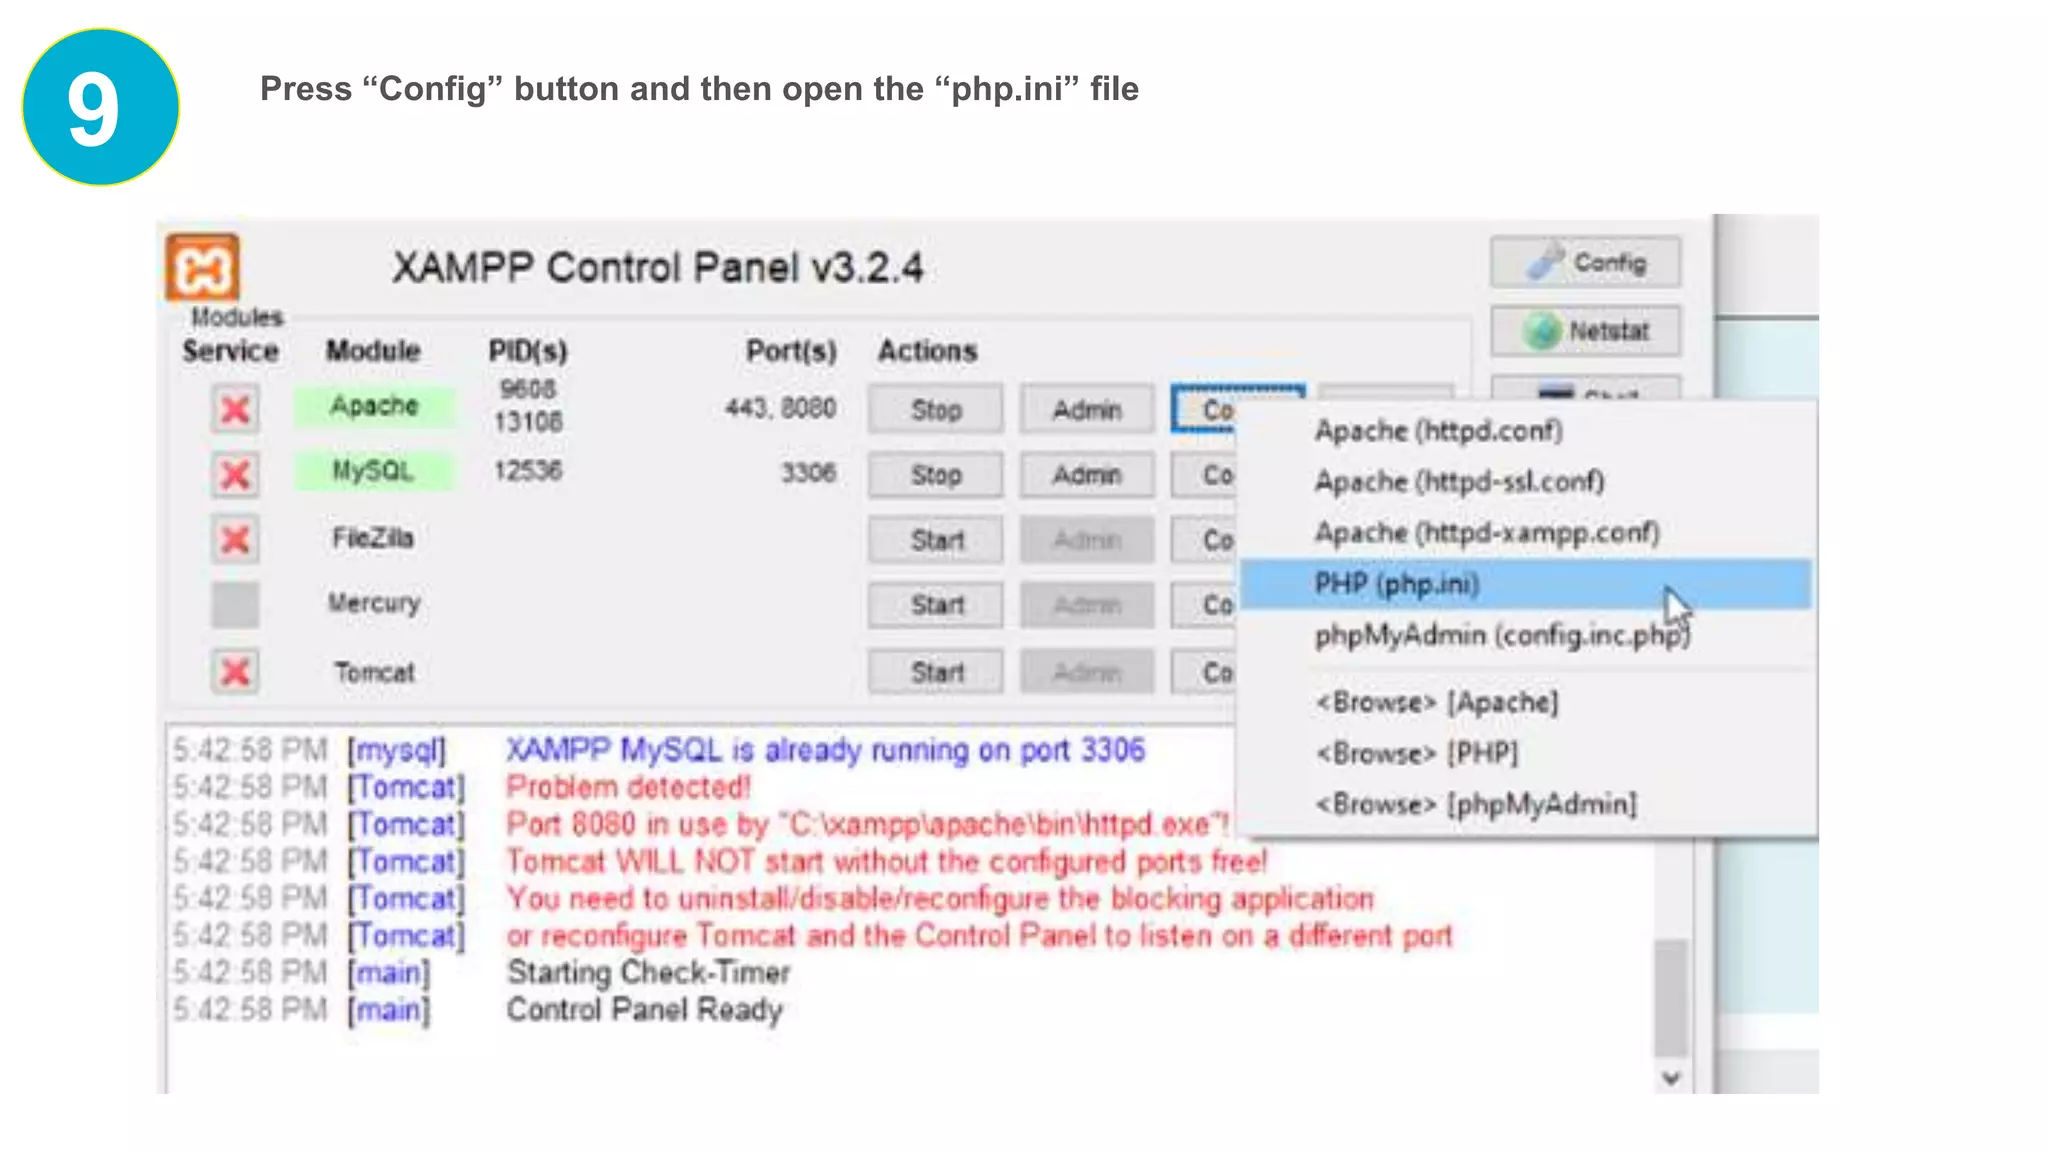
The document provides a 26-step guide for installing Moodle, an open-source learning management system. It begins with an overview of Moodle and its uses. It then outlines the steps to download and extract the Moodle files, configure the PHP and database settings, run the installation wizard to set up the database and first admin account, and complete the installation. Upon finishing, the user's Moodle website will be up and running locally and they can begin adding students, courses, themes, and plugins.