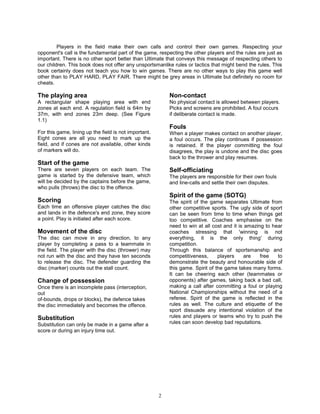
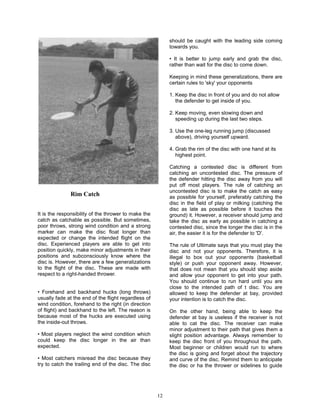
CHAPTER 1


                                  BACKGROUND ABOUT ULTIMATE

History of the game

The sport originated in the 1960s on the lawns of Yale University, played by students killing time between
lectures. Ultimate has been in Singapore for a while but it has only become truly organized and popular
among Singaporeans in the last six years. The number of players in Singapore has increased significantly
from a pool of 20 players to over 300 players.The Singapore Ultimate Players Association (UPA)
organises pick-up (casual) games and a twice-yearly league while clubs practise year-round to compete
in local and international tournaments. Currently the Singapore UPA is trying to promote the sport
by introducing it to the schools through the sports development programmed.


Rules of the game
The purpose of the rules in Ultimate is to provide a guideline in the way the game is played. The
assumption is that no Ultimate player will deliberately violate the rules, thus there is no harsh penalties for
violations during the game. In Ultimate, which is a non-contact sport, an intentional foul is considered
cheating and a serious offence against the spirit of sportsmanship. The integrity of the game requires the
players to uphold the spirit of the game, and this should not be taken lightly.


Figure 1.1 The dimension of the playing field


                                                      1
Players in the field make their own calls and control their own games. Respecting your
opponent's call is the fundamental part of the game, respecting the other players and the rules are just as
important. There is no other sport better than Ultimate that conveys this message of respecting others to
our children. This book does not offer any unsportsmanlike rules or tactics that might bend the rules. This
book certainly does not teach you how to win games. There are no other ways to play this game well
other than to PLAY HARD, PLAY FAIR. There might be grey areas in Ultimate but definitely no room for
cheats.

The playing area                                           Non-contact
A rectangular shape playing area with end                  No physical contact is allowed between players.
zones at each end. A regulation field is 64m by            Picks and screens are prohibited. A foul occurs
37m, with end zones 23m deep. (See Figure                  if deliberate contact is made.
1.1)
                                                           Fouls
For this game, lining up the field is not important.       When a player makes contact on another player,
Eight cones are all you need to mark up the                a foul occurs. The play continues if possession
field, and if cones are not available, other kinds         is retained. If the player committing the foul
of markers will do.                                        disagrees, the play is undone and the disc goes
                                                           back to the thrower and play resumes.
Start of the game
There are seven players on each team. The                  Self-officiating
game is started by the defensive team, which               The players are responsible for their own fouls
will be decided by the captains before the game,           and line-calls and settle their own disputes.
who pulls (throws) the disc to the offence.
                                                           Spirit of the game (SOTG)
Scoring                                                    The spirit of the game separates Ultimate from
Each time an offensive player catches the disc             other competitive sports. The ugly side of sport
and lands in the defence's end zone, they score            can be seen from time to time when things get
a point. Play is initiated after each score.               too competitive. Coaches emphasise on the
                                                           need to win at all cost and it is amazing to hear
Movement of the disc                                       coaches stressing that 'winning is not
The disc can move in any direction, to any                 everything, it is the only thing' during
player by completing a pass to a teammate in               competition.
the field. The player with the disc (thrower) may          Through this balance of sportsmanship and
not run with the disc and they have ten seconds            competitiveness,      players     are   free   to
to release the disc. The defender guarding the             demonstrate the beauty and honourable side of
disc (marker) counts out the stall count.                  this game. Spirit of the game takes many forms.
                                                           It can be cheering each other (teammates or
Change of possession                                       opponents) after games, taking back a bad call,
Once there is an incomplete pass (interception,            making a call after committing a foul or playing
out                                                        National Championships without the need of a
of-bounds, drops or blocks), the defence takes             referee. Spirit of the game is reflected in the
the disc immediately and becomes the offence.              rules as well. The culture and etiquette of the
                                                           sport dissuade any intentional violation of the
Substitution                                               rules and players or teams who try to push the
Substitution can only be made in a game after a            rules can soon develop bad reputations.
score or during an injury time out.


                                                       2
CHAPTER 2

                  UNDERSTANDING THE FINER DETAILS OF ULTIMATE
One team throws the disc to the opponent to start each point. This is called the "PULL". By pulling the
disc to the opposition, the team starts on the defence. The players of both teams stay behind the Goal
Line in the end zone that they are defending before the disc is released. This rule must be reinforced to
new players as most of them will start running even before the opponents are ready. The team pulling will
raise the disc to indicate to the opponent that they are ready to start the game. The opponent will, out of
courtesy, raise their hands to indicate that they are ready too.

The receiving team can either catch the pull or allow it to hit the ground. Most pulls are allowed to hit the
ground before the receiving or OFFENSIVE team picks up the disc. The offensive team then attempts to
complete a PASS to a team mate. If the pull goes out-of-bounds, the disc is played from the nearest
sidelines from where the disc went out.

If the receiver attempts to catch the PULL and drops the disc, it is a TURNOVER. TURNOVER means
that possession has changed. The offence becomes the defence now. The new offensive will attempt to
pass the disc as soon as they pick it up.


                                                  When a player is catching the disc, they must have at least
                                                  one foot in contact with the PLAYING FIELD. If the foot is
                                                  ON THE LINE, it is a TURNOVER. A player cannot run with
                                                  the disc. Once they catch the disc, they can take a few steps
                                                  (two to three steps is a norm) to stop. However, if they take
                                                  more steps than required, the opponent should call
                                                  TRAVEL, and this is a violation and the player returns to the
                                                  appropriate spot.
                                                           After a CHECK of the disc (by shouting DISC IN by
                                                  the defender), the violator may attempt to pass again. A
                                                  player in possession of the disc may PIVOT on one
                                                  CONTACT POINT. This is known as the pivot foot. If the
                                                  player drags the pivot foot, it is a travel. If the disc is
                                                  released and the player drags the PIVOT
                                                           Start of the game. foot, it is also a travel and the
                                                  disc goes back to the thrower. However, if there is an
                                                  incomplete pass during the travel call, it is a TURNOVER.
                                                  Usually the PIVOT foot of a right-handed player is on the left
                                                  foot and vice versa for a lefthander.
                                                           A defensive player on the thrower is called the
                                                  MARKER, and he or she may not snatch, pull or hit the disc
                                                  out of the throwers' hands. This is called STRIP When a
                                                  strip occurs, the thrower calls "STRIP" and retrieves the disc
                                                  and continues play without stoppage


                                                     3
The MARKER should not make any contact               A RECEIVER can run to any part of the field to
with the THROWER while the disc is in the thrower's           receive the disc. There is no specific location that the
hand. Should there be any form of contact, the                player is limited to. However, the RECEIVER may not
thrower calls "FOUL", the play stops immediately. The         make use of his team mates or other players in the
players in the field must return to the position when         field to 'screen' out (in basketball) or lose his
the FOUL was called, without gaining any advantage.           defender. If this occurs, PICK is called and play
The MARKER will make sure everybody in his team               should stop. A PICK is a violation and does not result
(defensive) is ready before he CHECKS the disc and            in a TURNOVER.
calls DISC IN, and the thrower resumes play by trying
to complete a pass.                                           Once plays stop, the disc is returned to the
                                                              THROWER (if the disc was thrown). The DEFENSIVE
There can only be one MARKER on the disc at any               player who has been picked (in a disadvantaged
time. Other defensive players need to be at least             situation), he or she can move towards the
three metres away from the thrower. When two or               RECEIVER. Since it was a VIOLATION by the
more defenders are marking the THROWER within                 OFFENSIVE team, the players in the field may
three metres, the THROWER may call DOUBLE                     reposition themselves. Then the MARKER checks the
TEAM. The defensive players must move away from               disc and puts the disc into play. If the THROWER
the THROWER. However, the THROWER can                         releases the disc when PICK is called, and makes a
choose not to call DOUBLE TEAM because one of his             TURNOVER, the DEFENSIVE team picks up the disc
downfield players might be FREE (not guarded by a             and continues play. If the pass is completed when
defender) and the OFFENSIVE team can make use of              PICK is called, it must be returned to the THROWER
this advantage to complete a pass.                            and the disc must be CHECKED before play
                                                              continues.
The THROWER has 10 seconds to throw the disc. As
soon as the MARKER is within three metres or four             PICK often occurs when the players are crowding
steps away from the THROWER, he or she should                 around the disc or in this case, the THROWER. It is
start counting to 10. This is called the STALL COUNT.         good to tell the players not to go for the disc at the
The STALL COUNT should start with STALLING 1, 2               same time to help them avoid PICKS. Spreading out
... to 10 and should be spoken loud enough for the            or 'balancing the field' is also a good strategy to teach
THROWER to hear it.                                           our pupils or beginners to avoid PICKS because they
                                                              tend to go close to the disc. They want to get involved
The STALLING at the initial count indicates the start         in the game because that is where all the action is.
of the clock and the pace should be even at one-              Spreading out also helps so that the THROWER does
second per count. If the THROWER does not release             not have to throw into the crowd.
the disc when the MARKER reaches 10, it is a
TURNOVER and the THORWER must leave the disc                  There should not be intentional contact between the
on the ground for the new offensive team to pick up.          players at all times. If contact happens between the
                                                              DEFENDER and the RECEIVER , a FOUL may be
In higher- level games, discs are released well before        called by the RECEIVER. If the disc is thrown and is
the TEN COUNT. However, this rule is especially               turned over, and the receiver calls FOUL on the
important among beginners and students. Some                  DEFENDER, the DEFENDER is given the opportunity
players are too hesitant to release the disc and hold         to CONTEST the call. If the call is contested, the disc
on to the disc for too long. More often than not,             goes back to the THROWER for a restart of play.
players release the disc too quickly, for fear of being
STALLED OUT so they make a poor throw or                      If the FOUL is un-contested, then the disc goes back
decision. It is always important to encourage patience        to the RECEIVER and he or she becomes the
with the disc by telling beginners to "take their time        THROWER after a CHECK of the disc. There are
when throwing the disc".                                      several situations that could occur during the foul, for
                                                              example a foul in the end zone, of the disc foul and
If the MARKER hits the disc after it has been released        foul on the thrower. It is advisable for novice players
by the THROWER, it is called a HAND BLOCK and                 to read and understand the rules of the game before
results in a TURNOVER.                                        playing. In this way, there will be less discrepancy
                                                              among the players and they can better enjoy the
An OFFENSIVE player not in possession of the disc             game.
is known as the RECEIVER. A DEFENSIVE player
who is covering the RECEIVER is known as the
DEFENDER.


                                                          4
CHAPTER 3

                                           INDIVIDUAL SKILL


In explaining the techniques to executing a               time to master and applies differently to
throw, there are four teaching points to take             individual players.
note:
 • Grip • Stance • Execution • Release                    Execution
                                                          The execution of the skill is important as we
Grip                                                      want to focus on the learner's release point,
                                                          body mechanics and a 'smooth execution'.
First and foremost, before you can throw a disc,
you need to know the correct method of gripping           Release
the disc. It is a fundamental skill in Ultimate and       The last part of the throw is the release of the
it is usually one of the areas neglected in               disc, which needs to be emphasised to the
Ultimate. Even though this is the most basic skill        thrower. Generally, we want to look out for the
in Ultimate, very few players actually think about        spin of the disc and subsequently a stable disc
the way they grip and throw the disc, and even            upon release.
less on how and why they are using a particular
grip. The way the disc is held plays a major part         We can look at these key points to improve our
in whether the throw is going to be a good one            players or our throws. Beginners usually make a
or not.                                                   lot of mistakes while throwing and focus on too
                                                          many factors at the same time. I must
Stance                                                    emphasise again that if the thrower can create
The stance is the position before, during and             the spin on the disc, he will master the throwing
after the execution of a throw. Explain and               technique faster. It is easier to correct the
demonstrate the stance to beginners as it is              stance, execution and grip, but tough to teach
easier to learn through mimicking the action.             the thrower how to create the spin on the disc.
Some of the stances are complicated, taking               An excellent analogy that is commonly used is
                                                          "flicking                a                 towel".


             Forehand Basic Grip                                  Backhand Basic Grip


                                                      5
CHAPTER 4
                                         THE BACKHAND THROW


Basic Grip                                                  Stance

This is the most fundamental backhand grip.                 The thrower is to stand facing side-on to the
Commonly used by beginners, it gives a high                 target. In general, if you are a right-hander, you
degree of stability and control. The index finger           should be facing the left side with your shoulders
of the throwing hand is placed along the outside            facing the target. Step across to the left side of
rim of the disc. The middle finger of the throwing          your body and your body becomes a torque
hand is extended and pointing towards the                   instantly. In this way, you can generate more
centre of the disc. On the other hand, this grip            force to the disc using your body.
does not impart a lot of spin to the disc and it
leads to lesser power. The reason is due to the             Execution
fact that there are only two fingers gripping the           The disc should be thrown below the belly
rim. A good analogy is "shaking hands with the              button and released outside the body.
disc".
                                                            Release

                                                            The thrower should release the disc with a snap
Power Grip                                                  of the wrist.
Most of the experienced players use this grip. All
the fingers are gripping the disc tightly and there         Common problems
are no fingers supporting the disc. Even though
there is a loss of control and stability, the benefit       • Disc flies up into the air (throw and release the
of this grip brings about large power gain                  disc below or at the belly button and avoid
brought to the disc. The release point is much              pressing the thumb towards the centre of the
harder to judge but after some practice, players            disc).
will be able to regain the control.                         • Cannot grip the Frisbee (change to a smaller
                                                            disc or try a modified grip which the thrower is
Generally, the tighter the grip is on the disc, the         comfortable with).
more spin you will be able to impart to the disc.           • Not enough spin (concentrate on the whipping
This is extremely important when throwing into              action and look into the grip. The thrower might
the wind. The variation of this grip is the position        want to try pulling the arm back after releasing).
of the thumb, specifically the air bounce, where            • Disc wobbles (check grip and wrist snap).
the thumb is pointing towards the centre of the             • Disc does not travel straight (either turns over
disc, which also leads to a tighter grip. However,          or inside out) (keep the disc below belly button
if the thumb is pointing towards the centre of the          height, angle the disc in the opposite direction of
disc, it is harder to generate power and throw              the turnover, bend elbow and follow though after
far. This is because of the tendency to drag                throwing by pointing towards the thrower).
across the back edge of the disc on release.


                                                        6
CHAPTER 5
                                         THE FOREHAND THROW


Basic Grip

Form a "V" shape with the thumb and the index
finger of the throwing hand. The index finger of
the throwing hand is pointing towards the centre
of the disc and the middle finger of the throwing
hand is inside the rim of the disc. The advantage
of this method is control and stability. The
disadvantage is the lack of power because
spreading out the fingers will prevent the thrower
from cocking the wrist as far back as possible for
release.


                                                          Backhand Power Grip.

                                                          Stance
                                                          The thrower should be facing the target and step
                                                          to the side before releasing the disc. Most of the
                                                          beginners will hold the disc in a forehand grip
                                                          and execute it like a backhand throw. When
                                                          explaining the forehand throw, try to explain the
                                                          three key points in quick succession. It is not
                                                          advisable to breakdown the throwing process as
                                                          the forehand needs to be executed in a smooth
                                                          motion. The teaching points will be handy while
Forehand Power Grip.                                      we are correcting mistakes made by the learner.

Power Grip                                                Action
                                                          Throw and release disc below belly button
The middle finger and the index finger of the             height.
throwing hand are pressed hard up against the
rim of the disc. This grip increases in power             Release
because the wrist can be cocked back further
and more snap can be imparted to the disc. This           Explain to the pupils that the release is similar to
grip has the same problem as the power grip in            the backhand which is to release with a snap of
the backhand, resulting in a loss of control, as          the wrist. The middle finger should be the last
there is no finger to support the disc. Players           point of release creating the spin to the disc. In
trying this grip for the first time tend to throw a       order to teach the correct throwing habits, ask
wobbly and unstable disc, resulting in the lost of        the pupils to imagine themselves opening the
distance. The wobble is due to the disc and wrist         door. Their throwing forearm should be upwards
riot being released at the same angle.                    facing the thrower.


                                                      7
Common problems                                           by a perfectly weighted pass? In Ultimate, you
                                                          seldom or never will encounter a situation when
• Disc flies up into the air (throw and release the       you have a stationary target receiving a pass. In
disc below or at the belly button and avoid               highly competitive games, the receivers will be
pressing the thumb towards the centre of the              sprinting at top speed trying to shake off their
disc)                                                     defenders. The passes have to be perfectly
• Cannot grip the Frisbee (change to a smaller            weighted and directed because any deviation
disc or try a modified grip which the thrower is          will result in the defender getting a piece of the
comfortable with)                                         disc thus causing a turnover: The disc cannot be
• Disc wobbles (check grip and wrist snap)                thrown so hard towards the receiver that it hit
• Disc does not travel straight (either turnover or       sand bounces off the receiver. It cannot be
inside out) (angle the outside edge down and              thrown so softly that the defender catches up
avoid rolling the wrist on release)                       with the receiver and makes a lay-out block. The
• Disc has no spin (do not use arm power to               pass has to be just right and you will need lots of
project the disc and emphasise that the point of          finesse to execute it.
contact with the disc is the middle finger)
                                                          In order to be an exceptionally good thrower,
Advance tips on throwing                                  you have to visualise where the disc should
                                                          travel and how the receiver will be catching it.
Take a second to think of an exceptionally good           You should have a mental picture of how the
player in any team sport. Think of a few reasons          disc should travel: the flight, the speed, the
why they are better than the rest. Some of these          angle and the release point of the disc. You
good players or 'stars' are extremely athletic and        must also know your receivers, their speed, their
I think we agree that most, if not all of them are        approaches and their defender's position.
talented in the game. Some of them might
possess exceptional skills that fascinate us.             The general rule is to throw the disc into space
These players make great plays, display                   so that the receiver can reach there in a position
outstanding skill and lead their teams when in            that allows them to catch the disc easily before
need. But, the bottom line is that these players          their defenders. Once you are able to complete
are fantastic due to their consistencies                  your passes, you will realise that your team
throughout their career.                                  mates have the confidence to pass the disc to
                                                          you. They trust you will be able to treasure the
In order to advance to another level, you have to         disc without making rash decisions. This is a
be consistent. Encourage your players or                  virtuous cycle. If you are getting more passes
students to be consistent in their throwing. By           from your team mates, you acquire the chance
that, I mean they have to make or complete at             to practise your throws and you will only get
least 90 per cent of their passes. You can                better through these experiences.
question that it takes two to complete a pass
and the receiver might be such a bad catcher              From now onwards, focus on completing your
that they drop all the discs. In terms of throwing,       passes. Make safe, confident throws and take
it should be a personal challenge to execute a            calculated risks. Visualise the end results (your
pass accurately to the team mate. A player must           team mate catching the disc) and you are on
know where the disc should go and if the                  your way to becoming a great player.
receiver drops a perfectly weighted pass, then it
is not entirely the thrower's fault.What do I mean


                                   Forehand Stance


                                                      8
CHAPTER 6
                                              CATCHING

Catching is an important skill which is                   consequence is usually unnecessary drops and
underrated. Some experienced players display              turnovers.
poor and lazy techniques, which results in
frequent drops. These turnovers are costly in a           Phase 3 – Execution
game where the team that makes the least
turnovers will win. An excellent catcher will make        There are a few methods to execute catching
difficult catches look easy and impossible                the disc. The different catching techniques
catches look magical. It is often said that if you        depend on the height and speed of the disc.
can get a hand to the disc, you should be able to         Generally, the execution is divided into two
catch the disc. Catching is a mental skill. Good          ways. The two handed catch or the one-handed
foundation and mechanics, and other factors               catch.
such as determination, focus and aggressive
plays will make an impact in determining                  Pancake catch. This is one of the safest
whether the disc is caught.                               catches and should be used for the majority of
                                                          throws, whenever possible. The pancake catch
                                                          is executed close to the body with both the
Phase 1 – Identify                                        palms facing each other. The catcher should
                                                          adjust their bodies behind the direction of travel
Firstly you need to identify the time and your            of the disc. The advantage of this catch is to
position of catching the disc. What is the stall          minimise error, especially if the catch is
count at when you are making your cut? Are you            mistimed and the disc hits the body of the
marked tightly or are you poached? You need to            catcher. The catcher still has enough time to
know that you are free and the thrower is                 catch the disc between the hands even though
directing the disc to you. The disc could be              the disc is not caught the first time.
thrown into space or right at you, the disc could
be coming to you fast or the disc could be                Crocodile catch. The crocodile catch looks just
wobbling or hanging in the air.                           like the mouth of a crocodile. The arms are
                                                          parallel to each other, reaching out in front of the
As a catcher, you need to alter your speed from           body. This type of catch is used when the disc is
all-out sprint to a speed that allows you to              travelling at the speed relative to the receiver.
change your path. Alternating the speed is                The forearm provides a longer distance for the
important to get free from your defender and              disc to travel before decelerating. Thus making it
staying balanced with less weight leaning                 easier to catch hard throws. The disadvantage is
forward, is essential in catching the disc.               that the disc tends to flip sideways if the arms do
                                                          not move up and down together before catching
Phase 2 – Approach                                        the disc.

Your approach to the disc is important when               Rim catch. Catching the rim with both hands is
catching because it will determine whether it is          extremely risky and unnecessary. This catch
an easy or tough catch. A poor lead up may                should only be used whenever the disc is
result in                                                 travelling above the head or below the knees.
As a rule of thumb, try to position your body             The receiver only uses this catch if it is not
directly in front of the disc before running              possible or dangerous to lay out (dive) to catch
through the disc. Reaching to the side to grab            it. The disadvantage of the rim catch is that the
the disc due to wrong approach will result in             disc will spin out of the receiver's hands, if the
your body being asymmetrical to the disc and              disc is not caught both on top and bottom using
losing balance. It is very difficult to adjust your       the pancake catch.
body and recover if the throw is poor. Also, it is
much tougher to catch the disc cleanly and the


                                                      9
One-handed catch. A one-handed catch is
                                                         usually attempted when it is necessary or if the
                                                         catch is difficult. Discs that are thrown to the
                                                         catcher which are either too low to the ankles,
                                                         too high above the head or too far out to the
                                                         sides require a one-handed catch. Having to
                                                         stretch out of the catcher's comfort zone or the
                                                         fear of falling to the ground is not an excuse for
                                                         catching with one hand. The disc is usually skied
                                                         above the receivers and defenders with one
                                                         hand. This is especially true if the disc is
                                                         hanging in the air and players should be
                                                         adventurous to contest the disc with one hand.
                                                         The height of the jump is usually higher if the
                                                         catcher has a run up before skying with one
                                                         hand. It is more difficult to jump high with both
                                                         arms in the air to grab the disc. This will be
                                                         discussed in detail later.

                                                         Generally, if the disc is above the elbows, the
                                                         thumb should be facing up, otherwise, the thumb
                                                         should be facing down. It takes experience to
                                                         understand this, but for children and beginners,
                                                         it is advisable to teach them this technique to
                                                         prevent bad form in the future.


Crocodile catch                                          A one-handed catch should be attempted at the
                                                         rim of the disc. But there are many sides of the
Layout catch. Most of the time players are               disc. Which side is the 'sweet spot'? Ideally, one
required to dive in order to get dose to the disc        should not catch the disc on the leading edge
or get away from their defenders. The catching           because the disc is travelling away from you.
method should either be a crocodile or a rim             This is because both angular and linear
catch.                                                   momentum is absorbed by the catch (It is good
The disc is usually dislodged from the player            to incorporate science into sports for older
and this is also known as GROUND STRIP To                pupils). Pupils can explore this through
avoid being ground stripped, it is important that        experiment or trial and error.
the catcher uses the body to take the impact
rather than rely solely on the arms. This is the         Always remember to run through the disc
only time when you use the rim catch, because            without slowing down or changing your running
once you get hold of the disc, it is much harder         stance. It is important not to slow down before
to dislodge it.                                          the catch because the defender who is pursuing
Furthermore, using the pancake catch during a            you will get a layout block by intercepting the
                                                         path of the disc. This technique is difficult to
layout is difficult because the arms below the
disc will take the highest amount of impact. The         master due to the slight decrease in hand-eye
catcher should keep the arm with the disc, or at         coordination from the harsh running. There are
least the elbow, off the ground. Lastly, it is           three techniques to catch passes below the
advisable to slide after you have caught the disc        waist.
to 'spread' (cushion) the impact from the fall.
Players who stop abruptly during the layout will         They are the crouch, the bend and the slide.
most likely suffer injuries, especially to the           These techniques are usually done instinctively
shoulders.                                               so that you can make the catch as easy as
                                                         possible. Look at the pictures below to get a
                                                         better idea.


                                                    10
Phase 4 – Ending                                          this case, it is the receiver's interest to get their
                                                          body as high as possible. Jumping for the disc is
Jumping. There are two ways of jumping to                 essential if you want to be a good player and
catch the disc. The first way is simply to jump so        below are some tips on jumping techniques.
that the catch is easier. The second way is to
jump and get as high as possible to have a                Two-legged (standing) jump. Two-legged
chance to catch the disc first.                           jumps are used when the player is standing still,
                                                          with both feet fully extended, to keep the centre
                                                          of gravity low. The non-catching arm should be
                                                          lowered to maintain stability, avoid swinging the
                                                          arm and contacting other players. Try doing tuck
                                                          jumps or strength training to improve on your
                                                          explosiveness and the height of your jump.

                                                          One-legged (running) jump. The one-legged
                                                          jump gives you greater height. Jumping and
                                                          catching while running for the disc allows you
                                                          the ability to adjust the body to the flight of the
                                                          disc. The only disadvantage is that it is more
                                                          difficult to challenge for the disc once the
                                                          opponent has established position. These are
                                                          the teaching points for a one-legged jump:

                                                          • Lean backwards slightly and lower your Centre
                                                            of Mass (COM).

                                                          • Take short and quick steps at approach.

                                                          • The trailing leg should swing through and
                                                             upwards, raising your COM at the last step.
                                                          • Both arms should be swung up during the last
                                                            step.
                                                          • After the take off, the non-catching arm should
                                                            be lowered.

                                                          • The disc should be caught with the hand
                                                            opposite from the take-off leg.
             Pancake catch.
                                                          Try practicing lay-ups by jumping and reaching
The most comfortable area to catch the disc is            as high as possible using a basketball hoop as a
just above the waist. If the disc is above this           mark.
height, the receiver should jump, rather than
stretch to catch with one hand. The first reason          Skying
for jumping is to catch the disc at a more                This special technique is used by players to
convenient height, preferably at the waist. The           catch long and floating passes, especially in the
second reason is to stabilise the body to create          end zone. The skills include reading the flight of
a more conducive environment, as running                  the disc, catcher positioning relative to the disc
towards the disc will cause the body to jolt up           and players, maintaining possession and getting
and down. The catcher only needs to focus on              the height from your jump (sky).
the flight and movement of the disc, and not
their body. Both feet should leave the ground to
make the catch

Sometimes it is not possible to catch the disc
unless the receiver jumps. This is an important
skill especially if defenders contest the disc. In


                                                     11
should be caught with the leading side coming
                                                           towards you.

                                                           • It is better to jump early and grab the disc,
                                                           rather than wait for the disc to come down.

                                                           Keeping in mind these generalizations, there are
                                                           certain rules to 'sky' your opponents

                                                           1. Keep the disc in front of you and do not allow
                                                              the defender to get inside of you.

                                                           2. Keep moving, even slowing down and
                                                              speeding up during the last two steps.

                                                           3. Use the one-leg running jump (discussed
                                                              above), driving yourself upward.

                                                           4. Grab the rim of the disc with one hand at its
                                                              highest point.

                                                           Catching a contested disc is different from
                                                           catching an uncontested disc. The pressure of
                                                           the defender hitting the disc away from you will
                                                           put off most players. The rule of catching an
                                                           uncontested disc is to make the catch as easy
              Rim Catch                                    as possible for yourself, preferably catching the
                                                           disc in the field of play or milking (catching the
                                                           disc as late as possible before it touches the
It is the responsibility of the thrower to make the        ground) it. However, a receiver should jump and
catch as catchable as possible. But sometimes,             take the disc as early as possible in catching a
poor throws, strong wind condition and a strong            contested disc, since the longer the disc is in the
marker can make the disc float longer than                 air, the easier it is for the defender to 'D'.
expected or change the intended flight on the
disc. Experienced players are able to get into             The rule of Ultimate says that you must play the
position quickly, make minor adjustments in their          disc and not your opponents. Therefore, it is
positions and subconsciously know where the                illegal to box out your opponents (basketball
disc is. However, there are a few generalizations          style) or push your opponent away. However,
to the flight of the disc. These are made with             that does not mean that you should step aside
respect to a right-handed thrower.                         and allow your opponent to get into your path.
                                                           You should continue to run hard until you are
                                                           close to the intended path of t disc. You are
• Forehand and backhand hucks (long throws)                allowed to keep the defender at bay, provided
usually fade at the end of the flight regardless of        your intention is to catch the disc.
wind condition, forehand to the right (in direction
of flight) and backhand to the left. The reason is         On the other hand, being able to keep the
because most of the hucks are executed using               defender at bay is useless if the receiver is not
the inside-out throws.                                     able to cat the disc. The receiver can make
                                                           minor adjustment to their path that gives them a
• Most players neglect the wind condition which            slight position advantage. Always remember to
could keep the disc longer in the air than                 keep the disc front of you throughout the path.
expected.                                                  Most beginner or children would run to where
                                                           the disc is going and forget about the trajectory
• Most catchers misread the disc because they              and curve of the disc. Remind them to anticipate
try to catch the trailing end of the disc. The disc        the disc or ha the thrower or sidelines to guide


                                                      12
them as th often have better perspective of the
disc.
At the initial phase of the deep cut, you should
be sprinting all out to get separation from your
defender and be able to chase down overthrown
hucks. Once you hear the "up" call, take
occasional glances to track the disc, especially
which side ( the disc is tilting. You should not
turn your body around to look for the disc
because this will slow you down. When the disc
is in front of you, glance quickly to see where is
the sideline, goal line at defender(s) are.

If you realise that the disc is floating and you ha
lots of time to get to the disc, slow down a litl so
that you will be able to keep running at tl disc.
You do not want a situation where you a
standing stationary and jumping for the disc. Yo
defender will get an advantage over you by gettir
a running start and a better approach to the di~
Give yourself enough space so that you can go
a out and get your maximum leap to the disc.

If your defender is taller or a better jumper ft
you, try these possible tactics:

• Glance occasionally at the disc, make a quick
fake to the opposite side and cut back hard to
'attack' the disc. Since the defender is chasing
after you, the defender's focus might be on your
direction of travel rather than the flight of the
disc.

• Jumping early and faking the defender by
jumping early to "D" the disc. After the defender
misses the disc, you can go around or behind
the defender to catch the disc.

• You can use your body to block out the
defender to prevent them from getting the disc
and at the same time, make a play on catching
the disc.

Imagine a volleyball player spiking the ball.
Always remember to GO LOW then GO HIGH.
The jumping technique is similar to a volleyball
spike. Get low, swing both your arms, and push
off the ground. If the situation allows, try a two-
step run up to the disc. You should catch the
disc at the peak of your jump and experience
"hanging" momentarily in the air. Try not to think
about avoiding contact with other players and
focus on catching the disc and adjusting your
position later


                                                       13
CHAPTER 7

                                          BASIC MARKING


Marking is an active process during game play when the defender is guarding a thrower. The marker's job
is to make the thrower's job as difficult as possible by reacting to every movement. However, one must
remember that Ultimate Frisbee is a team game and the harder the marker works, the lesser work the
downfield defenders have to do to shut down their receivers. That is to say, with both the marker and the
defenders working hand in hand, it is going to be very tough for the offence to flow.

Tips to be a better marker

Keep your weight low. You should bend your knees slightly and feel your quadriceps working. This allows
you to balance and to get your hands low.

Keep on the ball of your feet. You have to react to the thrower and stop the breakmark throws. You
cannot react to the thrower who is pivoting if you are standing flatfooted. This is important especially if
you need to move quickly. It is advisable that you lean slightly forward.

Keep your hands low and spread out. By pulling your shoulders back, you look "bigger" and it helps in
your balance as well. If you are preventing a high throw, it is obvious that you put your hand up. In
general, the arm on the open side should be low and the other arm should be higher to stop the high
throws.

Learn to read fakes. Learn to differentiate between a fake and a genuine throw. It would be ideal if you
know certain players' fakes. Be careful not to commit to weak fakes from the throwers, especially when
they do not intend to throw the disc.

Always call "Up!" loudly when the thrower h released the disc. This allows the defenders who a fronting
their receivers (not looking at the throw( to glance around to look for the disc. The "u[ call is extremely
important if the throw is a huck and meant for the defenders who are marking the receivers who are
running deep.
Introduction to marking as a team
It is difficult to play defence especially in such big field. The team will agree beforehand on tF landmark
on each side of the field. For examp significant building or lone tree, or use genet terms such as "Home"
or "Away", which u apply to any field. Usually we use "Home" for tk side where we put our bags and
"Away" will k the opposite side. The defensive line will decide c the side to force before pulling the disc.

When the marker is near the thrower, he will call the force. e.g. "Force Home" means he will on allow the
thrower to throw to the home side. 1 - will "Hold the Force" by standing 45 degrees to th opposite side of
the force. The defenders down field will know most likely that the disc will be coming from the home side
and defend accordingly.

It is the marker's responsibility to hold the for( and not allow the thrower to throw in the opposil direction.
However, if the disc is thrown in th opposite direction of the force, then the mark( must call "Break!" loudly
to alert his defenders s that they can adjust their position quickly.

Direction of force
These are the few directions of forces which th team can choose from

Force Middle. The thrower is always force to throw towards the middle of the field. Mo! markers make the
mistake of calling the force a "Force Middle" rather than calling the sides that they should be forcing like


                                                      14
"Force Home or Away". s is usually done to prevent the offence from stringing a number of consecutive
passes down a sideline known as the "flow".

Force Line (Trap). The thrower is always forced throw towards the nearest sidelines. This is particularly
effective against weaker throwers or en the disc is very near the sideline. The thrower limited to very little
space on the side of the field throw into. The disadvantage is that with better throwers, it leaves the end
zone fairly open and break marks throws are costly to the defence
.
Force Straight Up. The marker stands directly in front of the thrower and tries to stop every throw or
fake. This is used effectively against teams that huck a lot and places a lot of stress on the defenders.
This can also be used when a receiver has just caught a huck near the end zone. The marker's
responsibility is to stop an easy pass for a score in a couple of seconds. The disadvantage is that it is
difficult to stop the thrower, and the defenders have to be close to the receivers as there is a possibility of
throwing to either side.

Force Wind. The thrower is forced to throw into/ against the wind. This is effective against weak throwers
who do not have low throws.


                                                Basic marking


                                                      15
CHAPTER 8

                                     ADVANCE MARKING

Nothing beats knowing the player that you are marking. Know their fakes and remember where their
favourite release point is. If you do your homework, you can modify your marking style in order to get
hand blocks or force the thrower to be out of his comfort zone and cause a turnover.

Marking against different players using a standard mark is inappropriate and something different must be
done to "suit" your thrower. Knowing the concepts is important, but knowing when to apply them and
reacting accordingly is even more so.

Hands Low or High?
Markers usually prefer to keep their hands low, since most of the break mark throws are released low. But
this is not the case when you are marking someone who likes to do the high release passes or hammers.
Against right-handed throwers, it would be wise to keep the right hand up and the left hai low. This gives
you a chance to get a block against these throws.

Marking Distance
Sometimes, the distance between yourself and tl thrower is important. By standing close to a weak
thrower, you pressurise the thrower resulting in turnover. However, if you are standing too clo to an
experienced thrower, you give him tl opportunity to break mark. Furthermore, if you a standing too close
to the thrower, you risk foulif the thrower during the throwing process

Fakes
Try not to fall for weak or obvious fakes. Sin, most players use the same fakes to throw you off would be
better if you knew the thrower well.


                                                    16
CHAPTER 9

                                              GUARDING

Preventing your offender from getting easy and dangerous throws are the fundamentals of guarding. By
standing between the receiver and the disc will effectively cause obstruction to the offense. Thus as a
defender, you must constantly readjust your position to that of your offender, place yourself in a power
position and minimize any chance of him getting the disc.

As a player, you must know what defence to play, what force has been called and what role you play on
defence. The main factor you need to consider while playing defence: who you are defending (what are
his or her abilities; how aggressive is that individual; their favourite moves or fakes, etc).

This information will help you greatly in your defence as you will be able to take control of your opponent
and this gives you an advantage. If your team decides to front your offense because of their weak long
throws, then your responsibility will be to prevent the shortcuts in. With this priority, you will be able to
position yourself correctly throughout the game.

While on one-on-one defense, always stay focused. Individual defence requiresthe utmost concentration
aseach step made by your opponent, the movement of the disc, the counting on the thrower plus the cuts
made by other offenders, requires immediate adjustment to your positioning. Proper adjustment will do
great damage to the offense as it prevents and/or minimises any easy cuts for the disc. As a defender,
constantly assess your environment and make small adjustments so that you will not be caught off guard
at any time. One free second is all it takes for the offense to get the disc and it might even lead to an easy
score.

Always keep your offender in your sight at all times so that you can reposition with his every move to be
in between the disc and him. Likewise, it will be good if you can see the throw as it is being released so
that you can react to it appropriately


                                                     17
Like any game, Ultimate has its own jargon.

BREAK (side, pass or cut)
The side to which the marker is trying to prevent the throw (or a pass/cut to this side).

HAMMER

High overhead throw; thedisc flies upsidedown in a parabolic type path. The grip, release, etc is similar to
the forehand.

CLEARING
To get out of the area where the thrower wants to pass the disc. This is absolutely necessary after
making an unsuccessful cut or after throwing the pass. The importance of this is often underplayed to
beginners.

CUT
An attempt to get free to receive the pass. Usually starting with a body fake and/or a sudden change in
direction or speed.

DUMP
Player who stands behind the thrower in order to help out (must get free for an easy pass) when the
offence gets in trouble.

FLOW
A series of quick passes to well-timed cuts - should result in an easy score.

FORCE (or mark)
To make it as difficult as possible forthe thrower to throw the disc in one direction (usually one side of the
field) in an attempt to make (force) him/her to make a pass to the other side. See the relevant section for
how and why this is done.

FREE (or OPEN)
To be available to receive the pass. The "free player" may be unmarked or have managed to get away
from his/her defender.

HAND BLOCK
This is when the defender stops the disc directly after it is released by the thrower.

HUCK
A long pass, often nearly the full length of the pitch and high, to a tall player in the end zone.

LAYOUT
When the player dives the catch or intercept the disc. Also referred to as "gung ho" (from going
horizontal).


                                                       18
MAN-ON-MAN
The most common type of defence. Each person on defence marks an offence player and attempts to
stay as close as possible with the intention of getting an interception or forcing a mistake.

OPEN (side, pass or cut)
(i) The side to which the thrower is being forced (or a pass/cut to this side).
(ii) Sometimes used to describe being free to receive a pass.

PIVOT
When you plant your foot (left for righthanders and right for left-handers) and step to the side (allowing
you the throw around the marker).

POACH
When a defender moves away from their marker to try and make an interception on a pass to another
player.

PULL
The throw at the start of each point that initiates play.

SWING
A lateral pass across the pitch - usually does not result in any upfield movement. This is useful to gain a
better position or to reset the stall count.

SWITCH
This is when two defenders exchange the offensive players that they are marking.

TURNOVER or change of possession
When the disc has been dropped or intercepted and the offense becomes the defence.

END ZONE
Area at the either end of the pitch within which a point is scored.

OFFENCE
The team with possession of the disc.

POINT (or score)
When the disc is caught in the end zone by a player on the offence.

STALLING (or Stall Count)
The player holding the disc has just ten seconds to pass itto a team mate-the defender marking the player
with the disc counts to ten out loud, and if the disc has not been released on "ten" the defender takes
possession. Forcing the thrower to make a less-than-ideal pass as the "stall count" nears ten is the idea
behind most defensive strategies.


                                                       19
REFERENCES

Launder, A.G.2001. Play Practice: The games approach to teaching and coaching sports. Illionis,
Human Kinetic

Parinella, J.& Zaslow, E. 2004. Ultimate Technique and Tactics. Illionis, Human Kinetic.


Online resources
www.mindef.gov.sg/life/ultimatefis.htm

www.whatisultimate.com/what.asp

www2.upa.org/ultimate.

www1.upa.org/ultimate/rules.appx.

www.ultimatehandbook.com

www.frisbeespew.com


                                              20

Modul frisbee[1]

  • 1.
    CHAPTER 1 BACKGROUND ABOUT ULTIMATE History of the game The sport originated in the 1960s on the lawns of Yale University, played by students killing time between lectures. Ultimate has been in Singapore for a while but it has only become truly organized and popular among Singaporeans in the last six years. The number of players in Singapore has increased significantly from a pool of 20 players to over 300 players.The Singapore Ultimate Players Association (UPA) organises pick-up (casual) games and a twice-yearly league while clubs practise year-round to compete in local and international tournaments. Currently the Singapore UPA is trying to promote the sport by introducing it to the schools through the sports development programmed. Rules of the game The purpose of the rules in Ultimate is to provide a guideline in the way the game is played. The assumption is that no Ultimate player will deliberately violate the rules, thus there is no harsh penalties for violations during the game. In Ultimate, which is a non-contact sport, an intentional foul is considered cheating and a serious offence against the spirit of sportsmanship. The integrity of the game requires the players to uphold the spirit of the game, and this should not be taken lightly. Figure 1.1 The dimension of the playing field 1
  • 2.
    Players in thefield make their own calls and control their own games. Respecting your opponent's call is the fundamental part of the game, respecting the other players and the rules are just as important. There is no other sport better than Ultimate that conveys this message of respecting others to our children. This book does not offer any unsportsmanlike rules or tactics that might bend the rules. This book certainly does not teach you how to win games. There are no other ways to play this game well other than to PLAY HARD, PLAY FAIR. There might be grey areas in Ultimate but definitely no room for cheats. The playing area Non-contact A rectangular shape playing area with end No physical contact is allowed between players. zones at each end. A regulation field is 64m by Picks and screens are prohibited. A foul occurs 37m, with end zones 23m deep. (See Figure if deliberate contact is made. 1.1) Fouls For this game, lining up the field is not important. When a player makes contact on another player, Eight cones are all you need to mark up the a foul occurs. The play continues if possession field, and if cones are not available, other kinds is retained. If the player committing the foul of markers will do. disagrees, the play is undone and the disc goes back to the thrower and play resumes. Start of the game There are seven players on each team. The Self-officiating game is started by the defensive team, which The players are responsible for their own fouls will be decided by the captains before the game, and line-calls and settle their own disputes. who pulls (throws) the disc to the offence. Spirit of the game (SOTG) Scoring The spirit of the game separates Ultimate from Each time an offensive player catches the disc other competitive sports. The ugly side of sport and lands in the defence's end zone, they score can be seen from time to time when things get a point. Play is initiated after each score. too competitive. Coaches emphasise on the need to win at all cost and it is amazing to hear Movement of the disc coaches stressing that 'winning is not The disc can move in any direction, to any everything, it is the only thing' during player by completing a pass to a teammate in competition. the field. The player with the disc (thrower) may Through this balance of sportsmanship and not run with the disc and they have ten seconds competitiveness, players are free to to release the disc. The defender guarding the demonstrate the beauty and honourable side of disc (marker) counts out the stall count. this game. Spirit of the game takes many forms. It can be cheering each other (teammates or Change of possession opponents) after games, taking back a bad call, Once there is an incomplete pass (interception, making a call after committing a foul or playing out National Championships without the need of a of-bounds, drops or blocks), the defence takes referee. Spirit of the game is reflected in the the disc immediately and becomes the offence. rules as well. The culture and etiquette of the sport dissuade any intentional violation of the Substitution rules and players or teams who try to push the Substitution can only be made in a game after a rules can soon develop bad reputations. score or during an injury time out. 2
  • 3.
    CHAPTER 2 UNDERSTANDING THE FINER DETAILS OF ULTIMATE One team throws the disc to the opponent to start each point. This is called the "PULL". By pulling the disc to the opposition, the team starts on the defence. The players of both teams stay behind the Goal Line in the end zone that they are defending before the disc is released. This rule must be reinforced to new players as most of them will start running even before the opponents are ready. The team pulling will raise the disc to indicate to the opponent that they are ready to start the game. The opponent will, out of courtesy, raise their hands to indicate that they are ready too. The receiving team can either catch the pull or allow it to hit the ground. Most pulls are allowed to hit the ground before the receiving or OFFENSIVE team picks up the disc. The offensive team then attempts to complete a PASS to a team mate. If the pull goes out-of-bounds, the disc is played from the nearest sidelines from where the disc went out. If the receiver attempts to catch the PULL and drops the disc, it is a TURNOVER. TURNOVER means that possession has changed. The offence becomes the defence now. The new offensive will attempt to pass the disc as soon as they pick it up. When a player is catching the disc, they must have at least one foot in contact with the PLAYING FIELD. If the foot is ON THE LINE, it is a TURNOVER. A player cannot run with the disc. Once they catch the disc, they can take a few steps (two to three steps is a norm) to stop. However, if they take more steps than required, the opponent should call TRAVEL, and this is a violation and the player returns to the appropriate spot. After a CHECK of the disc (by shouting DISC IN by the defender), the violator may attempt to pass again. A player in possession of the disc may PIVOT on one CONTACT POINT. This is known as the pivot foot. If the player drags the pivot foot, it is a travel. If the disc is released and the player drags the PIVOT Start of the game. foot, it is also a travel and the disc goes back to the thrower. However, if there is an incomplete pass during the travel call, it is a TURNOVER. Usually the PIVOT foot of a right-handed player is on the left foot and vice versa for a lefthander. A defensive player on the thrower is called the MARKER, and he or she may not snatch, pull or hit the disc out of the throwers' hands. This is called STRIP When a strip occurs, the thrower calls "STRIP" and retrieves the disc and continues play without stoppage 3
  • 4.
    The MARKER shouldnot make any contact A RECEIVER can run to any part of the field to with the THROWER while the disc is in the thrower's receive the disc. There is no specific location that the hand. Should there be any form of contact, the player is limited to. However, the RECEIVER may not thrower calls "FOUL", the play stops immediately. The make use of his team mates or other players in the players in the field must return to the position when field to 'screen' out (in basketball) or lose his the FOUL was called, without gaining any advantage. defender. If this occurs, PICK is called and play The MARKER will make sure everybody in his team should stop. A PICK is a violation and does not result (defensive) is ready before he CHECKS the disc and in a TURNOVER. calls DISC IN, and the thrower resumes play by trying to complete a pass. Once plays stop, the disc is returned to the THROWER (if the disc was thrown). The DEFENSIVE There can only be one MARKER on the disc at any player who has been picked (in a disadvantaged time. Other defensive players need to be at least situation), he or she can move towards the three metres away from the thrower. When two or RECEIVER. Since it was a VIOLATION by the more defenders are marking the THROWER within OFFENSIVE team, the players in the field may three metres, the THROWER may call DOUBLE reposition themselves. Then the MARKER checks the TEAM. The defensive players must move away from disc and puts the disc into play. If the THROWER the THROWER. However, the THROWER can releases the disc when PICK is called, and makes a choose not to call DOUBLE TEAM because one of his TURNOVER, the DEFENSIVE team picks up the disc downfield players might be FREE (not guarded by a and continues play. If the pass is completed when defender) and the OFFENSIVE team can make use of PICK is called, it must be returned to the THROWER this advantage to complete a pass. and the disc must be CHECKED before play continues. The THROWER has 10 seconds to throw the disc. As soon as the MARKER is within three metres or four PICK often occurs when the players are crowding steps away from the THROWER, he or she should around the disc or in this case, the THROWER. It is start counting to 10. This is called the STALL COUNT. good to tell the players not to go for the disc at the The STALL COUNT should start with STALLING 1, 2 same time to help them avoid PICKS. Spreading out ... to 10 and should be spoken loud enough for the or 'balancing the field' is also a good strategy to teach THROWER to hear it. our pupils or beginners to avoid PICKS because they tend to go close to the disc. They want to get involved The STALLING at the initial count indicates the start in the game because that is where all the action is. of the clock and the pace should be even at one- Spreading out also helps so that the THROWER does second per count. If the THROWER does not release not have to throw into the crowd. the disc when the MARKER reaches 10, it is a TURNOVER and the THORWER must leave the disc There should not be intentional contact between the on the ground for the new offensive team to pick up. players at all times. If contact happens between the DEFENDER and the RECEIVER , a FOUL may be In higher- level games, discs are released well before called by the RECEIVER. If the disc is thrown and is the TEN COUNT. However, this rule is especially turned over, and the receiver calls FOUL on the important among beginners and students. Some DEFENDER, the DEFENDER is given the opportunity players are too hesitant to release the disc and hold to CONTEST the call. If the call is contested, the disc on to the disc for too long. More often than not, goes back to the THROWER for a restart of play. players release the disc too quickly, for fear of being STALLED OUT so they make a poor throw or If the FOUL is un-contested, then the disc goes back decision. It is always important to encourage patience to the RECEIVER and he or she becomes the with the disc by telling beginners to "take their time THROWER after a CHECK of the disc. There are when throwing the disc". several situations that could occur during the foul, for example a foul in the end zone, of the disc foul and If the MARKER hits the disc after it has been released foul on the thrower. It is advisable for novice players by the THROWER, it is called a HAND BLOCK and to read and understand the rules of the game before results in a TURNOVER. playing. In this way, there will be less discrepancy among the players and they can better enjoy the An OFFENSIVE player not in possession of the disc game. is known as the RECEIVER. A DEFENSIVE player who is covering the RECEIVER is known as the DEFENDER. 4
  • 5.
    CHAPTER 3 INDIVIDUAL SKILL In explaining the techniques to executing a time to master and applies differently to throw, there are four teaching points to take individual players. note: • Grip • Stance • Execution • Release Execution The execution of the skill is important as we Grip want to focus on the learner's release point, body mechanics and a 'smooth execution'. First and foremost, before you can throw a disc, you need to know the correct method of gripping Release the disc. It is a fundamental skill in Ultimate and The last part of the throw is the release of the it is usually one of the areas neglected in disc, which needs to be emphasised to the Ultimate. Even though this is the most basic skill thrower. Generally, we want to look out for the in Ultimate, very few players actually think about spin of the disc and subsequently a stable disc the way they grip and throw the disc, and even upon release. less on how and why they are using a particular grip. The way the disc is held plays a major part We can look at these key points to improve our in whether the throw is going to be a good one players or our throws. Beginners usually make a or not. lot of mistakes while throwing and focus on too many factors at the same time. I must Stance emphasise again that if the thrower can create The stance is the position before, during and the spin on the disc, he will master the throwing after the execution of a throw. Explain and technique faster. It is easier to correct the demonstrate the stance to beginners as it is stance, execution and grip, but tough to teach easier to learn through mimicking the action. the thrower how to create the spin on the disc. Some of the stances are complicated, taking An excellent analogy that is commonly used is "flicking a towel". Forehand Basic Grip Backhand Basic Grip 5
  • 6.
    CHAPTER 4 THE BACKHAND THROW Basic Grip Stance This is the most fundamental backhand grip. The thrower is to stand facing side-on to the Commonly used by beginners, it gives a high target. In general, if you are a right-hander, you degree of stability and control. The index finger should be facing the left side with your shoulders of the throwing hand is placed along the outside facing the target. Step across to the left side of rim of the disc. The middle finger of the throwing your body and your body becomes a torque hand is extended and pointing towards the instantly. In this way, you can generate more centre of the disc. On the other hand, this grip force to the disc using your body. does not impart a lot of spin to the disc and it leads to lesser power. The reason is due to the Execution fact that there are only two fingers gripping the The disc should be thrown below the belly rim. A good analogy is "shaking hands with the button and released outside the body. disc". Release The thrower should release the disc with a snap Power Grip of the wrist. Most of the experienced players use this grip. All the fingers are gripping the disc tightly and there Common problems are no fingers supporting the disc. Even though there is a loss of control and stability, the benefit • Disc flies up into the air (throw and release the of this grip brings about large power gain disc below or at the belly button and avoid brought to the disc. The release point is much pressing the thumb towards the centre of the harder to judge but after some practice, players disc). will be able to regain the control. • Cannot grip the Frisbee (change to a smaller disc or try a modified grip which the thrower is Generally, the tighter the grip is on the disc, the comfortable with). more spin you will be able to impart to the disc. • Not enough spin (concentrate on the whipping This is extremely important when throwing into action and look into the grip. The thrower might the wind. The variation of this grip is the position want to try pulling the arm back after releasing). of the thumb, specifically the air bounce, where • Disc wobbles (check grip and wrist snap). the thumb is pointing towards the centre of the • Disc does not travel straight (either turns over disc, which also leads to a tighter grip. However, or inside out) (keep the disc below belly button if the thumb is pointing towards the centre of the height, angle the disc in the opposite direction of disc, it is harder to generate power and throw the turnover, bend elbow and follow though after far. This is because of the tendency to drag throwing by pointing towards the thrower). across the back edge of the disc on release. 6
  • 7.
    CHAPTER 5 THE FOREHAND THROW Basic Grip Form a "V" shape with the thumb and the index finger of the throwing hand. The index finger of the throwing hand is pointing towards the centre of the disc and the middle finger of the throwing hand is inside the rim of the disc. The advantage of this method is control and stability. The disadvantage is the lack of power because spreading out the fingers will prevent the thrower from cocking the wrist as far back as possible for release. Backhand Power Grip. Stance The thrower should be facing the target and step to the side before releasing the disc. Most of the beginners will hold the disc in a forehand grip and execute it like a backhand throw. When explaining the forehand throw, try to explain the three key points in quick succession. It is not advisable to breakdown the throwing process as the forehand needs to be executed in a smooth motion. The teaching points will be handy while Forehand Power Grip. we are correcting mistakes made by the learner. Power Grip Action Throw and release disc below belly button The middle finger and the index finger of the height. throwing hand are pressed hard up against the rim of the disc. This grip increases in power Release because the wrist can be cocked back further and more snap can be imparted to the disc. This Explain to the pupils that the release is similar to grip has the same problem as the power grip in the backhand which is to release with a snap of the backhand, resulting in a loss of control, as the wrist. The middle finger should be the last there is no finger to support the disc. Players point of release creating the spin to the disc. In trying this grip for the first time tend to throw a order to teach the correct throwing habits, ask wobbly and unstable disc, resulting in the lost of the pupils to imagine themselves opening the distance. The wobble is due to the disc and wrist door. Their throwing forearm should be upwards riot being released at the same angle. facing the thrower. 7
  • 8.
    Common problems by a perfectly weighted pass? In Ultimate, you seldom or never will encounter a situation when • Disc flies up into the air (throw and release the you have a stationary target receiving a pass. In disc below or at the belly button and avoid highly competitive games, the receivers will be pressing the thumb towards the centre of the sprinting at top speed trying to shake off their disc) defenders. The passes have to be perfectly • Cannot grip the Frisbee (change to a smaller weighted and directed because any deviation disc or try a modified grip which the thrower is will result in the defender getting a piece of the comfortable with) disc thus causing a turnover: The disc cannot be • Disc wobbles (check grip and wrist snap) thrown so hard towards the receiver that it hit • Disc does not travel straight (either turnover or sand bounces off the receiver. It cannot be inside out) (angle the outside edge down and thrown so softly that the defender catches up avoid rolling the wrist on release) with the receiver and makes a lay-out block. The • Disc has no spin (do not use arm power to pass has to be just right and you will need lots of project the disc and emphasise that the point of finesse to execute it. contact with the disc is the middle finger) In order to be an exceptionally good thrower, Advance tips on throwing you have to visualise where the disc should travel and how the receiver will be catching it. Take a second to think of an exceptionally good You should have a mental picture of how the player in any team sport. Think of a few reasons disc should travel: the flight, the speed, the why they are better than the rest. Some of these angle and the release point of the disc. You good players or 'stars' are extremely athletic and must also know your receivers, their speed, their I think we agree that most, if not all of them are approaches and their defender's position. talented in the game. Some of them might possess exceptional skills that fascinate us. The general rule is to throw the disc into space These players make great plays, display so that the receiver can reach there in a position outstanding skill and lead their teams when in that allows them to catch the disc easily before need. But, the bottom line is that these players their defenders. Once you are able to complete are fantastic due to their consistencies your passes, you will realise that your team throughout their career. mates have the confidence to pass the disc to you. They trust you will be able to treasure the In order to advance to another level, you have to disc without making rash decisions. This is a be consistent. Encourage your players or virtuous cycle. If you are getting more passes students to be consistent in their throwing. By from your team mates, you acquire the chance that, I mean they have to make or complete at to practise your throws and you will only get least 90 per cent of their passes. You can better through these experiences. question that it takes two to complete a pass and the receiver might be such a bad catcher From now onwards, focus on completing your that they drop all the discs. In terms of throwing, passes. Make safe, confident throws and take it should be a personal challenge to execute a calculated risks. Visualise the end results (your pass accurately to the team mate. A player must team mate catching the disc) and you are on know where the disc should go and if the your way to becoming a great player. receiver drops a perfectly weighted pass, then it is not entirely the thrower's fault.What do I mean Forehand Stance 8
  • 9.
    CHAPTER 6 CATCHING Catching is an important skill which is consequence is usually unnecessary drops and underrated. Some experienced players display turnovers. poor and lazy techniques, which results in frequent drops. These turnovers are costly in a Phase 3 – Execution game where the team that makes the least turnovers will win. An excellent catcher will make There are a few methods to execute catching difficult catches look easy and impossible the disc. The different catching techniques catches look magical. It is often said that if you depend on the height and speed of the disc. can get a hand to the disc, you should be able to Generally, the execution is divided into two catch the disc. Catching is a mental skill. Good ways. The two handed catch or the one-handed foundation and mechanics, and other factors catch. such as determination, focus and aggressive plays will make an impact in determining Pancake catch. This is one of the safest whether the disc is caught. catches and should be used for the majority of throws, whenever possible. The pancake catch is executed close to the body with both the Phase 1 – Identify palms facing each other. The catcher should adjust their bodies behind the direction of travel Firstly you need to identify the time and your of the disc. The advantage of this catch is to position of catching the disc. What is the stall minimise error, especially if the catch is count at when you are making your cut? Are you mistimed and the disc hits the body of the marked tightly or are you poached? You need to catcher. The catcher still has enough time to know that you are free and the thrower is catch the disc between the hands even though directing the disc to you. The disc could be the disc is not caught the first time. thrown into space or right at you, the disc could be coming to you fast or the disc could be Crocodile catch. The crocodile catch looks just wobbling or hanging in the air. like the mouth of a crocodile. The arms are parallel to each other, reaching out in front of the As a catcher, you need to alter your speed from body. This type of catch is used when the disc is all-out sprint to a speed that allows you to travelling at the speed relative to the receiver. change your path. Alternating the speed is The forearm provides a longer distance for the important to get free from your defender and disc to travel before decelerating. Thus making it staying balanced with less weight leaning easier to catch hard throws. The disadvantage is forward, is essential in catching the disc. that the disc tends to flip sideways if the arms do not move up and down together before catching Phase 2 – Approach the disc. Your approach to the disc is important when Rim catch. Catching the rim with both hands is catching because it will determine whether it is extremely risky and unnecessary. This catch an easy or tough catch. A poor lead up may should only be used whenever the disc is result in travelling above the head or below the knees. As a rule of thumb, try to position your body The receiver only uses this catch if it is not directly in front of the disc before running possible or dangerous to lay out (dive) to catch through the disc. Reaching to the side to grab it. The disadvantage of the rim catch is that the the disc due to wrong approach will result in disc will spin out of the receiver's hands, if the your body being asymmetrical to the disc and disc is not caught both on top and bottom using losing balance. It is very difficult to adjust your the pancake catch. body and recover if the throw is poor. Also, it is much tougher to catch the disc cleanly and the 9
  • 10.
    One-handed catch. Aone-handed catch is usually attempted when it is necessary or if the catch is difficult. Discs that are thrown to the catcher which are either too low to the ankles, too high above the head or too far out to the sides require a one-handed catch. Having to stretch out of the catcher's comfort zone or the fear of falling to the ground is not an excuse for catching with one hand. The disc is usually skied above the receivers and defenders with one hand. This is especially true if the disc is hanging in the air and players should be adventurous to contest the disc with one hand. The height of the jump is usually higher if the catcher has a run up before skying with one hand. It is more difficult to jump high with both arms in the air to grab the disc. This will be discussed in detail later. Generally, if the disc is above the elbows, the thumb should be facing up, otherwise, the thumb should be facing down. It takes experience to understand this, but for children and beginners, it is advisable to teach them this technique to prevent bad form in the future. Crocodile catch A one-handed catch should be attempted at the rim of the disc. But there are many sides of the Layout catch. Most of the time players are disc. Which side is the 'sweet spot'? Ideally, one required to dive in order to get dose to the disc should not catch the disc on the leading edge or get away from their defenders. The catching because the disc is travelling away from you. method should either be a crocodile or a rim This is because both angular and linear catch. momentum is absorbed by the catch (It is good The disc is usually dislodged from the player to incorporate science into sports for older and this is also known as GROUND STRIP To pupils). Pupils can explore this through avoid being ground stripped, it is important that experiment or trial and error. the catcher uses the body to take the impact rather than rely solely on the arms. This is the Always remember to run through the disc only time when you use the rim catch, because without slowing down or changing your running once you get hold of the disc, it is much harder stance. It is important not to slow down before to dislodge it. the catch because the defender who is pursuing Furthermore, using the pancake catch during a you will get a layout block by intercepting the path of the disc. This technique is difficult to layout is difficult because the arms below the disc will take the highest amount of impact. The master due to the slight decrease in hand-eye catcher should keep the arm with the disc, or at coordination from the harsh running. There are least the elbow, off the ground. Lastly, it is three techniques to catch passes below the advisable to slide after you have caught the disc waist. to 'spread' (cushion) the impact from the fall. Players who stop abruptly during the layout will They are the crouch, the bend and the slide. most likely suffer injuries, especially to the These techniques are usually done instinctively shoulders. so that you can make the catch as easy as possible. Look at the pictures below to get a better idea. 10
  • 11.
    Phase 4 –Ending this case, it is the receiver's interest to get their body as high as possible. Jumping for the disc is Jumping. There are two ways of jumping to essential if you want to be a good player and catch the disc. The first way is simply to jump so below are some tips on jumping techniques. that the catch is easier. The second way is to jump and get as high as possible to have a Two-legged (standing) jump. Two-legged chance to catch the disc first. jumps are used when the player is standing still, with both feet fully extended, to keep the centre of gravity low. The non-catching arm should be lowered to maintain stability, avoid swinging the arm and contacting other players. Try doing tuck jumps or strength training to improve on your explosiveness and the height of your jump. One-legged (running) jump. The one-legged jump gives you greater height. Jumping and catching while running for the disc allows you the ability to adjust the body to the flight of the disc. The only disadvantage is that it is more difficult to challenge for the disc once the opponent has established position. These are the teaching points for a one-legged jump: • Lean backwards slightly and lower your Centre of Mass (COM). • Take short and quick steps at approach. • The trailing leg should swing through and upwards, raising your COM at the last step. • Both arms should be swung up during the last step. • After the take off, the non-catching arm should be lowered. • The disc should be caught with the hand opposite from the take-off leg. Pancake catch. Try practicing lay-ups by jumping and reaching The most comfortable area to catch the disc is as high as possible using a basketball hoop as a just above the waist. If the disc is above this mark. height, the receiver should jump, rather than stretch to catch with one hand. The first reason Skying for jumping is to catch the disc at a more This special technique is used by players to convenient height, preferably at the waist. The catch long and floating passes, especially in the second reason is to stabilise the body to create end zone. The skills include reading the flight of a more conducive environment, as running the disc, catcher positioning relative to the disc towards the disc will cause the body to jolt up and players, maintaining possession and getting and down. The catcher only needs to focus on the height from your jump (sky). the flight and movement of the disc, and not their body. Both feet should leave the ground to make the catch Sometimes it is not possible to catch the disc unless the receiver jumps. This is an important skill especially if defenders contest the disc. In 11
  • 12.
    should be caughtwith the leading side coming towards you. • It is better to jump early and grab the disc, rather than wait for the disc to come down. Keeping in mind these generalizations, there are certain rules to 'sky' your opponents 1. Keep the disc in front of you and do not allow the defender to get inside of you. 2. Keep moving, even slowing down and speeding up during the last two steps. 3. Use the one-leg running jump (discussed above), driving yourself upward. 4. Grab the rim of the disc with one hand at its highest point. Catching a contested disc is different from catching an uncontested disc. The pressure of the defender hitting the disc away from you will put off most players. The rule of catching an uncontested disc is to make the catch as easy Rim Catch as possible for yourself, preferably catching the disc in the field of play or milking (catching the disc as late as possible before it touches the It is the responsibility of the thrower to make the ground) it. However, a receiver should jump and catch as catchable as possible. But sometimes, take the disc as early as possible in catching a poor throws, strong wind condition and a strong contested disc, since the longer the disc is in the marker can make the disc float longer than air, the easier it is for the defender to 'D'. expected or change the intended flight on the disc. Experienced players are able to get into The rule of Ultimate says that you must play the position quickly, make minor adjustments in their disc and not your opponents. Therefore, it is positions and subconsciously know where the illegal to box out your opponents (basketball disc is. However, there are a few generalizations style) or push your opponent away. However, to the flight of the disc. These are made with that does not mean that you should step aside respect to a right-handed thrower. and allow your opponent to get into your path. You should continue to run hard until you are close to the intended path of t disc. You are • Forehand and backhand hucks (long throws) allowed to keep the defender at bay, provided usually fade at the end of the flight regardless of your intention is to catch the disc. wind condition, forehand to the right (in direction of flight) and backhand to the left. The reason is On the other hand, being able to keep the because most of the hucks are executed using defender at bay is useless if the receiver is not the inside-out throws. able to cat the disc. The receiver can make minor adjustment to their path that gives them a • Most players neglect the wind condition which slight position advantage. Always remember to could keep the disc longer in the air than keep the disc front of you throughout the path. expected. Most beginner or children would run to where the disc is going and forget about the trajectory • Most catchers misread the disc because they and curve of the disc. Remind them to anticipate try to catch the trailing end of the disc. The disc the disc or ha the thrower or sidelines to guide 12
  • 13.
    them as thoften have better perspective of the disc. At the initial phase of the deep cut, you should be sprinting all out to get separation from your defender and be able to chase down overthrown hucks. Once you hear the "up" call, take occasional glances to track the disc, especially which side ( the disc is tilting. You should not turn your body around to look for the disc because this will slow you down. When the disc is in front of you, glance quickly to see where is the sideline, goal line at defender(s) are. If you realise that the disc is floating and you ha lots of time to get to the disc, slow down a litl so that you will be able to keep running at tl disc. You do not want a situation where you a standing stationary and jumping for the disc. Yo defender will get an advantage over you by gettir a running start and a better approach to the di~ Give yourself enough space so that you can go a out and get your maximum leap to the disc. If your defender is taller or a better jumper ft you, try these possible tactics: • Glance occasionally at the disc, make a quick fake to the opposite side and cut back hard to 'attack' the disc. Since the defender is chasing after you, the defender's focus might be on your direction of travel rather than the flight of the disc. • Jumping early and faking the defender by jumping early to "D" the disc. After the defender misses the disc, you can go around or behind the defender to catch the disc. • You can use your body to block out the defender to prevent them from getting the disc and at the same time, make a play on catching the disc. Imagine a volleyball player spiking the ball. Always remember to GO LOW then GO HIGH. The jumping technique is similar to a volleyball spike. Get low, swing both your arms, and push off the ground. If the situation allows, try a two- step run up to the disc. You should catch the disc at the peak of your jump and experience "hanging" momentarily in the air. Try not to think about avoiding contact with other players and focus on catching the disc and adjusting your position later 13
  • 14.
    CHAPTER 7 BASIC MARKING Marking is an active process during game play when the defender is guarding a thrower. The marker's job is to make the thrower's job as difficult as possible by reacting to every movement. However, one must remember that Ultimate Frisbee is a team game and the harder the marker works, the lesser work the downfield defenders have to do to shut down their receivers. That is to say, with both the marker and the defenders working hand in hand, it is going to be very tough for the offence to flow. Tips to be a better marker Keep your weight low. You should bend your knees slightly and feel your quadriceps working. This allows you to balance and to get your hands low. Keep on the ball of your feet. You have to react to the thrower and stop the breakmark throws. You cannot react to the thrower who is pivoting if you are standing flatfooted. This is important especially if you need to move quickly. It is advisable that you lean slightly forward. Keep your hands low and spread out. By pulling your shoulders back, you look "bigger" and it helps in your balance as well. If you are preventing a high throw, it is obvious that you put your hand up. In general, the arm on the open side should be low and the other arm should be higher to stop the high throws. Learn to read fakes. Learn to differentiate between a fake and a genuine throw. It would be ideal if you know certain players' fakes. Be careful not to commit to weak fakes from the throwers, especially when they do not intend to throw the disc. Always call "Up!" loudly when the thrower h released the disc. This allows the defenders who a fronting their receivers (not looking at the throw( to glance around to look for the disc. The "u[ call is extremely important if the throw is a huck and meant for the defenders who are marking the receivers who are running deep. Introduction to marking as a team It is difficult to play defence especially in such big field. The team will agree beforehand on tF landmark on each side of the field. For examp significant building or lone tree, or use genet terms such as "Home" or "Away", which u apply to any field. Usually we use "Home" for tk side where we put our bags and "Away" will k the opposite side. The defensive line will decide c the side to force before pulling the disc. When the marker is near the thrower, he will call the force. e.g. "Force Home" means he will on allow the thrower to throw to the home side. 1 - will "Hold the Force" by standing 45 degrees to th opposite side of the force. The defenders down field will know most likely that the disc will be coming from the home side and defend accordingly. It is the marker's responsibility to hold the for( and not allow the thrower to throw in the opposil direction. However, if the disc is thrown in th opposite direction of the force, then the mark( must call "Break!" loudly to alert his defenders s that they can adjust their position quickly. Direction of force These are the few directions of forces which th team can choose from Force Middle. The thrower is always force to throw towards the middle of the field. Mo! markers make the mistake of calling the force a "Force Middle" rather than calling the sides that they should be forcing like 14
  • 15.
    "Force Home orAway". s is usually done to prevent the offence from stringing a number of consecutive passes down a sideline known as the "flow". Force Line (Trap). The thrower is always forced throw towards the nearest sidelines. This is particularly effective against weaker throwers or en the disc is very near the sideline. The thrower limited to very little space on the side of the field throw into. The disadvantage is that with better throwers, it leaves the end zone fairly open and break marks throws are costly to the defence . Force Straight Up. The marker stands directly in front of the thrower and tries to stop every throw or fake. This is used effectively against teams that huck a lot and places a lot of stress on the defenders. This can also be used when a receiver has just caught a huck near the end zone. The marker's responsibility is to stop an easy pass for a score in a couple of seconds. The disadvantage is that it is difficult to stop the thrower, and the defenders have to be close to the receivers as there is a possibility of throwing to either side. Force Wind. The thrower is forced to throw into/ against the wind. This is effective against weak throwers who do not have low throws. Basic marking 15
  • 16.
    CHAPTER 8 ADVANCE MARKING Nothing beats knowing the player that you are marking. Know their fakes and remember where their favourite release point is. If you do your homework, you can modify your marking style in order to get hand blocks or force the thrower to be out of his comfort zone and cause a turnover. Marking against different players using a standard mark is inappropriate and something different must be done to "suit" your thrower. Knowing the concepts is important, but knowing when to apply them and reacting accordingly is even more so. Hands Low or High? Markers usually prefer to keep their hands low, since most of the break mark throws are released low. But this is not the case when you are marking someone who likes to do the high release passes or hammers. Against right-handed throwers, it would be wise to keep the right hand up and the left hai low. This gives you a chance to get a block against these throws. Marking Distance Sometimes, the distance between yourself and tl thrower is important. By standing close to a weak thrower, you pressurise the thrower resulting in turnover. However, if you are standing too clo to an experienced thrower, you give him tl opportunity to break mark. Furthermore, if you a standing too close to the thrower, you risk foulif the thrower during the throwing process Fakes Try not to fall for weak or obvious fakes. Sin, most players use the same fakes to throw you off would be better if you knew the thrower well. 16
  • 17.
    CHAPTER 9 GUARDING Preventing your offender from getting easy and dangerous throws are the fundamentals of guarding. By standing between the receiver and the disc will effectively cause obstruction to the offense. Thus as a defender, you must constantly readjust your position to that of your offender, place yourself in a power position and minimize any chance of him getting the disc. As a player, you must know what defence to play, what force has been called and what role you play on defence. The main factor you need to consider while playing defence: who you are defending (what are his or her abilities; how aggressive is that individual; their favourite moves or fakes, etc). This information will help you greatly in your defence as you will be able to take control of your opponent and this gives you an advantage. If your team decides to front your offense because of their weak long throws, then your responsibility will be to prevent the shortcuts in. With this priority, you will be able to position yourself correctly throughout the game. While on one-on-one defense, always stay focused. Individual defence requiresthe utmost concentration aseach step made by your opponent, the movement of the disc, the counting on the thrower plus the cuts made by other offenders, requires immediate adjustment to your positioning. Proper adjustment will do great damage to the offense as it prevents and/or minimises any easy cuts for the disc. As a defender, constantly assess your environment and make small adjustments so that you will not be caught off guard at any time. One free second is all it takes for the offense to get the disc and it might even lead to an easy score. Always keep your offender in your sight at all times so that you can reposition with his every move to be in between the disc and him. Likewise, it will be good if you can see the throw as it is being released so that you can react to it appropriately 17
  • 18.
    Like any game,Ultimate has its own jargon. BREAK (side, pass or cut) The side to which the marker is trying to prevent the throw (or a pass/cut to this side). HAMMER High overhead throw; thedisc flies upsidedown in a parabolic type path. The grip, release, etc is similar to the forehand. CLEARING To get out of the area where the thrower wants to pass the disc. This is absolutely necessary after making an unsuccessful cut or after throwing the pass. The importance of this is often underplayed to beginners. CUT An attempt to get free to receive the pass. Usually starting with a body fake and/or a sudden change in direction or speed. DUMP Player who stands behind the thrower in order to help out (must get free for an easy pass) when the offence gets in trouble. FLOW A series of quick passes to well-timed cuts - should result in an easy score. FORCE (or mark) To make it as difficult as possible forthe thrower to throw the disc in one direction (usually one side of the field) in an attempt to make (force) him/her to make a pass to the other side. See the relevant section for how and why this is done. FREE (or OPEN) To be available to receive the pass. The "free player" may be unmarked or have managed to get away from his/her defender. HAND BLOCK This is when the defender stops the disc directly after it is released by the thrower. HUCK A long pass, often nearly the full length of the pitch and high, to a tall player in the end zone. LAYOUT When the player dives the catch or intercept the disc. Also referred to as "gung ho" (from going horizontal). 18
  • 19.
    MAN-ON-MAN The most commontype of defence. Each person on defence marks an offence player and attempts to stay as close as possible with the intention of getting an interception or forcing a mistake. OPEN (side, pass or cut) (i) The side to which the thrower is being forced (or a pass/cut to this side). (ii) Sometimes used to describe being free to receive a pass. PIVOT When you plant your foot (left for righthanders and right for left-handers) and step to the side (allowing you the throw around the marker). POACH When a defender moves away from their marker to try and make an interception on a pass to another player. PULL The throw at the start of each point that initiates play. SWING A lateral pass across the pitch - usually does not result in any upfield movement. This is useful to gain a better position or to reset the stall count. SWITCH This is when two defenders exchange the offensive players that they are marking. TURNOVER or change of possession When the disc has been dropped or intercepted and the offense becomes the defence. END ZONE Area at the either end of the pitch within which a point is scored. OFFENCE The team with possession of the disc. POINT (or score) When the disc is caught in the end zone by a player on the offence. STALLING (or Stall Count) The player holding the disc has just ten seconds to pass itto a team mate-the defender marking the player with the disc counts to ten out loud, and if the disc has not been released on "ten" the defender takes possession. Forcing the thrower to make a less-than-ideal pass as the "stall count" nears ten is the idea behind most defensive strategies. 19
  • 20.
    REFERENCES Launder, A.G.2001. PlayPractice: The games approach to teaching and coaching sports. Illionis, Human Kinetic Parinella, J.& Zaslow, E. 2004. Ultimate Technique and Tactics. Illionis, Human Kinetic. Online resources www.mindef.gov.sg/life/ultimatefis.htm www.whatisultimate.com/what.asp www2.upa.org/ultimate. www1.upa.org/ultimate/rules.appx. www.ultimatehandbook.com www.frisbeespew.com 20