Downloaded 16 times


![12
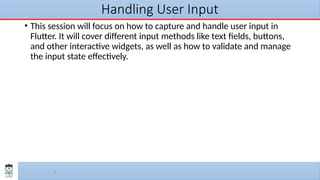
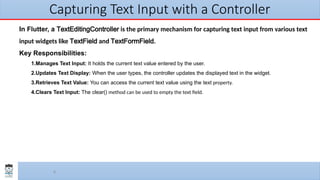
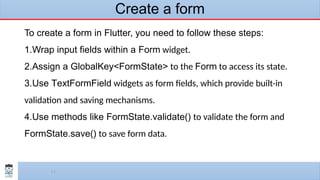
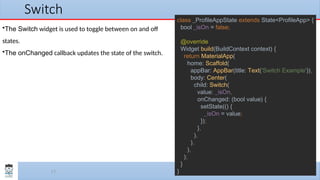
class _ProfileAppState extends State<ProfileApp> {
final _formKey = GlobalKey<FormState>();
String _name = '';
String _email = '';
void _submitForm() {
if (_formKey.currentState!.validate()) {
_formKey.currentState!.save();
print('Name: $_name, Email: $_email'); } }
@override
Widget build(BuildContext context) {
return MaterialApp(
home: Scaffold(
appBar: AppBar(title: Text('Form Example')),
body: Padding(padding: const EdgeInsets.all(16.0),
child: Form(
key: _formKey,
child: Column(
children: [
TextFormField( ),
TextFormField( ),
TextFormField( ),
ElevatedButton(
onPressed: _submitForm,
child: Text('Submit'),
), ], ), ), ), ), ); }}](https://image.slidesharecdn.com/mobileapplicationdevelopmentclass-05-241110161629-9f4a9aa7/85/Mobile-Application-Development-Handling-User-Input-and-Navigation-class-05-12-320.jpg)
![16
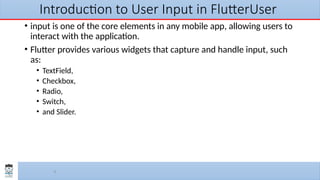
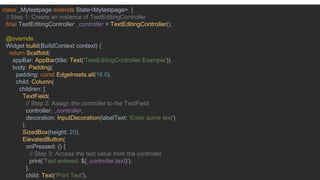
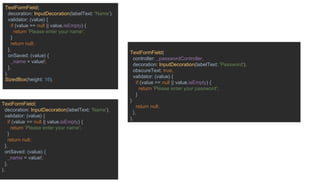
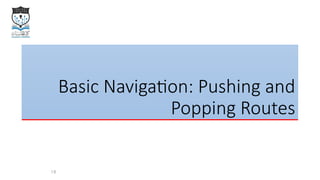
IconButton with an Icon
•A Checkbox widget is used to toggle a boolean value.
•The state is managed using a setState call to re-
render the widget when the checkbox is clicked.
class _ProfileAppState extends State<ProfileApp> {
bool _isChecked = false;
@override
Widget build(BuildContext context) {
return MaterialApp(
home: Scaffold(
appBar: AppBar(title: Text('Checkbox Example')),
body: Center(
child: Row(
mainAxisAlignment: MainAxisAlignment.center,
children: [
Checkbox (
value: _isChecked,
onChanged: (bool? value) {
setState(() {
_isChecked = value!;
});
},
),
Text(_isChecked ? 'Checked' : 'Unchecked'),
],
), ), ), ); }}](https://image.slidesharecdn.com/mobileapplicationdevelopmentclass-05-241110161629-9f4a9aa7/85/Mobile-Application-Development-Handling-User-Input-and-Navigation-class-05-16-320.jpg)
![21
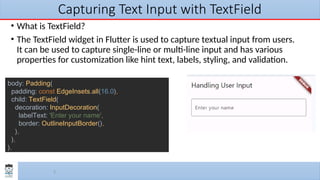
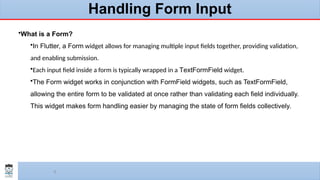
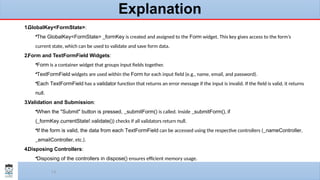
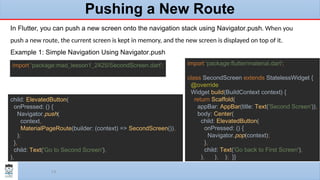
Passing Data Between Screens
In many scenarios, you will need to pass data between screens. Flutter allows you to pass
arguments to routes when navigating using both Navigator.push and named routes.
body: Center(
child: Column(
children: [
TextField(
controller: Textcontroller,
),
ElevatedButton(
onPressed: () {
Navigator.push(
context,
MaterialPageRoute(builder: (context) =>
SecondScreen(data: Textcontroller.text)),
);
},
child: Text('Go to Second Screen'),
),
], ),),
class SecondScreen extends StatelessWidget {
final String data;
SecondScreen({required this.data});
@override
Widget build(BuildContext context) {
return Scaffold(
appBar: AppBar(title: Text('Second Screen')),
body: Center(
child: Column(
children: [
ElevatedButton(
onPressed: () {Navigator.pop(context); },
child: Text('Go back to First Screen'),
),
SizedBox(height: 20),
Text(data)
], ), ), ); }}](https://image.slidesharecdn.com/mobileapplicationdevelopmentclass-05-241110161629-9f4a9aa7/85/Mobile-Application-Development-Handling-User-Input-and-Navigation-class-05-21-320.jpg)

The document provides a comprehensive lecture on handling user input and navigation in mobile application development using Flutter. It covers various input methods, including text fields, buttons, and forms, detailing their implementation, state management, and validation processes. Additionally, it explains navigation between screens and passing data between them, emphasizing best practices for user interaction in Flutter applications.