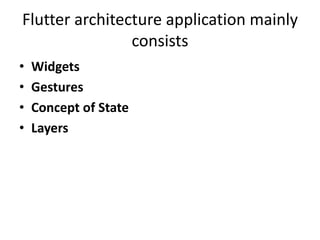
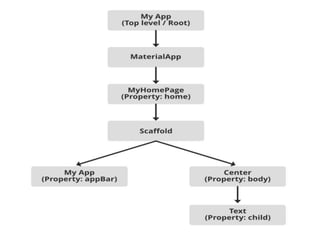
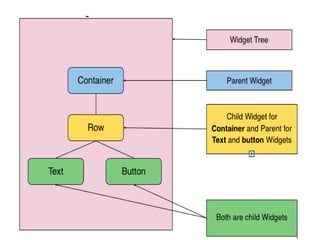
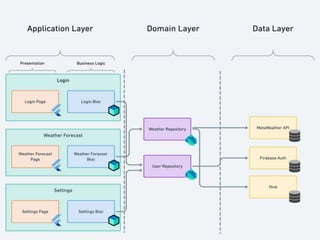
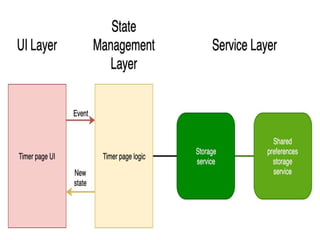
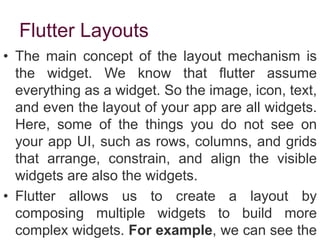
Flutter architecture consists of widgets, gestures, state management, and layers. The key components are:
- Widgets are the primary UI elements and make up the application structure. MaterialApp and Scaffold widgets provide common UI components.
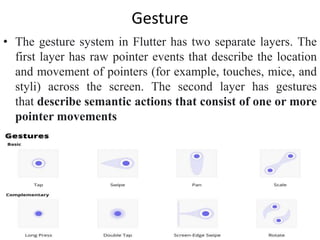
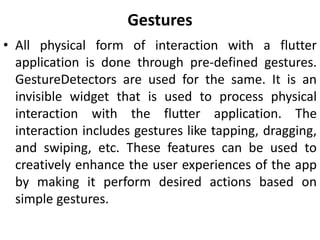
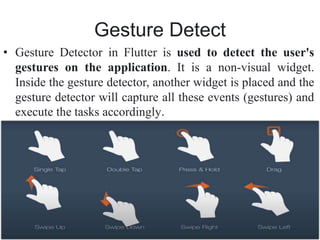
- Gestures allow interaction through taps, swipes, etc. and are handled by GestureDetector.
- State management tracks data that can change using StatefulWidget and State classes.
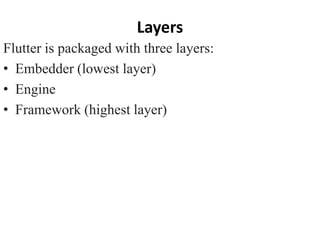
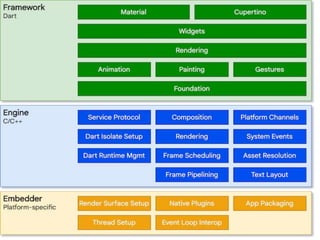
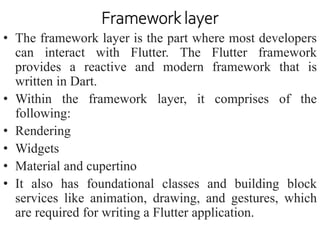
- The framework layer provides rendering, widgets and animation services to build Flutter apps.


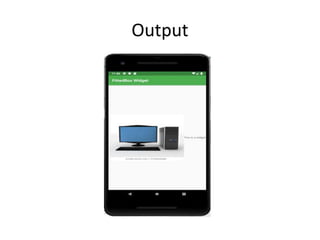
![Cont..
class MyHomePage extends StatelessWidget {
@override
Widget build(BuildContext context) {
return Scaffold(
appBar: AppBar(title: Text("FittedBox Widget")),
body: Center(
child: FittedBox(child: Row(
children: <Widget>[
Container(
child: Image.asset('assets/computer.png'),
),
Container(
child: Text("This is a widget"),
)
],
),
fit: BoxFit.contain,
)
),
);
}
}](https://image.slidesharecdn.com/flutterarchitecture-240302192539-2724abc7/85/FlutterArchitecture-FlutterArchitecture-ppt-49-320.jpg)
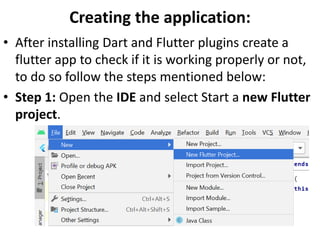
![Configure Flutter SDK and Dart SDK
Path if not Set
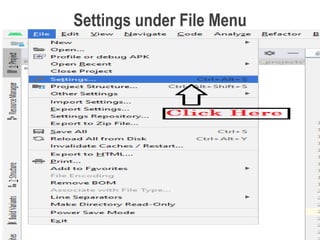
• Step 1 : Go to File Menu
Step 2 : Click on Settings ( Ctrl + Alt + S)
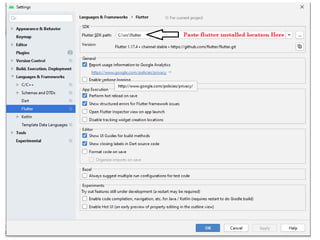
Step 3: then click on Flutter under Language &
Frameworks Tab
Step 4: In my PC I installed flutter in this location
( C:srcflutter )
[Note : please copy your PC installed location of flutter
]
Step 5 : Copy above Location and paste it to
your Flutter SDK path: location and click on Apply
and OK
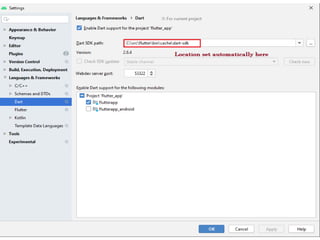
Step 6 : after above settings you will see that Dart SDK
path set automatically.](https://image.slidesharecdn.com/flutterarchitecture-240302192539-2724abc7/85/FlutterArchitecture-FlutterArchitecture-ppt-54-320.jpg)