A Complete Guide to Building Your First App with Flutter
1.
A Complete Guideto Building Your
First App with Flutter
Imagine, if you were able to create gorgeous, responsive apps that run smoothly on
iPhones, Android phones, PCs, and even webpages using a single codebase. This is not a
developer's dream; it is the reality that Flutter brings to life.
Flutter represents a fundamental change in how we approach app development. Flutter was
developed by Google and released to the public in 2017, has quickly matured from an
experimental toolkit to a mature platform that powers applications used by millions of people
worldwide.
At its heart, Flutter represents a simple but powerful idea: developers should not have to
choose between development speed, app performance, and design freedom. Rather than
having one to master various programming languages and tools for each platform, Flutter
offers a unified approach that simplifies development significantly.
What is Flutter Technology?
Flutter is an open-source UI software development kit (SDK) created by Google. Unlike
traditional frameworks that require separate codebases for different platforms, Flutter allows
developers to build natively compiled apps for Android, iOS, web, and desktop—all from a
single codebase.
Popular Apps Built with Flutter
Many well-known companies have adopted Flutter for their applications, proving its reliability
and efficiency:
● Google Ads – A mobile app for managing ad campaigns.
● Alibaba – One of the biggest e-commerce platforms.
● BMW – High-end automotive solutions.
● eBay Motors – A marketplace for buying and selling vehicles.
● Reflectly – An AI-powered journaling app.
What is Flutter SDK?
The Flutter SDK (Software Development Kit) is a collection of tools used for Flutter app
development. It includes:
● Flutter Framework – The core of Flutter, is packed with a rich set of pre-built UI
components (widgets) that help developers create visually stunning and highly
interactive apps with minimal effort.
2.
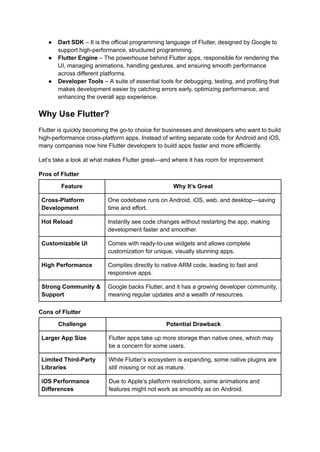
● Dart SDK– It is the official programming language of Flutter, designed by Google to
support high-performance, structured programming.
● Flutter Engine – The powerhouse behind Flutter apps, responsible for rendering the
UI, managing animations, handling gestures, and ensuring smooth performance
across different platforms.
● Developer Tools – A suite of essential tools for debugging, testing, and profiling that
makes development easier by catching errors early, optimizing performance, and
enhancing the overall app experience.
Why Use Flutter?
Flutter is quickly becoming the go-to choice for businesses and developers who want to build
high-performance cross-platform apps. Instead of writing separate code for Android and iOS,
many companies now hire Flutter developers to build apps faster and more efficiently.
Let’s take a look at what makes Flutter great—and where it has room for improvement:
Pros of Flutter
Feature Why It’s Great
Cross-Platform
Development
One codebase runs on Android, iOS, web, and desktop—saving
time and effort.
Hot Reload Instantly see code changes without restarting the app, making
development faster and smoother.
Customizable UI Comes with ready-to-use widgets and allows complete
customization for unique, visually stunning apps.
High Performance Compiles directly to native ARM code, leading to fast and
responsive apps.
Strong Community &
Support
Google backs Flutter, and it has a growing developer community,
meaning regular updates and a wealth of resources.
Cons of Flutter
Challenge Potential Drawback
Larger App Size Flutter apps take up more storage than native ones, which may
be a concern for some users.
Limited Third-Party
Libraries
While Flutter’s ecosystem is expanding, some native plugins are
still missing or not as mature.
iOS Performance
Differences
Due to Apple’s platform restrictions, some animations and
features might not work as smoothly as on Android.
3.
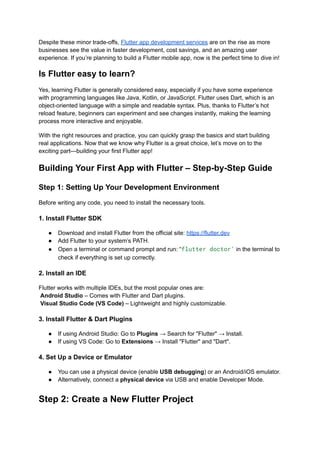
Despite these minortrade-offs, Flutter app development services are on the rise as more
businesses see the value in faster development, cost savings, and an amazing user
experience. If you’re planning to build a Flutter mobile app, now is the perfect time to dive in!
Is Flutter easy to learn?
Yes, learning Flutter is generally considered easy, especially if you have some experience
with programming languages like Java, Kotlin, or JavaScript. Flutter uses Dart, which is an
object-oriented language with a simple and readable syntax. Plus, thanks to Flutter’s hot
reload feature, beginners can experiment and see changes instantly, making the learning
process more interactive and enjoyable.
With the right resources and practice, you can quickly grasp the basics and start building
real applications. Now that we know why Flutter is a great choice, let’s move on to the
exciting part—building your first Flutter app!
Building Your First App with Flutter – Step-by-Step Guide
Step 1: Setting Up Your Development Environment
Before writing any code, you need to install the necessary tools.
1. Install Flutter SDK
● Download and install Flutter from the official site: https://flutter.dev
● Add Flutter to your system’s PATH.
● Open a terminal or command prompt and run: “flutter doctor’ in the terminal to
check if everything is set up correctly.
2. Install an IDE
Flutter works with multiple IDEs, but the most popular ones are:
Android Studio – Comes with Flutter and Dart plugins.
Visual Studio Code (VS Code) – Lightweight and highly customizable.
3. Install Flutter & Dart Plugins
● If using Android Studio: Go to Plugins → Search for "Flutter" → Install.
● If using VS Code: Go to Extensions → Install "Flutter" and "Dart".
4. Set Up a Device or Emulator
● You can use a physical device (enable USB debugging) or an Android/iOS emulator.
● Alternatively, connect a physical device via USB and enable Developer Mode.
Step 2: Create a New Flutter Project
4.
Once your setupis complete, create a new Flutter app by running:
CopyEdit
flutter create my_first_app
This generates a basic project structure. Navigate into the project folder:
CopyEdit
cd my_first_app
Then, open the project in your chosen IDE.
Step 3: Understanding the Folder Structure
When you open the project, you'll see:
📂lib/ – The main folder where you write the Dart code.
📂android/ & ios/ – Native platform-specific code.
📂assets/ – Stores images, fonts, and other static files.
📂pubspec.yaml – The config file where you manage dependencies, assets, and
metadata.
Your main code will be in lib/main.dart.
Step 4: Writing Your First Flutter App
Replace the code in main.dart with:
import 'package:flutter/material.dart';
void main() {
runApp(MyApp());
}
class MyApp extends StatelessWidget {
@override
Widget build(BuildContext context) {
return MaterialApp(
title: 'My First Flutter App',
theme: ThemeData(primarySwatch: Colors.blue),
home: HomePage(),
);
}
}
class HomePage extends StatelessWidget {
5.
Explanation:
✔ MaterialApp –The root widget of your Flutter app.
✔ Scaffold – Provides a structure like AppBar, Body, and Floating Action Button.
✔ Text – Displays text on the screen.
Run the app again using:
flutter run
You should see "Hello, Flutter!" displayed on the screen. 🎉
Step 5: Adding Interactivity (Stateful Widget)
To make the app interactive, let's add a button that increases a counter when clicked.
Replace HomePage with:
class HomePage extends StatefulWidget {
@override
_HomePageState createState() => _HomePageState();
}
class _HomePageState extends State<HomePage> {
int counter = 0;
void incrementCounter() {
setState(() {
counter++;
});
}
@override
Widget build(BuildContext context) {
return Scaffold(
appBar: AppBar(title: Text('Welcome to Flutter!')),
body: Center(
child: Text(
'Hello, Flutter!',
style: TextStyle(fontSize: 24, fontWeight: FontWeight.bold),
),
),
);
}
}
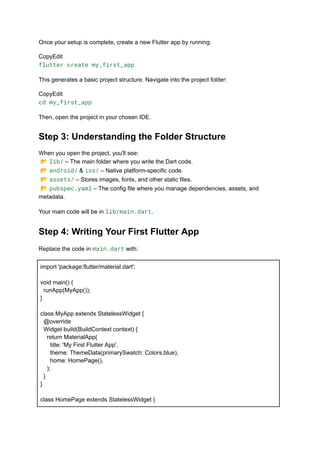
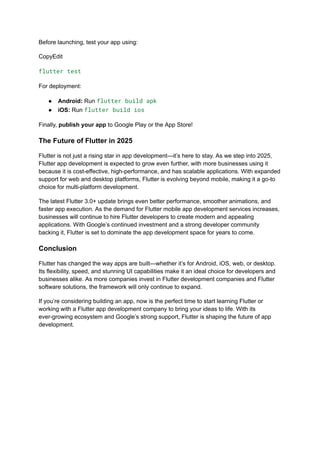
6.
@override
Widget build(BuildContext context){
return Scaffold(
appBar: AppBar(title: Text('Flutter Counter App')),
body: Center(
child: Column(
mainAxisAlignment: MainAxisAlignment.center,
children: [
Text('You pressed the button this many times:'),
Text('$counter', style: TextStyle(fontSize: 30, fontWeight: FontWeight.bold)),
],
),
),
floatingActionButton: FloatingActionButton(
onPressed: incrementCounter,
child: Icon(Icons.add),
),
);
}
}
What’s New?
● StatefulWidget – Used when the UI changes dynamically.
● setState() – Updates the UI when the button is clicked.
● FloatingActionButton – Adds a floating button with an icon.
Step 6: Running the App on a Device
1. Connect a physical device or open an emulator.
2. Run: flutter run
3. Click the + button, and the counter should increase.
Step 7: Adding UI Styling
Modify the Text widget inside HomePageState to add styling:
Text(
'$counter',
style: TextStyle(
fontSize: 40,
fontWeight: FontWeight.bold,
color: Colors.blue,
7.
),
)
You can alsocustomize the button color:
floatingActionButton: FloatingActionButton(
onPressed: incrementCounter,
backgroundColor: Colors.green,
child: Icon(Icons.add, color: Colors.white),
),
Step 8: Using External Packages
Flutter has a package manager called pub.dev. Let’s add an animation package.
Open pubspec.yaml and add:
dependencies:
animated_text_kit: ^4.2.2
1. Run: flutter pub get
2. Use it in your app:
import 'package:animated_text_kit/animated_text_kit.dart';
AnimatedTextKit(
animatedTexts: [
TypewriterAnimatedText('Hello, Flutter!', textStyle: TextStyle(fontSize: 32)),
],
)
This will display a cool typing animation! 🎉
Step 9: Testing Your App
Flutter makes testing easy! Run:
flutter test
You can write unit tests in the test/ folder to ensure your app works as expected.
Step 10: Building & Deploying Your App
8.
Before launching, testyour app using:
CopyEdit
flutter test
For deployment:
● Android: Run flutter build apk
● iOS: Run flutter build ios
Finally, publish your app to Google Play or the App Store!
The Future of Flutter in 2025
Flutter is not just a rising star in app development—it’s here to stay. As we step into 2025,
Flutter app development is expected to grow even further, with more businesses using it
because it is cost-effective, high-performance, and has scalable applications. With expanded
support for web and desktop platforms, Flutter is evolving beyond mobile, making it a go-to
choice for multi-platform development.
The latest Flutter 3.0+ update brings even better performance, smoother animations, and
faster app execution. As the demand for Flutter mobile app development services increases,
businesses will continue to hire Flutter developers to create modern and appealing
applications. With Google’s continued investment and a strong developer community
backing it, Flutter is set to dominate the app development space for years to come.
Conclusion
Flutter has changed the way apps are built—whether it’s for Android, iOS, web, or desktop.
Its flexibility, speed, and stunning UI capabilities make it an ideal choice for developers and
businesses alike. As more companies invest in Flutter development companies and Flutter
software solutions, the framework will only continue to expand.
If you’re considering building an app, now is the perfect time to start learning Flutter or
working with a Flutter app development company to bring your ideas to life. With its
ever-growing ecosystem and Google’s strong support, Flutter is shaping the future of app
development.
![@override
Widget build(BuildContext context) {
return Scaffold(
appBar: AppBar(title: Text('Flutter Counter App')),
body: Center(
child: Column(
mainAxisAlignment: MainAxisAlignment.center,
children: [
Text('You pressed the button this many times:'),
Text('$counter', style: TextStyle(fontSize: 30, fontWeight: FontWeight.bold)),
],
),
),
floatingActionButton: FloatingActionButton(
onPressed: incrementCounter,
child: Icon(Icons.add),
),
);
}
}
What’s New?
● StatefulWidget – Used when the UI changes dynamically.
● setState() – Updates the UI when the button is clicked.
● FloatingActionButton – Adds a floating button with an icon.
Step 6: Running the App on a Device
1. Connect a physical device or open an emulator.
2. Run: flutter run
3. Click the + button, and the counter should increase.
Step 7: Adding UI Styling
Modify the Text widget inside HomePageState to add styling:
Text(
'$counter',
style: TextStyle(
fontSize: 40,
fontWeight: FontWeight.bold,
color: Colors.blue,](https://image.slidesharecdn.com/acompleteguidetobuildingyourfirstappwithflutter-guestposting-250318074934-0e0a6cdf/85/A-Complete-Guide-to-Building-Your-First-App-with-Flutter-6-320.jpg)
![),
)
You can also customize the button color:
floatingActionButton: FloatingActionButton(
onPressed: incrementCounter,
backgroundColor: Colors.green,
child: Icon(Icons.add, color: Colors.white),
),
Step 8: Using External Packages
Flutter has a package manager called pub.dev. Let’s add an animation package.
Open pubspec.yaml and add:
dependencies:
animated_text_kit: ^4.2.2
1. Run: flutter pub get
2. Use it in your app:
import 'package:animated_text_kit/animated_text_kit.dart';
AnimatedTextKit(
animatedTexts: [
TypewriterAnimatedText('Hello, Flutter!', textStyle: TextStyle(fontSize: 32)),
],
)
This will display a cool typing animation! 🎉
Step 9: Testing Your App
Flutter makes testing easy! Run:
flutter test
You can write unit tests in the test/ folder to ensure your app works as expected.
Step 10: Building & Deploying Your App](https://image.slidesharecdn.com/acompleteguidetobuildingyourfirstappwithflutter-guestposting-250318074934-0e0a6cdf/85/A-Complete-Guide-to-Building-Your-First-App-with-Flutter-7-320.jpg)


![What is Flutter App Development [Step by Step Guide 2023]](https://cdn.slidesharecdn.com/ss_thumbnails/whatisflutterappdevelopmentstepbystepguide2023-240101101808-54fa8e23-thumbnail.jpg?width=640&height=640&fit=bounds)