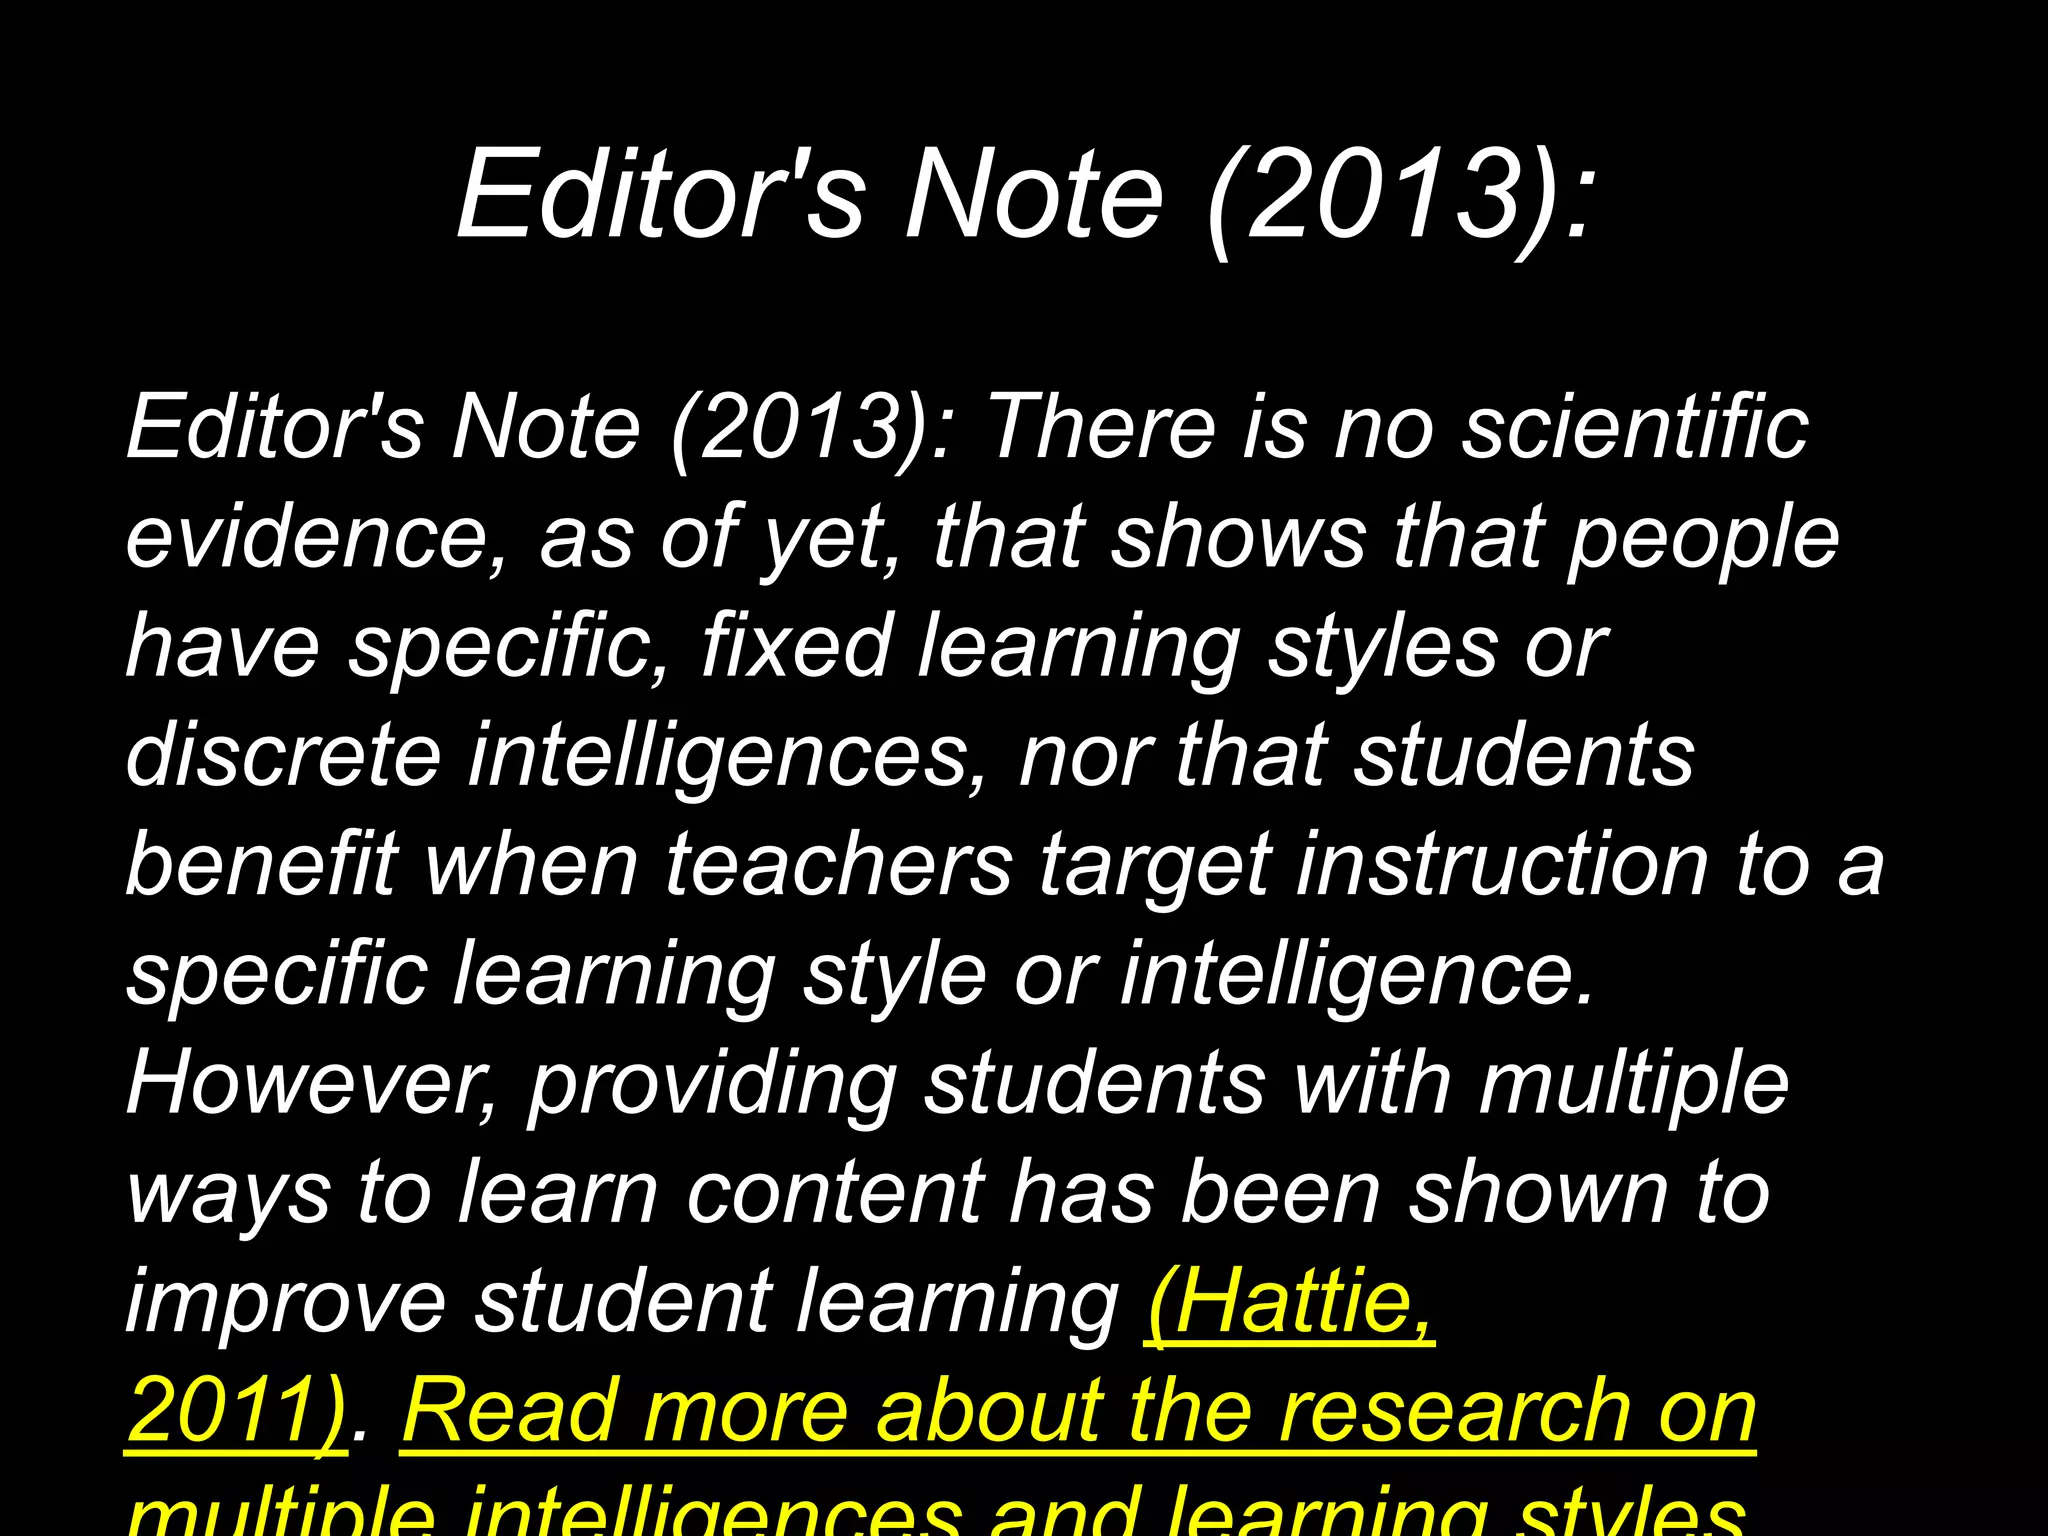
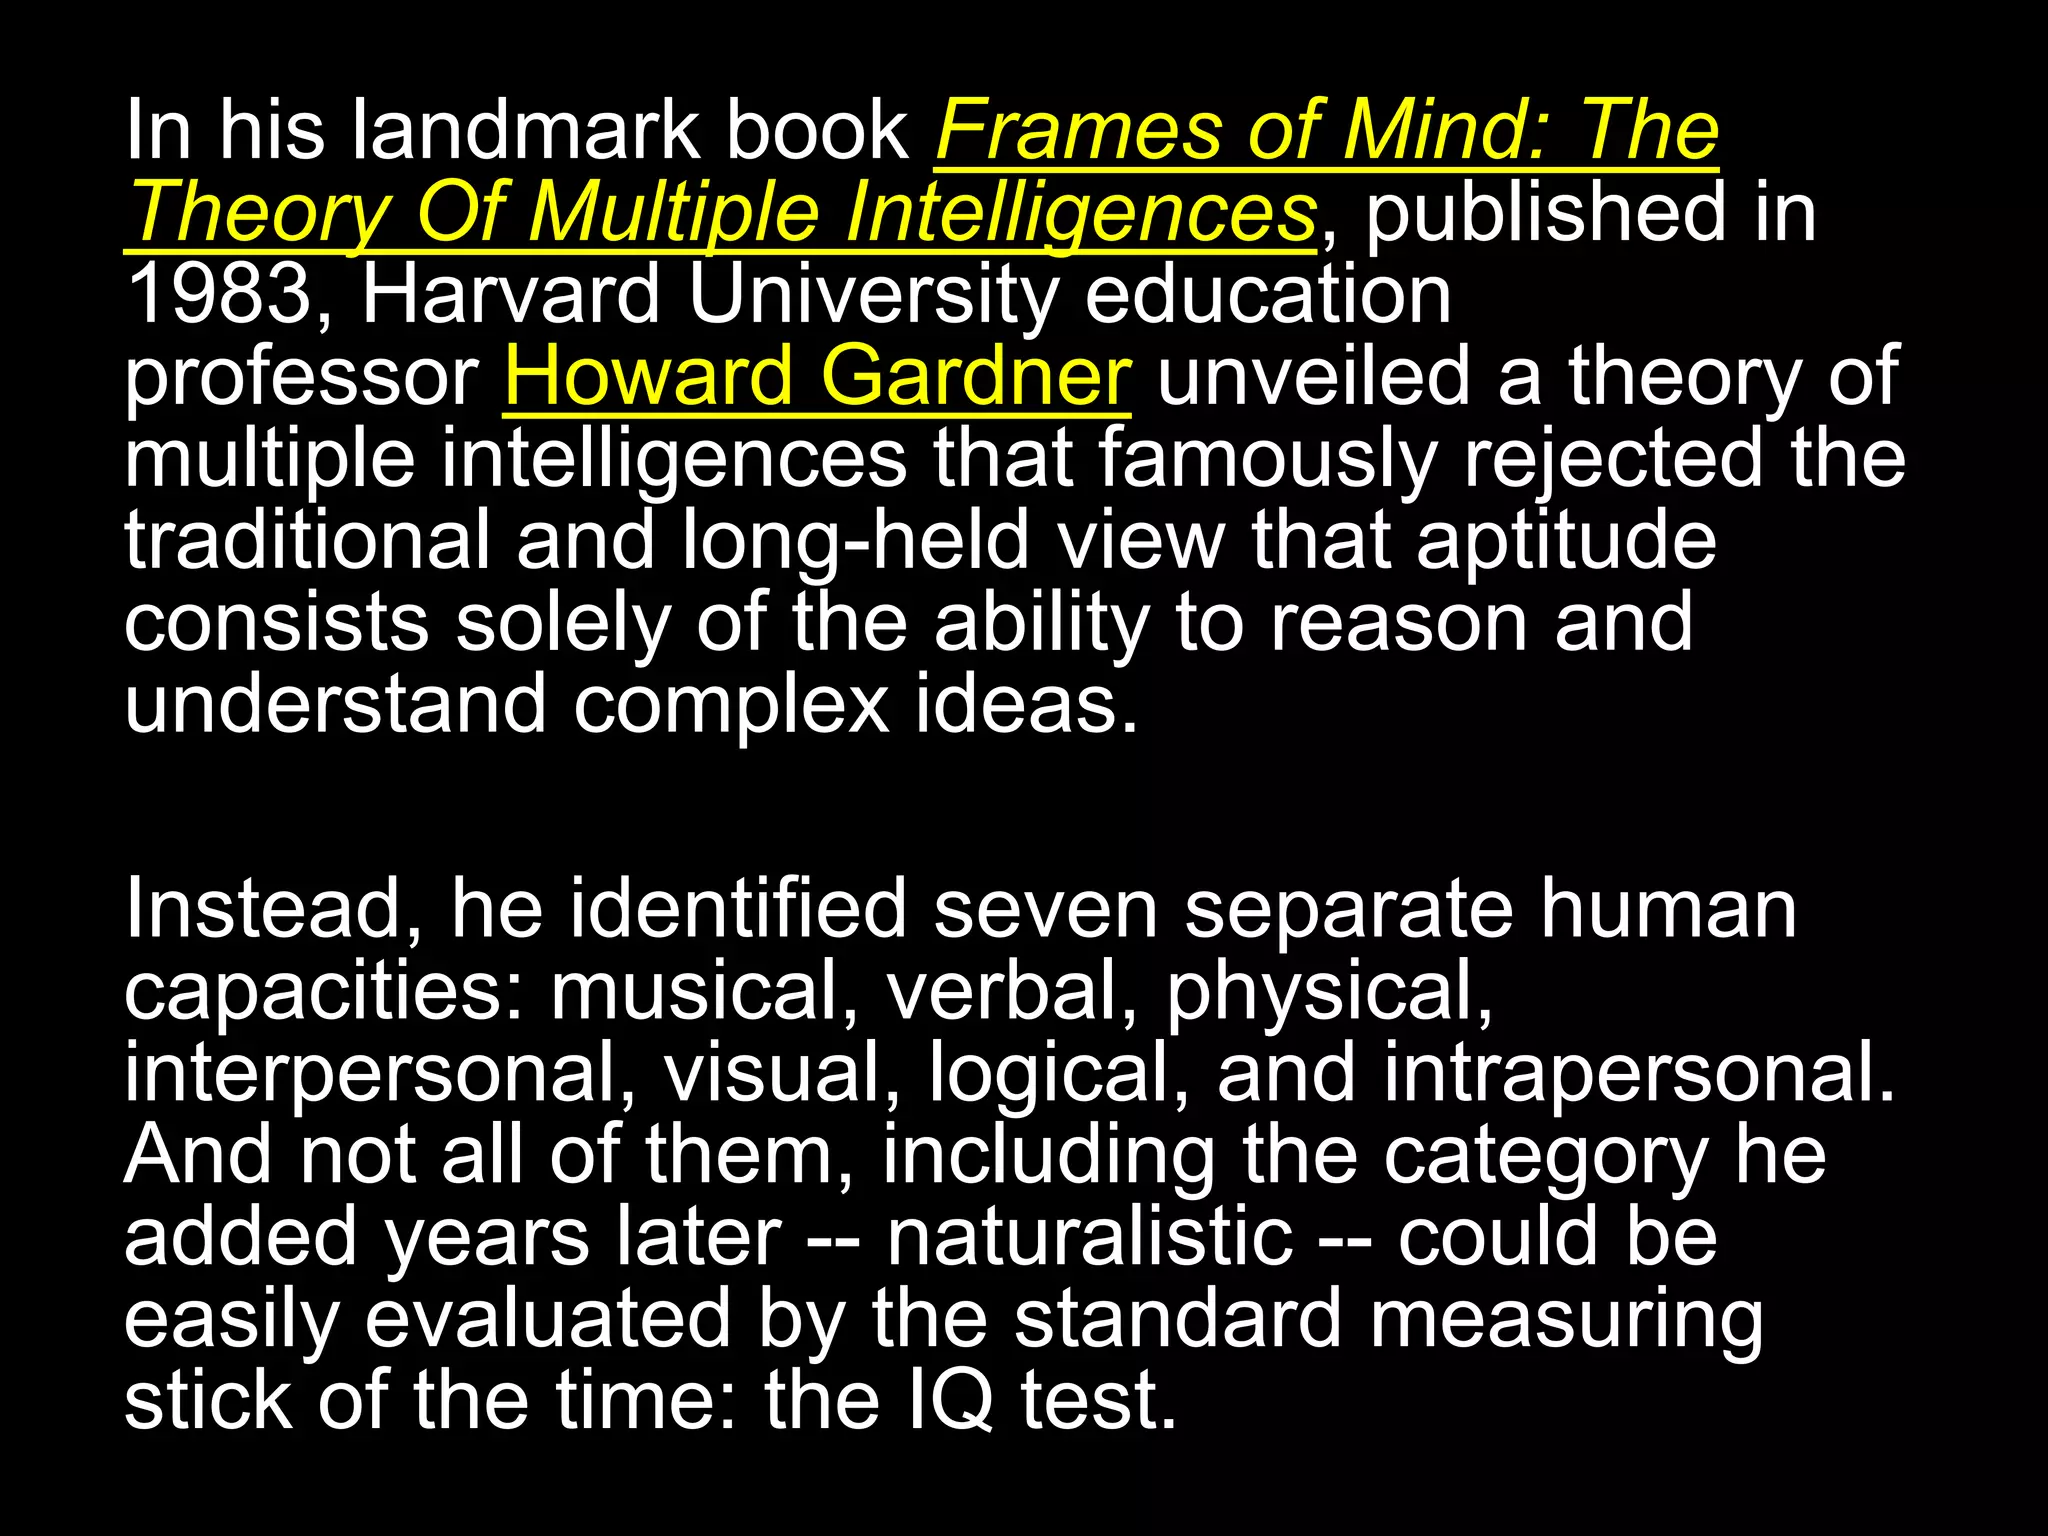
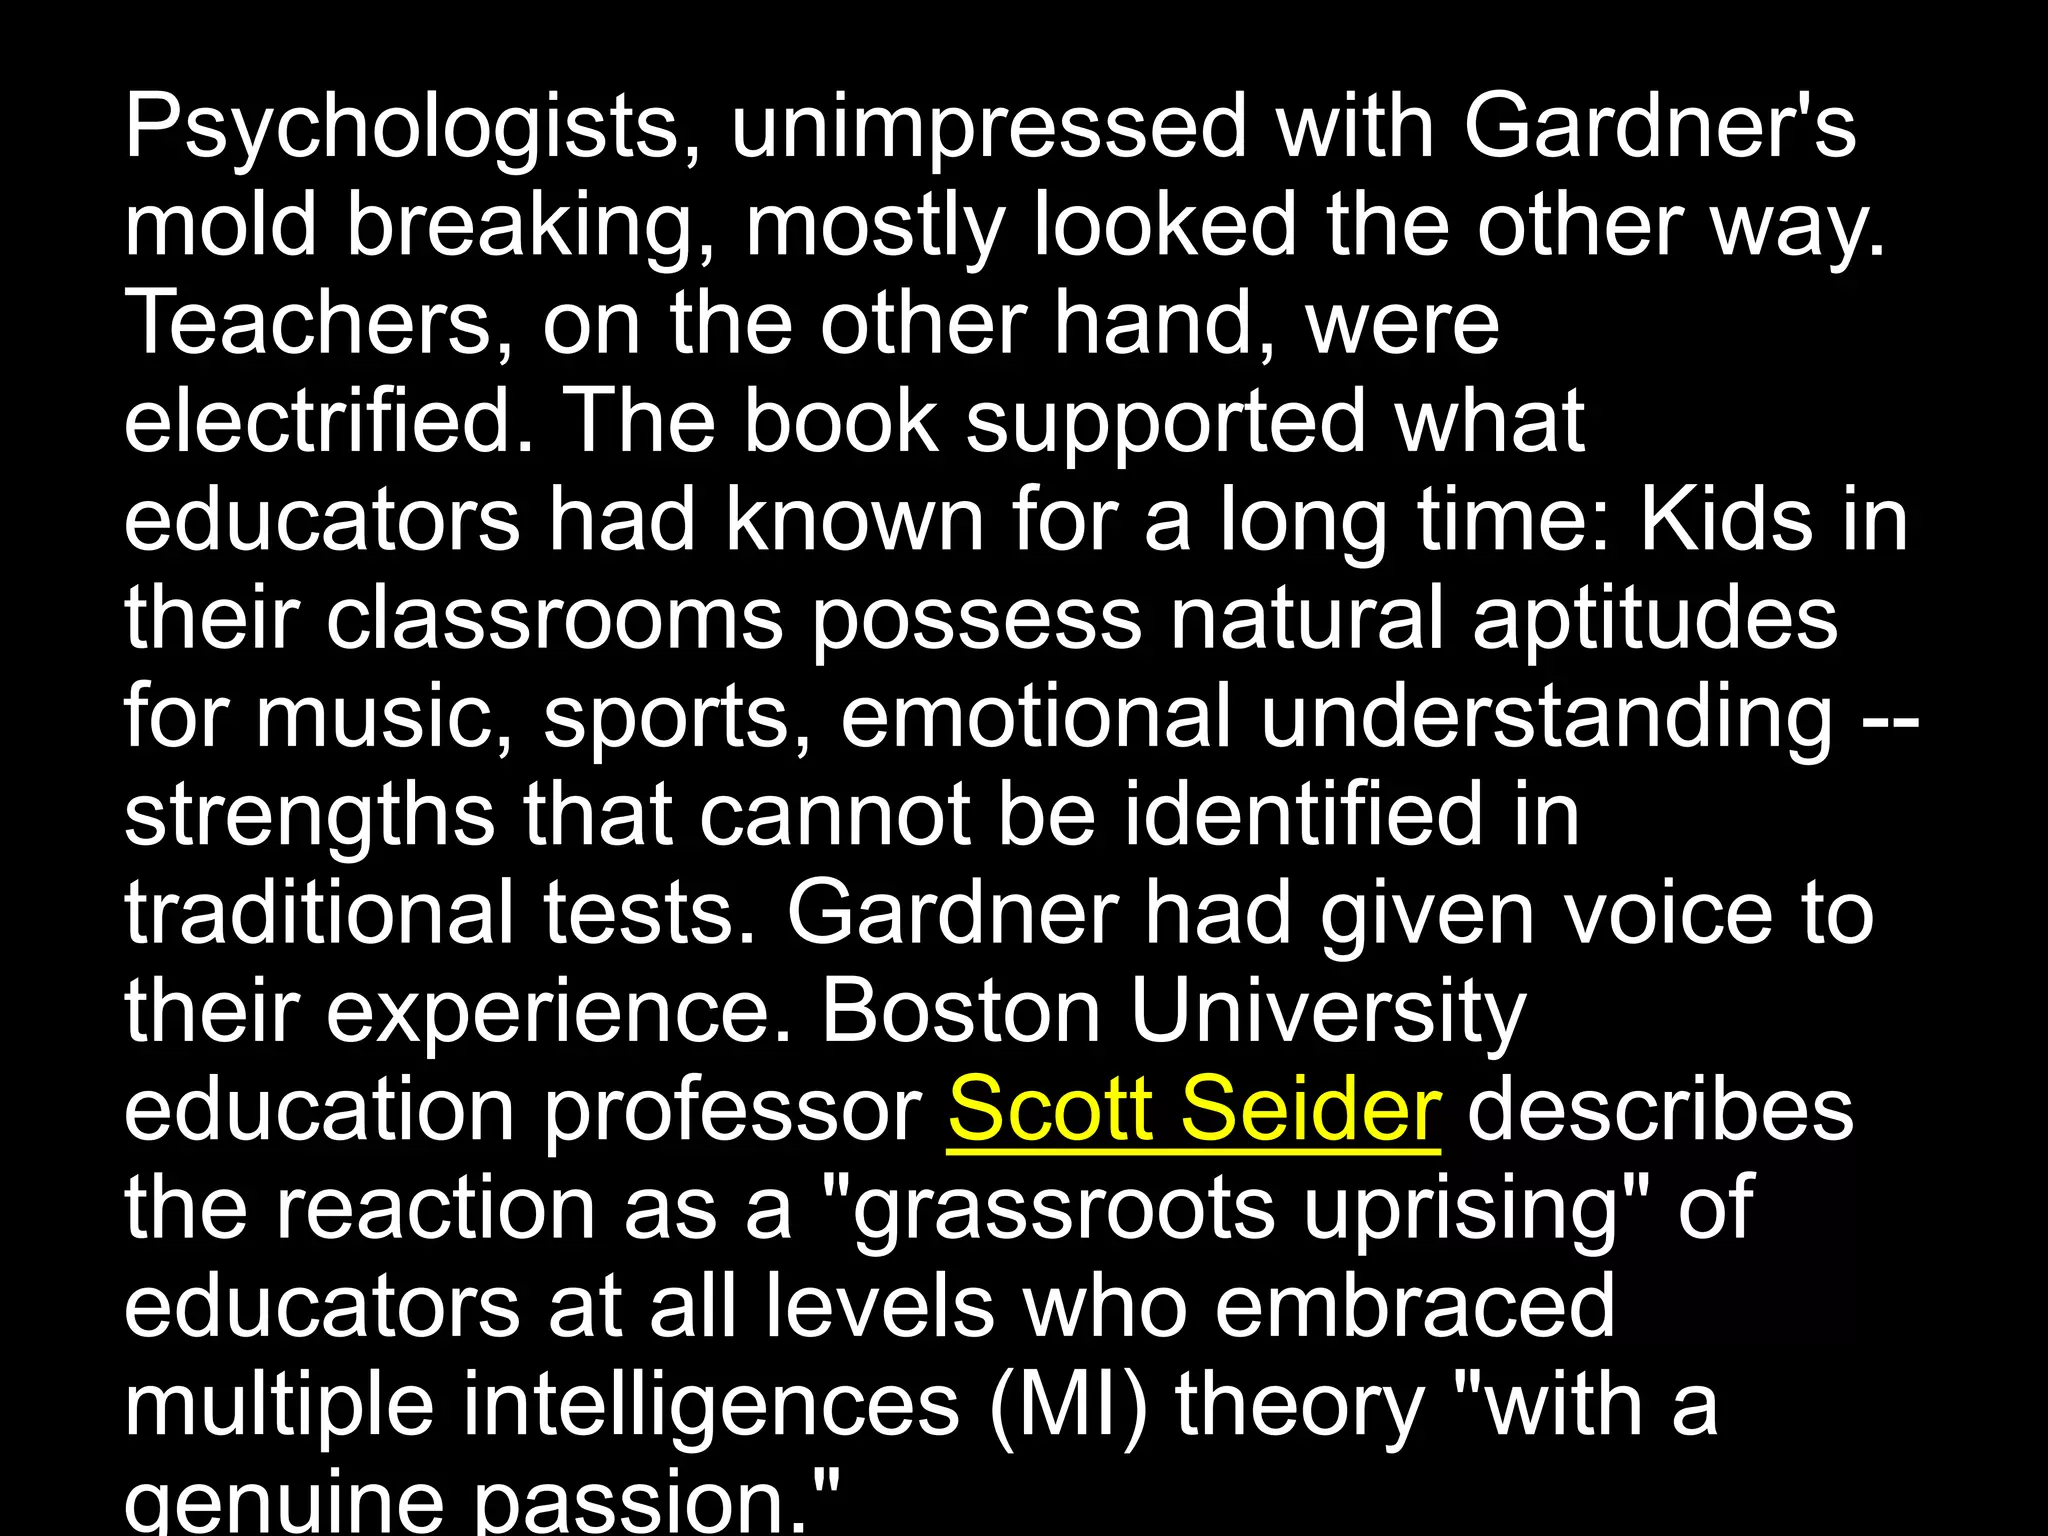
Thomas Alva Edison
Redefining Smart: Multiple
Intelligences
Edutopia reports on the resurgent
relevance of Howard Gardner's
ground-breaking theory, which
changed the game for students and
teachers.
Editor's Note (2013):
Editor's Note (2013): There is no scientific
evidence, as of yet, that shows that people
have specific, fixed learning styles or
discrete intelligences, nor that students
benefit when teachers target instruction to a
specific learning style or intelligence.
However, providing students with multiple
ways to learn content has been shown to
improve student learning (Hattie,
2011). Read more about the research on
In his landmark book Frames of Mind: The
Theory Of Multiple Intelligences, published in
1983, Harvard University education
professor Howard Gardner unveiled a theory of
multiple intelligences that famously rejected the
traditional and long-held view that aptitude
consists solely of the ability to reason and
understand complex ideas.
Instead, he identified seven separate human
capacities: musical, verbal, physical,
interpersonal, visual, logical, and intrapersonal.
And not all of them, including the category he
added years later -- naturalistic -- could be
easily evaluated by the standard measuring
stick of the time: the IQ test.
Psychologists, unimpressed with Gardner's
mold breaking, mostly looked the other way.
Teachers, on the other hand, were
electrified. The book supported what
educators had known for a long time: Kids in
their classrooms possess natural aptitudes
for music, sports, emotional understanding --
strengths that cannot be identified in
traditional tests. Gardner had given voice to
their experience. Boston University
education professor Scott Seider describes
the reaction as a "grassroots uprising" of
educators at all levels who embraced
multiple intelligences (MI) theory "with a
genuine passion."
In the articles that follow, we cast our light
on places where the passion awakened by
Gardner burns brightest today --
in schoolwide curricula, in the hearts and
minds of individual teachers, in
thecontinuing research on intelligences, and,
as ever, in the evolving philosophy of
Gardner himself. Like so many education
reforms, the theory of multiple intelligences
still is the subject of vociferous and ever-
changing debate. Such is the bumpy path to
change.
In keeping with our mission to illuminate
what works in public education, we look at
the specific ways MI enriches the
experience of students and advances the
goals of their teachers. Be sure to look for
more of our MI coverage here
on Edutopia.org, which includes a quick
personal-assessment test that could help
you discover a sense of your own native MI
brilliance.
Taken From:
• http://www.edutopia.org/multiple-
intelligences-introduction
• By Edutopia Staff: APRIL 1, 2009

Learning styles redefining smart

  • 1.
  • 2.
    Redefining Smart: Multiple Intelligences Edutopiareports on the resurgent relevance of Howard Gardner's ground-breaking theory, which changed the game for students and teachers.
  • 3.
    Editor's Note (2013): Editor'sNote (2013): There is no scientific evidence, as of yet, that shows that people have specific, fixed learning styles or discrete intelligences, nor that students benefit when teachers target instruction to a specific learning style or intelligence. However, providing students with multiple ways to learn content has been shown to improve student learning (Hattie, 2011). Read more about the research on
  • 4.
    In his landmarkbook Frames of Mind: The Theory Of Multiple Intelligences, published in 1983, Harvard University education professor Howard Gardner unveiled a theory of multiple intelligences that famously rejected the traditional and long-held view that aptitude consists solely of the ability to reason and understand complex ideas. Instead, he identified seven separate human capacities: musical, verbal, physical, interpersonal, visual, logical, and intrapersonal. And not all of them, including the category he added years later -- naturalistic -- could be easily evaluated by the standard measuring stick of the time: the IQ test.
  • 5.
    Psychologists, unimpressed withGardner's mold breaking, mostly looked the other way. Teachers, on the other hand, were electrified. The book supported what educators had known for a long time: Kids in their classrooms possess natural aptitudes for music, sports, emotional understanding -- strengths that cannot be identified in traditional tests. Gardner had given voice to their experience. Boston University education professor Scott Seider describes the reaction as a "grassroots uprising" of educators at all levels who embraced multiple intelligences (MI) theory "with a genuine passion."
  • 6.
    In the articlesthat follow, we cast our light on places where the passion awakened by Gardner burns brightest today -- in schoolwide curricula, in the hearts and minds of individual teachers, in thecontinuing research on intelligences, and, as ever, in the evolving philosophy of Gardner himself. Like so many education reforms, the theory of multiple intelligences still is the subject of vociferous and ever- changing debate. Such is the bumpy path to change.
  • 7.
    In keeping withour mission to illuminate what works in public education, we look at the specific ways MI enriches the experience of students and advances the goals of their teachers. Be sure to look for more of our MI coverage here on Edutopia.org, which includes a quick personal-assessment test that could help you discover a sense of your own native MI brilliance.
  • 8.

Editor's Notes

  • #2 Light Bulb Quote Horizontal (Intermediate)   To reproduce the video effects on this slide, do the following: On the Home tab, in the Slides group, click Layout, and then click Blank. On the Insert tab, in the Media group, click Video, and then click Video from File. In the left pane of the Insert Video dialog box, click the drive or library that contains the video. In the right pane of the dialog box, click the first video that you want and then click Insert. Under Video Tools on the Format tab, in the Size group, click the arrow at the bottom right corner launching the Format Video dialog box. In the Format Video dialog box, select Size in the left pane, under Size and Rotate in the right pane, set the Height to 2.5” and the Width to 3.29”. Also in the Format Video dialog box, select Border Color in the left pane, under Border Color in the right pane, select Solid line, then click the arrow to the right of Color, and under Theme Colors, select Black, Text 1 (first row, second option from left). Also in the Format Video dialog box, select Border Style in the left pane, under Border Style in the right pane, set the Width to 3 pt. Close the Format Video dialog box. In the Animations tab, in the Animation group, select Play. Also on the Animations tab, in the Timing group, click the arrow to the right of Start and select With Previous. On the Home tab, in the Drawing group, click Arrange, point to Align, and then do the following: Click Align Left. Click Align Top. On the Insert tab, in the Media group, click Video, and then click Video from File. In the left pane of the Insert Video dialog box, click the drive or library that contains the video. In the right pane of the dialog box, click the second video that you want and then click Insert. Under Video Tools on the Format tab, in the Size group, click the arrow at the bottom right corner launching the Format Video dialog box. In the Format Video dialog box, select Size in the left pane, under Size and Rotate in the right pane, set the Height to 2.5” and the Width to 3.29”. Also in the Format Video dialog box, select Border Color in the left pane, under Border Color in the right pane, select Solid line, then click the arrow to the right of Color, and under Theme Colors, select Black, Text 1 (first row, second option from left). Also in the Format Video dialog box, select Border Style in the left pane, under Border Style in the right pane, set the Width to 3 pt. Close the Format Video dialog box. In the Animations tab, in the Animation group, select Play. Also on the Animations tab, in the Timing group, click the arrow to the right of Start and select With Previous. On the Home tab, in the Drawing group, click Arrange, point to Align, and then do the following: Click Align Top. Click Align Center. On the Insert tab, in the Media group, click Video, and then click Video from File. In the left pane of the Insert Video dialog box, click the drive or library that contains the video. In the right pane of the dialog box, click the third video that you want and then click Insert. Under Video Tools on the Format tab, in the Size group, click the arrow at the bottom right corner launching the Format Video dialog box. In the Format Video dialog box, select Size in the left pane, under Size and Rotate in the right pane, set the Height to 2.5” and the Width to 3.29”. Also in the Format Video dialog box, select Border Color in the left pane, under Border Color in the right pane, select Solid line, then click the arrow to the right of Color, and under Theme Colors, select Black, Text 1 (first row, second option from left). Also in the Format Video dialog box, select Border Style in the left pane, under Border Style in the right pane, set the Width to 3 pt. Close the Format Video dialog box. In the Animations tab, in the Animation group, select Play. Also on the Animations tab, in the Timing group, click the arrow to the right of Start and select With Previous. On the Home tab, in the Drawing group, click Arrange, point to Align, and then do the following: Click Align Right. Click Align Top. On the Insert tab, in the Media group, click Video, and then click Video from File. In the left pane of the Insert Video dialog box, click the drive or library that contains the video. In the right pane of the dialog box, click the fourth video that you want and then click Insert. Under Video Tools on the Format tab, in the Size group, click the arrow at the bottom right corner launching the Format Video dialog box. In the Format Video dialog box, select Size in the left pane, under Size and Rotate in the right pane, set the Height to 2.5” and the Width to 3.29”. Also in the Format Video dialog box, select Border Color in the left pane, under Border Color in the right pane, select Solid line, then click the arrow to the right of Color, and under Theme Colors, select Black, Text 1 (first row, second option from left). Also in the Format Video dialog box, select Border Style in the left pane, under Border Style in the right pane, set the Width to 3 pt. Close the Format Video dialog box. In the Animations tab, in the Animation group, select Play. Also on the Animations tab, in the Timing group, click the arrow to the right of Start and select With Previous. On the Home tab, in the Drawing group, click Arrange, point to Align, and then do the following: Click Align Left. Click Align Bottom. On the Insert tab, in the Media group, click Video, and then click Video from File. In the left pane of the Insert Video dialog box, click the drive or library that contains the video. In the right pane of the dialog box, click the fifth video that you want and then click Insert. Under Video Tools on the Format tab, in the Size group, click the arrow at the bottom right corner launching the Format Video dialog box. In the Format Video dialog box, select Size in the left pane, under Size and Rotate in the right pane, set the Height to 2.5” and the Width to 3.29”. Also in the Format Video dialog box, select Border Color in the left pane, under Border Color in the right pane, select Solid line, then click the arrow to the right of Color, and under Theme Colors, select Black, Text 1 (first row, second option from left). Also in the Format Video dialog box, select Border Style in the left pane, under Border Style in the right pane, set the Width to 3 pt. Close the Format Video dialog box. In the Animations tab, in the Animation group, select Play. Also on the Animations tab, in the Timing group, click the arrow to the right of Start and select With Previous. On the Home tab, in the Drawing group, click Arrange, point to Align, and then do the following: Click Align Bottom. Click Align Center. On the Insert tab, in the Media group, click Video, and then click Video from File. In the left pane of the Insert Video dialog box, click the drive or library that contains the video. In the right pane of the dialog box, click the sixth video that you want and then click Insert. Under Video Tools on the Format tab, in the Size group, click the arrow at the bottom right corner launching the Format Video dialog box. In the Format Video dialog box, select Size in the left pane, under Size and Rotate in the right pane, set the Height to 2.5” and the Width to 3.29”. Also in the Format Video dialog box, select Border Color in the left pane, under Border Color in the right pane, select Solid line, then click the arrow to the right of Color, and under Theme Colors, select Black, Text 1 (first row, second option from left). Also in the Format Video dialog box, select Border Style in the left pane, under Border Style in the right pane, set the Width to 3 pt. Close the Format Video dialog box. In the Animations tab, in the Animation group, select Play. Also on the Animations tab, in the Timing group, click the arrow to the right of Start and select With Previous. On the Home tab, in the Drawing group, click Arrange, point to Align, and then do the following: Click Align Right. Click Align Bottom. Press and hold CTRL and select all three bottom videos. On the Home tab, in the Drawing group, click Arrange, point to Align, and then click Distribute Horizontally.   To reproduce the text effects on this slide, do the following: On the Insert tab, in the Text group, click Text Box, and then on the slide drag to draw a text box. Type the following in the text box: “We now know a thousand ways not to build a light bulb.” Select the text. On the Home tab in the Font group, select Garamond from the Font list, and then select 44 pt from the Font Size list, then click the Bold icon. Under Drawing Tools, on the Format tab, in the Size group enter the Height of the text box to be 1.58” and the Width to be 10”. Under Drawing Tools, on the Format tab in the WordArt Styles group click the arrow at the bottom right corner launching the Format Text Effects dialog box. In the Format Text Effects dialog box, select Text Fill in the left pane, then under Text Fill in the right pane, select Solid fill. Click the arrow to the right of Color and under Theme Colors select, White, Background 1 (first row, first option from left). Also in the Format Text Effects dialog box, select Text Outline in the left pane, then under Text Outline in the right pane, select Solid line. Click the arrow to the right of Color and select more colors, and then under the Custom tab do the following: In the Red box, enter 255. In the Green box, enter 255. In the Blue box, enter 204. Click OK to close the Colors dialog box. Also in the Format Text Effects dialog box, select Outline Style in the left pane, then under Outline Style in the right pane, set the Width to 0.75 pt. Also in the Format Text Effects dialog box, select Glow and Soft Edges in the left pane, then under Glow and Soft Edges in the right pane, under Glow in the right pane, click the arrow to the right of Color and under Theme Colors select Orange, Accent 6, Lighter 60% (third row, tenth option from left). Also under Glow in the right pane, set the Size to 8pt. Also under Glow in the right pane, set the Transparency to 80%. Also in the Format Text Effects dialog box, select 3-D Format in the left pane, under 3-D Format in the right pane, click the arrow to the right of Top, under Bevel select Circle (first row, first option from left), and then do the following: To the right of Top, in the Width box, enter 3 pt. To the right of Top, in the Height box, enter 2 pt. Under Depth, In the Depth box, enter 4.5 pt. Under Contour, click arrow to right of Color and under Theme Colors, select Tan, Background 2 (first row, third option from left). Under Surface, click the arrow to the right of Material and under Standard, select Metal (first row, fourth option from left), and then click the arrow to the right of Lighting and under Neutral, select Balance (first row, second option from left). In the Angle box, enter 35 degrees. Close the Format Text Effects dialog box. On the Home tab in the Paragraph group, click Center Text, and then click the arrow to the right of Align Text and select Bottom. Select the text box. On the Home tab, in the Drawing group, click Arrange, point to Align, and then click Align Middle. On the Insert tab, in the Text group, click Text Box, and then on the slide drag to draw a text box. Type text, Thomas Alva Edison, in the text box and then select the text. On the Home tab in the Font group, select Garamond (body) from the Theme Fonts section, and then select 18 pt from the Font Size list, then click the Bold and Italic icon. Select text box. Under Drawing Tools, on the Format tab, in the Size group, click the arrow at the bottom right corner launching the Format Shape dialog box. Select Size in the left pane, and under Size and rotate in the right pane enter the Height as 0.4” and the Width as 2.45”. Also in the Format Shape dialog box, select Position on the left pane, then under Position in the right pane set the Horizontal to 7.5” and the Vertical to 4.5”. Close the Format Shape dialog box. Under Drawing Tools, on the Format tab in the WordArt Styles group click the arrow at the bottom right corner launching the Format Text Effects dialog box. In the Format Text Effects dialog box, select Text Fill in the left pane, then under Text Fill in the right pane, select Solid fill. Click the arrow to the right of Color and under Theme Colors select, White, Background 1 (first row, first option from left). Also in the Format Text Effects dialog box, select Text Outline in the left pane, then under Text Outline in the right pane, select Solid line. Click the arrow to the right of Color and select more colors, and then under the Custom tab do the following: In the Red box, enter 255. In the Green box, enter 255. In the Blue box, enter 204. Click OK to close the Colors dialog box. Close the Format Text Effects dialog box. Select the text box and under Drawing Tools on the Format tab, in the Shape Styles group, click the arrow at the bottom right corner launching the Format Shape dialog box. In the Format Shape dialog box, select Position in the left pane, under Position on Slide and set Horizontal to 7.5” and Vertical to 4.5”. Close the Format Shape dialog box.   To reproduce the background effects on this slide, do the following: On the Design tab, in the bottom right corner of the Background group, click the arrow at the bottom right launching the Format Background dialog box. In the Format Background dialog box, select Fill in the left pane, under Fill in the right pane select Solid fill, and then click the arrow to the right of Color and under Theme Colors, select Black, Text 1 (first row, second option).