The document provides instructions for using an LCD display with a PIC microcontroller. It describes connecting the LCD to the microcontroller in 4-bit mode to save pins. It includes the LCD initialization routine, functions for sending data and commands to the LCD, and positioning the cursor. In the main program, it reads analog sensor values, controls fan speed with PWM, and displays the values and fan speed on the LCD at different lines and positions on the screen.
The aim for this work is to understand how the LCD 1602A-1 (V 1.2) module
operates including commands and registers from the Dot Matrix Liquid Crystal Display
Controller/Driver.
Implementation in C and Assembly.
The Art Pastor's Guide to Sabbath | Steve ThomasonSteve Thomason
What is the purpose of the Sabbath Law in the Torah. It is interesting to compare how the context of the law shifts from Exodus to Deuteronomy. Who gets to rest, and why?
Instructions for Submissions thorugh G- Classroom.pptxJheel Barad
This presentation provides a briefing on how to upload submissions and documents in Google Classroom. It was prepared as part of an orientation for new Sainik School in-service teacher trainees. As a training officer, my goal is to ensure that you are comfortable and proficient with this essential tool for managing assignments and fostering student engagement.
Model Attribute Check Company Auto PropertyCeline George
In Odoo, the multi-company feature allows you to manage multiple companies within a single Odoo database instance. Each company can have its own configurations while still sharing common resources such as products, customers, and suppliers.
We all have good and bad thoughts from time to time and situation to situation. We are bombarded daily with spiraling thoughts(both negative and positive) creating all-consuming feel , making us difficult to manage with associated suffering. Good thoughts are like our Mob Signal (Positive thought) amidst noise(negative thought) in the atmosphere. Negative thoughts like noise outweigh positive thoughts. These thoughts often create unwanted confusion, trouble, stress and frustration in our mind as well as chaos in our physical world. Negative thoughts are also known as “distorted thinking”.
How to Make a Field invisible in Odoo 17Celine George
It is possible to hide or invisible some fields in odoo. Commonly using “invisible” attribute in the field definition to invisible the fields. This slide will show how to make a field invisible in odoo 17.
Read| The latest issue of The Challenger is here! We are thrilled to announce that our school paper has qualified for the NATIONAL SCHOOLS PRESS CONFERENCE (NSPC) 2024. Thank you for your unwavering support and trust. Dive into the stories that made us stand out!
Students, digital devices and success - Andreas Schleicher - 27 May 2024..pptxEduSkills OECD
Andreas Schleicher presents at the OECD webinar ‘Digital devices in schools: detrimental distraction or secret to success?’ on 27 May 2024. The presentation was based on findings from PISA 2022 results and the webinar helped launch the PISA in Focus ‘Managing screen time: How to protect and equip students against distraction’ https://www.oecd-ilibrary.org/education/managing-screen-time_7c225af4-en and the OECD Education Policy Perspective ‘Students, digital devices and success’ can be found here - https://oe.cd/il/5yV
The French Revolution, which began in 1789, was a period of radical social and political upheaval in France. It marked the decline of absolute monarchies, the rise of secular and democratic republics, and the eventual rise of Napoleon Bonaparte. This revolutionary period is crucial in understanding the transition from feudalism to modernity in Europe.
For more information, visit-www.vavaclasses.com
2024.06.01 Introducing a competency framework for languag learning materials ...Sandy Millin
http://sandymillin.wordpress.com/iateflwebinar2024
Published classroom materials form the basis of syllabuses, drive teacher professional development, and have a potentially huge influence on learners, teachers and education systems. All teachers also create their own materials, whether a few sentences on a blackboard, a highly-structured fully-realised online course, or anything in between. Despite this, the knowledge and skills needed to create effective language learning materials are rarely part of teacher training, and are mostly learnt by trial and error.
Knowledge and skills frameworks, generally called competency frameworks, for ELT teachers, trainers and managers have existed for a few years now. However, until I created one for my MA dissertation, there wasn’t one drawing together what we need to know and do to be able to effectively produce language learning materials.
This webinar will introduce you to my framework, highlighting the key competencies I identified from my research. It will also show how anybody involved in language teaching (any language, not just English!), teacher training, managing schools or developing language learning materials can benefit from using the framework.
Ethnobotany and Ethnopharmacology:
Ethnobotany in herbal drug evaluation,
Impact of Ethnobotany in traditional medicine,
New development in herbals,
Bio-prospecting tools for drug discovery,
Role of Ethnopharmacology in drug evaluation,
Reverse Pharmacology.
MARUTI SUZUKI- A Successful Joint Venture in India.pptx
LCD_Example.pptx
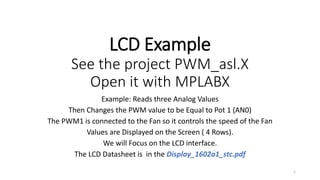
1. LCD Example
See the project PWM_asl.X
Open it with MPLABX
Example: Reads three Analog Values
Then Changes the PWM value to be Equal to Pot 1 (AN0)
The PWM1 is connected to the Fan so it controls the speed of the Fan
Values are Displayed on the Screen ( 4 Rows).
We will Focus on the LCD interface.
The LCD Datasheet is in the Display_1602a1_stc.pdf
1
4. LCD Basic Interface
• Two Ways to Interface the LCD:
• 8-bit Mode: Requires 8-bit of Data (DB0—DB7) , RS, E, and R/W. Sends one byte in
one write or read
• 4-bit Mode: Requires 4-bit of Data (DB4—DB7) , RS, E, and R/W. Sends one nibble in
one write or read. Writing/Reading a byte Requires 2 read or write operations..
Notice that we must use DB4—DB7 of the LCD NOT bits 0—4. This mode is also
called Nibble mode.
• To Save pins we usually use 4-bit mode,
• R/W : 1 means read, 0 means Write .
• RS : 1 Data, means we write data to the current location of the Cursor.
• RS : 0 Means we write command such as go to location, clear display. New
Line etc.
• E : Enable (clock)
4
5. LCD Basic Interface
• We need also to connect VCC, GND
• We need to connect contrast control, usually called V0 or Vlc or other,
This is connected to a potentiometer. See the Next Slide.
• We can connect the data bits, RS, R/W, and E to any digital outputs
but we usually use one port ( PORTD usually. Or sometimes we use
PORTD for data and Port E for the RS, R/W, and E.
• See next page. See the basic_circuit.png for an example.
• In the Example we are using 4 bit mode ( nibble mode)
5
9. LCD Example. We will use the same example
that will be used for pulse width modulation
• Here we will focus on LCD code.
• The files that we need are lcd_x8.h, lcd_x8.c
• You can add these to any new project by just copying these files to
your project and use add existing to add the lcd_x8.h to the header
and the lcd_x8.c to the sources.
• You can run it on the simulator.
• Look at the top of the header lcd_x8.h.
• You practically do not need to change anything in these files except
the mapping
9
10. Redefine some variable for this to work
Port D and Port E (lcd_x8.h)
struct lcd_pin_map { // look at the hardware on slide 4
unsigned un1 : 1; //unused on to an I/O port to gain, should be cleared
unsigned rs : 1; // rs =1 : data, 0 means rd
unsigned rw : 1; // the RD/WR .. We keep this as zero. Just write
unsigned enable : 1; // The E pin
unsigned data : 4; // data pins pins d0,1,2,3
} lcd __at(0xF83); //PORTD // this is new syntax
//@ 0x0F83; // ; PORTD // old Syntax
// followings are defined , the above for the actual circuit
// but for the simulator we change to thus
#define lcd_output_enable(x) PORTEbits.RE1 = x // For the simulator
//lcd.enable = x // for the actual circuit, use this
#define lcd_output_rs(x) PORTEbits.RE2 = x //For the Simulator
//lcd.rs = x // For the actual circuit.
10
12. Initialization void lcd_init()
• This is a strange code of initialization. It starts in 8 it mode then
changes to 4 bit mode. Do not worry about it just use as is. Works for
all of these displays. Just use it. Described in Data sheets.
• It sends some commands and then turns the LCD on.
• See the next page
12
14. 14
void lcd_init() {
unsigned char i;
lcd_output_rs(0);
//lcd_output_rw(0);
lcd_output_enable(0);
delay_ms(25); //
for (i = 1; i <= 3; ++i) {
lcd_send_nibble(3);
// lcd_send_nibble(0);
delay_ms(6); //5
}
lcd_send_nibble(2);
// lcd_send_nibble(0);
for (i = 0; i <= 3; ++i)
lcd_send_byte(0, LCD_INIT_STRING[i]);
}
15. Lcd_send_byte : Use it to send a byte or command. 0 command, 1 data ,
void lcd_send_byte(unsigned char cm_data, unsigned char n) {
// n is the byte to be written, cm_data:0 command, 1: data
// notice that it writes
lcd_output_rs(cm_data);
delay_cycles(1);
delay_cycles(1);
lcd_output_enable(0);
lcd_send_nibble(n >> 4); //write high nibble first
lcd_send_nibble(n & 0x0f); // then lower nibble
if (cm_data) __delaywdt_us(200);
else
delay_ms(2); //added by raed
}
15
16. Lcd_gotoxy(x, y) : x is character number 0—15 ( can be more for larger displays 0—19 ..etc)
y is the line number 1 or 2 ( up to 4 for 4 lines). Sets the cursor position at location x,y
void lcd_gotoxy(unsigned char x, unsigned char y) {
unsigned char address;
switch (y) {
case 1: address = 0x80; // line 1 , x is the x location usually 0 --15
break;
case 2: address = 0xc0; // line 2
break;
case 3: address = 0x80 + LCD_LINE_SIZE; // line 3 for displays with > 2 lines
break;
case 4: address = 0xc0 + LCD_LINE_SIZE; // line 4 for displays with 4 lines
break;
}
address += x - 1;
lcd_send_byte(0, (unsigned char) (0x80 | address));
}
16
17. Lcd_putc writes a character to of the cursor current location. Or sends some commands. We use this
to write main commands or bytes.
void lcd_putc(char c) {
switch (c) {
case 'f': lcd_send_byte(0, 1); //clears the display, command
delay_ms(2);
break;
case 'n': lcd_gotoxy(1, 2); // goes to line 2 , command
break;
case 'b': lcd_send_byte(0, 0x10); //one character back, command
break;
default: lcd_send_byte(1, c); // writes a data byte at current location.
break;
}
}
17
18. Lcd_puts: writes a string of data at current location
void lcd_puts(char *s) {
while (*s) {
lcd_putc(*s);
s++;
}
}
There are 2 more functions to shift left and right. Take a look
18
19. Use of LCD in main Function
Top of main:
--- some codehere
lcd_init(); // call lc_init
init_adc_no_lib();
init_pwm1();
//PORTCbits.RC4 =1;
PORTCbits.RC5 = 1;
send_string_no_lib((unsigned char *) "rrReading AN0, AN1, AN2rr");
lcd_putc('f’); //make sure you start by clearing the display
19
20. Use of LCD in main functin
Raw_val = read_adc_raw_no_lib(0); // read raw value for POT1
set_pwm1_raw(raw_val); // set the Pwm to that value 0--1023
lcd_gotoxy(1, 1); // position 1 line 1
sprintf(Buffer, "V0=%4.2fVnV1=%4.2fV", AN[0], AN[1]); // write using sprintf
lcd_puts(Buffer); // write it to the LCD. Notice the n goes to line 2
lcd_gotoxy(1, 3); // go to first location in line 3
RPS = RPS_count;
sprintf(Buffer, "Speed=%6.2f RPSn", RPS/7.0); // Display Speed and RPS on lines 3
lcd_puts(Buffer); // speed = Revolution per second
lcd_gotoxy(1, 4); ); // Go to line 4, the n works for line 2 only
sprintf(Buffer, "D=%5d,%6.2f", raw_val, (raw_val * 100.0) / 1023.0
lcd_puts(Buffer); // Above displays duty 0--1023, and also as percentage
lcd_gotoxy(15, 4); // at location 15 write %, see next line
lcd_putc('%');
20
21. Running the Example on the Simulator.
• Load the hex (pwm_asl.X.production.hex) file from the
pwm_asl.Xdistdefaultproduction
• Select Board 4, Processor PIC18F4620, 4MHz
• From file Configure select COM1, On Tera term select COM2
• Select hd44780 16x4 for LCD ( 4 lines)
• Change the Value on Pot. P1 ( Slider) represnts a 0—5 Potentiometer
which is An0. This value is set to PWM2 which controls the Speed of
the Fan.
• The Display displays all Values, AN0, AN1, Fan Speed, Duty cycle as
raw value ( 0—1023) and also as percentage 0—100.
• U should see results on LCD. See sample on next slide.
21