Kafka: A CompleteTutorial (Part 1) — Installing Kafka server without zookeeper (KRaft mode) using
binary, docker and Kubernetes
WS
·
Follow
5 min read
·
Sep 27, 2024
Apache Kafka is a powerful, distributed event streaming platform designed to handle high-
throughput, real-time data streams. It’s widely used for building real-time data pipelines and
streaming applications, serving as a central hub for asynchronous data exchange between systems.
Kafka excels in enabling communication across distributed systems by providing reliable, fault-
tolerant, and horizontally scalable messaging.
Kafka is composed of producers, consumers, topics, partitions, brokers, and ZooKeeper (in its
traditional architecture). For years, ZooKeeper has played a pivotal role in managing the Kafka cluster
by providing coordination and distributed consensus for tasks like broker discovery and leader
election. However, as Kafka continues to evolve, a new architecture is emerging: KRaft mode (Kafka
Raft).
KRaft Mode is Kafka’s new controller election protocol that replaces the need for ZooKeeper by
incorporating the management and coordination tasks directly into Kafka brokers. By eliminating the
dependency on ZooKeeper, KRaft promises to bring significant performance improvements, better
fault tolerance, and simpler deployment. This mode is quickly becoming the standard in modern
Kafka clusters as it enhances resiliency and reduces operational complexity.
In this blog post, I will outline three different ways to install Kafka on your local machine, focusing on
using KRaft mode, without the need for ZooKeeper.
1. Installing Kafka Without ZooKeeper Using Docker
One of the easiest ways to set up Kafka in KRaft mode on your local machine is by using Docker.
Docker provides an isolated environment for running Kafka, which can be especially useful for testing
and development.
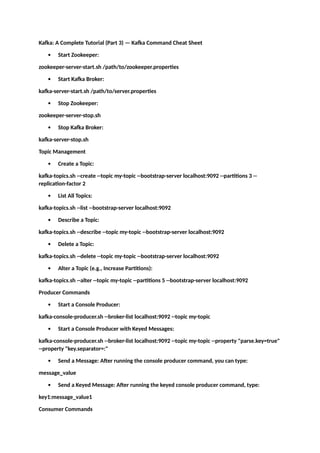
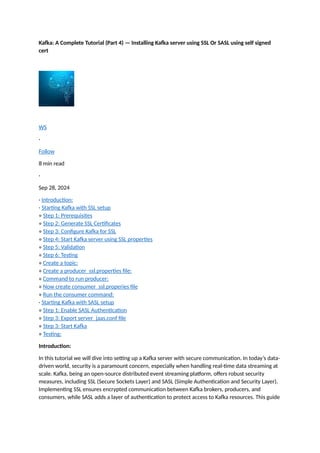
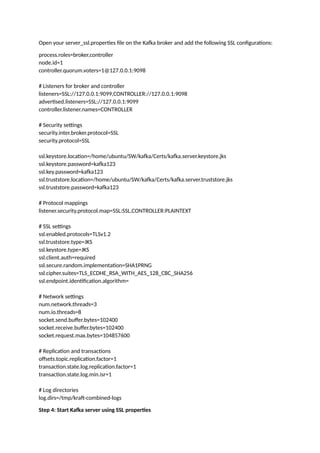
Step 1: Create a Docker Network
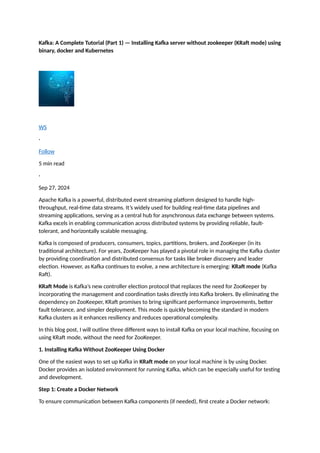
To ensure communication between Kafka components (if needed), first create a Docker network:
2.
docker network createkafka-network
Step 2: Run Kafka in KRaft Mode Using Docker
Next, run the following command to start a Kafka server using Docker:
docker run -d --name kafkaserver --network kafka-network
-e KAFKA_PROCESS_ROLES=broker,controller
-e KAFKA_CONTROLLER_LISTENER_NAMES=CONTROLLER
-e KAFKA_LISTENERS=PLAINTEXT://:9092,CONTROLLER://:9093
-e KAFKA_CONTROLLER_QUORUM_VOTERS=1@localhost:9093
-e KAFKA_NODE_ID=1
-e KAFKA_ADVERTISED_LISTENERS=PLAINTEXT://kafkaserver:9092
-e KAFKA_OFFSETS_TOPIC_REPLICATION_FACTOR=1
-e KAFKA_TRANSACTION_STATE_LOG_REPLICATION_FACTOR=1
-e KAFKA_TRANSACTION_STATE_LOG_MIN_ISR=1
-p 9092:9092
apache/kafka:latest
This command configures Kafka to run in KRaft mode, without ZooKeeper, by using
the KAFKA_PROCESS_ROLES and KAFKA_CONTROLLER_LISTENER_NAMES settings. The controller
and broker roles are combined in this setup, simplifying the architecture.
2. Installing Kafka Using Binaries (KRaft Mode)
If you prefer more control over your installation or wish to explore Kafka outside a containerized
environment, you can install Kafka using its binaries.
Step 1: Download Kafka Binaries
Start by downloading the Kafka binaries:
wget https://downloads.apache.org/kafka/3.8.0/kafka_2.12-3.8.0.tgz
tar -zxvf kafka_2.12-3.8.0.tgz
Step 2: Configure Kafka for KRaft Mode
After extracting the files, you might encounter an issue related to the absence of
a meta.properties file. Kafka requires this file to identify the cluster and node IDs. If the file is
missing, Kafka will throw the following error:
[2024-09-26 18:14:41,186] ERROR Exiting Kafka due to fatal exception (kafka.Kafka$)
java.lang.RuntimeException: No readable meta.properties files found.
To resolve this issue, create the necessary files and directories:
cd /tmp
mkdir kraft-combined-logs
touch kraft-combined-logs/meta.properties
Lets generate a kafka cluster id:
./bin/kafka-storage.sh random-uuid
output: fWDamvz8T0-dLH0IFQP2Wg
3.
Then add thefollowing content to the meta.properties file:
cluster.id=fWDamvz8T0-dLH0IFQP2Wg
node.id=1
version=1
This configuration initializes Kafka to run in KRaft mode with a single node.
3. Installing Using Kubernetes
Here’s a basic kafka.yml file for deploying Kafka in Kubernetes. This setup assumes that you're
using KRaft mode, without ZooKeeper, and it includes both a Kafka broker and a persistent
volume for data storage.
apiVersion: v1
kind: Namespace
metadata:
name: kafka
---
apiVersion: v1
kind: PersistentVolumeClaim
metadata:
name: kafka-pvc
namespace: kafka
spec:
accessModes:
- ReadWriteOnce
resources:
requests:
storage: 10Gi
---
apiVersion: v1
kind: Service
metadata:
name: kafka-service
namespace: kafka
spec:
selector:
app: kafka
ports:
- name: kafka
protocol: TCP
port: 9092
targetPort: 9092
- name: controller
protocol: TCP
port: 9093
targetPort: 9093
- name: KAFKA_TRANSACTION_STATE_LOG_MIN_ISR
value:"1"
volumes:
- name: kafka-storage
persistentVolumeClaim:
claimName: kafka-pvc
Key Components:
1. Namespace: Creates a separate namespace called kafka to manage Kafka-related resources.
2. PersistentVolumeClaim: Creates a PVC to store Kafka logs and other state information. The
storage requested is 10Gi, but you can adjust this as per your needs.
3. Service: A ClusterIP service to allow communication with Kafka from inside the cluster. The
ports exposed are 9092 for client communication and 9093 for controller communication.
4. StatefulSet: Deploys Kafka as a StatefulSet, which ensures the Kafka broker has persistent
storage (important for Kafka's log data). It includes environment variables to run Kafka
in KRaft mode:
KAFKA_PROCESS_ROLES: Kafka is configured as both broker and controller.
KAFKA_CONTROLLER_LISTENER_NAMES: The controller listens on a separate port (9093).
KAFKA_LISTENERS: Configures Kafka to listen on 9092 for client connections and 9093 for
controller communications.
KAFKA_ADVERTISED_LISTENERS: Sets the advertised listener as the internal service (kafka-
service).
KAFKA_LOG_DIRS: Specifies the log directory inside the container (/var/lib/kafka/data).
Steps to Apply the Configuration:
1. Save the kafka.yml file.
2. Apply the configuration with kubectl:
kubectl apply -f kafka.yml
kubectl get all -n kafka
NAME READY STATUS RESTARTS AGE
pod/kafka-0 1/1 Running 0 57s
NAME TYPE CLUSTER-IP EXTERNAL-IP PORT(S) AGE
service/kafka-service ClusterIP 10.106.198.187 <none> 9092/TCP,9093/TCP 57s
NAME READY AGE
statefulset.apps/kafka 1/1 57s
4. Testing Your Kafka Setup
6.
Once Kafka isup and running, whether via Docker or binaries, you can test your setup by creating
topics, producing, and consuming messages.
Step 1: Create a Topic
You can create a Kafka topic using the following command:
./kafka-topics.sh --create --topic topic1 --bootstrap-server localhost:9092
This creates a new topic named topic1 on the Kafka broker running on port 9092.
Step 2: Produce a Message
To produce messages to the topic, run:
./kafka-console-producer.sh --broker-list localhost:9092 --topic topic1
You can then type your messages directly into the terminal to send them to the Kafka topic.
Step 3: Consume Messages
Finally, you can consume messages from the topic using:
./kafka-console-consumer.sh --bootstrap-server localhost:9092 --topic topic1 --from-beginning
This will output the messages you’ve produced to the topic, allowing you to verify that Kafka is
working correctly.
Conclusion
With KRaft mode, Apache Kafka is evolving beyond its ZooKeeper-based architecture to a more
resilient, streamlined, and efficient system. By consolidating the management of metadata into the
Kafka brokers themselves, KRaft mode simplifies Kafka’s operational footprint and improves the
performance of large-scale clusters.
In this post, we explored three ways to install and run Kafka in KRaft mode on your local machine.
Whether you choose to use Docker for a quick, isolated setup or install Kafka binaries for more
control, KRaft mode is the future of Kafka deployments. This guide also covered testing Kafka by
creating topics, producing messages, and consuming them, ensuring your setup is fully functional.
Stay tuned for future posts where we’ll dive deeper into Kafka’s advanced configurations and use
cases for real-time data streaming!
Part 2: https://medium.com/@Shamimw/kafka-a-complete-tutorial-part-2-basics-architecture-
producer-consumer-partitioning-and-1900ad458d71
7.
Kafka: A CompleteTutorial (Part 2) — Basics, Architecture, producer,consumer, partitioning and
offsets.
Introduction
Apache Kafka has become a critical part of the modern data ecosystem, especially for building real-
time data pipelines and streaming applications. In this tutorial series, we will dive deep into the
world of Kafka, starting from its basics and progressing to more advanced topics like architecture,
setup, and best practices. This is Part 1 of the series, where we’ll explore the basics of Kafka and its
architecture.
· What is Apache Kafka?
· Key Use Cases of Kafka:
· Kafka Basics
· Kafka Terminology:
· Kafka Architecture
· 1. Broker
∘ How Kafka Broker Works
∘ Key Components of a Kafka Broker
∘ Kafka Broker in a Cluster
∘ Leader and Follower Replication
∘ Kafka Broker Configuration
∘ Broker Failures and Recovery
∘ Monitoring Kafka Brokers
· 2. Topic and Partitions
∘ Key Characteristics of Partitions:
∘ How Kafka Uses Topics and Partitions
∘ Data Distribution Across Partitions
∘ Partition Replication and Fault Tolerance
∘ Choosing the Right Number of Partitions
∘ Topic and Partition Configuration
· 3. Producer and Consumer
∘ Producer
∘ Key Features of a Kafka Producer:
∘ How Kafka Producers Work
∘ Consumer:
∘ Key Features of a Kafka Consumer:
∘ How Kafka Consumers Work
∘ Consumer Group?
∘ How Consumer Groups Work
8.
∘ Benefits ofUsing Consumer Groups
· 4. ZooKeeper
· 5. Deep Dive into Kafka Offset:
∘ Key Points About Kafka Offsets:
∘ How Kafka Uses Offsets
∘ Offset Management
∘ Types of Offsets
∘ Committing Offsets
∘ Advantages of Manual Offset Commit:
∘ Consumer Offset Strategies
∘ Offset Retention Policies
∘ Monitoring and Managing Offsets
· 6. Compression in Kafka
∘ Benefits of Compression in Kafka:
∘ Kafka Compression Codecs
∘ Kafka’s Supported Compression Codecs:
∘ Comparison of Kafka Compression Codecs:
∘ How Compression Works in Kafka
∘ Configuring Compression in Kafka
∘ Producer Configuration for Compression:
∘ Example of Kafka Producer Code with Compression in Java:
∘ Pros and Cons of Compression
∘ Pros:
∘ Cons:
∘ Best Practices for Kafka Compression
· 7. Kafka different from other systems:
· Conclusion
What is Apache Kafka?
Apache Kafka is an open-source distributed event streaming platform used by thousands of
companies for high-performance data pipelines, streaming analytics, data integration, and mission-
critical applications.
Kafka was originally developed at LinkedIn to handle real-time data ingestion and analysis, and later
donated to the Apache Software Foundation. Its core function is to handle data streams in real-time,
making it a go-to solution for messaging, log aggregation, and stream processing.
Key Use Cases of Kafka:
1. Real-time Analytics: Businesses use Kafka to monitor user activities, IoT data streams, and
financial transactions in real-time.
2. Log Aggregation: Kafka helps in collecting and aggregating log data from different services
into a centralized location.
3. Event Sourcing: Kafka can be used to capture a series of events from distributed systems and
replay them for auditing or error recovery.
4. Data Integration: Kafka serves as a reliable broker between multiple data systems,
integrating them into a cohesive, real-time platform.
10.
Kafka: A CompleteTutorial (Part 3) — Kafka Command Cheat Sheet
Start Zookeeper:
zookeeper-server-start.sh /path/to/zookeeper.properties
Start Kafka Broker:
kafka-server-start.sh /path/to/server.properties
Stop Zookeeper:
zookeeper-server-stop.sh
Stop Kafka Broker:
kafka-server-stop.sh
Topic Management
Create a Topic:
kafka-topics.sh --create --topic my-topic --bootstrap-server localhost:9092 --partitions 3 --
replication-factor 2
List All Topics:
kafka-topics.sh --list --bootstrap-server localhost:9092
Describe a Topic:
kafka-topics.sh --describe --topic my-topic --bootstrap-server localhost:9092
Delete a Topic:
kafka-topics.sh --delete --topic my-topic --bootstrap-server localhost:9092
Alter a Topic (e.g., Increase Partitions):
kafka-topics.sh --alter --topic my-topic --partitions 5 --bootstrap-server localhost:9092
Producer Commands
Start a Console Producer:
kafka-console-producer.sh --broker-list localhost:9092 --topic my-topic
Start a Console Producer with Keyed Messages:
kafka-console-producer.sh --broker-list localhost:9092 --topic my-topic --property "parse.key=true"
--property "key.separator=:"
Send a Message: After running the console producer command, you can type:
message_value
Send a Keyed Message: After running the keyed console producer command, type:
key1:message_value1
Consumer Commands
11.
Start aConsole Consumer:
kafka-console-consumer.sh --bootstrap-server localhost:9092 --topic my-topic --from-beginning
Start a Console Consumer with Group ID:
kafka-console-consumer.sh --bootstrap-server localhost:9092 --topic my-topic --group my-group
Consume Only Keyed Messages:
kafka-console-consumer.sh --bootstrap-server localhost:9092 --topic my-topic --property
print.key=true --property key.separator=":"
Consume Messages from Specific Offset:
kafka-console-consumer.sh --bootstrap-server localhost:9092 --topic my-topic --offset 10 --partition
0
Consumer Group Management
List All Consumer Groups:
kafka-consumer-groups.sh --bootstrap-server localhost:9092 --list
Describe a Consumer Group:
kafka-consumer-groups.sh --bootstrap-server localhost:9092 --describe --group my-group
Reset Consumer Group Offset to the Earliest:
kafka-consumer-groups.sh --bootstrap-server localhost:9092 --group my-group --reset-offsets --to-
earliest --topic my-topic --execute
Reset Consumer Group Offset to the Latest:
kafka-consumer-groups.sh --bootstrap-server localhost:9092 --group my-group --reset-offsets --to-
latest --topic my-topic --execute
Delete a Consumer Group:
kafka-consumer-groups.sh --bootstrap-server localhost:9092 --delete --group my-group
Message Offsets
Get Earliest Offset for a Partition:
kafka-run-class.sh kafka.tools.GetOffsetShell --broker-list localhost:9092 --topic my-topic --time -2
--offsets 1
Get Latest Offset for a Partition:
kafka-run-class.sh kafka.tools.GetOffsetShell --broker-list localhost:9092 --topic my-topic --time -1
--offsets 1
Cluster Management
Check Cluster Health:
kafka-run-class.sh kafka.admin.BrokerApiVersionsCommand --bootstrap-server localhost:9092
12.
List AllBrokers:
zookeeper-shell.sh localhost:2181 <<< "ls /brokers/ids"
Describe Broker Configurations:
kafka-configs.sh --describe --entity-type brokers --entity-name broker-id --bootstrap-server
localhost:9092
Partitions and Replication
Reassign Partitions:
kafka-reassign-partitions.sh --bootstrap-server localhost:9092 --reassignment-json-file
reassignment.json --execute
List Under-Replicated Partitions:
kafka-topics.sh --describe --under-replicated-partitions --bootstrap-server localhost:9092
Kafka ACL (Access Control Lists)
List ACLs:
kafka-acls.sh --list --bootstrap-server localhost:9092
Add ACL for a User to Read from a Topic:
kafka-acls.sh --add --allow-principal User:user --operation Read --topic my-topic --group my-group
--bootstrap-server localhost:9092
Remove ACL for a User:
kafka-acls.sh --remove --allow-principal User:user --operation Read --topic my-topic --bootstrap-
server localhost:9092
Log Management
Dump Log Segments:
kafka-run-class.sh kafka.tools.DumpLogSegments --files /path/to/logfile --print-data-log
Monitoring and Metrics
Get Broker Metrics:
kafka-run-class.sh kafka.tools.JmxTool --object-name
kafka.server:type=BrokerTopicMetrics,name=MessagesInPerSec --jmx-url
service:jmx:rmi:///jndi/rmi://localhost:9999/jmxrmi
Enable JMX Monitoring (Start Kafka Broker with JMX enabled):
JMX_PORT=9999 kafka-server-start.sh /path/to/server.properties
Replication
Describe Replicas:
kafka-topics.sh --describe --topic my-topic --bootstrap-server localhost:9092
13.
List OfflinePartitions:
kafka-topics.sh --describe --bootstrap-server localhost:9092 --under-replicated-partitions
Advanced Tools
Mirror Maker (Replicate data between Kafka clusters):
kafka-run-class.sh kafka.tools.MirrorMaker --consumer.config consumer.properties --
producer.config producer.properties --whitelist 'my-topic'
Run Kafka in Single-Node Mode:
kafka-server-start.sh /path/to/config/server.properties --override
listeners=PLAINTEXT://localhost:9092
Kafka Connect
Start Kafka Connect:
connect-distributed.sh /path/to/connect-distributed.properties
List Kafka Connect Connectors:
curl -X GET http://localhost:8083/connectors
Deploy a New Connector:
curl -X POST -H "Content-Type: application/json" -d @connector-config.json
http://localhost:8083/connectors
Delete a Connector:
curl -X DELETE http://localhost:8083/connectors/my-connector
Kafka Streams
Run Kafka Streams Application:
kafka-run-class.sh com.example.MyKafkaStreamsApp
Inspect Kafka Streams Application State:
kafka-streams-application-reset.sh --application-id my-streams-app --bootstrap-servers
localhost:9092
This cheat sheet covers the most common and advanced Kafka commands, from setting up and
managing topics, producers, and consumers to managing ACLs, replication, and monitoring Kafka
clusters. It’s a handy reference for Kafka users of all levels.
Part 1: https://medium.com/@Shamimw/kafka-a-complete-tutorial-part-1-installing-kafka-server-
without-zookeeper-kraft-mode-using-6fc60272457f
Part 2: https://medium.com/@Shamimw/kafka-a-complete-tutorial-part-2-basics-architecture-
producer-consumer-partitioning-and-1900ad458d71
14.
Kafka: A CompleteTutorial (Part 4) — Installing Kafka server using SSL Or SASL using self signed
cert
WS
·
Follow
8 min read
·
Sep 28, 2024
· Introduction:
· Starting Kafka with SSL setup
∘ Step 1: Prerequisites
∘ Step 2: Generate SSL Certificates
∘ Step 3: Configure Kafka for SSL
∘ Step 4: Start Kafka server using SSL properties
∘ Step 5: Validation
∘ Step 6: Testing
∘ Create a topic:
∘ Create a producer_ssl.properties file:
∘ Command to run producer:
∘ Now create consumer_ssl.properies file
∘ Run the consumer command:
· Starting Kafka with SASL setup
∘ Step 1: Enable SASL Authentication
∘ Step 3: Export server_jaas.conf file
∘ Step 3: Start Kafka
∘ Testing:
Introduction:
In this tutorial we will dive into setting up a Kafka server with secure communication. In today’s data-
driven world, security is a paramount concern, especially when handling real-time data streaming at
scale. Kafka, being an open-source distributed event streaming platform, offers robust security
measures, including SSL (Secure Sockets Layer) and SASL (Simple Authentication and Security Layer).
Implementing SSL ensures encrypted communication between Kafka brokers, producers, and
consumers, while SASL adds a layer of authentication to protect access to Kafka resources. This guide
15.
walks you throughthe step-by-step process of installing and configuring a Kafka server using SSL and
SASL, ensuring your Kafka deployment is secure and resilient.
Starting Kafka with SSL setup
Step 1: Prerequisites
Before we jump into configuring Kafka for SSL and SASL, make sure the following are in place:
Java JDK installed.
OpenSSL for certificate creation.
Access to the Kafka server and client machines.
Step 2: Generate SSL Certificates
To establish encrypted communication, you’ll first need to generate SSL certificates. You can either
use a Certificate Authority (CA) for production environments or generate self-signed certificates for
testing.
Generating a Keystore for the Kafka Server:
keytool -keystore kafka.server.keystore.jks -alias localhost -validity 365 -genkey -keyalg RSA
This command creates a new Java Keystore (JKS) file named kafka.server.keystore.jks for the
Kafka server. The keystore will contain a key pair (private and public keys) under the
alias localhost. The key will be valid for 365 days, and the RSA algorithm is used for key
generation.
-keystore kafka.server.keystore.jks: Specifies the keystore file where the generated keys will
be stored.
-alias localhost: Alias for the key entry, used to refer to the key within the keystore.
-validity 365: Specifies that the certificate will be valid for 365 days.
-genkey: Generates the key.
-keyalg RSA: Specifies the RSA algorithm for key generation.
Creating a Certificate Authority (CA) Certificate:
openssl req -new -x509 -keyout ca-key -out ca-cert -days 365
This command generates a self-signed CA certificate using OpenSSL. The CA certificate will be
used to sign the Kafka server’s certificate.
req -new -x509: Creates a new X.509 certificate.
-keyout ca-key: Outputs the generated private key to ca-key.
-out ca-cert: Outputs the self-signed CA certificate to ca-cert.
-days 365: The certificate will be valid for 365 days.
Importing the CA Certificate into the Kafka Server Truststore:
keytool -keystore kafka.server.truststore.jks -alias CARoot -import -file ca-cert
16.
This commandimports the previously created CA certificate into a
new truststore named kafka.server.truststore.jks. Kafka servers use this truststore to verify
client certificates.
-keystore kafka.server.truststore.jks: The truststore where the CA certificate will be stored.
-alias CARoot: Alias for the CA certificate entry in the truststore.
-import: Imports the provided certificate into the truststore.
-file ca-cert: The CA certificate file to import.
Importing the CA Certificate into the Kafka Client Truststore:
keytool -keystore kafka.client.truststore.jks -alias CARoot -import -file ca-cert
Similarly to the previous command, this imports the CA certificate into the Kafka client’s
truststore. This allows the Kafka client to trust the server’s certificate.
-keystore kafka.client.truststore.jks: The truststore for the Kafka client.
-alias CARoot: Alias for the CA certificate.
-import -file ca-cert: Imports the CA certificate into the client’s truststore.
Generating a Certificate Signing Request (CSR) for the Kafka Server:
keytool -keystore kafka.server.keystore.jks -alias localhost -certreq -file cert-file
This command generates a certificate signing request (CSR) for the Kafka server. The CSR is
later signed by the CA.
-certreq: Creates a CSR.
-keystore kafka.server.keystore.jks: The keystore containing the key for which the CSR is
being created.
-alias localhost: Alias for the key entry for which the CSR is generated.
-file cert-file: Specifies the output file where the CSR will be saved.
Signing the Kafka Server’s Certificate with the CA:
openssl x509 -req -CA ca-cert -CAkey ca-key -in cert-file -out cert-signed -days 365 -CAcreateserial -
passin pass:kafka123
This command uses OpenSSL to sign the Kafka server’s CSR with the CA’s private key,
producing a signed certificate for the Kafka server.
-req -CA ca-cert -CAkey ca-key: Specifies the CA certificate and CA private key to sign the
certificate.
-in cert-file: Input file containing the CSR to be signed.
-out cert-signed: Output file containing the signed certificate.
-days 365: Validity of the signed certificate.
-CAcreateserial: Creates a serial number file for the CA if it doesn’t exist.
17.
-passin pass:kafka123:Password for the CA private key.
Importing the CA Certificate into the Kafka Server Keystore:
keytool -keystore kafka.server.keystore.jks -alias CARoot -import -file ca-cert
This command imports the CA certificate into the Kafka server’s keystore. The server will
need the CA certificate to trust the client certificates.
-keystore kafka.server.keystore.jks: The Kafka server’s keystore.
-alias CARoot: Alias for the CA certificate.
-import: Imports the CA certificate into the keystore.
-file ca-cert: CA certificate to be imported.
Importing the Signed Certificate into the Kafka Server Keystore:
keytool -keystore kafka.server.keystore.jks -alias localhost -import -file cert-signed
Finally, this command imports the signed Kafka server certificate into the Kafka server’s
keystore.
-keystore kafka.server.keystore.jks: The keystore where the certificate is stored.
-alias localhost: Alias for the certificate.
-import: Imports the signed certificate into the keystore.
-file cert-signed: The signed certificate file to be imported.
List of files that gets generated:
-rw------- 1 ubuntu ubuntu 1854 Sep 27 15:08 ca-key
-rw-rw-r-- 1 ubuntu ubuntu 1318 Sep 27 15:08 ca-cert
-rw-rw-r-- 1 ubuntu ubuntu 1302 Sep 27 15:13 kafka.server.truststore.jks
-rw-rw-r-- 1 ubuntu ubuntu 1302 Sep 27 15:13 kafka.client.truststore.jks
-rw-rw-r-- 1 ubuntu ubuntu 1081 Sep 27 15:13 cert-file
-rw-rw-r-- 1 ubuntu ubuntu 41 Sep 27 15:13 ca-cert.srl
-rw-rw-r-- 1 ubuntu ubuntu 1196 Sep 27 15:13 cert-signed
-rw-rw-r-- 1 ubuntu ubuntu 4830 Sep 27 15:13 kafka.server.keystore.jks
Step 3: Configure Kafka for SSL
Now that we have the certificates, let’s configure Kafka to use SSL.
make a copy of server.properties
cp server.properties server_ssl.properties
create a meta.properteis file with below content at /tmp/kraft-combined-logs
node.id=1
directory.id=cnY7ldmJ6ePrEkePB-tH4w
version=1
cluster.id=1
18.
Open your server_ssl.propertiesfile on the Kafka broker and add the following SSL configurations:
process.roles=broker,controller
node.id=1
controller.quorum.voters=1@127.0.0.1:9098
# Listeners for broker and controller
listeners=SSL://127.0.0.1:9099,CONTROLLER://127.0.0.1:9098
advertised.listeners=SSL://127.0.0.1:9099
controller.listener.names=CONTROLLER
# Security settings
security.inter.broker.protocol=SSL
security.protocol=SSL
ssl.keystore.location=/home/ubuntu/SW/kafka/Certs/kafka.server.keystore.jks
ssl.keystore.password=kafka123
ssl.key.password=kafka123
ssl.truststore.location=/home/ubuntu/SW/kafka/Certs/kafka.server.truststore.jks
ssl.truststore.password=kafka123
# Protocol mappings
listener.security.protocol.map=SSL:SSL,CONTROLLER:PLAINTEXT
# SSL settings
ssl.enabled.protocols=TLSv1.2
ssl.truststore.type=JKS
ssl.keystore.type=JKS
ssl.client.auth=required
ssl.secure.random.implementation=SHA1PRNG
ssl.cipher.suites=TLS_ECDHE_RSA_WITH_AES_128_CBC_SHA256
ssl.endpoint.identification.algorithm=
# Network settings
num.network.threads=3
num.io.threads=8
socket.send.buffer.bytes=102400
socket.receive.buffer.bytes=102400
socket.request.max.bytes=104857600
# Replication and transactions
offsets.topic.replication.factor=1
transaction.state.log.replication.factor=1
transaction.state.log.min.isr=1
# Log directories
log.dirs=/tmp/kraft-combined-logs
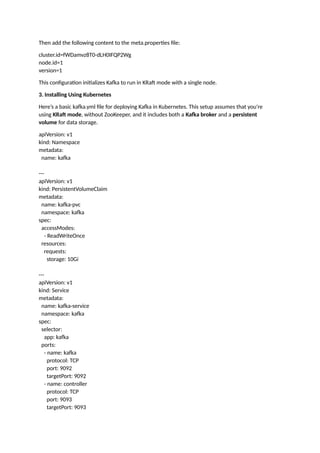
Step 4: Start Kafka server using SSL properties
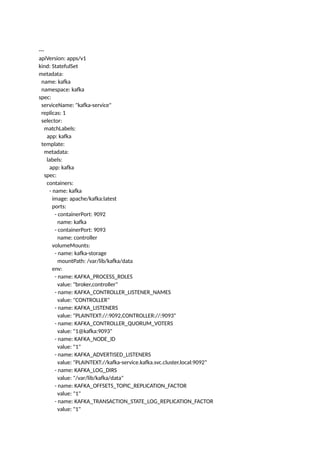
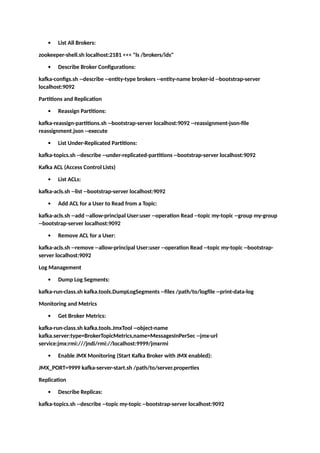
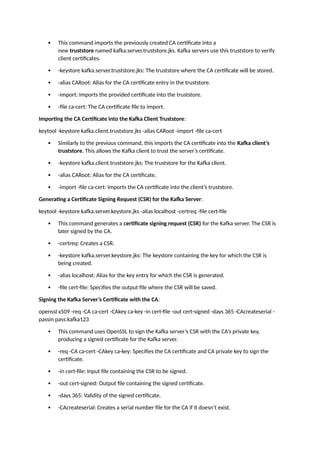
ssl.enabled.protocols=TLSv1.2
ssl.client.auth=required
Command to runproducer:
./kafka-console-producer.sh --broker-list localhost:9099 --producer.config
../config/producer_ssl.properties --topic testtopic
Note: Do not place — producer.config at the end of the command.
I struggled with below error for couple of hours :
[2024-09-27 20:39:11,603] INFO [SocketServer listenerType=BROKER, nodeId=1] Failed
authentication with /127.0.0.1 (channelId=127.0.0.1:9099-127.0.0.1:56288-9) (SSL handshake failed)
(org.apache.kafka.common.network.Selector)
Now create consumer_ssl.properies file
security.protocol=SSL
ssl.truststore.location=/home/ubuntu/SW/kafka/Certs/kafka.client.truststore.jks
ssl.truststore.password=kafka123
ssl.endpoint.identification.algorithm=
ssl.keystore.location = /home/ubuntu/SW/kafka/Certs/kafka.server.keystore.jks
ssl.keystore.password = kafka123
ssl.key.password = kafka123
Run the consumer command:
./kafka-console-consumer.sh --bootstrap-server localhost:9099 --topic testtopic --from-beginning --
consumer.config ../config/consumer_ssl.properties
Starting Kafka with SASL setup
Step 1: Enable SASL Authentication
Kafka supports multiple SASL mechanisms such as PLAIN, SCRAM, and GSSAPI (Kerberos). In this
tutorial, we’ll use SASL with SSL to authenticate clients.
Open your server_ssl.properties file on the Kafka broker and add the following SSL configurations:
process.roles=broker,controller
node.id=1
controller.quorum.voters=1@127.0.0.1:9098
# Listeners for broker and controller
listeners=SASL_SSL://127.0.0.1:9099,CONTROLLER://:9098
controller.listener.names=CONTROLLER
#inter.broker.listener.name=BROKER
# Advertised listener for external clients
advertised.listeners=SASL_SSL://127.0.0.1:9099
advertised.host.name=127.0.0.1
21.
# Inter-broker communicationusing SASL_SSL
security.inter.broker.protocol=SASL_SSL
sasl.mechanism.inter.broker.protocol=PLAIN
# Mechanism for inter-broker communication
# SASL configuration
sasl.enabled.mechanisms=PLAIN
# List of enabled SASL mechanisms
security.protocol=SASL_SSL
# Set the security protocol
# Authorizer Configuration for ACLs
authorizer.class.name=org.apache.kafka.metadata.authorizer.StandardAuthorizer
allow.everyone.if.no.acl.found=true
# SSL Configuration
ssl.keystore.location=/home/ubuntu/SW/kafka/Certs/kafka.server.keystore.jks
ssl.keystore.password=kafka123
ssl.key.password=kafka123
ssl.truststore.location=/home/ubuntu/SW/kafka/Certs/kafka.server.truststore.jks
ssl.truststore.password=kafka123
ssl.keystore.type=JKS
ssl.truststore.type=JKS
# SSL Protocols and Ciphers
#ssl.enabled.protocols=TLSv1.2 # Use only modern SSL protocols
#ssl.cipher.suites=TLS_ECDHE_RSA_WITH_AES_128_CBC_SHA256 # Recommended cipher suite
# SSL Authentication Settings
ssl.client.auth=none
# Change to 'required' if client authentication is needed
ssl.endpoint.identification.algorithm=https
# Optional but ensures hostname verification
ssl.secure.random.implementation=SHA1PRNG
# Listener security protocol mapping
listener.security.protocol.map=CONTROLLER:PLAINTEXT,SASL_SSL:SASL_SSL
# Kafka Cluster Configuration
num.network.threads=3
num.io.threads=8
# Enable topic auto-creation
auto.create.topics.enable=true
delete.topic.enable=true
auto.leader.rebalance.enable=true
log.dirs=/tmp/kraft-combined-logs
22.
Step 2: Createa server_jaas.conf file and add below content :
KafkaServer {
org.apache.kafka.common.security.plain.PlainLoginModule required
username="admin"
password="admin-secret"
user_admin="admin-secret";
};
Client {
org.apache.kafka.common.security.plain.PlainLoginModule required
username="admin"
password="admin-secret";
};
Step 3: Export server_jaas.conf file
export KAFKA_OPTS="-Djava.security.auth.login.config=config/server_jaas.conf"
Step 3: Start Kafka
./bin/kafka-server-start.sh config/server_sasl.properties
Finished waiting for the broker to be unfenced (kafka.server.BrokerServer)
[2024-09-27 20:59:14,863] INFO authorizerStart completed for endpoint SASL_SSL. Endpoint is now
READY. (org.apache.kafka.server.network.EndpointReadyFutures)
Testing:
Create client_jaas.conf file:
KafkaClient {
org.apache.kafka.common.security.plain.PlainLoginModule required
username="admin"
password="admin-secret";
};
Run export command:
export KAFKA_OPTS="-Djava.security.auth.login.config=../config/client_jaas.conf"
Create producer_sasl.properties file with below content:
security.protocol=SASL_SSL
sasl.mechanism=PLAIN
bootstrap.servers=localhost:9099
compression.type=none
sasl.kerberos.service.name=kafka
ssl.enabled.protocols=TLSv1.2,TLSv1.1,TLSv1
ssl.truststore.type=JKS
ssl.truststore.type = JKS
ssl.truststore.location=/home/ubuntu/SW/kafka/Certs/kafka.client.truststore.jks
23.
ssl.truststore.password=kafka123
ssl.endpoint.identification.algorithm=
ssl.keystore.location = /home/ubuntu/SW/kafka/Certs/kafka.server.keystore.jks
ssl.keystore.password= kafka123
ssl.key.password = kafka123
ssl.endpoint.identification.algorithm=
Run kafka prodcuer command:
./kafka-console-producer.sh --broker-list localhost:9099 --producer.config
../config/producer_sasl.properties --topic testtopic
>test
Now run the consumer command:
./kafka-console-consumer.sh --bootstrap-server localhost:9099 --topic testtopic --from-beginning --
consumer.config ../config/consumer_sasl.properties
test
These commands, when executed in sequence, will generate the necessary keystores, truststores,
and certificates for securely running Kafka with SSL and SASL encryption. Both the Kafka broker and
clients will be able to authenticate and communicate over secure channels.
![docker network create kafka-network
Step 2: Run Kafka in KRaft Mode Using Docker
Next, run the following command to start a Kafka server using Docker:
docker run -d --name kafkaserver --network kafka-network
-e KAFKA_PROCESS_ROLES=broker,controller
-e KAFKA_CONTROLLER_LISTENER_NAMES=CONTROLLER
-e KAFKA_LISTENERS=PLAINTEXT://:9092,CONTROLLER://:9093
-e KAFKA_CONTROLLER_QUORUM_VOTERS=1@localhost:9093
-e KAFKA_NODE_ID=1
-e KAFKA_ADVERTISED_LISTENERS=PLAINTEXT://kafkaserver:9092
-e KAFKA_OFFSETS_TOPIC_REPLICATION_FACTOR=1
-e KAFKA_TRANSACTION_STATE_LOG_REPLICATION_FACTOR=1
-e KAFKA_TRANSACTION_STATE_LOG_MIN_ISR=1
-p 9092:9092
apache/kafka:latest
This command configures Kafka to run in KRaft mode, without ZooKeeper, by using
the KAFKA_PROCESS_ROLES and KAFKA_CONTROLLER_LISTENER_NAMES settings. The controller
and broker roles are combined in this setup, simplifying the architecture.
2. Installing Kafka Using Binaries (KRaft Mode)
If you prefer more control over your installation or wish to explore Kafka outside a containerized
environment, you can install Kafka using its binaries.
Step 1: Download Kafka Binaries
Start by downloading the Kafka binaries:
wget https://downloads.apache.org/kafka/3.8.0/kafka_2.12-3.8.0.tgz
tar -zxvf kafka_2.12-3.8.0.tgz
Step 2: Configure Kafka for KRaft Mode
After extracting the files, you might encounter an issue related to the absence of
a meta.properties file. Kafka requires this file to identify the cluster and node IDs. If the file is
missing, Kafka will throw the following error:
[2024-09-26 18:14:41,186] ERROR Exiting Kafka due to fatal exception (kafka.Kafka$)
java.lang.RuntimeException: No readable meta.properties files found.
To resolve this issue, create the necessary files and directories:
cd /tmp
mkdir kraft-combined-logs
touch kraft-combined-logs/meta.properties
Lets generate a kafka cluster id:
./bin/kafka-storage.sh random-uuid
output: fWDamvz8T0-dLH0IFQP2Wg](https://image.slidesharecdn.com/kafka-250308003913-0a3633f9/85/Kafk-a-with-zoo-keeper-setup-documentation-2-320.jpg)
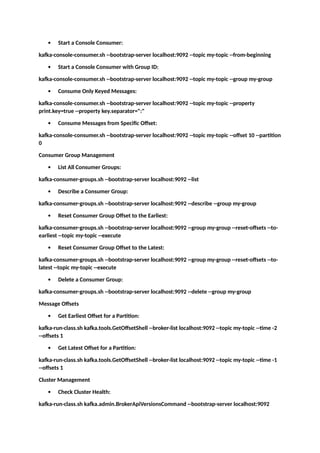
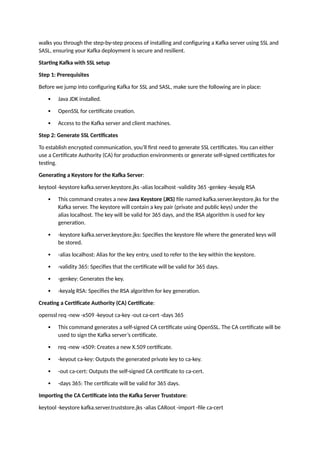
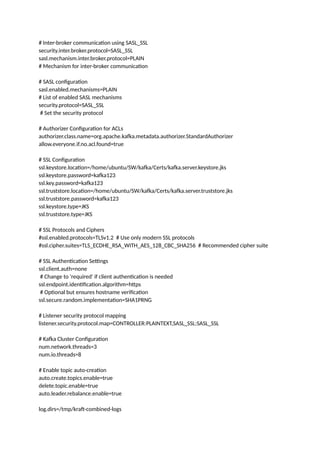
![./kafka-server-start.sh ../config/server_ssl.properties
Step 5: Validation
openssl s_client -debug -connect localhost:9099 -tls1
CONNECTED(00000003)
write to 0x5cb4620cb8d0 [0x5cb4621b6bc0] (188 bytes => 188 (0xBC))
0000 - 16 03 01 00 b7 01 00 00-b3 03 03 7b 5c c1 2a be ...........{.*.
0010 - 1e d9 64 7f 18 08 97 64-d5 95 02 40 06 ce db 59 ..d....d...@...Y
0020 - c5 ce dd f0 84 63 e4 e5-6a 2c 29 00 00 38 c0 2c .....c..j,)..8.,
0030 - c0 30 00 9f cc a9 cc a8-cc aa c0 2b c0 2f 00 9e .0.........+./..
0040 - c0 24 c0 28 00 6b c0 23-c0 27 00 67 c0 0a c0 14 .$.(.k.#.'.g....
0050 - 00 39 c0 09 c0 13 00 33-00 9d 00 9c 00 3d 00 3c .9.....3.....=.<
0060 - 00 35 00 2f 00 ff 01 00-00 52 00 0b 00 04 03 00 .5./.....R......
0070 - 01 02 00 0a 00 0c 00 0a-00 1d 00 17 00 1e 00 19 ................
0080 - 00 18 00 23 00 00 00 16-00 00 00 17 00 00 00 0d ...#............
0090 - 00 2a 00 28 04 03 05 03-06 03 08 07 08 08 08 09 .*.(............
00a0 - 08 0a 08 0b 08 04 08 05-08 06 04 01 05 01 06 01 ................
00b0 - 03 03 03 01 03 02 04 02-05 02 06 02 ............
read from 0x5cb4620cb8d0 [0x5cb4621ad993] (5 bytes => 5 (0x5))
Step 6: Testing
Create a topic:
./bin/kafka-topics.sh --create --topic my-topic --bootstrap-server localhost:9099 --command-config
config/topci_ssl.properties
./bin/kafka-topics.sh --list --bootstrap-server localhost:9099 --command-config
config/topic_ssl.properties
__consumer_offsets
my-topic
testtopic
testtopic1
Create a producer_ssl.properties file:
security.protocol=SSL
ssl.truststore.location=/home/ubuntu/SW/kafka/Certs/kafka.client.truststore.jks
ssl.truststore.password=kafka123
ssl.endpoint.identification.algorithm=
ssl.keystore.location = /home/ubuntu/SW/kafka/Certs/kafka.server.keystore.jks
ssl.keystore.password = kafka123
ssl.key.password = kafka123](https://image.slidesharecdn.com/kafka-250308003913-0a3633f9/85/Kafk-a-with-zoo-keeper-setup-documentation-19-320.jpg)
![ssl.enabled.protocols=TLSv1.2
ssl.client.auth=required
Command to run producer:
./kafka-console-producer.sh --broker-list localhost:9099 --producer.config
../config/producer_ssl.properties --topic testtopic
Note: Do not place — producer.config at the end of the command.
I struggled with below error for couple of hours :
[2024-09-27 20:39:11,603] INFO [SocketServer listenerType=BROKER, nodeId=1] Failed
authentication with /127.0.0.1 (channelId=127.0.0.1:9099-127.0.0.1:56288-9) (SSL handshake failed)
(org.apache.kafka.common.network.Selector)
Now create consumer_ssl.properies file
security.protocol=SSL
ssl.truststore.location=/home/ubuntu/SW/kafka/Certs/kafka.client.truststore.jks
ssl.truststore.password=kafka123
ssl.endpoint.identification.algorithm=
ssl.keystore.location = /home/ubuntu/SW/kafka/Certs/kafka.server.keystore.jks
ssl.keystore.password = kafka123
ssl.key.password = kafka123
Run the consumer command:
./kafka-console-consumer.sh --bootstrap-server localhost:9099 --topic testtopic --from-beginning --
consumer.config ../config/consumer_ssl.properties
Starting Kafka with SASL setup
Step 1: Enable SASL Authentication
Kafka supports multiple SASL mechanisms such as PLAIN, SCRAM, and GSSAPI (Kerberos). In this
tutorial, we’ll use SASL with SSL to authenticate clients.
Open your server_ssl.properties file on the Kafka broker and add the following SSL configurations:
process.roles=broker,controller
node.id=1
controller.quorum.voters=1@127.0.0.1:9098
# Listeners for broker and controller
listeners=SASL_SSL://127.0.0.1:9099,CONTROLLER://:9098
controller.listener.names=CONTROLLER
#inter.broker.listener.name=BROKER
# Advertised listener for external clients
advertised.listeners=SASL_SSL://127.0.0.1:9099
advertised.host.name=127.0.0.1](https://image.slidesharecdn.com/kafka-250308003913-0a3633f9/85/Kafk-a-with-zoo-keeper-setup-documentation-20-320.jpg)
![Step 2: Create a server_jaas.conf file and add below content :
KafkaServer {
org.apache.kafka.common.security.plain.PlainLoginModule required
username="admin"
password="admin-secret"
user_admin="admin-secret";
};
Client {
org.apache.kafka.common.security.plain.PlainLoginModule required
username="admin"
password="admin-secret";
};
Step 3: Export server_jaas.conf file
export KAFKA_OPTS="-Djava.security.auth.login.config=config/server_jaas.conf"
Step 3: Start Kafka
./bin/kafka-server-start.sh config/server_sasl.properties
Finished waiting for the broker to be unfenced (kafka.server.BrokerServer)
[2024-09-27 20:59:14,863] INFO authorizerStart completed for endpoint SASL_SSL. Endpoint is now
READY. (org.apache.kafka.server.network.EndpointReadyFutures)
Testing:
Create client_jaas.conf file:
KafkaClient {
org.apache.kafka.common.security.plain.PlainLoginModule required
username="admin"
password="admin-secret";
};
Run export command:
export KAFKA_OPTS="-Djava.security.auth.login.config=../config/client_jaas.conf"
Create producer_sasl.properties file with below content:
security.protocol=SASL_SSL
sasl.mechanism=PLAIN
bootstrap.servers=localhost:9099
compression.type=none
sasl.kerberos.service.name=kafka
ssl.enabled.protocols=TLSv1.2,TLSv1.1,TLSv1
ssl.truststore.type=JKS
ssl.truststore.type = JKS
ssl.truststore.location=/home/ubuntu/SW/kafka/Certs/kafka.client.truststore.jks](https://image.slidesharecdn.com/kafka-250308003913-0a3633f9/85/Kafk-a-with-zoo-keeper-setup-documentation-22-320.jpg)


![5G Explained! A High Level Overview [Introduction]](https://cdn.slidesharecdn.com/ss_thumbnails/5gexplainedahighleveloverview-260119165306-cc137a3e-thumbnail.jpg?width=640&height=640&fit=bounds)


