Download to read offline


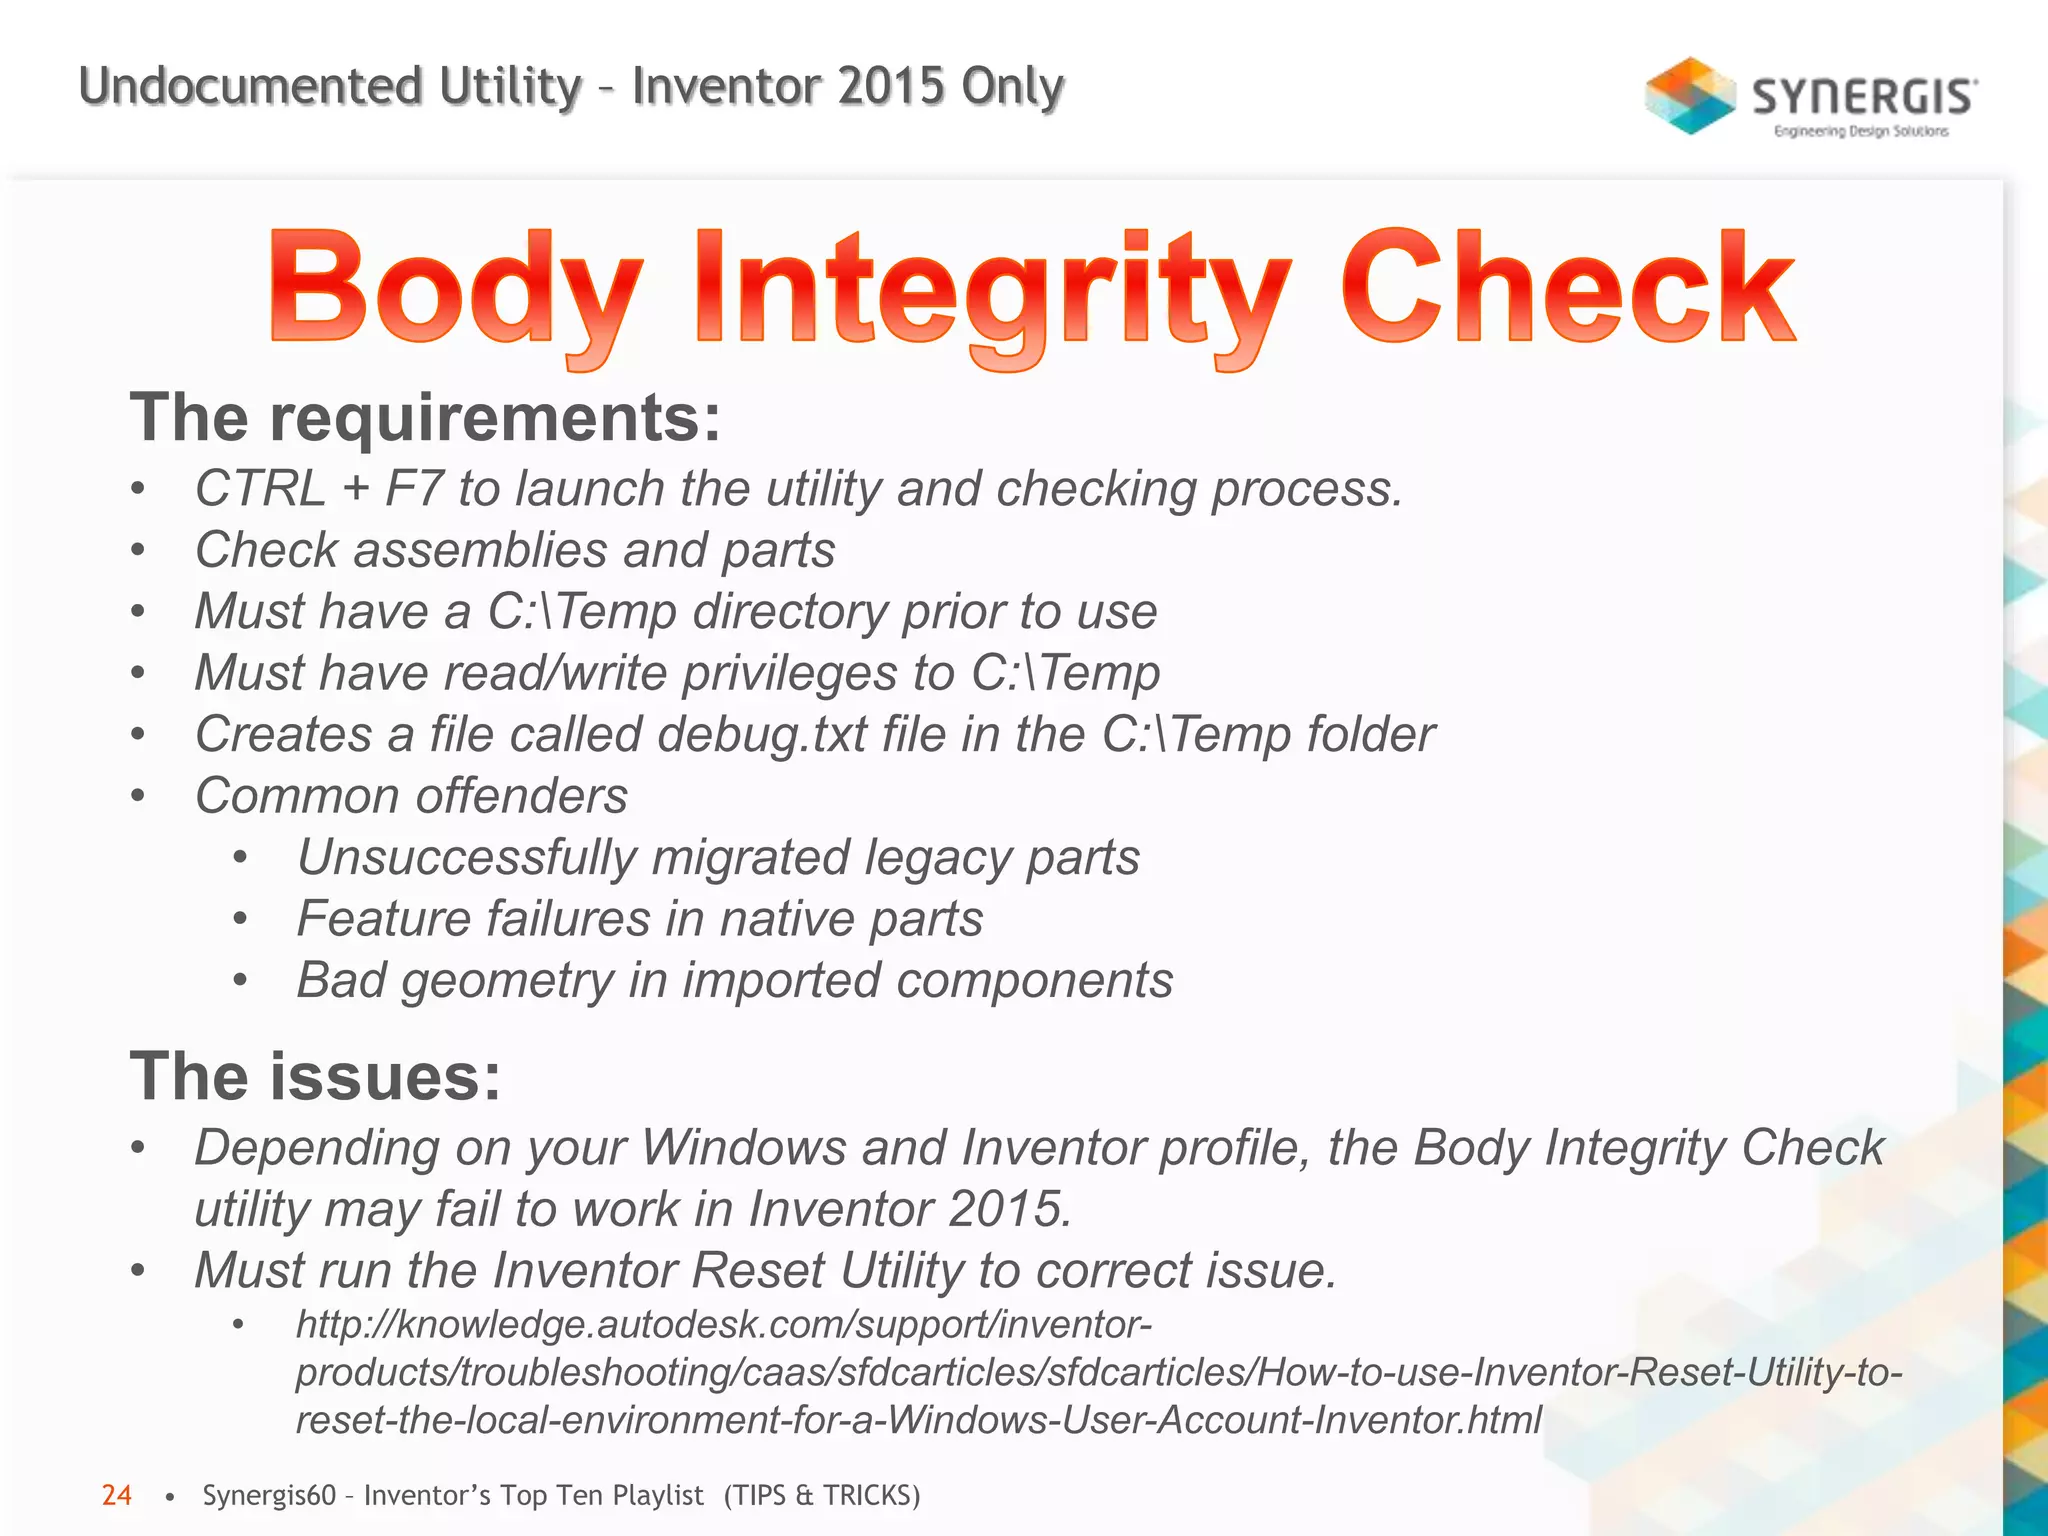
![Undocumented Utility – Inventor 2015 Only
• Synergis60 – Inventor’s Top Ten Playlist (TIPS & TRICKS)23
Analyzes for geometry errors
[bad geometry, boolean features, constraints, performance, mass]](https://image.slidesharecdn.com/inventortoptenplaylist-140710105421-phpapp01/75/Inventor-top-ten-playlist-23-2048.jpg)


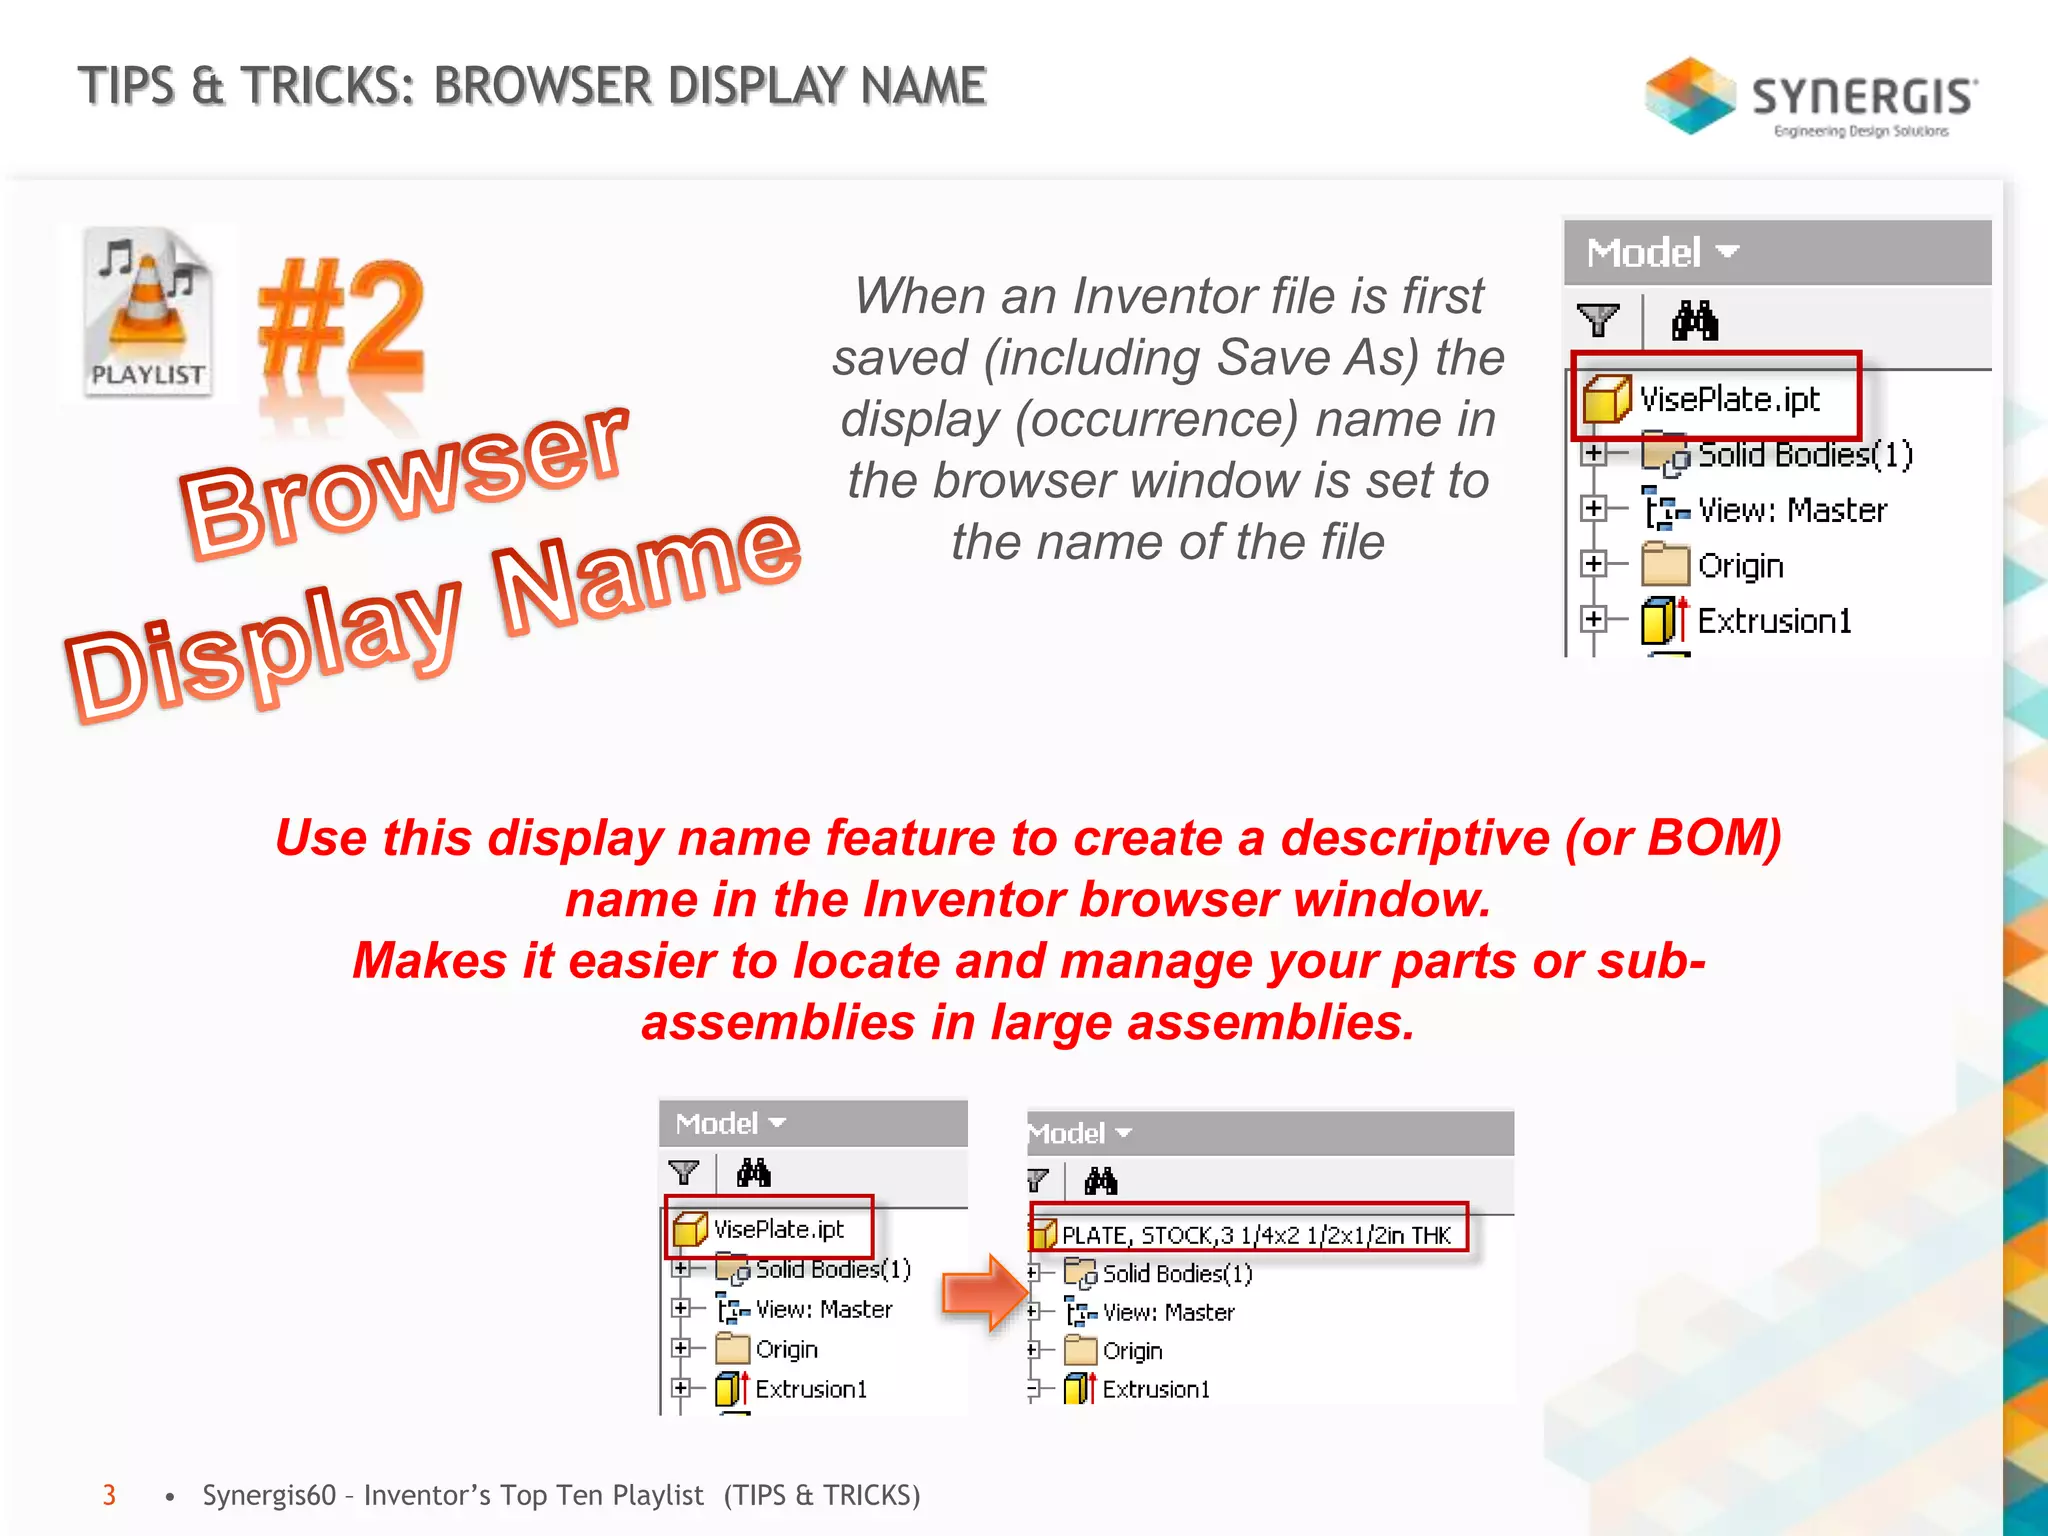
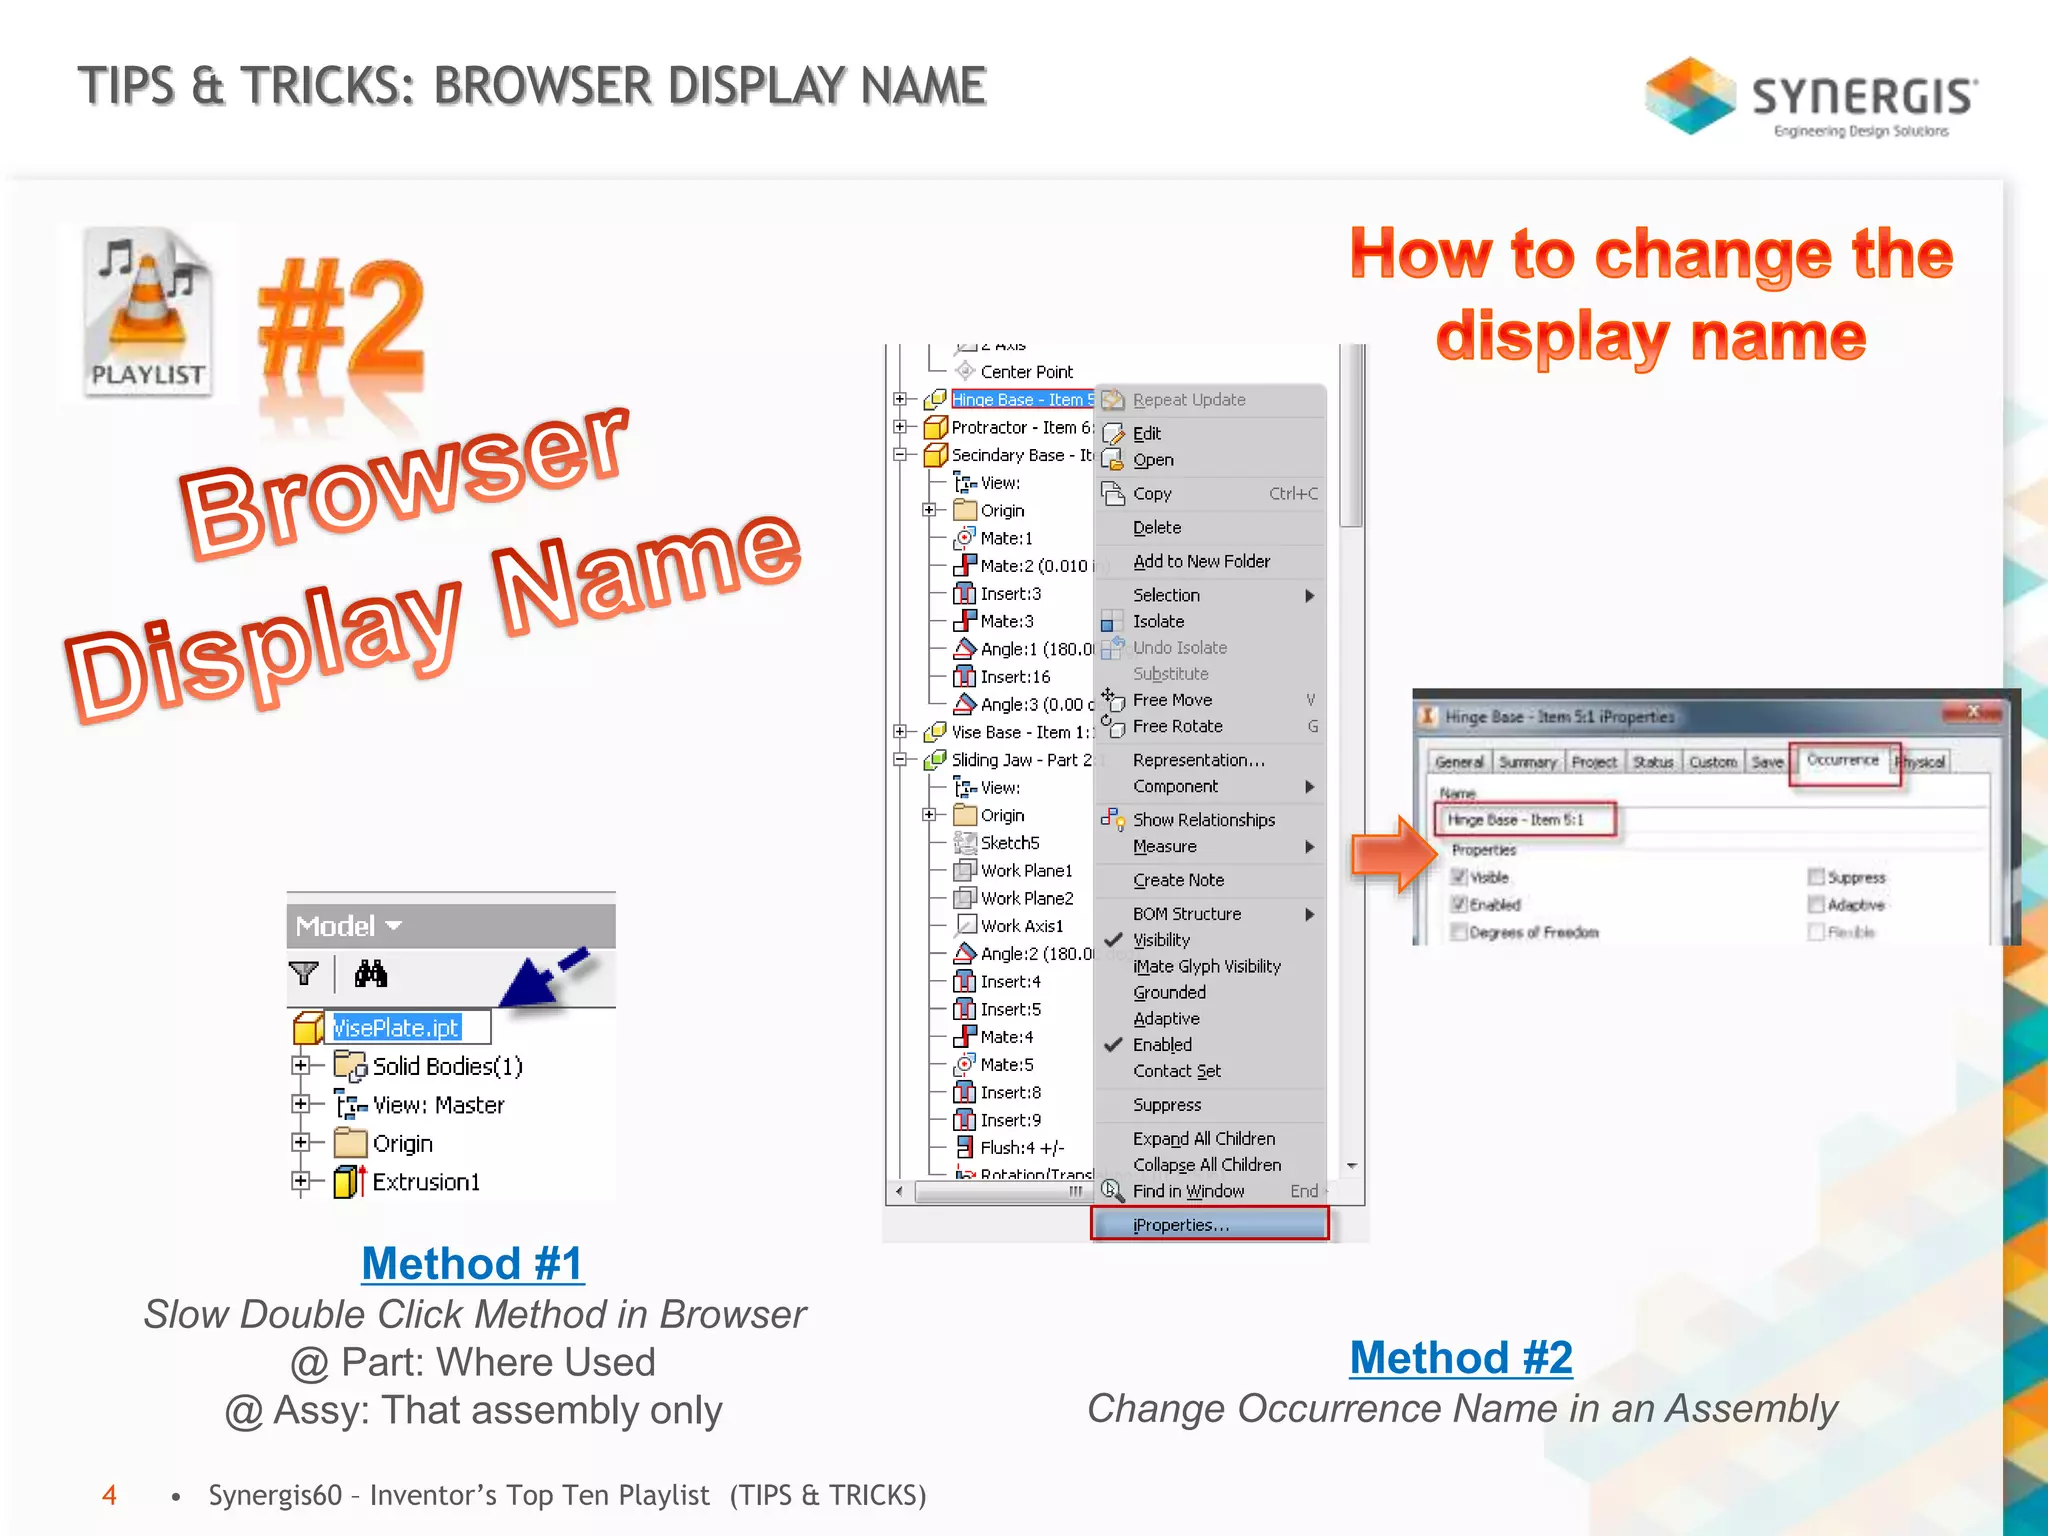
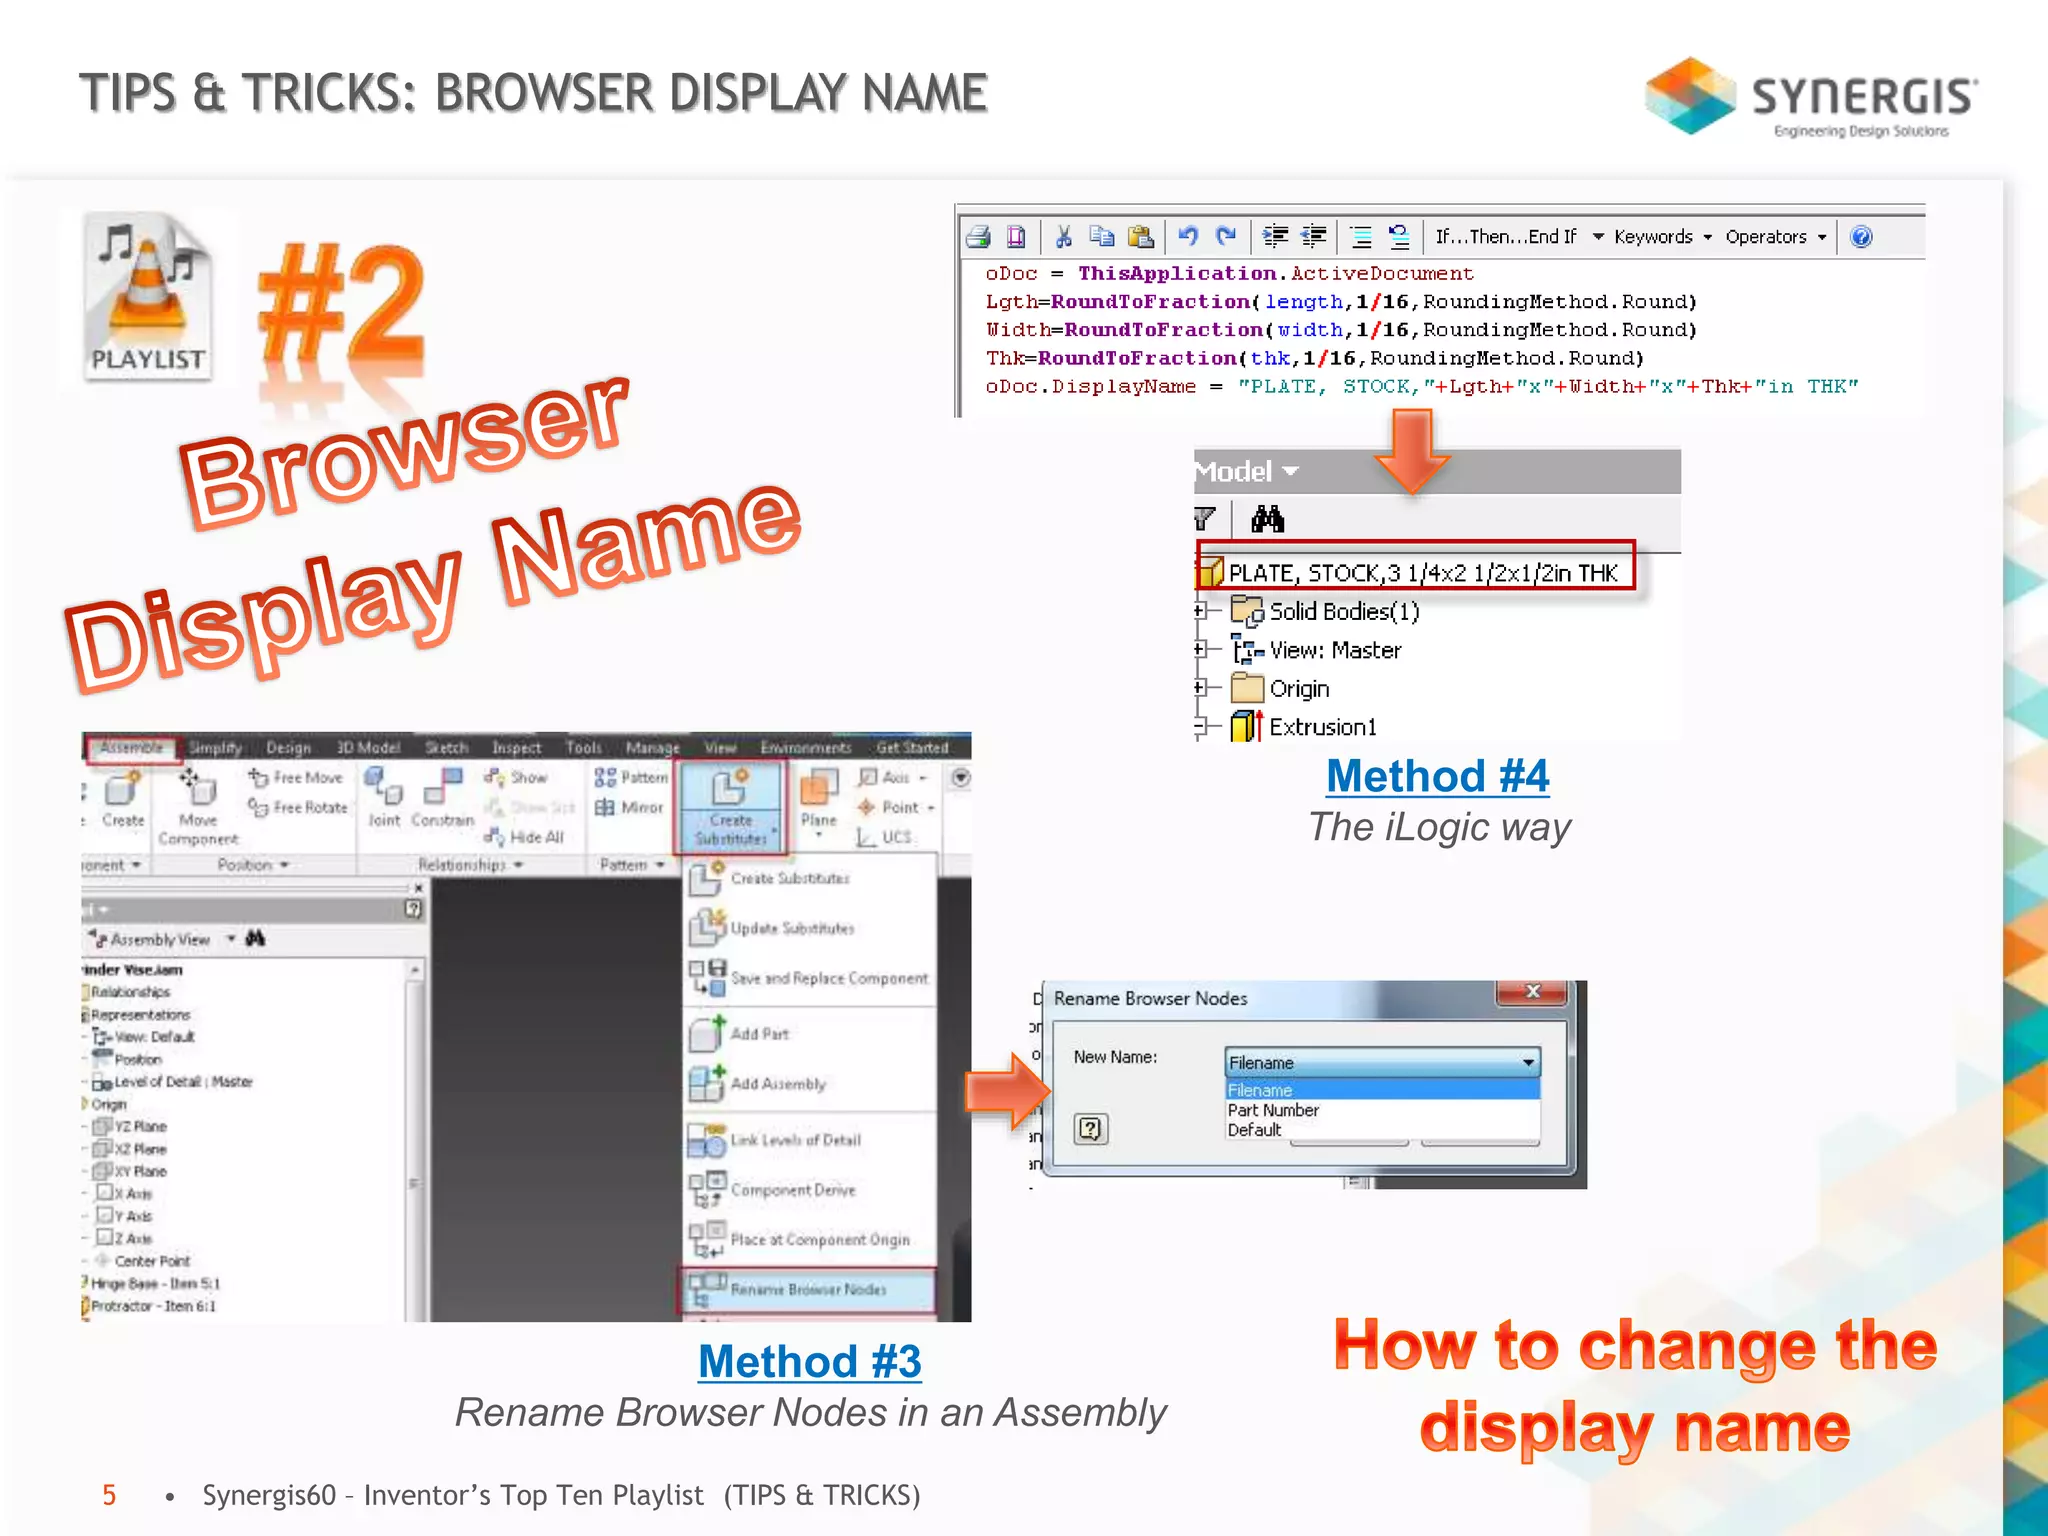
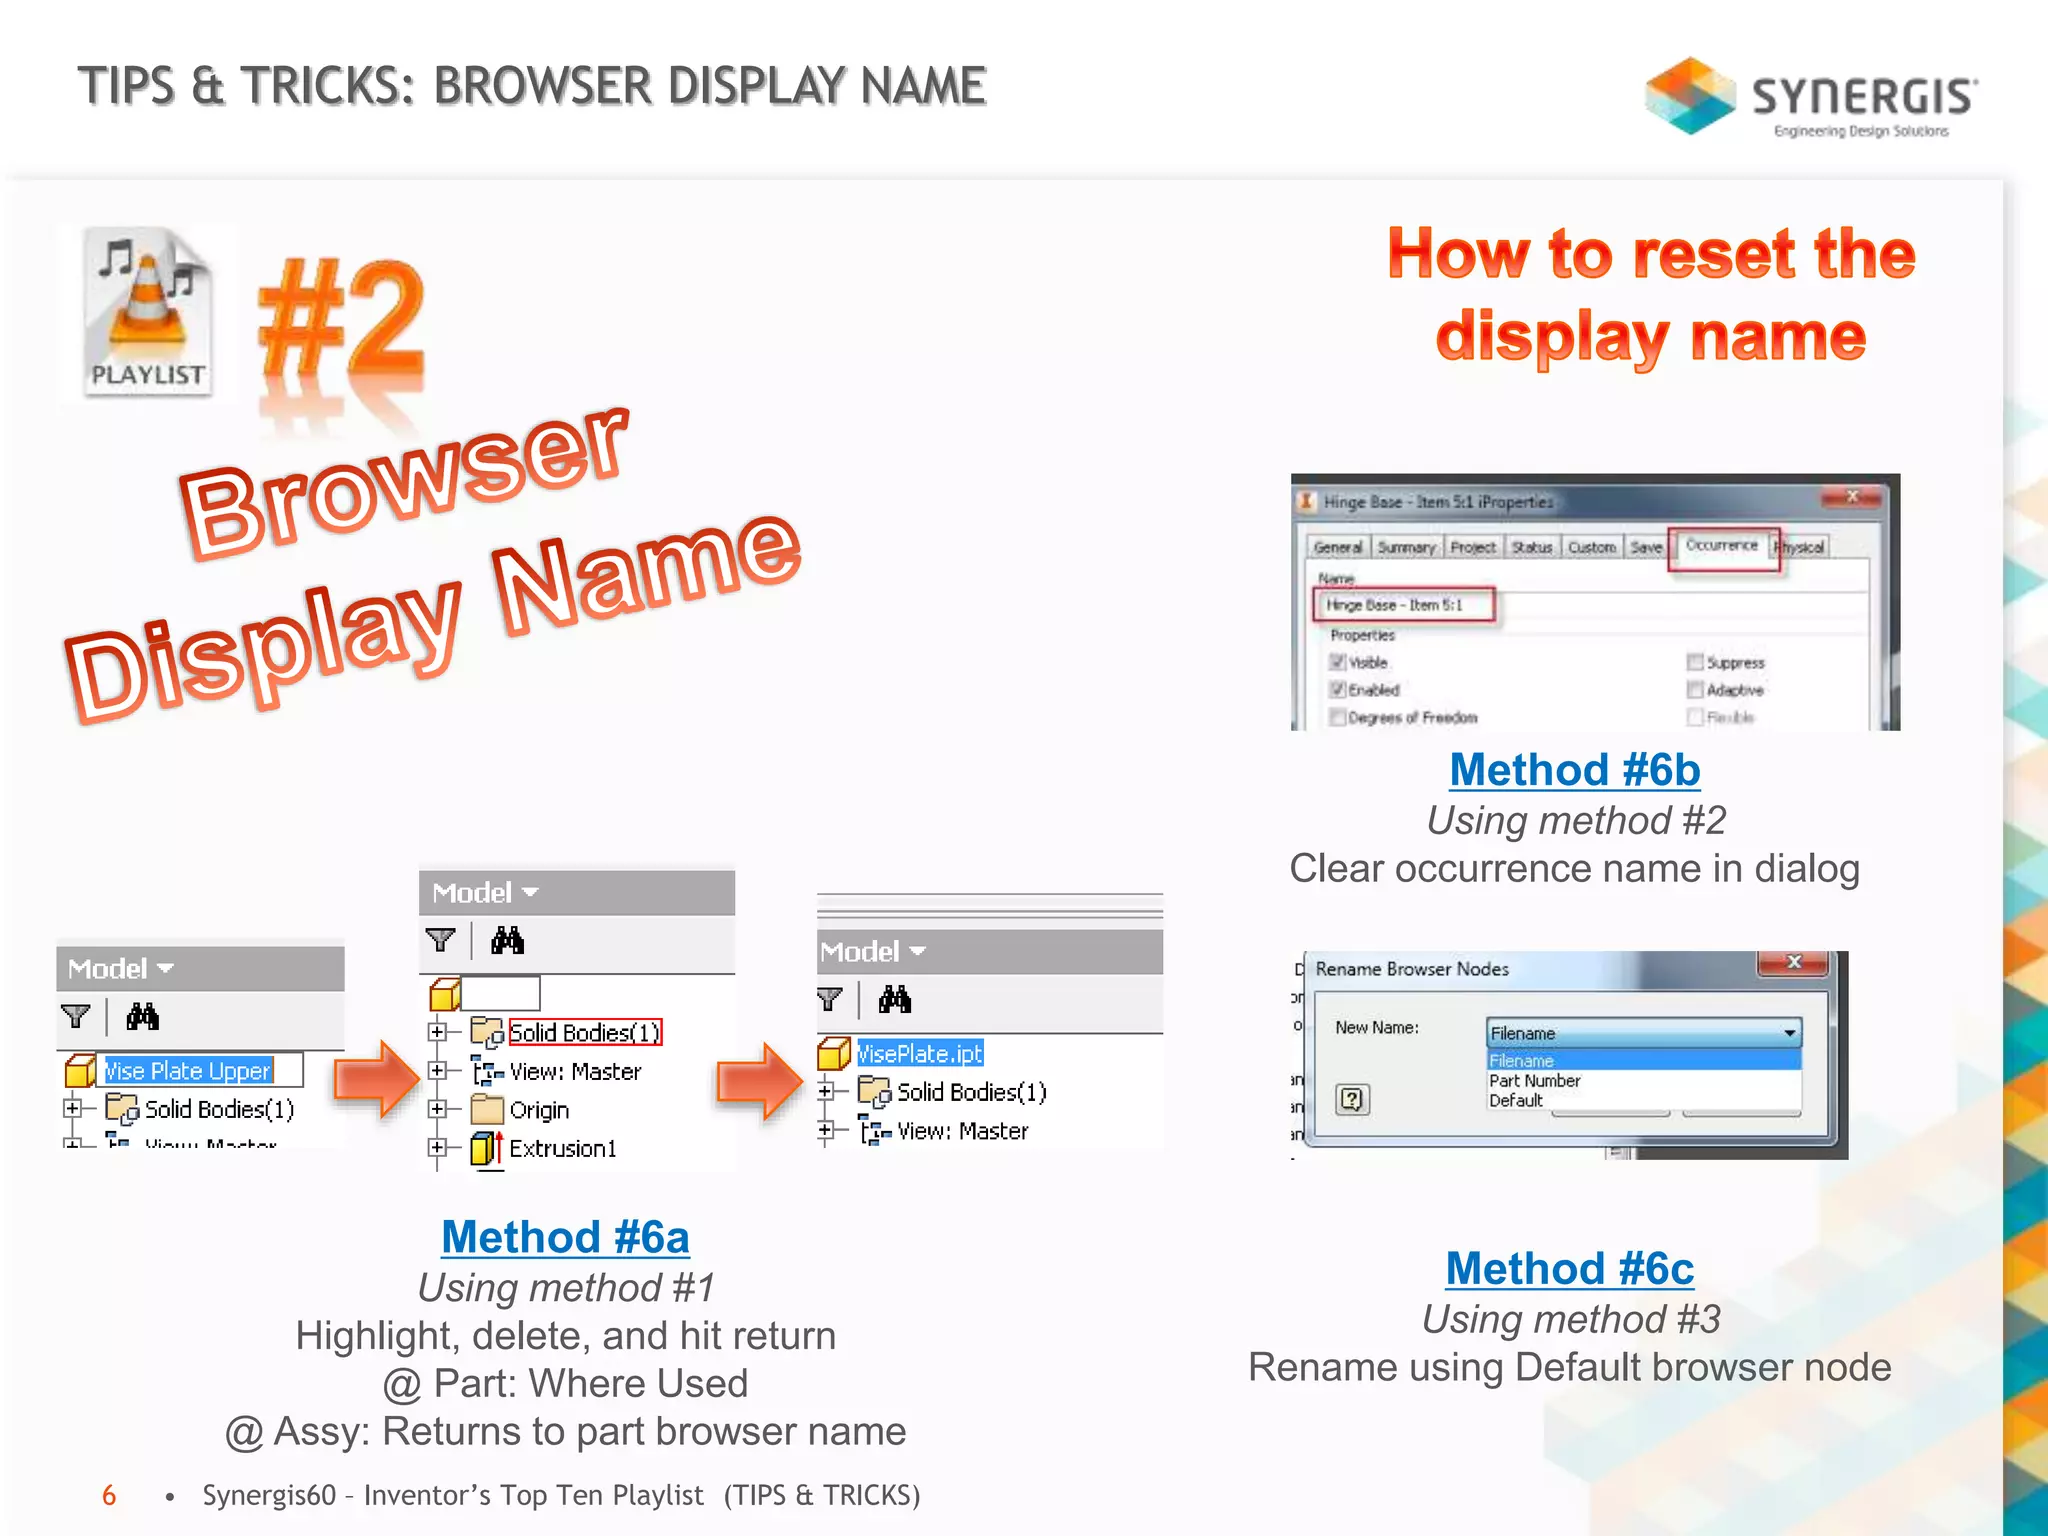
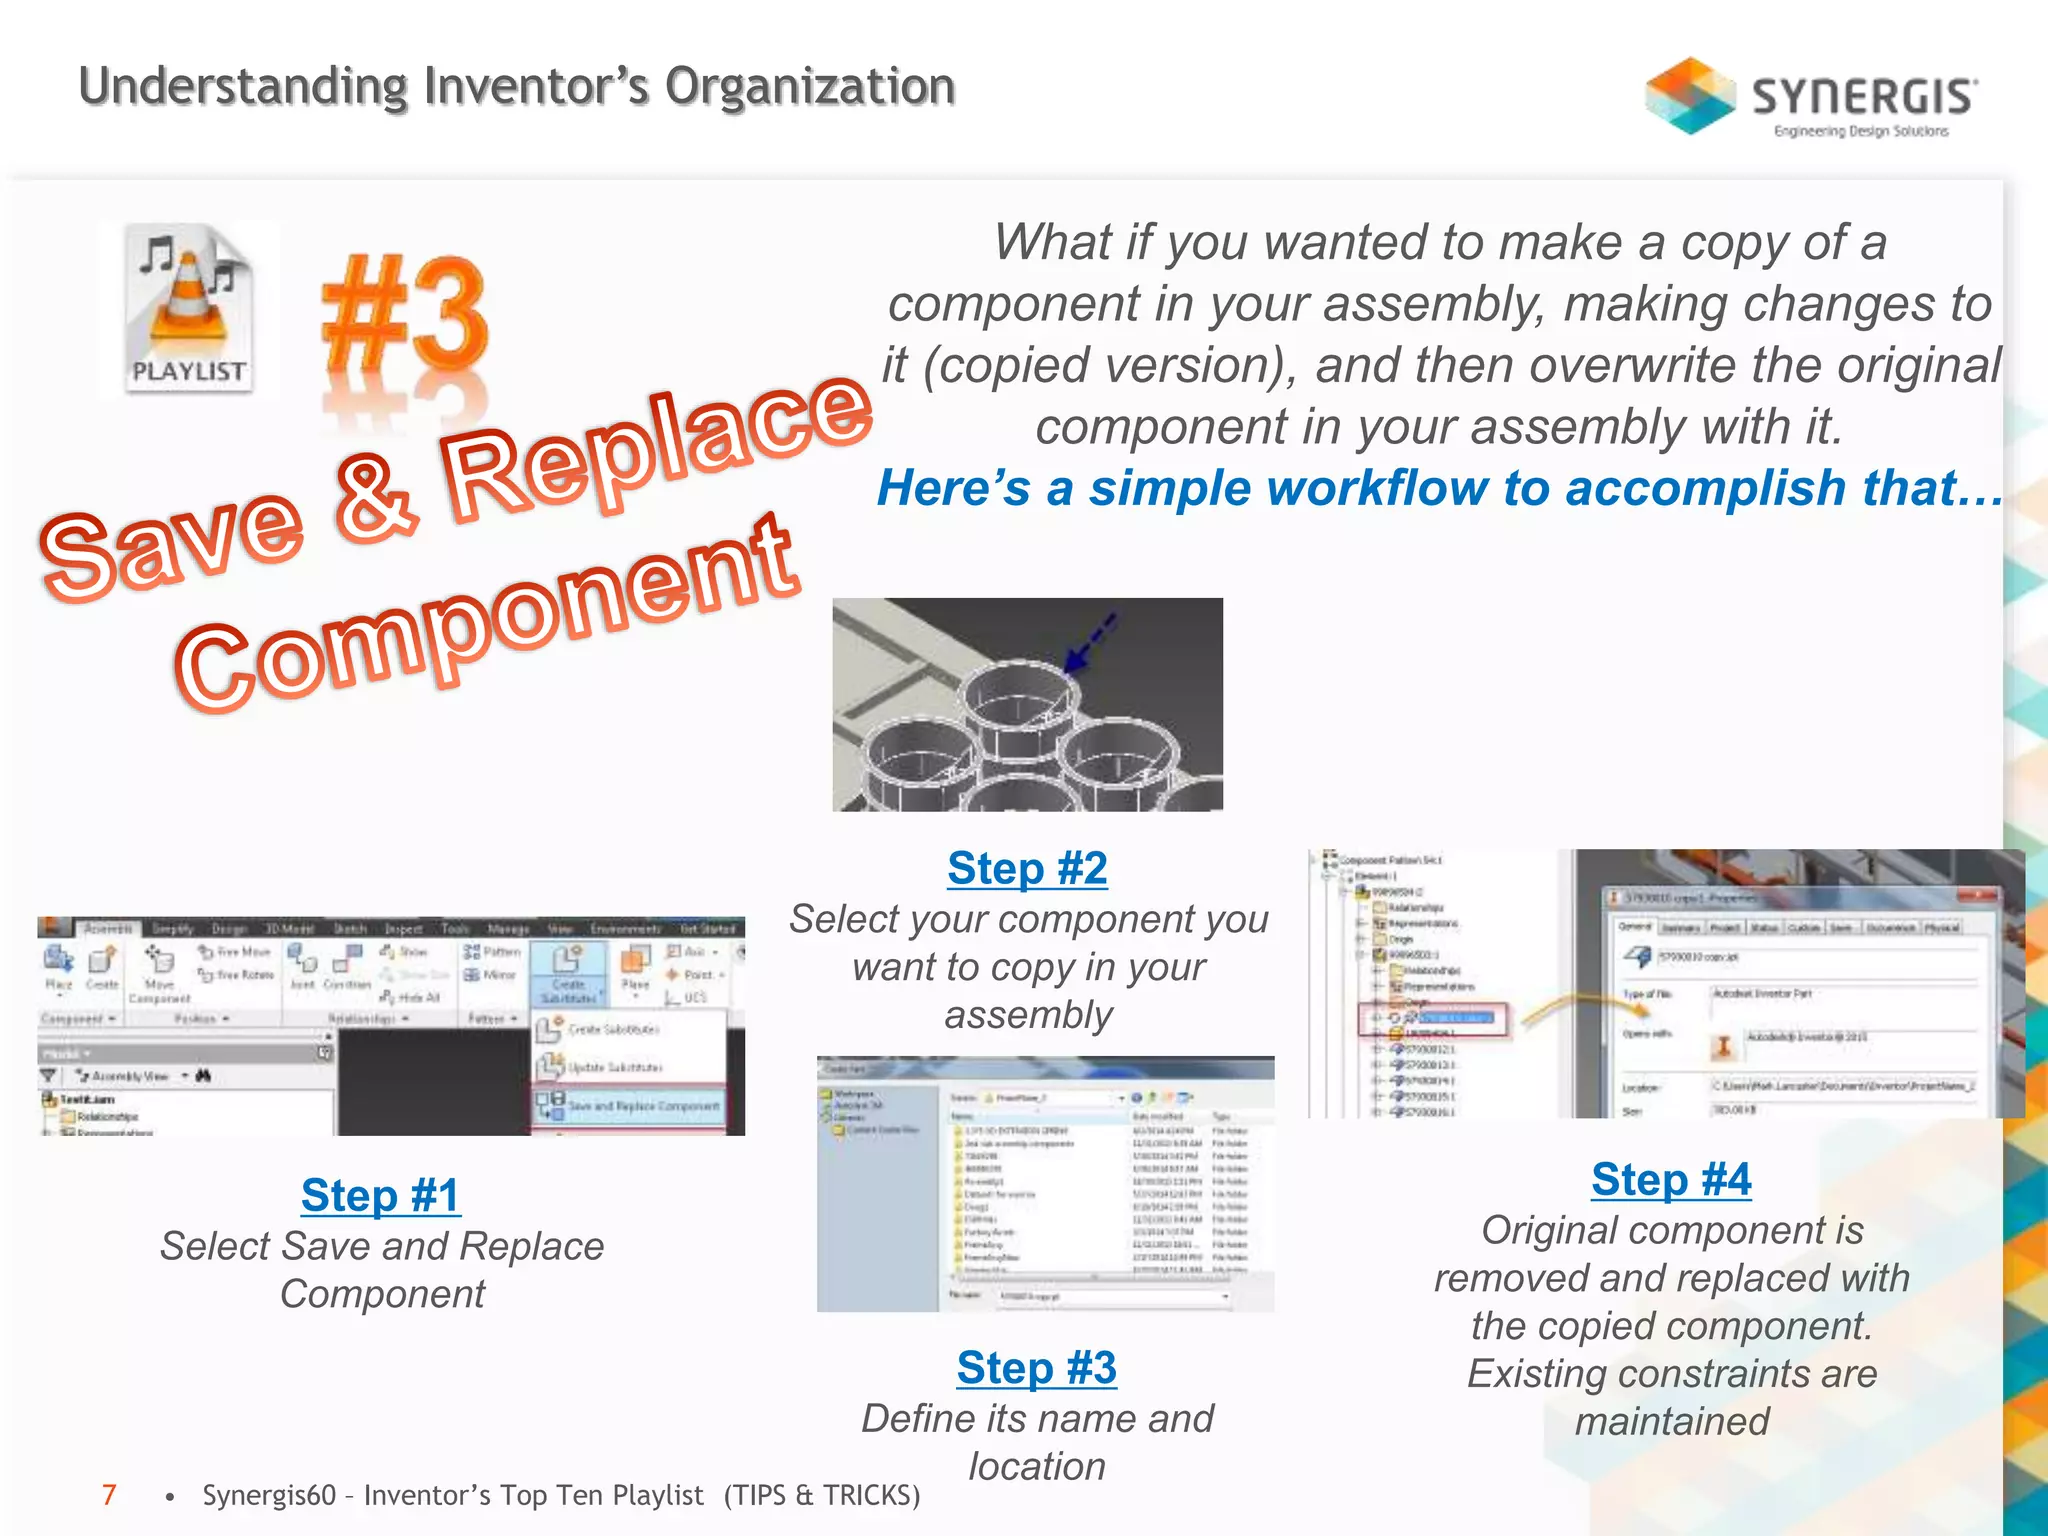
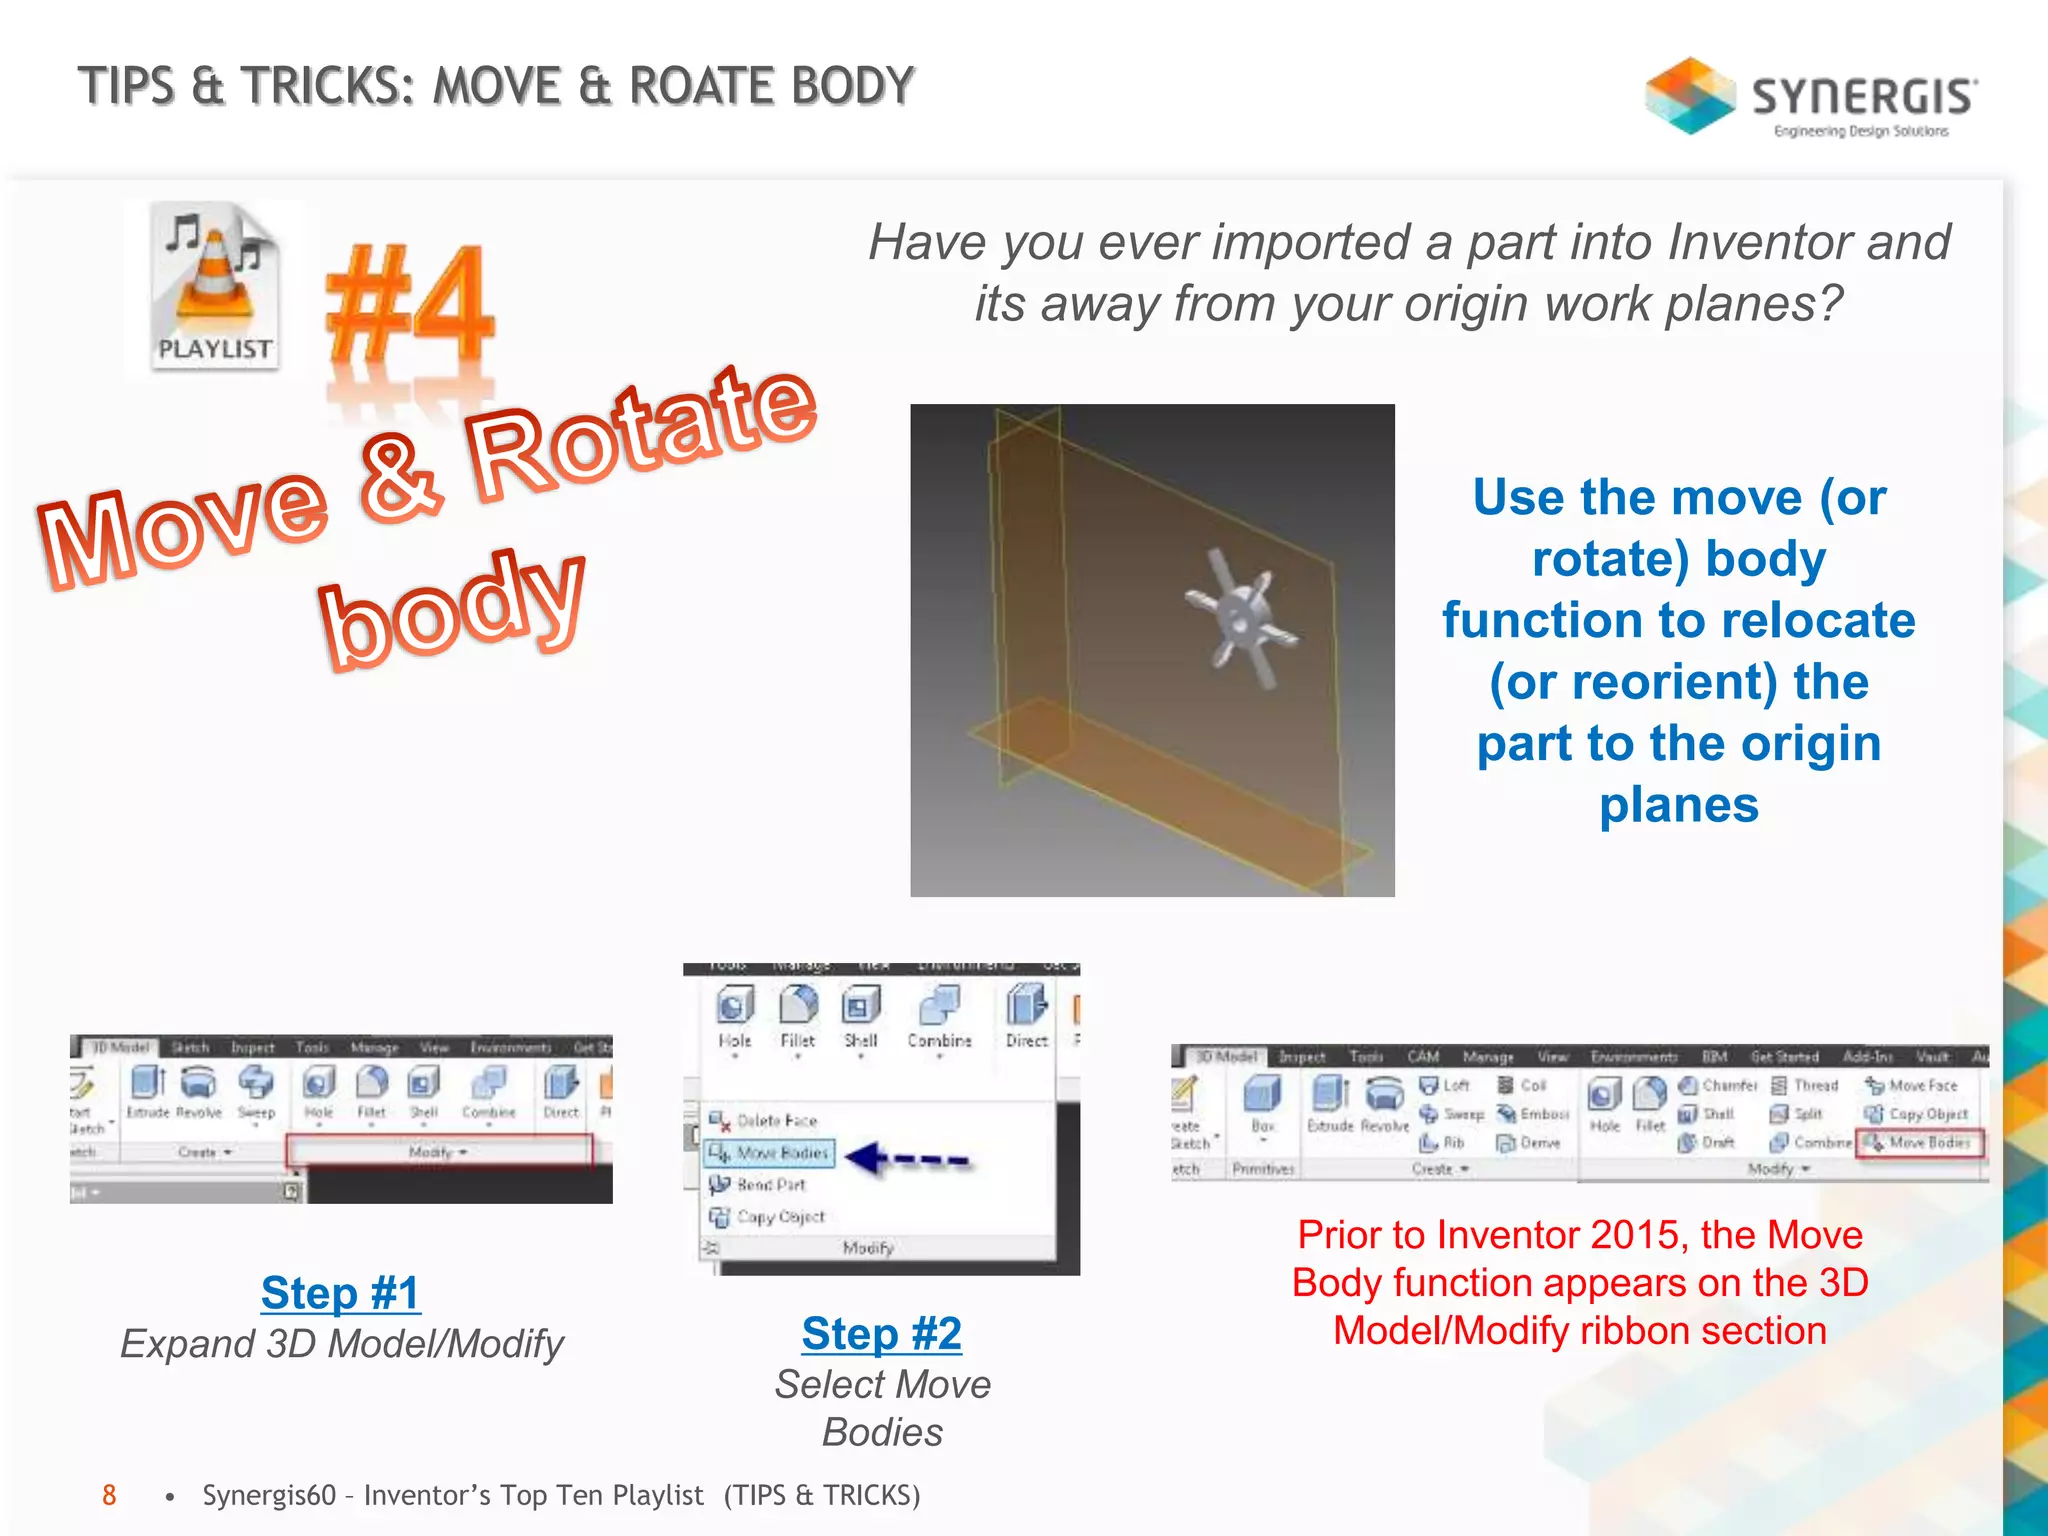
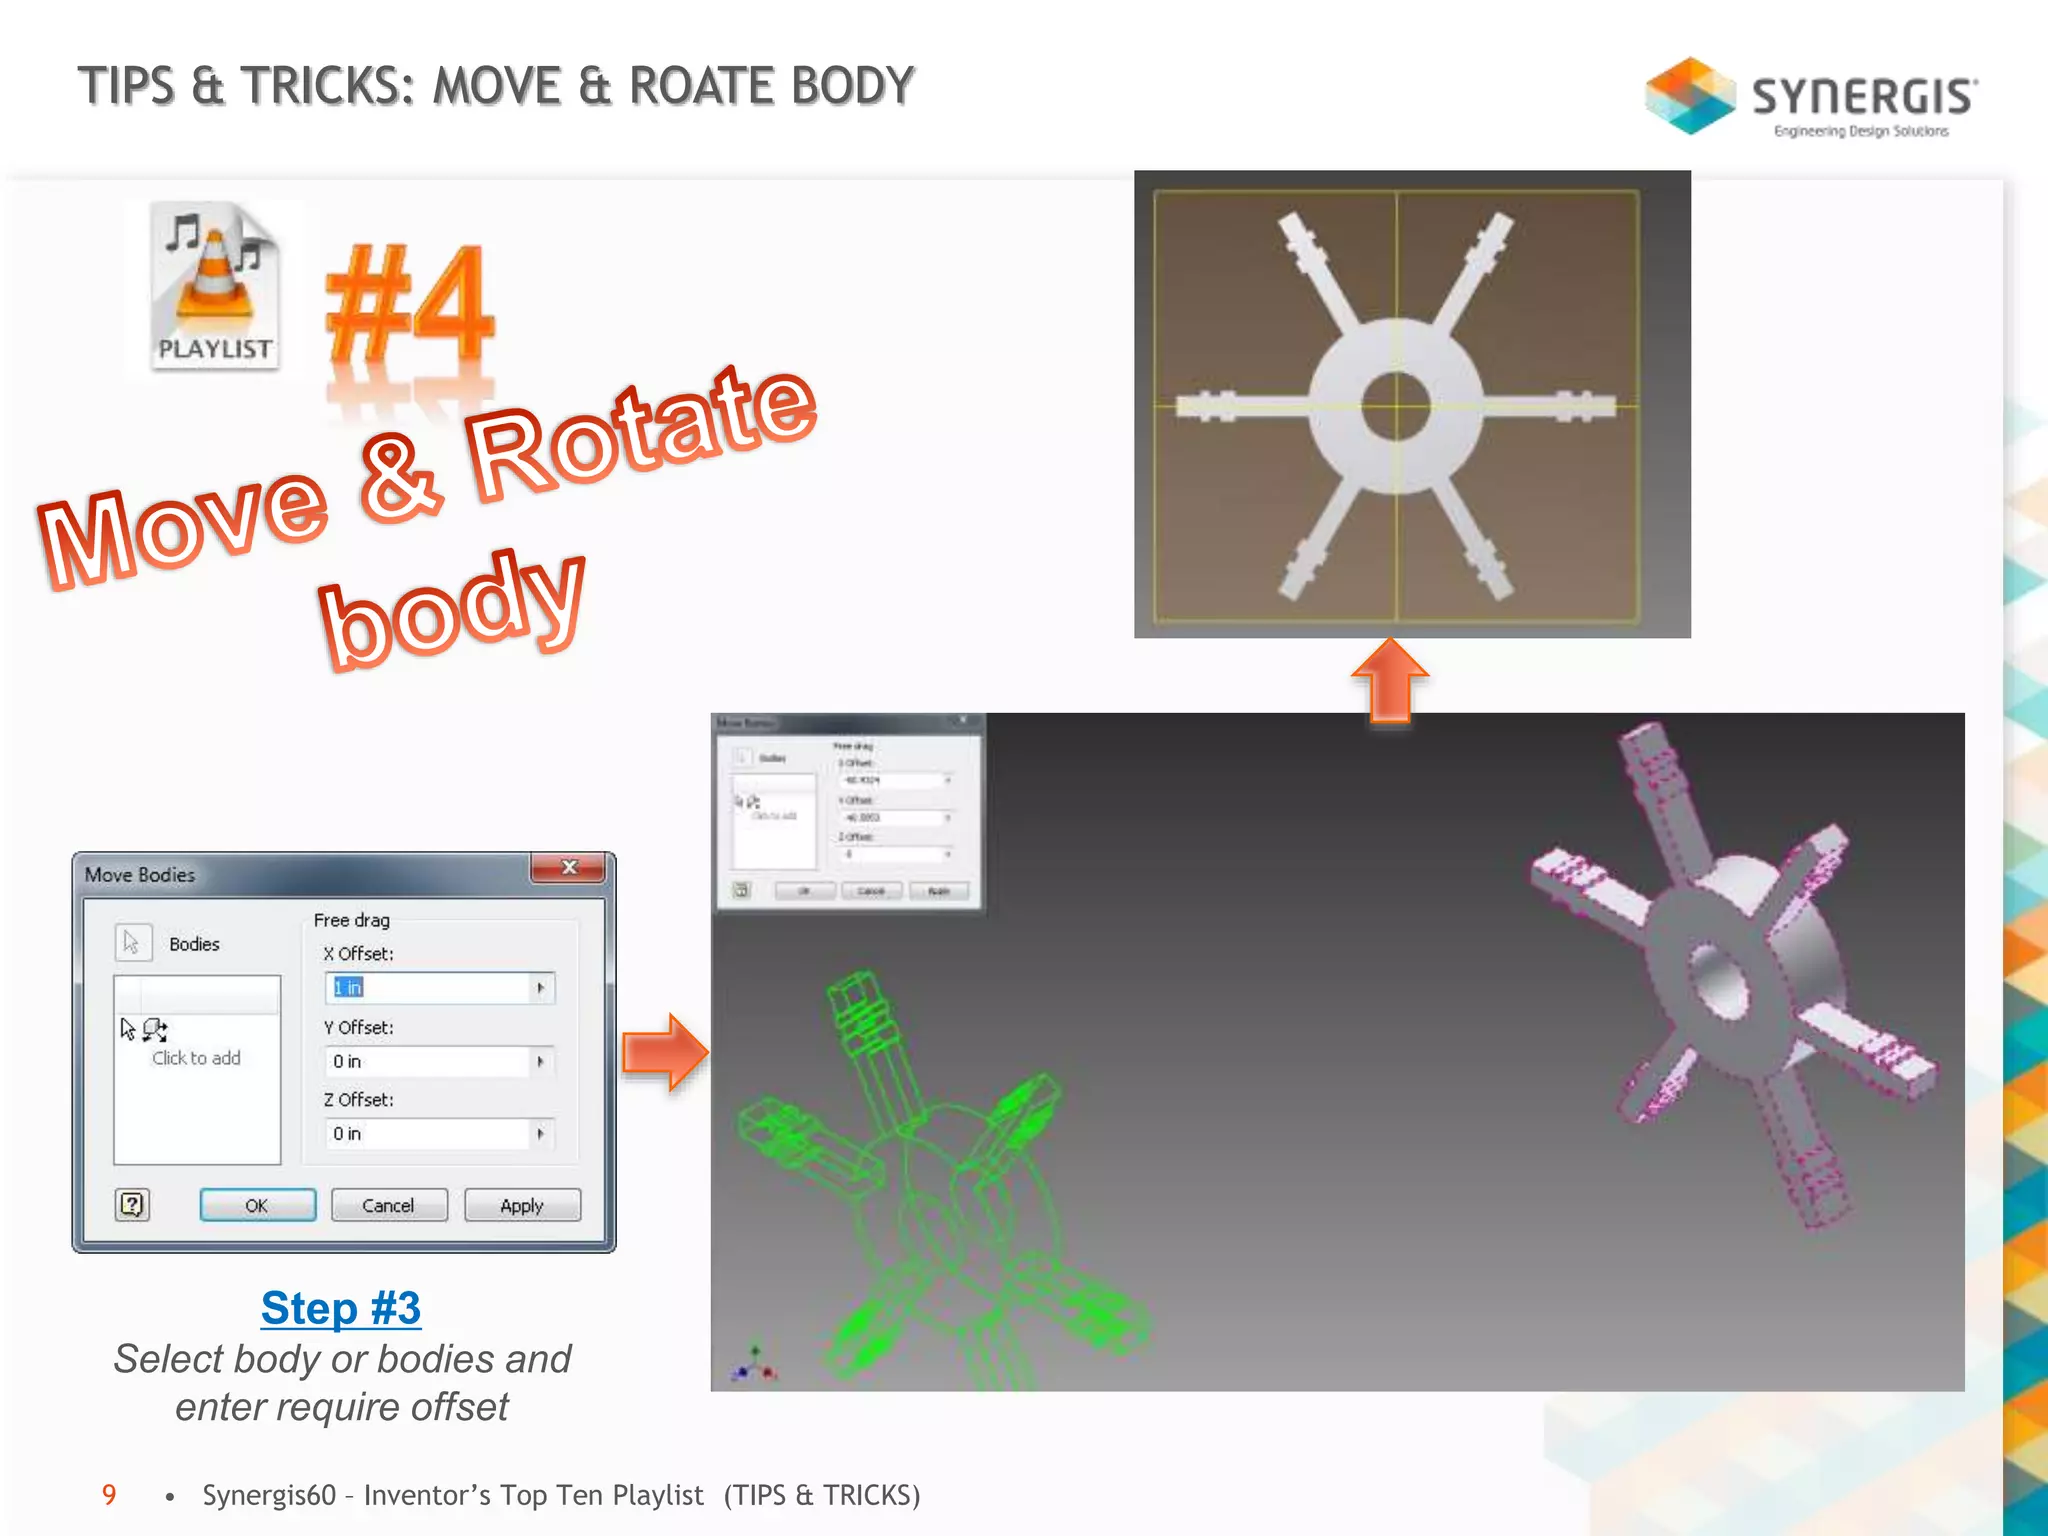
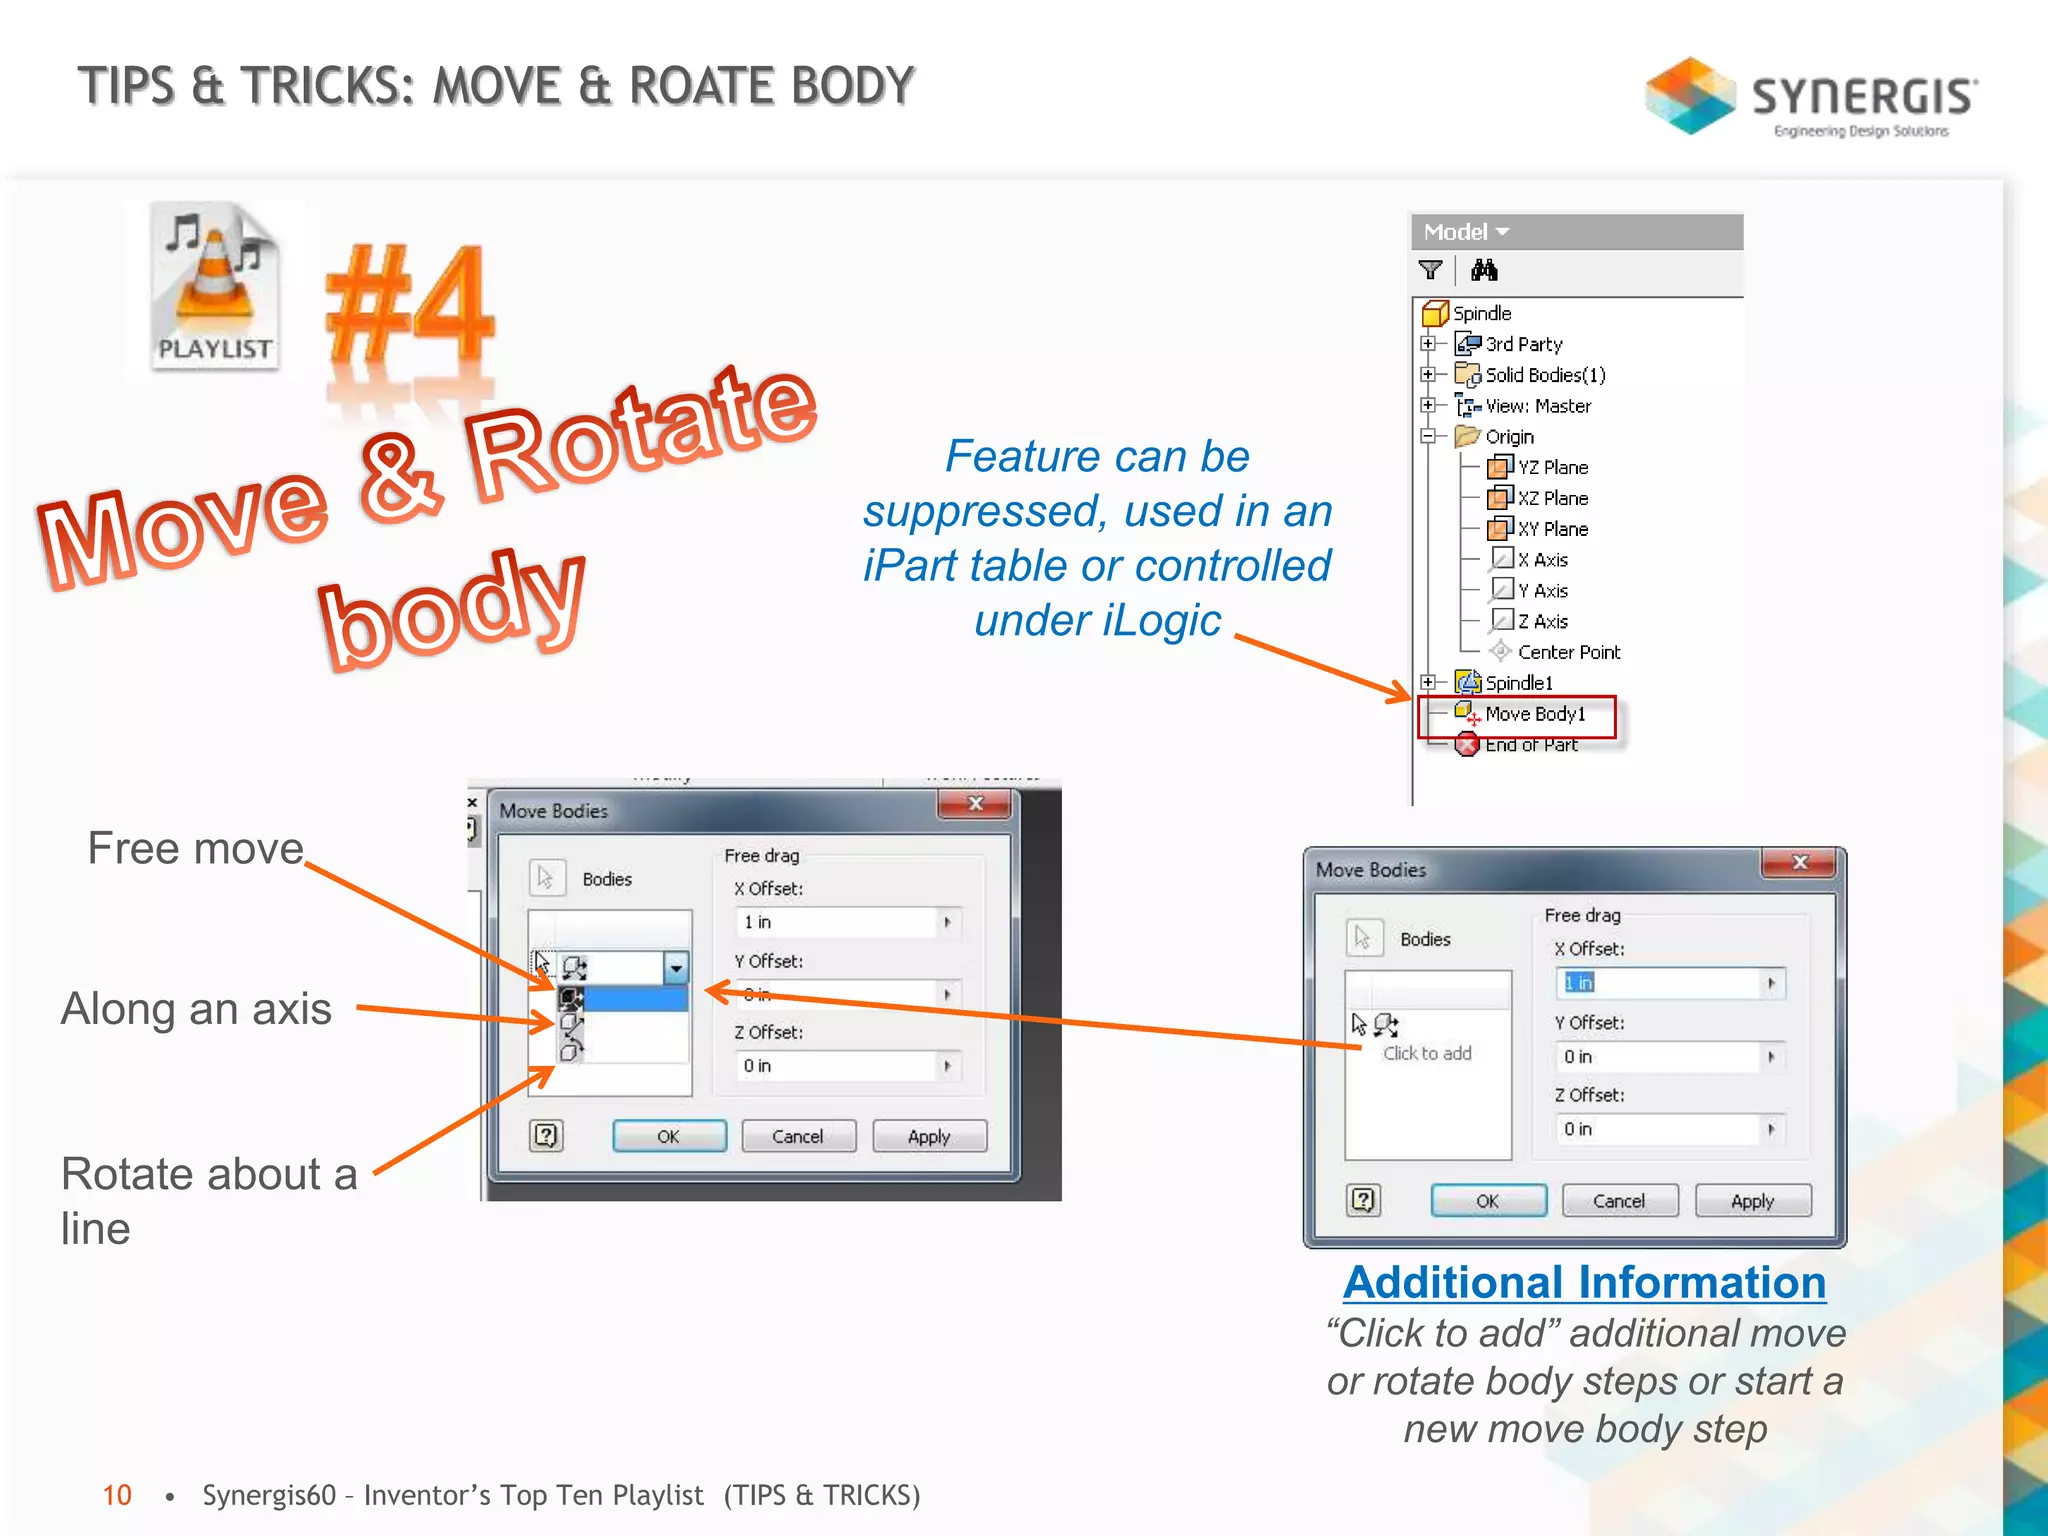
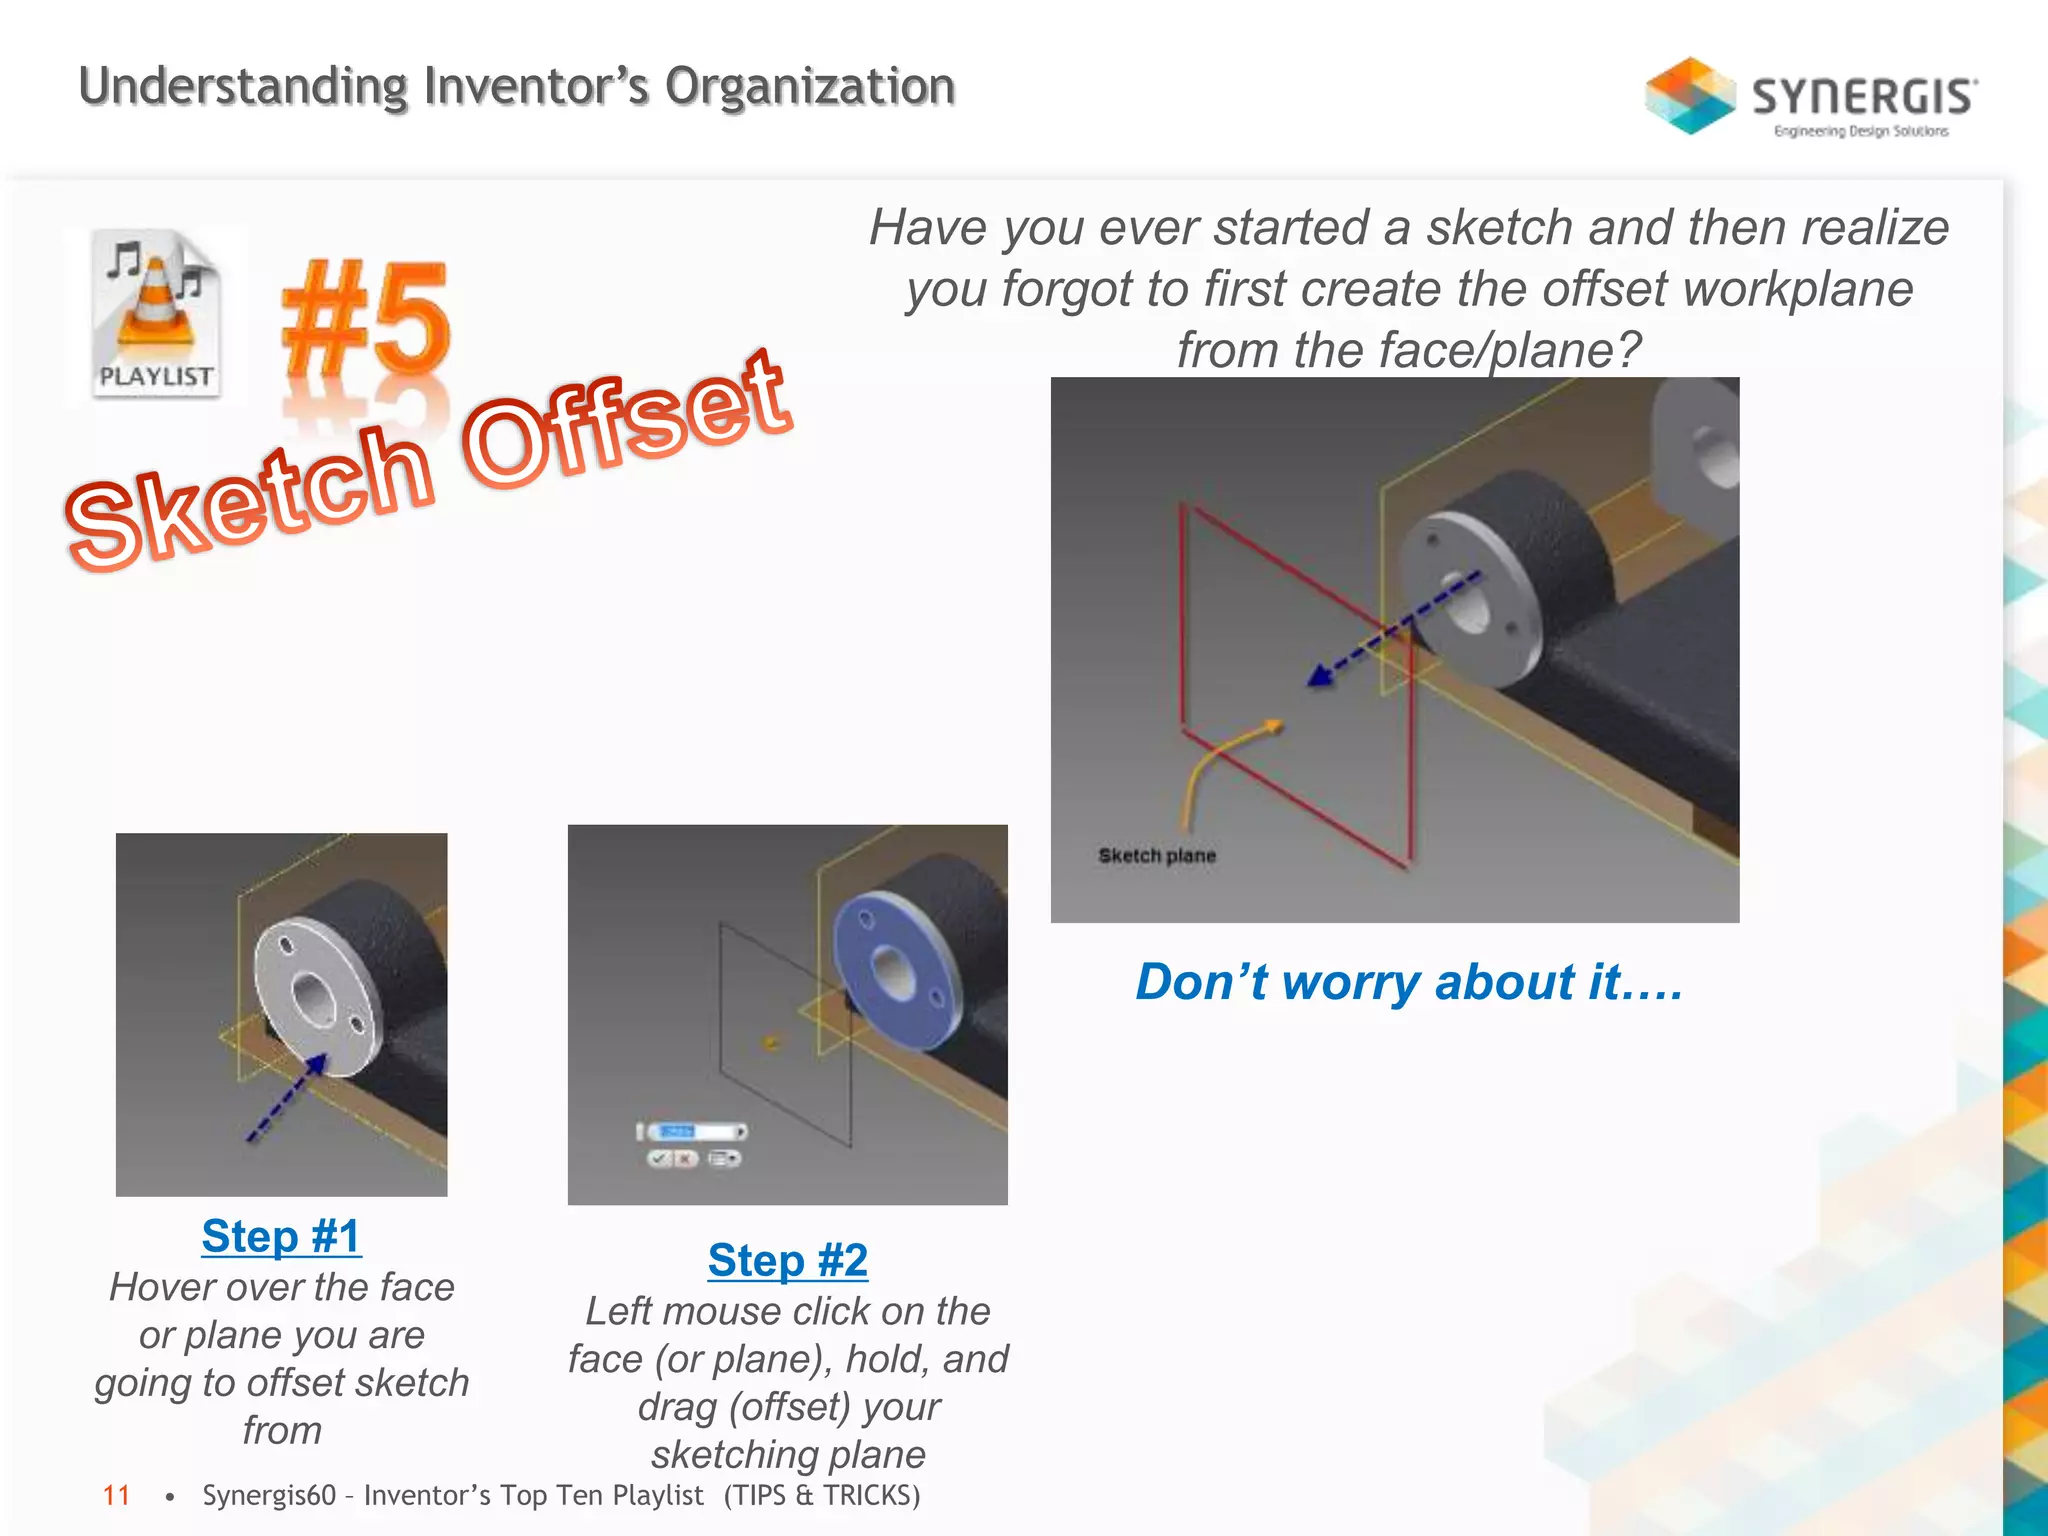
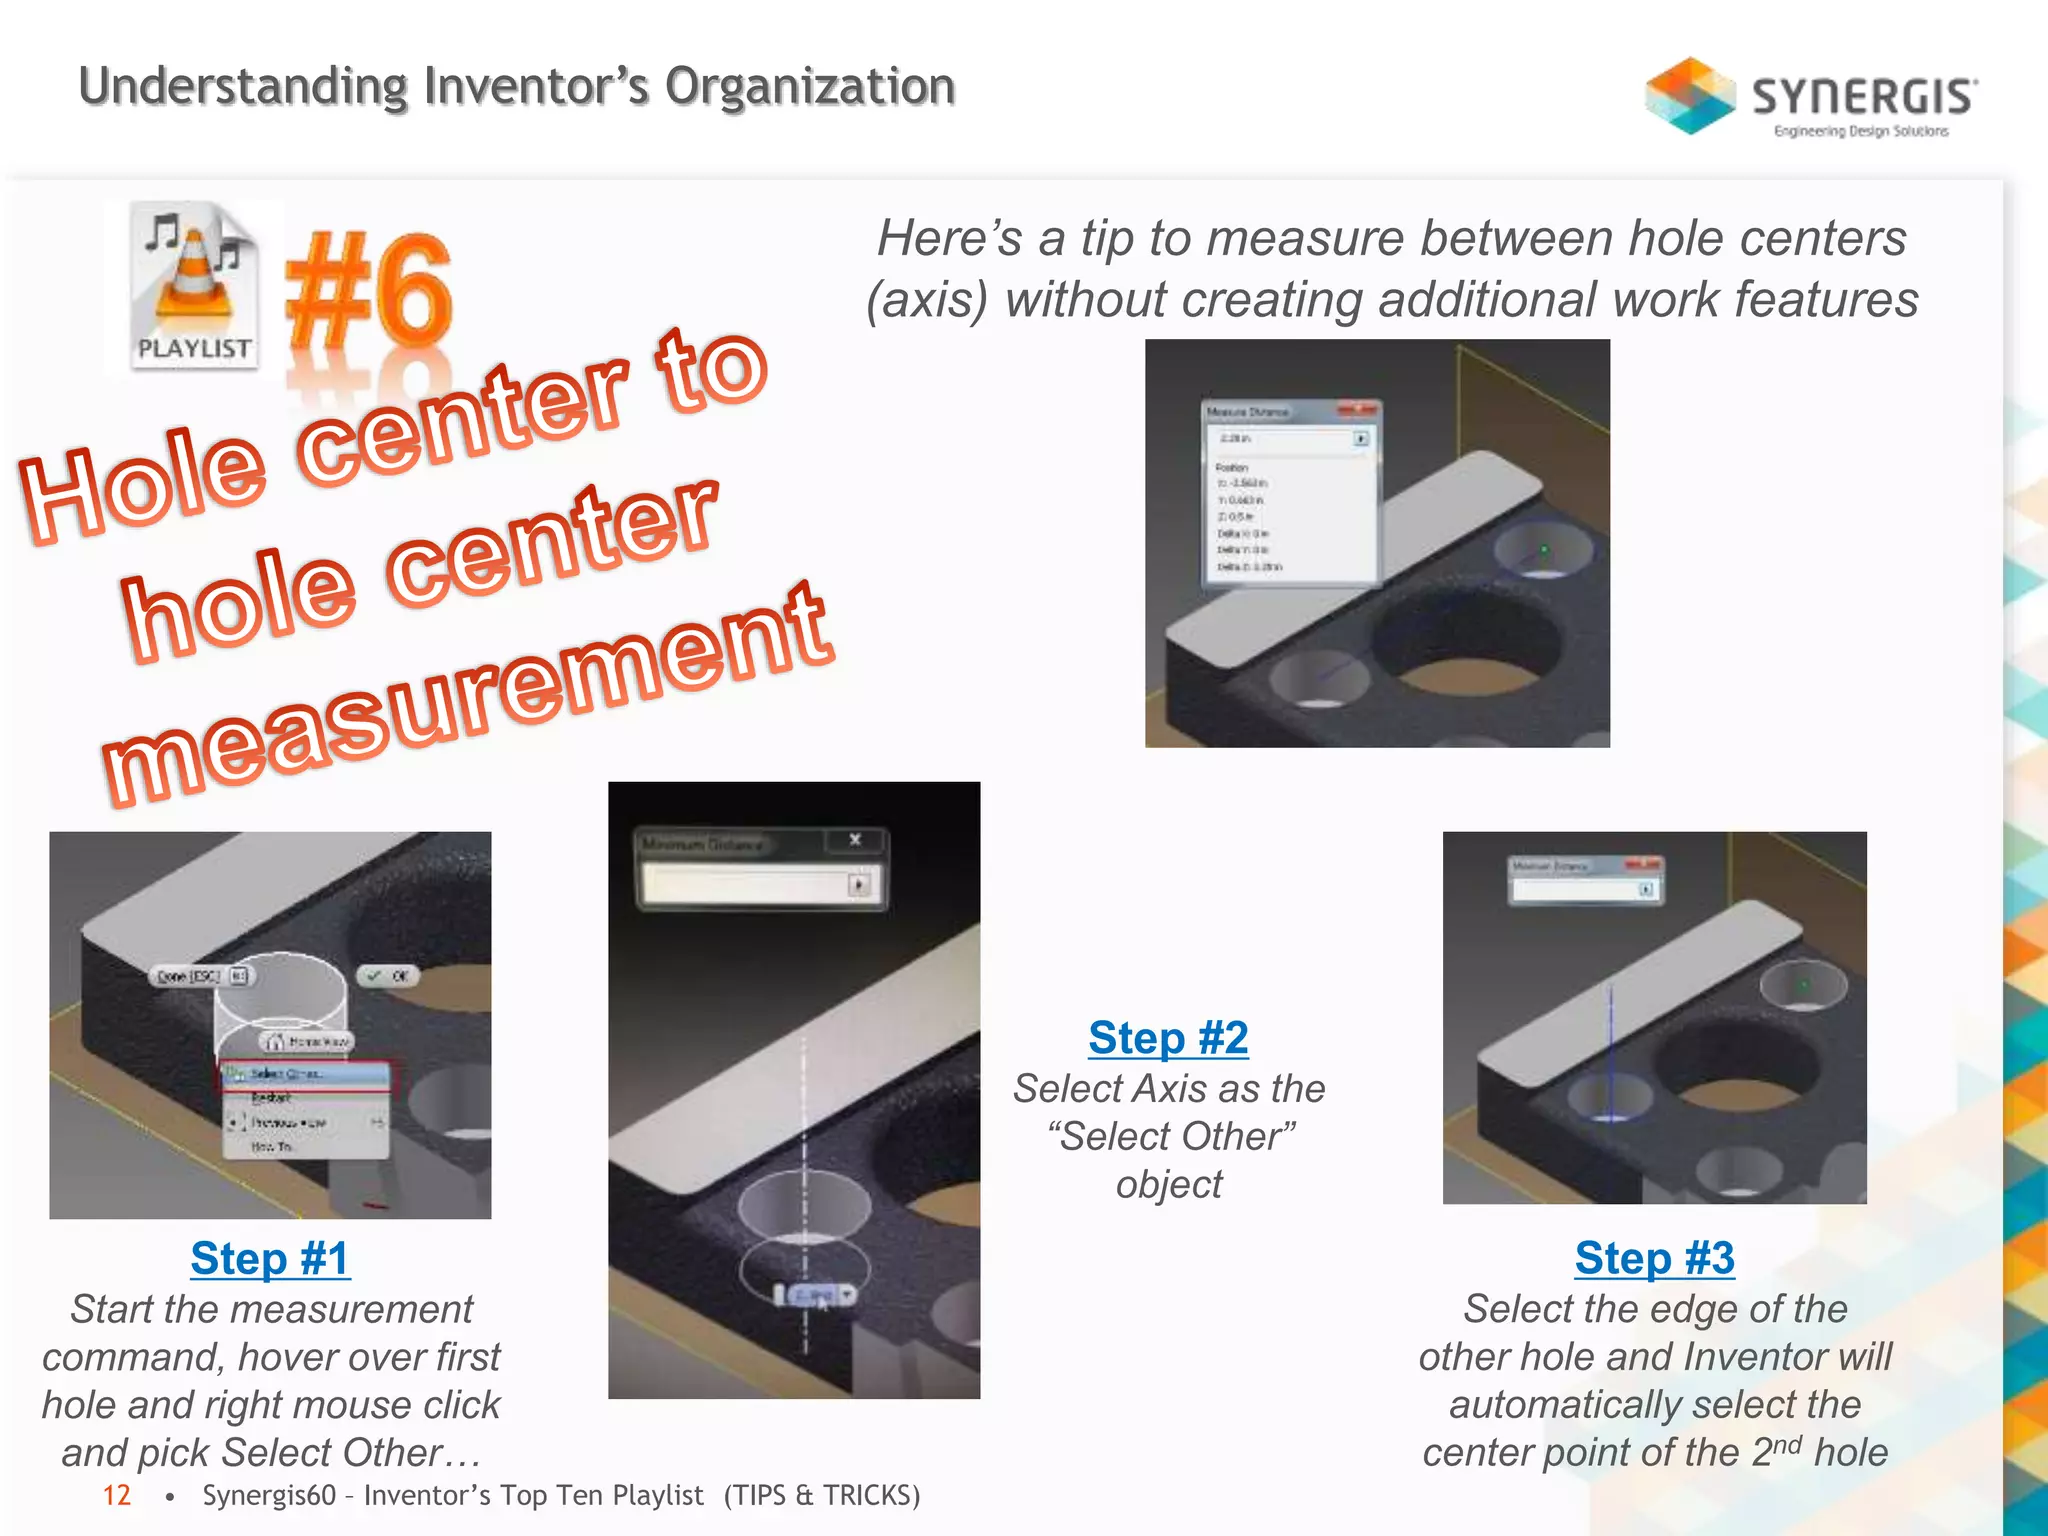
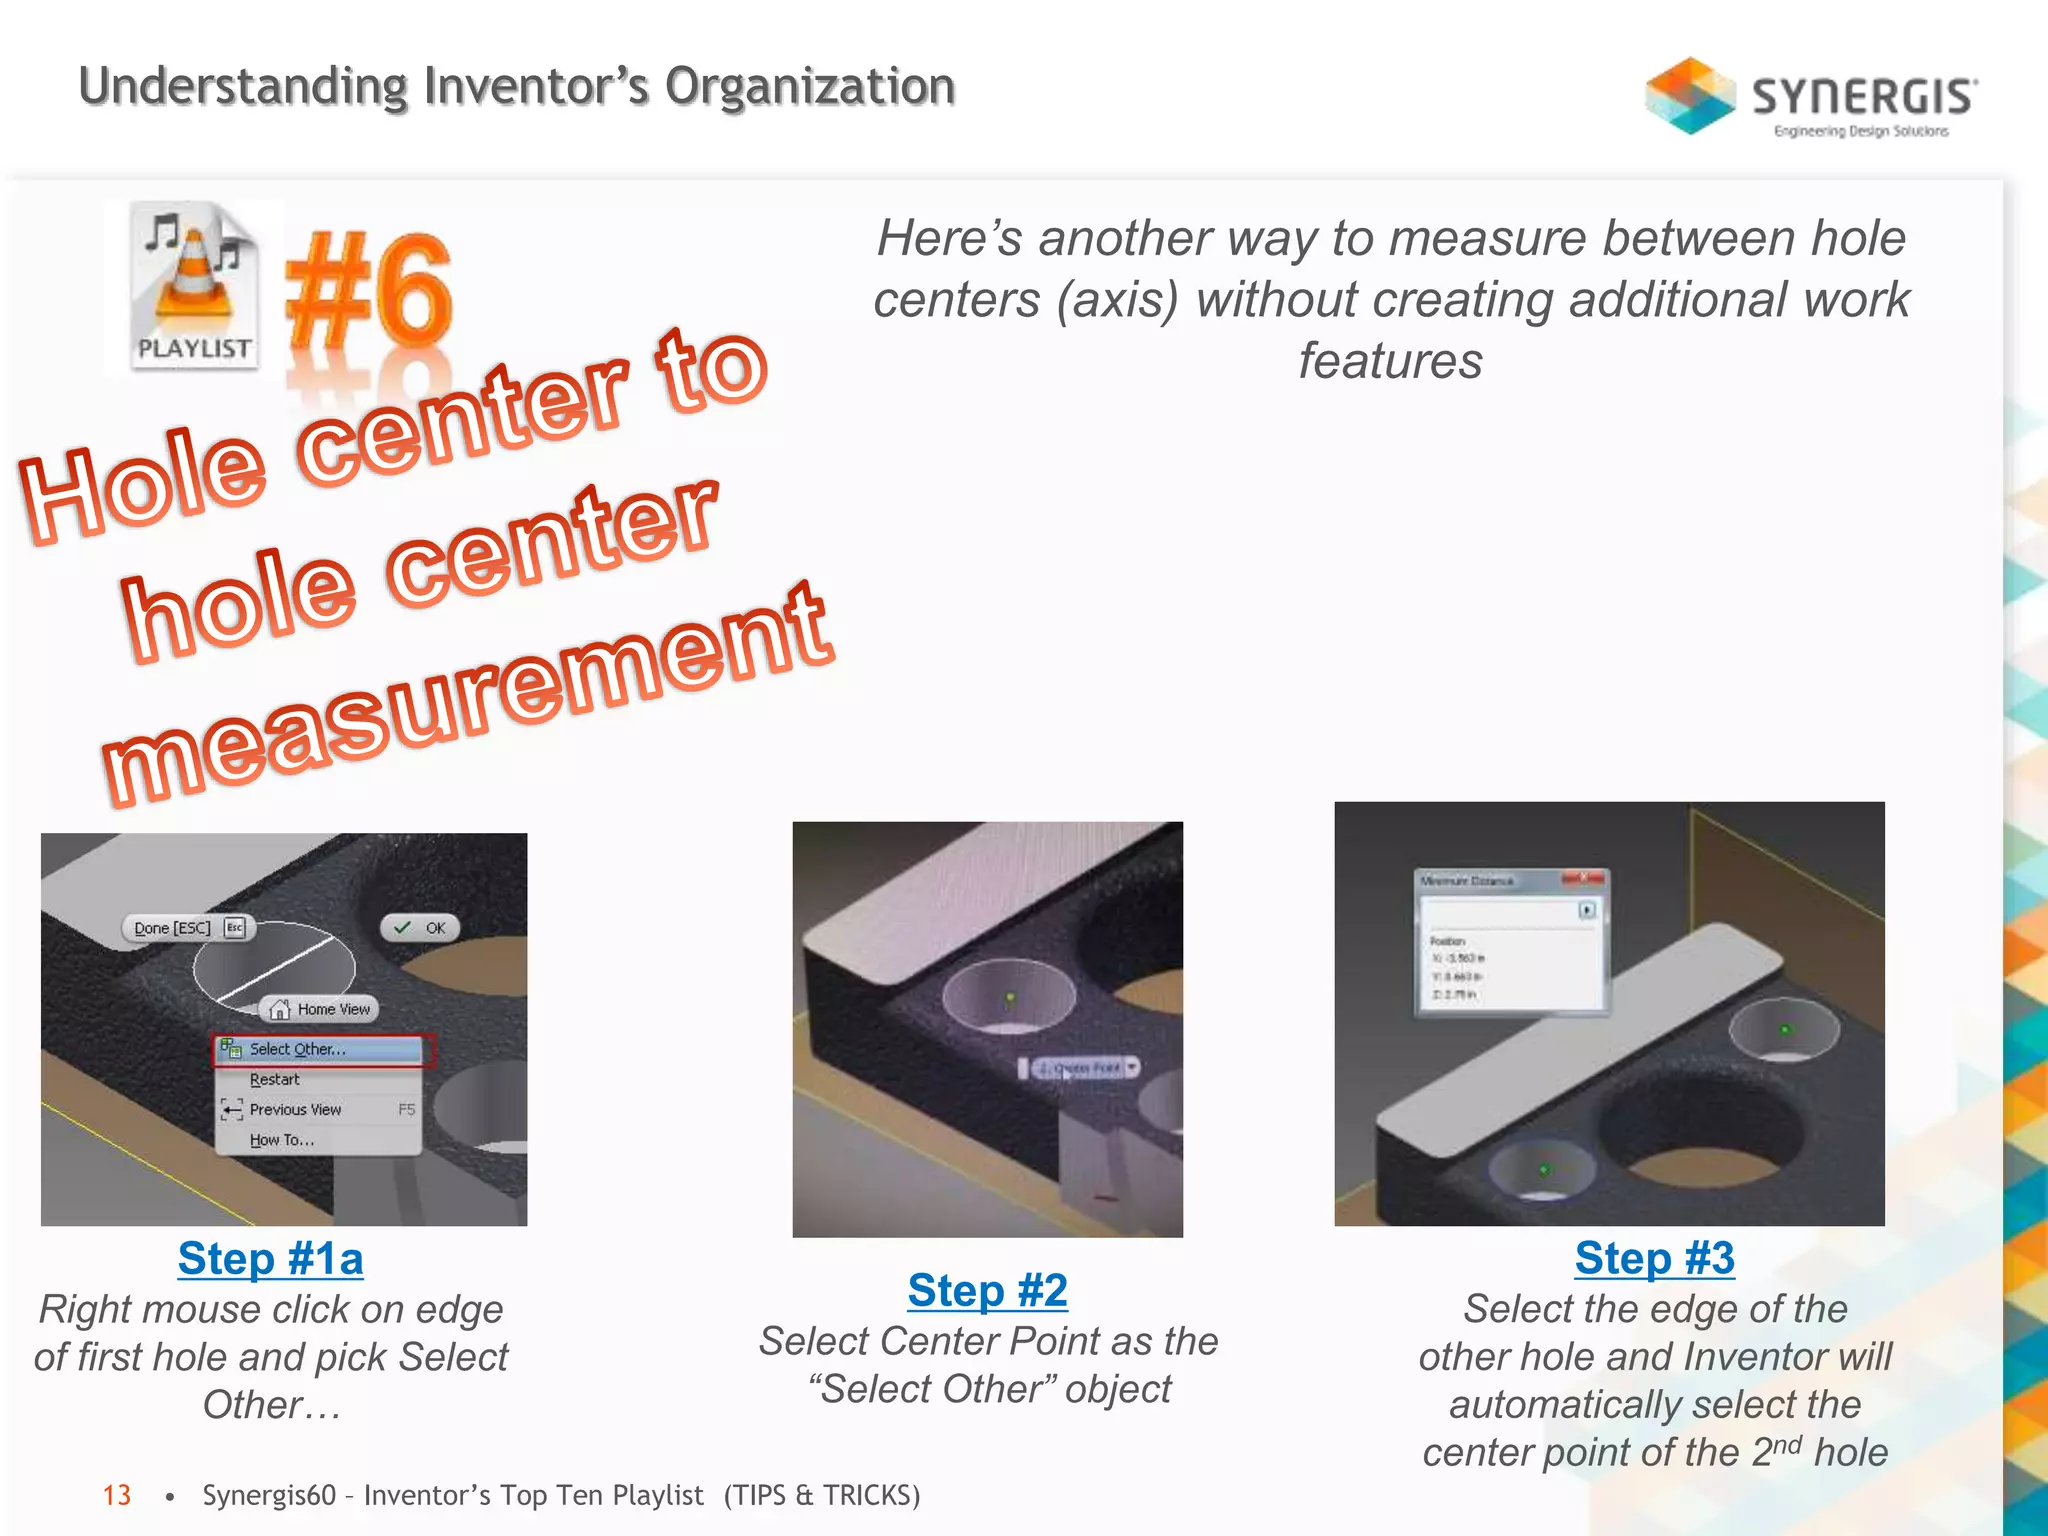
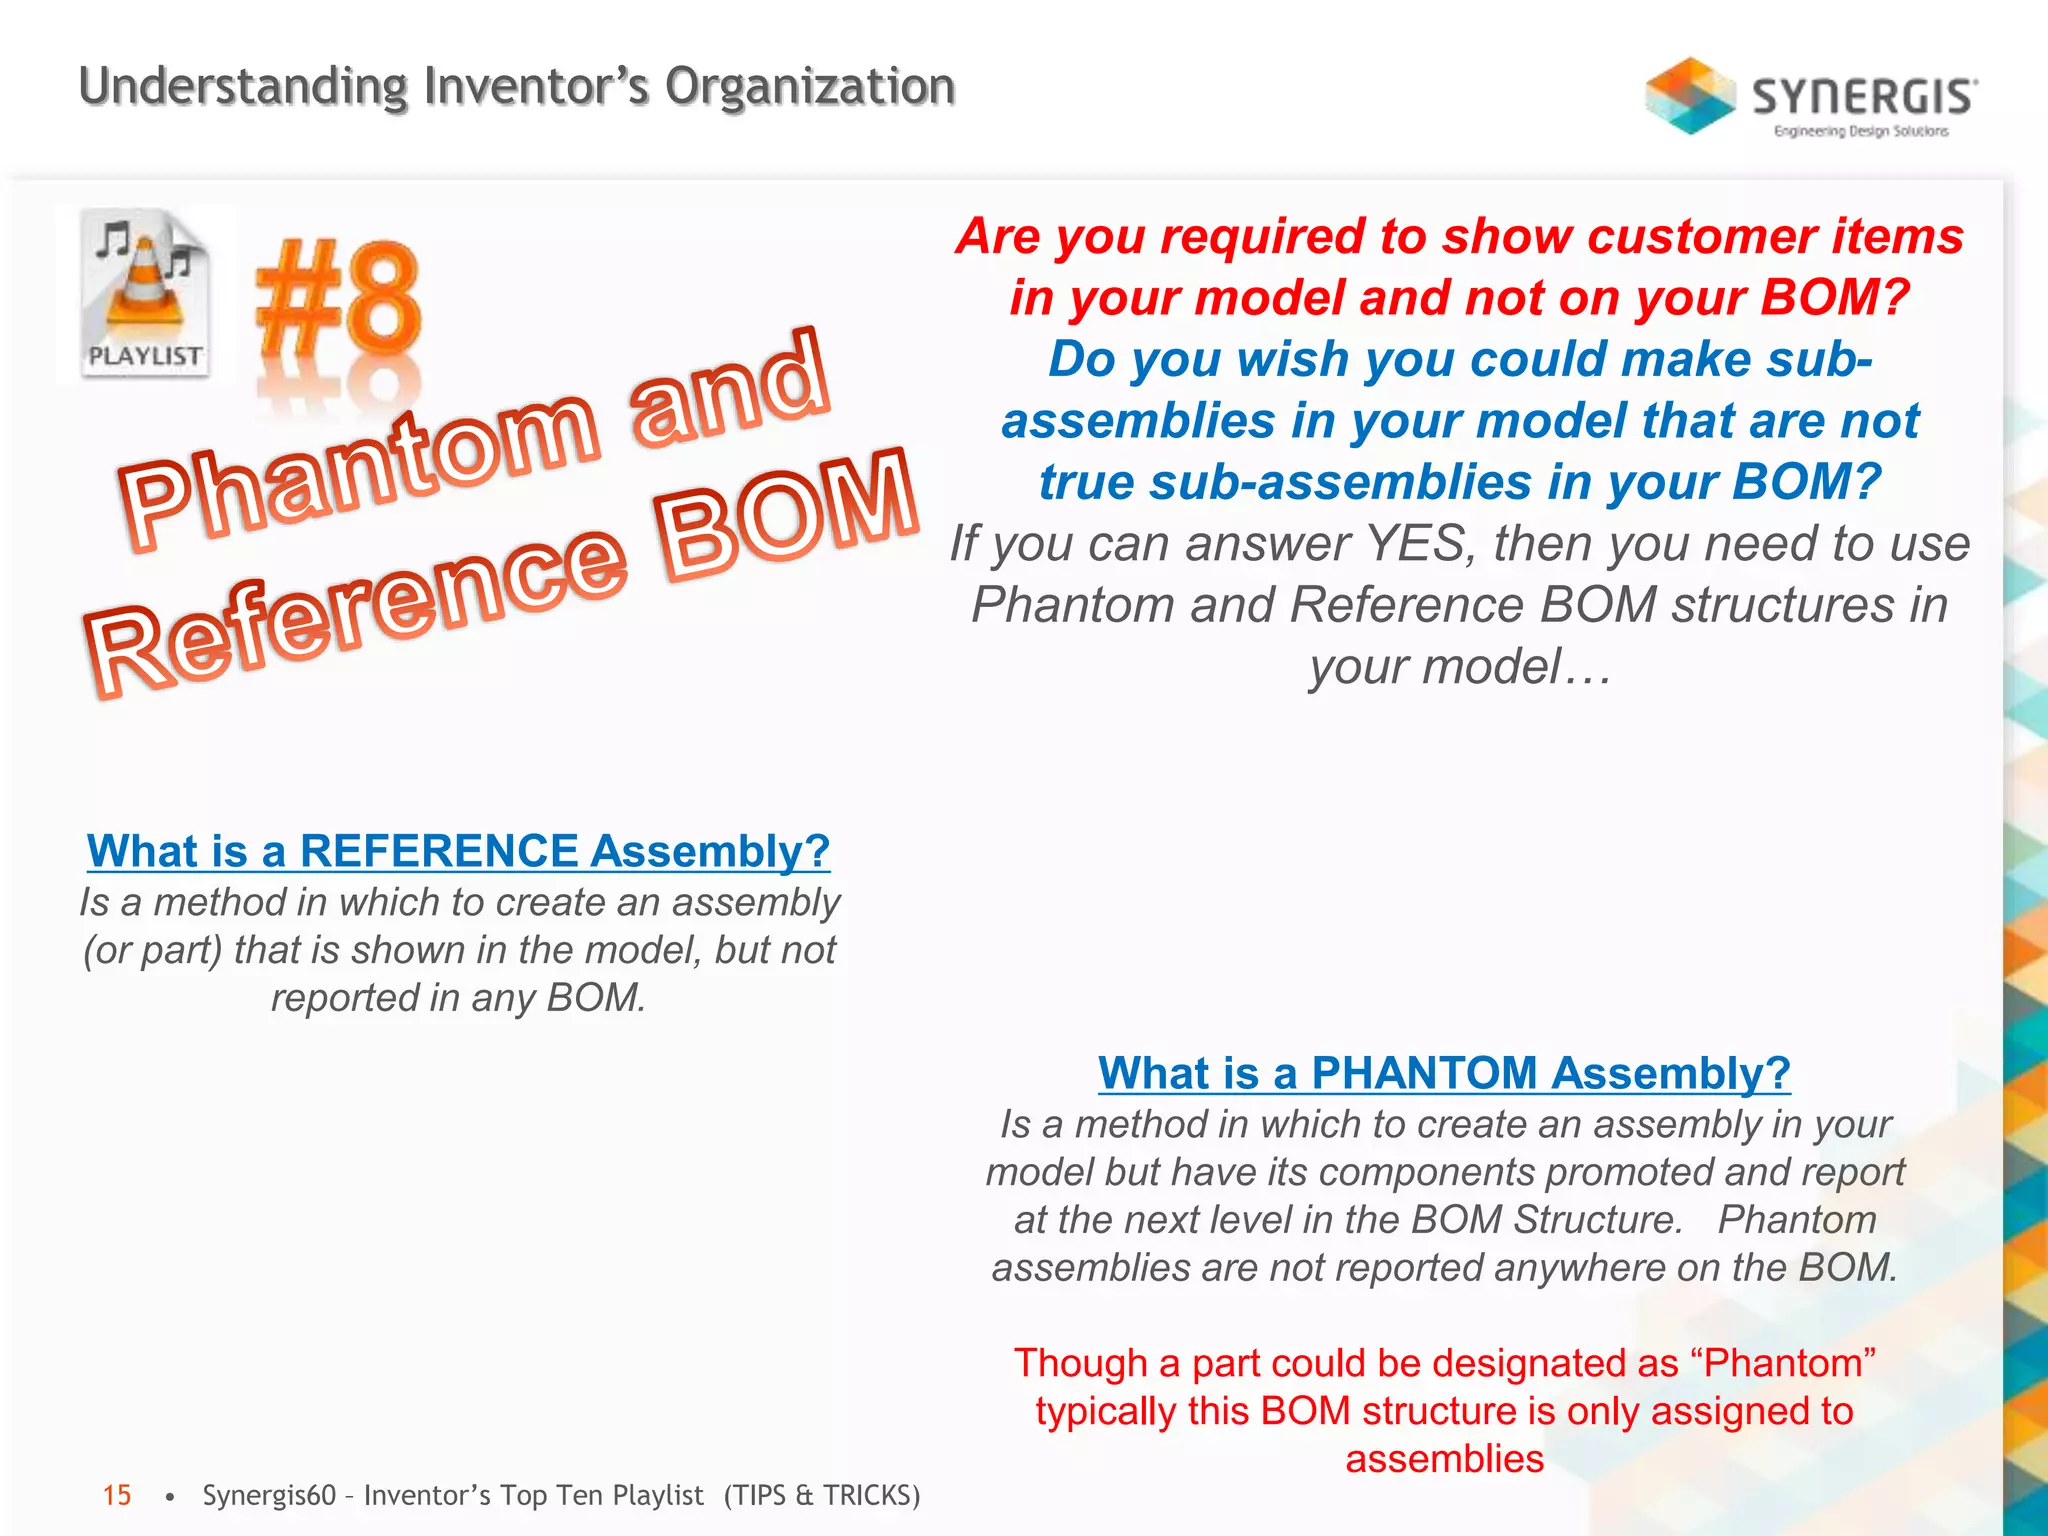
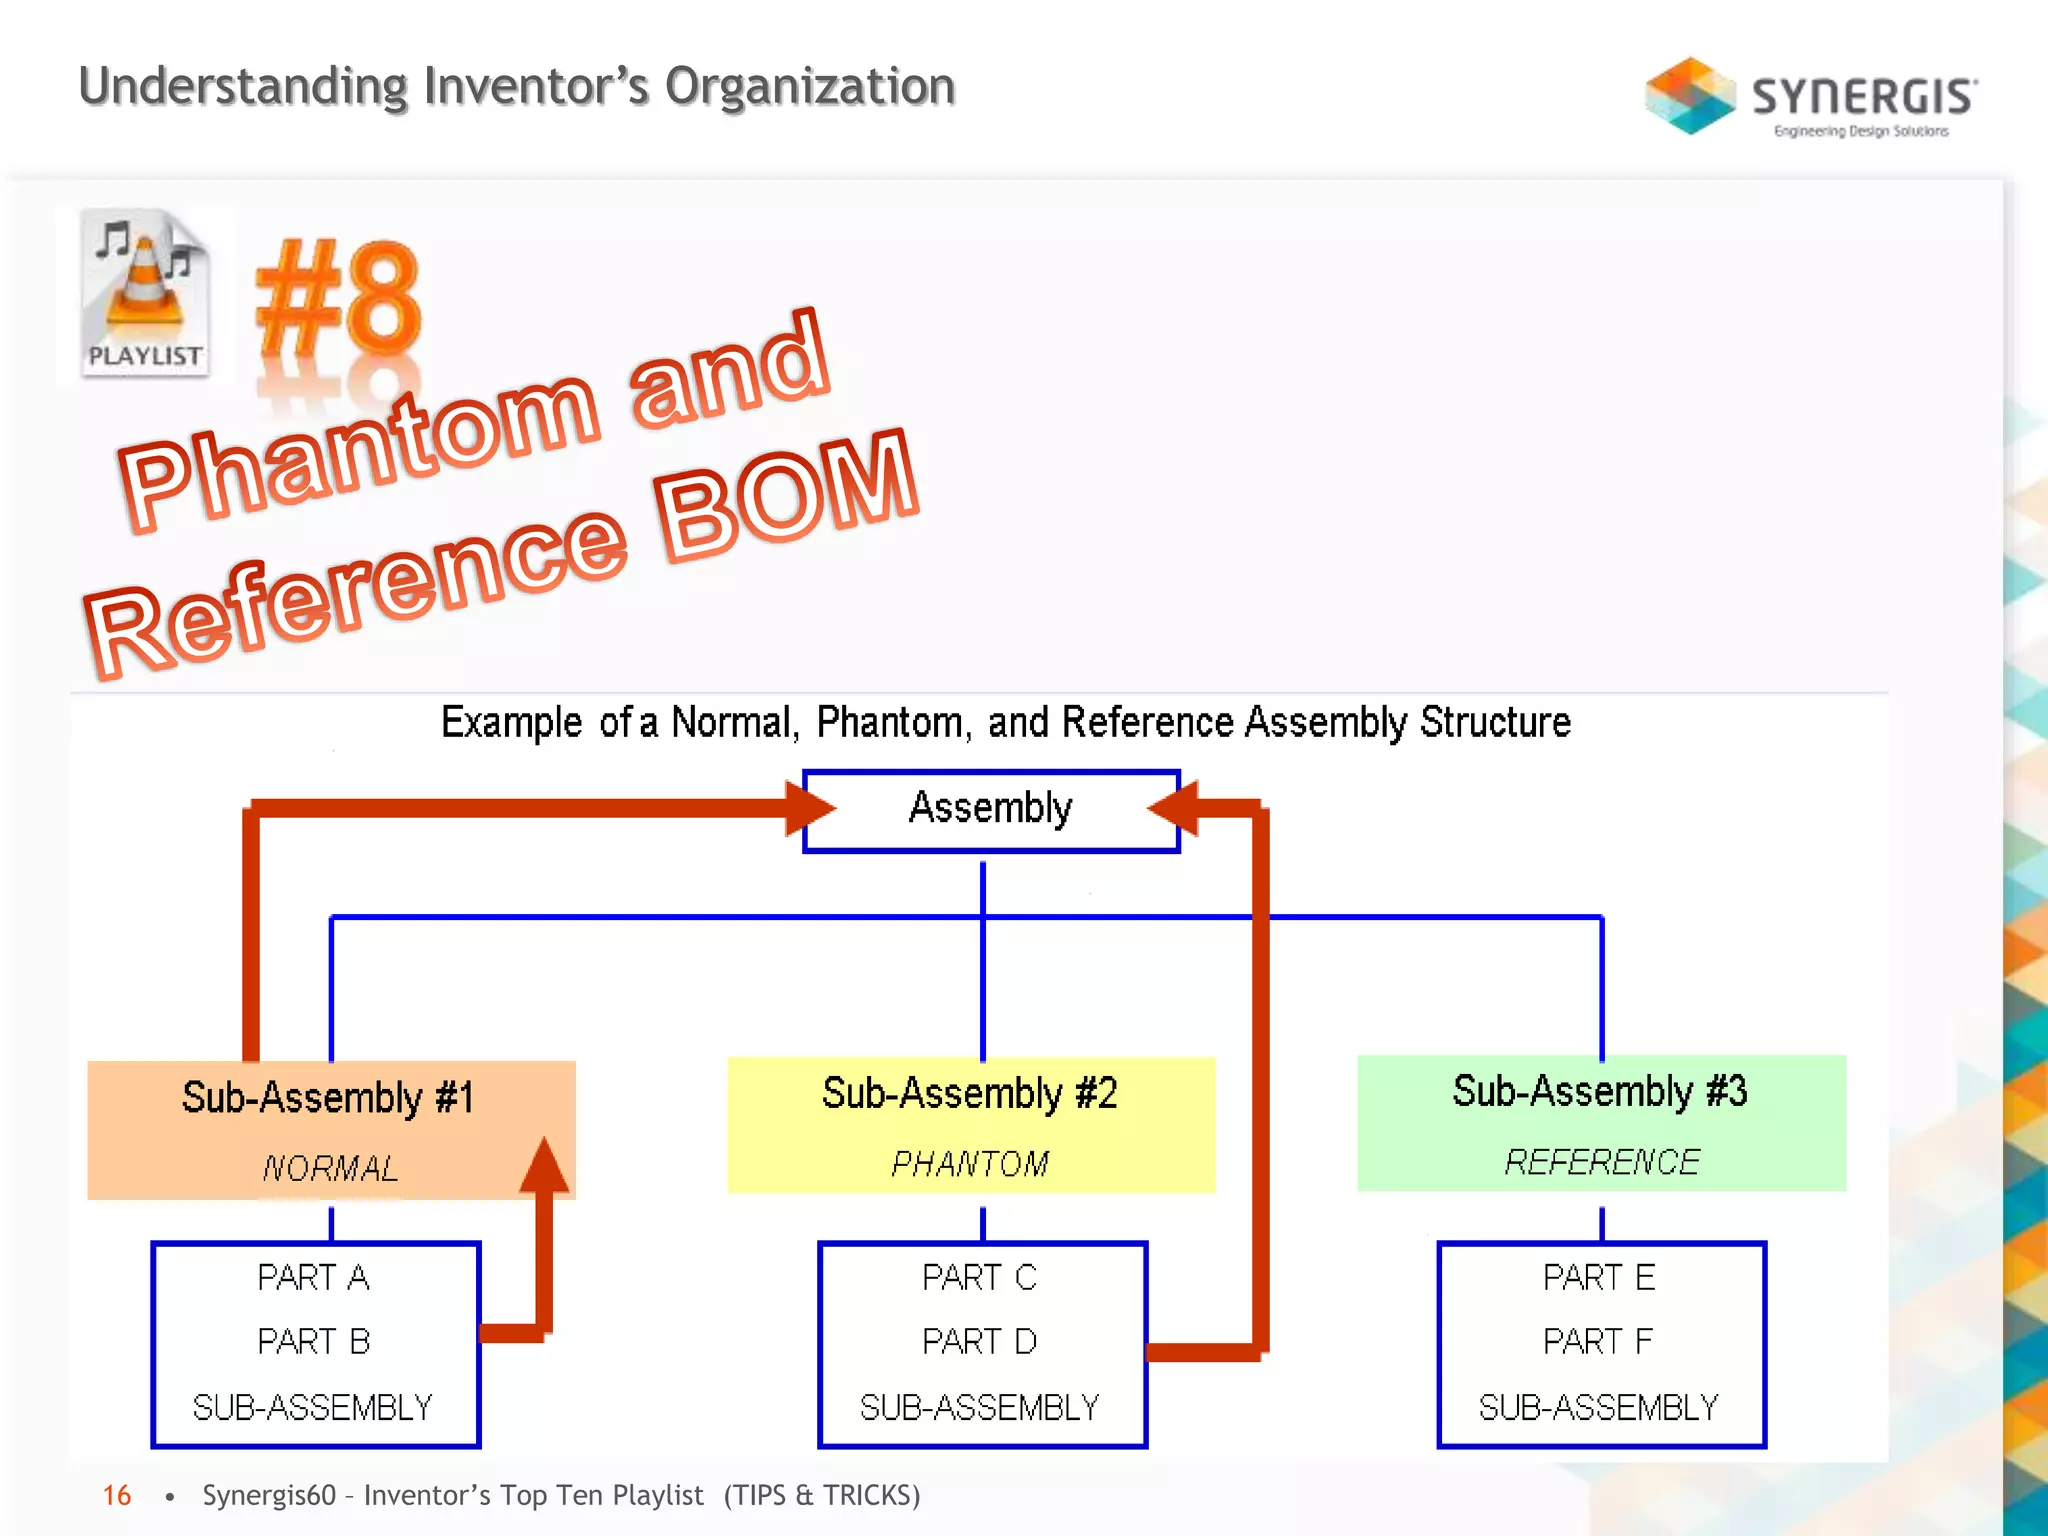
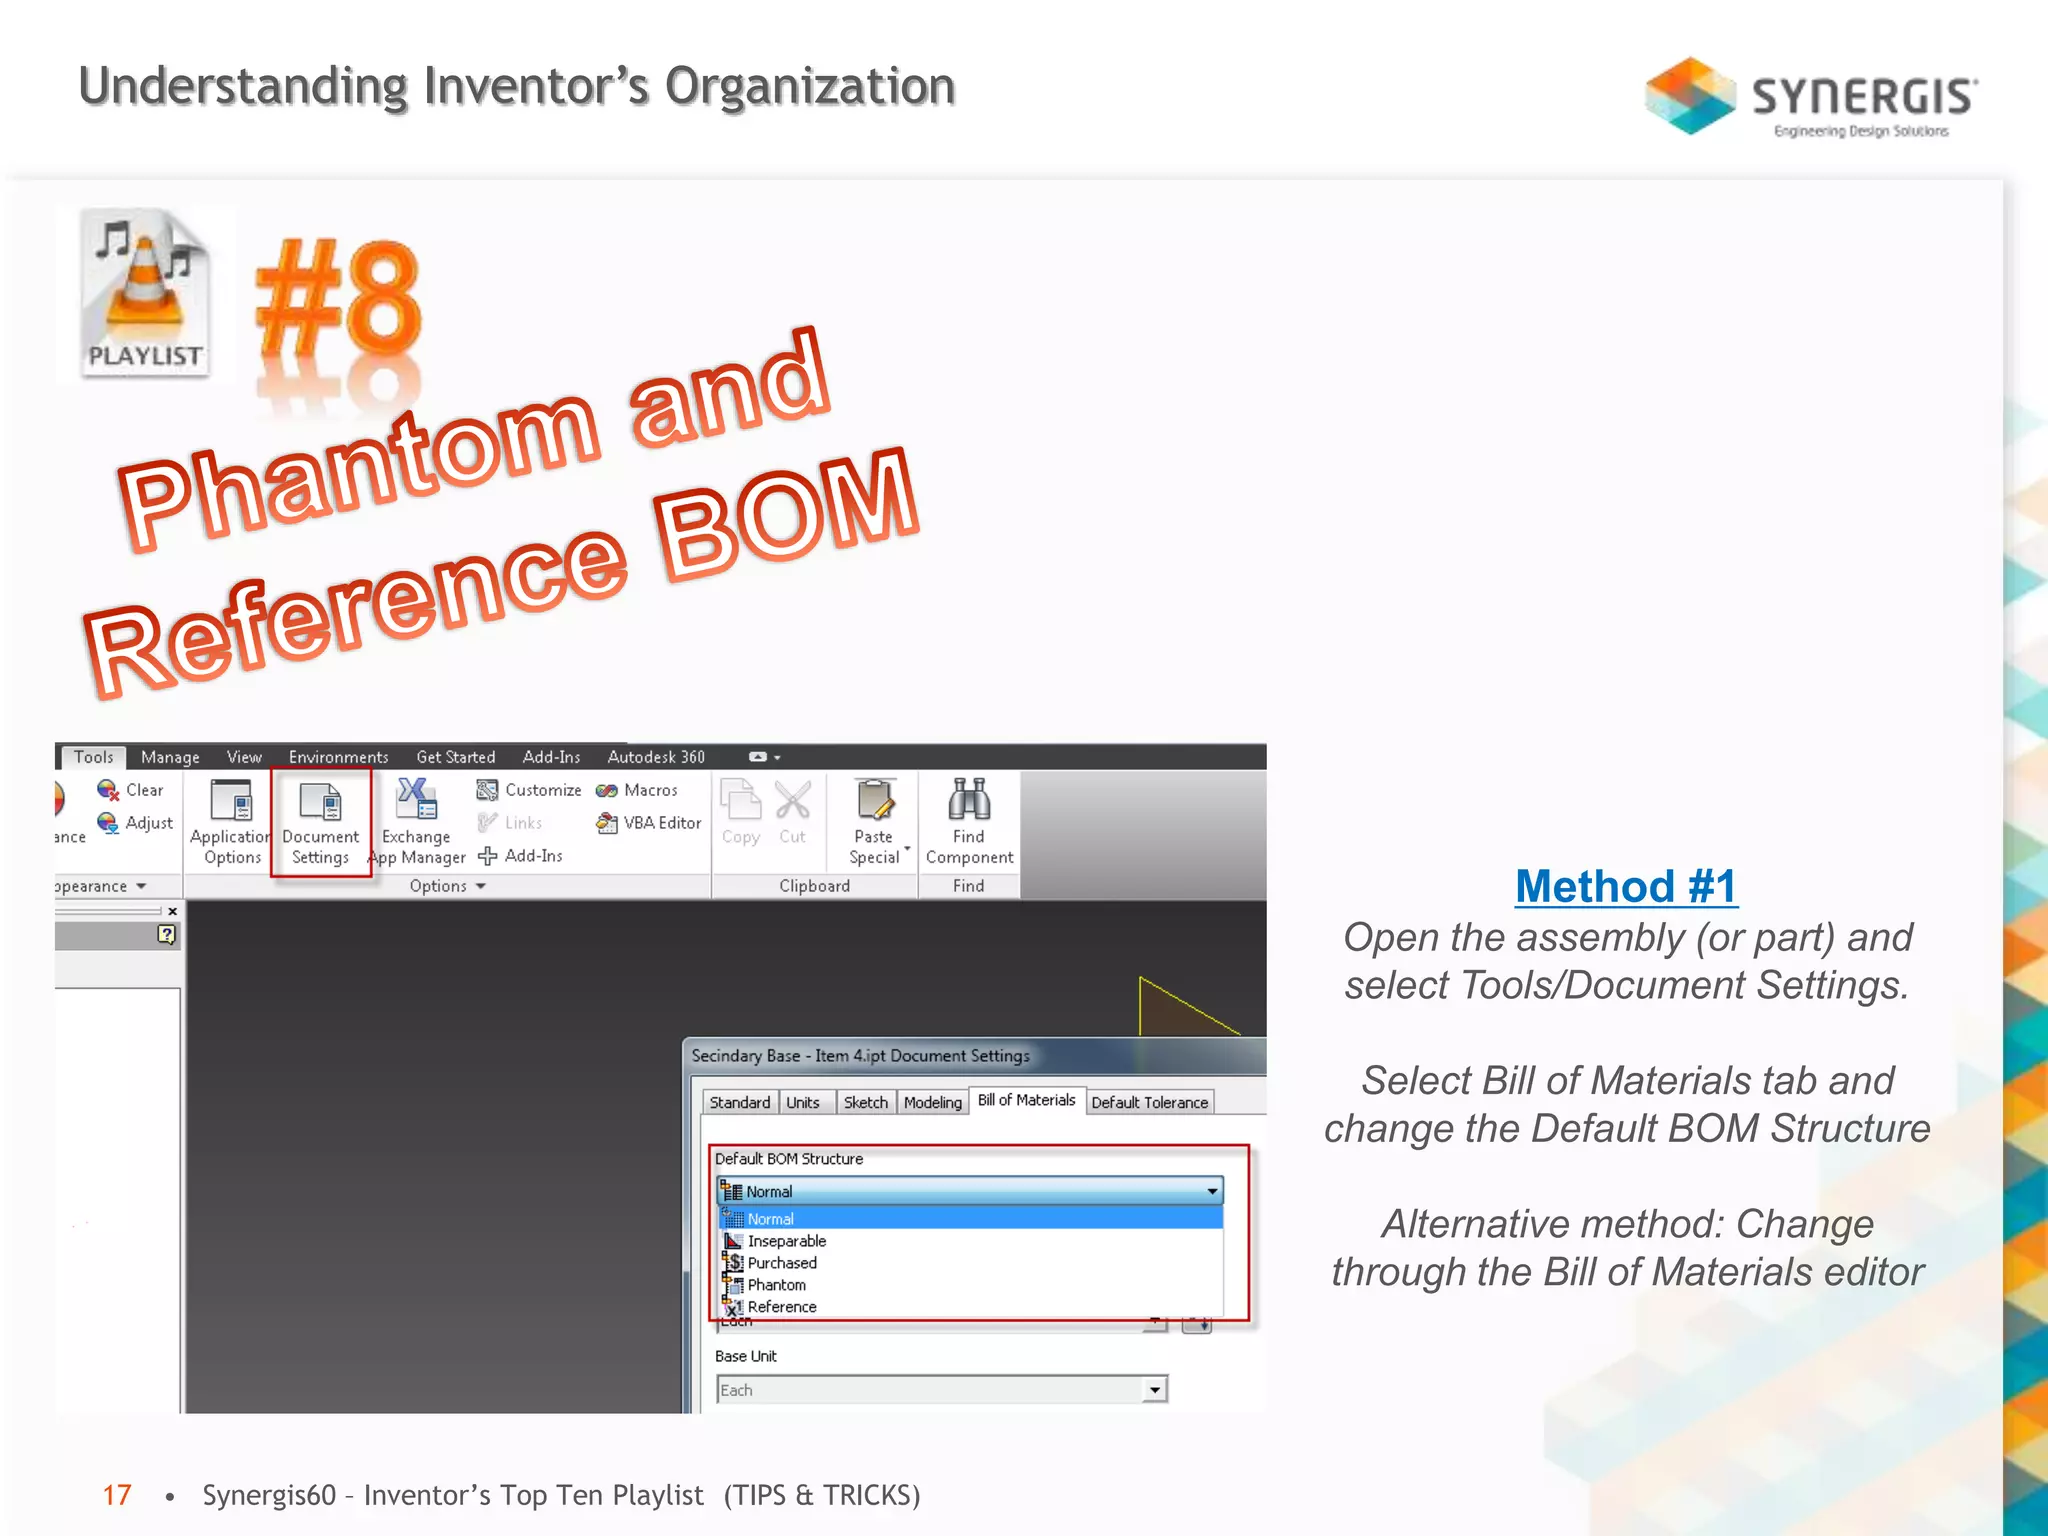
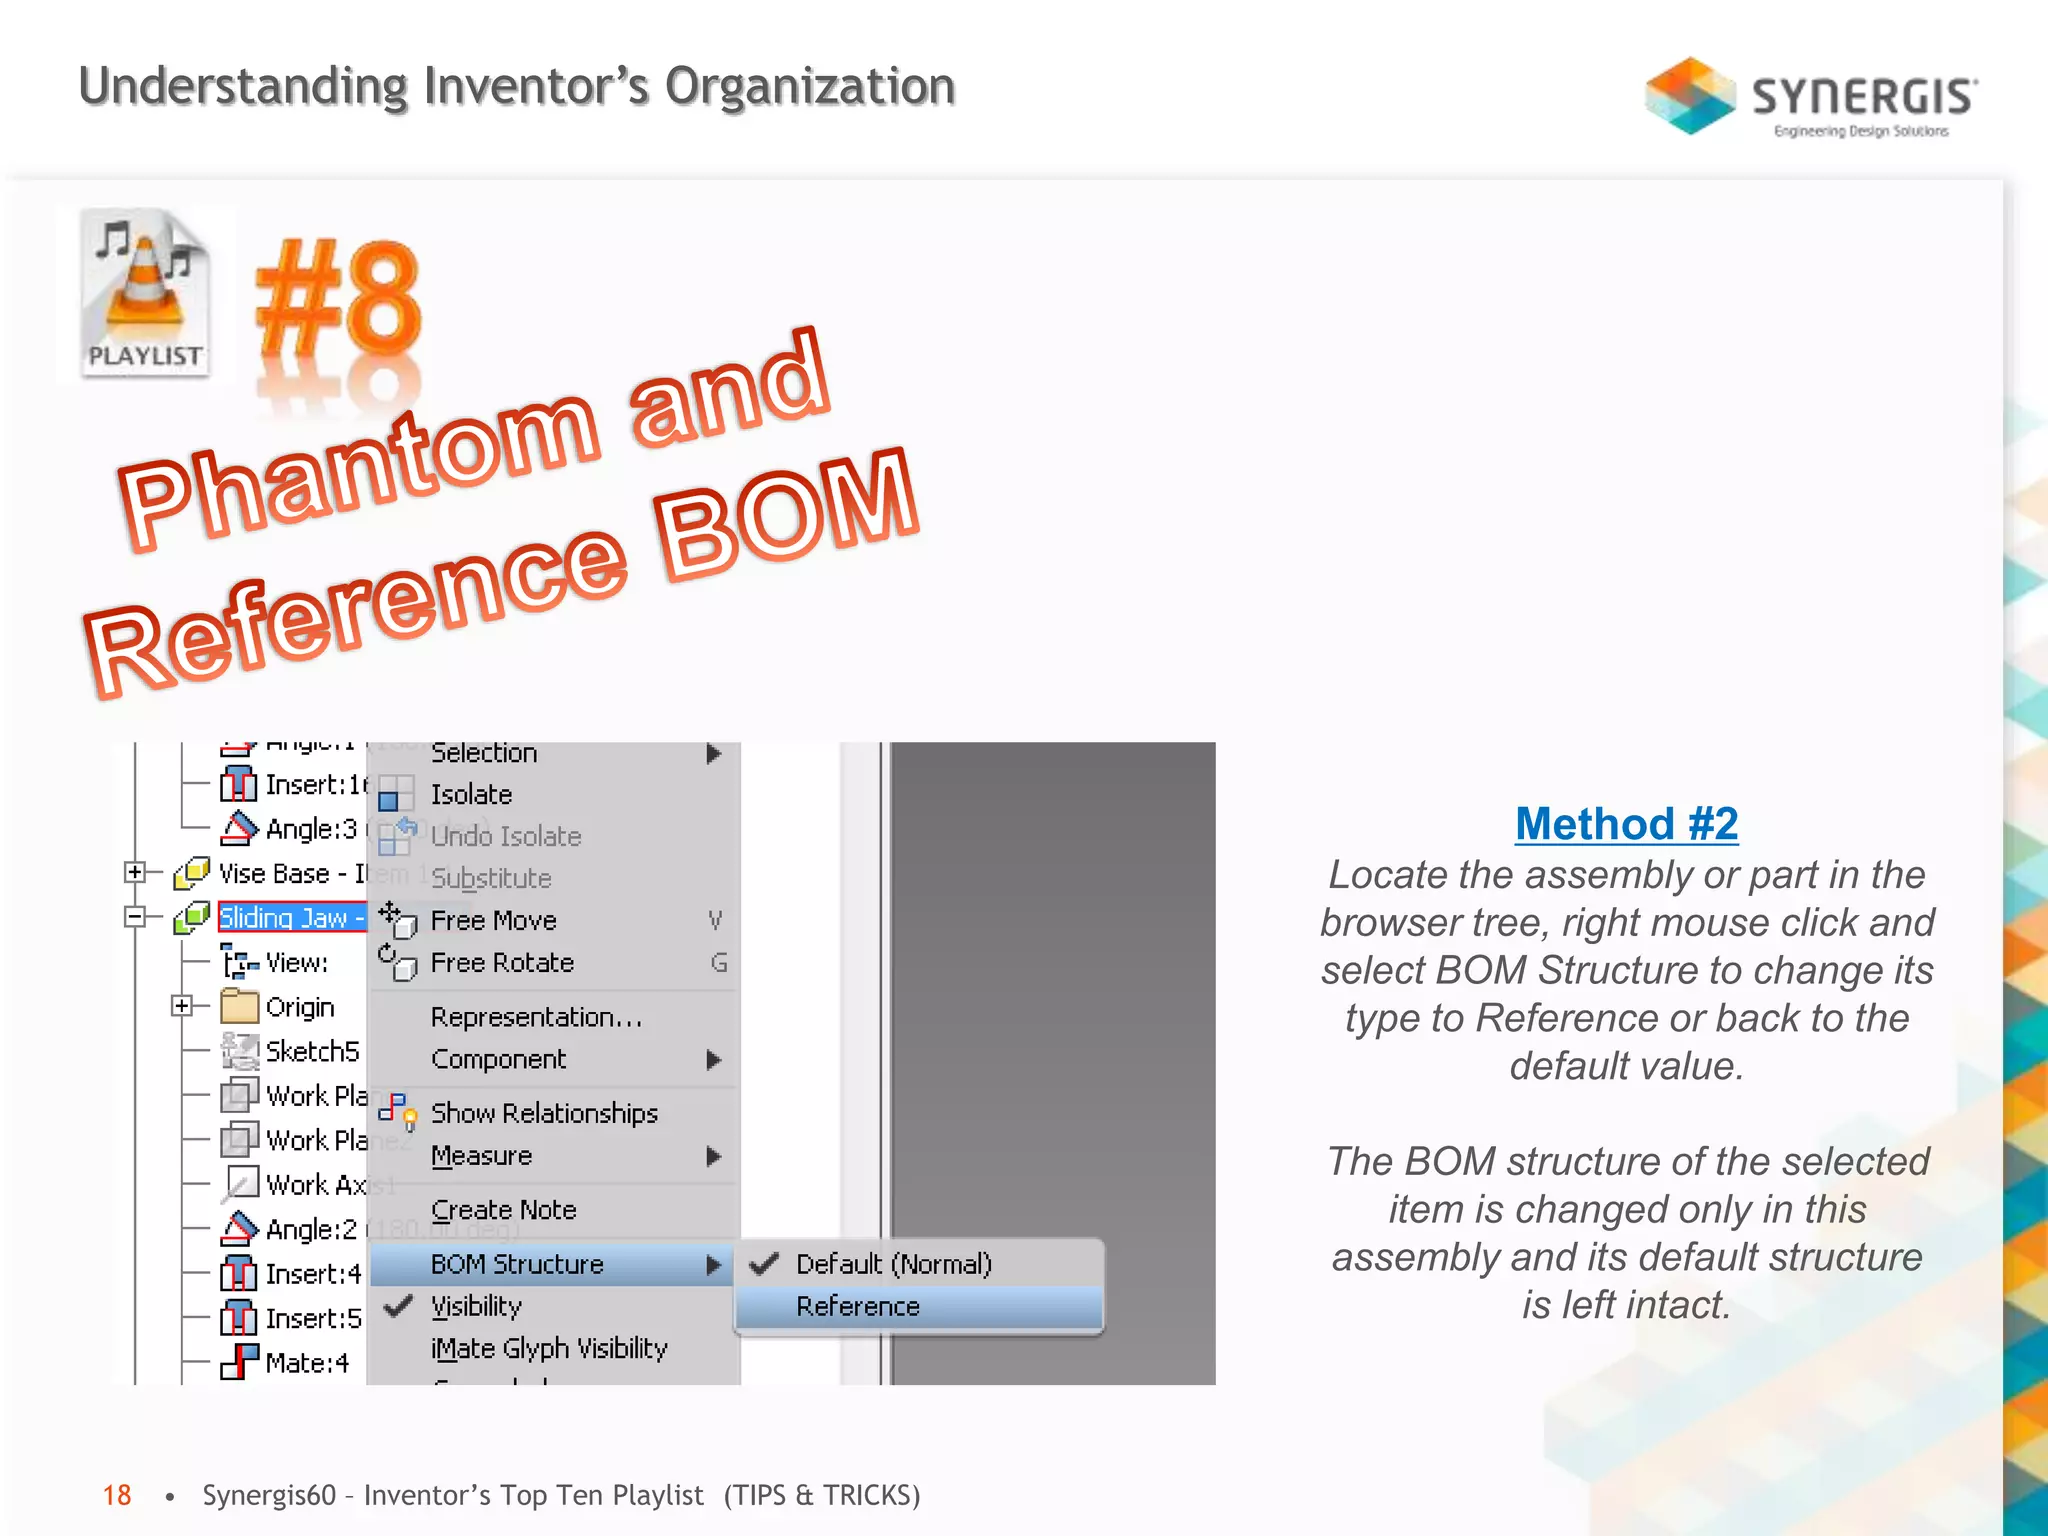
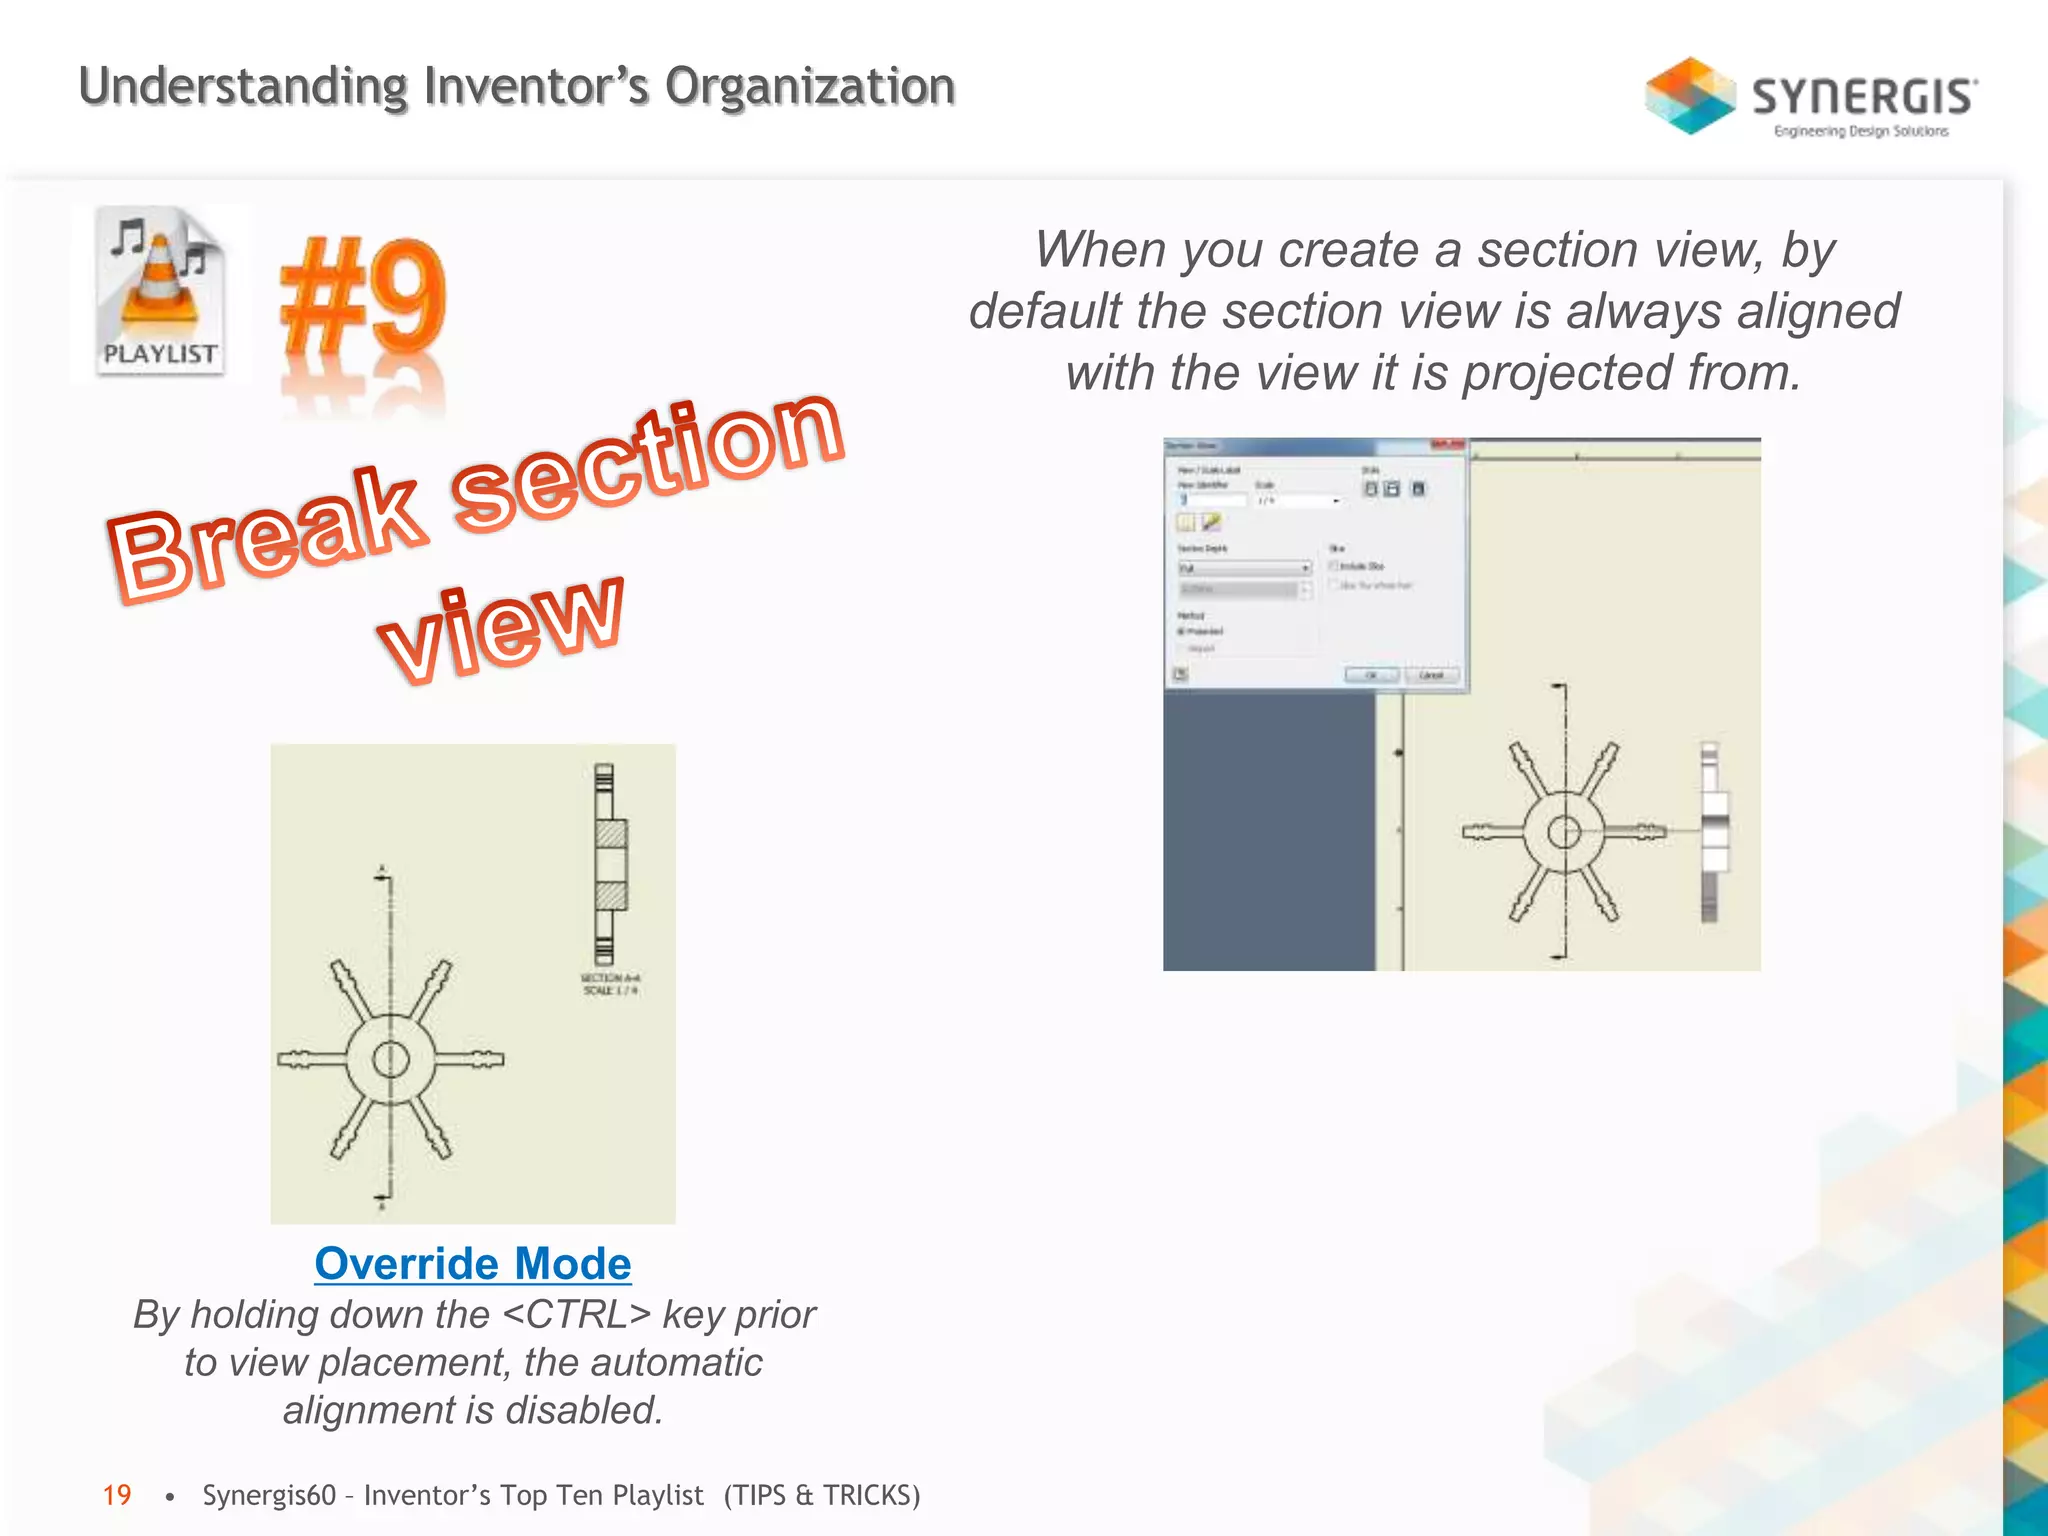
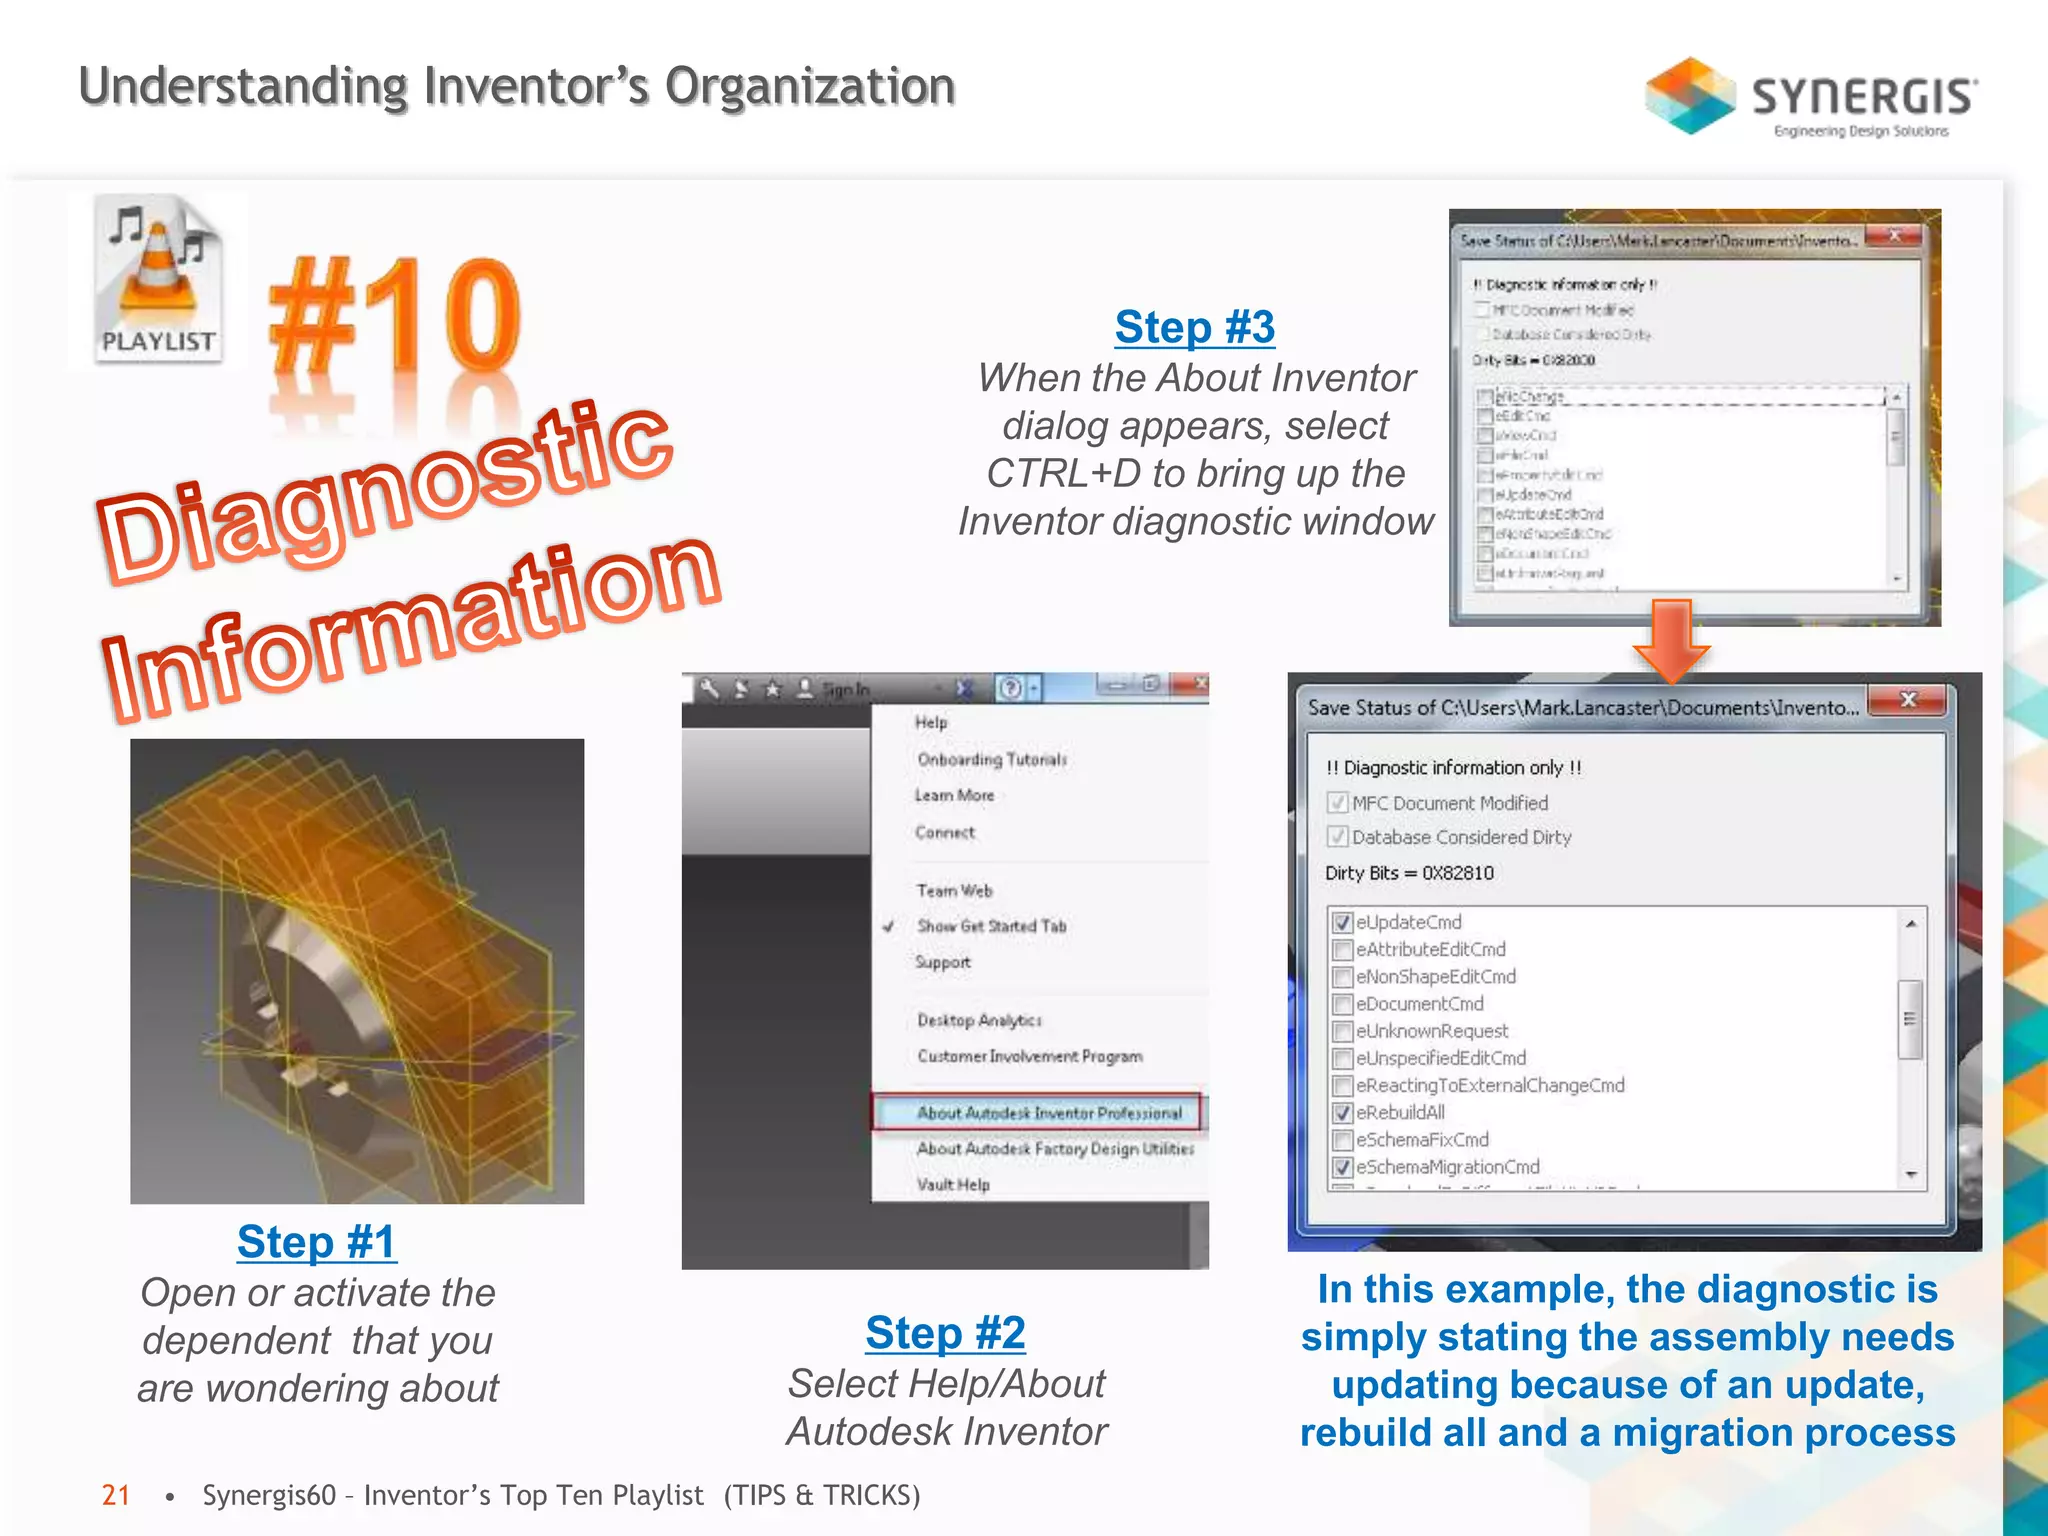
This document contains tips and tricks for Autodesk Inventor. It discusses methods for keeping holes centered in parts without parameters or constraints, setting descriptive names for parts in the browser window, copying and replacing components in assemblies, moving and rotating imported bodies, offsetting sketches from faces, measuring between hole centers without additional features, and using phantom and reference assemblies. It also covers section view alignment, diagnosing prompts to save dependent files, and an undocumented geometry checking utility.


![libro de modelado de diseño-part-2[001-090].pdf](https://cdn.slidesharecdn.com/ss_thumbnails/librodemodeladodediseo-part-2001-090-240707155355-092c490e-thumbnail.jpg?width=640&height=640&fit=bounds)


