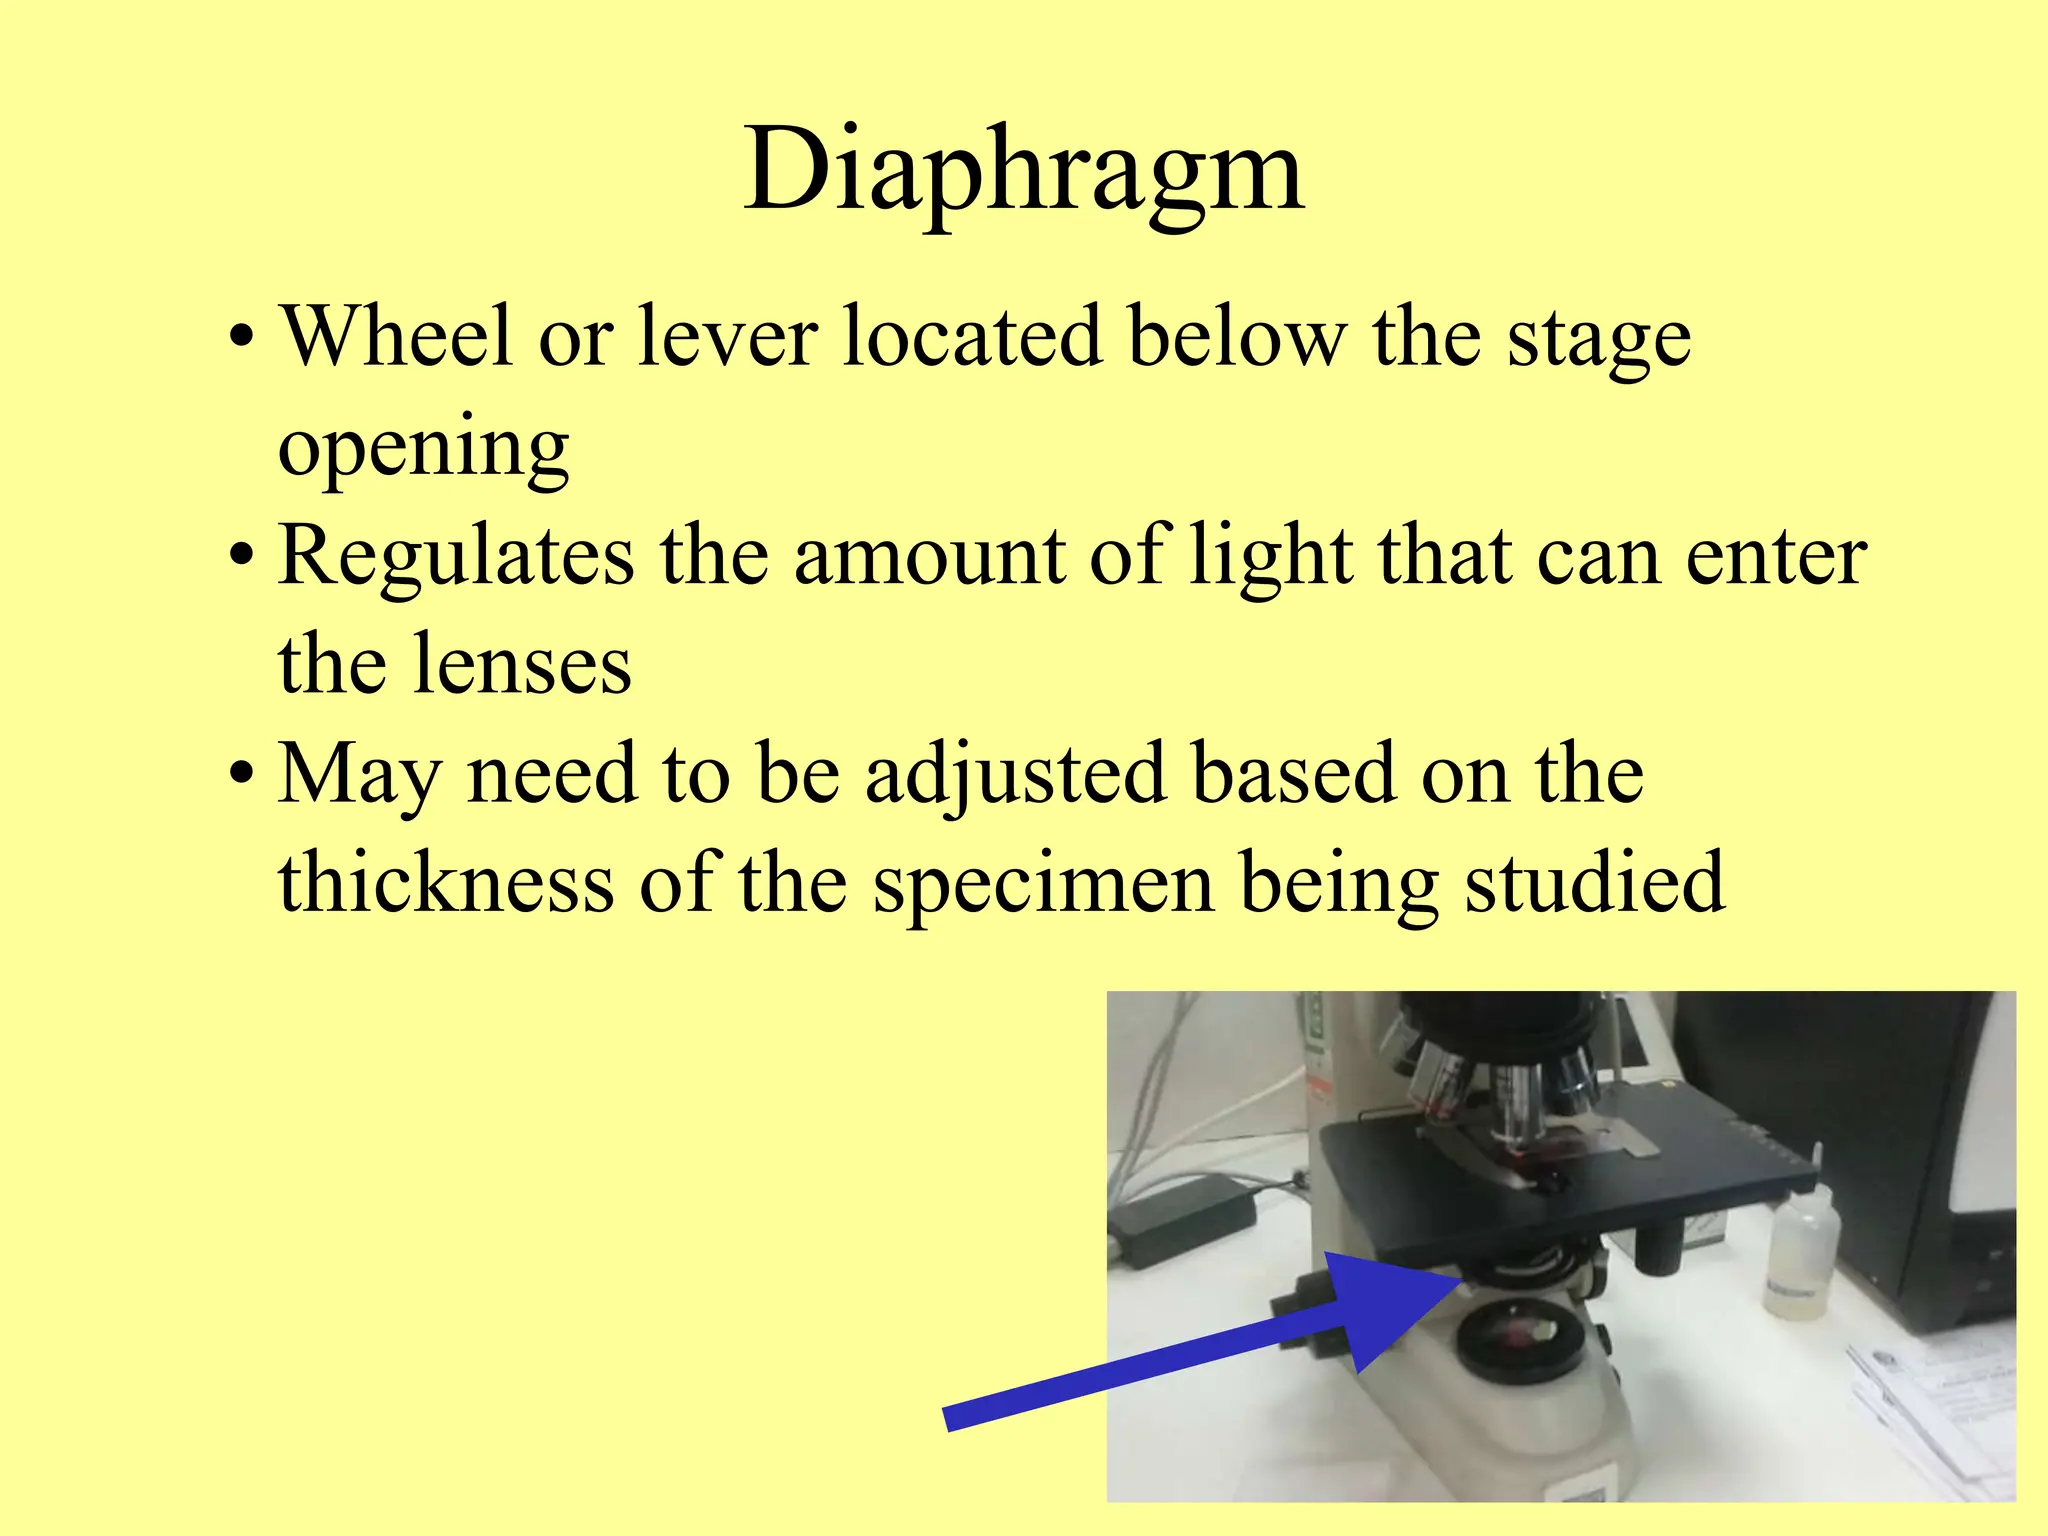
Introduction to the Light Microscope
Starting with use of a simple lens in ancient
times, to the first compound microscope
around 1590, and up to the microscopes you
are using in 7th grade life science, the
microscope has allowed scientists to make
discoveries about the “invisible world.”
The microscope has
become one of the most
recognizable symbols of
science.
Typical Classroom Microscope
What is the purpose of a
microscope?
• To magnify or enlarge the image of tiny
objects.
• The microscopes we will use this year in
science can magnify objects 40 times, 100
times, and 400 times the size of the object.
What type of microscope will we
be using in class this year?
• In 7th grade science, we use a compound
light microscope for most of our lab
activities.
• A light microscope uses light as a source
of energy for viewing objects.
• A compound microscope contains two
lenses for magnifying a specimen at the
same time, the eyepiece (ocular) and one of
the objective lenses.
Eyepiece
Eyepiece
• Also known as the ocular
• Contains the first lens you look through -
usually a magnification of 10x
• Located on the top of the body tube
Objective Lenses
Objective Lenses
• Used in combination with the eyepiece to
provide a range of magnification
• Magnification ranges from 40x to 400x
• Located on the nosepiece at the bottom of
the body tube
Nosepiece
Nosepiece
• Holds the objective lenses
• Rotates to enable magnification
• Located at the bottom of the body tube
Arm
Arm
• Supports the upper parts of the microscope
• Used to carry the microscope
• When carrying a microscope, always have
one hand on the arm and one hand on the
base. Use two hands!!
Base
Base
• Supports the whole microscope
• Used to carry the microscope
• When carrying a microscope, always have
one hand on the arm and one hand on the
base. Use two hands!!
Stage
Stage
• Supports the slide
• The slide contains the specimen or object
that you are viewing with the microscope.
Stage Clip
Stage Clip
• Helps to hold the slide in place
• Usually one on each side of the hole (stage
opening) = 2 stage clips
• The stage opening allows light to pass from
the light source to the lenses.
Light Source
Light Source
• Provides light necessary for viewing the
specimen
• Usually either a mirror or illuminator
• Sends light through the stage opening to
the diaphragm
Diaphragm
Diaphragm
• Wheel or lever located below the stage
opening
• Regulates the amount of light that can enter
the lenses
• May need to be adjusted based on the
thickness of the specimen being studied
Coarse Adjustment
Knob
Coarse Adjustment Knob
• Raises and lowers the stage or objective
lenses
• Used only when focusing the low power
(4x) objective lens
Fine Adjustment Knob
• Raises and lowers the stage or objective
lenses a small distance for exact focusing
• Used when focusing the medium power
(10x) and high power (40x) objective
lenses
Let’s Review...
http://www.biologycorner.com/microquiz/

Intro to the Microscope ALL TYPES PPT.pptx

  • 1.
    Introduction to theLight Microscope
  • 2.
    Starting with useof a simple lens in ancient times, to the first compound microscope around 1590, and up to the microscopes you are using in 7th grade life science, the microscope has allowed scientists to make discoveries about the “invisible world.” The microscope has become one of the most recognizable symbols of science.
  • 3.
  • 4.
    What is thepurpose of a microscope? • To magnify or enlarge the image of tiny objects. • The microscopes we will use this year in science can magnify objects 40 times, 100 times, and 400 times the size of the object.
  • 5.
    What type ofmicroscope will we be using in class this year? • In 7th grade science, we use a compound light microscope for most of our lab activities. • A light microscope uses light as a source of energy for viewing objects. • A compound microscope contains two lenses for magnifying a specimen at the same time, the eyepiece (ocular) and one of the objective lenses.
  • 6.
  • 7.
    Eyepiece • Also knownas the ocular • Contains the first lens you look through - usually a magnification of 10x • Located on the top of the body tube
  • 8.
  • 9.
    Objective Lenses • Usedin combination with the eyepiece to provide a range of magnification • Magnification ranges from 40x to 400x • Located on the nosepiece at the bottom of the body tube
  • 10.
  • 11.
    Nosepiece • Holds theobjective lenses • Rotates to enable magnification • Located at the bottom of the body tube
  • 12.
  • 13.
    Arm • Supports theupper parts of the microscope • Used to carry the microscope • When carrying a microscope, always have one hand on the arm and one hand on the base. Use two hands!!
  • 14.
  • 15.
    Base • Supports thewhole microscope • Used to carry the microscope • When carrying a microscope, always have one hand on the arm and one hand on the base. Use two hands!!
  • 16.
  • 17.
    Stage • Supports theslide • The slide contains the specimen or object that you are viewing with the microscope.
  • 18.
  • 19.
    Stage Clip • Helpsto hold the slide in place • Usually one on each side of the hole (stage opening) = 2 stage clips • The stage opening allows light to pass from the light source to the lenses.
  • 20.
  • 21.
    Light Source • Provideslight necessary for viewing the specimen • Usually either a mirror or illuminator • Sends light through the stage opening to the diaphragm
  • 22.
  • 23.
    Diaphragm • Wheel orlever located below the stage opening • Regulates the amount of light that can enter the lenses • May need to be adjusted based on the thickness of the specimen being studied
  • 24.
  • 25.
    Coarse Adjustment Knob •Raises and lowers the stage or objective lenses • Used only when focusing the low power (4x) objective lens
  • 26.
  • 27.
    Fine Adjustment Knob •Raises and lowers the stage or objective lenses a small distance for exact focusing • Used when focusing the medium power (10x) and high power (40x) objective lenses
  • 28.