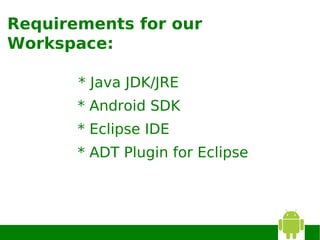
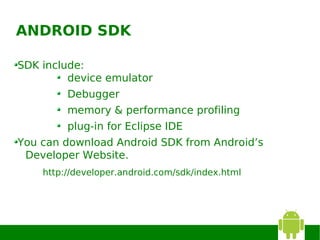
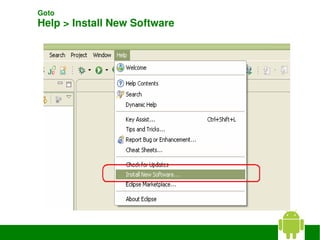
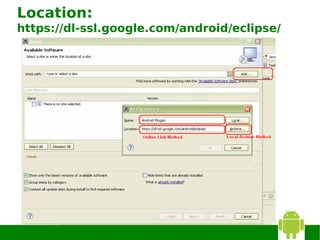
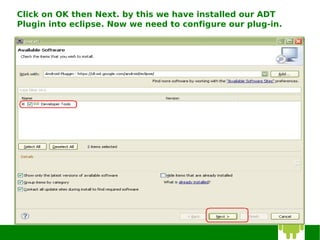
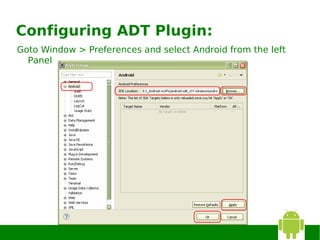
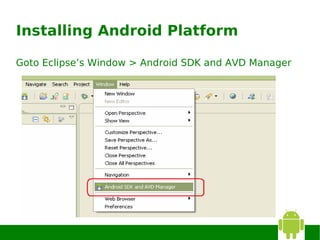
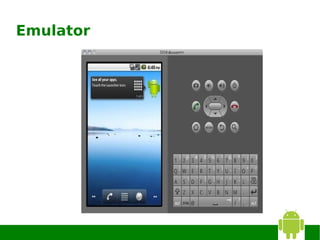
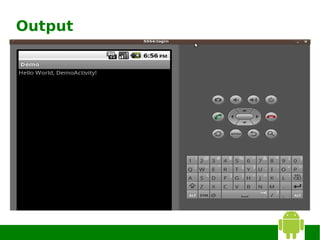
INSTALLING ECLIPSE
       AND
   ANDROID SDK


          CT Muthumani
Requirements for our
Workspace:

       * Java JDK/JRE
       * Android SDK
       * Eclipse IDE
       * ADT Plugin for Eclipse
JAVA

Before you start developing a Android application,
 make sure that you have installed Java on your
 machine.
JDK 5 or JDK 6 (JRE alone is not sufficient)
ANDROID SDK

SDK include:
         device emulator
         Debugger
         memory & performance profiling
         plug-in for Eclipse IDE
You can download Android SDK from Android’s
 Developer Website.
    http://developer.android.com/sdk/index.html
ECLIPSE IDE

Eclipse is the most popular open source IDE for
 developers.
It is written mostly in Java and can be used to
  develop applications in Java and, by means of
  various plug-ins, other programming languages.
It has plug-in support from Android for development.
ADT PLUG-IN FOR ECLIPSE
Android Development Tools (ADT) is a plug-in for the
 Eclipse IDE that is designed to give you a powerful,
 integrated environment in which to build Android
 applications.
ADT extends the capabilities of Eclipse to let you quickly
 set up new Android projects, create an application UI,
 add components based on the Android Framework API,
 debug your applications using the Android SDK tools
Now we have Installed Java on your machine, and
 extracted out Eclipse to your preferred location.
Now we’ll configure our ADT Plugin with Eclipse.
Goto 
Help > Install New Software 
Location:
https://dl-ssl.google.com/android/eclipse/
Click on OK then Next. by this we have installed our ADT
Plugin into eclipse. Now we need to configure our plug-in.
Configuring ADT Plugin:
Goto Window > Preferences and select Android from the left
  Panel
Installing Android Platform

Goto Eclipse’s Window > Android SDK and AVD Manager
You have three things in your left navigation
panel: Virtual devices, Installed packages, and
Available Packages.
AVD Configuration:
Goto Window > Android SDK and AVD Manager >
Virtual Devices


 Click on New
  In the pop up window, provide any Name for your plug­in
   The version of Android you want to use for your testing 
 purposes in Target field. 
 Finally click on Create AVD button, and you are done. 
ANDROID BUILDING BLOCKS
Building Blocks
ACTIVITIES

             ●
                 Activities are stacked
             ●
                 like a deck of cards.
             ●
                 only one is visible
             ●
                 only one is active
             ●
                 new activities are
                 placed on top
Activities State
Active
         ­At top of the stack
Paused
         ­Lost focus but still visible
         ­Can be killed
Stopped
         ­Not at the top of the stack
Dropped
         ­Killed to reclaim its memory
Views

Views are basic building blocks
Know how to draw themselves
Respond to events
Organized as trees to build up GUI
Described in XML in layout resources
Loading A Layout

Android complies the XML layout code that is later
  loaded in code usually by


     public void onCreate(Bundle savedInstance)
     {
       ......
       setContentView(R.layout.filename);
       ....
     }
Intents
Intents are used to move from one Activity to another
Describes what the application wants
An Intent provides a facility for performing late
 runtime binding between the codes in different
 activity.
Services

Services run in the background
Wont interact with the user
Run on the main thread of the process
Is kept running as long as
    – Is started
    – Has connections
Notifications

Notify the user about events
Sent through NotificationManager
Types
    – Persistent icon
    – Turning LEDS
Content Providers

ContentProviders are objects that can
       Retrive data
       Store data
Data is available to all applications
Only way to share data across packages
Usually the back-end is SQLite
Data exposed as a unique URI
AndroidManifest.xml

Control file that tells the
 system what to do
It is the glue that
  actually specifies which
  intents your Activities
  receives
Specifies permissions
HELLO WORLD PROGRAM
Java File
XML File
Emulator
Output
Questions ?
THANK YOU


            33

Installing eclipse & sdk

  • 1.
    INSTALLING ECLIPSE AND ANDROID SDK CT Muthumani
  • 2.
    Requirements for our Workspace: * Java JDK/JRE * Android SDK * Eclipse IDE * ADT Plugin for Eclipse
  • 3.
    JAVA Before you startdeveloping a Android application, make sure that you have installed Java on your machine. JDK 5 or JDK 6 (JRE alone is not sufficient)
  • 4.
    ANDROID SDK SDK include: device emulator Debugger memory & performance profiling plug-in for Eclipse IDE You can download Android SDK from Android’s Developer Website. http://developer.android.com/sdk/index.html
  • 5.
    ECLIPSE IDE Eclipse isthe most popular open source IDE for developers. It is written mostly in Java and can be used to develop applications in Java and, by means of various plug-ins, other programming languages. It has plug-in support from Android for development.
  • 6.
    ADT PLUG-IN FORECLIPSE Android Development Tools (ADT) is a plug-in for the Eclipse IDE that is designed to give you a powerful, integrated environment in which to build Android applications. ADT extends the capabilities of Eclipse to let you quickly set up new Android projects, create an application UI, add components based on the Android Framework API, debug your applications using the Android SDK tools Now we have Installed Java on your machine, and extracted out Eclipse to your preferred location. Now we’ll configure our ADT Plugin with Eclipse.
  • 7.
  • 8.
  • 9.
    Click on OKthen Next. by this we have installed our ADT Plugin into eclipse. Now we need to configure our plug-in.
  • 10.
    Configuring ADT Plugin: GotoWindow > Preferences and select Android from the left Panel
  • 11.
    Installing Android Platform GotoEclipse’s Window > Android SDK and AVD Manager
  • 12.
    You have threethings in your left navigation panel: Virtual devices, Installed packages, and Available Packages.
  • 13.
    AVD Configuration: Goto Window> Android SDK and AVD Manager > Virtual Devices Click on New  In the pop up window, provide any Name for your plug­in  The version of Android you want to use for your testing  purposes in Target field.  Finally click on Create AVD button, and you are done. 
  • 15.
  • 16.
  • 17.
    ACTIVITIES ● Activities are stacked ● like a deck of cards. ● only one is visible ● only one is active ● new activities are placed on top
  • 18.
    Activities State Active ­At top of the stack Paused ­Lost focus but still visible ­Can be killed Stopped ­Not at the top of the stack Dropped ­Killed to reclaim its memory
  • 19.
    Views Views are basicbuilding blocks Know how to draw themselves Respond to events Organized as trees to build up GUI Described in XML in layout resources
  • 20.
    Loading A Layout Androidcomplies the XML layout code that is later loaded in code usually by public void onCreate(Bundle savedInstance) { ...... setContentView(R.layout.filename); .... }
  • 21.
    Intents Intents are usedto move from one Activity to another Describes what the application wants An Intent provides a facility for performing late runtime binding between the codes in different activity.
  • 22.
    Services Services run inthe background Wont interact with the user Run on the main thread of the process Is kept running as long as – Is started – Has connections
  • 23.
    Notifications Notify the userabout events Sent through NotificationManager Types – Persistent icon – Turning LEDS
  • 24.
    Content Providers ContentProviders areobjects that can Retrive data Store data Data is available to all applications Only way to share data across packages Usually the back-end is SQLite Data exposed as a unique URI
  • 25.
    AndroidManifest.xml Control file thattells the system what to do It is the glue that actually specifies which intents your Activities receives Specifies permissions
  • 26.
  • 28.
  • 29.
  • 30.
  • 31.
  • 32.
  • 33.