SlideShare a Scribd company logo
Introducing the
      Arduino
CS4062 - Eoin Brazil - Semester 2 - 2009


         http://www.flickr.com/photos/collinmel/2317520331/
What is Arduino?
             The development
The hardware                 The community
               environment
Why Arduino?
artists & designers
“opportunistic prototyping”
   device hacking & reuse

“open source hardware”
   Open Source Physical Computing Platform

open source
   free to inspect & modify

community
   wiki, forums, tutorials
The Nuts & Bolts
  physical computing. er, what? ubiquitous computing,
pervasive computing, ambient intelligence, calm
computing, everyware, spimes, blogjects, smart
objects...
  tiny computer you can program
  completely stand-alone, talks to other devices

         ‘C’                    Ruby
         Flash                  Python
         Processing             PHP
         PD                     Matlab
         Max/MSP                Squeak (Smalltalk)
``Physical Computing is about prototyping with electronics,
 turning sensors, actuators and microcontrollers into materials for
                                            designers and artists.’’

``It involves the design of interactive objects that can communicate
with humans using sensors and actuators controlled by a behaviour
         implemented as software running inside a microcontroller.’’

                          Massimo Banzi, Tinker.it & Arduino Co-Founder
Examples of Arduino
Examples of Arduino
Examples of Arduino
Examples of Arduino
Examples of Arduino
Arduino Capabilities


            =
Intel 286       Arduino
Arduino Capabilities
   16 kBytes of Flash program memory
   1 kByte of RAM
   16 MHz (Apple II: 1 MHz / Intel 286: 12.5 MHz /
Intel Core 2: 3 GHz)
   inputs and outputs
       13 digital input/output pins
       5 analog input pins
       6 analog output pins (PWM only)
Analog Reference pin (orange)

                         Digital Ground (light green)

                         Digital Pins 2-13 (green)

                          Digital Pins 0-1/Serial In/Out - TX/RX (dark
                       green)

                            These pins cannot be used for digital i/o
                            (digitalRead and digitalWrite) if you are also
                            using serial communiation (e.g. Serial.begin).

                         Reset Button - S1 (dark blue)

                         In-circuit Serial Programmer (blue-green)

                        Analog In Pins 0-5 (light blue)

                         Power and Ground Pins (power: orange,
                       grounds: light orange)

                          External Power Supply In (9-12VDC) - X1
                       (pink)

                         Toggles External Power and USB Power (place
                       jumper on two pins closest to desired supply) -

Layout of an Arduino   SV1 (purple)

                         USB (used for uploading sketches to the board
                       and for serial communication between the board
                       and the computer; can be used to power the
                       board) (yellow)
Arduino Glossary
   ``sketch’’ - program that runs on the board
   ``pin’’ - input or output connected to something, e.g.
output to an LED, input from switch
   ``digital’’ - 1 (HIGH) or 0 (LOW) value (i.e. on/off)
   ``analog’’ - range (0-255 typically), e.g. LED brightness
    wiring drawing shows the interconnection (physical
layout) of all devices and components
   schematic drawing shows underlying logic may not link
back to physical layout
Arduino IO
Arduino IO
 Bluetooth - BlueSmirf
 Internet - MatchPort
     Many others:
 Wifi, IrDa, Zigbee, etc.
Arduino IO


      Motors:
DC, Steppers, Servos
Arduino IO


       Sensors:
Flex, IrDa, Switches,
FSR, Accelerometers
Arduino IO


   Custom Hardware:
e.g. VMusic 2 MP3 player
Blinking a LED
Diagrams


             Wiring
            diagram


Schematic             Wired circuit
 diagram
Solderless
            Breadboard
+                                  +

-                                  -
    1          10   15   20
        5                     25
                                   A
A
                                   B
B
                                   C
C
                                   D
D
                                   E
E

F                                  F
G                                  G
H                                  H
I                                  I
J                                  J
-   1          10   15   20
        5                     25
                                   -
+                                  +
Track
(all connected)

   Drilled or cut holes
   (breaks connection)


 Stripboard /
  Perfboard
  Example
Tips:

                                                                                                                                                             Stripboard Layout Planning Sheet
                                                                            • Mark out the Vs and 0V power lines first, then
                                                                                 place the ICs.
                                                                                                                                                                 Project:
                                                                                 Remember to cut the track between the pins of
                                                                            •
                                                                                 an IC. Mark the cuts on the diagram with an X.                       Designed by:
                                                                                 Try to make resistors and axial capacitors lay
                                                                            •
                                                                                                                                                             Version:
Actual size stripboard. Hole spacing 0.1” (2.54mm)                               flat on the stripboard. Resistors usually require
                                                                                 a gap of 4 holes, capacitors a gap of 8 holes.
                                                                                                                                                                   Date:
                                                                                 Use the actual size grid on th e left to check
                                                                            •
Tracks run this way                                                              component spacing.
                                                                                                                                                                  Notes:
                                                                                                                         1         8
                                                                                 Number the pins of the ICs as
                                                                            •                                            2         7
                                                                                                                         3         6
                                                                                 shown.                                  4         5


         1   2   3    4   5   6   7   8   9   10   11   12   13   14   15       16   17   18   19   20   21   22   23   24   25   26   27   28   29    30   31    32   33    34   35   36   37   38   39   40   41   42   43   44

    22                                                                                                                                                                                                                              22


    21                                                                                                                                                                                                                              2l1


    20                                                                                                                                                                                                                              20


    19                                                                                                                                                                                                                              19


    18                                                                                                                                                                                                                              18


    17                                                                                                                                                                                                                              17


    16                                                                                                                                                                                                                              16


    15                                                                                                                                                                                                                              15


    14                                                                                                                                                                                                                              14


    13                                                                                                                                                                                                                              13


    12                                                                                                                                                                                                                              12


    11                                                                                                                                                                                                                              11


    10                                                                                                                                                                                                                              10


     9                                                                                                                                                                                                                              9


     8                                                                                                                                                                                                                              8


     7                                                                                                                                                                                                                              7


     6                                                                                                                                                                                                                              6


     5                                                                                                                                                                                                                              5


     4                                                                                                                                                                                                                              4


     3                                                                                                                                                                                                                              3


     2                                                                                                                                                                                                                              2


     1                                                                                                                                                                                                                              1


         1   2   3    4   5   6   7   8   9   10   11   12   13   14   15       16   17   18   19   20   21   22   23   24   25   26   27   28   29    30   31    32   33    34   35   36   37   38   39   40   41   42   43   44


                                                                                                                                                                            Version 3 : 3/02 © 2002 Electronics in Meccano www.eleinmec.com


                              stripboard diagramming
Books & first time
prototyping advice
                         Blogs,YouTube,
                       and Google


                       Not direction
          Resistor
                         sensitive

                            LED
             short leg is negative &
             goes to the ground
Expensive but
 user friendly
Expensive but
    user friendly


  Sufficient for
almost all needs
Expensive but
    user friendly


  Sufficient for     Chips and
almost all needs      PCBs
Lego Mindstorm NXT
                          Arduino


                     ATMega168
Lego Mindstorm NXT
                          Arduino


   Approx.
                     ATMega168
    ~€250
Approx.
Lego Mindstorm NXT
                                     ~€25
                          Arduino


   Approx.
                     ATMega168
    ~€250
Approx.
Lego Mindstorm NXT
                                     ~€25
                          Arduino


   Approx.
                     ATMega168
    ~€250
                                    Approx.
                                     ~€4
Programming
Programming an
   Arduino
         Write program

          Compile (check
       for errors)

         Reset board

         Upload to board
An Arduino “Sketch”
        Declare variables at top


        Initialize
             setup() – run once at beginning, set pins


        Running
             loop() – run repeatedly, after setup()
An Arduino “Sketch”
                   int ledPin = 13; – led
                   connected to control pin 13

                   int aSensor = 0; – setup
Global Variables
                   sensor 'aSensor' on analog pin 0

                   int statePin = LOW; – use this
                   to hold the state of a pin
An Arduino “Sketch”

          pinMode() – set a pin as input
          or output
setup()
          serial.Begin() – setup to `talk'
          to the computer
An Arduino “Sketch”

          pinMode(ledPin, Output); –
          set the pin `ledPin' as an output
setup()
          serial.Begin(9600); – talk to
          the computer at 9600 baud rate
An Arduino “Sketch”

          digitalWrite() – set a digital pin high/low
          digitalRead() – read a digital pin’s state
          analogRead() – read an analog pin
 loop()
          analogWrite() – write an “analog” PWM value
          delay() – wait an amount of time
          millis() – get the current tim
Input / Output


14 Digital IO (pins 0 - 13)
6 Analog In (pins 0 - 5)
6 Analog Out (pins 3, 5, 6, 9, 10, 11)
Digital ? Analog ?

   Digital – only has two values: on/off

  Analog – has many (infinite) values

   Computers don’t really do analog - use
quantization instead
Digital ? Analog ?
   Many states (Analog) or just
two (HIGH/LOW - Digital)
   Number of states (or “bins”) is
resolution
   Common computer resolutions:
      8-bit = 256 states
      16-bit = 65,536 states
      32-bit = 4,294,967,296 states
IO to/from what?
   Sensors         Actuators
  LDR / IR
                   Solenoid
  Switch /
                   Stepper Motor
Potentiometer /
Joystick / Piezo
  Accelerometer    Other Circuits
  Ultrasonic
                   Prototype shields
   Indicators
                   Special ICs
 LED / Lamps
 Buzzers
What is a switch?
Hello World!
void setup()                            Install latest Arduino IDE from arduino.cc
{                                       Run Arduino IDE
  // start serial port at 9600 bps:      Write the code on the left into the editor
  Serial.begin(9600);
                                         Compile / Verify the code by clicking the play
}                                     button

                                        Before uploading your sketch, check the board and
void loop()
                                      the serial port are correct for your Arduino and for
{                                     your computer
  Serial.print(quot;Hello World!nrquot;);
                                           Menu -> Tools -> Board
  // wait 2sec for next reading:
                                           Menu -> Tools -> Serial Port
  delay(2000);
}                                        Upload the code from the computer to the
                                      Arduino using the upload button
/* Blinking LED ---
* turns on and off a light emitting diode(LED) connected to a digital
* pin, based on data coming over serial
*/

int ledPin = 13; // LED connected to digital pin 13
int inByte = 0;

void setup()
{
	      pinMode(ledPin, OUTPUT); // sets the digital pin as output
	      Serial.begin(19200); // initiate serial communication
}

void loop()
{
	      while (Serial.available()>0) {
	      	     inByte = Serial.read();
	      }
	      if (inByte>0) {
	      	     digitalWrite(ledPin, HIGH); // sets the LED on
	      } else {
	      	     digitalWrite(ledPin, LOW); // sets the LED off
	      }
}
/* Blinking LED ---
* turns on and off a light emitting diode(LED) connected to a digital
* pin, based on data coming over serial
                                                                    Initialise
*/


                                                                  some of the
int ledPin = 13; // LED connected to digital pin 13
int inByte = 0;

                                                                    variables
void setup()
{
	      pinMode(ledPin, OUTPUT); // sets the digital pin as output
	      Serial.begin(19200); // initiate serial communication
}

void loop()
{
	      while (Serial.available()>0) {
	      	     inByte = Serial.read();
	      }
	      if (inByte>0) {
	      	     digitalWrite(ledPin, HIGH); // sets the LED on
	      } else {
	      	     digitalWrite(ledPin, LOW); // sets the LED off
	      }
}
/* Blinking LED ---
* turns on and off a light emitting diode(LED) connected to a digital
* pin, based on data coming over serial
*/

int ledPin = 13; // LED connected to digital pin 13
int inByte = 0;

void setup()
{
	      pinMode(ledPin, OUTPUT); // sets the digital pin as output
	      Serial.begin(19200); // initiate serial communication
}

void loop()
                                                  Setup LED pin and
{
	      while (Serial.available()>0) {
                                                   serial connection
	      	     inByte = Serial.read();
	      }
	      if (inByte>0) {
	      	     digitalWrite(ledPin, HIGH); // sets the LED on
	      } else {
	      	     digitalWrite(ledPin, LOW); // sets the LED off
	      }
}
/* Blinking LED ---
* turns on and off a light emitting diode(LED) connected to a digital
* pin, based on data coming over serial
*/

int ledPin = 13; // LED connected to digital pin 13
int inByte = 0;

void setup()
{
	      pinMode(ledPin, OUTPUT); // sets the digital pin as output
	      Serial.begin(19200); // initiate serial communication
                                       Loop - Reading the
}


                                       serial for info, when
void loop()
{

             inByte = Serial.read(); something is received
	      while (Serial.available()>0) {
	      	
	      }
                                           turn LED on LED on
                                                     the
	      if (inByte>0) {
	      	     digitalWrite(ledPin, HIGH); // sets the
	       } else {
	       	    digitalWrite(ledPin, LOW); // sets the LED off
	       }
}
/* Digital reading, turns on and off a light emitting diode (LED) connected to digital
* pin 13, when pressing a pushbutton attached to pin 7. It illustrates the concept of
* Active-Low, which consists in connecting buttons using a 1K to 10K pull-up resistor.
*/

int ledPin = 13; // choose the pin for the LED
int inPin = 7; // choose the input pin (button)
int buttonval = 0; // variable for reading the pin status

void setup() {
	      pinMode(ledPin, OUTPUT); // set LED as output
	      pinMode(inPin, INPUT); // set pushbutton as input
	      Serial.begin(19200); // start serial communication to computer
}

void loop() {
	      buttonval = digitalRead(inPin); // read the pin and get the button's state
	      if (buttonval == HIGH) { // check if the input is HIGH (button released)
	      	     digitalWrite(ledPin, LOW); // turn LED OFF
	      	     Serial.write('0'); // Button off (0) sent to computer
	      } else {
	      	     digitalWrite(ledPin, HIGH); // turn LED ON
	      	     Serial.write('1'); // Button on (1) sent to computer
	      }
}
/* Digital reading, turns on and off a light emitting diode (LED) connected to digital
* pin 13, when pressing a pushbutton attached to pin 7. It illustrates the concept of
* Active-Low, which consists in connecting buttons using a 1K to 10K pull-up resistor.

                                                                      Initialise
*/

int ledPin = 13; // choose the pin for the LED
                                                                    some of the
int inPin = 7; // choose the input pin (button)
int buttonval = 0; // variable for reading the pin status
                                                                      variables
void setup() {
	      pinMode(ledPin, OUTPUT); // set LED as output
	      pinMode(inPin, INPUT); // set pushbutton as input
	      Serial.begin(19200); // start serial communication to computer
}

void loop() {
	      buttonval = digitalRead(inPin); // read the pin and get the button's state
	      if (buttonval == HIGH) { // check if the input is HIGH (button released)
	      	     digitalWrite(ledPin, LOW); // turn LED OFF
	      	     Serial.write('0'); // Button off (0) sent to computer
	      } else {
	      	     digitalWrite(ledPin, HIGH); // turn LED ON
	      	     Serial.write('1'); // Button on (1) sent to computer
	      }
}
/* Digital reading, turns on and off a light emitting diode (LED) connected to digital
* pin 13, when pressing a pushbutton attached to pin 7. It illustrates the concept of
* Active-Low, which consists in connecting buttons using a 1K to 10K pull-up resistor.
*/

                                                      Setup LED pin,
int ledPin = 13; // choose the pin for the LED
int inPin = 7; // choose the input pin (button)
                                                      switch pin and
int buttonval = 0; // variable for reading the pin status

                                                     serial connection
void setup() {
	      pinMode(ledPin, OUTPUT); // set LED as output
	       pinMode(inPin, INPUT); // set pushbutton as input
	       Serial.begin(19200); // start serial communication to computer
}

void loop() {
	      buttonval = digitalRead(inPin); // read the pin and get the button's state
	      if (buttonval == HIGH) { // check if the input is HIGH (button released)
	      	     digitalWrite(ledPin, LOW); // turn LED OFF
	      	     Serial.write('0'); // Button off (0) sent to computer
	      } else {
	      	     digitalWrite(ledPin, HIGH); // turn LED ON
	      	     Serial.write('1'); // Button on (1) sent to computer
	      }
}
/* Digital reading, turns on and off a light emitting diode (LED) connected to digital
* pin 13, when pressing a pushbutton attached to pin 7. It illustrates the concept of
* Active-Low, which consists in connecting buttons using a 1K to 10K pull-up resistor.

                                                    Loop - Reading the
*/

int ledPin = 13; // choose the pin for the LED
int inPin = 7; // choose the input pin (button) button for info, when
int buttonval = 0; // variable for reading the pin status
                                                   button is press turn
void setup() {

        pinMode(inPin, INPUT); // set pushbutton asthe LED on and
	       pinMode(ledPin, OUTPUT); // set LED as output
	                                                       input

                                                   signal the computer
	       Serial.begin(19200); // start serial communication to computer
}

                                                              ofthe button's state
                                                                 change
void loop() {
	       buttonval = digitalRead(inPin); // read the pin and get
	       if (buttonval == HIGH) { // check if the input is HIGH (button released)
	       	     digitalWrite(ledPin, LOW); // turn LED OFF
	       	     Serial.write('0'); // Button off (0) sent to computer
	       } else {
	       	     digitalWrite(ledPin, HIGH); // turn LED ON
	       	     Serial.write('1'); // Button on (1) sent to computer
	       }
}
Spooky Skull Example
To / From
  Other
Software
Pure Data


       Pduino
       SimpleMessageSystem
Flash
                           // arduino serial proxy helper
                           // send messages from arduino to your
    Serial Proxy           // serial port >> socket
                           // and read it through flash
(XMLSocket server) a
small program that runs    #define inPin 2
on your Mac/PC and
                           void setup(){
keeps a live connection     Serial.begin(9600);
between the serial port    }
                           void loop(){
and Flash
                             byte readValue=digitalRead(inPin);
                             if(readValue == HIGH){
                              Serial.print(quot;highquot;);
                              Serial.print(0, BYTE);
                             }
                           }
Flash Example


  http://file-error.net/1o1o1o1o1/?Physical_Computing_and_Interaction:Arduino:Arduino_VS_Flash
                              http://protolab.pbwiki.com/Arduino2Flash
Animata
Animata
Processing
Interactive Objects /
       Displays
                        Spooky Skull Example - Tod E. Kurt
                        Lilypad - Leah Buechley
                       Wanderlust - Hector Ouilhet
                        Ambient Auditory Group Presence
                      Display
                        Hanging Gardens


Dawn07, Dawn08, Dawn 09 (What will you do ?)
Lilypad
    A set of stitchable controllers,
 sensors and actuators enables
 novices to build their own
 electronic textiles.
Wanderlust
                                                   A mobile service, uses identities and
                                                needs (in terms of time and distance)
                                                to explore spaces as well to meet
                                                people with similar interests.
                                                   Ad-Hoc Social Networking tool as it
                                                provides suggestions from people and
                                                places that can be relevant to you.

   The prototype used physical tokens (reels) to represent a user’s different
identities. Each reel is mapped to an identity; when this reel is introduced to the View-
Master it will play a video showing the contents and attributes of this identity.


   Consists of a original View-Master (red), wooden body, Arduino board, RFID
reader & antenna
Wanderlust Prototype
Ambient Auditory Group
Presence Display:
   Designed to explore, using concurrent
auditory icons, the issue of group
awareness (ICAD07 paper)
   Presence and activity are conveyed by
changes in the soundscape
   Ruby, Python, C, Growl and Boodler
   Semi-Public Display for Small, Co-
located Groups
Hanging Gardens:
Collaboration with Jurgen Simpson
Two Places - UL / Ormeau, Belfast
Network of Speakers and Sensors
Arduino, Ruby, Max/MSP
2 field of insects
Circadian rhythm
Walls and nodes
Hanging Gardens:
Collaboration with Jurgen Simpson
Two Places - UL / Ormeau, Belfast
Network of Speakers and Sensors
Arduino, Ruby, Max/MSP
2 field of insects
Circadian rhythm
Walls and nodes
Useful Links
  Arduino - http://www.arduino.cc/

  Wanderlust - http://www.thejaguarhouse.com/blog/

  Arduino lectures - http://www.slideshare.net/eoinbrazil

   Tod E. Kurt’s blog (check his Spooky Arduino projects) - http://todbot.com/
blog/category/arduino/

  ITP Physical Computing - http://itp.nyu.edu/physcomp/Intro/HomePage

  The Art and Craft of Toy Design - http://yg.typepad.com/makingtoys2/

  Lilypad - http://www.cs.colorado.edu/~buechley/diy/diy_lilypad_arduino.html

   Usman Haque and Adam Somlai-Fischer - ``Low tech sensors and actuators
for artists and architects’’

More Related Content

What's hot

Introduction to the Arduino
Introduction to the ArduinoIntroduction to the Arduino
Introduction to the ArduinoWingston
 
Introduction to arduino
Introduction to arduinoIntroduction to arduino
Introduction to arduinoAhmed Sakr
 
Ardui no
Ardui no Ardui no
Ardui no
Amol Sakhalkar
 
Report on arduino
Report on arduinoReport on arduino
Report on arduino
Ravi Phadtare
 
An Overview on Programmable System on Chip: PSoC-5
An Overview on Programmable System on Chip: PSoC-5An Overview on Programmable System on Chip: PSoC-5
An Overview on Programmable System on Chip: PSoC-5
Premier Farnell
 
Arduino Uno Pin Description
Arduino Uno Pin DescriptionArduino Uno Pin Description
Arduino Uno Pin Description
Niket Chandrawanshi
 
Arduino presentation by_warishusain
Arduino presentation by_warishusainArduino presentation by_warishusain
Arduino presentation by_warishusain
student
 
Embedded system
Embedded systemEmbedded system
Embedded system
Vinod Srivastava
 
Introduction to Arduino Hardware and Programming
Introduction to Arduino Hardware and ProgrammingIntroduction to Arduino Hardware and Programming
Introduction to Arduino Hardware and Programming
Emmanuel Obot
 
Introduction to Arduino
Introduction to ArduinoIntroduction to Arduino
Introduction to Arduino
Richard Rixham
 
Arduino IDE
Arduino IDE Arduino IDE
Arduino IDE
Mrunal Deshkar
 
Introduction to Arduino
Introduction to ArduinoIntroduction to Arduino
Introduction to Arduino
Green Moon Solutions
 
Temperature measurement using nodemcu esp8266
Temperature measurement  using nodemcu esp8266Temperature measurement  using nodemcu esp8266
Temperature measurement using nodemcu esp8266
DheerendraKumar43
 
ARDUINO EMBEDDED SYSTEM
ARDUINO EMBEDDED SYSTEMARDUINO EMBEDDED SYSTEM
ARDUINO EMBEDDED SYSTEM
Vishal GARG
 
Arduino Workshop
Arduino WorkshopArduino Workshop
Arduino Workshop
atuline
 
Introduction to Arduino Programming
Introduction to Arduino ProgrammingIntroduction to Arduino Programming
Introduction to Arduino Programming
James Lewis
 
Proteus Circuit Simulation
Proteus Circuit SimulationProteus Circuit Simulation
Proteus Circuit SimulationAbdul Haseeb
 
Modules and ports in Verilog HDL
Modules and ports in Verilog HDLModules and ports in Verilog HDL
Modules and ports in Verilog HDL
anand hd
 
What is Arduino ?
What is Arduino ?What is Arduino ?
What is Arduino ?
Niket Chandrawanshi
 

What's hot (20)

Introduction to the Arduino
Introduction to the ArduinoIntroduction to the Arduino
Introduction to the Arduino
 
Introduction to arduino
Introduction to arduinoIntroduction to arduino
Introduction to arduino
 
Ardui no
Ardui no Ardui no
Ardui no
 
Report on arduino
Report on arduinoReport on arduino
Report on arduino
 
An Overview on Programmable System on Chip: PSoC-5
An Overview on Programmable System on Chip: PSoC-5An Overview on Programmable System on Chip: PSoC-5
An Overview on Programmable System on Chip: PSoC-5
 
Arduino Uno Pin Description
Arduino Uno Pin DescriptionArduino Uno Pin Description
Arduino Uno Pin Description
 
Arduino presentation by_warishusain
Arduino presentation by_warishusainArduino presentation by_warishusain
Arduino presentation by_warishusain
 
Embedded system
Embedded systemEmbedded system
Embedded system
 
Introduction to Arduino Hardware and Programming
Introduction to Arduino Hardware and ProgrammingIntroduction to Arduino Hardware and Programming
Introduction to Arduino Hardware and Programming
 
Introduction to Arduino
Introduction to ArduinoIntroduction to Arduino
Introduction to Arduino
 
Arduino IDE
Arduino IDE Arduino IDE
Arduino IDE
 
Introduction to Arduino
Introduction to ArduinoIntroduction to Arduino
Introduction to Arduino
 
Basics of digital electronics
Basics of digital electronicsBasics of digital electronics
Basics of digital electronics
 
Temperature measurement using nodemcu esp8266
Temperature measurement  using nodemcu esp8266Temperature measurement  using nodemcu esp8266
Temperature measurement using nodemcu esp8266
 
ARDUINO EMBEDDED SYSTEM
ARDUINO EMBEDDED SYSTEMARDUINO EMBEDDED SYSTEM
ARDUINO EMBEDDED SYSTEM
 
Arduino Workshop
Arduino WorkshopArduino Workshop
Arduino Workshop
 
Introduction to Arduino Programming
Introduction to Arduino ProgrammingIntroduction to Arduino Programming
Introduction to Arduino Programming
 
Proteus Circuit Simulation
Proteus Circuit SimulationProteus Circuit Simulation
Proteus Circuit Simulation
 
Modules and ports in Verilog HDL
Modules and ports in Verilog HDLModules and ports in Verilog HDL
Modules and ports in Verilog HDL
 
What is Arduino ?
What is Arduino ?What is Arduino ?
What is Arduino ?
 

Similar to Arduino Lecture 1 - Introducing the Arduino

Introduction to arduino
Introduction to arduinoIntroduction to arduino
Introduction to arduino
Jawaher Abdulwahab Fadhil
 
IOTC08 The Arduino Platform
IOTC08 The Arduino PlatformIOTC08 The Arduino Platform
IOTC08 The Arduino Platform
Eoin Brazil
 
Intro arduino
Intro arduinoIntro arduino
Intro arduino
MaLcom MooNwalker
 
Arduino spooky projects_class1
Arduino spooky projects_class1Arduino spooky projects_class1
Arduino spooky projects_class1
Felipe Belarmino
 
Unit 2-IoT.ppt Introduction to Elements of IOT
Unit 2-IoT.ppt  Introduction to Elements of IOTUnit 2-IoT.ppt  Introduction to Elements of IOT
Unit 2-IoT.ppt Introduction to Elements of IOT
poojashinde511268
 
Intro_to_Arduino_-_v30.pptx
Intro_to_Arduino_-_v30.pptxIntro_to_Arduino_-_v30.pptx
Intro_to_Arduino_-_v30.pptx
CephasMpandikaKalemb
 
Introduction to arduino ppt main
Introduction to  arduino ppt mainIntroduction to  arduino ppt main
Introduction to arduino ppt main
eddy royappa
 
Neno Project.docx
Neno Project.docxNeno Project.docx
Neno Project.docx
AditiBhushan3
 
Arduino Foundations
Arduino FoundationsArduino Foundations
Arduino Foundations
John Breslin
 
Basics of open source embedded development board (
Basics of open source embedded development board (Basics of open source embedded development board (
Basics of open source embedded development board (
Dhruwank Vankawala
 
Basics of open source embedded development board (
Basics of open source embedded development board (Basics of open source embedded development board (
Basics of open source embedded development board (
Dhruwank Vankawala
 
pcb design
pcb designpcb design
pcb design
VinothBala1
 
Tech Tips 101
Tech Tips 101Tech Tips 101
Tech Tips 101
pshsTECH
 
Making things sense - Day 1 (May 2011)
Making things sense - Day 1 (May 2011)Making things sense - Day 1 (May 2011)
Making things sense - Day 1 (May 2011)
markumoto
 
IOT ARDUINO UNO.pptx
IOT ARDUINO UNO.pptxIOT ARDUINO UNO.pptx
IOT ARDUINO UNO.pptx
SanaMateen7
 
Introduction Arduino
Introduction Arduino Introduction Arduino
Introduction Arduino
Venkatesh Mukkapati
 

Similar to Arduino Lecture 1 - Introducing the Arduino (20)

Introduction to arduino
Introduction to arduinoIntroduction to arduino
Introduction to arduino
 
IOTC08 The Arduino Platform
IOTC08 The Arduino PlatformIOTC08 The Arduino Platform
IOTC08 The Arduino Platform
 
Intro arduino
Intro arduinoIntro arduino
Intro arduino
 
Arduino spooky projects_class1
Arduino spooky projects_class1Arduino spooky projects_class1
Arduino spooky projects_class1
 
Unit 2-IoT.ppt Introduction to Elements of IOT
Unit 2-IoT.ppt  Introduction to Elements of IOTUnit 2-IoT.ppt  Introduction to Elements of IOT
Unit 2-IoT.ppt Introduction to Elements of IOT
 
Intro_to_Arduino_-_v30.pptx
Intro_to_Arduino_-_v30.pptxIntro_to_Arduino_-_v30.pptx
Intro_to_Arduino_-_v30.pptx
 
Introduction to arduino ppt main
Introduction to  arduino ppt mainIntroduction to  arduino ppt main
Introduction to arduino ppt main
 
Neno Project.docx
Neno Project.docxNeno Project.docx
Neno Project.docx
 
Arduino Foundations
Arduino FoundationsArduino Foundations
Arduino Foundations
 
Basics of open source embedded development board (
Basics of open source embedded development board (Basics of open source embedded development board (
Basics of open source embedded development board (
 
Basics of open source embedded development board (
Basics of open source embedded development board (Basics of open source embedded development board (
Basics of open source embedded development board (
 
pcb design
pcb designpcb design
pcb design
 
Arduino Programming Basic
Arduino Programming BasicArduino Programming Basic
Arduino Programming Basic
 
Programming arduino makeymakey
Programming arduino makeymakeyProgramming arduino makeymakey
Programming arduino makeymakey
 
Tech Tips 101
Tech Tips 101Tech Tips 101
Tech Tips 101
 
Making things sense - Day 1 (May 2011)
Making things sense - Day 1 (May 2011)Making things sense - Day 1 (May 2011)
Making things sense - Day 1 (May 2011)
 
YCAM Workshop Part 1
YCAM Workshop Part 1YCAM Workshop Part 1
YCAM Workshop Part 1
 
67WS Funnel
67WS Funnel67WS Funnel
67WS Funnel
 
IOT ARDUINO UNO.pptx
IOT ARDUINO UNO.pptxIOT ARDUINO UNO.pptx
IOT ARDUINO UNO.pptx
 
Introduction Arduino
Introduction Arduino Introduction Arduino
Introduction Arduino
 

More from Eoin Brazil

Pragmatic Analytics - Case Studies of High Performance Computing for Better B...
Pragmatic Analytics - Case Studies of High Performance Computing for Better B...Pragmatic Analytics - Case Studies of High Performance Computing for Better B...
Pragmatic Analytics - Case Studies of High Performance Computing for Better B...
Eoin Brazil
 
Introduction to Machine Learning using R - Dublin R User Group - Oct 2013
Introduction to Machine Learning using R - Dublin R User Group - Oct 2013Introduction to Machine Learning using R - Dublin R User Group - Oct 2013
Introduction to Machine Learning using R - Dublin R User Group - Oct 2013
Eoin Brazil
 
Mobile Services from Concept to Reality - Case Studies at the Mobile Service ...
Mobile Services from Concept to Reality - Case Studies at the Mobile Service ...Mobile Services from Concept to Reality - Case Studies at the Mobile Service ...
Mobile Services from Concept to Reality - Case Studies at the Mobile Service ...
Eoin Brazil
 
Cloud Computing Examples at ICHEC
Cloud Computing Examples at ICHECCloud Computing Examples at ICHEC
Cloud Computing Examples at ICHEC
Eoin Brazil
 
An example of discovering simple patterns using basic data mining
An example of discovering simple patterns using basic data miningAn example of discovering simple patterns using basic data mining
An example of discovering simple patterns using basic data mining
Eoin Brazil
 
Bringing HPC to tackle your business problems
Bringing HPC to tackle your business problemsBringing HPC to tackle your business problems
Bringing HPC to tackle your business problems
Eoin Brazil
 
Fat Nodes & GPGPUs - Red-shifting your infrastructure without breaking the bu...
Fat Nodes & GPGPUs - Red-shifting your infrastructure without breaking the bu...Fat Nodes & GPGPUs - Red-shifting your infrastructure without breaking the bu...
Fat Nodes & GPGPUs - Red-shifting your infrastructure without breaking the bu...
Eoin Brazil
 
Example optimisation using GPGPUs by ICHEC
Example optimisation using GPGPUs by ICHECExample optimisation using GPGPUs by ICHEC
Example optimisation using GPGPUs by ICHEC
Eoin Brazil
 
Ichec is vs-andthecloud
Ichec is vs-andthecloudIchec is vs-andthecloud
Ichec is vs-andthecloudEoin Brazil
 
Mixing Interaction, Sonification, Rendering and Design - The art of creating ...
Mixing Interaction, Sonification, Rendering and Design - The art of creating ...Mixing Interaction, Sonification, Rendering and Design - The art of creating ...
Mixing Interaction, Sonification, Rendering and Design - The art of creating ...
Eoin Brazil
 
Arduino Lecture 4 - Interactive Media CS4062 Semester 2 2009
Arduino Lecture 4 - Interactive Media CS4062 Semester 2 2009Arduino Lecture 4 - Interactive Media CS4062 Semester 2 2009
Arduino Lecture 4 - Interactive Media CS4062 Semester 2 2009
Eoin Brazil
 
Arduino Lecture 3 - Interactive Media CS4062 Semester 2 2009
Arduino Lecture 3 - Interactive Media CS4062 Semester 2 2009Arduino Lecture 3 - Interactive Media CS4062 Semester 2 2009
Arduino Lecture 3 - Interactive Media CS4062 Semester 2 2009
Eoin Brazil
 
Arduino Lecture 3 - Interactive Media CS4062 Semester 2 2009
Arduino Lecture 3 - Interactive Media CS4062 Semester 2 2009Arduino Lecture 3 - Interactive Media CS4062 Semester 2 2009
Arduino Lecture 3 - Interactive Media CS4062 Semester 2 2009
Eoin Brazil
 
Arduino Lecture 2 - Interactive Media CS4062 Semester 2 2009
Arduino Lecture 2 - Interactive Media CS4062 Semester 2 2009Arduino Lecture 2 - Interactive Media CS4062 Semester 2 2009
Arduino Lecture 2 - Interactive Media CS4062 Semester 2 2009
Eoin Brazil
 
Echoes, Whispers, and Footsteps from the Conflux of Sonic Interaction Design ...
Echoes, Whispers, and Footsteps from the Conflux of Sonic Interaction Design ...Echoes, Whispers, and Footsteps from the Conflux of Sonic Interaction Design ...
Echoes, Whispers, and Footsteps from the Conflux of Sonic Interaction Design ...
Eoin Brazil
 
Arduino Lecture 2 - Electronic, LEDs, Communications and Datasheets
Arduino Lecture 2 - Electronic, LEDs, Communications and DatasheetsArduino Lecture 2 - Electronic, LEDs, Communications and Datasheets
Arduino Lecture 2 - Electronic, LEDs, Communications and Datasheets
Eoin Brazil
 
Arduino Lecture 3 - Making Things Move and AVR programming
Arduino Lecture 3 - Making Things Move and AVR programmingArduino Lecture 3 - Making Things Move and AVR programming
Arduino Lecture 3 - Making Things Move and AVR programming
Eoin Brazil
 

More from Eoin Brazil (17)

Pragmatic Analytics - Case Studies of High Performance Computing for Better B...
Pragmatic Analytics - Case Studies of High Performance Computing for Better B...Pragmatic Analytics - Case Studies of High Performance Computing for Better B...
Pragmatic Analytics - Case Studies of High Performance Computing for Better B...
 
Introduction to Machine Learning using R - Dublin R User Group - Oct 2013
Introduction to Machine Learning using R - Dublin R User Group - Oct 2013Introduction to Machine Learning using R - Dublin R User Group - Oct 2013
Introduction to Machine Learning using R - Dublin R User Group - Oct 2013
 
Mobile Services from Concept to Reality - Case Studies at the Mobile Service ...
Mobile Services from Concept to Reality - Case Studies at the Mobile Service ...Mobile Services from Concept to Reality - Case Studies at the Mobile Service ...
Mobile Services from Concept to Reality - Case Studies at the Mobile Service ...
 
Cloud Computing Examples at ICHEC
Cloud Computing Examples at ICHECCloud Computing Examples at ICHEC
Cloud Computing Examples at ICHEC
 
An example of discovering simple patterns using basic data mining
An example of discovering simple patterns using basic data miningAn example of discovering simple patterns using basic data mining
An example of discovering simple patterns using basic data mining
 
Bringing HPC to tackle your business problems
Bringing HPC to tackle your business problemsBringing HPC to tackle your business problems
Bringing HPC to tackle your business problems
 
Fat Nodes & GPGPUs - Red-shifting your infrastructure without breaking the bu...
Fat Nodes & GPGPUs - Red-shifting your infrastructure without breaking the bu...Fat Nodes & GPGPUs - Red-shifting your infrastructure without breaking the bu...
Fat Nodes & GPGPUs - Red-shifting your infrastructure without breaking the bu...
 
Example optimisation using GPGPUs by ICHEC
Example optimisation using GPGPUs by ICHECExample optimisation using GPGPUs by ICHEC
Example optimisation using GPGPUs by ICHEC
 
Ichec is vs-andthecloud
Ichec is vs-andthecloudIchec is vs-andthecloud
Ichec is vs-andthecloud
 
Mixing Interaction, Sonification, Rendering and Design - The art of creating ...
Mixing Interaction, Sonification, Rendering and Design - The art of creating ...Mixing Interaction, Sonification, Rendering and Design - The art of creating ...
Mixing Interaction, Sonification, Rendering and Design - The art of creating ...
 
Arduino Lecture 4 - Interactive Media CS4062 Semester 2 2009
Arduino Lecture 4 - Interactive Media CS4062 Semester 2 2009Arduino Lecture 4 - Interactive Media CS4062 Semester 2 2009
Arduino Lecture 4 - Interactive Media CS4062 Semester 2 2009
 
Arduino Lecture 3 - Interactive Media CS4062 Semester 2 2009
Arduino Lecture 3 - Interactive Media CS4062 Semester 2 2009Arduino Lecture 3 - Interactive Media CS4062 Semester 2 2009
Arduino Lecture 3 - Interactive Media CS4062 Semester 2 2009
 
Arduino Lecture 3 - Interactive Media CS4062 Semester 2 2009
Arduino Lecture 3 - Interactive Media CS4062 Semester 2 2009Arduino Lecture 3 - Interactive Media CS4062 Semester 2 2009
Arduino Lecture 3 - Interactive Media CS4062 Semester 2 2009
 
Arduino Lecture 2 - Interactive Media CS4062 Semester 2 2009
Arduino Lecture 2 - Interactive Media CS4062 Semester 2 2009Arduino Lecture 2 - Interactive Media CS4062 Semester 2 2009
Arduino Lecture 2 - Interactive Media CS4062 Semester 2 2009
 
Echoes, Whispers, and Footsteps from the Conflux of Sonic Interaction Design ...
Echoes, Whispers, and Footsteps from the Conflux of Sonic Interaction Design ...Echoes, Whispers, and Footsteps from the Conflux of Sonic Interaction Design ...
Echoes, Whispers, and Footsteps from the Conflux of Sonic Interaction Design ...
 
Arduino Lecture 2 - Electronic, LEDs, Communications and Datasheets
Arduino Lecture 2 - Electronic, LEDs, Communications and DatasheetsArduino Lecture 2 - Electronic, LEDs, Communications and Datasheets
Arduino Lecture 2 - Electronic, LEDs, Communications and Datasheets
 
Arduino Lecture 3 - Making Things Move and AVR programming
Arduino Lecture 3 - Making Things Move and AVR programmingArduino Lecture 3 - Making Things Move and AVR programming
Arduino Lecture 3 - Making Things Move and AVR programming
 

Recently uploaded

JMeter webinar - integration with InfluxDB and Grafana
JMeter webinar - integration with InfluxDB and GrafanaJMeter webinar - integration with InfluxDB and Grafana
JMeter webinar - integration with InfluxDB and Grafana
RTTS
 
GenAISummit 2024 May 28 Sri Ambati Keynote: AGI Belongs to The Community in O...
GenAISummit 2024 May 28 Sri Ambati Keynote: AGI Belongs to The Community in O...GenAISummit 2024 May 28 Sri Ambati Keynote: AGI Belongs to The Community in O...
GenAISummit 2024 May 28 Sri Ambati Keynote: AGI Belongs to The Community in O...
Sri Ambati
 
DevOps and Testing slides at DASA Connect
DevOps and Testing slides at DASA ConnectDevOps and Testing slides at DASA Connect
DevOps and Testing slides at DASA Connect
Kari Kakkonen
 
Connector Corner: Automate dynamic content and events by pushing a button
Connector Corner: Automate dynamic content and events by pushing a buttonConnector Corner: Automate dynamic content and events by pushing a button
Connector Corner: Automate dynamic content and events by pushing a button
DianaGray10
 
FIDO Alliance Osaka Seminar: Overview.pdf
FIDO Alliance Osaka Seminar: Overview.pdfFIDO Alliance Osaka Seminar: Overview.pdf
FIDO Alliance Osaka Seminar: Overview.pdf
FIDO Alliance
 
State of ICS and IoT Cyber Threat Landscape Report 2024 preview
State of ICS and IoT Cyber Threat Landscape Report 2024 previewState of ICS and IoT Cyber Threat Landscape Report 2024 preview
State of ICS and IoT Cyber Threat Landscape Report 2024 preview
Prayukth K V
 
FIDO Alliance Osaka Seminar: Passkeys and the Road Ahead.pdf
FIDO Alliance Osaka Seminar: Passkeys and the Road Ahead.pdfFIDO Alliance Osaka Seminar: Passkeys and the Road Ahead.pdf
FIDO Alliance Osaka Seminar: Passkeys and the Road Ahead.pdf
FIDO Alliance
 
Mission to Decommission: Importance of Decommissioning Products to Increase E...
Mission to Decommission: Importance of Decommissioning Products to Increase E...Mission to Decommission: Importance of Decommissioning Products to Increase E...
Mission to Decommission: Importance of Decommissioning Products to Increase E...
Product School
 
Empowering NextGen Mobility via Large Action Model Infrastructure (LAMI): pav...
Empowering NextGen Mobility via Large Action Model Infrastructure (LAMI): pav...Empowering NextGen Mobility via Large Action Model Infrastructure (LAMI): pav...
Empowering NextGen Mobility via Large Action Model Infrastructure (LAMI): pav...
Thierry Lestable
 
To Graph or Not to Graph Knowledge Graph Architectures and LLMs
To Graph or Not to Graph Knowledge Graph Architectures and LLMsTo Graph or Not to Graph Knowledge Graph Architectures and LLMs
To Graph or Not to Graph Knowledge Graph Architectures and LLMs
Paul Groth
 
"Impact of front-end architecture on development cost", Viktor Turskyi
"Impact of front-end architecture on development cost", Viktor Turskyi"Impact of front-end architecture on development cost", Viktor Turskyi
"Impact of front-end architecture on development cost", Viktor Turskyi
Fwdays
 
When stars align: studies in data quality, knowledge graphs, and machine lear...
When stars align: studies in data quality, knowledge graphs, and machine lear...When stars align: studies in data quality, knowledge graphs, and machine lear...
When stars align: studies in data quality, knowledge graphs, and machine lear...
Elena Simperl
 
Dev Dives: Train smarter, not harder – active learning and UiPath LLMs for do...
Dev Dives: Train smarter, not harder – active learning and UiPath LLMs for do...Dev Dives: Train smarter, not harder – active learning and UiPath LLMs for do...
Dev Dives: Train smarter, not harder – active learning and UiPath LLMs for do...
UiPathCommunity
 
Slack (or Teams) Automation for Bonterra Impact Management (fka Social Soluti...
Slack (or Teams) Automation for Bonterra Impact Management (fka Social Soluti...Slack (or Teams) Automation for Bonterra Impact Management (fka Social Soluti...
Slack (or Teams) Automation for Bonterra Impact Management (fka Social Soluti...
Jeffrey Haguewood
 
Key Trends Shaping the Future of Infrastructure.pdf
Key Trends Shaping the Future of Infrastructure.pdfKey Trends Shaping the Future of Infrastructure.pdf
Key Trends Shaping the Future of Infrastructure.pdf
Cheryl Hung
 
Transcript: Selling digital books in 2024: Insights from industry leaders - T...
Transcript: Selling digital books in 2024: Insights from industry leaders - T...Transcript: Selling digital books in 2024: Insights from industry leaders - T...
Transcript: Selling digital books in 2024: Insights from industry leaders - T...
BookNet Canada
 
Builder.ai Founder Sachin Dev Duggal's Strategic Approach to Create an Innova...
Builder.ai Founder Sachin Dev Duggal's Strategic Approach to Create an Innova...Builder.ai Founder Sachin Dev Duggal's Strategic Approach to Create an Innova...
Builder.ai Founder Sachin Dev Duggal's Strategic Approach to Create an Innova...
Ramesh Iyer
 
GDG Cloud Southlake #33: Boule & Rebala: Effective AppSec in SDLC using Deplo...
GDG Cloud Southlake #33: Boule & Rebala: Effective AppSec in SDLC using Deplo...GDG Cloud Southlake #33: Boule & Rebala: Effective AppSec in SDLC using Deplo...
GDG Cloud Southlake #33: Boule & Rebala: Effective AppSec in SDLC using Deplo...
James Anderson
 
ODC, Data Fabric and Architecture User Group
ODC, Data Fabric and Architecture User GroupODC, Data Fabric and Architecture User Group
ODC, Data Fabric and Architecture User Group
CatarinaPereira64715
 
De-mystifying Zero to One: Design Informed Techniques for Greenfield Innovati...
De-mystifying Zero to One: Design Informed Techniques for Greenfield Innovati...De-mystifying Zero to One: Design Informed Techniques for Greenfield Innovati...
De-mystifying Zero to One: Design Informed Techniques for Greenfield Innovati...
Product School
 

Recently uploaded (20)

JMeter webinar - integration with InfluxDB and Grafana
JMeter webinar - integration with InfluxDB and GrafanaJMeter webinar - integration with InfluxDB and Grafana
JMeter webinar - integration with InfluxDB and Grafana
 
GenAISummit 2024 May 28 Sri Ambati Keynote: AGI Belongs to The Community in O...
GenAISummit 2024 May 28 Sri Ambati Keynote: AGI Belongs to The Community in O...GenAISummit 2024 May 28 Sri Ambati Keynote: AGI Belongs to The Community in O...
GenAISummit 2024 May 28 Sri Ambati Keynote: AGI Belongs to The Community in O...
 
DevOps and Testing slides at DASA Connect
DevOps and Testing slides at DASA ConnectDevOps and Testing slides at DASA Connect
DevOps and Testing slides at DASA Connect
 
Connector Corner: Automate dynamic content and events by pushing a button
Connector Corner: Automate dynamic content and events by pushing a buttonConnector Corner: Automate dynamic content and events by pushing a button
Connector Corner: Automate dynamic content and events by pushing a button
 
FIDO Alliance Osaka Seminar: Overview.pdf
FIDO Alliance Osaka Seminar: Overview.pdfFIDO Alliance Osaka Seminar: Overview.pdf
FIDO Alliance Osaka Seminar: Overview.pdf
 
State of ICS and IoT Cyber Threat Landscape Report 2024 preview
State of ICS and IoT Cyber Threat Landscape Report 2024 previewState of ICS and IoT Cyber Threat Landscape Report 2024 preview
State of ICS and IoT Cyber Threat Landscape Report 2024 preview
 
FIDO Alliance Osaka Seminar: Passkeys and the Road Ahead.pdf
FIDO Alliance Osaka Seminar: Passkeys and the Road Ahead.pdfFIDO Alliance Osaka Seminar: Passkeys and the Road Ahead.pdf
FIDO Alliance Osaka Seminar: Passkeys and the Road Ahead.pdf
 
Mission to Decommission: Importance of Decommissioning Products to Increase E...
Mission to Decommission: Importance of Decommissioning Products to Increase E...Mission to Decommission: Importance of Decommissioning Products to Increase E...
Mission to Decommission: Importance of Decommissioning Products to Increase E...
 
Empowering NextGen Mobility via Large Action Model Infrastructure (LAMI): pav...
Empowering NextGen Mobility via Large Action Model Infrastructure (LAMI): pav...Empowering NextGen Mobility via Large Action Model Infrastructure (LAMI): pav...
Empowering NextGen Mobility via Large Action Model Infrastructure (LAMI): pav...
 
To Graph or Not to Graph Knowledge Graph Architectures and LLMs
To Graph or Not to Graph Knowledge Graph Architectures and LLMsTo Graph or Not to Graph Knowledge Graph Architectures and LLMs
To Graph or Not to Graph Knowledge Graph Architectures and LLMs
 
"Impact of front-end architecture on development cost", Viktor Turskyi
"Impact of front-end architecture on development cost", Viktor Turskyi"Impact of front-end architecture on development cost", Viktor Turskyi
"Impact of front-end architecture on development cost", Viktor Turskyi
 
When stars align: studies in data quality, knowledge graphs, and machine lear...
When stars align: studies in data quality, knowledge graphs, and machine lear...When stars align: studies in data quality, knowledge graphs, and machine lear...
When stars align: studies in data quality, knowledge graphs, and machine lear...
 
Dev Dives: Train smarter, not harder – active learning and UiPath LLMs for do...
Dev Dives: Train smarter, not harder – active learning and UiPath LLMs for do...Dev Dives: Train smarter, not harder – active learning and UiPath LLMs for do...
Dev Dives: Train smarter, not harder – active learning and UiPath LLMs for do...
 
Slack (or Teams) Automation for Bonterra Impact Management (fka Social Soluti...
Slack (or Teams) Automation for Bonterra Impact Management (fka Social Soluti...Slack (or Teams) Automation for Bonterra Impact Management (fka Social Soluti...
Slack (or Teams) Automation for Bonterra Impact Management (fka Social Soluti...
 
Key Trends Shaping the Future of Infrastructure.pdf
Key Trends Shaping the Future of Infrastructure.pdfKey Trends Shaping the Future of Infrastructure.pdf
Key Trends Shaping the Future of Infrastructure.pdf
 
Transcript: Selling digital books in 2024: Insights from industry leaders - T...
Transcript: Selling digital books in 2024: Insights from industry leaders - T...Transcript: Selling digital books in 2024: Insights from industry leaders - T...
Transcript: Selling digital books in 2024: Insights from industry leaders - T...
 
Builder.ai Founder Sachin Dev Duggal's Strategic Approach to Create an Innova...
Builder.ai Founder Sachin Dev Duggal's Strategic Approach to Create an Innova...Builder.ai Founder Sachin Dev Duggal's Strategic Approach to Create an Innova...
Builder.ai Founder Sachin Dev Duggal's Strategic Approach to Create an Innova...
 
GDG Cloud Southlake #33: Boule & Rebala: Effective AppSec in SDLC using Deplo...
GDG Cloud Southlake #33: Boule & Rebala: Effective AppSec in SDLC using Deplo...GDG Cloud Southlake #33: Boule & Rebala: Effective AppSec in SDLC using Deplo...
GDG Cloud Southlake #33: Boule & Rebala: Effective AppSec in SDLC using Deplo...
 
ODC, Data Fabric and Architecture User Group
ODC, Data Fabric and Architecture User GroupODC, Data Fabric and Architecture User Group
ODC, Data Fabric and Architecture User Group
 
De-mystifying Zero to One: Design Informed Techniques for Greenfield Innovati...
De-mystifying Zero to One: Design Informed Techniques for Greenfield Innovati...De-mystifying Zero to One: Design Informed Techniques for Greenfield Innovati...
De-mystifying Zero to One: Design Informed Techniques for Greenfield Innovati...
 

Arduino Lecture 1 - Introducing the Arduino

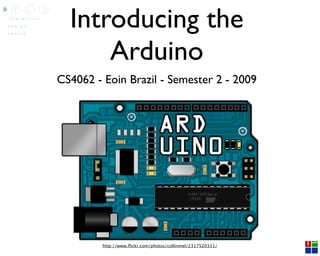
  • 1. Introducing the Arduino CS4062 - Eoin Brazil - Semester 2 - 2009 http://www.flickr.com/photos/collinmel/2317520331/
  • 2. What is Arduino? The development The hardware The community environment
  • 3. Why Arduino? artists & designers “opportunistic prototyping” device hacking & reuse “open source hardware” Open Source Physical Computing Platform open source free to inspect & modify community wiki, forums, tutorials
  • 4. The Nuts & Bolts physical computing. er, what? ubiquitous computing, pervasive computing, ambient intelligence, calm computing, everyware, spimes, blogjects, smart objects... tiny computer you can program completely stand-alone, talks to other devices ‘C’ Ruby Flash Python Processing PHP PD Matlab Max/MSP Squeak (Smalltalk)
  • 5. ``Physical Computing is about prototyping with electronics, turning sensors, actuators and microcontrollers into materials for designers and artists.’’ ``It involves the design of interactive objects that can communicate with humans using sensors and actuators controlled by a behaviour implemented as software running inside a microcontroller.’’ Massimo Banzi, Tinker.it & Arduino Co-Founder
  • 11. Arduino Capabilities = Intel 286 Arduino
  • 12. Arduino Capabilities 16 kBytes of Flash program memory 1 kByte of RAM 16 MHz (Apple II: 1 MHz / Intel 286: 12.5 MHz / Intel Core 2: 3 GHz) inputs and outputs 13 digital input/output pins 5 analog input pins 6 analog output pins (PWM only)
  • 13. Analog Reference pin (orange) Digital Ground (light green) Digital Pins 2-13 (green) Digital Pins 0-1/Serial In/Out - TX/RX (dark green) These pins cannot be used for digital i/o (digitalRead and digitalWrite) if you are also using serial communiation (e.g. Serial.begin). Reset Button - S1 (dark blue) In-circuit Serial Programmer (blue-green) Analog In Pins 0-5 (light blue) Power and Ground Pins (power: orange, grounds: light orange) External Power Supply In (9-12VDC) - X1 (pink) Toggles External Power and USB Power (place jumper on two pins closest to desired supply) - Layout of an Arduino SV1 (purple) USB (used for uploading sketches to the board and for serial communication between the board and the computer; can be used to power the board) (yellow)
  • 14. Arduino Glossary ``sketch’’ - program that runs on the board ``pin’’ - input or output connected to something, e.g. output to an LED, input from switch ``digital’’ - 1 (HIGH) or 0 (LOW) value (i.e. on/off) ``analog’’ - range (0-255 typically), e.g. LED brightness wiring drawing shows the interconnection (physical layout) of all devices and components schematic drawing shows underlying logic may not link back to physical layout
  • 16. Arduino IO Bluetooth - BlueSmirf Internet - MatchPort Many others: Wifi, IrDa, Zigbee, etc.
  • 17. Arduino IO Motors: DC, Steppers, Servos
  • 18. Arduino IO Sensors: Flex, IrDa, Switches, FSR, Accelerometers
  • 19. Arduino IO Custom Hardware: e.g. VMusic 2 MP3 player
  • 21. Diagrams Wiring diagram Schematic Wired circuit diagram
  • 22. Solderless Breadboard + + - - 1 10 15 20 5 25 A A B B C C D D E E F F G G H H I I J J - 1 10 15 20 5 25 - + +
  • 23. Track (all connected) Drilled or cut holes (breaks connection) Stripboard / Perfboard Example
  • 24. Tips: Stripboard Layout Planning Sheet • Mark out the Vs and 0V power lines first, then place the ICs. Project: Remember to cut the track between the pins of • an IC. Mark the cuts on the diagram with an X. Designed by: Try to make resistors and axial capacitors lay • Version: Actual size stripboard. Hole spacing 0.1” (2.54mm) flat on the stripboard. Resistors usually require a gap of 4 holes, capacitors a gap of 8 holes. Date: Use the actual size grid on th e left to check • Tracks run this way component spacing. Notes: 1 8 Number the pins of the ICs as • 2 7 3 6 shown. 4 5 1 2 3 4 5 6 7 8 9 10 11 12 13 14 15 16 17 18 19 20 21 22 23 24 25 26 27 28 29 30 31 32 33 34 35 36 37 38 39 40 41 42 43 44 22 22 21 2l1 20 20 19 19 18 18 17 17 16 16 15 15 14 14 13 13 12 12 11 11 10 10 9 9 8 8 7 7 6 6 5 5 4 4 3 3 2 2 1 1 1 2 3 4 5 6 7 8 9 10 11 12 13 14 15 16 17 18 19 20 21 22 23 24 25 26 27 28 29 30 31 32 33 34 35 36 37 38 39 40 41 42 43 44 Version 3 : 3/02 © 2002 Electronics in Meccano www.eleinmec.com stripboard diagramming
  • 25. Books & first time prototyping advice Blogs,YouTube, and Google Not direction Resistor sensitive LED short leg is negative & goes to the ground
  • 26.
  • 27. Expensive but user friendly
  • 28. Expensive but user friendly Sufficient for almost all needs
  • 29. Expensive but user friendly Sufficient for Chips and almost all needs PCBs
  • 30. Lego Mindstorm NXT Arduino ATMega168
  • 31. Lego Mindstorm NXT Arduino Approx. ATMega168 ~€250
  • 32. Approx. Lego Mindstorm NXT ~€25 Arduino Approx. ATMega168 ~€250
  • 33. Approx. Lego Mindstorm NXT ~€25 Arduino Approx. ATMega168 ~€250 Approx. ~€4
  • 35. Programming an Arduino Write program Compile (check for errors) Reset board Upload to board
  • 36. An Arduino “Sketch” Declare variables at top Initialize setup() – run once at beginning, set pins Running loop() – run repeatedly, after setup()
  • 37. An Arduino “Sketch” int ledPin = 13; – led connected to control pin 13 int aSensor = 0; – setup Global Variables sensor 'aSensor' on analog pin 0 int statePin = LOW; – use this to hold the state of a pin
  • 38. An Arduino “Sketch” pinMode() – set a pin as input or output setup() serial.Begin() – setup to `talk' to the computer
  • 39. An Arduino “Sketch” pinMode(ledPin, Output); – set the pin `ledPin' as an output setup() serial.Begin(9600); – talk to the computer at 9600 baud rate
  • 40. An Arduino “Sketch” digitalWrite() – set a digital pin high/low digitalRead() – read a digital pin’s state analogRead() – read an analog pin loop() analogWrite() – write an “analog” PWM value delay() – wait an amount of time millis() – get the current tim
  • 41. Input / Output 14 Digital IO (pins 0 - 13) 6 Analog In (pins 0 - 5) 6 Analog Out (pins 3, 5, 6, 9, 10, 11)
  • 42. Digital ? Analog ? Digital – only has two values: on/off Analog – has many (infinite) values Computers don’t really do analog - use quantization instead
  • 43. Digital ? Analog ? Many states (Analog) or just two (HIGH/LOW - Digital) Number of states (or “bins”) is resolution Common computer resolutions: 8-bit = 256 states 16-bit = 65,536 states 32-bit = 4,294,967,296 states
  • 44. IO to/from what? Sensors Actuators LDR / IR Solenoid Switch / Stepper Motor Potentiometer / Joystick / Piezo Accelerometer Other Circuits Ultrasonic Prototype shields Indicators Special ICs LED / Lamps Buzzers
  • 45. What is a switch?
  • 46. Hello World! void setup() Install latest Arduino IDE from arduino.cc { Run Arduino IDE // start serial port at 9600 bps: Write the code on the left into the editor Serial.begin(9600); Compile / Verify the code by clicking the play } button Before uploading your sketch, check the board and void loop() the serial port are correct for your Arduino and for { your computer Serial.print(quot;Hello World!nrquot;); Menu -> Tools -> Board // wait 2sec for next reading: Menu -> Tools -> Serial Port delay(2000); } Upload the code from the computer to the Arduino using the upload button
  • 47. /* Blinking LED --- * turns on and off a light emitting diode(LED) connected to a digital * pin, based on data coming over serial */ int ledPin = 13; // LED connected to digital pin 13 int inByte = 0; void setup() { pinMode(ledPin, OUTPUT); // sets the digital pin as output Serial.begin(19200); // initiate serial communication } void loop() { while (Serial.available()>0) { inByte = Serial.read(); } if (inByte>0) { digitalWrite(ledPin, HIGH); // sets the LED on } else { digitalWrite(ledPin, LOW); // sets the LED off } }
  • 48. /* Blinking LED --- * turns on and off a light emitting diode(LED) connected to a digital * pin, based on data coming over serial Initialise */ some of the int ledPin = 13; // LED connected to digital pin 13 int inByte = 0; variables void setup() { pinMode(ledPin, OUTPUT); // sets the digital pin as output Serial.begin(19200); // initiate serial communication } void loop() { while (Serial.available()>0) { inByte = Serial.read(); } if (inByte>0) { digitalWrite(ledPin, HIGH); // sets the LED on } else { digitalWrite(ledPin, LOW); // sets the LED off } }
  • 49. /* Blinking LED --- * turns on and off a light emitting diode(LED) connected to a digital * pin, based on data coming over serial */ int ledPin = 13; // LED connected to digital pin 13 int inByte = 0; void setup() { pinMode(ledPin, OUTPUT); // sets the digital pin as output Serial.begin(19200); // initiate serial communication } void loop() Setup LED pin and { while (Serial.available()>0) { serial connection inByte = Serial.read(); } if (inByte>0) { digitalWrite(ledPin, HIGH); // sets the LED on } else { digitalWrite(ledPin, LOW); // sets the LED off } }
  • 50. /* Blinking LED --- * turns on and off a light emitting diode(LED) connected to a digital * pin, based on data coming over serial */ int ledPin = 13; // LED connected to digital pin 13 int inByte = 0; void setup() { pinMode(ledPin, OUTPUT); // sets the digital pin as output Serial.begin(19200); // initiate serial communication Loop - Reading the } serial for info, when void loop() { inByte = Serial.read(); something is received while (Serial.available()>0) { } turn LED on LED on the if (inByte>0) { digitalWrite(ledPin, HIGH); // sets the } else { digitalWrite(ledPin, LOW); // sets the LED off } }
  • 51. /* Digital reading, turns on and off a light emitting diode (LED) connected to digital * pin 13, when pressing a pushbutton attached to pin 7. It illustrates the concept of * Active-Low, which consists in connecting buttons using a 1K to 10K pull-up resistor. */ int ledPin = 13; // choose the pin for the LED int inPin = 7; // choose the input pin (button) int buttonval = 0; // variable for reading the pin status void setup() { pinMode(ledPin, OUTPUT); // set LED as output pinMode(inPin, INPUT); // set pushbutton as input Serial.begin(19200); // start serial communication to computer } void loop() { buttonval = digitalRead(inPin); // read the pin and get the button's state if (buttonval == HIGH) { // check if the input is HIGH (button released) digitalWrite(ledPin, LOW); // turn LED OFF Serial.write('0'); // Button off (0) sent to computer } else { digitalWrite(ledPin, HIGH); // turn LED ON Serial.write('1'); // Button on (1) sent to computer } }
  • 52. /* Digital reading, turns on and off a light emitting diode (LED) connected to digital * pin 13, when pressing a pushbutton attached to pin 7. It illustrates the concept of * Active-Low, which consists in connecting buttons using a 1K to 10K pull-up resistor. Initialise */ int ledPin = 13; // choose the pin for the LED some of the int inPin = 7; // choose the input pin (button) int buttonval = 0; // variable for reading the pin status variables void setup() { pinMode(ledPin, OUTPUT); // set LED as output pinMode(inPin, INPUT); // set pushbutton as input Serial.begin(19200); // start serial communication to computer } void loop() { buttonval = digitalRead(inPin); // read the pin and get the button's state if (buttonval == HIGH) { // check if the input is HIGH (button released) digitalWrite(ledPin, LOW); // turn LED OFF Serial.write('0'); // Button off (0) sent to computer } else { digitalWrite(ledPin, HIGH); // turn LED ON Serial.write('1'); // Button on (1) sent to computer } }
  • 53. /* Digital reading, turns on and off a light emitting diode (LED) connected to digital * pin 13, when pressing a pushbutton attached to pin 7. It illustrates the concept of * Active-Low, which consists in connecting buttons using a 1K to 10K pull-up resistor. */ Setup LED pin, int ledPin = 13; // choose the pin for the LED int inPin = 7; // choose the input pin (button) switch pin and int buttonval = 0; // variable for reading the pin status serial connection void setup() { pinMode(ledPin, OUTPUT); // set LED as output pinMode(inPin, INPUT); // set pushbutton as input Serial.begin(19200); // start serial communication to computer } void loop() { buttonval = digitalRead(inPin); // read the pin and get the button's state if (buttonval == HIGH) { // check if the input is HIGH (button released) digitalWrite(ledPin, LOW); // turn LED OFF Serial.write('0'); // Button off (0) sent to computer } else { digitalWrite(ledPin, HIGH); // turn LED ON Serial.write('1'); // Button on (1) sent to computer } }
  • 54. /* Digital reading, turns on and off a light emitting diode (LED) connected to digital * pin 13, when pressing a pushbutton attached to pin 7. It illustrates the concept of * Active-Low, which consists in connecting buttons using a 1K to 10K pull-up resistor. Loop - Reading the */ int ledPin = 13; // choose the pin for the LED int inPin = 7; // choose the input pin (button) button for info, when int buttonval = 0; // variable for reading the pin status button is press turn void setup() { pinMode(inPin, INPUT); // set pushbutton asthe LED on and pinMode(ledPin, OUTPUT); // set LED as output input signal the computer Serial.begin(19200); // start serial communication to computer } ofthe button's state change void loop() { buttonval = digitalRead(inPin); // read the pin and get if (buttonval == HIGH) { // check if the input is HIGH (button released) digitalWrite(ledPin, LOW); // turn LED OFF Serial.write('0'); // Button off (0) sent to computer } else { digitalWrite(ledPin, HIGH); // turn LED ON Serial.write('1'); // Button on (1) sent to computer } }
  • 56. To / From Other Software
  • 57. Pure Data Pduino SimpleMessageSystem
  • 58. Flash // arduino serial proxy helper // send messages from arduino to your Serial Proxy // serial port >> socket // and read it through flash (XMLSocket server) a small program that runs #define inPin 2 on your Mac/PC and void setup(){ keeps a live connection Serial.begin(9600); between the serial port } void loop(){ and Flash byte readValue=digitalRead(inPin); if(readValue == HIGH){ Serial.print(quot;highquot;); Serial.print(0, BYTE); } }
  • 59. Flash Example http://file-error.net/1o1o1o1o1/?Physical_Computing_and_Interaction:Arduino:Arduino_VS_Flash http://protolab.pbwiki.com/Arduino2Flash
  • 63. Interactive Objects / Displays Spooky Skull Example - Tod E. Kurt Lilypad - Leah Buechley Wanderlust - Hector Ouilhet Ambient Auditory Group Presence Display Hanging Gardens Dawn07, Dawn08, Dawn 09 (What will you do ?)
  • 64. Lilypad A set of stitchable controllers, sensors and actuators enables novices to build their own electronic textiles.
  • 65. Wanderlust A mobile service, uses identities and needs (in terms of time and distance) to explore spaces as well to meet people with similar interests. Ad-Hoc Social Networking tool as it provides suggestions from people and places that can be relevant to you. The prototype used physical tokens (reels) to represent a user’s different identities. Each reel is mapped to an identity; when this reel is introduced to the View- Master it will play a video showing the contents and attributes of this identity. Consists of a original View-Master (red), wooden body, Arduino board, RFID reader & antenna
  • 67. Ambient Auditory Group Presence Display: Designed to explore, using concurrent auditory icons, the issue of group awareness (ICAD07 paper) Presence and activity are conveyed by changes in the soundscape Ruby, Python, C, Growl and Boodler Semi-Public Display for Small, Co- located Groups
  • 68. Hanging Gardens: Collaboration with Jurgen Simpson Two Places - UL / Ormeau, Belfast Network of Speakers and Sensors Arduino, Ruby, Max/MSP 2 field of insects Circadian rhythm Walls and nodes
  • 69. Hanging Gardens: Collaboration with Jurgen Simpson Two Places - UL / Ormeau, Belfast Network of Speakers and Sensors Arduino, Ruby, Max/MSP 2 field of insects Circadian rhythm Walls and nodes
  • 70. Useful Links Arduino - http://www.arduino.cc/ Wanderlust - http://www.thejaguarhouse.com/blog/ Arduino lectures - http://www.slideshare.net/eoinbrazil Tod E. Kurt’s blog (check his Spooky Arduino projects) - http://todbot.com/ blog/category/arduino/ ITP Physical Computing - http://itp.nyu.edu/physcomp/Intro/HomePage The Art and Craft of Toy Design - http://yg.typepad.com/makingtoys2/ Lilypad - http://www.cs.colorado.edu/~buechley/diy/diy_lilypad_arduino.html Usman Haque and Adam Somlai-Fischer - ``Low tech sensors and actuators for artists and architects’’