How to create Security Group and Manage Access Rights in Odoo 18
The Security groups and Access rights in Odoo 18 are used to control the user access to various modules and records within the system. Security groups allows us to group the users based on their roles or responsibilities.
How to create Security Group and Manage Access Rights in Odoo 18
1.
How to createSecurity Group and
Manage Access Rights in Odoo 18
Enterprise
2.
Enterprise
Introduction
The Security groupsand Access rights in Odoo 18 are used to
control the user access to various modules and records within the
system. Security groups allows us to group the users based on their
roles or responsibilities. Access rights control the basic access for
read, write, create and delete actions for the users created in the
system so far.
Let’s see how these two concepts are handled in Odoo 18
3.
Enterprise
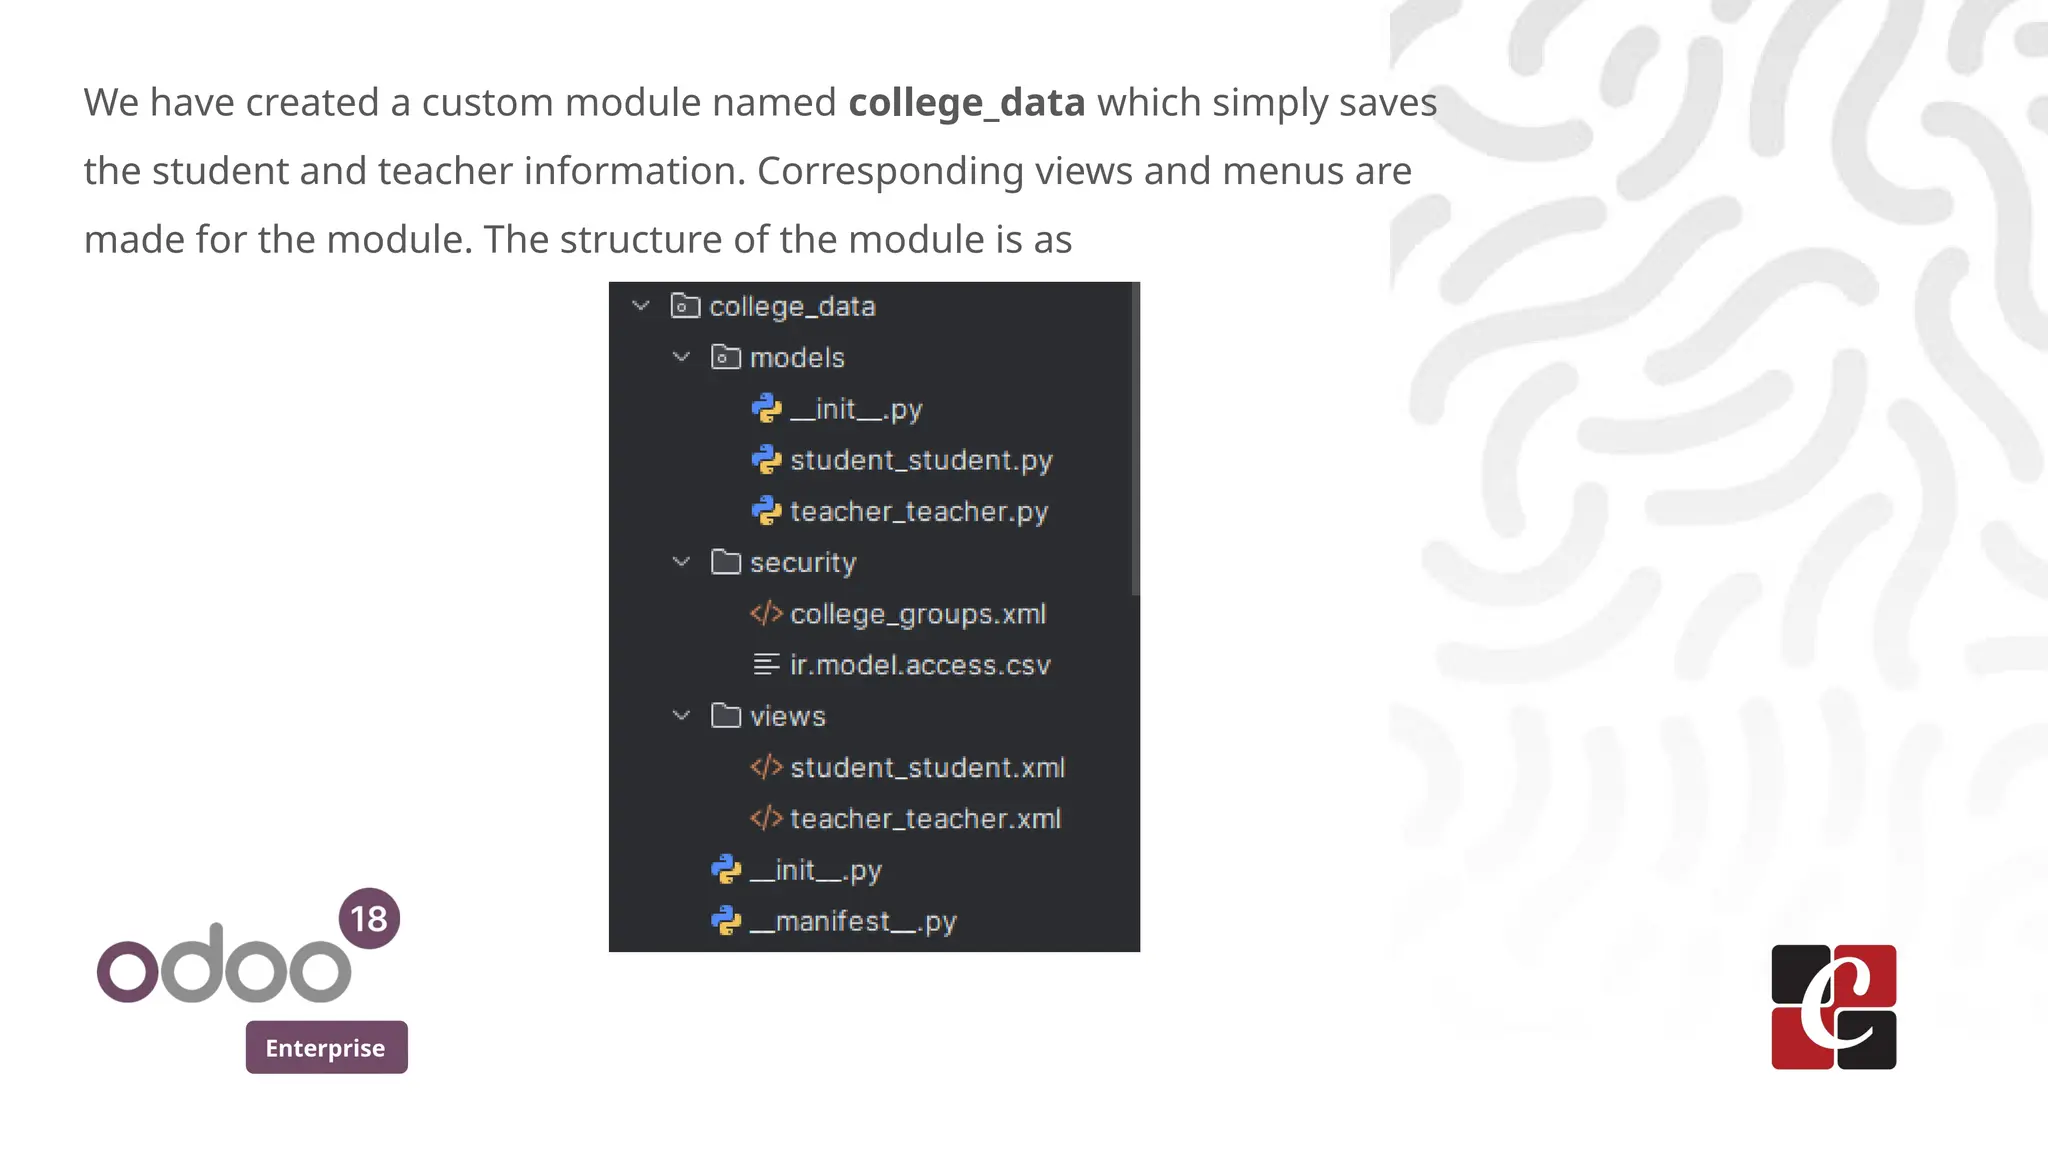
We have createda custom module named college_data which simply saves
the student and teacher information. Corresponding views and menus are
made for the module. The structure of the module is as
4.
Enterprise
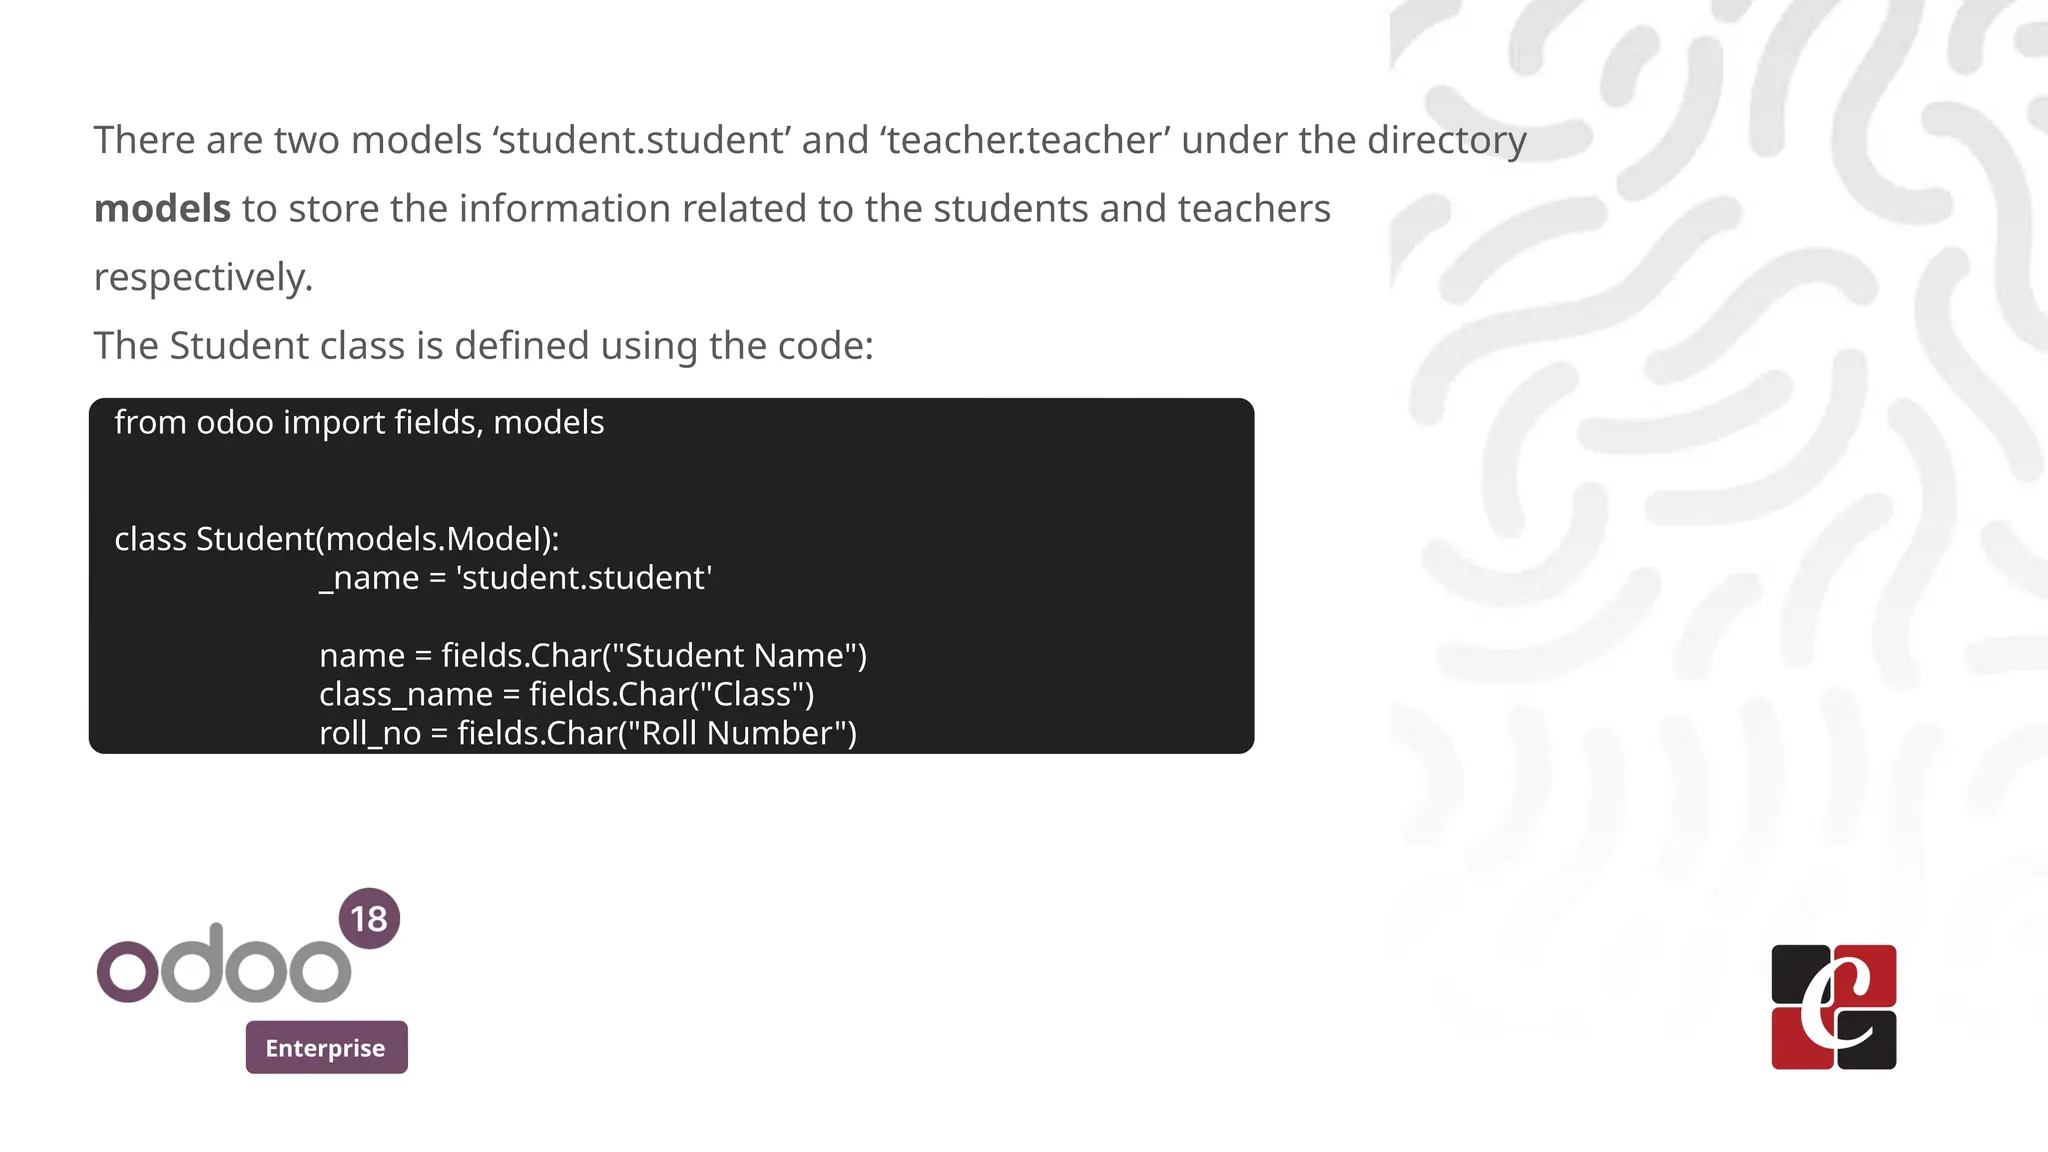
There are twomodels ‘student.student’ and ‘teacher.teacher’ under the directory
models to store the information related to the students and teachers
respectively.
The Student class is defined using the code:
from odoo import fields, models
class Student(models.Model):
_name = 'student.student'
name = fields.Char("Student Name")
class_name = fields.Char("Class")
roll_no = fields.Char("Roll Number")
Enterprise
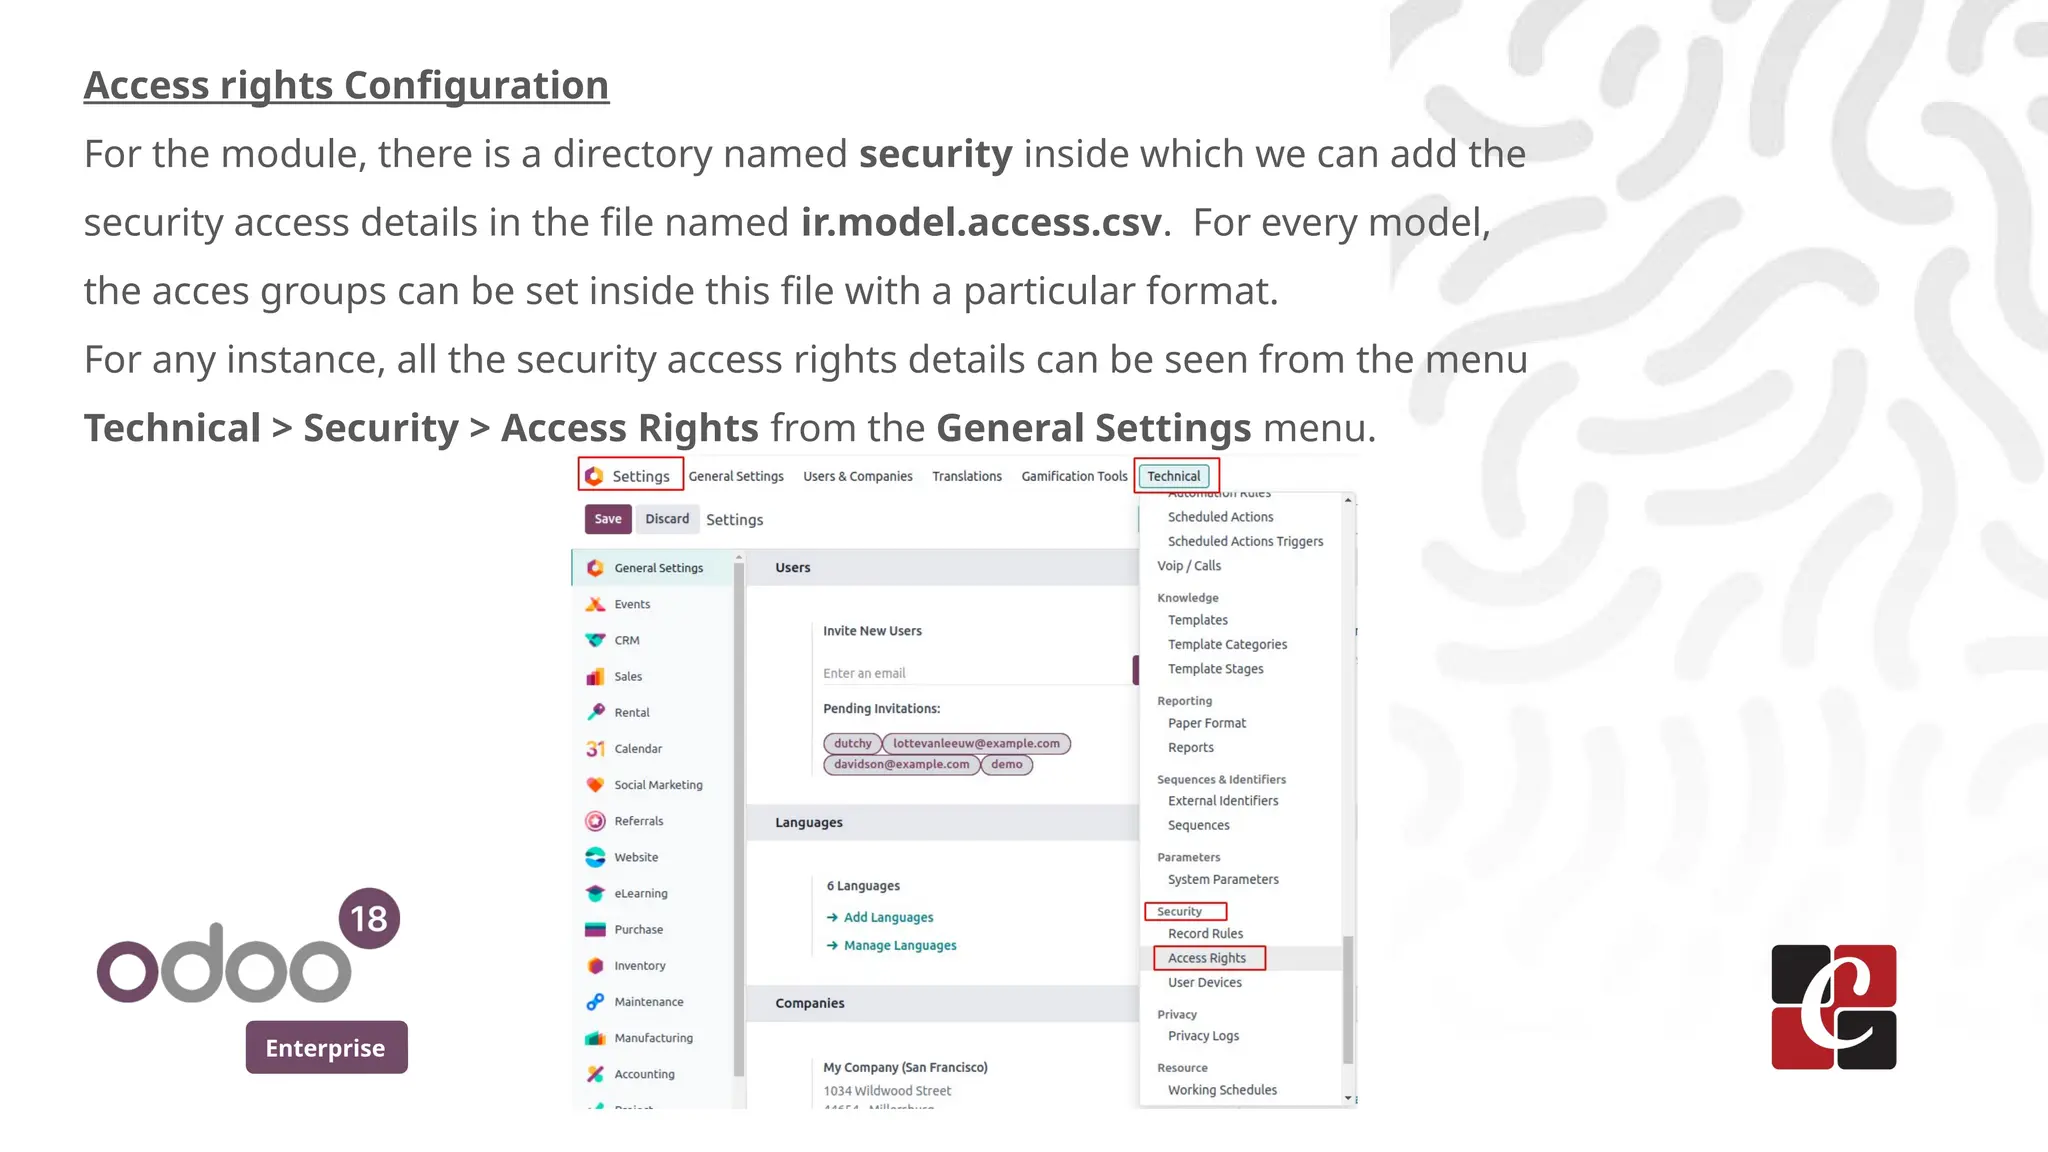
Access rights Configuration
Forthe module, there is a directory named security inside which we can add the
security access details in the file named ir.model.access.csv. For every model,
the acces groups can be set inside this file with a particular format.
For any instance, all the security access rights details can be seen from the menu
Technical > Security > Access Rights from the General Settings menu.
7.
Enterprise
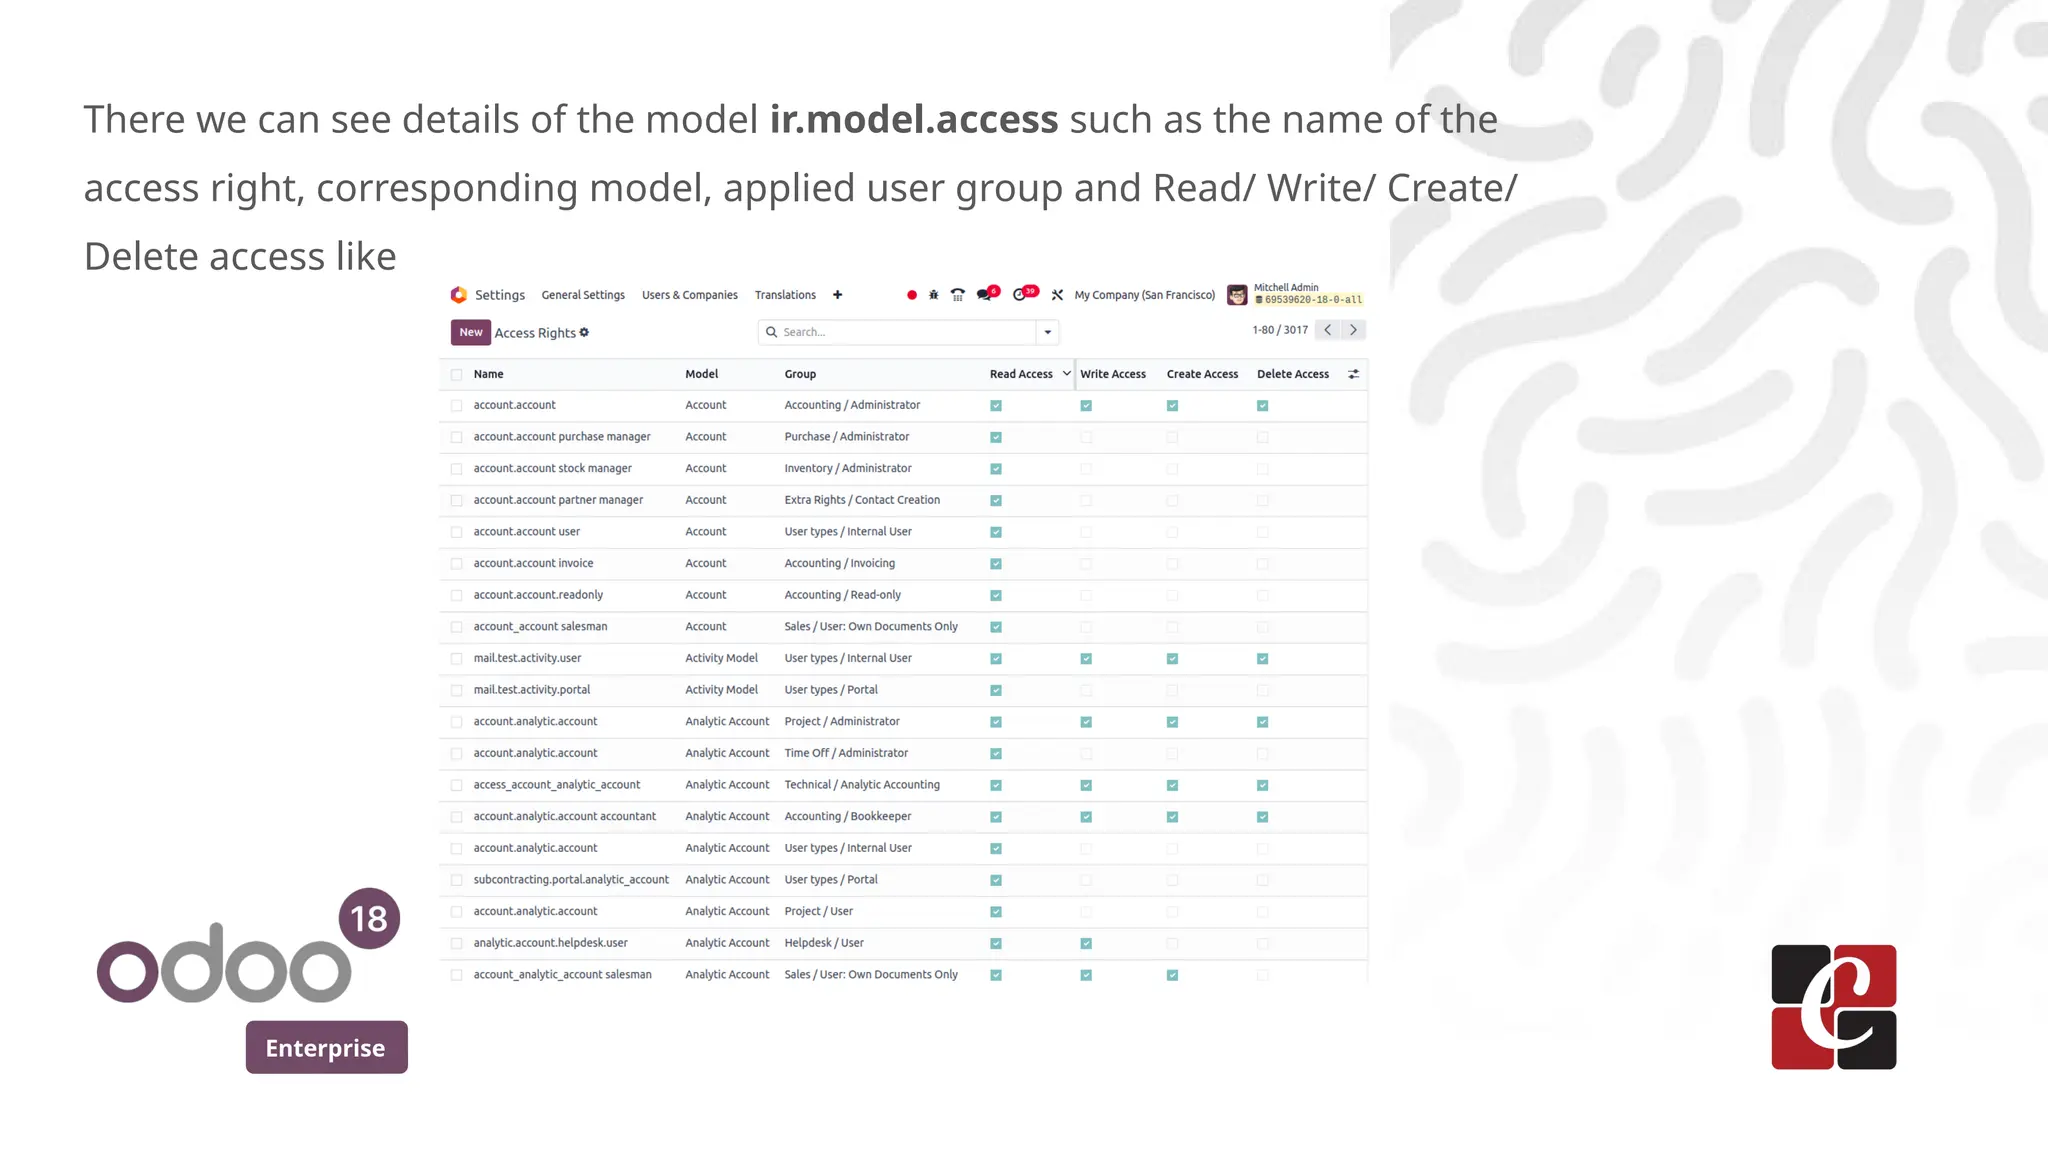
There we cansee details of the model ir.model.access such as the name of the
access right, corresponding model, applied user group and Read/ Write/ Create/
Delete access like
8.
Enterprise
Using the ir.model.access.csvfile, we can create the records into the same
model where each comma separated values represent the columns of the
previous seen recordset of the model ir.model.access.
Here, for the mosel student.student, we add the access right as
id,name,model_id:id,group_id:id,perm_read,perm_write,perm_create,perm_unlink
access_student_student,access.student.student,model_student_student,base.group_user,1,1,1,1
The first line is the field names of the ir.model.access model and every line
following it represents a record in the ir.model.access model, specifying which
group has what kind of access to a particular model.
9.
Enterprise
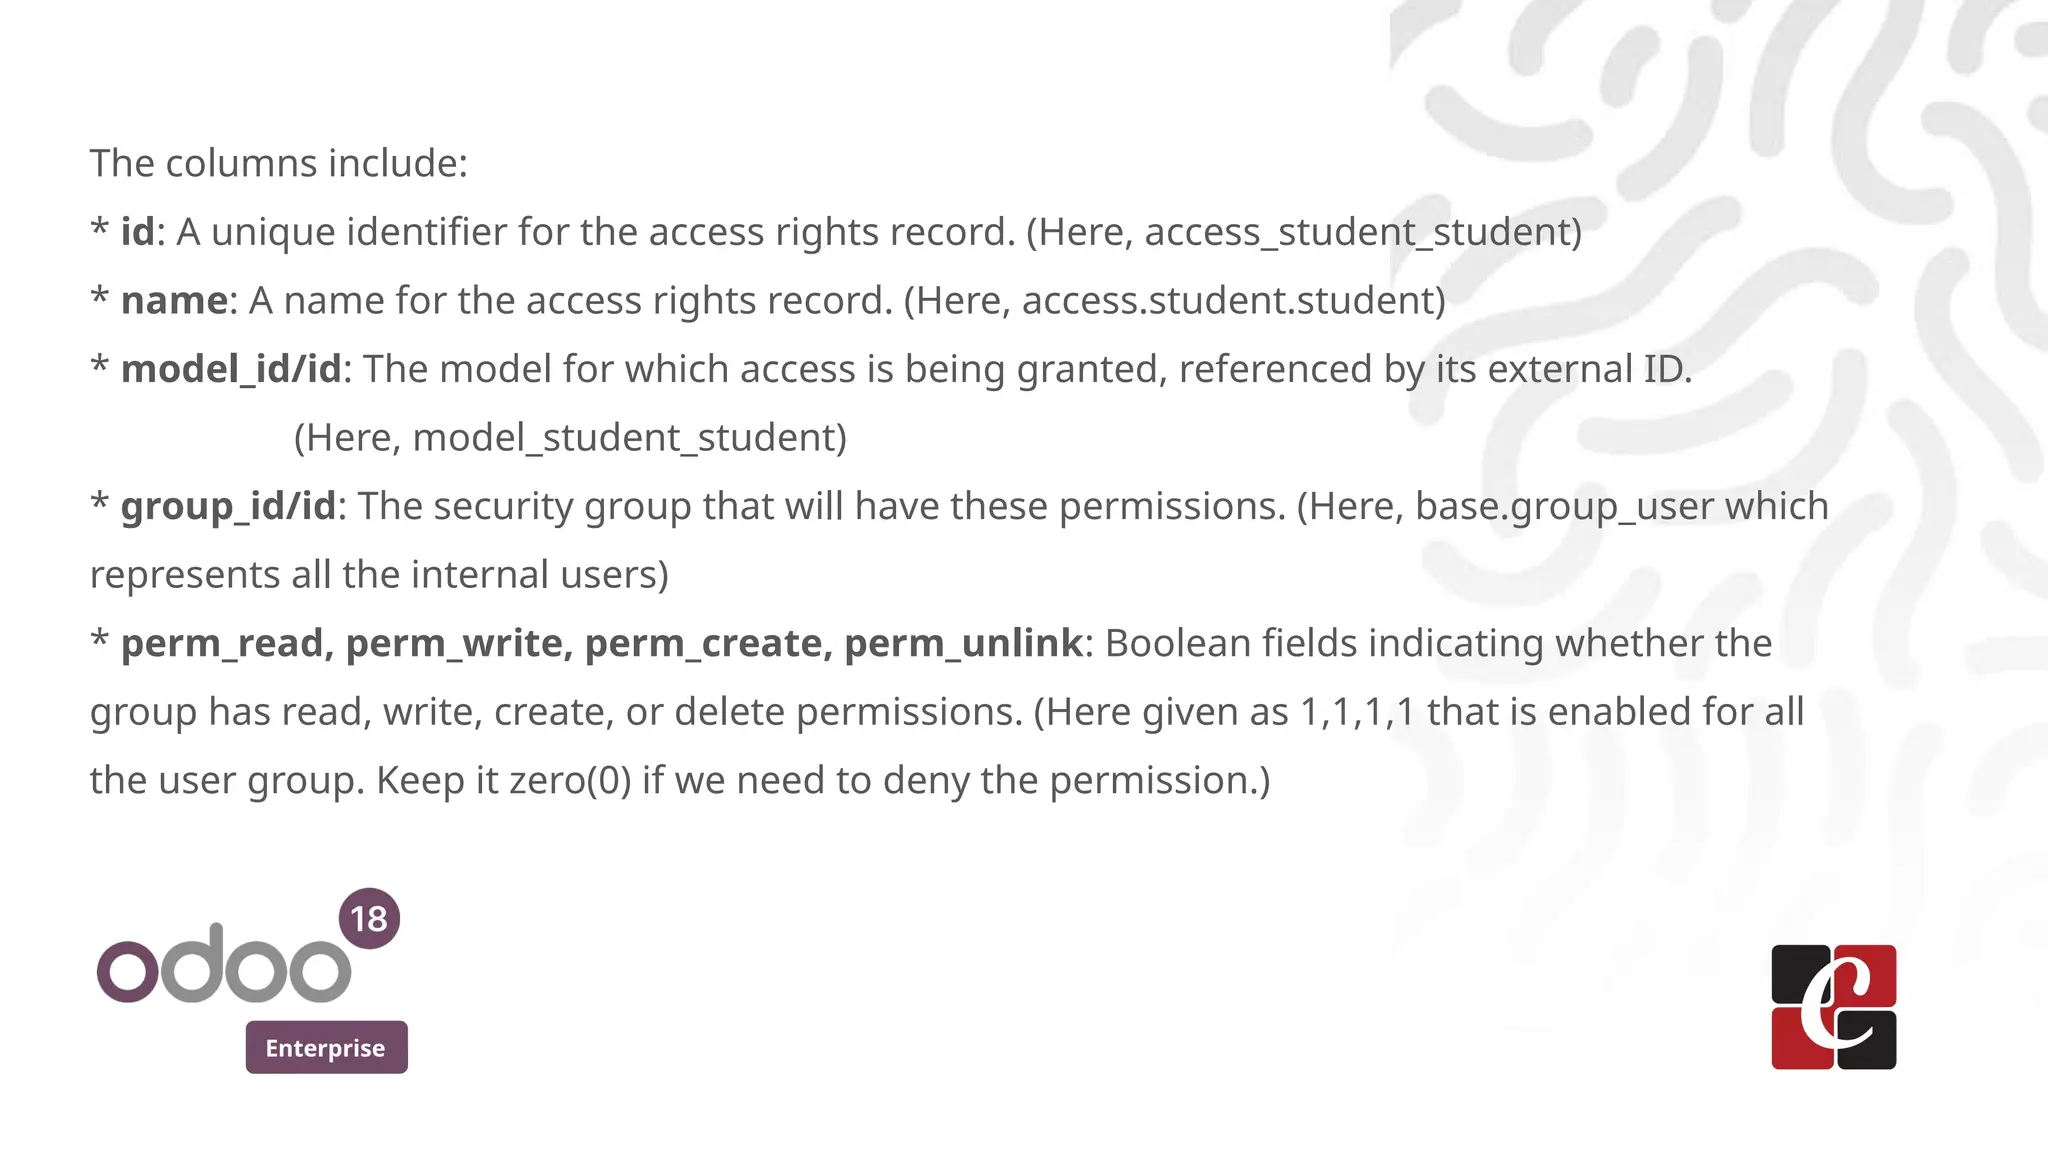
The columns include:
*id: A unique identifier for the access rights record. (Here, access_student_student)
* name: A name for the access rights record. (Here, access.student.student)
* model_id/id: The model for which access is being granted, referenced by its external ID.
(Here, model_student_student)
* group_id/id: The security group that will have these permissions. (Here, base.group_user which
represents all the internal users)
* perm_read, perm_write, perm_create, perm_unlink: Boolean fields indicating whether the
group has read, write, create, or delete permissions. (Here given as 1,1,1,1 that is enabled for all
the user group. Keep it zero(0) if we need to deny the permission.)
10.
Enterprise
Managing Security Groups
Wecan define a new group in an XML file, which you’ll type in the file
college_groups.xml under the security directory of the module.
The sample code creating a new user group named ‘Manager’ is as follows:
<?xml version="1.0" encoding="UTF-8" ?>
<odoo>
<record id="college_manager_group" model="res.groups">
<field name="name">Manager</field>
<field name="category_id" ref="base.module_category_hidden"/>
</record>
</odoo>
Here, the ‘base.module_category_hidden’ is used to make the user group fall
under the Technical category. Let’s create similar user groups named ‘Office
Staff’, ‘Teacher’ also for this module.
11.
Enterprise
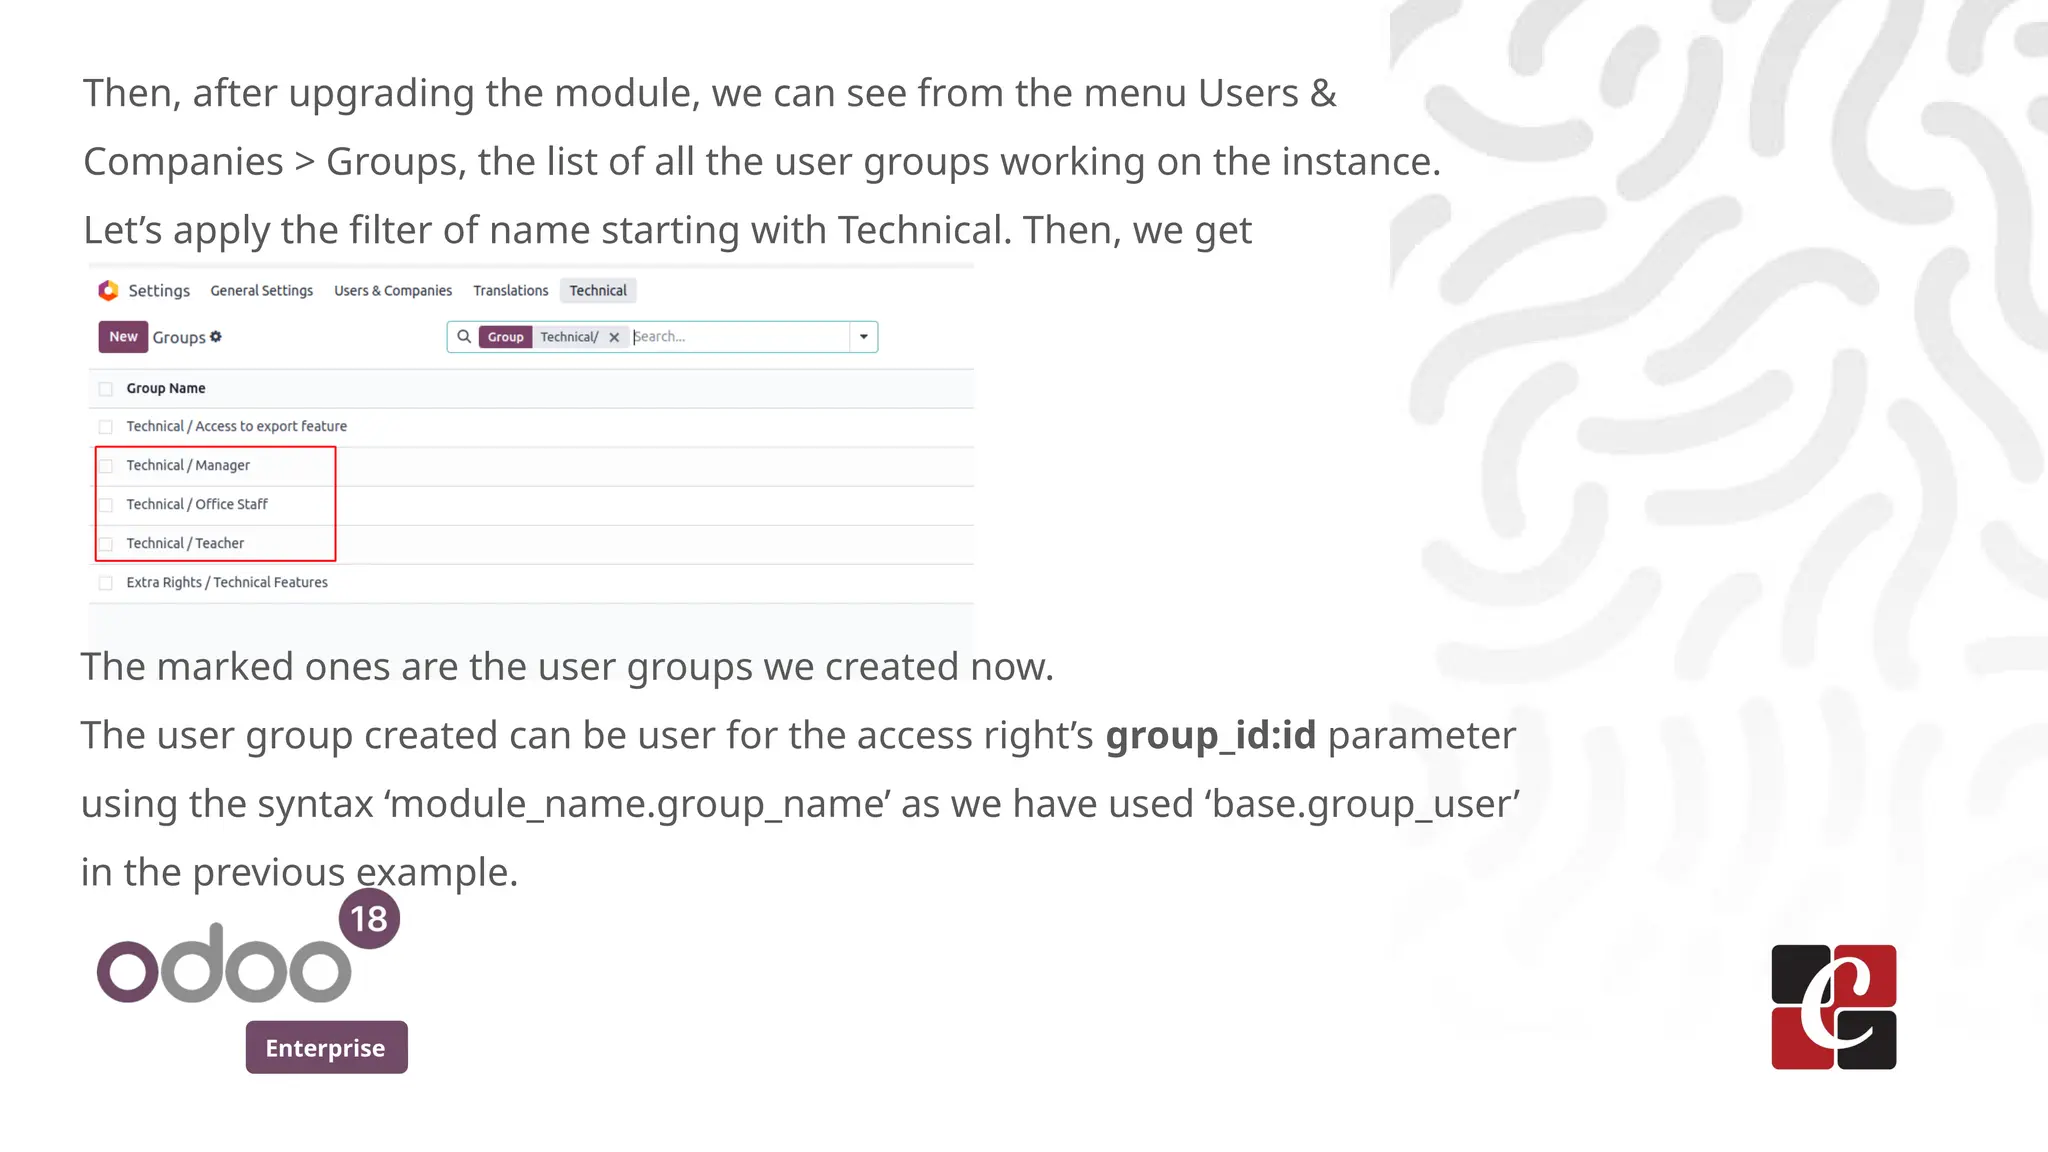
Then, after upgradingthe module, we can see from the menu Users &
Companies > Groups, the list of all the user groups working on the instance.
Let’s apply the filter of name starting with Technical. Then, we get
The marked ones are the user groups we created now.
The user group created can be user for the access right’s group_id:id parameter
using the syntax ‘module_name.group_name’ as we have used ‘base.group_user’
in the previous example.
12.
Enterprise
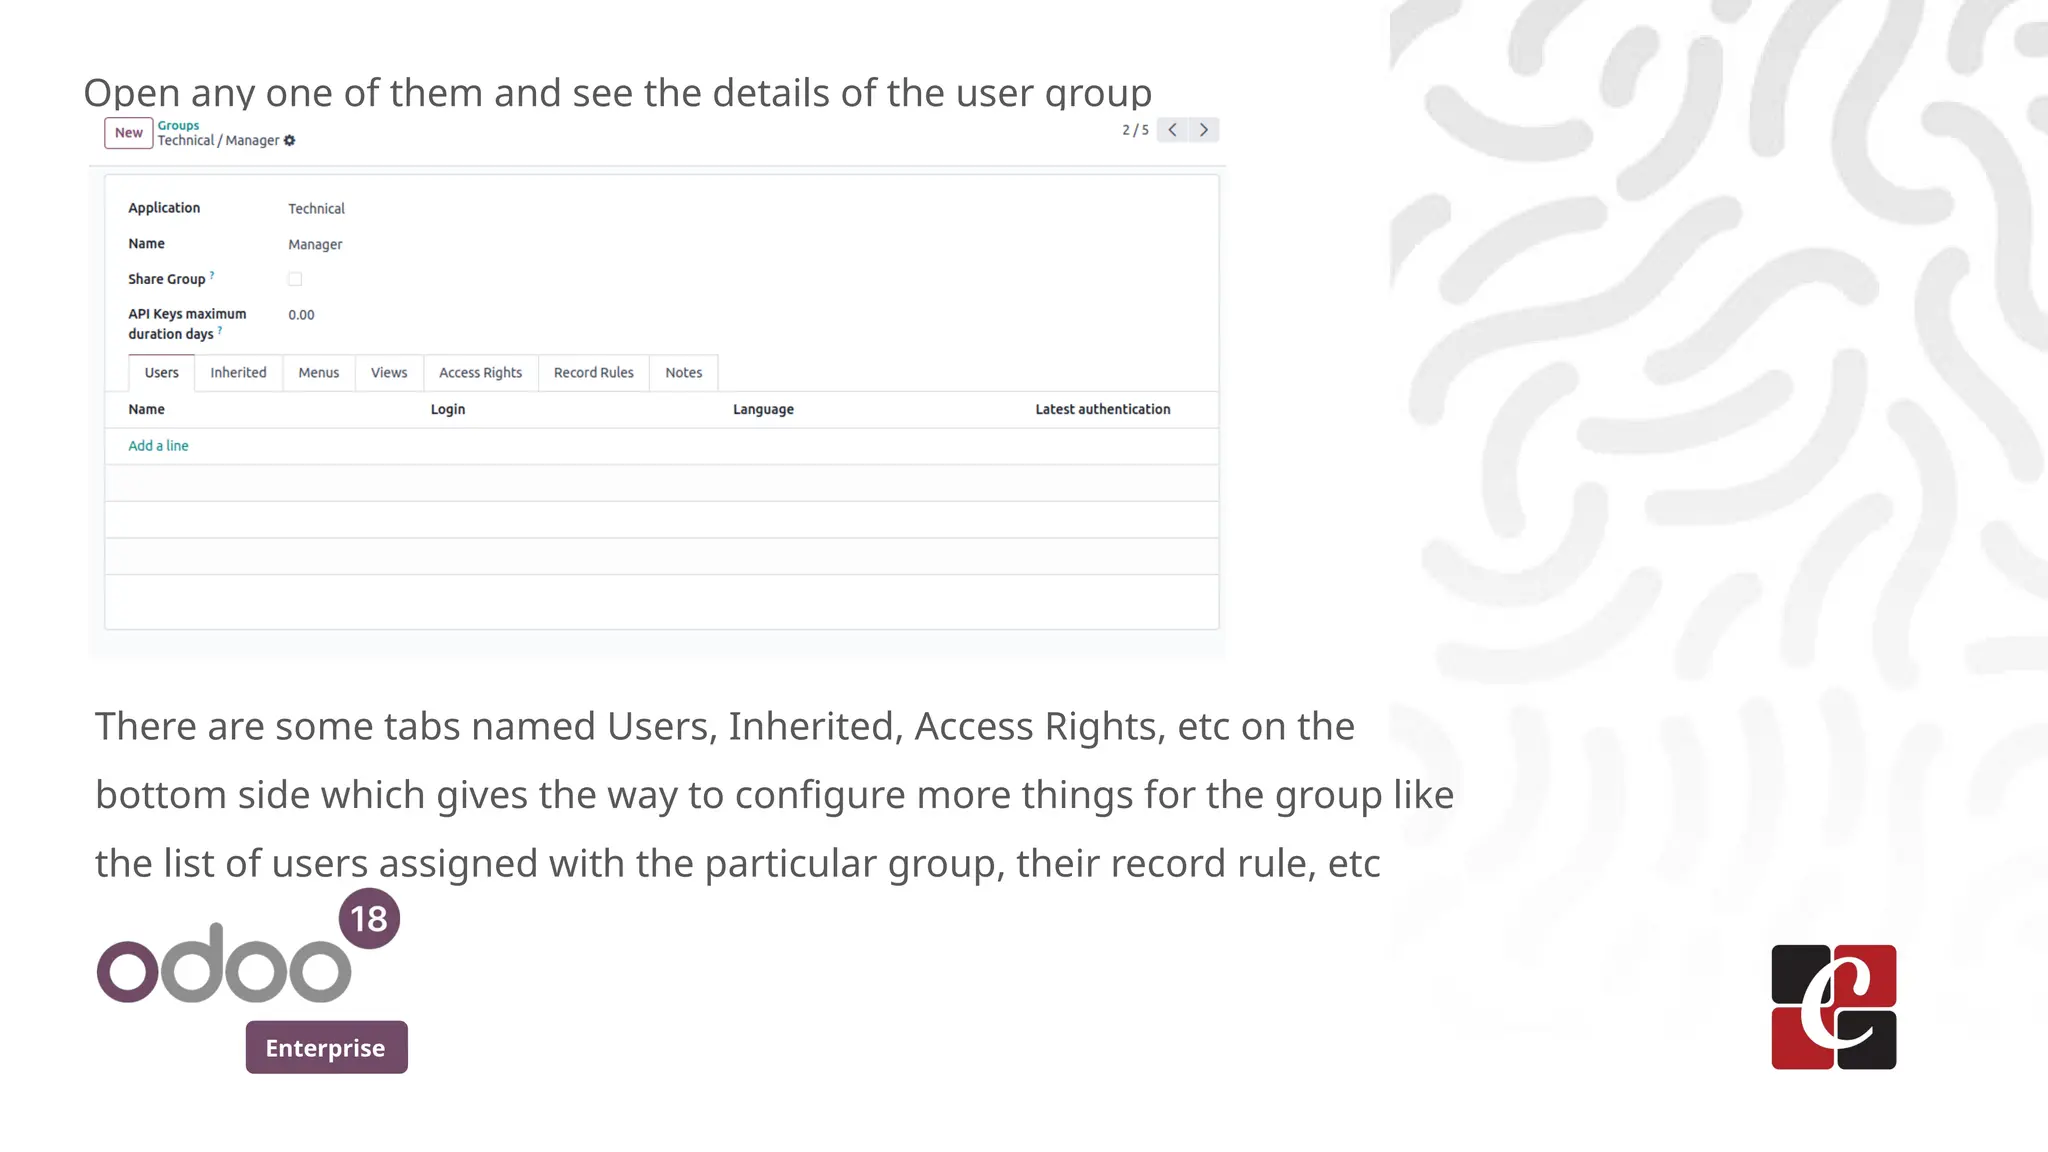
Open any oneof them and see the details of the user group
There are some tabs named Users, Inherited, Access Rights, etc on the
bottom side which gives the way to configure more things for the group like
the list of users assigned with the particular group, their record rule, etc
13.
Enterprise
Each user canbelong to one or more security groups, and these groups
control the user’s permissions.
By using a combination of security groups, access rights, record rules,
and field-level security, Odoo administrators can create a robust security
structure that ensures users only access what they are allowed to, based
on their roles.
14.
For More Info.
Checkour company website for related blogs
and Odoo book.
Check our YouTube channel for
functional and technical videos in Odoo.
Enterprise
www.cybrosys.com


![How To Break Odoo's Security [Odoo Experience 2018]](https://cdn.slidesharecdn.com/ss_thumbnails/odooexperience2018-howtobreakodoosecurity-191112111830-thumbnail.jpg?width=640&height=640&fit=bounds)


