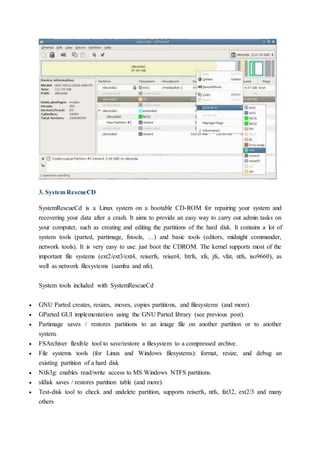
EXPNO: HARD DISK PARTITIONING,FORMATING
INTRODUCTION THEORY
Why format Disk
 Permanent storage of data and programs
 Distributing data from one computer to another
 Making copies
 Formatting (initializing) the disk:
 Process of preparing disk so that it is compatible with an operating
system
 All disks (including hard
 disks) must be formatted
All disks (including hard disks) must be formatted. Hard disks must be:
 Partitioned
 Formatted with file system
Two parts to formatting a disk:
è Low-level (physical) formatting
è High level (logical) formatting
Low-level (physical) formatting:
è Sequentially numbers tracks and sectors
è Identifies each track and sector
è Disk is physically prepared to hold data
High-level (logical) formatting:
è Determines how OS uses a disk
è Builds structure to keep track of location of files
è Done so files can be stored and retrieved.
I. HARDDISK FORMATTING, PARTITIONING AND WINDOWS
INSTALLATION USING BOOTABLE CD
II.HARD DISK PARTITIONING USING THIRDPARTY SOFTWARE TOOLS
Disk partitioning divides the data storage space of a hard disk into separate areas referred to
as ‘partitions’. Partitions are usually created when the hard disk is first being prepared for
usage. Once a disk is divided into partitions, directories and files may be stored on them.
Because of later changes on the computer and operating system, often an administrator or
power user will be faced with the need to resize partitions, create new partitions in the
unallocated space, and sometimes even undelete partitions that were previously removed or
deleted.
Hard disk partitioning tools will allow you to create additional partitions from existing
ones by resizing the existing partitions and creating empty, un-used space on which you can
create new partitions. The most important aspect of such tools is their ability to do this
without losing your data that is currently on your existing partitions. Such tools allow you to
create and format these new partitions.
Hard Drive Partitioning: Use Caution!
Most tools will let you convert a partition from one file type to another, i.e. from NTFS to
FAT/FAT32 or vice versa. Needless to say that in most cases, such a conversion, especially
from NTFS to FAT/FAT32 will cause the files to lose their NTFS permissions (ACLs), and
in some cases where EFS was used to encrypt the files, it will actually cause you to lose
access to these files. So beware!
Some of these tools may be able to help you recover deleted partitions, and if data on that
disk was un-damaged, actually help you gain access to that data. Some, but not all of the tools
may have the ability to move existing partitions from one location on the disk to another
location, again, without losing data.
Note: We’ve tried to make this guide as definitive as possible, there are always changes in
the software world that we’re not aware of. We would gladly accept your feedback,
comments and tool recommendations. Please limit your feedback to freeware utilities.
Disclaimer: The author of this article cannot be held responsible for any data loss or
computer malfunction due to using any of the tools listed in this article. Please carefully read
the software creators’ read-me files and manuals, and always test before using any tool on a
computer or hard disk that holds critical information. Remember as well that free products
rarely, if ever, provide any kind of end user support other than forum or community
support. If you’re unsure of what you’re doing, or need technical support, it’s best to go with
a paid product.
10 Free Partition Tools
1 . Ultimate Boot CD
The Ultimate Boot CD is a bootable CD containing tools that allow you to:
 Run floppy-based diagnostic tools from CDROM drives. More and more PCs are shipped
without floppy drives these days, and it is such a royal pain when you need to run diagnostic
tools on them.
 Free yourself from the slow loading speed of the floppy drive. Even if you do have a floppy
drive, it is still much much faster to run your diagnostic tools from the CDROM drive, rather
than wait for the tool to load from the floppy drive.
 Consolidate as many diagnostic tools as possible into one bootable CD.
 Run Ultimate Boot CD from your USB memory stick. A script on the CD prepares your USB
memory stick so that it can be used on newer machines that supports booting from USB
devices. You can access the same tools as you would from the CD version.
When you boot up from the CD, a text-based menu will be displayed, and you will be able to
select the tool you want to run. The selected tool actually boots off a virtual floppy disk
created in memory.
UBCD contains a ton of tools including: CPU Tests, Memory Tests, Peripherals Tools, CPU
Information, System Information, Benchmark Tools, BIOS Tools, Hard Disk Installation
Tools, Hard Disk Diagnostic Tools, Hard Disk Device Management Tools, Hard Disk
Wiping Tools, Hard Disk Cloning Tools, Hard Disk Low-Level Editing Tools, Partition
Tools, Boot Managers, File Tools, NTFS Tools, Anti-Virus/Malware Tools, Network Tools,
DOS Boot Disks and Linux Boot Disks.
2. GParted Live
The purpose of GParted is to allow the individual to take a hard disk and change the partition
organization therein, while preserving the partition contents. GParted is an industrial-strength
package for creating, destroying, resizing, moving, checking and copying partitions, and the
file systems on them. This is useful for creating space for new operating systems,
reorganizing disk usage, copying data residing on hard disks and mirroring one partition with
another (disk imaging). GParted Live is a small bootable GNU/Linux distribution for x86
machine. It enables you to use all the features of the latest versions of GParted. GParted Live
can be installed on CD, USB, PXE server, and Hard Disk then run on an x86 machine.
Note: Take care when using GParted on Windows XP/Vista installations. Read here for more
information:
Update to “resize-windows.txt” – Draft to discuss (Page 1) – Documentation – GParted
forum
Using GParted to Resize Your Windows Vista Partition The How-To Geek
You can also get GParted on various distributions such as the SystemRescueCD, listed
below.
3. System RescueCD
SystemRescueCd is a Linux system on a bootable CD-ROM for repairing your system and
recovering your data after a crash. It aims to provide an easy way to carry out admin tasks on
your computer, such as creating and editing the partitions of the hard disk. It contains a lot of
system tools (parted, partimage, fstools, …) and basic tools (editors, midnight commander,
network tools). It is very easy to use: just boot the CDROM. The kernel supports most of the
important file systems (ext2/ext3/ext4, reiserfs, reiser4, btrfs, xfs, jfs, vfat, ntfs, iso9660), as
well as network filesystems (samba and nfs).
System tools included with SystemRescueCd
 GNU Parted creates, resizes, moves, copies partitions, and filesystems (and more).
 GParted GUI implementation using the GNU Parted library (see previous post).
 Partimage saves / restores partitions to an image file on another partition or to another
system.
 FSArchiver flexible tool to save/restore a filesystem to a compressed archive.
 File systems tools (for Linux and Windows filesystems): format, resize, and debug an
existing partition of a hard disk
 Ntfs3g: enables read/write access to MS Windows NTFS partitions.
 sfdisk saves / restores partition table (and more).
 Test-disk tool to check and undelete partition, supports reiserfs, ntfs, fat32, ext2/3 and many
others
 Memtest+ to test the memory of your computer (first thing to test when you have a crash or
unexpected problems)
 Network tools (Samba, NFS, ping, nslookup, …) to backup your data across the network
4. TestDisk
TestDisk is a powerful free data recovery software! It was primarily designed to help recover
lost partitions and/or make non-booting disks bootable again when these symptoms are
caused by faulty software, certain types of viruses or human error (such as accidentally
deleting a Partition Table). Partition table recovery using TestDisk is really easy. TestDisk
has features for both novices and experts. For those who know little or nothing about data
recovery techniques, TestDisk can be used to collect detailed information about a non-
booting drive which can then be sent to a tech for further analysis. Those more familiar with
such procedures should find TestDisk a handy tool in performing onsite recovery.
TestDisk can:
 Fix partition table, recover deleted partition
 Recover FAT32 boot sector from its backup
 Rebuild FAT12/FAT16/FAT32 boot sector
 Fix FAT tables
 Rebuild NTFS boot sector
 Recover NTFS boot sector from its backup
 Fix MFT using MFT mirror
 Locate ext2/ext3 Backup SuperBlock
 Undelete files from FAT, NTFS and ext2 filesystem
 Copy files from deleted FAT, NTFS and ext2/ext3 partitions.
5. Ranish Partition Manager
Ranish Partition Manager is a powerful hard disk partitioning tool. It gives users high level of
control for running multiple operating systems, such as Linux, Windows 98/XP, FreeDOS,
and FreeBSD on a single disk. Partition Manager can create, copy, and resize primary and
extended partitions. It includes command line interface and simulation mode that works with
large files so you can safely experiment before working on the real hard drive partition tables.
6. Partition Logic
Partition Logic is a free hard disk partitioning and data management tool. It can create,
delete, format, defragment, resize, and move partitions and modify their attributes. One cool
feature about it is that it can copy entire hard disks from one to another. Partition Logic is
free software, based on the Visopsys operating system. It boots from a CD or floppy disk and
runs as a standalone system, independent of your regular operating system. It is intended to
become a free alternative to such commercial programs.
It’s worth noting that the current (as of March 2009) version of Partition logic has the
following limitations:
 Does not work with some SATA hard disks, no hardware support for non-USB SCSI hard
disks
 Supports only DOS/Windows-style MBR partition tables (used on nearly all IBM PC-
compatibles)
 No support for Sun or BSD disk labels, or EFI/GPT tables used on Itanium and Intel Mac
platforms
 Most important: Cannot format partitions as NTFS (however, it can resize NTFS)
 Cannot resize FAT or EXT filesystems
 No hardware support for serial mice or for PCMCIA
III.How to partition and format a hard disk after installing Windows
Introduction
In order to use a hard drive, or a portion of a hard drive, in Windows you need to first
partition it and then format it. This process will then assign a drive letter to the partition
allowing you to access it in order to use it to store and retrieve data.
If you would like more information on partitions you can read this tutorial:
Understanding Hard Disk Partitions
This tutorial is based on Windows XP. These techniques will work, though, with Windows
2000, 2003, and the upcoming Vista.
Creating and formatting a partition in Windows
Before you can partition a hard drive in Windows, you must have installed a new unused hard
disk, deleted an existing partition, or have some unpartitioned space available on an existing
drive. In the example in this tutorial I will take the unused space from one of my hard drives
and partition/format it. The steps shown here will work whether you are working with a brand
new hard drive, deleting an existing partition and reusing it, or partitioning available space on
an existing hard drive.
All hard disk management is done in the Disk Management Administrative Tool. Follow
these steps to open this tool:
1. If you are using Windows 8, type Disk Management at the start screen, click on Settings,
and then click on the Create and format hard disk partitions option. Then skip to step
3. Otherwise, click on the Start button and select the Control Panel option.
2. If in Classic control panel mode, double-click on the Administrative Tools icon and then
double-click on Computer Management icon.
If your control panel is in the Category view, click on Performance and Maintenance, then
click on Administrative Tools, and finally double-click on the Computer
Management icon.
3. When the Computer Management screen opens, click on the Disk Management option
under the Storage category. This will present you with a screen similar to the one below.
The Disk Management Screen
When you are in the disk management tool you will see a listing of your current hard drives
and how they are partitioned. From the image above you can see that I have two hard disks
installed. The first disk, Disc 0, has two partitions. One partition is a 24 GB NTFS partition
that has been assigned the drive letter C:. The other partition on that drive is a 87 GB NTFS
partition that has been assigned the drive letter E:. The other drive, has only one partition, the
D: partition. The rest of the space, 26 GB, shows that it is unallocated and therefore can be
used to make other partitions.
To make a partition from the unused space you would do the following.
1. Right click on the space listed as unallocated.
2. At the menu that comes up, click on the New Partition option.
3. You will now be presented with a wizard as to how you would like the partition to be
created. At the first screen press Next.
4. At the following screen, determine if you need a primary or extended partition. For more
information about these partitions you can read our partition tutorial listed above. Most
people will be fine selecting Primary Partition. Select Primary Partition and press Next.
5. At the next screen you will be prompted to type in how much of the unallocated space you
would like used for the new partition. In my example, my unallocated space is 26.43 GB, so I
can choose to make a partition of that entire amount of only use half and save the rest for
another partition. Regardless, of what you decide, you need to enter a size in the Partition
size in MB: field, or stick with the default size, and press the Next button.
6. At the next screen select the drive letter you would like assigned to it, or use the default
one given. When done, press the Next button. The drive letter that you assign here will be
how you access the partition later.
7. In this step you will determine how you would like the new partition to be formatted. For
the most part you are advised to use the NTFS file system. If you need a file system that can
be readable by older operating systems like DOS, Windows 95, Windows 98, or Windows
ME, then you should instead choose the FAT32 file system.
8. Type a name in the Volume Label field that will be associated with this partition or leave
it blank.
9. Finally press the Next button and you will come to a summary screen. Review how the
partition will be created, and if you are satisfied, press the Finish button to complete the
creation and formatting of your new hard disk partition.
When the computer finishes creating and formatting the new partition you will be presented
with the Disk Management screen again and will see that you have a new partition and drive
letter on your computer. Now you can use that drive to start storing your data.
Deleting a partition in Windows
If you have existing partitions on your computer that you would like to delete in order to use
its space for other purposes, then you first need to delete this partition. It is important to
note that by deleting a partition you will lose all your data on that partition. With that
warning given, let me give some examples of why you would want to delete a partition. Lets
say that you have a 60 GB hard drive in your computer that was originally partitioned into a
20 GB partition and a 40 GB partition. You would like to install another operating system on
your computer, but feel that neither partition is big enough on its own, and would like to
instead create one partition using the full storage of 60 GB. The only way to do that would be
to delete both of the existing partitions and recreate a new one using all the available space.
To delete a partition please follow these steps:
1. Click on the Start button and select the Control Panel option.
2. If in Classic control panel mode, double-click on the Administrative Tools icon and then
double-click on Computer Management icon.
If your control panel is in the Category view, click on Performance and Maintenance, then
click on Administrative Tools, and finally double-click on the Computer
Management icon.
3. When the Computer Management screen opens, click on the Disk Management option
under the Storage category.
4. Right-click on the partition you would like to delete and choose the Delete
Partition option.
5. A confirmation box will come up asking if you are sure you would like to continue. If you
press the yes button, all data on this partition will be deleted. If you are sure about deleting
this partition, press the Yes button.
The partition will now be deleted and you can either create a new partition or exit the
program

HARD DISK PARTITIONING,FORMATING

  • 1.
    EXPNO: HARD DISKPARTITIONING,FORMATING INTRODUCTION THEORY Why format Disk  Permanent storage of data and programs  Distributing data from one computer to another  Making copies  Formatting (initializing) the disk:  Process of preparing disk so that it is compatible with an operating system  All disks (including hard  disks) must be formatted All disks (including hard disks) must be formatted. Hard disks must be:  Partitioned  Formatted with file system Two parts to formatting a disk: è Low-level (physical) formatting è High level (logical) formatting Low-level (physical) formatting: è Sequentially numbers tracks and sectors è Identifies each track and sector è Disk is physically prepared to hold data High-level (logical) formatting: è Determines how OS uses a disk è Builds structure to keep track of location of files è Done so files can be stored and retrieved.
  • 2.
    I. HARDDISK FORMATTING,PARTITIONING AND WINDOWS INSTALLATION USING BOOTABLE CD II.HARD DISK PARTITIONING USING THIRDPARTY SOFTWARE TOOLS Disk partitioning divides the data storage space of a hard disk into separate areas referred to as ‘partitions’. Partitions are usually created when the hard disk is first being prepared for usage. Once a disk is divided into partitions, directories and files may be stored on them. Because of later changes on the computer and operating system, often an administrator or power user will be faced with the need to resize partitions, create new partitions in the unallocated space, and sometimes even undelete partitions that were previously removed or deleted. Hard disk partitioning tools will allow you to create additional partitions from existing ones by resizing the existing partitions and creating empty, un-used space on which you can create new partitions. The most important aspect of such tools is their ability to do this without losing your data that is currently on your existing partitions. Such tools allow you to create and format these new partitions. Hard Drive Partitioning: Use Caution! Most tools will let you convert a partition from one file type to another, i.e. from NTFS to FAT/FAT32 or vice versa. Needless to say that in most cases, such a conversion, especially from NTFS to FAT/FAT32 will cause the files to lose their NTFS permissions (ACLs), and in some cases where EFS was used to encrypt the files, it will actually cause you to lose access to these files. So beware! Some of these tools may be able to help you recover deleted partitions, and if data on that disk was un-damaged, actually help you gain access to that data. Some, but not all of the tools may have the ability to move existing partitions from one location on the disk to another location, again, without losing data. Note: We’ve tried to make this guide as definitive as possible, there are always changes in the software world that we’re not aware of. We would gladly accept your feedback, comments and tool recommendations. Please limit your feedback to freeware utilities.
  • 3.
    Disclaimer: The authorof this article cannot be held responsible for any data loss or computer malfunction due to using any of the tools listed in this article. Please carefully read the software creators’ read-me files and manuals, and always test before using any tool on a computer or hard disk that holds critical information. Remember as well that free products rarely, if ever, provide any kind of end user support other than forum or community support. If you’re unsure of what you’re doing, or need technical support, it’s best to go with a paid product. 10 Free Partition Tools 1 . Ultimate Boot CD The Ultimate Boot CD is a bootable CD containing tools that allow you to:  Run floppy-based diagnostic tools from CDROM drives. More and more PCs are shipped without floppy drives these days, and it is such a royal pain when you need to run diagnostic tools on them.  Free yourself from the slow loading speed of the floppy drive. Even if you do have a floppy drive, it is still much much faster to run your diagnostic tools from the CDROM drive, rather than wait for the tool to load from the floppy drive.  Consolidate as many diagnostic tools as possible into one bootable CD.  Run Ultimate Boot CD from your USB memory stick. A script on the CD prepares your USB memory stick so that it can be used on newer machines that supports booting from USB devices. You can access the same tools as you would from the CD version. When you boot up from the CD, a text-based menu will be displayed, and you will be able to select the tool you want to run. The selected tool actually boots off a virtual floppy disk created in memory. UBCD contains a ton of tools including: CPU Tests, Memory Tests, Peripherals Tools, CPU Information, System Information, Benchmark Tools, BIOS Tools, Hard Disk Installation Tools, Hard Disk Diagnostic Tools, Hard Disk Device Management Tools, Hard Disk Wiping Tools, Hard Disk Cloning Tools, Hard Disk Low-Level Editing Tools, Partition Tools, Boot Managers, File Tools, NTFS Tools, Anti-Virus/Malware Tools, Network Tools, DOS Boot Disks and Linux Boot Disks.
  • 4.
    2. GParted Live Thepurpose of GParted is to allow the individual to take a hard disk and change the partition organization therein, while preserving the partition contents. GParted is an industrial-strength package for creating, destroying, resizing, moving, checking and copying partitions, and the file systems on them. This is useful for creating space for new operating systems, reorganizing disk usage, copying data residing on hard disks and mirroring one partition with another (disk imaging). GParted Live is a small bootable GNU/Linux distribution for x86 machine. It enables you to use all the features of the latest versions of GParted. GParted Live can be installed on CD, USB, PXE server, and Hard Disk then run on an x86 machine. Note: Take care when using GParted on Windows XP/Vista installations. Read here for more information: Update to “resize-windows.txt” – Draft to discuss (Page 1) – Documentation – GParted forum Using GParted to Resize Your Windows Vista Partition The How-To Geek You can also get GParted on various distributions such as the SystemRescueCD, listed below.
  • 5.
    3. System RescueCD SystemRescueCdis a Linux system on a bootable CD-ROM for repairing your system and recovering your data after a crash. It aims to provide an easy way to carry out admin tasks on your computer, such as creating and editing the partitions of the hard disk. It contains a lot of system tools (parted, partimage, fstools, …) and basic tools (editors, midnight commander, network tools). It is very easy to use: just boot the CDROM. The kernel supports most of the important file systems (ext2/ext3/ext4, reiserfs, reiser4, btrfs, xfs, jfs, vfat, ntfs, iso9660), as well as network filesystems (samba and nfs). System tools included with SystemRescueCd  GNU Parted creates, resizes, moves, copies partitions, and filesystems (and more).  GParted GUI implementation using the GNU Parted library (see previous post).  Partimage saves / restores partitions to an image file on another partition or to another system.  FSArchiver flexible tool to save/restore a filesystem to a compressed archive.  File systems tools (for Linux and Windows filesystems): format, resize, and debug an existing partition of a hard disk  Ntfs3g: enables read/write access to MS Windows NTFS partitions.  sfdisk saves / restores partition table (and more).  Test-disk tool to check and undelete partition, supports reiserfs, ntfs, fat32, ext2/3 and many others
  • 6.
     Memtest+ totest the memory of your computer (first thing to test when you have a crash or unexpected problems)  Network tools (Samba, NFS, ping, nslookup, …) to backup your data across the network 4. TestDisk TestDisk is a powerful free data recovery software! It was primarily designed to help recover lost partitions and/or make non-booting disks bootable again when these symptoms are caused by faulty software, certain types of viruses or human error (such as accidentally deleting a Partition Table). Partition table recovery using TestDisk is really easy. TestDisk has features for both novices and experts. For those who know little or nothing about data recovery techniques, TestDisk can be used to collect detailed information about a non- booting drive which can then be sent to a tech for further analysis. Those more familiar with such procedures should find TestDisk a handy tool in performing onsite recovery. TestDisk can:  Fix partition table, recover deleted partition  Recover FAT32 boot sector from its backup  Rebuild FAT12/FAT16/FAT32 boot sector  Fix FAT tables  Rebuild NTFS boot sector  Recover NTFS boot sector from its backup  Fix MFT using MFT mirror  Locate ext2/ext3 Backup SuperBlock  Undelete files from FAT, NTFS and ext2 filesystem  Copy files from deleted FAT, NTFS and ext2/ext3 partitions. 5. Ranish Partition Manager Ranish Partition Manager is a powerful hard disk partitioning tool. It gives users high level of control for running multiple operating systems, such as Linux, Windows 98/XP, FreeDOS, and FreeBSD on a single disk. Partition Manager can create, copy, and resize primary and extended partitions. It includes command line interface and simulation mode that works with large files so you can safely experiment before working on the real hard drive partition tables.
  • 7.
    6. Partition Logic PartitionLogic is a free hard disk partitioning and data management tool. It can create, delete, format, defragment, resize, and move partitions and modify their attributes. One cool feature about it is that it can copy entire hard disks from one to another. Partition Logic is free software, based on the Visopsys operating system. It boots from a CD or floppy disk and runs as a standalone system, independent of your regular operating system. It is intended to become a free alternative to such commercial programs. It’s worth noting that the current (as of March 2009) version of Partition logic has the following limitations:  Does not work with some SATA hard disks, no hardware support for non-USB SCSI hard disks  Supports only DOS/Windows-style MBR partition tables (used on nearly all IBM PC- compatibles)  No support for Sun or BSD disk labels, or EFI/GPT tables used on Itanium and Intel Mac platforms  Most important: Cannot format partitions as NTFS (however, it can resize NTFS)  Cannot resize FAT or EXT filesystems  No hardware support for serial mice or for PCMCIA
  • 8.
    III.How to partitionand format a hard disk after installing Windows Introduction In order to use a hard drive, or a portion of a hard drive, in Windows you need to first partition it and then format it. This process will then assign a drive letter to the partition allowing you to access it in order to use it to store and retrieve data. If you would like more information on partitions you can read this tutorial: Understanding Hard Disk Partitions This tutorial is based on Windows XP. These techniques will work, though, with Windows 2000, 2003, and the upcoming Vista. Creating and formatting a partition in Windows Before you can partition a hard drive in Windows, you must have installed a new unused hard disk, deleted an existing partition, or have some unpartitioned space available on an existing drive. In the example in this tutorial I will take the unused space from one of my hard drives and partition/format it. The steps shown here will work whether you are working with a brand new hard drive, deleting an existing partition and reusing it, or partitioning available space on an existing hard drive.
  • 9.
    All hard diskmanagement is done in the Disk Management Administrative Tool. Follow these steps to open this tool: 1. If you are using Windows 8, type Disk Management at the start screen, click on Settings, and then click on the Create and format hard disk partitions option. Then skip to step 3. Otherwise, click on the Start button and select the Control Panel option. 2. If in Classic control panel mode, double-click on the Administrative Tools icon and then double-click on Computer Management icon. If your control panel is in the Category view, click on Performance and Maintenance, then click on Administrative Tools, and finally double-click on the Computer Management icon. 3. When the Computer Management screen opens, click on the Disk Management option under the Storage category. This will present you with a screen similar to the one below. The Disk Management Screen When you are in the disk management tool you will see a listing of your current hard drives and how they are partitioned. From the image above you can see that I have two hard disks installed. The first disk, Disc 0, has two partitions. One partition is a 24 GB NTFS partition that has been assigned the drive letter C:. The other partition on that drive is a 87 GB NTFS partition that has been assigned the drive letter E:. The other drive, has only one partition, the D: partition. The rest of the space, 26 GB, shows that it is unallocated and therefore can be used to make other partitions. To make a partition from the unused space you would do the following.
  • 10.
    1. Right clickon the space listed as unallocated. 2. At the menu that comes up, click on the New Partition option. 3. You will now be presented with a wizard as to how you would like the partition to be created. At the first screen press Next. 4. At the following screen, determine if you need a primary or extended partition. For more information about these partitions you can read our partition tutorial listed above. Most people will be fine selecting Primary Partition. Select Primary Partition and press Next. 5. At the next screen you will be prompted to type in how much of the unallocated space you would like used for the new partition. In my example, my unallocated space is 26.43 GB, so I can choose to make a partition of that entire amount of only use half and save the rest for another partition. Regardless, of what you decide, you need to enter a size in the Partition size in MB: field, or stick with the default size, and press the Next button. 6. At the next screen select the drive letter you would like assigned to it, or use the default one given. When done, press the Next button. The drive letter that you assign here will be how you access the partition later. 7. In this step you will determine how you would like the new partition to be formatted. For the most part you are advised to use the NTFS file system. If you need a file system that can be readable by older operating systems like DOS, Windows 95, Windows 98, or Windows ME, then you should instead choose the FAT32 file system. 8. Type a name in the Volume Label field that will be associated with this partition or leave it blank. 9. Finally press the Next button and you will come to a summary screen. Review how the partition will be created, and if you are satisfied, press the Finish button to complete the creation and formatting of your new hard disk partition. When the computer finishes creating and formatting the new partition you will be presented with the Disk Management screen again and will see that you have a new partition and drive letter on your computer. Now you can use that drive to start storing your data. Deleting a partition in Windows If you have existing partitions on your computer that you would like to delete in order to use its space for other purposes, then you first need to delete this partition. It is important to note that by deleting a partition you will lose all your data on that partition. With that warning given, let me give some examples of why you would want to delete a partition. Lets say that you have a 60 GB hard drive in your computer that was originally partitioned into a
  • 11.
    20 GB partitionand a 40 GB partition. You would like to install another operating system on your computer, but feel that neither partition is big enough on its own, and would like to instead create one partition using the full storage of 60 GB. The only way to do that would be to delete both of the existing partitions and recreate a new one using all the available space. To delete a partition please follow these steps: 1. Click on the Start button and select the Control Panel option. 2. If in Classic control panel mode, double-click on the Administrative Tools icon and then double-click on Computer Management icon. If your control panel is in the Category view, click on Performance and Maintenance, then click on Administrative Tools, and finally double-click on the Computer Management icon. 3. When the Computer Management screen opens, click on the Disk Management option under the Storage category. 4. Right-click on the partition you would like to delete and choose the Delete Partition option. 5. A confirmation box will come up asking if you are sure you would like to continue. If you press the yes button, all data on this partition will be deleted. If you are sure about deleting this partition, press the Yes button. The partition will now be deleted and you can either create a new partition or exit the program