SlideShare a Scribd company logo
1 of 60
MODULE 3
SKILLS
Internet Basics
© Paradigm Publishing, Inc. 1
SKILLS© Paradigm Publishing, Inc. 2
SKILLS
Guidelines for Using the Internet
© Paradigm Publishing, Inc. 3
 In order to access and connect to the Internet,
you need the following:
– a computer, tablet, smartphone, or other Internet-
capable device
– a hotspot that provides free Internet access or an
account with an Internet service provider (ISP) and
related communications hardware such as a DSL
modem or cable modem
– a wireless network card or an Ethernet card in your
computer to support connectivity
– a web browser
SKILLS
Guidelines for Using the Internet…continued
© Paradigm Publishing, Inc. 4
Internet Service Provider (ISP)
 Is a company that provides access to the
Internet through one or more servers, which are
large, powerful computers
 Provides connection instructions and may
provide you with necessary equipment, such as
a cable modem or router
 May also provide email accounts and other
services
SKILLS
Guidelines for Using the Internet…continued
© Paradigm Publishing, Inc. 5
Connection Options
SKILLS
Guidelines for Using the Internet…continued
© Paradigm Publishing, Inc. 6
Web Browsers
 A web browser is a software program that
allows you to locate and view web pages
 The term web page refers to a single page or
document
 The term website refers to all of the web pages
that make up a site
SKILLS
Guidelines for Using the Internet…continued
© Paradigm Publishing, Inc. 7
Web Browsers…continued
SKILLS
Skills You Learn
1. Explore Microsoft Internet Explorer 10 in the
Windows 8 desktop interface
2. Explore Microsoft Internet Explorer 10 in the
Windows 8 user interface
3. Explore the Mozilla Firefox interface
4. Explore the Google Chrome interface
5. Navigate among web pages
© Paradigm Publishing, Inc. 8
SKILLS
Skills You Learn…continued
6. Use tabbed browsing
7. Set up a home page
8. Follow links and history
9. Save sites as Favorites/Bookmarks
10. Download files
11. Print a web page
12. Use search engines
© Paradigm Publishing, Inc. 9
SKILLS
Skill 1 Steps: Explore Microsoft Internet
Explorer 10 in the Windows 8 Desktop Interface
1. Click the Desktop tile in the Start screen
2. Click the Internet Explorer button, located on
the Windows Taskbar, to start Internet Explorer
3. Click the Address bar to select the text, type
www.loc.gov, and then press Enter
4. If the Command bar is not displayed, right-click
an empty area of the toolbar and select
Command bar
5. Click the Page button on the Command bar
© Paradigm Publishing, Inc. 10
SKILLS
Skill 1 Steps…continued
6.Click Text size
7.Click Larger to increase the size of the text and
images in the web page
8.Click the Help button on the Command bar
9.Click Internet Explorer Help to display the help
page for Internet Explorer 10
10.Scroll to browse the help information
11.Click the Close button to close the Help window
12.Return to the Library of Congress window and
press the Alt key to display the Menu bar
© Paradigm Publishing, Inc. 11
SKILLS
Skill 1 Steps…continued
13. Click Edit on the Menu bar
14. Click Find on this page
15. Type History in the Find text box
16. All occurrences of History are highlighted on
the web page and the Find toolbar indicates
the number of matches
17. Click the Close button to close the Find toolbar
18. Click the Close button to close the browser
window
© Paradigm Publishing, Inc. 12
SKILLS
Skill 1 Visual: Explore Microsoft Internet
Explorer 10 in the Windows 8 Desktop Interface
© Paradigm Publishing, Inc. 13
Click the Page
button on the
Command bar, click
the option Text size,
and then click the
option Large to
make the text on the
webpage larger.
SKILLS
Skill 1 Visual…continued
© Paradigm Publishing, Inc. 14
All occurrences of History
are highlighted on the
web page and the Find
toolbar indicates the
number of matches.
SKILLS© Paradigm Publishing, Inc. 15
Using the Refresh and Stop Buttons
 To refresh website content
– either click the Refresh button ( ), located to the
right of the Address bar
– or press the F5 key
 To stop the loading process
– either click the Stop button ( ), displayed in place of
the Refresh button when a website is loading
– or press the Esc key
SKILLS
Skill 2 Steps: Explore Microsoft Internet
Explorer 10 in the Windows 8 User Interface
1. Click the Internet Explorer tile in the Start screen
2. Click in the Address bar to select the text, type
www.loc.gov, and then press Enter
3. Click anywhere in the web page to remove the
Navigation bar
4. Right-click anywhere in the web page to
redisplay the Navigation bar and to display the
tab switcher
5. Click in the web page to remove the Navigation
bar and the tab switcher
© Paradigm Publishing, Inc. 16
SKILLS
Skill 2 Steps…continued
6. Press Win + C to display the Charms bar
7. Click the Settings charm
8. Click Internet Options
9. Click the Zoom bar to increase the text and
image size on the web page and then use the
Zoom bar to restore the zoom to 100%
10. Click in the web page to remove the Internet
Explorer Settings pane
11. Right-click anywhere in the web page to
redisplay the Navigation bar
© Paradigm Publishing, Inc. 17
SKILLS
Skill 2 Steps…continued
12. Click the Page tools button on the Navigation bar
13. Click Find on page
14. Type History in the Find text box
15. All occurrences of History are highlighted in the
web page
16. Click the Close button to close the Find toolbar
17. Press Win + C to display the Charms bar
18. Click the Start charm to return to the Start screen
© Paradigm Publishing, Inc. 18
SKILLS
Skill 2 Visual: Explore Microsoft Internet
Explorer 10 in the Windows 8 User Interface
© Paradigm Publishing, Inc. 19
Click the Page tools
button on the
Navigation bar and
then click the Find on
page option to open the
Find text box.
SKILLS© Paradigm Publishing, Inc. 20
Using a Touch Screen
 To display the Navigation bar, swipe your finger
in from the bottom of the screen
 To display the Charms bar, swipe your finger in
from the right side of the screen
 To increase the size of the text or an image, use
two fingers to point to the text or image and
then spread the two fingers apart
 To decrease the size of the text or image, touch
the screen with two fingers spread apart and
then pull them together
SKILLS
Skill 3 Steps: Explore the Mozilla Firefox Interface
1. From the Start screen, type Mozilla Firefox and
then click Mozilla Firefox in the Apps results list
2. Select the text in the Location bar, type
www.loc.gov, and then press Enter
3. Press the Alt key to display the Menu bar and
then click View on the Menu bar
4. Click Zoom and then click Zoom In to increase
the text and image size
© Paradigm Publishing, Inc. 21
SKILLS
Skill 3 Steps…continued
5. Press the Alt key to redisplay the Menu bar,
click View on the Menu bar, click Zoom, and
then click Zoom Out to decrease the text and
image size
6.Press the Alt key and then click Help on the
Menu bar
7.Click Firefox Help
8.Scroll to browse the help information
9.Hover over a help topic link and notice that the
URL for the link appears in the Status bar
© Paradigm Publishing, Inc. 22
SKILLS
Skill 3 Steps…continued
10.Clickthe Close Tab button to close the Firefox
Help tab
11.Click the Alt key and then click Edit on the
Menu bar
12.Click Find
13.Type History in the Find text box and then click
the Highlight all button
14.Click the Close button to close the Find text box
15.Click the Close button to close the browser
window
© Paradigm Publishing, Inc. 23
SKILLS
Skill 3 Visual: Explore the Mozilla Firefox Interface
© Paradigm Publishing, Inc. 24
Search box
SKILLS
Skill 4 Steps: Explore the Google Chrome Interface
1. From the Start screen, type Chrome and then
click Chrome in the Apps results list
2. Select the text in the browser toolbar, type
www.loc.gov, and then press Enter
3. Click the Customize and Control button on the
browser toolbar
4. Click the zoom in button (+) to increase the text
and image size
5. Click the zoom out button (-) to decrease the
text and image size
© Paradigm Publishing, Inc. 25
SKILLS
Skill 4 Steps…continued
6. Click Help in the Customize and Control menu
7. Scroll to browse the help information
8. Click the Close Tab button to close the Chrome
Help tab
9. Click the Customize and Control button
10. Click Find
11. Type History in the Find text box
12. Click the Close button to close the Find text box
13. Click the Close button to close the browser
window
© Paradigm Publishing, Inc. 26
SKILLS
Skill 4 Visual: Explore the Google Chrome Interface
© Paradigm Publishing, Inc. 27
Click the Customize
and Control button on
the browser toolbar.
SKILLS
Skill 5 Steps: Navigate among Web Pages
1. Start Internet Explorer in desktop mode
2. Select the URL in the Address bar, type
www.fsa.usda.gov, and then press Enter
3. Click the Aerial Photography link
4. Click the About APFO button
5. Click the Back button to return to the APFO home
page
6. Click the Close button to close the browser tab
containing the APFO home page
7. Click the Close button to close the browser
window
© Paradigm Publishing, Inc. 28
SKILLS
Skill 5 Visual: Navigate among Web Pages
© Paradigm Publishing, Inc. 29
Click the Close
button to close the
browser tab
containing the
APFO home page.
SKILLS© Paradigm Publishing, Inc. 30
The Safari Browser
 The Safari browser is installed with the
Mac OS X and iOS operating systems
 A version of the Safari browser can be
downloaded for the Microsoft Windows
operating system
 Use of the Safari browser is increasing because
it runs on the iPhone and the iPad, both of
which are popular devices
SKILLS
Skill 6 Steps: Use Tabbed Browsing
1. Start Internet Explorer in desktop mode
2. Type www.emcp.com in the Address bar and
press Enter
3. Click the New Tab button
4. Type www.google.com in the Address bar and
press Enter
5. Right-click the Images link on the Google web
page
6. Select Open in new tab to open the Google
Images web page in a new tab
© Paradigm Publishing, Inc. 31
SKILLS
Skill 6 Steps…continued
7. Click the EMC Publishing tab to display it
8. Click the Close Tab button to close the EMC
Publishing tab
9. Click the New Tab button
10. Click the Reopen closed tabs link
11. Click the EMC Publishing LLC | Welcome to
EMC link
12. Click the Close button and then click the Close
all tabs button in the Internet Explorer dialog box
to close the browser window
© Paradigm Publishing, Inc. 32
SKILLS
Skill 6 Visual: Use Tabbed Browsing
© Paradigm Publishing, Inc. 33
New Tab button
SKILLS© Paradigm Publishing, Inc. 34
Exploring New Tab Options
 Internet Explorer allows you to browse the Web
without leaving a history trail
 Simply click Safety on the Command bar and
select InPrivate Browsing
 This opens a new browser window that displays
the InPrivate indicator to the left of the search
box
 Each new tab that you open inside this browser
window will also display the InPrivate indicator
SKILLS
Skill 7 Steps: Set Up a Home Page
1. Start Internet Explorer in desktop mode
2. Type www.emcp.com in the Address bar and press
Enter
3. Click the Home button arrow on the Command bar
4. Click Add or change home page
5. Click the Use this webpage as your only home page
option and click Yes
6. Click the Close button to close the web browser
7. Start Internet Explorer and your new home page
displays
8. Click the Close button to close the browser window
© Paradigm Publishing, Inc. 35
SKILLS
Skill 7 Visual: Set Up a Home Page
© Paradigm Publishing, Inc. 36
Click the Use this
webpage as your only
home page option.
SKILLS© Paradigm Publishing, Inc. 37
Choosing Multiple Home Pages
 Use the following steps to create a set of tabs in
Internet Explorer:
1. navigate to the selected web page
2. click the arrow next to the Home button
3. click Add or change home page
4. click the Add this webpage to your home page tabs
option
 Repeat these steps for each page you want to
add to your home page tab set
SKILLS© Paradigm Publishing, Inc. 38
Understanding Portals
 A Web portal displays a variety of information,
such as the weather, stock quotes, news
headlines, and a search engine all on one page
 Web portals are a good choice for a home page
because a variety of information collected from
various sources is available all on one page
SKILLS
Skill 8 Steps: Follow Links and History
1. Start Internet Explorer in desktop mode
2. Type www.nps.gov in the Address bar and
press Enter
3. Type www.usda.gov in the Address bar and
press Enter
4. Click the Show Address bar Autocomplete
arrow at the end of the Address bar to display a
list of web addresses that you have previously
typed into the Address bar
5. Click http://www.nps.gov/
© Paradigm Publishing, Inc. 39
SKILLS
Skill 8 Steps…continued
6. Click the View favorites, feeds, and history
button and then select the History tab
7. Click Today to display the websites you visited
today
8. Click the usda (www.usda.gov) folder and then
the U.S. Department of Agriculture link to
redisplay the USDA home page
9. Click the Close button to close the browser
window and all tabs
© Paradigm Publishing, Inc. 40
SKILLS
Skill 8 Visual: Follow Links and History
© Paradigm Publishing, Inc. 41
Click the Show Address bar
Autocomplete arrow at the end
of the Address bar to display a
list of web addresses that you
have previously typed into the
Address bar.
SKILLS© Paradigm Publishing, Inc. 42
Changing History Duration
 Use these steps to change the number of days
Internet Explorer keeps your web page history:
1. click Tools in the Menu bar
2. click Internet options to open the Internet Options
dialog box
3. click the General tab
4. click the Settings button in the Browsing history
section to open the Website Data Settings dialog
box
5. click the History tab
6. specify the number of days Internet Explorer should
save the list of websites you have visited
SKILLS
Skill 9 Steps: Save Sites as Favorites/Bookmarks
1. Start Internet Explorer in desktop mode
2. Type www.weather.gov in the Address bar and
press Enter to display the National Weather
Service website
3. Click the View favorites, feeds, and history
button and then click the Favorites tab to open
the Favorites Center
4. Click the Add to favorites button and a dialog
box displays
5. Replace the selected text in the Name box by
typing NOAA National Weather Service
© Paradigm Publishing, Inc. 43
SKILLS
Skill 9 Steps…continued
6. Click the Add button to add this site to your
Favorites list
7. Type www.nps.gov in the Address bar and
press Enter to display the National Park
Service website
8. Click the View favorites, feeds, and history
button
9. Click the NOAA National Weather Service link
in the Favorites list to redisplay the National
Weather Service page
10. Click the Close button to close the browser
window
© Paradigm Publishing, Inc. 44
SKILLS
Skill 9 Visual: Save Sites as Favorites/Bookmarks
© Paradigm Publishing, Inc. 45
Type in the Name box
to rename the favorite.
Click the New Folder
button to create a new
folder.
SKILLS© Paradigm Publishing, Inc. 46
Cleaning Out Your Favorites
 Periodically review and delete listed sites that
you no longer visit very often
 Use the following steps to clean out favorites in
Internet Explorer:
1. go to the Favorites Center
2. select the Favorites tab
3. right-click the item you wish to remove
4. click the Delete option from the shortcut menu
SKILLS
Skill 10 Steps: Download Files
1. Start Internet Explorer in desktop mode
2. Type www.emcp.net/guidelines13/M3S10 in the
Address bar and press Enter
3. Position the arrow pointer on the large textbook
cover image and then right-click to display a
menu
4. Click Save picture as to display the Save Picture
dialog box
5. Click Save to save the image to your Pictures
library and accept the assigned file name and
file type
© Paradigm Publishing, Inc. 47
SKILLS
Skill 10 Steps…continued
6. Click the View Contents Listing (PDF) link to
open the Contents page for your textbook
7. Click Open if a bar appears asking if you want
to open or save the file
8. Click the Close button to close the tab or
window containing the PDF
9. Click the Close button to close the browser
window
© Paradigm Publishing, Inc. 48
SKILLS
Skill 10 Visual: Download Files
© Paradigm Publishing, Inc. 49
Click Save picture as
to display the Save
Picture dialog box.
SKILLS© Paradigm Publishing, Inc. 50
Installing Adobe Reader
 Adobe Reader is free software that is used to
view PDF files
 To get and install Adobe Reader, go to
get.adobe.com/reader/ and click the Download
now button
 If you have certain security settings in place,
you may first have to agree to install an ActiveX
Control on your computer or give Windows
permission to download the software
SKILLS
Skill 11 Steps: Print a Web Page
1. Start Internet Explorer in desktop mode.
2. Type www.fueleconomy.gov in the Address bar
and press Enter
3. Click the Print button arrow on the Command bar
4. Click Print preview to display how the web page
will appear when printed
5. Click the Landscape button to change the page
orientation from portrait to landscape format
6. Click the Show multiple pages drop-down arrow
and select 2 Page View
© Paradigm Publishing, Inc. 51
SKILLS
Skill 11 Steps…continued
7. Click the Show multiple pages drop-down
arrow again and select 1 Page View
8. Drag the bottom horizontal Adjust margin
marker up slightly to divide page 1 and page 2
at an appropriate location
9. Click the Print Document button
10. In the Print dialog box, either click Print or click
Cancel if you do not want to print the page
11. Click the Close button to close the Print
Preview window and then click the Close
button to close the browser window
© Paradigm Publishing, Inc. 52
SKILLS
Skill 11 Visual: Print a Web Page
© Paradigm Publishing, Inc. 53
Click Print preview to
display how the web
page will appear
when printed.
SKILLS© Paradigm Publishing, Inc. 54
Adding Headers and Footers to Printed Web Pages
 In Internet Explorer, you can add a header or
footer in the Print Preview window by following
these steps:
1. click the Page Setup button to display the Page
Setup dialog box
2. click the desired buttons in the Headers and Footers
section
3. click the options you want to print in the header and
footer areas of the page
SKILLS
Skill 12 Steps: Use Search Engines
1. Start Internet Explorer in desktop mode
2. Click in the Address bar, type www.bing.com,
and then press Enter
3. Click in the search box and type new york city
attractions
4. Click the Search button (or press Enter) to
display the search results
5. Click a link that interests you and read the
information at that site
© Paradigm Publishing, Inc. 55
SKILLS
Skill 12 Steps…continued
6. Click in the Address bar, type
www.google.com, and then click the Go to
button (or press Enter) to display the Google
home page
7. Click the Images link
8. Click in the search box and type red roses
9. Click the Search button
10. Click the Close button to close the browser
window
© Paradigm Publishing, Inc. 56
SKILLS
Skill 12 Visual: Use Search Engines
© Paradigm Publishing, Inc. 57
Click in the search
box, type red roses,
and then click the
Search button.
SKILLS© Paradigm Publishing, Inc. 58
Using Advanced Search
 To help you search more successfully, most
search engines offer an Advanced Search link
with options for narrowing your search
 To access Advanced Search, you first need to
perform a basic search
 When the results are displayed, scroll to the
bottom of the page and click the Advanced
search link
SKILLS
Tasks Summary: 1 of 2
© Paradigm Publishing, Inc. 59
SKILLS
Tasks Summary: 2 of 2
© Paradigm Publishing, Inc. 60

More Related Content

What's hot

basic tutorial for frontpage 2003
basic tutorial for frontpage 2003basic tutorial for frontpage 2003
basic tutorial for frontpage 2003israeljumbo
 
Adobe acrobat connect
Adobe acrobat connectAdobe acrobat connect
Adobe acrobat connectSara Zillmer
 
How to Disable a Pop Up Blocker - Product Listing
How to Disable a Pop Up Blocker - Product ListingHow to Disable a Pop Up Blocker - Product Listing
How to Disable a Pop Up Blocker - Product Listingseller_zone
 
Windows 7-getting-started
Windows 7-getting-startedWindows 7-getting-started
Windows 7-getting-startedjaimehero
 
How to remove go.mail.ru
How to remove go.mail.ruHow to remove go.mail.ru
How to remove go.mail.ruharoNaroum
 
SoclPie: Add a Brand
SoclPie: Add a BrandSoclPie: Add a Brand
SoclPie: Add a Brandsoclpie
 
Flash Tutorial
Flash TutorialFlash Tutorial
Flash TutorialAdil Jafri
 

What's hot (8)

basic tutorial for frontpage 2003
basic tutorial for frontpage 2003basic tutorial for frontpage 2003
basic tutorial for frontpage 2003
 
Adobe acrobat connect
Adobe acrobat connectAdobe acrobat connect
Adobe acrobat connect
 
How to Disable a Pop Up Blocker - Product Listing
How to Disable a Pop Up Blocker - Product ListingHow to Disable a Pop Up Blocker - Product Listing
How to Disable a Pop Up Blocker - Product Listing
 
Windows 7-getting-started
Windows 7-getting-startedWindows 7-getting-started
Windows 7-getting-started
 
Parental Control
Parental ControlParental Control
Parental Control
 
How to remove go.mail.ru
How to remove go.mail.ruHow to remove go.mail.ru
How to remove go.mail.ru
 
SoclPie: Add a Brand
SoclPie: Add a BrandSoclPie: Add a Brand
SoclPie: Add a Brand
 
Flash Tutorial
Flash TutorialFlash Tutorial
Flash Tutorial
 

Viewers also liked

Presentation s kills tips
Presentation s kills tipsPresentation s kills tips
Presentation s kills tipssonuwgl
 
Top Ten Internet Uses
Top Ten Internet UsesTop Ten Internet Uses
Top Ten Internet UsesSuell
 
Top 10 internet uses
Top 10 internet usesTop 10 internet uses
Top 10 internet usesRandy Sherman
 
Importance of power point
Importance of power pointImportance of power point
Importance of power pointPasang Sherpa
 
Power Point Presentation
Power Point Presentation Power Point Presentation
Power Point Presentation Arun Murali
 
Internet browsing tracking
Internet browsing trackingInternet browsing tracking
Internet browsing trackingKanika Cummings
 
Internet & Importance Social Media China Q3 2011
Internet & Importance Social Media China Q3 2011Internet & Importance Social Media China Q3 2011
Internet & Importance Social Media China Q3 2011Henk Terol
 
Training Computer Users - How to Make a PowerPoint Presentation
Training Computer Users - How to Make a PowerPoint PresentationTraining Computer Users - How to Make a PowerPoint Presentation
Training Computer Users - How to Make a PowerPoint Presentationrcanfield1
 
presentations that everyone like
presentations that everyone likepresentations that everyone like
presentations that everyone likehiratufail
 
How to create a PowerPoint presentation
How to create a PowerPoint presentationHow to create a PowerPoint presentation
How to create a PowerPoint presentationlisadma
 
Techniques for an educative use of Internet
Techniques for an educative use of InternetTechniques for an educative use of Internet
Techniques for an educative use of InternetRaúl Reinoso
 
The Internet and Its Importance
The Internet and Its ImportanceThe Internet and Its Importance
The Internet and Its ImportanceChuchi Dilao
 
How to use internet effectively
How to use internet effectivelyHow to use internet effectively
How to use internet effectivelyLenny
 
Top ten internet uses for educators
Top ten internet uses for educatorsTop ten internet uses for educators
Top ten internet uses for educatorsdavjohn3057
 
Internet applications
Internet applicationsInternet applications
Internet applicationsNur Azlina
 
Presentation (PowerPoint File)
Presentation (PowerPoint File)Presentation (PowerPoint File)
Presentation (PowerPoint File)webhostingguy
 
5 introduction to internet
5 introduction to internet5 introduction to internet
5 introduction to internetVedpal Yadav
 
Semantic Web Servers
Semantic Web ServersSemantic Web Servers
Semantic Web Serverswebhostingguy
 

Viewers also liked (20)

Presentation s kills tips
Presentation s kills tipsPresentation s kills tips
Presentation s kills tips
 
Top Ten Internet Uses
Top Ten Internet UsesTop Ten Internet Uses
Top Ten Internet Uses
 
Top 10 internet uses
Top 10 internet usesTop 10 internet uses
Top 10 internet uses
 
Importance of power point
Importance of power pointImportance of power point
Importance of power point
 
Power Point Presentation
Power Point Presentation Power Point Presentation
Power Point Presentation
 
Internet browsing tracking
Internet browsing trackingInternet browsing tracking
Internet browsing tracking
 
Internet & Importance Social Media China Q3 2011
Internet & Importance Social Media China Q3 2011Internet & Importance Social Media China Q3 2011
Internet & Importance Social Media China Q3 2011
 
Training Computer Users - How to Make a PowerPoint Presentation
Training Computer Users - How to Make a PowerPoint PresentationTraining Computer Users - How to Make a PowerPoint Presentation
Training Computer Users - How to Make a PowerPoint Presentation
 
presentations that everyone like
presentations that everyone likepresentations that everyone like
presentations that everyone like
 
How to create a PowerPoint presentation
How to create a PowerPoint presentationHow to create a PowerPoint presentation
How to create a PowerPoint presentation
 
Techniques for an educative use of Internet
Techniques for an educative use of InternetTechniques for an educative use of Internet
Techniques for an educative use of Internet
 
The Internet and Its Importance
The Internet and Its ImportanceThe Internet and Its Importance
The Internet and Its Importance
 
How to use internet effectively
How to use internet effectivelyHow to use internet effectively
How to use internet effectively
 
Top ten internet uses for educators
Top ten internet uses for educatorsTop ten internet uses for educators
Top ten internet uses for educators
 
Internet applications
Internet applicationsInternet applications
Internet applications
 
Download It
Download ItDownload It
Download It
 
Presentation (PowerPoint File)
Presentation (PowerPoint File)Presentation (PowerPoint File)
Presentation (PowerPoint File)
 
5 introduction to internet
5 introduction to internet5 introduction to internet
5 introduction to internet
 
5-WebServers.ppt
5-WebServers.ppt5-WebServers.ppt
5-WebServers.ppt
 
Semantic Web Servers
Semantic Web ServersSemantic Web Servers
Semantic Web Servers
 

Similar to Gl13 m3-presentation

Gl2010 m3 int-presentation
Gl2010 m3 int-presentationGl2010 m3 int-presentation
Gl2010 m3 int-presentationTracie King
 
Gl13 m2-c1-presentation
Gl13 m2-c1-presentationGl13 m2-c1-presentation
Gl13 m2-c1-presentationTracie King
 
Gl13 m2-c3-presentation
Gl13 m2-c3-presentationGl13 m2-c3-presentation
Gl13 m2-c3-presentationTracie King
 
Gl13 m4-presentation
Gl13 m4-presentationGl13 m4-presentation
Gl13 m4-presentationTracie King
 
Gl13 m0-c3 presentation
Gl13 m0-c3 presentationGl13 m0-c3 presentation
Gl13 m0-c3 presentationTracie King
 
Girl Scouts Website Designer Badge Seminar - Workbook
Girl Scouts Website Designer Badge Seminar - WorkbookGirl Scouts Website Designer Badge Seminar - Workbook
Girl Scouts Website Designer Badge Seminar - WorkbookLauren Hayward Schaefer
 
Gl13 m5-c1-presentation
Gl13 m5-c1-presentationGl13 m5-c1-presentation
Gl13 m5-c1-presentationTracie King
 
Delicious instructions
Delicious instructionsDelicious instructions
Delicious instructionsThe Wise Group
 
CBIS 327 ~ Chapter 01
CBIS 327 ~ Chapter 01CBIS 327 ~ Chapter 01
CBIS 327 ~ Chapter 01mwarrick
 
Diigo document
Diigo documentDiigo document
Diigo documentImad Ddine
 
Gl13 m0-c1-presentation
Gl13 m0-c1-presentationGl13 m0-c1-presentation
Gl13 m0-c1-presentationTracie King
 
Gl13 m0-c1-presentation
Gl13 m0-c1-presentationGl13 m0-c1-presentation
Gl13 m0-c1-presentationTracie King
 
Saw13 ch11-ppt
Saw13 ch11-pptSaw13 ch11-ppt
Saw13 ch11-pptCEPadgett
 
Unit 3: Lesson 3
Unit 3: Lesson 3Unit 3: Lesson 3
Unit 3: Lesson 3Neil James
 
Windows 8.1 Training Session 3 by Atidan
Windows 8.1 Training Session 3 by AtidanWindows 8.1 Training Session 3 by Atidan
Windows 8.1 Training Session 3 by AtidanDavid J Rosenthal
 
Gl13 m0-c2-presentation
Gl13 m0-c2-presentationGl13 m0-c2-presentation
Gl13 m0-c2-presentationTracie King
 

Similar to Gl13 m3-presentation (20)

Gl2010 m3 int-presentation
Gl2010 m3 int-presentationGl2010 m3 int-presentation
Gl2010 m3 int-presentation
 
Gl13 m2-c1-presentation
Gl13 m2-c1-presentationGl13 m2-c1-presentation
Gl13 m2-c1-presentation
 
Gl13 m2-c3-presentation
Gl13 m2-c3-presentationGl13 m2-c3-presentation
Gl13 m2-c3-presentation
 
Gl13 m4-presentation
Gl13 m4-presentationGl13 m4-presentation
Gl13 m4-presentation
 
Gl13 m0-c3 presentation
Gl13 m0-c3 presentationGl13 m0-c3 presentation
Gl13 m0-c3 presentation
 
Girl Scouts Website Designer Badge Seminar - Workbook
Girl Scouts Website Designer Badge Seminar - WorkbookGirl Scouts Website Designer Badge Seminar - Workbook
Girl Scouts Website Designer Badge Seminar - Workbook
 
Gl13 m5-c1-presentation
Gl13 m5-c1-presentationGl13 m5-c1-presentation
Gl13 m5-c1-presentation
 
Delicious instructions
Delicious instructionsDelicious instructions
Delicious instructions
 
CBIS 327 ~ Chapter 01
CBIS 327 ~ Chapter 01CBIS 327 ~ Chapter 01
CBIS 327 ~ Chapter 01
 
Saveasdialog
SaveasdialogSaveasdialog
Saveasdialog
 
Diigo document
Diigo documentDiigo document
Diigo document
 
Gl13 m0-c1-presentation
Gl13 m0-c1-presentationGl13 m0-c1-presentation
Gl13 m0-c1-presentation
 
Gl13 m0-c1-presentation
Gl13 m0-c1-presentationGl13 m0-c1-presentation
Gl13 m0-c1-presentation
 
Saw13 ch11-ppt
Saw13 ch11-pptSaw13 ch11-ppt
Saw13 ch11-ppt
 
Unit 3: Lesson 3
Unit 3: Lesson 3Unit 3: Lesson 3
Unit 3: Lesson 3
 
Sharepoint
SharepointSharepoint
Sharepoint
 
Sharepoint
SharepointSharepoint
Sharepoint
 
Sharepoint
SharepointSharepoint
Sharepoint
 
Windows 8.1 Training Session 3 by Atidan
Windows 8.1 Training Session 3 by AtidanWindows 8.1 Training Session 3 by Atidan
Windows 8.1 Training Session 3 by Atidan
 
Gl13 m0-c2-presentation
Gl13 m0-c2-presentationGl13 m0-c2-presentation
Gl13 m0-c2-presentation
 

More from Tracie King

The career search project
The career search projectThe career search project
The career search projectTracie King
 
The career search project word
The career search project wordThe career search project word
The career search project wordTracie King
 
Roles and Responsibilities: Developing the Team
Roles and Responsibilities: Developing the TeamRoles and Responsibilities: Developing the Team
Roles and Responsibilities: Developing the TeamTracie King
 
Interface: Creating the connection
Interface: Creating the connectionInterface: Creating the connection
Interface: Creating the connectionTracie King
 
Gameplay: Creating the Experience
Gameplay:  Creating the ExperienceGameplay:  Creating the Experience
Gameplay: Creating the ExperienceTracie King
 
Game Story and Character Development
Game Story and Character DevelopmentGame Story and Character Development
Game Story and Character DevelopmentTracie King
 
Production and Management: Developing the Process
Production and Management: Developing the ProcessProduction and Management: Developing the Process
Production and Management: Developing the ProcessTracie King
 
98 374 Lesson 02-slides
98 374 Lesson 02-slides98 374 Lesson 02-slides
98 374 Lesson 02-slidesTracie King
 
98 374 Lesson 01-slides
98 374 Lesson 01-slides98 374 Lesson 01-slides
98 374 Lesson 01-slidesTracie King
 
98 374 Lesson 06-slides
98 374 Lesson 06-slides98 374 Lesson 06-slides
98 374 Lesson 06-slidesTracie King
 
98 374 Lesson 05-slides
98 374 Lesson 05-slides98 374 Lesson 05-slides
98 374 Lesson 05-slidesTracie King
 
98 374 Lesson 04-slides
98 374 Lesson 04-slides98 374 Lesson 04-slides
98 374 Lesson 04-slidesTracie King
 
98 374 Lesson 03-slides
98 374 Lesson 03-slides98 374 Lesson 03-slides
98 374 Lesson 03-slidesTracie King
 

More from Tracie King (20)

The career search project
The career search projectThe career search project
The career search project
 
The career search project word
The career search project wordThe career search project word
The career search project word
 
Roles and Responsibilities: Developing the Team
Roles and Responsibilities: Developing the TeamRoles and Responsibilities: Developing the Team
Roles and Responsibilities: Developing the Team
 
Interface: Creating the connection
Interface: Creating the connectionInterface: Creating the connection
Interface: Creating the connection
 
Gameplay: Creating the Experience
Gameplay:  Creating the ExperienceGameplay:  Creating the Experience
Gameplay: Creating the Experience
 
Game Story and Character Development
Game Story and Character DevelopmentGame Story and Character Development
Game Story and Character Development
 
Production and Management: Developing the Process
Production and Management: Developing the ProcessProduction and Management: Developing the Process
Production and Management: Developing the Process
 
98 374 Lesson 02-slides
98 374 Lesson 02-slides98 374 Lesson 02-slides
98 374 Lesson 02-slides
 
98 374 Lesson 01-slides
98 374 Lesson 01-slides98 374 Lesson 01-slides
98 374 Lesson 01-slides
 
98 374 Lesson 06-slides
98 374 Lesson 06-slides98 374 Lesson 06-slides
98 374 Lesson 06-slides
 
98 374 Lesson 05-slides
98 374 Lesson 05-slides98 374 Lesson 05-slides
98 374 Lesson 05-slides
 
98 374 Lesson 04-slides
98 374 Lesson 04-slides98 374 Lesson 04-slides
98 374 Lesson 04-slides
 
98 374 Lesson 03-slides
98 374 Lesson 03-slides98 374 Lesson 03-slides
98 374 Lesson 03-slides
 
Max2015 ch01
Max2015 ch01Max2015 ch01
Max2015 ch01
 
Max2015 ch03
Max2015 ch03Max2015 ch03
Max2015 ch03
 
Max2015 ch02
Max2015 ch02Max2015 ch02
Max2015 ch02
 
Max2015 ch05
Max2015 ch05Max2015 ch05
Max2015 ch05
 
Max2015 ch04
Max2015 ch04Max2015 ch04
Max2015 ch04
 
Max2015 ch06
Max2015 ch06Max2015 ch06
Max2015 ch06
 
Max2015 ch07
Max2015 ch07Max2015 ch07
Max2015 ch07
 

Recently uploaded

Kisan Call Centre - To harness potential of ICT in Agriculture by answer farm...
Kisan Call Centre - To harness potential of ICT in Agriculture by answer farm...Kisan Call Centre - To harness potential of ICT in Agriculture by answer farm...
Kisan Call Centre - To harness potential of ICT in Agriculture by answer farm...Krashi Coaching
 
Mastering the Unannounced Regulatory Inspection
Mastering the Unannounced Regulatory InspectionMastering the Unannounced Regulatory Inspection
Mastering the Unannounced Regulatory InspectionSafetyChain Software
 
Q4-W6-Restating Informational Text Grade 3
Q4-W6-Restating Informational Text Grade 3Q4-W6-Restating Informational Text Grade 3
Q4-W6-Restating Informational Text Grade 3JemimahLaneBuaron
 
CARE OF CHILD IN INCUBATOR..........pptx
CARE OF CHILD IN INCUBATOR..........pptxCARE OF CHILD IN INCUBATOR..........pptx
CARE OF CHILD IN INCUBATOR..........pptxGaneshChakor2
 
Introduction to ArtificiaI Intelligence in Higher Education
Introduction to ArtificiaI Intelligence in Higher EducationIntroduction to ArtificiaI Intelligence in Higher Education
Introduction to ArtificiaI Intelligence in Higher Educationpboyjonauth
 
APM Welcome, APM North West Network Conference, Synergies Across Sectors
APM Welcome, APM North West Network Conference, Synergies Across SectorsAPM Welcome, APM North West Network Conference, Synergies Across Sectors
APM Welcome, APM North West Network Conference, Synergies Across SectorsAssociation for Project Management
 
18-04-UA_REPORT_MEDIALITERAСY_INDEX-DM_23-1-final-eng.pdf
18-04-UA_REPORT_MEDIALITERAСY_INDEX-DM_23-1-final-eng.pdf18-04-UA_REPORT_MEDIALITERAСY_INDEX-DM_23-1-final-eng.pdf
18-04-UA_REPORT_MEDIALITERAСY_INDEX-DM_23-1-final-eng.pdfssuser54595a
 
POINT- BIOCHEMISTRY SEM 2 ENZYMES UNIT 5.pptx
POINT- BIOCHEMISTRY SEM 2 ENZYMES UNIT 5.pptxPOINT- BIOCHEMISTRY SEM 2 ENZYMES UNIT 5.pptx
POINT- BIOCHEMISTRY SEM 2 ENZYMES UNIT 5.pptxSayali Powar
 
Alper Gobel In Media Res Media Component
Alper Gobel In Media Res Media ComponentAlper Gobel In Media Res Media Component
Alper Gobel In Media Res Media ComponentInMediaRes1
 
microwave assisted reaction. General introduction
microwave assisted reaction. General introductionmicrowave assisted reaction. General introduction
microwave assisted reaction. General introductionMaksud Ahmed
 
Accessible design: Minimum effort, maximum impact
Accessible design: Minimum effort, maximum impactAccessible design: Minimum effort, maximum impact
Accessible design: Minimum effort, maximum impactdawncurless
 
Micromeritics - Fundamental and Derived Properties of Powders
Micromeritics - Fundamental and Derived Properties of PowdersMicromeritics - Fundamental and Derived Properties of Powders
Micromeritics - Fundamental and Derived Properties of PowdersChitralekhaTherkar
 
Sanyam Choudhary Chemistry practical.pdf
Sanyam Choudhary Chemistry practical.pdfSanyam Choudhary Chemistry practical.pdf
Sanyam Choudhary Chemistry practical.pdfsanyamsingh5019
 
Arihant handbook biology for class 11 .pdf
Arihant handbook biology for class 11 .pdfArihant handbook biology for class 11 .pdf
Arihant handbook biology for class 11 .pdfchloefrazer622
 
BASLIQ CURRENT LOOKBOOK LOOKBOOK(1) (1).pdf
BASLIQ CURRENT LOOKBOOK  LOOKBOOK(1) (1).pdfBASLIQ CURRENT LOOKBOOK  LOOKBOOK(1) (1).pdf
BASLIQ CURRENT LOOKBOOK LOOKBOOK(1) (1).pdfSoniaTolstoy
 
Presentation by Andreas Schleicher Tackling the School Absenteeism Crisis 30 ...
Presentation by Andreas Schleicher Tackling the School Absenteeism Crisis 30 ...Presentation by Andreas Schleicher Tackling the School Absenteeism Crisis 30 ...
Presentation by Andreas Schleicher Tackling the School Absenteeism Crisis 30 ...EduSkills OECD
 
Software Engineering Methodologies (overview)
Software Engineering Methodologies (overview)Software Engineering Methodologies (overview)
Software Engineering Methodologies (overview)eniolaolutunde
 
Organic Name Reactions for the students and aspirants of Chemistry12th.pptx
Organic Name Reactions  for the students and aspirants of Chemistry12th.pptxOrganic Name Reactions  for the students and aspirants of Chemistry12th.pptx
Organic Name Reactions for the students and aspirants of Chemistry12th.pptxVS Mahajan Coaching Centre
 

Recently uploaded (20)

Kisan Call Centre - To harness potential of ICT in Agriculture by answer farm...
Kisan Call Centre - To harness potential of ICT in Agriculture by answer farm...Kisan Call Centre - To harness potential of ICT in Agriculture by answer farm...
Kisan Call Centre - To harness potential of ICT in Agriculture by answer farm...
 
Mastering the Unannounced Regulatory Inspection
Mastering the Unannounced Regulatory InspectionMastering the Unannounced Regulatory Inspection
Mastering the Unannounced Regulatory Inspection
 
Q4-W6-Restating Informational Text Grade 3
Q4-W6-Restating Informational Text Grade 3Q4-W6-Restating Informational Text Grade 3
Q4-W6-Restating Informational Text Grade 3
 
CARE OF CHILD IN INCUBATOR..........pptx
CARE OF CHILD IN INCUBATOR..........pptxCARE OF CHILD IN INCUBATOR..........pptx
CARE OF CHILD IN INCUBATOR..........pptx
 
Introduction to ArtificiaI Intelligence in Higher Education
Introduction to ArtificiaI Intelligence in Higher EducationIntroduction to ArtificiaI Intelligence in Higher Education
Introduction to ArtificiaI Intelligence in Higher Education
 
TataKelola dan KamSiber Kecerdasan Buatan v022.pdf
TataKelola dan KamSiber Kecerdasan Buatan v022.pdfTataKelola dan KamSiber Kecerdasan Buatan v022.pdf
TataKelola dan KamSiber Kecerdasan Buatan v022.pdf
 
APM Welcome, APM North West Network Conference, Synergies Across Sectors
APM Welcome, APM North West Network Conference, Synergies Across SectorsAPM Welcome, APM North West Network Conference, Synergies Across Sectors
APM Welcome, APM North West Network Conference, Synergies Across Sectors
 
18-04-UA_REPORT_MEDIALITERAСY_INDEX-DM_23-1-final-eng.pdf
18-04-UA_REPORT_MEDIALITERAСY_INDEX-DM_23-1-final-eng.pdf18-04-UA_REPORT_MEDIALITERAСY_INDEX-DM_23-1-final-eng.pdf
18-04-UA_REPORT_MEDIALITERAСY_INDEX-DM_23-1-final-eng.pdf
 
POINT- BIOCHEMISTRY SEM 2 ENZYMES UNIT 5.pptx
POINT- BIOCHEMISTRY SEM 2 ENZYMES UNIT 5.pptxPOINT- BIOCHEMISTRY SEM 2 ENZYMES UNIT 5.pptx
POINT- BIOCHEMISTRY SEM 2 ENZYMES UNIT 5.pptx
 
Alper Gobel In Media Res Media Component
Alper Gobel In Media Res Media ComponentAlper Gobel In Media Res Media Component
Alper Gobel In Media Res Media Component
 
Código Creativo y Arte de Software | Unidad 1
Código Creativo y Arte de Software | Unidad 1Código Creativo y Arte de Software | Unidad 1
Código Creativo y Arte de Software | Unidad 1
 
microwave assisted reaction. General introduction
microwave assisted reaction. General introductionmicrowave assisted reaction. General introduction
microwave assisted reaction. General introduction
 
Accessible design: Minimum effort, maximum impact
Accessible design: Minimum effort, maximum impactAccessible design: Minimum effort, maximum impact
Accessible design: Minimum effort, maximum impact
 
Micromeritics - Fundamental and Derived Properties of Powders
Micromeritics - Fundamental and Derived Properties of PowdersMicromeritics - Fundamental and Derived Properties of Powders
Micromeritics - Fundamental and Derived Properties of Powders
 
Sanyam Choudhary Chemistry practical.pdf
Sanyam Choudhary Chemistry practical.pdfSanyam Choudhary Chemistry practical.pdf
Sanyam Choudhary Chemistry practical.pdf
 
Arihant handbook biology for class 11 .pdf
Arihant handbook biology for class 11 .pdfArihant handbook biology for class 11 .pdf
Arihant handbook biology for class 11 .pdf
 
BASLIQ CURRENT LOOKBOOK LOOKBOOK(1) (1).pdf
BASLIQ CURRENT LOOKBOOK  LOOKBOOK(1) (1).pdfBASLIQ CURRENT LOOKBOOK  LOOKBOOK(1) (1).pdf
BASLIQ CURRENT LOOKBOOK LOOKBOOK(1) (1).pdf
 
Presentation by Andreas Schleicher Tackling the School Absenteeism Crisis 30 ...
Presentation by Andreas Schleicher Tackling the School Absenteeism Crisis 30 ...Presentation by Andreas Schleicher Tackling the School Absenteeism Crisis 30 ...
Presentation by Andreas Schleicher Tackling the School Absenteeism Crisis 30 ...
 
Software Engineering Methodologies (overview)
Software Engineering Methodologies (overview)Software Engineering Methodologies (overview)
Software Engineering Methodologies (overview)
 
Organic Name Reactions for the students and aspirants of Chemistry12th.pptx
Organic Name Reactions  for the students and aspirants of Chemistry12th.pptxOrganic Name Reactions  for the students and aspirants of Chemistry12th.pptx
Organic Name Reactions for the students and aspirants of Chemistry12th.pptx
 

Gl13 m3-presentation

  • 1. MODULE 3 SKILLS Internet Basics © Paradigm Publishing, Inc. 1
  • 3. SKILLS Guidelines for Using the Internet © Paradigm Publishing, Inc. 3  In order to access and connect to the Internet, you need the following: – a computer, tablet, smartphone, or other Internet- capable device – a hotspot that provides free Internet access or an account with an Internet service provider (ISP) and related communications hardware such as a DSL modem or cable modem – a wireless network card or an Ethernet card in your computer to support connectivity – a web browser
  • 4. SKILLS Guidelines for Using the Internet…continued © Paradigm Publishing, Inc. 4 Internet Service Provider (ISP)  Is a company that provides access to the Internet through one or more servers, which are large, powerful computers  Provides connection instructions and may provide you with necessary equipment, such as a cable modem or router  May also provide email accounts and other services
  • 5. SKILLS Guidelines for Using the Internet…continued © Paradigm Publishing, Inc. 5 Connection Options
  • 6. SKILLS Guidelines for Using the Internet…continued © Paradigm Publishing, Inc. 6 Web Browsers  A web browser is a software program that allows you to locate and view web pages  The term web page refers to a single page or document  The term website refers to all of the web pages that make up a site
  • 7. SKILLS Guidelines for Using the Internet…continued © Paradigm Publishing, Inc. 7 Web Browsers…continued
  • 8. SKILLS Skills You Learn 1. Explore Microsoft Internet Explorer 10 in the Windows 8 desktop interface 2. Explore Microsoft Internet Explorer 10 in the Windows 8 user interface 3. Explore the Mozilla Firefox interface 4. Explore the Google Chrome interface 5. Navigate among web pages © Paradigm Publishing, Inc. 8
  • 9. SKILLS Skills You Learn…continued 6. Use tabbed browsing 7. Set up a home page 8. Follow links and history 9. Save sites as Favorites/Bookmarks 10. Download files 11. Print a web page 12. Use search engines © Paradigm Publishing, Inc. 9
  • 10. SKILLS Skill 1 Steps: Explore Microsoft Internet Explorer 10 in the Windows 8 Desktop Interface 1. Click the Desktop tile in the Start screen 2. Click the Internet Explorer button, located on the Windows Taskbar, to start Internet Explorer 3. Click the Address bar to select the text, type www.loc.gov, and then press Enter 4. If the Command bar is not displayed, right-click an empty area of the toolbar and select Command bar 5. Click the Page button on the Command bar © Paradigm Publishing, Inc. 10
  • 11. SKILLS Skill 1 Steps…continued 6.Click Text size 7.Click Larger to increase the size of the text and images in the web page 8.Click the Help button on the Command bar 9.Click Internet Explorer Help to display the help page for Internet Explorer 10 10.Scroll to browse the help information 11.Click the Close button to close the Help window 12.Return to the Library of Congress window and press the Alt key to display the Menu bar © Paradigm Publishing, Inc. 11
  • 12. SKILLS Skill 1 Steps…continued 13. Click Edit on the Menu bar 14. Click Find on this page 15. Type History in the Find text box 16. All occurrences of History are highlighted on the web page and the Find toolbar indicates the number of matches 17. Click the Close button to close the Find toolbar 18. Click the Close button to close the browser window © Paradigm Publishing, Inc. 12
  • 13. SKILLS Skill 1 Visual: Explore Microsoft Internet Explorer 10 in the Windows 8 Desktop Interface © Paradigm Publishing, Inc. 13 Click the Page button on the Command bar, click the option Text size, and then click the option Large to make the text on the webpage larger.
  • 14. SKILLS Skill 1 Visual…continued © Paradigm Publishing, Inc. 14 All occurrences of History are highlighted on the web page and the Find toolbar indicates the number of matches.
  • 15. SKILLS© Paradigm Publishing, Inc. 15 Using the Refresh and Stop Buttons  To refresh website content – either click the Refresh button ( ), located to the right of the Address bar – or press the F5 key  To stop the loading process – either click the Stop button ( ), displayed in place of the Refresh button when a website is loading – or press the Esc key
  • 16. SKILLS Skill 2 Steps: Explore Microsoft Internet Explorer 10 in the Windows 8 User Interface 1. Click the Internet Explorer tile in the Start screen 2. Click in the Address bar to select the text, type www.loc.gov, and then press Enter 3. Click anywhere in the web page to remove the Navigation bar 4. Right-click anywhere in the web page to redisplay the Navigation bar and to display the tab switcher 5. Click in the web page to remove the Navigation bar and the tab switcher © Paradigm Publishing, Inc. 16
  • 17. SKILLS Skill 2 Steps…continued 6. Press Win + C to display the Charms bar 7. Click the Settings charm 8. Click Internet Options 9. Click the Zoom bar to increase the text and image size on the web page and then use the Zoom bar to restore the zoom to 100% 10. Click in the web page to remove the Internet Explorer Settings pane 11. Right-click anywhere in the web page to redisplay the Navigation bar © Paradigm Publishing, Inc. 17
  • 18. SKILLS Skill 2 Steps…continued 12. Click the Page tools button on the Navigation bar 13. Click Find on page 14. Type History in the Find text box 15. All occurrences of History are highlighted in the web page 16. Click the Close button to close the Find toolbar 17. Press Win + C to display the Charms bar 18. Click the Start charm to return to the Start screen © Paradigm Publishing, Inc. 18
  • 19. SKILLS Skill 2 Visual: Explore Microsoft Internet Explorer 10 in the Windows 8 User Interface © Paradigm Publishing, Inc. 19 Click the Page tools button on the Navigation bar and then click the Find on page option to open the Find text box.
  • 20. SKILLS© Paradigm Publishing, Inc. 20 Using a Touch Screen  To display the Navigation bar, swipe your finger in from the bottom of the screen  To display the Charms bar, swipe your finger in from the right side of the screen  To increase the size of the text or an image, use two fingers to point to the text or image and then spread the two fingers apart  To decrease the size of the text or image, touch the screen with two fingers spread apart and then pull them together
  • 21. SKILLS Skill 3 Steps: Explore the Mozilla Firefox Interface 1. From the Start screen, type Mozilla Firefox and then click Mozilla Firefox in the Apps results list 2. Select the text in the Location bar, type www.loc.gov, and then press Enter 3. Press the Alt key to display the Menu bar and then click View on the Menu bar 4. Click Zoom and then click Zoom In to increase the text and image size © Paradigm Publishing, Inc. 21
  • 22. SKILLS Skill 3 Steps…continued 5. Press the Alt key to redisplay the Menu bar, click View on the Menu bar, click Zoom, and then click Zoom Out to decrease the text and image size 6.Press the Alt key and then click Help on the Menu bar 7.Click Firefox Help 8.Scroll to browse the help information 9.Hover over a help topic link and notice that the URL for the link appears in the Status bar © Paradigm Publishing, Inc. 22
  • 23. SKILLS Skill 3 Steps…continued 10.Clickthe Close Tab button to close the Firefox Help tab 11.Click the Alt key and then click Edit on the Menu bar 12.Click Find 13.Type History in the Find text box and then click the Highlight all button 14.Click the Close button to close the Find text box 15.Click the Close button to close the browser window © Paradigm Publishing, Inc. 23
  • 24. SKILLS Skill 3 Visual: Explore the Mozilla Firefox Interface © Paradigm Publishing, Inc. 24 Search box
  • 25. SKILLS Skill 4 Steps: Explore the Google Chrome Interface 1. From the Start screen, type Chrome and then click Chrome in the Apps results list 2. Select the text in the browser toolbar, type www.loc.gov, and then press Enter 3. Click the Customize and Control button on the browser toolbar 4. Click the zoom in button (+) to increase the text and image size 5. Click the zoom out button (-) to decrease the text and image size © Paradigm Publishing, Inc. 25
  • 26. SKILLS Skill 4 Steps…continued 6. Click Help in the Customize and Control menu 7. Scroll to browse the help information 8. Click the Close Tab button to close the Chrome Help tab 9. Click the Customize and Control button 10. Click Find 11. Type History in the Find text box 12. Click the Close button to close the Find text box 13. Click the Close button to close the browser window © Paradigm Publishing, Inc. 26
  • 27. SKILLS Skill 4 Visual: Explore the Google Chrome Interface © Paradigm Publishing, Inc. 27 Click the Customize and Control button on the browser toolbar.
  • 28. SKILLS Skill 5 Steps: Navigate among Web Pages 1. Start Internet Explorer in desktop mode 2. Select the URL in the Address bar, type www.fsa.usda.gov, and then press Enter 3. Click the Aerial Photography link 4. Click the About APFO button 5. Click the Back button to return to the APFO home page 6. Click the Close button to close the browser tab containing the APFO home page 7. Click the Close button to close the browser window © Paradigm Publishing, Inc. 28
  • 29. SKILLS Skill 5 Visual: Navigate among Web Pages © Paradigm Publishing, Inc. 29 Click the Close button to close the browser tab containing the APFO home page.
  • 30. SKILLS© Paradigm Publishing, Inc. 30 The Safari Browser  The Safari browser is installed with the Mac OS X and iOS operating systems  A version of the Safari browser can be downloaded for the Microsoft Windows operating system  Use of the Safari browser is increasing because it runs on the iPhone and the iPad, both of which are popular devices
  • 31. SKILLS Skill 6 Steps: Use Tabbed Browsing 1. Start Internet Explorer in desktop mode 2. Type www.emcp.com in the Address bar and press Enter 3. Click the New Tab button 4. Type www.google.com in the Address bar and press Enter 5. Right-click the Images link on the Google web page 6. Select Open in new tab to open the Google Images web page in a new tab © Paradigm Publishing, Inc. 31
  • 32. SKILLS Skill 6 Steps…continued 7. Click the EMC Publishing tab to display it 8. Click the Close Tab button to close the EMC Publishing tab 9. Click the New Tab button 10. Click the Reopen closed tabs link 11. Click the EMC Publishing LLC | Welcome to EMC link 12. Click the Close button and then click the Close all tabs button in the Internet Explorer dialog box to close the browser window © Paradigm Publishing, Inc. 32
  • 33. SKILLS Skill 6 Visual: Use Tabbed Browsing © Paradigm Publishing, Inc. 33 New Tab button
  • 34. SKILLS© Paradigm Publishing, Inc. 34 Exploring New Tab Options  Internet Explorer allows you to browse the Web without leaving a history trail  Simply click Safety on the Command bar and select InPrivate Browsing  This opens a new browser window that displays the InPrivate indicator to the left of the search box  Each new tab that you open inside this browser window will also display the InPrivate indicator
  • 35. SKILLS Skill 7 Steps: Set Up a Home Page 1. Start Internet Explorer in desktop mode 2. Type www.emcp.com in the Address bar and press Enter 3. Click the Home button arrow on the Command bar 4. Click Add or change home page 5. Click the Use this webpage as your only home page option and click Yes 6. Click the Close button to close the web browser 7. Start Internet Explorer and your new home page displays 8. Click the Close button to close the browser window © Paradigm Publishing, Inc. 35
  • 36. SKILLS Skill 7 Visual: Set Up a Home Page © Paradigm Publishing, Inc. 36 Click the Use this webpage as your only home page option.
  • 37. SKILLS© Paradigm Publishing, Inc. 37 Choosing Multiple Home Pages  Use the following steps to create a set of tabs in Internet Explorer: 1. navigate to the selected web page 2. click the arrow next to the Home button 3. click Add or change home page 4. click the Add this webpage to your home page tabs option  Repeat these steps for each page you want to add to your home page tab set
  • 38. SKILLS© Paradigm Publishing, Inc. 38 Understanding Portals  A Web portal displays a variety of information, such as the weather, stock quotes, news headlines, and a search engine all on one page  Web portals are a good choice for a home page because a variety of information collected from various sources is available all on one page
  • 39. SKILLS Skill 8 Steps: Follow Links and History 1. Start Internet Explorer in desktop mode 2. Type www.nps.gov in the Address bar and press Enter 3. Type www.usda.gov in the Address bar and press Enter 4. Click the Show Address bar Autocomplete arrow at the end of the Address bar to display a list of web addresses that you have previously typed into the Address bar 5. Click http://www.nps.gov/ © Paradigm Publishing, Inc. 39
  • 40. SKILLS Skill 8 Steps…continued 6. Click the View favorites, feeds, and history button and then select the History tab 7. Click Today to display the websites you visited today 8. Click the usda (www.usda.gov) folder and then the U.S. Department of Agriculture link to redisplay the USDA home page 9. Click the Close button to close the browser window and all tabs © Paradigm Publishing, Inc. 40
  • 41. SKILLS Skill 8 Visual: Follow Links and History © Paradigm Publishing, Inc. 41 Click the Show Address bar Autocomplete arrow at the end of the Address bar to display a list of web addresses that you have previously typed into the Address bar.
  • 42. SKILLS© Paradigm Publishing, Inc. 42 Changing History Duration  Use these steps to change the number of days Internet Explorer keeps your web page history: 1. click Tools in the Menu bar 2. click Internet options to open the Internet Options dialog box 3. click the General tab 4. click the Settings button in the Browsing history section to open the Website Data Settings dialog box 5. click the History tab 6. specify the number of days Internet Explorer should save the list of websites you have visited
  • 43. SKILLS Skill 9 Steps: Save Sites as Favorites/Bookmarks 1. Start Internet Explorer in desktop mode 2. Type www.weather.gov in the Address bar and press Enter to display the National Weather Service website 3. Click the View favorites, feeds, and history button and then click the Favorites tab to open the Favorites Center 4. Click the Add to favorites button and a dialog box displays 5. Replace the selected text in the Name box by typing NOAA National Weather Service © Paradigm Publishing, Inc. 43
  • 44. SKILLS Skill 9 Steps…continued 6. Click the Add button to add this site to your Favorites list 7. Type www.nps.gov in the Address bar and press Enter to display the National Park Service website 8. Click the View favorites, feeds, and history button 9. Click the NOAA National Weather Service link in the Favorites list to redisplay the National Weather Service page 10. Click the Close button to close the browser window © Paradigm Publishing, Inc. 44
  • 45. SKILLS Skill 9 Visual: Save Sites as Favorites/Bookmarks © Paradigm Publishing, Inc. 45 Type in the Name box to rename the favorite. Click the New Folder button to create a new folder.
  • 46. SKILLS© Paradigm Publishing, Inc. 46 Cleaning Out Your Favorites  Periodically review and delete listed sites that you no longer visit very often  Use the following steps to clean out favorites in Internet Explorer: 1. go to the Favorites Center 2. select the Favorites tab 3. right-click the item you wish to remove 4. click the Delete option from the shortcut menu
  • 47. SKILLS Skill 10 Steps: Download Files 1. Start Internet Explorer in desktop mode 2. Type www.emcp.net/guidelines13/M3S10 in the Address bar and press Enter 3. Position the arrow pointer on the large textbook cover image and then right-click to display a menu 4. Click Save picture as to display the Save Picture dialog box 5. Click Save to save the image to your Pictures library and accept the assigned file name and file type © Paradigm Publishing, Inc. 47
  • 48. SKILLS Skill 10 Steps…continued 6. Click the View Contents Listing (PDF) link to open the Contents page for your textbook 7. Click Open if a bar appears asking if you want to open or save the file 8. Click the Close button to close the tab or window containing the PDF 9. Click the Close button to close the browser window © Paradigm Publishing, Inc. 48
  • 49. SKILLS Skill 10 Visual: Download Files © Paradigm Publishing, Inc. 49 Click Save picture as to display the Save Picture dialog box.
  • 50. SKILLS© Paradigm Publishing, Inc. 50 Installing Adobe Reader  Adobe Reader is free software that is used to view PDF files  To get and install Adobe Reader, go to get.adobe.com/reader/ and click the Download now button  If you have certain security settings in place, you may first have to agree to install an ActiveX Control on your computer or give Windows permission to download the software
  • 51. SKILLS Skill 11 Steps: Print a Web Page 1. Start Internet Explorer in desktop mode. 2. Type www.fueleconomy.gov in the Address bar and press Enter 3. Click the Print button arrow on the Command bar 4. Click Print preview to display how the web page will appear when printed 5. Click the Landscape button to change the page orientation from portrait to landscape format 6. Click the Show multiple pages drop-down arrow and select 2 Page View © Paradigm Publishing, Inc. 51
  • 52. SKILLS Skill 11 Steps…continued 7. Click the Show multiple pages drop-down arrow again and select 1 Page View 8. Drag the bottom horizontal Adjust margin marker up slightly to divide page 1 and page 2 at an appropriate location 9. Click the Print Document button 10. In the Print dialog box, either click Print or click Cancel if you do not want to print the page 11. Click the Close button to close the Print Preview window and then click the Close button to close the browser window © Paradigm Publishing, Inc. 52
  • 53. SKILLS Skill 11 Visual: Print a Web Page © Paradigm Publishing, Inc. 53 Click Print preview to display how the web page will appear when printed.
  • 54. SKILLS© Paradigm Publishing, Inc. 54 Adding Headers and Footers to Printed Web Pages  In Internet Explorer, you can add a header or footer in the Print Preview window by following these steps: 1. click the Page Setup button to display the Page Setup dialog box 2. click the desired buttons in the Headers and Footers section 3. click the options you want to print in the header and footer areas of the page
  • 55. SKILLS Skill 12 Steps: Use Search Engines 1. Start Internet Explorer in desktop mode 2. Click in the Address bar, type www.bing.com, and then press Enter 3. Click in the search box and type new york city attractions 4. Click the Search button (or press Enter) to display the search results 5. Click a link that interests you and read the information at that site © Paradigm Publishing, Inc. 55
  • 56. SKILLS Skill 12 Steps…continued 6. Click in the Address bar, type www.google.com, and then click the Go to button (or press Enter) to display the Google home page 7. Click the Images link 8. Click in the search box and type red roses 9. Click the Search button 10. Click the Close button to close the browser window © Paradigm Publishing, Inc. 56
  • 57. SKILLS Skill 12 Visual: Use Search Engines © Paradigm Publishing, Inc. 57 Click in the search box, type red roses, and then click the Search button.
  • 58. SKILLS© Paradigm Publishing, Inc. 58 Using Advanced Search  To help you search more successfully, most search engines offer an Advanced Search link with options for narrowing your search  To access Advanced Search, you first need to perform a basic search  When the results are displayed, scroll to the bottom of the page and click the Advanced search link
  • 59. SKILLS Tasks Summary: 1 of 2 © Paradigm Publishing, Inc. 59
  • 60. SKILLS Tasks Summary: 2 of 2 © Paradigm Publishing, Inc. 60

Editor's Notes

  1. In this module, you learn to use three of the most popular web browsers—Microsoft Internet Explorer (IE), Mozilla Firefox, and Google Chrome—to quickly navigate among web pages and become familiar with tabbed browsing.
  2. You learn how to designate a home page that displays every time you start your browser and how to save or bookmark sites that you would like to return to later. You learn to download files and print a web page. You also learn tips for specifying search criteria to find information on the Internet.
  3. The Internet is the largest computer network in the world. You can use the Internet to communicate and share data with others all over the world.
  4. ISPs usually charge a monthly fee. If you use a school computer or connect to the school’s network, you will use the school’s ISP and should ask your instructor how to connect to the Internet. You can also connect at a WiFi hotspot, which is a location that offers wireless Internet, often without a fee. Hotspots are found at many colleges and some retail locations.
  5. The way you connect to the Internet varies according to the kind of Internet connection you have. The illustration on this slide shows types of connections and the essential equipment required for each type.
  6. Most browsers have similar interfaces and features, so browser choice is usually a matter of individual preference.
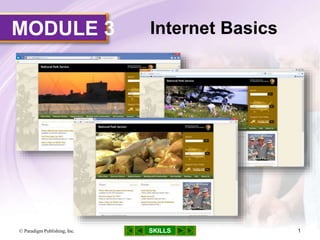
  7. Browser usage statistics vary, depending on the information source, but a recent estimate states that Mozilla Firefox has approximately 23% of the market and Chrome, approximately 28%. Internet Explorer receives approximately 27%. Other popular browsers include Safari and Opera. Portable devices, such as your cell phone, use mobile browsers. Shown on this slide are screen captures of the National Park Service’s website, accessed using Internet Explorer, Mozilla Firefox, and Google Chrome. Notice the similar features, including the Address/Location bar (where you type the address of a website).
  8. Navigation Tip: In Slide Show view, click an underlined topic on this slide to navigate directly to the related slide. At any time in Slide Show view, you may navigate to the beginning of this presentation by clicking the left-most button at the bottom center of the slide. To navigate to the previous slide in this presentation, click the second button from the left. Click the SKILLS button to return to this slide. Click the button to the right of the SKILLS button to navigate to the next slide in this presentation, and click the right-most button to navigate to the end of this presentation.
  9. Navigation Tip: In Slide Show view, click an underlined topic on this slide to navigate directly to the related slide. At any time in Slide Show view, you may navigate to the beginning of this presentation by clicking the left-most button at the bottom center of the slide. To navigate to the previous slide in this presentation, click the second button from the left. Click the SKILLS button to return to this slide. Click the button to the right of the SKILLS button to navigate to the next slide in this presentation, and click the right-most button to navigate to the end of this presentation.
  10. Internet Explorer is a web browser developed by Microsoft and included with the Windows operating system. There are two ways to run Internet Explorer 10. It can be run as a standard Windows application in desktop mode and it can also be run as an app designed for touch screens in the Windows 8 user interface (UI). Internet Explorer’s desktop mode interface has several toolbars, including the Menu bar, the Command bar, and the Address bar (where you can type a web address). In this skill, you become familiar with Internet Explorer using the desktop mode interface. You also display and locate information on a web page, access commands and settings, and browse Internet Explorer Help. Depending on your system configuration, the steps to start Internet Explorer in the desktop interface may vary.
  11. To increase text size, you can also use the shortcut Ctrl + Shift + +. To decrease text size, click the Page button on the Command bar, click Text size, and then click Smaller. Alternatively, you can press Crtl + -. To make everything (including images) larger on the page, click the Page button on the Command bar, click Zoom, and then select a zoom setting. You can also use the shortcut F1 to open Internet Explorer Help. Click the other three options (Overview, Your web favorites, and Help protect yourself) at the Help drop-down list to learn more about IE 10. The Alt key toggles the Menu bar on and off. Another Way: Right-click the title bar and select Menu bar.
  12. You can also use the shortcut Ctrl + F to open the Find text box. Click the Next button in the Find bar to find the next occurrence of the search text.
  13. The illustration in this slide displays the options available in the Page button on the Command bar.
  14. Website content changes frequently, so the number of matches you find may vary from the number shown in the illustration on this slide.
  15. Many websites, such as newspaper websites, refresh or update their site content on a regular basis. Some websites do so automatically, but others require action on your part. You might want to stop the loading process if you start to load a website and change your mind, or if the website is taking a long time to load.
  16. In Skill 1, you explored the Internet Explorer interface in desktop mode. In this skill, you will explore Internet Explorer when it is run as a Windows 8 app designed for touch screens. Even though this version is designed for touch screens, it also works with a keyboard and a mouse. This skill will explain how to use this app with a keyboard and a mouse as well as with a touch screen. IE 10 will open in the Windows 8 user interface only if you have it set as your default browser. If it opens in the desktop interface, close the browser to return to the Start screen, type Default Programs, click Default Programs in the Apps results list, click the Set your default programs option, click Internet Explorer in the list of programs, click Set this program as default, and then click OK. If the Address bar does not appear when you open IE, right-click the screen to display it. When you type a URL, navigation tiles of frequently visited web pages are displayed. Tap or click a navigation tile to go to that web page. The tab switcher will display open web pages and contains a New Tab button and a Tab Tools button.
  17. The Charms bar contains Search, Settings, Share, and Devices charms. You can also use the shortcuts Ctrl + Shift + + to increase the text and image size and Ctrl + - to decrease the text and image size. Windows 8 UI, Explorer’s interface, runs in full-screen view with the Navigation bar at the bottom of the screen. The Navigation bar contains the Address bar, where you can type a Web address. It also contains several buttons including the Back, Refresh/Stop, Page Tools, and Pin to Start button. A Charms bar is displayed on the right side of the screen and is used to change settings, search the Web, and print a web page.
  18. The Find toolbar displays the number of matches
  19. The illustration in this slide displays the options available in the Page tools button on the Navigation bar.
  20. Navigating Internet Explorer 10 on a touch screen is quite different from using a keyboard and mouse. Instead of clicking the mouse, you tap the screen with your finger.
  21. Firefox is a web browser developed by Mozilla. A free download is available from www.mozilla.com. Firefox’s interface includes the Menu and Navigation bars. The Navigation bar contains the Location bar, where you type a web address, and the navigation buttons. The Status bar is located along the bottom of the Firefox window and displays information, such as a URL when you hover over a link. In this skill, you become familiar with the interface, display and locate information on a web page, use the Menu bar to access commands and settings, and browse Help. Depending on your system configuration, the steps to start Firefox may vary. You can also use the shortcut Ctrl + L to select the URL in the Location bar.
  22. Use the Menu bar to access Firefox commands and settings. If the Menu bar is not available, activate it by pressing the Alt key. You can force the Menu bar to remain visible by clicking View, selecting Toolbars, and selecting Menu Bar. Use the Down Arrow key, the wheel on your mouse, or the vertical scroll bar to scroll down the Firefox Help window.
  23. The Find bar is displayed at the bottom of the window. All occurrences of History are highlighted on the web page. Click the Next button in the Find bar to find the next occurrence of the search text.
  24. The Firefox Help web page opens in a new tab as illustrated on this slide. The search box, where you can type keywords to find help on a specific topic, is available on this page.
  25. Chrome is a web browser developed by Google and is available as a free download from www.google.com. Chrome’s interface includes the toolbar, which contains the Address bar where you can type a web address and the buttons that you use to navigate websites. The Status bar is located along the bottom of the Chrome window and displays alerts about current activities, such as progress in downloading a file. In this skill, you become familiar with Chrome’s user interface. You also display and locate information on a web page, use the browser toolbar to access commands and settings and browse Chrome Help.
  26. You can also use the shortcut F1. The search box, where you type keywords to find help on a specific topic, is also available on this page.
  27. The illustration in this slide displays the options available in the Customize and Control button on the browser toolbar.
  28. A Uniform Resource Locator (URL) specifies the address of a web page on the Internet. You can go to a particular web page by typing a URL, such as www.emcp.com, in the Address or Location bar of a web browser. Web pages contain links which can be clicked to display another web page. Links are usually underlined but may also take other forms, including buttons or images. You can click the Back and Forward buttons on the browser’s interface to navigate through web pages you have already visited. Click the Home button to display the Home page, which is the page that displays when you start the web browser. Pressing Enter displays the home page for the United States Department of Agriculture (USDA) Farm Service Agency (FSA). When you enter a URL for a site (such as www.fsa.usda.gov), the page that appears is that website’s home page. The top-level domain specifies the type of website. For example, .com indicates it is a business, .gov indicates it is a government site, and .edu indicates it is an educational institution. Clicking the link opens a new browser window containing the USDA Aerial Photography Field Office (APFO) home page.
  29. The illustration in this slide displays the APFO home page.
  30. A recent estimate states Safari has approximately 14% of the web browser market.
  31. Tabbed browsing is a browser feature that allows you to open more than one website in a single browser window. You can switch between websites by clicking the tab you want to view. You can use the shortcut Ctrl + T to open a new tab (IE, Firefox, and Chrome). You can press Ctrl while clicking a link to open the link in a new tab.
  32. You can also move between open tabs by pressing Ctrl + Tab. If you have changed the new tab page to your home page, type about:tabs in the Address bar to see the new tab page with the Reopen closed tabs link. When you close Firefox, a prompt may ask if you want to save your tabs for the next time you start Firefox. Click Save and Quit to save them or click Quit to close without saving them.
  33. This slide illustrates the New Tab button, which you click to open a new browser tab. When a new browser tab is opened, you can type a web address in the Address/Location bar to open another website.
  34. To end InPrivate browsing, close the new browser window and all its tabs. Access private browsing in Firefox by clicking Tools on the Menu bar and then selecting Start Private Browsing. For Chrome, click the Customize and Control button and then select New incognito window.
  35. When you start your web browser, the page you see is called the browser’s home page. This page also displays when you click the Home button in your web browser. Therefore, you probably want your home page to be a web page that you visit often. For example, your home page might be your company’s website or one of your favorite news and information sites. In this skill, you set the home page for your browser. Another Way: Depending on your IE settings, if you completed Skill 6 the IE window may display an EMCP icon. You can click this icon to open the EMC Publishing web page. If you are using this skill to change the home page on your personal or home computer, rather than entering www.emcp.com, navigate to the web page that you plan to use as your home page. You can also close the browser with the shortcut Alt + F4.
  36. The illustration in this slide shows how to set the home page for your browser in the Add or Change Home Page dialog box in Internet Explorer. To set up a home page in Firefox, display the website you want as your home page, press the web page icon that displays at the left of the web address in the Location bar, and then drag it to the Home button. Click Yes in the Set Home Page window. You can open your favorite pages every time you start Chrome. Click the Customize and Control button and select Settings. In the On startup section, select Open a specific page or set of pages and then click the Set page link to set your preferences.
  37. Do you find it impossible to decide on just one home page? You may maintain more than one home page by having a set of two or more tabs display when you start your browser.
  38. You are probably familiar with the websites Yahoo!, MSN, and AOL. These websites can be classified as Web portals.
  39. As you browse the Web, Internet Explorer stores information about the websites you visit. Having this information stored on your computer can be helpful. It can improve your web browsing speed and also can help you to find sites you have already visited, without requiring you to remember and type their URLs. In Internet Explorer, previously visited sites are displayed in the Address bar and you can also access them through the History tab in the Favorites Center. The National Park Service website displays without your having to retype the web address.
  40. You will now see the Favorites Center with the History tab selected. Another Way: Press the Alt key to display the Menu bar, click View, select Explorer bars, and then select History. You will need to click the Close button to close the Favorites Center if you open it this way.
  41. The illustration in this slide shows the previously typed web addresses available by clicking the Show Address bar Autocomplete arrow at the end of the Address bar. When you type the first few letters of a web address in the Address/Location bar, Internet Explorer and Firefox display a list of previously entered web addresses that begin with those letters. Click one and press Enter to go to it. In Chrome, you can type keywords in the Address bar and the browser will make suggestions based not only on your previously visited URLs, but also on similar web page titles.
  42. By default, Internet Explorer keeps a 20-day history of the web pages you have visited. After 20 days, it automatically deletes those history entries. If you do not want a web page history kept, set the number of days to 0. Click OK to close the Website Data Settings dialog box. Click OK to close the Internet Options dialog box.
  43. Internet Explorer favorites are links that you save to websites you visit frequently. Firefox has a similar feature but refers to these favorite sites as bookmarks. In Internet Explorer, when you add a website to your Favorites bar, you can then go to that site by simply clicking its name, instead of having to type its web address. If you add a large number of favorites or bookmarks, you can organize them within folders to easily find the site you need. You can also add a favorite with the shortcut Ctrl + D.
  44. In Firefox, click Bookmarks and then click Bookmark This Page to add a bookmark. Click the Done button. For Chrome, select the Bookmark icon (shaped like a star) at the right of the Address bar. To view suggestions for other websites based on the web page you are currently viewing, click the Suggested Sites button at the bottom of the Favorites Center. You may need to click Turn on Suggested Sites first.
  45. The illustration in this slide displays the Add a Favorite dialog box. You can replace the selected text in the Name box if you want to. Click the New Folder button to create a new folder within your Favorites folder. You can create new folders, as needed, to organize your favorites.
  46. After a while your favorites or bookmarks list can get kind of long, making it hard to find what you need. (A long list defeats the whole purpose of easy-to-find favorites!)
  47. When you download a file, you transfer it from the Internet to your computer or another digital device, such as an MP3 player, cell phone, or tablet. Commonly downloaded files include programs, software updates, images, and music files. In contrast, when you upload a file, you transfer it from your computer or other device to a site on the Internet. In this skill, you download an image and a PDF document from a web page. The Pictures library is the default location for saving images in Explorer. The default location for Firefox and Chrome is the Downloads folder. The default download location may have been redefined in your school. NOTE: If you want to, you can change the name and type before saving the document.
  48. Whether the page opens in a browser window or in Adobe Reader or Acrobat depends on your Adobe Reader or Acrobat settings. The page will only open if Adobe Reader or Acrobat is installed on your computer. Copyright laws protect much of the information on the Internet. Before using files you have downloaded from the Internet, check the source site for restrictions.
  49. The illustration in this slide displays the options available after right-clicking an image. When you download a file, you take a risk that the file will contain a virus or a program that can damage your computer or your stored information. Be sure to install and use an antivirus program and only download files from sites you trust.
  50. PDF is a file format that keeps all document formatting regardless of what application it was created in. It is a good file format to save a file if you are going to share the file because the person viewing the file only has to have Adobe Reader installed and not the software that the document was created in. Once you have cleared the security hurdles, you can begin the download and install process.
  51. You may want to print the information you find on a web page. Keep in mind that your web page may render differently on your screen than on paper. So it is usually a good idea to preview the document before you print it. Previewing will show you exactly what the printed document will look like and how many pages are required for the printout. You can then adjust the page orientation, scaling, and margins, if necessary, in the Print Preview window before you click Print. Another Way: Press the Alt key to display the Menu bar, click the File tab, and then click Print preview. The Print Preview window shows that this document will now print on two pages.
  52. The horizontal Adjust margin marker appears as an up-and-down-pointing arrow with a horizontal line in the middle. In Firefox, click the Firefox button, click Print, and then click Print Preview to display the Print Preview window. In Chrome, click the Customize and Control button and then Print. Chrome automatically displays the Preview screen when printing. In Internet Explorer, by default, the Print Size is set to Shrink To Fit. Stretch or shrink the page size by clicking the Change Print Size drop-down arrow and selecting a percentage. In Firefox you can change the percentage using the Scale drop-down menu.
  53. The illustration in this slide displays the location of the Print preview option in the Print button drop-down list. The Print Preview window will show the number of pages on which this document will print.
  54. Place additional information at the top and bottom of your web page printouts by using headers and footers. For example, add the current date or time, the page number, the window title, or the web page address in a header or footer. In Firefox, click Print Preview in the Firefox drop-down menu and then click the Page Setup button. In the Page Setup dialog box, select the Margins & Header/Footer tab. For Chrome, Click Print in the Customize and Control menu. Use the Margins and Options settings to make adjustments.
  55. A search engine finds information on the Web by looking through web pages for words or phrases that you specify and then returning a list of matches. Search engines include Google (www.google.com), Yahoo! (www.yahoo.com), Bing (www.bing .com), and Ask (www.ask.com). Most search engines include tools to help you specify search criteria in order to narrow your search. IE, Firefox, and Chrome all display suggestions as you type words into the search box. Click a suggestion to start the search without having to type the rest of the word or phrase. In Firefox, the default search engine is listed in the search box to the right of the Location bar. You can change the default search engine by clicking the down arrow to the right of the search engine icon and then choosing your preferred search engine from the drop-down list. In Chrome, you can change the default search engine by clicking the Customize and Control button, selecting Settings, and making your choice in the Search section.
  56. The search results display images of red roses.
  57. To search for information in a search engine, type your search criteria in the search box, as displayed in the illustration in this slide, and then press the Enter key or click the Search button.
  58. Because the Internet contains such a large quantity of information, you may sometimes have difficulty finding exactly what you want. Google allows you to use Advanced Search to display options such as “none of these words.” Advanced Search empowers you with many options, including specifying that your search take place within a particular site or domain, such as at the site youtube.com or at sites ending with the domain destination .gov.
  59. The table in this slide, which continues on the next slide, lists the tasks covered in this chapter.
  60. The table in this slide, which continues from the previous slide, lists the tasks covered in this chapter.