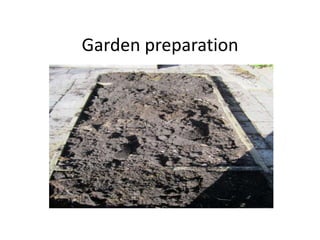
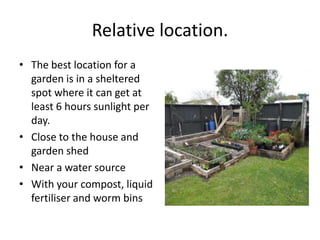
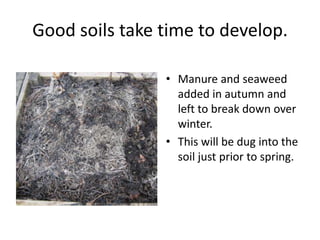
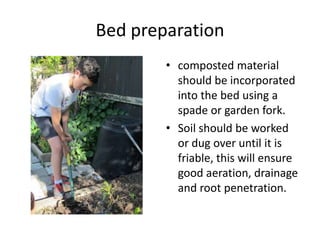
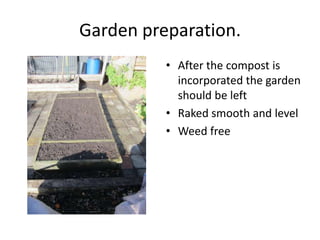
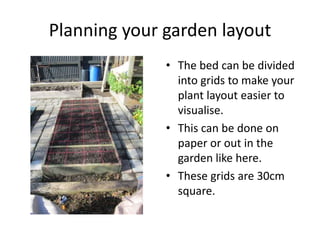
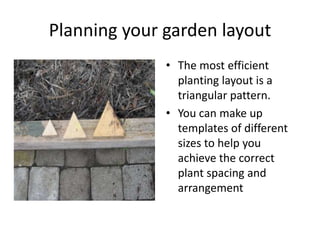
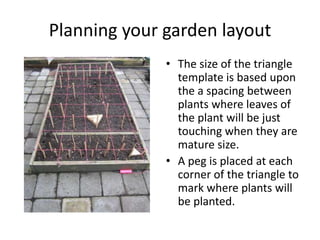
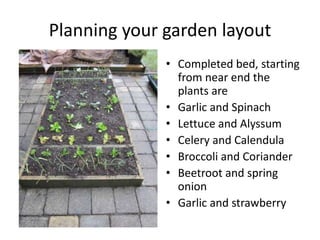
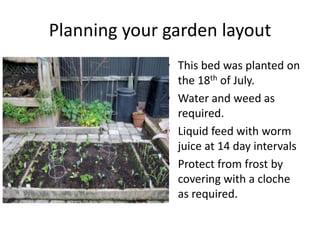
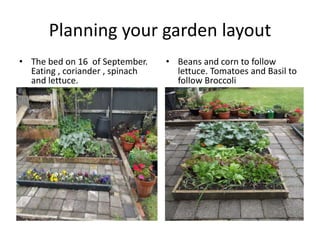
Garden preparation
Garden preparation
Relative location.
• The best location for a
  garden is in a sheltered
  spot where it can get at
  least 6 hours sunlight per
  day.
• Close to the house and
  garden shed
• Near a water source
• With your compost, liquid
  fertiliser and worm bins
Good soils take time to develop.

                • Manure and seaweed
                  added in autumn and
                  left to break down over
                  winter.
                • This will be dug into the
                  soil just prior to spring.
Good soils take time to develop.
• Building your soil can be achieved by regular
  additions of organic materials like manures,
  vermicast and green crops directly to your
  bed, or
• By composting your garden wastes and
  incorporating this into the soil by forking it in.
What a good soil looks like
              • Garden soil needs to be
                rich in organic matter,
                as indicated by the dark
                black colour.
              • Friable, breaks up easily
                into small crumbs
              • and at least 60cm deep
Compost
    • Compost is an ideal soil
      conditioner it provides
    • Structure so your soil
      can hold more water
      and improves soil
      drainage
    • nutrients which are in a
      plant available form and
      microorganisms which
      help your plants grow.
Bed preparation
        • Add your compost or
          manure to the surface
          of the garden bed
        • Fork this organic matter
          into the bed so that it is
          well mixed
          (incorporated) into the
          existing soil.
Bed preparation
        • composted material
          should be incorporated
          into the bed using a
          spade or garden fork.
        • Soil should be worked
          or dug over until it is
          friable, this will ensure
          good aeration, drainage
          and root penetration.
Garden preparation.
          • After the compost is
            incorporated the garden
            should be left
          • Raked smooth and level
          • Weed free
Planning your garden layout
              • The bed can be divided
                into grids to make your
                plant layout easier to
                visualise.
              • This can be done on
                paper or out in the
                garden like here.
              • These grids are 30cm
                square.
Planning your garden layout
              • The most efficient
                planting layout is a
                triangular pattern.
              • You can make up
                templates of different
                sizes to help you
                achieve the correct
                plant spacing and
                arrangement
Planning your garden layout
              • The size of the triangle
                template is based upon
                the a spacing between
                plants where leaves of
                the plant will be just
                touching when they are
                mature size.
              • A peg is placed at each
                corner of the triangle to
                mark where plants will
                be planted.
Planning your garden layout
              • Completed bed, starting
                from near end the
                plants are
              • Garlic and Spinach
              • Lettuce and Alyssum
              • Celery and Calendula
              • Broccoli and Coriander
              • Beetroot and spring
                onion
              • Garlic and strawberry
Planning your garden layout
              • This bed was planted on
                the 18th of July.
              • Water and weed as
                required.
              • Liquid feed with worm
                juice at 14 day intervals
              • Protect from frost by
                covering with a cloche
                as required.
Planning your garden layout
• The bed on 16 of September.    • Beans and corn to follow
  Eating , coriander , spinach     lettuce. Tomatoes and Basil to
  and lettuce.                     follow Broccoli


• Spinach and lettuce ready

Garden preparation

  • 1.
  • 2.
  • 3.
    Relative location. • Thebest location for a garden is in a sheltered spot where it can get at least 6 hours sunlight per day. • Close to the house and garden shed • Near a water source • With your compost, liquid fertiliser and worm bins
  • 4.
    Good soils taketime to develop. • Manure and seaweed added in autumn and left to break down over winter. • This will be dug into the soil just prior to spring.
  • 5.
    Good soils taketime to develop. • Building your soil can be achieved by regular additions of organic materials like manures, vermicast and green crops directly to your bed, or • By composting your garden wastes and incorporating this into the soil by forking it in.
  • 6.
    What a goodsoil looks like • Garden soil needs to be rich in organic matter, as indicated by the dark black colour. • Friable, breaks up easily into small crumbs • and at least 60cm deep
  • 7.
    Compost • Compost is an ideal soil conditioner it provides • Structure so your soil can hold more water and improves soil drainage • nutrients which are in a plant available form and microorganisms which help your plants grow.
  • 8.
    Bed preparation • Add your compost or manure to the surface of the garden bed • Fork this organic matter into the bed so that it is well mixed (incorporated) into the existing soil.
  • 9.
    Bed preparation • composted material should be incorporated into the bed using a spade or garden fork. • Soil should be worked or dug over until it is friable, this will ensure good aeration, drainage and root penetration.
  • 10.
    Garden preparation. • After the compost is incorporated the garden should be left • Raked smooth and level • Weed free
  • 11.
    Planning your gardenlayout • The bed can be divided into grids to make your plant layout easier to visualise. • This can be done on paper or out in the garden like here. • These grids are 30cm square.
  • 12.
    Planning your gardenlayout • The most efficient planting layout is a triangular pattern. • You can make up templates of different sizes to help you achieve the correct plant spacing and arrangement
  • 13.
    Planning your gardenlayout • The size of the triangle template is based upon the a spacing between plants where leaves of the plant will be just touching when they are mature size. • A peg is placed at each corner of the triangle to mark where plants will be planted.
  • 14.
    Planning your gardenlayout • Completed bed, starting from near end the plants are • Garlic and Spinach • Lettuce and Alyssum • Celery and Calendula • Broccoli and Coriander • Beetroot and spring onion • Garlic and strawberry
  • 15.
    Planning your gardenlayout • This bed was planted on the 18th of July. • Water and weed as required. • Liquid feed with worm juice at 14 day intervals • Protect from frost by covering with a cloche as required.
  • 16.
    Planning your gardenlayout • The bed on 16 of September. • Beans and corn to follow Eating , coriander , spinach lettuce. Tomatoes and Basil to and lettuce. follow Broccoli • Spinach and lettuce ready

Editor's Notes

  • #5 Seaweed , sheep manure and compost laid on garden bed and left to break down over winter . In spring any bulky bits that remain will be raked off and composted the remaining material worked into the soil with a garden fork.
  • #8 Compost prior to being added to garden bed, note crumbly structure, prolific worm numbers, dark brown colour.
  • #9 Any weed cover is removed and compost is added to the garden bed and then forked in
  • #10 Fork the soil over to encourage deep root penetration and to work in the compost.
  • #11 A smooth surface is easier to plant both transplants and seed into and it is easier to achieve the desired planting and spacing arrangements.
  • #12 Its best to plan your garden on graph paper before you plant. This enables you to work out the most efficient planting and spacing arrangement and provides you with a record that makes rotations easier to manage.