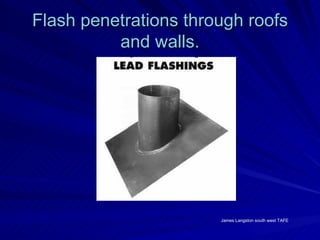
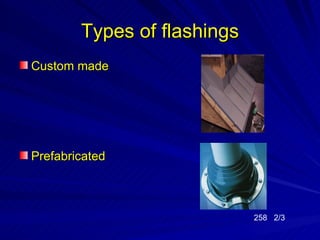
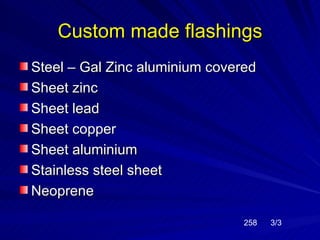
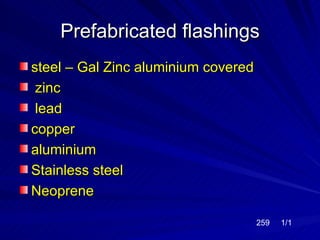
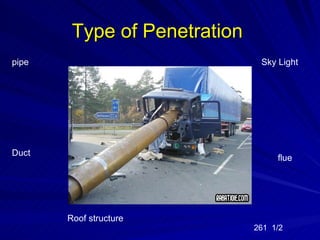
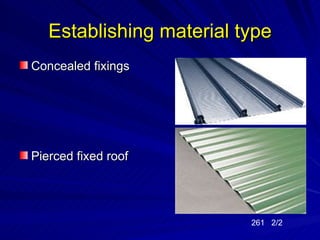
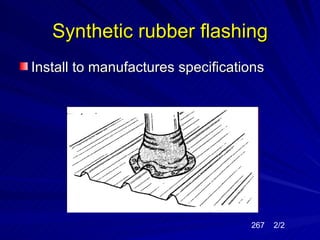
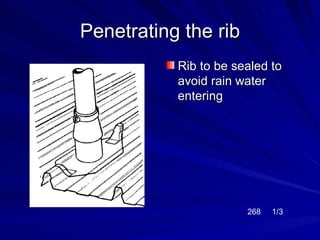
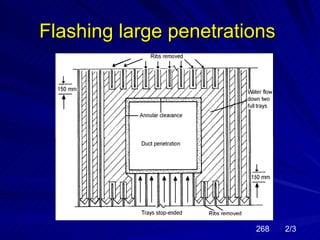
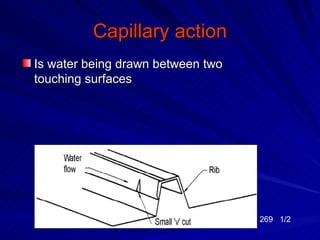
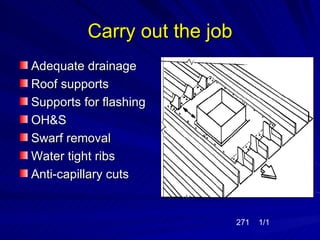
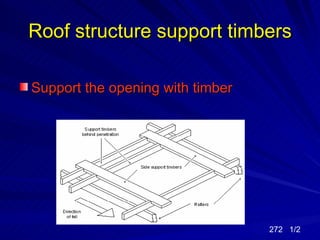
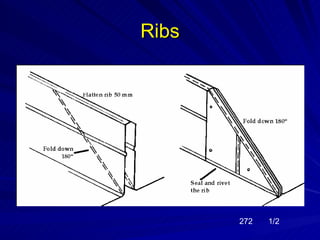
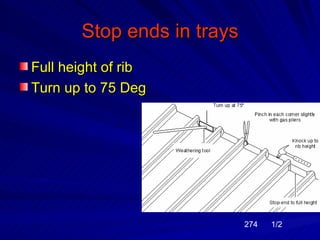
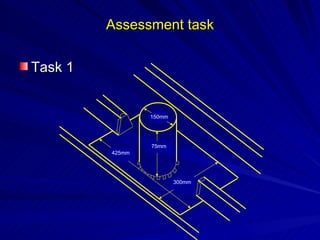
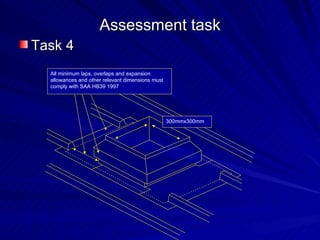
Flash penetrations through roofs
          and walls.


                       James Langston south west TAFE
Introduction
What are flashings

What is a penetration

Why do we need them


                          258 1/3
Types of flashings
Custom made


Prefabricated


                             258 2/3
Custom made flashings
Steel – Gal Zinc aluminium covered
Sheet zinc
Sheet lead
Sheet copper
Sheet aluminium
Stainless steel sheet
Neoprene

                                258   3/3
Prefabricated flashings
steel – Gal Zinc aluminium covered
 zinc
 lead
copper
aluminium
Stainless steel
Neoprene

                                     259   1/1
Plan work activities
   Establish what will be penetrated
   Establish the type of material to be used
   Conduct a site inspection
   Get specs for job
   Check for structural alterations


James Langston south west TAFE
                                              260 1/1
Type of Penetration
pipe                           Sky Light


Duct
                                   flue


       Roof structure
                              261 1/2
Establishing material type
Concealed fixings


Pierced fixed roof


                          261 2/2
Conduct site inspection
Is the penetration clear of !!!!!!!!

Electrical wiring
Building services
Other pipe work
Roof supports


                              262   1/4
Building plans
You need to be able to !!!!!

Read a Job Plan
Estimate job requirements
Under stand your task


                            262   2/4
Check for structural alteration

Safety mesh

Need to be reinforced

Check the structure

Insulation

                         262   3/4
Quality assurance
Procedures
Materials
Handling
Maintenance
specifications


                        262   4/4
Safety PPE
Overalls           Gloves
Boots              Sun screen
Safety glasses     Hard hat
Ear plugs
Dust mask


                                263   1/1
How did that get in there


James Langston's wife
Tools and equipment

Scaffolding      Signage
E,W,P            Electrical leads
Ladders
Hand tools
Power tools


                          264   1/1
Make the work site safe
Water lines-   Flooding

Gas Lines-     fire hazard

Electrical-    electrocution

Cutting members-     structure weakness
                                265   1/2
Worksheet questions
                   Answer question one and
                   two on your work sheet


James Langston
                                    265 2/2
Determine flashing requirements


                           266 1/2
Penetration between ribs
Must have an up
stand with a base
plate

Be sealed to roof
surface


                        266   2/2
Tapered skirt
Sealed around
penetration
Overlap up stand by
no lass then 50mm


                            267   1/2
Synthetic rubber flashing
Install to manufactures specifications


                                   267   2/2
Penetrating the rib
           Rib to be sealed to
           avoid rain water
           entering


                       268   1/3
Flashing large penetrations


                        268   2/3
Worksheet questions

        Answer question three and
        four on your work sheet


James Langston
Capillary action
Is water being drawn between two
touching surfaces


                                   269 1/2
Quantities @ Materials
Matching existing materials

Right size

Avoid contact between dissimilar metals

Draining from upper to lower roof must
correct materials
                              269   2/2
Quantities @ quality
Right sheets
Right length
Right fasteners
Right sealant
Correct size flashings
Materials compatible

                         270 1/1
Carry out the job
Adequate drainage
Roof supports
Supports for flashing
OH&S
Swarf removal
Water tight ribs
Anti-capillary cuts


                              271   1/1
Roof structure support timbers

Support the opening with timber


                                  272 1/2
Worksheet questions
   Answer question five
    on your work sheet
Ribs


       272   1/2
Ribs


       273   2/2
Stop ends in trays
Full height of rib
Turn up to 75 Deg


                            274   1/2
Cutting the surface
Ensuring joints are flush
Joints Lapped the right way
Joints secure
Keep power leads away from sharps
Do not use carborundum cutting disks


                              274   2/2
Ensuring joints are
        flush
Avoid the build up of
undrained water on
roof
                275   1/4
Ensuring joints are
lapped in the
direction of the outlet

                  275   2/4
Ensuring joints are secure

        Allowances for
Wind pressure
Thermal movement
Water tightness


                         275   3/4
Preparation of opening
Compatible material
Large enough to drain the water
Annular space


                        275   4/4
Installing structural supports

Install supports
when roof has
been weakened
by sheet or
structure cutting


                          276     1/2
                           James Langston
Flashing of large duct
Dimension the opening
Sheets are cut
Roof reinforced
Soaker made up and
installed
Apron made and
installed
Remove swarf

                        277   1/2
Soldering

Not common these days because
Other methods available
Material type


                            277   2/2
Sealants
Commonly used
Containing silicone rubber
Many colours
Suitable for roofing


                             278   1/2
Worksheet questions

Answer question seven on
your work sheet
Benefits of silicone
Stick to most material
Sealant flexible
Last at least 30 years


                         278   2/2
Take care using silicone
•Surface free of grease          •Joints to be fixed
•Read instructions               •25mm wide seal
•Surface must be clean           joint

•Can clean with non-carcinogen   •Seal to cover
solvent                          fixings


                                             279   1/2
Jointing procedure
Assemble        Place sealant
Drill           Reassemble joint
Remove burs     Seal rivets or screws
clean           Clean off extra
                silicone


                         279   2/2
Questions and answers


Answer question eight in the
        work book


                      280   1/1
Assessment task

Task 1


                 150mm


                 75mm
         425mm


                         300mm
Assessment task
Task 2
                               corrugated wall cladding


         Under flashing to
         be riveted and
         silicone sealed
         at this point to                      Minimum
         prevent water                         300mm x 350mm
         running behind                        Duct
         sheet
Assessment task
Task 3


                     75mm
 Measurement
 to suit job

                               300mm


                            450mm
Assessment task
Task 4
  All minimum laps, overlaps and expansion
  allowances and other relevant dimensions must
  comply with SAA HB39 1997


                                                  300mmx300mm

Flash peno roof_walls