SlideShare a Scribd company logo
1 of 118
Rivers Fieldwork
Questions
• Whilst measuring the velocity at Hellworth 
Beck the speed of the river was to slow to 
move the impellor along the shaft of the 
hydroprop. Therefore, we had to record the 
velocity of the river as 0.08ms, which meant 
that we could have over estimated the 
velocity of the river.
Equipment for the Examinations 
Black ink or black ball – point pen. 
Use of pencil only for drawing. 
Calculator 
Protractor 
Ruler 
Rubber
Unit 2 – January 2009 
Explain the geographical concept, process or theory that underpinned your fieldwork 
enquiry. (4) 
How did you respond to risks associated with undertaking your primary data 
collection? (4) 
Outline and justify one method of data collection that you used in your enquiry. (6) 
With the aid of a sketch diagram, describe one technique that you used to present 
data in your enquiry. (6) 
Making specific reference to your results, suggest how your enquiry could be 
improved. (5)
Unit 2 – Summer 2009 
Describe the location of your fieldwork and outline why this was a suitable site for 
your investigation. (4) 
State one hypothesis or research question or issue for evaluation that you have 
investigated in 2a. Describe one method of primary data collection used in the 
investigation. (5) 
Discuss the limitations of your chosen method in 2a. (6) 
Outline and justify the use of one or more techniques used to analyse your results. (5) 
Drawing upon your findings, explain how your enquiry improved your understanding 
of the topic. (5
Unit 2 – January 2010 
Sate the aim of your investigation and describe one method of data collection 
associated with the aim. (6) 
Discuss the strengths and weaknesses of the method of data collection desribed 
above. (6) 
Describe one method used to present your data. (5) 
How far did your fieldwork conclusions match the geographical theory, concept or 
idea on which your investigation was based? (5)
Unit 2 – Summer 2010 
State the aim of the fieldwork investigation. 
Describe the geographical theory, concept or idea that formed the basis of your 
fieldwork investigation. (5) 
With reference to your fieldwork, distinguish between qualitative and quantitative 
data. (3) 
Describe one method that you used for the collection of primary or secondary data. 
(6) 
Outline one technique that you used to present results from your data collection. (4) 
Evaluate your investigation. In your answer, you should: a- comment on the strengths 
and weaknesses of the different aspects of the study and b – suggest improvements. 
(7)
Unit 2 – January 2011 
Describe the purpose of your fieldwork enguiry. (5) 
In the box provided below, draw an annotated sketch map of the location of your 
study area to show its basic characteristics. (5) 
Distinguish between primary and secondary sources of data used in your fieldwork. (3) 
With reference to one technique you chose to present data in your enquiry, justify the 
choice of this technique. (6) 
Explain how your fieldwork enquiry could have been improved. (6)
Unit 2 – Summer 2011 
Outline the purpose of your enquiry. (5) 
Using specific examples from your fieldwork, describe the risk assessment you 
undertook in relation to your enquiry. (6) 
Evaluate one of your methods of data collection. (5) 
Summarise the main findings of your fieldwork. (4) 
How far did your findings reflect your expectations at the start of the enquiry? (5)
Unit 2 – January 2012 
You have experienced geography fieldwork as part of the course. Use this experience 
to answer the following questions. 
State the aim of your fieldwork enquiry. 
Describe the advantages of your chosen location for the fieldwork enquiry. (4) 
Evaluate one method of primary data collection that you used in your enquiry. 
(6) 
Outline how you obtained and why you used secondary data in your enquiry. 
(5) 
Describe advantages of a technique that you used to analyse your data. (5) 
With specific reference to your results, summarise the main conclusions of your 
enquiry. (5)
Unit 2 – Summer 2012 
You have experienced geography fieldwork as part of the course. Use this experience 
to answer the following questions. 
Describe the purpose of your fieldwork enquiry. (6) 
Describe a sampling technique you used to collect data. (5) 
Justify the use of one technique used to analyse data in your enquiry. (6) 
Referring to your results, outline the main conclusions of your enquiry and 
suggest further areas of research. (8)
Unit 2 – January 2013 
X
Unit 4a – January 2010 
State the aim(s) of your investigation. 
Describe the location of your fieldwork investigation and explain its relevance to the 
aim(s). (12) 
Explain how one method of data collection that you used was suitable for the 
investigation. (6) 
As a result of your experience in the field. Justify one or more improvements that you 
would make to a method of data collection that you used. (12) 
Evaluate the usefulness of the conclusions reached in your investigation and consider 
their potential implications. (10)
Unit 4a – Summer 2010 
State the aim(s) of your investigation. 
Explain the reasons why you selected this aim for investigation. (10) 
Describe and justify the measures you took to minimise the health and safety risks 
involved in your investigation. (8) 
Describe one technique of data analysis you used and explain how far the data you 
collected made this technique appropriate to your investigation. (10) 
With reference to your aim(s), evaluate the success of your investigation. (12)
Unit 4a – January 2011 
State the aim(s) of your investigation. 
Select one method of primary data collection that you used in your investigation. 
Explain the relevance of this method to the aim(s) of your investigation. (8) 
Evaluate the effectiveness of this method in the light of your experience in the field. 
(8) 
Describe one technique of data analysis that you used and justify its inclusion in your 
investigation. (12) 
Assess how useful you found your investigation to your understanding of geography. 
(12)
Unit 4a – Summer 2011 
State the aim(s) of your fieldwork investigation. 
Explain how the location of your fieldwork was relevant to the theory / concept / issue 
being investigated. (8) 
Describe and justify how you made sure that the data collected were as accurate and 
reliable as possible. (12) 
Select one method of data presentation used in your investigation. Explain, why you 
used and evaluate its effectiveness in showing the data you collected. (12) 
In the light of your results, suggest how your investigation could be further developed 
and/or extended. (8)
Unit 4a – January 2012 
All your answers must relate to the geographical fieldwork investigation that you 
undertook in preparation for this examination. 
State the aim(s) of your investigation. 
Explain the importance of the choice of location for your investigation in relation to 
your aim(s). (12) 
Outline one method of primary data collection used in the field in your 
investigation. (6) 
Evaluate the suitability of this method of primary data collection. (10) 
Explain how secondary data were used, or could have been used, to develop 
your conclusions. (12)
Unit 4a – Summer 2012 
All your answers must relate to the geography fieldwork investigation that you 
undertook in preparation for this examination. 
State the aim(s) of your fieldwork investigation 
Explain the geographical reasons for carrying out your investigation in the area. (10) 
Describe and justify the steps taken to minimise the risks involved in collecting data 
for your investigation. (8) 
Assess the usefulness of one method of data presentation that you used in 
your investigation. (12) 
Discuss how your investigation helped your understanding of geographical 
theory. (10)
Unit 4a – January 2013 
x
Aim
Aim 
To investigate the extent that downstream mean channel 
velocity for the upper Derwent river increases. Even though 
the gradient of the river decreases downstream. 
RQ1 – How does velocity change downstream . 
RQ2 – What factors influence the change in velocity.
Theory
General Factors that Effect Velocity 
Downstream Gradient of the river. 
Hydraulic Radius. 
Roughness of the wetted Perimeter. 
Geology of the bedload. 
Human interference on the river channel.
Theory 
The factors that control the velocity of a river channel
Theory 
As the hydraulic radius increases the ratio of water in contact with the wetted 
perimeter of the river channel decreases. This means that the water loses 
proportionately less energy in overcoming friction and the mean velocity of the river 
channel increases. 
The hydraulic radius increases as the cross sectional area of the river channel 
increases. This is because as you move down the long profile of a river its catchment 
area increases in size. This means that there is an increase in the amount of water 
entering the river channel, either by more tributaries entering the main channel or by 
surface flow, through flow or ground wtare flow. 
The roughness of the wetted perimeter also decreases as the size of the stones 
become smaller and smoother. This is because the river has had more time to erode 
these stones, either by attrition or abrasion. The smoother and smaller stones of the 
wetted perimeter again reduce the amount of friction the river channel has to 
overcome. This increases the velocity of the river.
Location
Location of the Drainage Basin 
The River Derwent is situated in the North York Moors on it southern flank to the west 
of Scarborough. It flows in a southern direction of the moors and joins the River Ouse. 
The study area covers only a 12 km stretch of the upper course of the Derwent River 
between its source a 200 meter high moorland plateau called Stoney Marl Moor to 
where the river flows past Howden Moor farm at Broxa. 
The drainage basin varies from high moorland plateaus in the north and north east, a 
coniferous forested area in north east and an area of slopes devoted to grassland in 
the south. These areas of highland are intersected by deep v-shaped valleys of the 
River Derwent and its tributaries. The following three sampling sites were chosen to 
investigate the aim. 
Helwath Beck – 110m altitude - 3 km from source – drainage basin of 10 km2 
Jugger Howe Beck – 100m altitude - 5 km from source – drainage basin 28 km2 
River Derwent – 60m attitude – 12 km from source – drainage basin of 48 km2
Upper course of 
River Derwent 
Helwath Beck 
Jugger Howe Beck 
Broxa 
Kirby Grindalythe 
Source of Derwent 
River continues 
through Vale of 
York to join the 
R. Ouse before 
flowing into the 
Humber Estuary 
Total length: 170km
Source area - North York Moors
Summary of the Characteristics of the Drainage 
Basin 
There is very little human interference of river the channel by human activity, such 
as channelization or building of bridges. 
The underlying geology for the whole of the drainage basin is sandstone. 
The attitude of the river falls by over 50 meters within a 12 km stretch. 
The size of the river’s drainage basin increases from 10 km2 to 45 km2 within a 12 
km stretch. 
The drainage basin of the river has high amounts of rainfall that ensure the river 
flows throughout the year. 
The rivers are small enough to allow sixth form students to collect primary data 
safely. 
All the sites can be visited in one day and we have the landlords permission to 
access the sites.
Sites 1& 2 
Helwath 
Beck 
& 
Jugger 
Howe 
Beck 
1 
2
Site 3: 
R. Derwent 
downstream 
to Broxa 
3
The drainage basin within the study area of the River Derwent experiences high levels 
of precipitation and within 12 km of its source it quickly increases in size from 10 km2 
to 48 km2. 
These factors ensured that the investigation could analyse how downstream changes 
in the rivers mean velocity were influenced by significant changes in its hydraulic 
radius and the roughness of its wetted perimeter. 
The influence of human activity on river was minimal and sandstone formed the 
underlying geology of the drainage basin. This reduced the influence that other 
factors may have had on the velocity of the river and allowed the investigation to 
concentrate on how the change in gradient, hydraulic radius and roughness of the 
wetted perimeter influenced velocity. 
Since all three sample sites were within 12 km of each other and prior permission for 
access had been gained from their landlords it was possible to complete the fieldwork 
within the one day allocated. 
The relatively low velocities and the shallow nature of the river allowed the 
investigation to be carried out safely. 
This stretch of river has a large set of secondary data which can be compared to the 
primary data collected to evaluate the success of the investigation.
Risk Assessment 
(Hazards, Risks, Control Measures & Justification)
Risk Assessment 
Hazards are the physical problems that cannot be removed e.g. steep and wet paths 
leading to the upstream sites, deep water and high velocity river, uneven and 
slippery stones in river channel, remote location of upper stream sites, heavy 
rainfall, and cold temperatures. 
A formal risk assessment was completed prior to the investigation. This assessment 
listed the separate hazards and the potential risks associated with each hazard. 
These risks were then assessed on a scale of low , medium or high to work out the 
likelihood of these risks happening and the level of there impact. 
Then appropriate control measures were put in place to minimise the risks involved in 
carrying out the fieldwork. 
Hazard = The physical problem that cannot be removed e.g. weather, slope, water 
Risk = The likelihood of it happening and the extent of the consequence. 
Then what you do to reduce the consequence.
Risk Assessment 
Hazard = The physical problem that cannot be removed e.g. weather, slope, water 
Risk = The likelihood of it happening and the extent of the consequence. 
Then what you do to reduce the consequence.
As the path from the mini bus to the river ran down the side of a steep sided valley on 
which we could easily have slipped we wore appropriate footwear, carried any extra 
clothes, are packed lunch and any field equipment in our rucksacks. This allowed are 
hands to be free to reduce the effect in the event that we slipped or tripped up. 
To reduce the risk of catching hypothermia from any cold and/or wet weather on the 
day of the fieldwork we wore clothing that was warm, layered and waterproof. In case 
we encountered any unseasonably cold or wet weather each member of the group 
carried a hat, a pair of gloves and an extra lay of clothing in their rucksack. The weather 
forecast was also checked before we set of to make sure we were appropriately 
prepared for the weather condition. 
The site at Broxa was just downstream from a farm and in order to reduce the chances 
of contracting Weils Disease we tape up any open cuts or grazes which may have been 
exposed to the river and washed our hands before eating with anti bacterial hand wash. 
Uneven and slippery rocks in a deep and / or fast flowing river – The likelihood of 
injury or death from these hazards are probably low to medium. However, the impact 
from an accident could be very serious ranging from a twisted or broken ankle, a person 
been knocked unconscious or in an extreme case been drowned.
To reduce the risk we made sure that we only walked and did not run, wore 
wellington boots and watched where we placed are feet when working in the river 
channel, especially when carrying field equipment. Only parts of the river no deeper 
than our calfs and where the current was slow enough for us too keep our balance 
were used. We also worked in groups of three or more. If someone did injury 
themselves or knocked themselves unconscious some of the group members could 
have remove them from the river and remained to look after them. This left another 
person free to inform the group leader of what had happened. 
The remote location of the steep sided valley in which the two upstream sites were 
located would have compounded the effect of the risks mentioned above. As it would 
have made it very difficult and time consuming for any injured person that could be 
moved to be taken to hospital for treatment. 
For a very serious accident where the person could not be moved the group leader 
would have had to walk and then drive to an area with mobile phone coverage to call 
the emergency services. This delay along with the response time of the emergency 
services could have put the persons life at risk or made treatment of their injuries 
more difficult.
Methodology and Data Collection
Downstream Sites and Cross - Sections 
The three sites were chosen using a stratified sampling method. 
The cross section were sampled using a systematic point sampling method.
Choosing the 3 Sites 
A stratified sampling technique was employed to ensure that the three sites from 
which we collected our data were situated progressively downstream from the source 
of the River Derwent. 
An OS map was used to work out the stream order for each individual river within the 
upper drainage basin of the River Derwent. Each individual river was categorised as 
either 1st, 2nd, 3rd or 4th order. 
One site was selected from a 2nd, 3rd and 4th order stream. 
Random sampling could have led to the possibility that all the sites could have been 
located in only 1 order of stream, which would not use useful in investigating how and 
why the velocity changes downstream. 
It was decided not to sample any 1st order streams. The distance and terrain to reach 
these streams would have been too time consuming and dangerous for us to carry the 
equipment needed. Also the hydo prop would not have functioned probably as the 
streams would have been to shallow for the impellor to turn.
Stream Orders 
All the initial, unbranched source tributaries are called first order streams. When two 
first order streams merge they form a second order stream; When two second order 
streams merge they form a third order stream; and so on. Notice that it needs two 
stream segments of equal order to join to produce a segment of a higher order.
The sites 
The following sites where selected because they represented each of the different 
stream orders, they were safe to access by foot and we had permission from the 
landlord cross their land. 
2nd order stream - Helwath Beck – 110 ms- 3 km from source – DB of 10 km2 
3rd order stream - Jugger Howe Beck – 100 ms- 5 km from source – DB of 28 km2 
4th order stream - River Derwent – 60 meters – 12 km from source – DB of 48 km2 
At each site a method of random sampling was used to identify where to obtain 
measurements from the river. A tape was laid out to measure along the river bank for 
a length of 5 meters, a random number was picked from a random numbers table, and 
used to mark the position where the measurements for the cross – section would be 
taken. 
This method was designed to get rid of bias and avoid me choosing to measure the 
easiest section of the river, which might not necessarily be representive of the river.
Data Collected at Each Site 
Velocity = 3 point and mean velocity 
Present width and present depth (cross sectional area) 
Wetted Perimeter = chain 
Bed Load Size = B axis 
Gradient = m/m or angle
Velocity
Velocity – Hydro Prop 
The velocity of the river was measured at ¼, ½ and ¾ of the rivers width. To work out 
at what intervals to measure the velocity the width of the river was divided by 4. 
The impeller of the hydro prop was set to ½ the depth of the river and then wound to 
the end of its shaft and given a half turn backwards to ensure it did not get stuck. With 
the impeller facing upstream it was placed in the water and timed using a stopwatch 
to see how long it took to reach the end of its shaft. 
The time recorded in seconds was then compared with a calibration table to work out 
the actual velocity of the river in ms-1. The three separate point velocities were then 
averaged to work out the mean velocity of the river. 
This method was repeated at all three downstream sites.
Velocity – Strengths and Justifications 
This method was used as the systematic sample gave data which was representative 
of the entire channel at each site and so bias or subjectivity in our technique was 
reduced. 
The time data was converted into ms-1.. Therefore, the data collected could be directly 
compared between the different sample sites. This gave a greater accuracy to our 
results so our conclusions would be more reliable. 
This technique was also quite easy and quick to use. 
It gave relevant data to help investigate the main aim and answer research question 1 
which was How does velocity change downstream.
Velocity – Limitations 
The impellor had a high critical velocity of 0.08 ms-1 .This means at low velocities 
the river did not have enough energy to turn the impellor. If the impellor had not 
reached the end of the shaft after one minute the measurement was stopped. 
All measurements of one minute and over were converted into a velocity of 0.08 
ms-1. These results might not have been a true reflection of the rivers velocity. For 
very low velocities this method could have over estimated the rivers true velocity. 
However, for higher flows this method would have given results nearer to the river 
true velocity. 
At very low channel depths the hydo props impellor was either touching the river 
bed or appearing above the surface of the water. These results might not have 
been a true reflection of the rivers velocity. For very low depths this method could 
have over estimated the rivers true velocity. However, for deeper depths this 
method would have given results nearer to the river true velocity.
Velocity – Improvements 
Measure the velocity at more points along the cross – section. By using a larger 
number of points to measure the velocity you would reduce the percentage error. 
If only three point velocities were measured and one was anomalous then there 
would be a 33.3% error in the results. If the number of point velocities measured was 
increased to 9 measurements the error would be reduced to only 11.3%, a more 
acceptable level of error. 
Therefore, the results for mean channel velocity would be more accurate and any 
conclusions draw from these results would more likely to be reliable. 
Use a electromagnetic open channel flow meter to measure the point velocities. This 
would reduce any overestimates of measurements where the point velocity of the 
channel was below 0.08 ms-1.and give more accurate results were sections of the 
channel were too shallow for the hydro prop to work properly.
Cross – Sectional Area
Present flow – Width and Depth - CSA 
To work out the width of the river a peg was placed on either side of the river channel 
where the dry banks meet the water. A line was run between these two pegs and in 
order to avoid drag, the line was pulled tight at 900 above the flow of the river. The 
length of the line was then measured using a 30 meter tape measure. 
To work out at what intervals to measure the depth of the river the width was divided 
by 10. At each of the 9 intervals a meter ruler was placed in the water with its thin 
edge facing upstream to measure the depth. 
To work out the cross - sectional area of the river the width was multiplied by the 
average depth of the river. 
This method was repeated at all three downstream sites.
Present flow – CSA – Strengths & Justifications 
This method was used as the systematic sample gave data which was representative 
of the entire channel at each site and so bias or subjectivity in our technique was 
reduced. 
This technique was easy to replicate at each of the three sites surveyed. Therefore, 
the data collected could be directly compared. This gave a greater accuracy to our 
results so our conclusions would be more reliable. 
This technique was also quite easy and quick to use. 
This data was collected as the width and depth of river are used to calculate the rivers 
cross sectional area. The sum of all the depths recorded is calculated and divided by 
number of samples taken to work out the average depth. This is then multiplied by the 
width to work our the cross – sectional area of the river. 
The cross – sectional area is one of components used to calculate the hydraulic radius. 
The hydraulic radius for each site was then used to try explain any changes in velocity 
found.
Present flow –CSA – Limitations & 
Improvements 
An accurate measurement of the depth might not have been recorded as the meter 
ruler was not held vertically. Also the person recording the depth could have misread 
the actual depth. 
By only using 9 sample points the distance between each point will be greater in the 
wider stretches of the river. This could increase the chance of missing any sudden 
changes in depth. Therefore, this method could produce results that did not truly 
reflect the actual depth of the river and the calculation of the average depth of the 
channel could have been inaccurate, which in turn would have produced a miss 
leading figure for the cross – sectional area of the channel. Our conclusions relating to 
how hydraulic radius influences velocity might have been unreliable. 
Complete 3 or 4 cross sections for each stream order surveyed. This should provide a 
more representative sample of the depth of the river. This gives a greater accuracy to 
our results so our conclusions could be more reliable.
Wetted Perimeter
Wetted Perimeter 
To work out the wetted perimeter a metal chain is run along the bed and banks of the 
river channel between the pegs placed on either side of the river channel where the 
dry banks meet the water. 
It must be ensured that the chain follows all the undulations of the bed and banks of 
river channel and is not pulled taught. 
The length of the chain is the measured by feeding the chain and a tape measure 
vertically through your hands simultaneous. 
This method was repeated at all three downstream sites.
Wetted Perimeter – Strengths and Justifications 
This method was representative of the entire channel at each site and so bias or 
subjectivity in our technique was reduced. 
This technique was easy to replicate at each of the three sites survey. Therefore, 
the data we collected could be directly compared between different sample sites. 
This gave a greater accuracy to our results so our conclusions would be more 
reliable. 
This technique was also quite easy and quick to use. 
This data was collected as the wetted perimeter of a river channel is one of 
components used to calculate the Hydraulic Radius . The hydraulic radius for each 
site was then used to try explain any changes in velocity found.
Wetted Perimeter – Limitations & 
Improvements 
If the chain is not forced into all undulations found on the river bed and banks the 
length of the wetted perimeter could be underestimated. 
Errors could occur when the chain is measured against the tape measure because 
the chain has not been held vertically as it is fed through your hands. 
Any error in measuring the width of the wetted perimeter will result in an 
inaccurate value been calculated for the river hydraulic radius. This in turn could 
affect the reliability of our conclusions. 
The only way to improve this method is to be careful when placing the chain across 
the river beds and banks and when the total length of the chain is been measured
Bedload Size
Bedload Size 
To work out the width of the river a peg was placed on either side of the river channel 
where the dry banks meet the water. A line was run between these two pegs and in 
order to avoid drag, the line was pulled tight at 900 above the flow of the river. The 
length of the line was then measured using a 30 meter tape measure. 
To work out at what intervals to measure the depth of the river the width was divided 
by 10. At each of the 9 interval a meter ruler was placed in the water with its thin 
edge facing upstream to measure the depth. 
The stone touching the bottom of the meter ruler was then measured along its 
B – axis. 
This method was repeated at all three downstream sites.
Bedload Size – Strengths and Justifications 
This method was used as the systematic sample gave data which was representative 
of the entire channel at each site and so bias or subjectivity in our technique was 
reduced. This technique was easy to replicate at each of the three sites surveyed. 
Therefore, the data we collected could be directly compared between different 
sample sites. This gave a greater accuracy to our results so our conclusions would be 
more reliable. 
This technique was also quite easy and quick to use. 
This data was collected as the roughness of a river channel is one of components used 
to calculate the hydraulic radius . The Hydraulic Radius for each site was then used to 
try and explain any changes in velocity found. 
As the size of the bedload was measure at 9 points across each of the downstream 
cross-sections , there was sufficient data to complete a Mann Whitney U- test. This 
test would then see if there was a statically significant difference between the size of 
the bedload at Helwath Beck and Jugger Howe Beck and between Jugger Howe Beck 
and Broxa. If there was a difference in size it could be inferred that size does influence 
the velocity of the river.
Bedload Size – Limitations 
The size of the bedload was determined by measuring the B – axis with a ruler. 
Gaining an accurate result was difficult as the sides of the bedload were not straight 
and the length varies across the B – axis. 
This technique could be biased in that it is easier to pick up the larger pieces of 
bedload located under the metal ruler. This would skew our data collection in favour 
of the larger stones at the expense of the smaller stones. 
This method only calculates the size of the bedload and does not take into account 
how the stone shape changes downstream. The shape of the bedload also influences 
how much friction the water has to overcome. As the bedload becomes more 
rounded downstream the river has to overcome proportionally less friction and its 
velocity should increase. This method only takes into account how the size of the 
bedload influences the river velocity, when in reality it is the both the size and shape 
of the bedload that influences velocity. 
Therefore, the we could question whether the data we collected would allow us to 
reach a reliable conclusions about what factors influence mean channel velocity.
This technique could have be biased in that it is easier to pick up the larger pieces of 
bedload located under the metal ruler. This would skew our data collection in favour 
of the larger stones at the expense of the smaller stones. 
This method only calculates the size of the bedload and does not take into account 
how the stone shape changes downstream. The shape of the bedload also influences 
how much friction the water has to overcome. As the bedload becomes more 
rounded downstream the river has to overcome proportionally less friction and its 
velocity should increase. This method only takes into account how the size of the 
bedload influences the river velocity, when in reality it is the both the size and shape 
of the bedload that influences velocity. 
Therefore, the we could question whether the data we collected would allow us to 
reach a reliable conclusions about what factors influence mean channel velocity. 
Between Jugger Howe Beck and Broxa there was very little reduction in median stone 
size and it was inferred that this small reduction in roughness had little influence on 
the increase in velocity. If smoothness of the stones had also been investigated it 
could have been found that it was the shape of the stones and not the size that had 
had an influence on the increase in velocity in this stretch of river.
Bedload Size – Improvements 
The B - axis could have been measured using callipers instead of a ruler. The distance 
between the pincers of the callipers could then have been measured again the a ruler. 
This would have resulted in more accurate measurement of the bedloads B – axis. 
To attain more accurate data for the size of the bedload I could measure the A, B and 
C axes and then work out the average size. This could have made the results more 
accurate and therefore the conclusions reached about how the roughness of the 
wetted perimeter influences the velocity more reliable. 
I could also have measured the shape of the bedload using the ‘Powers’ Scale of 
Roundess to place the bedload measured into six different categories from very 
angular to well rounded. 
Then using the chi - squared (X2) test these different categories of bedload shape could 
then have been used to see if there was any statically significant difference of 
roundness between Helwath Beck , Jugger Howe Beck and Broxa. 
If a statistically significant difference in shape was found it could have been inferred 
that it is mot just size but also shape that influences the mean velocity of the river.
Gradient
Gradient 
A 20 meter stretch of the river was measured downstream using a 30 meter tape 
measure. A surveyors level was set up in the middle of this 20 meter stretch at the 
side of the river channel and levelled. 
Two graduated E staffs were placed vertically at either end of the 20 meter stretch. 
The bottom of these poles been aliened with the surface of the water in the river. 
The difference in height is then measure between each pole and the level. The 
vertical drop in horizontal height (cm) can be worked out. 
The measured change in horizontal height and vertical distance downstream are then 
used to work out the gradient. 
This process was repeated at each of the downstream sites so that the gradient of the 
waters surface could be compared between the sites.
Data Presentation 
and 
Analysis
Types of Data Presentation and Analysis Used. 
Flow Lines 
Cross – Sections 
Bar charts 
Dispersion Graphs 
Central Tendency - Range, Median and Inter Quartile Range 
Mann Whitney U Test
Group 7 
Velocity 
0.125 - 0.125 - 0.08 
0.11 – 0.26 – 0.135 
0.33 – 0.26 – 0.25
The Velocity increased form 0.11 ms-1 at Helwath Beck to 0.16 ms-1 at Jugger Howe 
Beck , an increase of 45%. 
From Jugger Howe Beck to Broxa it increased from 0.16 ms-1 to of 0.28 ms-1 an increase 
of 75%. 
0.125 - 0.125 - 0.08 // 0.11 – 0.26 – 0.135 // 0.33 – 0.26 – 0.25 
The Gradient decreased form 0.021 m/m at Helwath Beck to 0.013 m/m at Jugger 
Howe Beck , a decrease of 38%. 
From Jugger Howe Beck to Broxa it decreased from 0.013 m/m to 0.008 m/m a 
decrease of 38%.
The wetted perimeter increased form 2.76 meters at Helwath Beck to 7.25 meters at 
Jugger Howe Beck , an increase of 162%. 
From Jugger Howe Beck to Broxa it increased from 7.25 meters to 8.92 meters an 
increase of 23%. 
The mean present flow depth and river width also increased downstream. This meant 
that the cross – sectional area of the river increased from 0.16 m3 at Helwath Beck to 
0.48 m3at Jugger Howe Beck, an increase of 200%. 
From Jugger Howe Beck to Broxa it increased from to 0.48 m3 to 0.92 m3 an increase of 
91%. 
The reasons why the CSA increase down stream was due to an increase in the 
drainage basin of the river from 10 km2 to 48 km2. 
As the cross – sectional area of the river increased at a faster rate than the wetted 
perimeter the hydraulic radius would also have increased downstream. Therefore, as 
the channel loses proportionately less energy in overcoming friction the mean velocity 
of the river channel would have increased
The hydraulic radius increased form 0.06 at Helwath Beck to 0.07 at Jugger Howe 
Beck , an increase of 17%. 
From Jugger Howe Beck to Broxa it increased from 0.07 to 0.10 an increase of 42%. 
As the hydraulic radius of the river channel increases the channel loses 
proportionately less energy in overcoming friction and the mean velocity of the river 
channel increases. 
These figures indicate that the increase in the hydraulic radius has had a greater 
influence on the channel velocity between Jugger Howe Beck and Broxa than between 
Helwath Beck and Jugger Howe Beck.
The median size for the B – axis of bedload size at Helwath Beck was the greatest at 
24 cm and had a range of 14.5 cm, with the highest and lowest sizes been 25 cm and 
10.5 cm respectively. 
The median size for the B – axis of bedload size at Jugger Howe Beck was smaller at 7 
cm and had a range of 7.5 cm, with the highest and lowest sizes been 11 cm and 3.5 
cm respectively. 
The median size for the B – axis of bedload size at Broxa was the even smaller at 5 cm 
and had a range of 4 cm, with the highest and lowest sizes been 6.5cm and 2.5 cm 
respectively.
The data between Helwath Beck and Jugger Howe Beck shows that there is a large 
difference between the median size of bedload of 17 cm a 71% change in median size 
and only a very small overlap between the two ranges of bedload size of 0.5 cm. 
Since the bedload size is of a much smaller size at Jugger Howe Beck than at Helwath 
Beck it could be inferred that the roughness of the wetted perimeter has greatly 
decreased. 
Therefore, this reduction in channel roughness could have had a great influence on 
the increase in the mean channel velocity as the channel loses proportionately less 
energy in overcoming friction.
The data between Jugger Howe Beck and Broxa shows that there is only a small 
difference between the median size of bedload of 2 cm a 28% change in size and a 
relatively large overlap between the two ranges of bedload size of 3 cm. 
Since there is little difference in bedload size between Jugger Howe Beck and Broxa it 
could be inferred that the roughness of the wetted perimeter has remained almost 
the same. 
Since the mean channel velocity is greater at Broxa than at Jugger Howe Beck this 
increase must have been mainly caused by an increase in the hydraulic radius and only 
marginally by the reduction in the roughness of the wetted perimeter.
To add greater validity to our analysis and increase the reliability of our conclusions I 
conducted a Mann Whitney U test to see if there is a statistically significant difference 
the median bedload size at Helwath Beck and Jugger Howe Beck and then between 
Jugger Howe Beck and Broxa. 
The result of the test showed there was a statistical significant difference between the 
median bedload size between Helwath Beck and Jugger Howe Beck. There was less 
than a 5% probability that this difference happened by chance. 
However, there was not a statistical significant difference between the median 
bedload size between Jugger Howe Beck and Broxa.
Dispersion Graphs 
(Describe, Strengths, Weakness & Justification)
Describe how to Complete a Dispersion Graph 
The x – axis was labelled with the three different downstream sample sites called 
Helwath Beck, Jugger Howe Beck and Broxa. 
An appropriate scale for the bedload size was then calculated for the y – axis by 
working out that the highest value for the three sites was 24 cm and lowest value was 
2.5 cm. 
The values of the nine bedload samples for Helwath Beck were then plotted vertically 
against the y - axis. Where the values were equal they were plotted adjacent to each 
other. 
This process was repeated further along the x – axis for the sites of Jugger Howe Beck 
and Broxa. 
The median and a box and whisker plot where then labelled on the graph for each of 
the different sample sites.
Strengths & Weaknesses of a Dispersion Graph 
It provides a clear visual representation of the range and clustering of the bedload size 
at each of the three downstream sample sites. (S) 
It allows a clear visual comparison of any similarities or differences that occur in the 
range and clustering of the bed load size between each of the three downstream 
sample sites. (S) 
Valid conclusions can then be drawn about how bedload size influences the mean 
channel velocity from the varying ranges and clustering illustrated at each of the 
downstream sample point. (S) 
It may be difficult to read the actual values of the individual stone sizes if the scale of 
the y – axis is to small. (W) 
It cannot used to graph data from categorised variables such as bedload shape. (W) 
It cannot be used to compare data form more than one variable e.g. Hydraulic radius 
verses velocity. (W)
Justification of a Dispersion Graph 
Part of my aim was to investigate how different factors such as the roughness of the 
wetted perimeter contributed to the downstream increase in mean channel velocity. 
Therefore, a dispersion graph was constructed to visually compare how the 
downstream changes in the size of bedload and its clustering may have influenced this 
velocity. 
The graph showed that there was a large difference in bedload size between the 
sample sites of Helwath Beck and Jugger Howe Beck as 4 of the 9 stones at Helwath 
Beck where clustered above the median of 24 cm and only one of the smaller stones 
was of a size that overlapped with the stones sampled at Jugger Howe Beck which 
were evenly distributed between 11 and 3.5 cm. 
However, it was found that there was only a small difference in bedload size between 
Jugger Howe Beck and Broxa as 8 of the 9 largest stones at Broxa were larger than the 
smallest stone sampled upstream at Jugger Howe Beck. 
This data clearly illustrated my conclusion that the downstream change in roughness 
of the wetted perimeter had a diminishing influence on the increase in mean channel 
velocity.
The Mann Whitney U Test 
for the River Derwent
The First Mann Whitney U Test for 
- 
(Helwath Beck and Jugger Howe Beck) 
This is a statistical test to determine whether 2 sets of data of the same variable are 
significantly different. It tests the difference between the medians of the two data 
sets. 
By using the critical values table, it is possible to assess the probability to which any 
observed difference is a result of chance. 
I wrote down the null hypothesis and research hypothesis and set the level of 
significance at 0.05. 
NH – There is no significant difference in the size of bedload between Helwath Beck 
and Jugger Howe Beck. 
RH -There is a significant difference in the size of bedload between Helwath Beck and 
Jugger Howe Beck.
The best way to proceed is to incorporate the finding into a table that allows you to 
calculate the results 
I then ranked the size of the bedload in terms of their position in both samples. The 
largest stone was given the lowest rank and the smallest the highest rank. Where the 
size of the stones were the same I took the average of the rank values. 
I then totalled the ranks for the bedload size of Helwath Beck and Jugger Howe Beck.
I then calculated the U values for both samples using the formula below. 
9 x 9 + 9 x (9 +1) – 46 = 80 
2 
9 x 9 + 9 x (9 +1) – 125 = 1 
2
. 
I used the critical values table to work out that the critical value for this set of data 
was 17 at the 95% confidence level. 
I found that the value for U2 of 1 was lower than the critical value of 17. Therefore, I 
accepted my research hypothesis that there is a statistical significant difference in 
the size of bedload between Helwath Beck and Jugger Howe Beck.
The Second Mann Whitney U Test for 
- 
(Jugger Howe Beck and Broxa) 
This is a statistical test to determine whether 2 sets of data of the same variable are 
significantly different. It tests the difference between the medians of the two data 
sets. 
By using the critical values table, it is possible to assess the probability to which any 
observed difference is a result of chance. 
I wrote down the null hypothesis and research hypothesis and set the level of 
significance at 0.05. 
NT – There is no significant difference in the size of bedload between Jugger Howe 
Beck and Broxa. 
RH -There is a significant difference in the size of bedload between Jugger Howe Beck 
and Broxa.
The best way to proceed is to incorporate the finding into a table that allows you to 
calculate the results. 
I then ranked the size of the bedload in terms of their position in both samples. The 
largest stone was given the lowest rank and the smallest the highest rank. Where the 
size of the stones were the same I took the average of the rank values. 
I then totalled the ranks for the bedload size of Jugger Howe Beck and Broxa.
I then calculated the U values for both samples using the formula below. 
9 x 9 + 9 x (9 +1) – 67 = 59 
2 
9 x 9 + 9 x (9 +1) – 104 = 22 
2
. 
I used the critical values table to work out that the critical value for this set of data 
was 17 at the 95% confidence level. 
I found that the value for U2 of 22 was higher than the critical value of 17. 
Therefore, I accepted my Null hypothesis that there is no statistical significant 
difference in the size of bedload between Jugger Howe Beck and Broxa
Mann Whitney U Test – Analysis 
There was a statistical significant difference in the median bedload size between 
Helwath Beck and Jugger Howe Beck. As there was less than a 5% probability that this 
difference happened by chance. 
The bedload at Jugger Howe Beck was smaller than that found at Helwath Beck. From 
this it can be inferred that the roughness of the wetted perimeter at Jugger Howe 
Beck is lower which means that the river uses proportionally less energy to overcome 
friction and the velocity should increase. 
There was not a statistical significant difference in the median bedload size between 
Jugger Howe Beck and Broxa. There was more than a 5% probability that this 
difference happened by chance. 
The bedload at Broxa was not significantly smaller than that found at Jugger Howe 
Beck. From this it can be inferred that there is little difference in the roughness of the 
wetted perimeter between the two sites and therefore, the river should be using 
proportionally the same energy to overcome friction.
Mann Whitney U Test 
(Describe, Strengths, Weakness & Justification)
Describe how to Complete a 
Mann Whitney U Test 
First set out the null and research hypothesis stating that there is either no 
significance or that there is a significance difference in the size of bedload between 
Helwath Beck and Jugger Howe Beck. 
Place the individual values for bedload size into two columns, the first for the values of 
Helwath Beck and the second for the values of Jugger Howe Beck. 
Rank the size of the bedload in terms of there position in both samples. The largest 
stone been given the lowest rank and the smallest the highest rank. For stones of the 
same size take the average of the rank values. 
Then separately calculate the sum of the ranks for Helwath Beck and Jugger Howe 
Beck.
Use the sum of the ranks for Helwath Beck and Jugger Howe Beck to calculate the 
values of U1 and U2 by inserting them into the formula. 
The critical values table was then used to work out that 17 was the critical value for 
this set of data at a 95% confidence level. 
As the value for U2 of 1 was lower than the critical value of 17 I accepted my research 
hypothesis that there was a statistical significant difference in the median size of 
bedload between Helwath Beck and Jugger Howe Beck.
Strengths & Weaknesses of the 
Mann Whitney U Test 
This is a statistical test to determine whether the median for 2 sets of data of the 
same variable are significantly different or have occurred by chance. (S) 
It can be used on 2 sets of data that have different sizes, e.g. one data set could have 
10 values and the other only 8 values. (S) 
It contains a lengthy calculation that can be prone to human error. This human error 
could result in the wrong conclusion been reached as the U values have been 
calculated incorrectly. (W) 
It does not explain why the difference in the two data sets has occurred. (W) 
The test cannot be applied to data that has been categorised such as bedload shape. 
(W)
Justification of the Mann Whitney U Test 
Part of my aim was to investigate how different factors such as the roughness of the 
wetted perimeter influenced the mean channel velocity. 
Therefore, I conducted a Mann Whitney U Test to see if there was a significant 
downstream change in the median size of bedload between the sample sites of 
Helwath Beck , Jugger Howe Beck and Broxa. 
The first test proved that there was a statistical significant difference of the median 
size of bedload between Helwath Beck and Jugger Howe Beck as one of the U values 
of 1 was below the critical value of 17. 
The second test proved that there was no statistical significant difference of the 
median size of bedload between Jugger Howe Beck and Broxa as both the U values of 
59 and 22 were above the critical of 17.
This test added statistically validity to my conclusion that the downstream change in 
roughness of the wetted perimeter had a diminishing influence on the increase in 
mean channel velocity. 
It was an appropriate technique to analyse the data collected for bedload size as it 
was measured in centimetres, which was a form of ordinal data that could be ranked. 
As 9 stones were measured at each site this falls between the minimum of 5 and the 
maximum of 20 pieces of data recommend to carry at this test.
Conclusion 
(what did I Learn)
The investigation did show an overall increase in downstream mean channel velocity 
for the upper River Derwent even though the gradient did decreased. 
However, the mean channel velocity increased at a faster rate the further the river 
travelled downstream. Between the two sample sites nearest to the rivers source 
there was an increase from 0.11 ms-1 to 0.16 ms-1 a relative change of 45% compared 
to a change from 0.16 ms-1 to 0.28 ms-1 a relative increase of 75% between the two 
sites furthest from the rivers source. 
The overall, increase in downstream velocity can be attributed to two factors: a) the 
increase in the efficiency of the river as the hydraulic radius becomes larger and b) the 
reduction in the roughness of the wetted perimeter as the river has had more time to 
erode its bed and banks. 
However, there was a difference in the major factor that influenced the increase in 
velocity between the two upstream sites of Helwath Beck and Jugger Howe Beck and 
the two lower stream sites of Jugger Howe Beck and Broxa.
In the upper reach the major factor that influenced the increase in channel velocity 
was probably the statistically significant reduction in the bedload size of the wetted 
perimeter as there was only a small increase in the hydraulic radius of 17%. 
In the lower reach of the river the major factor that influenced the increase in channel 
velocity was probably the large increase in the hydraulic radius of 41% as there was no 
statistically significant reduction in the bedload size of the wetted perimeter. 
I have learnt that the mean channel velocity does increase downstream as Schumm’s 
or Bradshaw’s model predicts and that gradient, hydraulic radius and the wetted 
perimeter do influence this change as AS geography textbooks state. 
However, my understanding of the reasons behind this increase in velocity has 
developed beyond the theory provided in the AS geography textbooks. The textbooks 
do not mention that the major factor influencing mean channel velocity may vary over 
different reaches of a river.
Evaluation
Evaluate the success of your investigation using each section listed below 
Aim 
Location of the study area 
Sampling Methods 
Data Collection Methods 
Data Presentation 
Accuracy of Results 
Reliability of Conclusions 
Evaluate the strengths and weaknesses of your fieldwork investigation using each of 
the section listed above. 
What could I have done to improve this fieldwork investigation. 
What could I have done to extend this fieldwork investigation. 
In what ways would you conclusions be of use to other geographers etc.
My aim was 
‘To investigate the extent that downstream mean channel velocity for the upper 
Derwent river increases. Even though the gradient of the river decreases 
downstream’. 
My investigation was successful because not only did we discovered that the mean 
velocity does increase downstream, but it increases at a faster rate the further the 
river moves downstream. For example in the upper reach between the sites of 
Helwath Beck and Jugger Howe beck there was a 45% increase compared to a 75% 
increase in the lower reach of the river between the sites of Jugger Howe Beck and 
Broxa. 
I also discovered that both the hydraulic radius of the river channel and the roughness 
of the wetted perimeter do influence the mean velocity as the geography textbooks 
state in there theory sections. 
However, my understanding was further developed as I discovered that a decrease in 
roughness of the wetted perimeter has a major influence on the change in mean 
velocity in the upper reach of the river Derwent between Helwath Beck and Jugger 
Howe Beck and only a minor influence on the change in mean velocity in the lower 
reach between Jugger Howe Beck and Broxa.
Parts of the method could have been evaluated by looking at the results obtained. For 
example at Helwath Beck timing of the point velocity measurement for the right-hand 
side of the channel was stopped because it exceeded 1 minute. 
This timing was converted into a velocity of 0.08 ms-1. This results might not have 
been a true reflection of the rivers velocity at this point. For the very low velocity at 
this point in the river the hydro prop could have over estimated the true velocity. 
The mean channel velocity of 0.11 ms-1 which was calculated using the three point 
velocities could also have been over estimated. Therefore, the results for the mean 
channel velocity would not have been accurate and any conclusions drawn could have 
been unreliable. 
To overcome this inaccuracy an electromagnetic open channel flow meter could have 
been used. This instrument would have reduced the overestimate of this point 
velocity. This is because the electromagnetic open channel flow meter works at 
velocities as low 0.01 ms-1.
The results could have been evaluated by comparing them the average results 
obtained by merging the data collected by all the groups that survey the river 
channel. 
My results for the increase in downstream mean channel velocity and the hydraulic 
radius reflected the general trends for that of the group average. 
Also there was only a small difference in the actual results. At Helwath Beck the 
mean velocity was underestimated by 10% and at Jugger Howe Beck and Broxa 
they were overestimated by about 15%. 
This was an acceptable margin of error given that the point velocities were only 
measured at three points along the river cross – section and then averaged to give 
a mean channel velocity at each site. 
However, there was a slightly larger margin of error for the actual hydraulic radius 
results as they were within + or – 30% of the groups average for each site. 
It can therefore, be inferred that the results that collected where fairly accurate 
and therefore the conclusions drawn reliable.
My investigation could have be improved and /or extended in the following ways; 
Data could have been collected from a 1st order streams. This data could then have 
been added to the data collected from the 2nd to 4th order streams to see if my 
investigation still reached the same conclusion that mean velocity does increase 
downstream at an ever increasing rate and that the roughness of the wetted 
perimeter still has a greater influence in the higher reaches of the upper Derwent 
river. 
The number of sample sites for each order stream could have been increased from 1 
to 3. This would have given data that was more representative of the river channel 
and the conclusions that were reached would have been more reliable. 
The number of points that velocity was measured along the cross – sections could 
have been increased from 3 to 5. This would have reduced the margin of error that 
one anomalous result had when calculating the mean channel velocity from 33.3% to 
20%. Therefore, the mean velocity obtained would have been a truer reflection of the 
actual mean velocity of the river channel and any conclusions drawn from this data 
would have been more reliable.
My investigation could have be improved and /or extended in the following ways; 
To attain more accurate data for the size of the bedload I could measure the A, B and 
C axes and then work out the average size. This could have made the results more 
accurate and therefore the conclusions reached about how the roughness of the 
wetted perimeter influences the mean velocity more reliable. 
I could also have measured the shape of the bedload using the ‘Powers’ Scale of 
Roundess. The bedload measured is placed into one of the six different categories 
from very angular to well rounded. 
Then using the chi - squared (X2) test these different categories of bedload shape to 
see if there was any statically significant difference of shape between Helwath Beck, 
Jugger Howe Beck and Broxa. 
If a statistically significant difference in shape was found it could have been inferred 
that it is not just size but also shape that influences the mean velocity of the river.
My investigation could have be improved and /or extended in the following ways; 
The landuse of the drainage could be mapped to investigate if this was a factor in the 
increase of aret of discharge. 
Compare the with manning equation is evaluate 
H storm curse 
Work out bank full to see.

More Related Content

What's hot

CAMBRIDGE GEOGRAPHY A2 REVISION - TROPICAL ENVIRONMENTS: TROPICAL ECOSYSTEMS
CAMBRIDGE GEOGRAPHY A2 REVISION - TROPICAL ENVIRONMENTS: TROPICAL ECOSYSTEMSCAMBRIDGE GEOGRAPHY A2 REVISION - TROPICAL ENVIRONMENTS: TROPICAL ECOSYSTEMS
CAMBRIDGE GEOGRAPHY A2 REVISION - TROPICAL ENVIRONMENTS: TROPICAL ECOSYSTEMSGeorge Dumitrache
 
AS GEOGRAPHY - ATMOSPHERE AND WEATHER - ATMOSPHERIC CIRCULATION MODEL
AS GEOGRAPHY - ATMOSPHERE AND WEATHER - ATMOSPHERIC CIRCULATION MODELAS GEOGRAPHY - ATMOSPHERE AND WEATHER - ATMOSPHERIC CIRCULATION MODEL
AS GEOGRAPHY - ATMOSPHERE AND WEATHER - ATMOSPHERIC CIRCULATION MODELGeorge Dumitrache
 
CAMBRIDGE AS GEOGRAPHY REVISION: ATMOSPHERE AND WEATHER - 2.2 THE GLOBAL ENER...
CAMBRIDGE AS GEOGRAPHY REVISION: ATMOSPHERE AND WEATHER - 2.2 THE GLOBAL ENER...CAMBRIDGE AS GEOGRAPHY REVISION: ATMOSPHERE AND WEATHER - 2.2 THE GLOBAL ENER...
CAMBRIDGE AS GEOGRAPHY REVISION: ATMOSPHERE AND WEATHER - 2.2 THE GLOBAL ENER...George Dumitrache
 
Introduction to GCSE Weather
Introduction to GCSE WeatherIntroduction to GCSE Weather
Introduction to GCSE Weatherjacksonthree
 
T1w6 flood management
T1w6   flood managementT1w6   flood management
T1w6 flood managementYanjie Luo
 
Environmental management
Environmental managementEnvironmental management
Environmental managementArm Punyathorn
 
Motions of the earth
Motions of the earthMotions of the earth
Motions of the earthsanj_1911
 
Unit 9, Lesson 3 - The Hydrosphere
Unit 9, Lesson 3 - The HydrosphereUnit 9, Lesson 3 - The Hydrosphere
Unit 9, Lesson 3 - The Hydrospherejudan1970
 
CAMBRIDGE GEOGRAPHY A2 REVISION - TROPICAL ENVIRONMENTS: TROPICAL LANDFORMS
CAMBRIDGE GEOGRAPHY A2 REVISION - TROPICAL ENVIRONMENTS: TROPICAL LANDFORMSCAMBRIDGE GEOGRAPHY A2 REVISION - TROPICAL ENVIRONMENTS: TROPICAL LANDFORMS
CAMBRIDGE GEOGRAPHY A2 REVISION - TROPICAL ENVIRONMENTS: TROPICAL LANDFORMSGeorge Dumitrache
 
Movement of Ocean Water
Movement of Ocean WaterMovement of Ocean Water
Movement of Ocean Waterrebelbrindley
 
Chapter 5 - Floods (Part 2)
Chapter 5 - Floods (Part 2)Chapter 5 - Floods (Part 2)
Chapter 5 - Floods (Part 2)GeographyByTian
 
Global warming
Global warmingGlobal warming
Global warmingPrashant .
 
Chapter20 coastal processes
Chapter20 coastal processesChapter20 coastal processes
Chapter20 coastal processesashtonx
 
A2 CAMBRIDGE GEOGRAPHY: COASTAL ENVIRONMENTS - WAVE, MARINE AND SUB-AERIAL PR...
A2 CAMBRIDGE GEOGRAPHY: COASTAL ENVIRONMENTS - WAVE, MARINE AND SUB-AERIAL PR...A2 CAMBRIDGE GEOGRAPHY: COASTAL ENVIRONMENTS - WAVE, MARINE AND SUB-AERIAL PR...
A2 CAMBRIDGE GEOGRAPHY: COASTAL ENVIRONMENTS - WAVE, MARINE AND SUB-AERIAL PR...George Dumitrache
 
A2 CAMBRIDGE GEOGRAPHY: CHARACTERISTICS AND FORMATION OF COASTAL LANDFORMS
A2 CAMBRIDGE GEOGRAPHY: CHARACTERISTICS AND FORMATION OF COASTAL LANDFORMSA2 CAMBRIDGE GEOGRAPHY: CHARACTERISTICS AND FORMATION OF COASTAL LANDFORMS
A2 CAMBRIDGE GEOGRAPHY: CHARACTERISTICS AND FORMATION OF COASTAL LANDFORMSGeorge Dumitrache
 
2008 sichuan earthquake
2008 sichuan earthquake2008 sichuan earthquake
2008 sichuan earthquakeBruce Liu
 

What's hot (20)

CAMBRIDGE GEOGRAPHY A2 REVISION - TROPICAL ENVIRONMENTS: TROPICAL ECOSYSTEMS
CAMBRIDGE GEOGRAPHY A2 REVISION - TROPICAL ENVIRONMENTS: TROPICAL ECOSYSTEMSCAMBRIDGE GEOGRAPHY A2 REVISION - TROPICAL ENVIRONMENTS: TROPICAL ECOSYSTEMS
CAMBRIDGE GEOGRAPHY A2 REVISION - TROPICAL ENVIRONMENTS: TROPICAL ECOSYSTEMS
 
AS GEOGRAPHY - ATMOSPHERE AND WEATHER - ATMOSPHERIC CIRCULATION MODEL
AS GEOGRAPHY - ATMOSPHERE AND WEATHER - ATMOSPHERIC CIRCULATION MODELAS GEOGRAPHY - ATMOSPHERE AND WEATHER - ATMOSPHERIC CIRCULATION MODEL
AS GEOGRAPHY - ATMOSPHERE AND WEATHER - ATMOSPHERIC CIRCULATION MODEL
 
CAMBRIDGE AS GEOGRAPHY REVISION: ATMOSPHERE AND WEATHER - 2.2 THE GLOBAL ENER...
CAMBRIDGE AS GEOGRAPHY REVISION: ATMOSPHERE AND WEATHER - 2.2 THE GLOBAL ENER...CAMBRIDGE AS GEOGRAPHY REVISION: ATMOSPHERE AND WEATHER - 2.2 THE GLOBAL ENER...
CAMBRIDGE AS GEOGRAPHY REVISION: ATMOSPHERE AND WEATHER - 2.2 THE GLOBAL ENER...
 
Introduction to GCSE Weather
Introduction to GCSE WeatherIntroduction to GCSE Weather
Introduction to GCSE Weather
 
Zemljotresi
ZemljotresiZemljotresi
Zemljotresi
 
Flood
FloodFlood
Flood
 
T1w6 flood management
T1w6   flood managementT1w6   flood management
T1w6 flood management
 
Environmental management
Environmental managementEnvironmental management
Environmental management
 
Motions of the earth
Motions of the earthMotions of the earth
Motions of the earth
 
Unit 9, Lesson 3 - The Hydrosphere
Unit 9, Lesson 3 - The HydrosphereUnit 9, Lesson 3 - The Hydrosphere
Unit 9, Lesson 3 - The Hydrosphere
 
CAMBRIDGE GEOGRAPHY A2 REVISION - TROPICAL ENVIRONMENTS: TROPICAL LANDFORMS
CAMBRIDGE GEOGRAPHY A2 REVISION - TROPICAL ENVIRONMENTS: TROPICAL LANDFORMSCAMBRIDGE GEOGRAPHY A2 REVISION - TROPICAL ENVIRONMENTS: TROPICAL LANDFORMS
CAMBRIDGE GEOGRAPHY A2 REVISION - TROPICAL ENVIRONMENTS: TROPICAL LANDFORMS
 
LAYERS OF ATMOSPHERE
LAYERS OF ATMOSPHERELAYERS OF ATMOSPHERE
LAYERS OF ATMOSPHERE
 
Movement of Ocean Water
Movement of Ocean WaterMovement of Ocean Water
Movement of Ocean Water
 
Chapter 5 - Floods (Part 2)
Chapter 5 - Floods (Part 2)Chapter 5 - Floods (Part 2)
Chapter 5 - Floods (Part 2)
 
Global warming
Global warmingGlobal warming
Global warming
 
Chapter20 coastal processes
Chapter20 coastal processesChapter20 coastal processes
Chapter20 coastal processes
 
A2 CAMBRIDGE GEOGRAPHY: COASTAL ENVIRONMENTS - WAVE, MARINE AND SUB-AERIAL PR...
A2 CAMBRIDGE GEOGRAPHY: COASTAL ENVIRONMENTS - WAVE, MARINE AND SUB-AERIAL PR...A2 CAMBRIDGE GEOGRAPHY: COASTAL ENVIRONMENTS - WAVE, MARINE AND SUB-AERIAL PR...
A2 CAMBRIDGE GEOGRAPHY: COASTAL ENVIRONMENTS - WAVE, MARINE AND SUB-AERIAL PR...
 
A2 CAMBRIDGE GEOGRAPHY: CHARACTERISTICS AND FORMATION OF COASTAL LANDFORMS
A2 CAMBRIDGE GEOGRAPHY: CHARACTERISTICS AND FORMATION OF COASTAL LANDFORMSA2 CAMBRIDGE GEOGRAPHY: CHARACTERISTICS AND FORMATION OF COASTAL LANDFORMS
A2 CAMBRIDGE GEOGRAPHY: CHARACTERISTICS AND FORMATION OF COASTAL LANDFORMS
 
Tsunami
TsunamiTsunami
Tsunami
 
2008 sichuan earthquake
2008 sichuan earthquake2008 sichuan earthquake
2008 sichuan earthquake
 

Viewers also liked

A* full marks GCSE geography coursework (rivers)
A* full marks GCSE geography coursework (rivers)A* full marks GCSE geography coursework (rivers)
A* full marks GCSE geography coursework (rivers)Nishay Patel
 
Strengths and weakness of data presentation
Strengths and weakness of data presentationStrengths and weakness of data presentation
Strengths and weakness of data presentationWill Williams
 
4A 2 Questions = Graphical Skills
4A 2 Questions = Graphical Skills4A 2 Questions = Graphical Skills
4A 2 Questions = Graphical SkillsAlex C G Cooper
 
Weather Climate Change All Questions
Weather Climate Change All QuestionsWeather Climate Change All Questions
Weather Climate Change All QuestionsAlex C G Cooper
 
Air Masses Affecting the British Isles
Air Masses Affecting the British IslesAir Masses Affecting the British Isles
Air Masses Affecting the British IslesAlex C G Cooper
 
Jan 2011 geog investigations paper
Jan 2011 geog investigations paperJan 2011 geog investigations paper
Jan 2011 geog investigations paperSally Longford
 
L2 ap 2013 research & overuse
L2 ap 2013 research & overuseL2 ap 2013 research & overuse
L2 ap 2013 research & overuseSHS Geog
 
INAYETH MUSTAPHA - FINAL THESIS
INAYETH MUSTAPHA - FINAL THESISINAYETH MUSTAPHA - FINAL THESIS
INAYETH MUSTAPHA - FINAL THESISInayeth Mustapha
 
Stream Order Lesson PowerPoint, River and Water Unit
Stream Order Lesson PowerPoint, River and Water UnitStream Order Lesson PowerPoint, River and Water Unit
Stream Order Lesson PowerPoint, River and Water Unitwww.sciencepowerpoint.com
 
River Valley Study Guide
River Valley Study GuideRiver Valley Study Guide
River Valley Study GuideLaura Beckham
 
Thinking About Rivers
Thinking About RiversThinking About Rivers
Thinking About RiversSimon Jones
 
Coastal FW Presentation Guidelines
Coastal FW Presentation GuidelinesCoastal FW Presentation Guidelines
Coastal FW Presentation Guidelinesyahui_tan
 

Viewers also liked (20)

A* full marks GCSE geography coursework (rivers)
A* full marks GCSE geography coursework (rivers)A* full marks GCSE geography coursework (rivers)
A* full marks GCSE geography coursework (rivers)
 
AQA Geography Geog2
AQA Geography Geog2AQA Geography Geog2
AQA Geography Geog2
 
Pakistan Floods
Pakistan FloodsPakistan Floods
Pakistan Floods
 
GEOG2 2014
GEOG2 2014GEOG2 2014
GEOG2 2014
 
Strengths and weakness of data presentation
Strengths and weakness of data presentationStrengths and weakness of data presentation
Strengths and weakness of data presentation
 
4A 2 Questions = Graphical Skills
4A 2 Questions = Graphical Skills4A 2 Questions = Graphical Skills
4A 2 Questions = Graphical Skills
 
Arran trip
Arran tripArran trip
Arran trip
 
Weather all Questions
Weather all QuestionsWeather all Questions
Weather all Questions
 
Weather Climate Change All Questions
Weather Climate Change All QuestionsWeather Climate Change All Questions
Weather Climate Change All Questions
 
Air Masses Affecting the British Isles
Air Masses Affecting the British IslesAir Masses Affecting the British Isles
Air Masses Affecting the British Isles
 
Jan 2011 geog investigations paper
Jan 2011 geog investigations paperJan 2011 geog investigations paper
Jan 2011 geog investigations paper
 
Geog2 question 2
Geog2 question 2Geog2 question 2
Geog2 question 2
 
THESIS
THESISTHESIS
THESIS
 
L2 ap 2013 research & overuse
L2 ap 2013 research & overuseL2 ap 2013 research & overuse
L2 ap 2013 research & overuse
 
INAYETH MUSTAPHA - FINAL THESIS
INAYETH MUSTAPHA - FINAL THESISINAYETH MUSTAPHA - FINAL THESIS
INAYETH MUSTAPHA - FINAL THESIS
 
Stream Order Lesson PowerPoint, River and Water Unit
Stream Order Lesson PowerPoint, River and Water UnitStream Order Lesson PowerPoint, River and Water Unit
Stream Order Lesson PowerPoint, River and Water Unit
 
Deep waters
Deep watersDeep waters
Deep waters
 
River Valley Study Guide
River Valley Study GuideRiver Valley Study Guide
River Valley Study Guide
 
Thinking About Rivers
Thinking About RiversThinking About Rivers
Thinking About Rivers
 
Coastal FW Presentation Guidelines
Coastal FW Presentation GuidelinesCoastal FW Presentation Guidelines
Coastal FW Presentation Guidelines
 

Similar to Fieldwork Cranedale

How to write a research paper
How to write a research paperHow to write a research paper
How to write a research paperBhomik Shah
 
ASSIGNMENT 2 - Research Proposal Weighting 30 tow.docx
ASSIGNMENT 2 - Research Proposal    Weighting 30 tow.docxASSIGNMENT 2 - Research Proposal    Weighting 30 tow.docx
ASSIGNMENT 2 - Research Proposal Weighting 30 tow.docxsherni1
 
1 London School of Business & Management QCF L.docx
 1  London School of Business & Management QCF L.docx 1  London School of Business & Management QCF L.docx
1 London School of Business & Management QCF L.docxaryan532920
 
Geog Coursework Guide
Geog Coursework GuideGeog Coursework Guide
Geog Coursework Guidewortha
 
Content of Reserach Proposal.pptx
Content of Reserach Proposal.pptxContent of Reserach Proposal.pptx
Content of Reserach Proposal.pptxAdanePetros3
 
PR1-Lesson-6-Writing-the-Introduction-Its-Subsections_PPT_JJAI.pdf
PR1-Lesson-6-Writing-the-Introduction-Its-Subsections_PPT_JJAI.pdfPR1-Lesson-6-Writing-the-Introduction-Its-Subsections_PPT_JJAI.pdf
PR1-Lesson-6-Writing-the-Introduction-Its-Subsections_PPT_JJAI.pdfyaughldaughs
 
Ib 09 River Holford
Ib 09 River HolfordIb 09 River Holford
Ib 09 River Holfordtudorgeog
 
3.5 student info 2013
3.5 student info 20133.5 student info 2013
3.5 student info 2013Taka Geo
 
Goals and Implementation Plan of Pillar 5 - Purpose and Concept of GLOSOLAN
Goals and Implementation Plan of Pillar 5 - Purpose and Concept of GLOSOLANGoals and Implementation Plan of Pillar 5 - Purpose and Concept of GLOSOLAN
Goals and Implementation Plan of Pillar 5 - Purpose and Concept of GLOSOLANExternalEvents
 
Eggars setting the scene
Eggars setting the sceneEggars setting the scene
Eggars setting the sceneMrs Coles
 
Research-Methodology...pptx
Research-Methodology...pptxResearch-Methodology...pptx
Research-Methodology...pptxRohan504920
 
Research Proposal Defense Slide Presentation Template.pptx
Research Proposal Defense Slide Presentation Template.pptxResearch Proposal Defense Slide Presentation Template.pptx
Research Proposal Defense Slide Presentation Template.pptxCarlJohnCarolino
 
Syllabus educ200 methods of research
Syllabus educ200 methods of researchSyllabus educ200 methods of research
Syllabus educ200 methods of researchMaria Theresa
 
As91244 intro to research plan
As91244 intro to research planAs91244 intro to research plan
As91244 intro to research planlavenderbongo
 
Overview of research methodology.pptx
Overview of research methodology.pptxOverview of research methodology.pptx
Overview of research methodology.pptxYogeshPatel28169
 
3.5 instructions no 2 (2014)
3.5 instructions no 2 (2014)3.5 instructions no 2 (2014)
3.5 instructions no 2 (2014)Taka Geo
 
1 HOW TO LAY OUT A RESEARCH PROPOSAL Title Page .docx
1 HOW TO LAY OUT A RESEARCH PROPOSAL  Title Page .docx1 HOW TO LAY OUT A RESEARCH PROPOSAL  Title Page .docx
1 HOW TO LAY OUT A RESEARCH PROPOSAL Title Page .docxoswald1horne84988
 

Similar to Fieldwork Cranedale (20)

Geog2
Geog2Geog2
Geog2
 
How to write a research paper
How to write a research paperHow to write a research paper
How to write a research paper
 
ASSIGNMENT 2 - Research Proposal Weighting 30 tow.docx
ASSIGNMENT 2 - Research Proposal    Weighting 30 tow.docxASSIGNMENT 2 - Research Proposal    Weighting 30 tow.docx
ASSIGNMENT 2 - Research Proposal Weighting 30 tow.docx
 
1 London School of Business & Management QCF L.docx
 1  London School of Business & Management QCF L.docx 1  London School of Business & Management QCF L.docx
1 London School of Business & Management QCF L.docx
 
Geog Coursework Guide
Geog Coursework GuideGeog Coursework Guide
Geog Coursework Guide
 
Research methodology
Research methodologyResearch methodology
Research methodology
 
Content of Reserach Proposal.pptx
Content of Reserach Proposal.pptxContent of Reserach Proposal.pptx
Content of Reserach Proposal.pptx
 
PR1-Lesson-6-Writing-the-Introduction-Its-Subsections_PPT_JJAI.pdf
PR1-Lesson-6-Writing-the-Introduction-Its-Subsections_PPT_JJAI.pdfPR1-Lesson-6-Writing-the-Introduction-Its-Subsections_PPT_JJAI.pdf
PR1-Lesson-6-Writing-the-Introduction-Its-Subsections_PPT_JJAI.pdf
 
Ib 09 River Holford
Ib 09 River HolfordIb 09 River Holford
Ib 09 River Holford
 
3.5 student info 2013
3.5 student info 20133.5 student info 2013
3.5 student info 2013
 
Goals and Implementation Plan of Pillar 5 - Purpose and Concept of GLOSOLAN
Goals and Implementation Plan of Pillar 5 - Purpose and Concept of GLOSOLANGoals and Implementation Plan of Pillar 5 - Purpose and Concept of GLOSOLAN
Goals and Implementation Plan of Pillar 5 - Purpose and Concept of GLOSOLAN
 
Eggars setting the scene
Eggars setting the sceneEggars setting the scene
Eggars setting the scene
 
Research-Methodology...pptx
Research-Methodology...pptxResearch-Methodology...pptx
Research-Methodology...pptx
 
Research Proposal Defense Slide Presentation Template.pptx
Research Proposal Defense Slide Presentation Template.pptxResearch Proposal Defense Slide Presentation Template.pptx
Research Proposal Defense Slide Presentation Template.pptx
 
Syllabus educ200 methods of research
Syllabus educ200 methods of researchSyllabus educ200 methods of research
Syllabus educ200 methods of research
 
As91244 intro to research plan
As91244 intro to research planAs91244 intro to research plan
As91244 intro to research plan
 
4 gaidhane observational studies
4 gaidhane observational studies4 gaidhane observational studies
4 gaidhane observational studies
 
Overview of research methodology.pptx
Overview of research methodology.pptxOverview of research methodology.pptx
Overview of research methodology.pptx
 
3.5 instructions no 2 (2014)
3.5 instructions no 2 (2014)3.5 instructions no 2 (2014)
3.5 instructions no 2 (2014)
 
1 HOW TO LAY OUT A RESEARCH PROPOSAL Title Page .docx
1 HOW TO LAY OUT A RESEARCH PROPOSAL  Title Page .docx1 HOW TO LAY OUT A RESEARCH PROPOSAL  Title Page .docx
1 HOW TO LAY OUT A RESEARCH PROPOSAL Title Page .docx
 

More from Alex C G Cooper (20)

emergency oxygen provider dan europe and Middle East
emergency oxygen provider dan europe and Middle Eastemergency oxygen provider dan europe and Middle East
emergency oxygen provider dan europe and Middle East
 
TOURISM PR CS QUES
TOURISM PR CS QUESTOURISM PR CS QUES
TOURISM PR CS QUES
 
ECOSYSTEMS PR QUES
ECOSYSTEMS PR QUESECOSYSTEMS PR QUES
ECOSYSTEMS PR QUES
 
ECOSYSTEMS QUES
ECOSYSTEMS QUESECOSYSTEMS QUES
ECOSYSTEMS QUES
 
COASTS PR QUES
COASTS PR QUESCOASTS PR QUES
COASTS PR QUES
 
COASTS CS QUES
COASTS CS QUESCOASTS CS QUES
COASTS CS QUES
 
TOURISM CS QUES
TOURISM CS QUESTOURISM CS QUES
TOURISM CS QUES
 
BI - ANTICYCLONES
BI - ANTICYCLONES BI - ANTICYCLONES
BI - ANTICYCLONES
 
ANTICYCLONES QUESTIONS
ANTICYCLONES QUESTIONSANTICYCLONES QUESTIONS
ANTICYCLONES QUESTIONS
 
FOGS
FOGSFOGS
FOGS
 
ANTICYCLONES
ANTICYCLONESANTICYCLONES
ANTICYCLONES
 
GLOBAL CIRCULATION
GLOBAL CIRCULATIONGLOBAL CIRCULATION
GLOBAL CIRCULATION
 
DEPRESSIONS
DEPRESSIONSDEPRESSIONS
DEPRESSIONS
 
03 mass tourism
03 mass tourism03 mass tourism
03 mass tourism
 
Rivers All 15 Mark Questions
Rivers All 15 Mark Questions Rivers All 15 Mark Questions
Rivers All 15 Mark Questions
 
2 W&C OVERVIEW PPT
2 W&C OVERVIEW PPT 2 W&C OVERVIEW PPT
2 W&C OVERVIEW PPT
 
Sand Dune Succession
Sand Dune SuccessionSand Dune Succession
Sand Dune Succession
 
Coastal Management
Coastal ManagementCoastal Management
Coastal Management
 
Essay Planning Sheet
Essay Planning SheetEssay Planning Sheet
Essay Planning Sheet
 
AQA Command Words
AQA Command WordsAQA Command Words
AQA Command Words
 

Fieldwork Cranedale

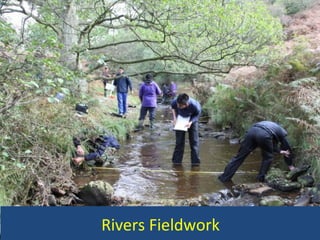
  • 3. • Whilst measuring the velocity at Hellworth Beck the speed of the river was to slow to move the impellor along the shaft of the hydroprop. Therefore, we had to record the velocity of the river as 0.08ms, which meant that we could have over estimated the velocity of the river.
  • 4. Equipment for the Examinations Black ink or black ball – point pen. Use of pencil only for drawing. Calculator Protractor Ruler Rubber
  • 5.
  • 6.
  • 7. Unit 2 – January 2009 Explain the geographical concept, process or theory that underpinned your fieldwork enquiry. (4) How did you respond to risks associated with undertaking your primary data collection? (4) Outline and justify one method of data collection that you used in your enquiry. (6) With the aid of a sketch diagram, describe one technique that you used to present data in your enquiry. (6) Making specific reference to your results, suggest how your enquiry could be improved. (5)
  • 8. Unit 2 – Summer 2009 Describe the location of your fieldwork and outline why this was a suitable site for your investigation. (4) State one hypothesis or research question or issue for evaluation that you have investigated in 2a. Describe one method of primary data collection used in the investigation. (5) Discuss the limitations of your chosen method in 2a. (6) Outline and justify the use of one or more techniques used to analyse your results. (5) Drawing upon your findings, explain how your enquiry improved your understanding of the topic. (5
  • 9. Unit 2 – January 2010 Sate the aim of your investigation and describe one method of data collection associated with the aim. (6) Discuss the strengths and weaknesses of the method of data collection desribed above. (6) Describe one method used to present your data. (5) How far did your fieldwork conclusions match the geographical theory, concept or idea on which your investigation was based? (5)
  • 10. Unit 2 – Summer 2010 State the aim of the fieldwork investigation. Describe the geographical theory, concept or idea that formed the basis of your fieldwork investigation. (5) With reference to your fieldwork, distinguish between qualitative and quantitative data. (3) Describe one method that you used for the collection of primary or secondary data. (6) Outline one technique that you used to present results from your data collection. (4) Evaluate your investigation. In your answer, you should: a- comment on the strengths and weaknesses of the different aspects of the study and b – suggest improvements. (7)
  • 11. Unit 2 – January 2011 Describe the purpose of your fieldwork enguiry. (5) In the box provided below, draw an annotated sketch map of the location of your study area to show its basic characteristics. (5) Distinguish between primary and secondary sources of data used in your fieldwork. (3) With reference to one technique you chose to present data in your enquiry, justify the choice of this technique. (6) Explain how your fieldwork enquiry could have been improved. (6)
  • 12. Unit 2 – Summer 2011 Outline the purpose of your enquiry. (5) Using specific examples from your fieldwork, describe the risk assessment you undertook in relation to your enquiry. (6) Evaluate one of your methods of data collection. (5) Summarise the main findings of your fieldwork. (4) How far did your findings reflect your expectations at the start of the enquiry? (5)
  • 13. Unit 2 – January 2012 You have experienced geography fieldwork as part of the course. Use this experience to answer the following questions. State the aim of your fieldwork enquiry. Describe the advantages of your chosen location for the fieldwork enquiry. (4) Evaluate one method of primary data collection that you used in your enquiry. (6) Outline how you obtained and why you used secondary data in your enquiry. (5) Describe advantages of a technique that you used to analyse your data. (5) With specific reference to your results, summarise the main conclusions of your enquiry. (5)
  • 14. Unit 2 – Summer 2012 You have experienced geography fieldwork as part of the course. Use this experience to answer the following questions. Describe the purpose of your fieldwork enquiry. (6) Describe a sampling technique you used to collect data. (5) Justify the use of one technique used to analyse data in your enquiry. (6) Referring to your results, outline the main conclusions of your enquiry and suggest further areas of research. (8)
  • 15. Unit 2 – January 2013 X
  • 16. Unit 4a – January 2010 State the aim(s) of your investigation. Describe the location of your fieldwork investigation and explain its relevance to the aim(s). (12) Explain how one method of data collection that you used was suitable for the investigation. (6) As a result of your experience in the field. Justify one or more improvements that you would make to a method of data collection that you used. (12) Evaluate the usefulness of the conclusions reached in your investigation and consider their potential implications. (10)
  • 17. Unit 4a – Summer 2010 State the aim(s) of your investigation. Explain the reasons why you selected this aim for investigation. (10) Describe and justify the measures you took to minimise the health and safety risks involved in your investigation. (8) Describe one technique of data analysis you used and explain how far the data you collected made this technique appropriate to your investigation. (10) With reference to your aim(s), evaluate the success of your investigation. (12)
  • 18. Unit 4a – January 2011 State the aim(s) of your investigation. Select one method of primary data collection that you used in your investigation. Explain the relevance of this method to the aim(s) of your investigation. (8) Evaluate the effectiveness of this method in the light of your experience in the field. (8) Describe one technique of data analysis that you used and justify its inclusion in your investigation. (12) Assess how useful you found your investigation to your understanding of geography. (12)
  • 19. Unit 4a – Summer 2011 State the aim(s) of your fieldwork investigation. Explain how the location of your fieldwork was relevant to the theory / concept / issue being investigated. (8) Describe and justify how you made sure that the data collected were as accurate and reliable as possible. (12) Select one method of data presentation used in your investigation. Explain, why you used and evaluate its effectiveness in showing the data you collected. (12) In the light of your results, suggest how your investigation could be further developed and/or extended. (8)
  • 20. Unit 4a – January 2012 All your answers must relate to the geographical fieldwork investigation that you undertook in preparation for this examination. State the aim(s) of your investigation. Explain the importance of the choice of location for your investigation in relation to your aim(s). (12) Outline one method of primary data collection used in the field in your investigation. (6) Evaluate the suitability of this method of primary data collection. (10) Explain how secondary data were used, or could have been used, to develop your conclusions. (12)
  • 21. Unit 4a – Summer 2012 All your answers must relate to the geography fieldwork investigation that you undertook in preparation for this examination. State the aim(s) of your fieldwork investigation Explain the geographical reasons for carrying out your investigation in the area. (10) Describe and justify the steps taken to minimise the risks involved in collecting data for your investigation. (8) Assess the usefulness of one method of data presentation that you used in your investigation. (12) Discuss how your investigation helped your understanding of geographical theory. (10)
  • 22. Unit 4a – January 2013 x
  • 23. Aim
  • 24. Aim To investigate the extent that downstream mean channel velocity for the upper Derwent river increases. Even though the gradient of the river decreases downstream. RQ1 – How does velocity change downstream . RQ2 – What factors influence the change in velocity.
  • 26. General Factors that Effect Velocity Downstream Gradient of the river. Hydraulic Radius. Roughness of the wetted Perimeter. Geology of the bedload. Human interference on the river channel.
  • 27. Theory The factors that control the velocity of a river channel
  • 28. Theory As the hydraulic radius increases the ratio of water in contact with the wetted perimeter of the river channel decreases. This means that the water loses proportionately less energy in overcoming friction and the mean velocity of the river channel increases. The hydraulic radius increases as the cross sectional area of the river channel increases. This is because as you move down the long profile of a river its catchment area increases in size. This means that there is an increase in the amount of water entering the river channel, either by more tributaries entering the main channel or by surface flow, through flow or ground wtare flow. The roughness of the wetted perimeter also decreases as the size of the stones become smaller and smoother. This is because the river has had more time to erode these stones, either by attrition or abrasion. The smoother and smaller stones of the wetted perimeter again reduce the amount of friction the river channel has to overcome. This increases the velocity of the river.
  • 30. Location of the Drainage Basin The River Derwent is situated in the North York Moors on it southern flank to the west of Scarborough. It flows in a southern direction of the moors and joins the River Ouse. The study area covers only a 12 km stretch of the upper course of the Derwent River between its source a 200 meter high moorland plateau called Stoney Marl Moor to where the river flows past Howden Moor farm at Broxa. The drainage basin varies from high moorland plateaus in the north and north east, a coniferous forested area in north east and an area of slopes devoted to grassland in the south. These areas of highland are intersected by deep v-shaped valleys of the River Derwent and its tributaries. The following three sampling sites were chosen to investigate the aim. Helwath Beck – 110m altitude - 3 km from source – drainage basin of 10 km2 Jugger Howe Beck – 100m altitude - 5 km from source – drainage basin 28 km2 River Derwent – 60m attitude – 12 km from source – drainage basin of 48 km2
  • 31. Upper course of River Derwent Helwath Beck Jugger Howe Beck Broxa Kirby Grindalythe Source of Derwent River continues through Vale of York to join the R. Ouse before flowing into the Humber Estuary Total length: 170km
  • 32. Source area - North York Moors
  • 33. Summary of the Characteristics of the Drainage Basin There is very little human interference of river the channel by human activity, such as channelization or building of bridges. The underlying geology for the whole of the drainage basin is sandstone. The attitude of the river falls by over 50 meters within a 12 km stretch. The size of the river’s drainage basin increases from 10 km2 to 45 km2 within a 12 km stretch. The drainage basin of the river has high amounts of rainfall that ensure the river flows throughout the year. The rivers are small enough to allow sixth form students to collect primary data safely. All the sites can be visited in one day and we have the landlords permission to access the sites.
  • 34. Sites 1& 2 Helwath Beck & Jugger Howe Beck 1 2
  • 35. Site 3: R. Derwent downstream to Broxa 3
  • 36. The drainage basin within the study area of the River Derwent experiences high levels of precipitation and within 12 km of its source it quickly increases in size from 10 km2 to 48 km2. These factors ensured that the investigation could analyse how downstream changes in the rivers mean velocity were influenced by significant changes in its hydraulic radius and the roughness of its wetted perimeter. The influence of human activity on river was minimal and sandstone formed the underlying geology of the drainage basin. This reduced the influence that other factors may have had on the velocity of the river and allowed the investigation to concentrate on how the change in gradient, hydraulic radius and roughness of the wetted perimeter influenced velocity. Since all three sample sites were within 12 km of each other and prior permission for access had been gained from their landlords it was possible to complete the fieldwork within the one day allocated. The relatively low velocities and the shallow nature of the river allowed the investigation to be carried out safely. This stretch of river has a large set of secondary data which can be compared to the primary data collected to evaluate the success of the investigation.
  • 37. Risk Assessment (Hazards, Risks, Control Measures & Justification)
  • 38. Risk Assessment Hazards are the physical problems that cannot be removed e.g. steep and wet paths leading to the upstream sites, deep water and high velocity river, uneven and slippery stones in river channel, remote location of upper stream sites, heavy rainfall, and cold temperatures. A formal risk assessment was completed prior to the investigation. This assessment listed the separate hazards and the potential risks associated with each hazard. These risks were then assessed on a scale of low , medium or high to work out the likelihood of these risks happening and the level of there impact. Then appropriate control measures were put in place to minimise the risks involved in carrying out the fieldwork. Hazard = The physical problem that cannot be removed e.g. weather, slope, water Risk = The likelihood of it happening and the extent of the consequence. Then what you do to reduce the consequence.
  • 39. Risk Assessment Hazard = The physical problem that cannot be removed e.g. weather, slope, water Risk = The likelihood of it happening and the extent of the consequence. Then what you do to reduce the consequence.
  • 40.
  • 41. As the path from the mini bus to the river ran down the side of a steep sided valley on which we could easily have slipped we wore appropriate footwear, carried any extra clothes, are packed lunch and any field equipment in our rucksacks. This allowed are hands to be free to reduce the effect in the event that we slipped or tripped up. To reduce the risk of catching hypothermia from any cold and/or wet weather on the day of the fieldwork we wore clothing that was warm, layered and waterproof. In case we encountered any unseasonably cold or wet weather each member of the group carried a hat, a pair of gloves and an extra lay of clothing in their rucksack. The weather forecast was also checked before we set of to make sure we were appropriately prepared for the weather condition. The site at Broxa was just downstream from a farm and in order to reduce the chances of contracting Weils Disease we tape up any open cuts or grazes which may have been exposed to the river and washed our hands before eating with anti bacterial hand wash. Uneven and slippery rocks in a deep and / or fast flowing river – The likelihood of injury or death from these hazards are probably low to medium. However, the impact from an accident could be very serious ranging from a twisted or broken ankle, a person been knocked unconscious or in an extreme case been drowned.
  • 42. To reduce the risk we made sure that we only walked and did not run, wore wellington boots and watched where we placed are feet when working in the river channel, especially when carrying field equipment. Only parts of the river no deeper than our calfs and where the current was slow enough for us too keep our balance were used. We also worked in groups of three or more. If someone did injury themselves or knocked themselves unconscious some of the group members could have remove them from the river and remained to look after them. This left another person free to inform the group leader of what had happened. The remote location of the steep sided valley in which the two upstream sites were located would have compounded the effect of the risks mentioned above. As it would have made it very difficult and time consuming for any injured person that could be moved to be taken to hospital for treatment. For a very serious accident where the person could not be moved the group leader would have had to walk and then drive to an area with mobile phone coverage to call the emergency services. This delay along with the response time of the emergency services could have put the persons life at risk or made treatment of their injuries more difficult.
  • 43. Methodology and Data Collection
  • 44. Downstream Sites and Cross - Sections The three sites were chosen using a stratified sampling method. The cross section were sampled using a systematic point sampling method.
  • 45. Choosing the 3 Sites A stratified sampling technique was employed to ensure that the three sites from which we collected our data were situated progressively downstream from the source of the River Derwent. An OS map was used to work out the stream order for each individual river within the upper drainage basin of the River Derwent. Each individual river was categorised as either 1st, 2nd, 3rd or 4th order. One site was selected from a 2nd, 3rd and 4th order stream. Random sampling could have led to the possibility that all the sites could have been located in only 1 order of stream, which would not use useful in investigating how and why the velocity changes downstream. It was decided not to sample any 1st order streams. The distance and terrain to reach these streams would have been too time consuming and dangerous for us to carry the equipment needed. Also the hydo prop would not have functioned probably as the streams would have been to shallow for the impellor to turn.
  • 46. Stream Orders All the initial, unbranched source tributaries are called first order streams. When two first order streams merge they form a second order stream; When two second order streams merge they form a third order stream; and so on. Notice that it needs two stream segments of equal order to join to produce a segment of a higher order.
  • 47. The sites The following sites where selected because they represented each of the different stream orders, they were safe to access by foot and we had permission from the landlord cross their land. 2nd order stream - Helwath Beck – 110 ms- 3 km from source – DB of 10 km2 3rd order stream - Jugger Howe Beck – 100 ms- 5 km from source – DB of 28 km2 4th order stream - River Derwent – 60 meters – 12 km from source – DB of 48 km2 At each site a method of random sampling was used to identify where to obtain measurements from the river. A tape was laid out to measure along the river bank for a length of 5 meters, a random number was picked from a random numbers table, and used to mark the position where the measurements for the cross – section would be taken. This method was designed to get rid of bias and avoid me choosing to measure the easiest section of the river, which might not necessarily be representive of the river.
  • 48. Data Collected at Each Site Velocity = 3 point and mean velocity Present width and present depth (cross sectional area) Wetted Perimeter = chain Bed Load Size = B axis Gradient = m/m or angle
  • 50. Velocity – Hydro Prop The velocity of the river was measured at ¼, ½ and ¾ of the rivers width. To work out at what intervals to measure the velocity the width of the river was divided by 4. The impeller of the hydro prop was set to ½ the depth of the river and then wound to the end of its shaft and given a half turn backwards to ensure it did not get stuck. With the impeller facing upstream it was placed in the water and timed using a stopwatch to see how long it took to reach the end of its shaft. The time recorded in seconds was then compared with a calibration table to work out the actual velocity of the river in ms-1. The three separate point velocities were then averaged to work out the mean velocity of the river. This method was repeated at all three downstream sites.
  • 51.
  • 52. Velocity – Strengths and Justifications This method was used as the systematic sample gave data which was representative of the entire channel at each site and so bias or subjectivity in our technique was reduced. The time data was converted into ms-1.. Therefore, the data collected could be directly compared between the different sample sites. This gave a greater accuracy to our results so our conclusions would be more reliable. This technique was also quite easy and quick to use. It gave relevant data to help investigate the main aim and answer research question 1 which was How does velocity change downstream.
  • 53. Velocity – Limitations The impellor had a high critical velocity of 0.08 ms-1 .This means at low velocities the river did not have enough energy to turn the impellor. If the impellor had not reached the end of the shaft after one minute the measurement was stopped. All measurements of one minute and over were converted into a velocity of 0.08 ms-1. These results might not have been a true reflection of the rivers velocity. For very low velocities this method could have over estimated the rivers true velocity. However, for higher flows this method would have given results nearer to the river true velocity. At very low channel depths the hydo props impellor was either touching the river bed or appearing above the surface of the water. These results might not have been a true reflection of the rivers velocity. For very low depths this method could have over estimated the rivers true velocity. However, for deeper depths this method would have given results nearer to the river true velocity.
  • 54. Velocity – Improvements Measure the velocity at more points along the cross – section. By using a larger number of points to measure the velocity you would reduce the percentage error. If only three point velocities were measured and one was anomalous then there would be a 33.3% error in the results. If the number of point velocities measured was increased to 9 measurements the error would be reduced to only 11.3%, a more acceptable level of error. Therefore, the results for mean channel velocity would be more accurate and any conclusions draw from these results would more likely to be reliable. Use a electromagnetic open channel flow meter to measure the point velocities. This would reduce any overestimates of measurements where the point velocity of the channel was below 0.08 ms-1.and give more accurate results were sections of the channel were too shallow for the hydro prop to work properly.
  • 56. Present flow – Width and Depth - CSA To work out the width of the river a peg was placed on either side of the river channel where the dry banks meet the water. A line was run between these two pegs and in order to avoid drag, the line was pulled tight at 900 above the flow of the river. The length of the line was then measured using a 30 meter tape measure. To work out at what intervals to measure the depth of the river the width was divided by 10. At each of the 9 intervals a meter ruler was placed in the water with its thin edge facing upstream to measure the depth. To work out the cross - sectional area of the river the width was multiplied by the average depth of the river. This method was repeated at all three downstream sites.
  • 57. Present flow – CSA – Strengths & Justifications This method was used as the systematic sample gave data which was representative of the entire channel at each site and so bias or subjectivity in our technique was reduced. This technique was easy to replicate at each of the three sites surveyed. Therefore, the data collected could be directly compared. This gave a greater accuracy to our results so our conclusions would be more reliable. This technique was also quite easy and quick to use. This data was collected as the width and depth of river are used to calculate the rivers cross sectional area. The sum of all the depths recorded is calculated and divided by number of samples taken to work out the average depth. This is then multiplied by the width to work our the cross – sectional area of the river. The cross – sectional area is one of components used to calculate the hydraulic radius. The hydraulic radius for each site was then used to try explain any changes in velocity found.
  • 58. Present flow –CSA – Limitations & Improvements An accurate measurement of the depth might not have been recorded as the meter ruler was not held vertically. Also the person recording the depth could have misread the actual depth. By only using 9 sample points the distance between each point will be greater in the wider stretches of the river. This could increase the chance of missing any sudden changes in depth. Therefore, this method could produce results that did not truly reflect the actual depth of the river and the calculation of the average depth of the channel could have been inaccurate, which in turn would have produced a miss leading figure for the cross – sectional area of the channel. Our conclusions relating to how hydraulic radius influences velocity might have been unreliable. Complete 3 or 4 cross sections for each stream order surveyed. This should provide a more representative sample of the depth of the river. This gives a greater accuracy to our results so our conclusions could be more reliable.
  • 60. Wetted Perimeter To work out the wetted perimeter a metal chain is run along the bed and banks of the river channel between the pegs placed on either side of the river channel where the dry banks meet the water. It must be ensured that the chain follows all the undulations of the bed and banks of river channel and is not pulled taught. The length of the chain is the measured by feeding the chain and a tape measure vertically through your hands simultaneous. This method was repeated at all three downstream sites.
  • 61. Wetted Perimeter – Strengths and Justifications This method was representative of the entire channel at each site and so bias or subjectivity in our technique was reduced. This technique was easy to replicate at each of the three sites survey. Therefore, the data we collected could be directly compared between different sample sites. This gave a greater accuracy to our results so our conclusions would be more reliable. This technique was also quite easy and quick to use. This data was collected as the wetted perimeter of a river channel is one of components used to calculate the Hydraulic Radius . The hydraulic radius for each site was then used to try explain any changes in velocity found.
  • 62. Wetted Perimeter – Limitations & Improvements If the chain is not forced into all undulations found on the river bed and banks the length of the wetted perimeter could be underestimated. Errors could occur when the chain is measured against the tape measure because the chain has not been held vertically as it is fed through your hands. Any error in measuring the width of the wetted perimeter will result in an inaccurate value been calculated for the river hydraulic radius. This in turn could affect the reliability of our conclusions. The only way to improve this method is to be careful when placing the chain across the river beds and banks and when the total length of the chain is been measured
  • 64. Bedload Size To work out the width of the river a peg was placed on either side of the river channel where the dry banks meet the water. A line was run between these two pegs and in order to avoid drag, the line was pulled tight at 900 above the flow of the river. The length of the line was then measured using a 30 meter tape measure. To work out at what intervals to measure the depth of the river the width was divided by 10. At each of the 9 interval a meter ruler was placed in the water with its thin edge facing upstream to measure the depth. The stone touching the bottom of the meter ruler was then measured along its B – axis. This method was repeated at all three downstream sites.
  • 65. Bedload Size – Strengths and Justifications This method was used as the systematic sample gave data which was representative of the entire channel at each site and so bias or subjectivity in our technique was reduced. This technique was easy to replicate at each of the three sites surveyed. Therefore, the data we collected could be directly compared between different sample sites. This gave a greater accuracy to our results so our conclusions would be more reliable. This technique was also quite easy and quick to use. This data was collected as the roughness of a river channel is one of components used to calculate the hydraulic radius . The Hydraulic Radius for each site was then used to try and explain any changes in velocity found. As the size of the bedload was measure at 9 points across each of the downstream cross-sections , there was sufficient data to complete a Mann Whitney U- test. This test would then see if there was a statically significant difference between the size of the bedload at Helwath Beck and Jugger Howe Beck and between Jugger Howe Beck and Broxa. If there was a difference in size it could be inferred that size does influence the velocity of the river.
  • 66. Bedload Size – Limitations The size of the bedload was determined by measuring the B – axis with a ruler. Gaining an accurate result was difficult as the sides of the bedload were not straight and the length varies across the B – axis. This technique could be biased in that it is easier to pick up the larger pieces of bedload located under the metal ruler. This would skew our data collection in favour of the larger stones at the expense of the smaller stones. This method only calculates the size of the bedload and does not take into account how the stone shape changes downstream. The shape of the bedload also influences how much friction the water has to overcome. As the bedload becomes more rounded downstream the river has to overcome proportionally less friction and its velocity should increase. This method only takes into account how the size of the bedload influences the river velocity, when in reality it is the both the size and shape of the bedload that influences velocity. Therefore, the we could question whether the data we collected would allow us to reach a reliable conclusions about what factors influence mean channel velocity.
  • 67. This technique could have be biased in that it is easier to pick up the larger pieces of bedload located under the metal ruler. This would skew our data collection in favour of the larger stones at the expense of the smaller stones. This method only calculates the size of the bedload and does not take into account how the stone shape changes downstream. The shape of the bedload also influences how much friction the water has to overcome. As the bedload becomes more rounded downstream the river has to overcome proportionally less friction and its velocity should increase. This method only takes into account how the size of the bedload influences the river velocity, when in reality it is the both the size and shape of the bedload that influences velocity. Therefore, the we could question whether the data we collected would allow us to reach a reliable conclusions about what factors influence mean channel velocity. Between Jugger Howe Beck and Broxa there was very little reduction in median stone size and it was inferred that this small reduction in roughness had little influence on the increase in velocity. If smoothness of the stones had also been investigated it could have been found that it was the shape of the stones and not the size that had had an influence on the increase in velocity in this stretch of river.
  • 68. Bedload Size – Improvements The B - axis could have been measured using callipers instead of a ruler. The distance between the pincers of the callipers could then have been measured again the a ruler. This would have resulted in more accurate measurement of the bedloads B – axis. To attain more accurate data for the size of the bedload I could measure the A, B and C axes and then work out the average size. This could have made the results more accurate and therefore the conclusions reached about how the roughness of the wetted perimeter influences the velocity more reliable. I could also have measured the shape of the bedload using the ‘Powers’ Scale of Roundess to place the bedload measured into six different categories from very angular to well rounded. Then using the chi - squared (X2) test these different categories of bedload shape could then have been used to see if there was any statically significant difference of roundness between Helwath Beck , Jugger Howe Beck and Broxa. If a statistically significant difference in shape was found it could have been inferred that it is mot just size but also shape that influences the mean velocity of the river.
  • 69.
  • 71. Gradient A 20 meter stretch of the river was measured downstream using a 30 meter tape measure. A surveyors level was set up in the middle of this 20 meter stretch at the side of the river channel and levelled. Two graduated E staffs were placed vertically at either end of the 20 meter stretch. The bottom of these poles been aliened with the surface of the water in the river. The difference in height is then measure between each pole and the level. The vertical drop in horizontal height (cm) can be worked out. The measured change in horizontal height and vertical distance downstream are then used to work out the gradient. This process was repeated at each of the downstream sites so that the gradient of the waters surface could be compared between the sites.
  • 73. Types of Data Presentation and Analysis Used. Flow Lines Cross – Sections Bar charts Dispersion Graphs Central Tendency - Range, Median and Inter Quartile Range Mann Whitney U Test
  • 74. Group 7 Velocity 0.125 - 0.125 - 0.08 0.11 – 0.26 – 0.135 0.33 – 0.26 – 0.25
  • 75.
  • 76.
  • 77.
  • 78.
  • 79. The Velocity increased form 0.11 ms-1 at Helwath Beck to 0.16 ms-1 at Jugger Howe Beck , an increase of 45%. From Jugger Howe Beck to Broxa it increased from 0.16 ms-1 to of 0.28 ms-1 an increase of 75%. 0.125 - 0.125 - 0.08 // 0.11 – 0.26 – 0.135 // 0.33 – 0.26 – 0.25 The Gradient decreased form 0.021 m/m at Helwath Beck to 0.013 m/m at Jugger Howe Beck , a decrease of 38%. From Jugger Howe Beck to Broxa it decreased from 0.013 m/m to 0.008 m/m a decrease of 38%.
  • 80. The wetted perimeter increased form 2.76 meters at Helwath Beck to 7.25 meters at Jugger Howe Beck , an increase of 162%. From Jugger Howe Beck to Broxa it increased from 7.25 meters to 8.92 meters an increase of 23%. The mean present flow depth and river width also increased downstream. This meant that the cross – sectional area of the river increased from 0.16 m3 at Helwath Beck to 0.48 m3at Jugger Howe Beck, an increase of 200%. From Jugger Howe Beck to Broxa it increased from to 0.48 m3 to 0.92 m3 an increase of 91%. The reasons why the CSA increase down stream was due to an increase in the drainage basin of the river from 10 km2 to 48 km2. As the cross – sectional area of the river increased at a faster rate than the wetted perimeter the hydraulic radius would also have increased downstream. Therefore, as the channel loses proportionately less energy in overcoming friction the mean velocity of the river channel would have increased
  • 81. The hydraulic radius increased form 0.06 at Helwath Beck to 0.07 at Jugger Howe Beck , an increase of 17%. From Jugger Howe Beck to Broxa it increased from 0.07 to 0.10 an increase of 42%. As the hydraulic radius of the river channel increases the channel loses proportionately less energy in overcoming friction and the mean velocity of the river channel increases. These figures indicate that the increase in the hydraulic radius has had a greater influence on the channel velocity between Jugger Howe Beck and Broxa than between Helwath Beck and Jugger Howe Beck.
  • 82.
  • 83. The median size for the B – axis of bedload size at Helwath Beck was the greatest at 24 cm and had a range of 14.5 cm, with the highest and lowest sizes been 25 cm and 10.5 cm respectively. The median size for the B – axis of bedload size at Jugger Howe Beck was smaller at 7 cm and had a range of 7.5 cm, with the highest and lowest sizes been 11 cm and 3.5 cm respectively. The median size for the B – axis of bedload size at Broxa was the even smaller at 5 cm and had a range of 4 cm, with the highest and lowest sizes been 6.5cm and 2.5 cm respectively.
  • 84. The data between Helwath Beck and Jugger Howe Beck shows that there is a large difference between the median size of bedload of 17 cm a 71% change in median size and only a very small overlap between the two ranges of bedload size of 0.5 cm. Since the bedload size is of a much smaller size at Jugger Howe Beck than at Helwath Beck it could be inferred that the roughness of the wetted perimeter has greatly decreased. Therefore, this reduction in channel roughness could have had a great influence on the increase in the mean channel velocity as the channel loses proportionately less energy in overcoming friction.
  • 85. The data between Jugger Howe Beck and Broxa shows that there is only a small difference between the median size of bedload of 2 cm a 28% change in size and a relatively large overlap between the two ranges of bedload size of 3 cm. Since there is little difference in bedload size between Jugger Howe Beck and Broxa it could be inferred that the roughness of the wetted perimeter has remained almost the same. Since the mean channel velocity is greater at Broxa than at Jugger Howe Beck this increase must have been mainly caused by an increase in the hydraulic radius and only marginally by the reduction in the roughness of the wetted perimeter.
  • 86. To add greater validity to our analysis and increase the reliability of our conclusions I conducted a Mann Whitney U test to see if there is a statistically significant difference the median bedload size at Helwath Beck and Jugger Howe Beck and then between Jugger Howe Beck and Broxa. The result of the test showed there was a statistical significant difference between the median bedload size between Helwath Beck and Jugger Howe Beck. There was less than a 5% probability that this difference happened by chance. However, there was not a statistical significant difference between the median bedload size between Jugger Howe Beck and Broxa.
  • 87. Dispersion Graphs (Describe, Strengths, Weakness & Justification)
  • 88. Describe how to Complete a Dispersion Graph The x – axis was labelled with the three different downstream sample sites called Helwath Beck, Jugger Howe Beck and Broxa. An appropriate scale for the bedload size was then calculated for the y – axis by working out that the highest value for the three sites was 24 cm and lowest value was 2.5 cm. The values of the nine bedload samples for Helwath Beck were then plotted vertically against the y - axis. Where the values were equal they were plotted adjacent to each other. This process was repeated further along the x – axis for the sites of Jugger Howe Beck and Broxa. The median and a box and whisker plot where then labelled on the graph for each of the different sample sites.
  • 89. Strengths & Weaknesses of a Dispersion Graph It provides a clear visual representation of the range and clustering of the bedload size at each of the three downstream sample sites. (S) It allows a clear visual comparison of any similarities or differences that occur in the range and clustering of the bed load size between each of the three downstream sample sites. (S) Valid conclusions can then be drawn about how bedload size influences the mean channel velocity from the varying ranges and clustering illustrated at each of the downstream sample point. (S) It may be difficult to read the actual values of the individual stone sizes if the scale of the y – axis is to small. (W) It cannot used to graph data from categorised variables such as bedload shape. (W) It cannot be used to compare data form more than one variable e.g. Hydraulic radius verses velocity. (W)
  • 90. Justification of a Dispersion Graph Part of my aim was to investigate how different factors such as the roughness of the wetted perimeter contributed to the downstream increase in mean channel velocity. Therefore, a dispersion graph was constructed to visually compare how the downstream changes in the size of bedload and its clustering may have influenced this velocity. The graph showed that there was a large difference in bedload size between the sample sites of Helwath Beck and Jugger Howe Beck as 4 of the 9 stones at Helwath Beck where clustered above the median of 24 cm and only one of the smaller stones was of a size that overlapped with the stones sampled at Jugger Howe Beck which were evenly distributed between 11 and 3.5 cm. However, it was found that there was only a small difference in bedload size between Jugger Howe Beck and Broxa as 8 of the 9 largest stones at Broxa were larger than the smallest stone sampled upstream at Jugger Howe Beck. This data clearly illustrated my conclusion that the downstream change in roughness of the wetted perimeter had a diminishing influence on the increase in mean channel velocity.
  • 91. The Mann Whitney U Test for the River Derwent
  • 92. The First Mann Whitney U Test for - (Helwath Beck and Jugger Howe Beck) This is a statistical test to determine whether 2 sets of data of the same variable are significantly different. It tests the difference between the medians of the two data sets. By using the critical values table, it is possible to assess the probability to which any observed difference is a result of chance. I wrote down the null hypothesis and research hypothesis and set the level of significance at 0.05. NH – There is no significant difference in the size of bedload between Helwath Beck and Jugger Howe Beck. RH -There is a significant difference in the size of bedload between Helwath Beck and Jugger Howe Beck.
  • 93. The best way to proceed is to incorporate the finding into a table that allows you to calculate the results I then ranked the size of the bedload in terms of their position in both samples. The largest stone was given the lowest rank and the smallest the highest rank. Where the size of the stones were the same I took the average of the rank values. I then totalled the ranks for the bedload size of Helwath Beck and Jugger Howe Beck.
  • 94. I then calculated the U values for both samples using the formula below. 9 x 9 + 9 x (9 +1) – 46 = 80 2 9 x 9 + 9 x (9 +1) – 125 = 1 2
  • 95. . I used the critical values table to work out that the critical value for this set of data was 17 at the 95% confidence level. I found that the value for U2 of 1 was lower than the critical value of 17. Therefore, I accepted my research hypothesis that there is a statistical significant difference in the size of bedload between Helwath Beck and Jugger Howe Beck.
  • 96. The Second Mann Whitney U Test for - (Jugger Howe Beck and Broxa) This is a statistical test to determine whether 2 sets of data of the same variable are significantly different. It tests the difference between the medians of the two data sets. By using the critical values table, it is possible to assess the probability to which any observed difference is a result of chance. I wrote down the null hypothesis and research hypothesis and set the level of significance at 0.05. NT – There is no significant difference in the size of bedload between Jugger Howe Beck and Broxa. RH -There is a significant difference in the size of bedload between Jugger Howe Beck and Broxa.
  • 97. The best way to proceed is to incorporate the finding into a table that allows you to calculate the results. I then ranked the size of the bedload in terms of their position in both samples. The largest stone was given the lowest rank and the smallest the highest rank. Where the size of the stones were the same I took the average of the rank values. I then totalled the ranks for the bedload size of Jugger Howe Beck and Broxa.
  • 98. I then calculated the U values for both samples using the formula below. 9 x 9 + 9 x (9 +1) – 67 = 59 2 9 x 9 + 9 x (9 +1) – 104 = 22 2
  • 99. . I used the critical values table to work out that the critical value for this set of data was 17 at the 95% confidence level. I found that the value for U2 of 22 was higher than the critical value of 17. Therefore, I accepted my Null hypothesis that there is no statistical significant difference in the size of bedload between Jugger Howe Beck and Broxa
  • 100. Mann Whitney U Test – Analysis There was a statistical significant difference in the median bedload size between Helwath Beck and Jugger Howe Beck. As there was less than a 5% probability that this difference happened by chance. The bedload at Jugger Howe Beck was smaller than that found at Helwath Beck. From this it can be inferred that the roughness of the wetted perimeter at Jugger Howe Beck is lower which means that the river uses proportionally less energy to overcome friction and the velocity should increase. There was not a statistical significant difference in the median bedload size between Jugger Howe Beck and Broxa. There was more than a 5% probability that this difference happened by chance. The bedload at Broxa was not significantly smaller than that found at Jugger Howe Beck. From this it can be inferred that there is little difference in the roughness of the wetted perimeter between the two sites and therefore, the river should be using proportionally the same energy to overcome friction.
  • 101. Mann Whitney U Test (Describe, Strengths, Weakness & Justification)
  • 102. Describe how to Complete a Mann Whitney U Test First set out the null and research hypothesis stating that there is either no significance or that there is a significance difference in the size of bedload between Helwath Beck and Jugger Howe Beck. Place the individual values for bedload size into two columns, the first for the values of Helwath Beck and the second for the values of Jugger Howe Beck. Rank the size of the bedload in terms of there position in both samples. The largest stone been given the lowest rank and the smallest the highest rank. For stones of the same size take the average of the rank values. Then separately calculate the sum of the ranks for Helwath Beck and Jugger Howe Beck.
  • 103. Use the sum of the ranks for Helwath Beck and Jugger Howe Beck to calculate the values of U1 and U2 by inserting them into the formula. The critical values table was then used to work out that 17 was the critical value for this set of data at a 95% confidence level. As the value for U2 of 1 was lower than the critical value of 17 I accepted my research hypothesis that there was a statistical significant difference in the median size of bedload between Helwath Beck and Jugger Howe Beck.
  • 104. Strengths & Weaknesses of the Mann Whitney U Test This is a statistical test to determine whether the median for 2 sets of data of the same variable are significantly different or have occurred by chance. (S) It can be used on 2 sets of data that have different sizes, e.g. one data set could have 10 values and the other only 8 values. (S) It contains a lengthy calculation that can be prone to human error. This human error could result in the wrong conclusion been reached as the U values have been calculated incorrectly. (W) It does not explain why the difference in the two data sets has occurred. (W) The test cannot be applied to data that has been categorised such as bedload shape. (W)
  • 105. Justification of the Mann Whitney U Test Part of my aim was to investigate how different factors such as the roughness of the wetted perimeter influenced the mean channel velocity. Therefore, I conducted a Mann Whitney U Test to see if there was a significant downstream change in the median size of bedload between the sample sites of Helwath Beck , Jugger Howe Beck and Broxa. The first test proved that there was a statistical significant difference of the median size of bedload between Helwath Beck and Jugger Howe Beck as one of the U values of 1 was below the critical value of 17. The second test proved that there was no statistical significant difference of the median size of bedload between Jugger Howe Beck and Broxa as both the U values of 59 and 22 were above the critical of 17.
  • 106. This test added statistically validity to my conclusion that the downstream change in roughness of the wetted perimeter had a diminishing influence on the increase in mean channel velocity. It was an appropriate technique to analyse the data collected for bedload size as it was measured in centimetres, which was a form of ordinal data that could be ranked. As 9 stones were measured at each site this falls between the minimum of 5 and the maximum of 20 pieces of data recommend to carry at this test.
  • 107. Conclusion (what did I Learn)
  • 108. The investigation did show an overall increase in downstream mean channel velocity for the upper River Derwent even though the gradient did decreased. However, the mean channel velocity increased at a faster rate the further the river travelled downstream. Between the two sample sites nearest to the rivers source there was an increase from 0.11 ms-1 to 0.16 ms-1 a relative change of 45% compared to a change from 0.16 ms-1 to 0.28 ms-1 a relative increase of 75% between the two sites furthest from the rivers source. The overall, increase in downstream velocity can be attributed to two factors: a) the increase in the efficiency of the river as the hydraulic radius becomes larger and b) the reduction in the roughness of the wetted perimeter as the river has had more time to erode its bed and banks. However, there was a difference in the major factor that influenced the increase in velocity between the two upstream sites of Helwath Beck and Jugger Howe Beck and the two lower stream sites of Jugger Howe Beck and Broxa.
  • 109. In the upper reach the major factor that influenced the increase in channel velocity was probably the statistically significant reduction in the bedload size of the wetted perimeter as there was only a small increase in the hydraulic radius of 17%. In the lower reach of the river the major factor that influenced the increase in channel velocity was probably the large increase in the hydraulic radius of 41% as there was no statistically significant reduction in the bedload size of the wetted perimeter. I have learnt that the mean channel velocity does increase downstream as Schumm’s or Bradshaw’s model predicts and that gradient, hydraulic radius and the wetted perimeter do influence this change as AS geography textbooks state. However, my understanding of the reasons behind this increase in velocity has developed beyond the theory provided in the AS geography textbooks. The textbooks do not mention that the major factor influencing mean channel velocity may vary over different reaches of a river.
  • 111. Evaluate the success of your investigation using each section listed below Aim Location of the study area Sampling Methods Data Collection Methods Data Presentation Accuracy of Results Reliability of Conclusions Evaluate the strengths and weaknesses of your fieldwork investigation using each of the section listed above. What could I have done to improve this fieldwork investigation. What could I have done to extend this fieldwork investigation. In what ways would you conclusions be of use to other geographers etc.
  • 112. My aim was ‘To investigate the extent that downstream mean channel velocity for the upper Derwent river increases. Even though the gradient of the river decreases downstream’. My investigation was successful because not only did we discovered that the mean velocity does increase downstream, but it increases at a faster rate the further the river moves downstream. For example in the upper reach between the sites of Helwath Beck and Jugger Howe beck there was a 45% increase compared to a 75% increase in the lower reach of the river between the sites of Jugger Howe Beck and Broxa. I also discovered that both the hydraulic radius of the river channel and the roughness of the wetted perimeter do influence the mean velocity as the geography textbooks state in there theory sections. However, my understanding was further developed as I discovered that a decrease in roughness of the wetted perimeter has a major influence on the change in mean velocity in the upper reach of the river Derwent between Helwath Beck and Jugger Howe Beck and only a minor influence on the change in mean velocity in the lower reach between Jugger Howe Beck and Broxa.
  • 113. Parts of the method could have been evaluated by looking at the results obtained. For example at Helwath Beck timing of the point velocity measurement for the right-hand side of the channel was stopped because it exceeded 1 minute. This timing was converted into a velocity of 0.08 ms-1. This results might not have been a true reflection of the rivers velocity at this point. For the very low velocity at this point in the river the hydro prop could have over estimated the true velocity. The mean channel velocity of 0.11 ms-1 which was calculated using the three point velocities could also have been over estimated. Therefore, the results for the mean channel velocity would not have been accurate and any conclusions drawn could have been unreliable. To overcome this inaccuracy an electromagnetic open channel flow meter could have been used. This instrument would have reduced the overestimate of this point velocity. This is because the electromagnetic open channel flow meter works at velocities as low 0.01 ms-1.
  • 114. The results could have been evaluated by comparing them the average results obtained by merging the data collected by all the groups that survey the river channel. My results for the increase in downstream mean channel velocity and the hydraulic radius reflected the general trends for that of the group average. Also there was only a small difference in the actual results. At Helwath Beck the mean velocity was underestimated by 10% and at Jugger Howe Beck and Broxa they were overestimated by about 15%. This was an acceptable margin of error given that the point velocities were only measured at three points along the river cross – section and then averaged to give a mean channel velocity at each site. However, there was a slightly larger margin of error for the actual hydraulic radius results as they were within + or – 30% of the groups average for each site. It can therefore, be inferred that the results that collected where fairly accurate and therefore the conclusions drawn reliable.
  • 115.
  • 116. My investigation could have be improved and /or extended in the following ways; Data could have been collected from a 1st order streams. This data could then have been added to the data collected from the 2nd to 4th order streams to see if my investigation still reached the same conclusion that mean velocity does increase downstream at an ever increasing rate and that the roughness of the wetted perimeter still has a greater influence in the higher reaches of the upper Derwent river. The number of sample sites for each order stream could have been increased from 1 to 3. This would have given data that was more representative of the river channel and the conclusions that were reached would have been more reliable. The number of points that velocity was measured along the cross – sections could have been increased from 3 to 5. This would have reduced the margin of error that one anomalous result had when calculating the mean channel velocity from 33.3% to 20%. Therefore, the mean velocity obtained would have been a truer reflection of the actual mean velocity of the river channel and any conclusions drawn from this data would have been more reliable.
  • 117. My investigation could have be improved and /or extended in the following ways; To attain more accurate data for the size of the bedload I could measure the A, B and C axes and then work out the average size. This could have made the results more accurate and therefore the conclusions reached about how the roughness of the wetted perimeter influences the mean velocity more reliable. I could also have measured the shape of the bedload using the ‘Powers’ Scale of Roundess. The bedload measured is placed into one of the six different categories from very angular to well rounded. Then using the chi - squared (X2) test these different categories of bedload shape to see if there was any statically significant difference of shape between Helwath Beck, Jugger Howe Beck and Broxa. If a statistically significant difference in shape was found it could have been inferred that it is not just size but also shape that influences the mean velocity of the river.
  • 118. My investigation could have be improved and /or extended in the following ways; The landuse of the drainage could be mapped to investigate if this was a factor in the increase of aret of discharge. Compare the with manning equation is evaluate H storm curse Work out bank full to see.