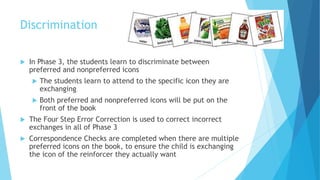
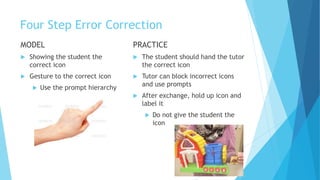
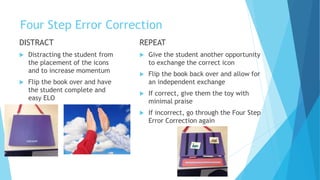
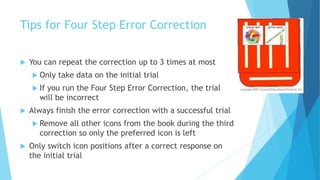
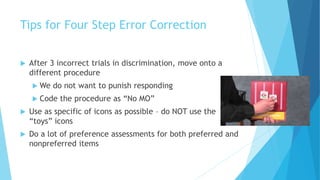
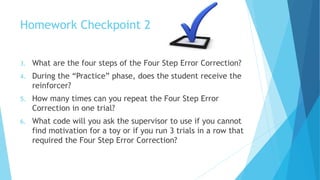
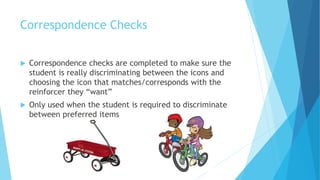
Discrimination
Discrimination
 In Phase 3, the students learn to discriminate between
preferred and nonpreferred icons
 The students learn to attend to the specific icon they are
exchanging
 Both preferred and nonpreferred icons will be put on the
front of the book
 The Four Step Error Correction is used to correct incorrect
exchanges in all of Phase 3
 Correspondence Checks are completed when there are multiple
preferred icons on the book, to ensure the child is exchanging
the icon of the reinforcer they actually want
Nonpreferred vs. Neutral Items
 A non-preferred item is something the student does not like
and does not interact with
 Examples: paper clip, spoon, tissue
 A neutral item is something the student uses appropriately or
engages with the item for more than 15 seconds but is not a
reinforcer
 Examples: using a spoon to eat, wiping their nose with the
tissue
 If you are using a non-preferred item and the student uses it
functionally, it becomes a neutral item
 Do not use that item in discrimination
Homework Checkpoint 1
1. Give two examples of nonpreferred items.
2. How does a nonpreferred item become a neutral item?
Four Step Error Correction
MODEL
 Showing the student the
correct icon
 Gesture to the correct icon
 Use the prompt hierarchy
PRACTICE
 The student should hand the tutor
the correct icon
 Tutor can block incorrect icons
and use prompts
 After exchange, hold up icon and
label it
 Do not give the student the
icon
Four Step Error Correction
DISTRACT
 Distracting the student from
the placement of the icons
and to increase momentum
 Flip the book over and have
the student complete and
easy ELO
REPEAT
 Give the student another opportunity
to exchange the correct icon
 Flip the book back over and allow for
an independent exchange
 If correct, give them the toy with
minimal praise
 If incorrect, go through the Four Step
Error Correction again
Tips for Four Step Error Correction
 You can repeat the correction up to 3 times at most
 Only take data on the initial trial
 If you run the Four Step Error Correction, the trial
will be incorrect
 Always finish the error correction with a successful trial
 Remove all other icons from the book during the third
correction so only the preferred icon is left
 Only switch icon positions after a correct response on
the initial trial
Tips for Four Step Error Correction
 After 3 incorrect trials in discrimination, move onto a
different procedure
 We do not want to punish responding
 Code the procedure as “No MO”
 Use as specific of icons as possible – do NOT use the
“toys” icons
 Do a lot of preference assessments for both preferred and
nonpreferred items
Homework Checkpoint 2
3. What are the four steps of the Four Step Error Correction?
4. During the “Practice” phase, does the student receive the
reinforcer?
5. How many times can you repeat the Four Step Error
Correction in one trial?
6. What code will you ask the supervisor to use if you cannot
find motivation for a toy or if you run 3 trials in a row that
required the Four Step Error Correction?
Correspondence Checks
 Correspondence checks are completed to make sure the
student is really discriminating between the icons and
choosing the icon that matches/corresponds with the
reinforcer they “want”
 Only used when the student is required to discriminate
between preferred items
How to Conduct a Correspondence
Check
 After the student exchanges the icon, hold the items up and
say, “Go ahead and take it.”
 If the student choses the item that corresponds with the
icon, allow them to take the reinforcer and mark the trial
as correct
 If the student choses an item that does not correspond
with the icon, block access to the item, move directly into
the Four Step Error Correction, and mark the trial as
incorrect
The item they reached for is the “correct” item
Tips for Conducting Correspondence
Checks
 Do NOT name the item before conducting a Correspondence Check!
 When in the common area, try to move items as close together as
possible
 When in the booth, use a bin lid to easily present all of the items
 You can block their second hand if they are reaching for more than
one item
 If you start a trial with a Correspondence Check and have to run
the Four Step Error Correction, always run another Correspondence
Check during the final phase of the correction
Homework Checkpoint 3
7. What do you say to the student when running a
Correspondence Check after they exchanged the icon?
8. If the student chooses an item that does not correspond
with the icon, block access to the item, move directly into
the _____________, and mark the trial as ________.
9. True OR False: You should name the item before
conducting a Correspondence Check.
10.What can you use to help run Correspondence Checks
while working in the booth?
Discrimination

Discrimination

  • 1.
  • 2.
    Discrimination  In Phase3, the students learn to discriminate between preferred and nonpreferred icons  The students learn to attend to the specific icon they are exchanging  Both preferred and nonpreferred icons will be put on the front of the book  The Four Step Error Correction is used to correct incorrect exchanges in all of Phase 3  Correspondence Checks are completed when there are multiple preferred icons on the book, to ensure the child is exchanging the icon of the reinforcer they actually want
  • 3.
    Nonpreferred vs. NeutralItems  A non-preferred item is something the student does not like and does not interact with  Examples: paper clip, spoon, tissue  A neutral item is something the student uses appropriately or engages with the item for more than 15 seconds but is not a reinforcer  Examples: using a spoon to eat, wiping their nose with the tissue  If you are using a non-preferred item and the student uses it functionally, it becomes a neutral item  Do not use that item in discrimination
  • 4.
    Homework Checkpoint 1 1.Give two examples of nonpreferred items. 2. How does a nonpreferred item become a neutral item?
  • 5.
    Four Step ErrorCorrection MODEL  Showing the student the correct icon  Gesture to the correct icon  Use the prompt hierarchy PRACTICE  The student should hand the tutor the correct icon  Tutor can block incorrect icons and use prompts  After exchange, hold up icon and label it  Do not give the student the icon
  • 6.
    Four Step ErrorCorrection DISTRACT  Distracting the student from the placement of the icons and to increase momentum  Flip the book over and have the student complete and easy ELO REPEAT  Give the student another opportunity to exchange the correct icon  Flip the book back over and allow for an independent exchange  If correct, give them the toy with minimal praise  If incorrect, go through the Four Step Error Correction again
  • 7.
    Tips for FourStep Error Correction  You can repeat the correction up to 3 times at most  Only take data on the initial trial  If you run the Four Step Error Correction, the trial will be incorrect  Always finish the error correction with a successful trial  Remove all other icons from the book during the third correction so only the preferred icon is left  Only switch icon positions after a correct response on the initial trial
  • 8.
    Tips for FourStep Error Correction  After 3 incorrect trials in discrimination, move onto a different procedure  We do not want to punish responding  Code the procedure as “No MO”  Use as specific of icons as possible – do NOT use the “toys” icons  Do a lot of preference assessments for both preferred and nonpreferred items
  • 9.
    Homework Checkpoint 2 3.What are the four steps of the Four Step Error Correction? 4. During the “Practice” phase, does the student receive the reinforcer? 5. How many times can you repeat the Four Step Error Correction in one trial? 6. What code will you ask the supervisor to use if you cannot find motivation for a toy or if you run 3 trials in a row that required the Four Step Error Correction?
  • 10.
    Correspondence Checks  Correspondencechecks are completed to make sure the student is really discriminating between the icons and choosing the icon that matches/corresponds with the reinforcer they “want”  Only used when the student is required to discriminate between preferred items
  • 11.
    How to Conducta Correspondence Check  After the student exchanges the icon, hold the items up and say, “Go ahead and take it.”  If the student choses the item that corresponds with the icon, allow them to take the reinforcer and mark the trial as correct  If the student choses an item that does not correspond with the icon, block access to the item, move directly into the Four Step Error Correction, and mark the trial as incorrect The item they reached for is the “correct” item
  • 12.
    Tips for ConductingCorrespondence Checks  Do NOT name the item before conducting a Correspondence Check!  When in the common area, try to move items as close together as possible  When in the booth, use a bin lid to easily present all of the items  You can block their second hand if they are reaching for more than one item  If you start a trial with a Correspondence Check and have to run the Four Step Error Correction, always run another Correspondence Check during the final phase of the correction
  • 13.
    Homework Checkpoint 3 7.What do you say to the student when running a Correspondence Check after they exchanged the icon? 8. If the student chooses an item that does not correspond with the icon, block access to the item, move directly into the _____________, and mark the trial as ________. 9. True OR False: You should name the item before conducting a Correspondence Check. 10.What can you use to help run Correspondence Checks while working in the booth?