Downloaded 54 times
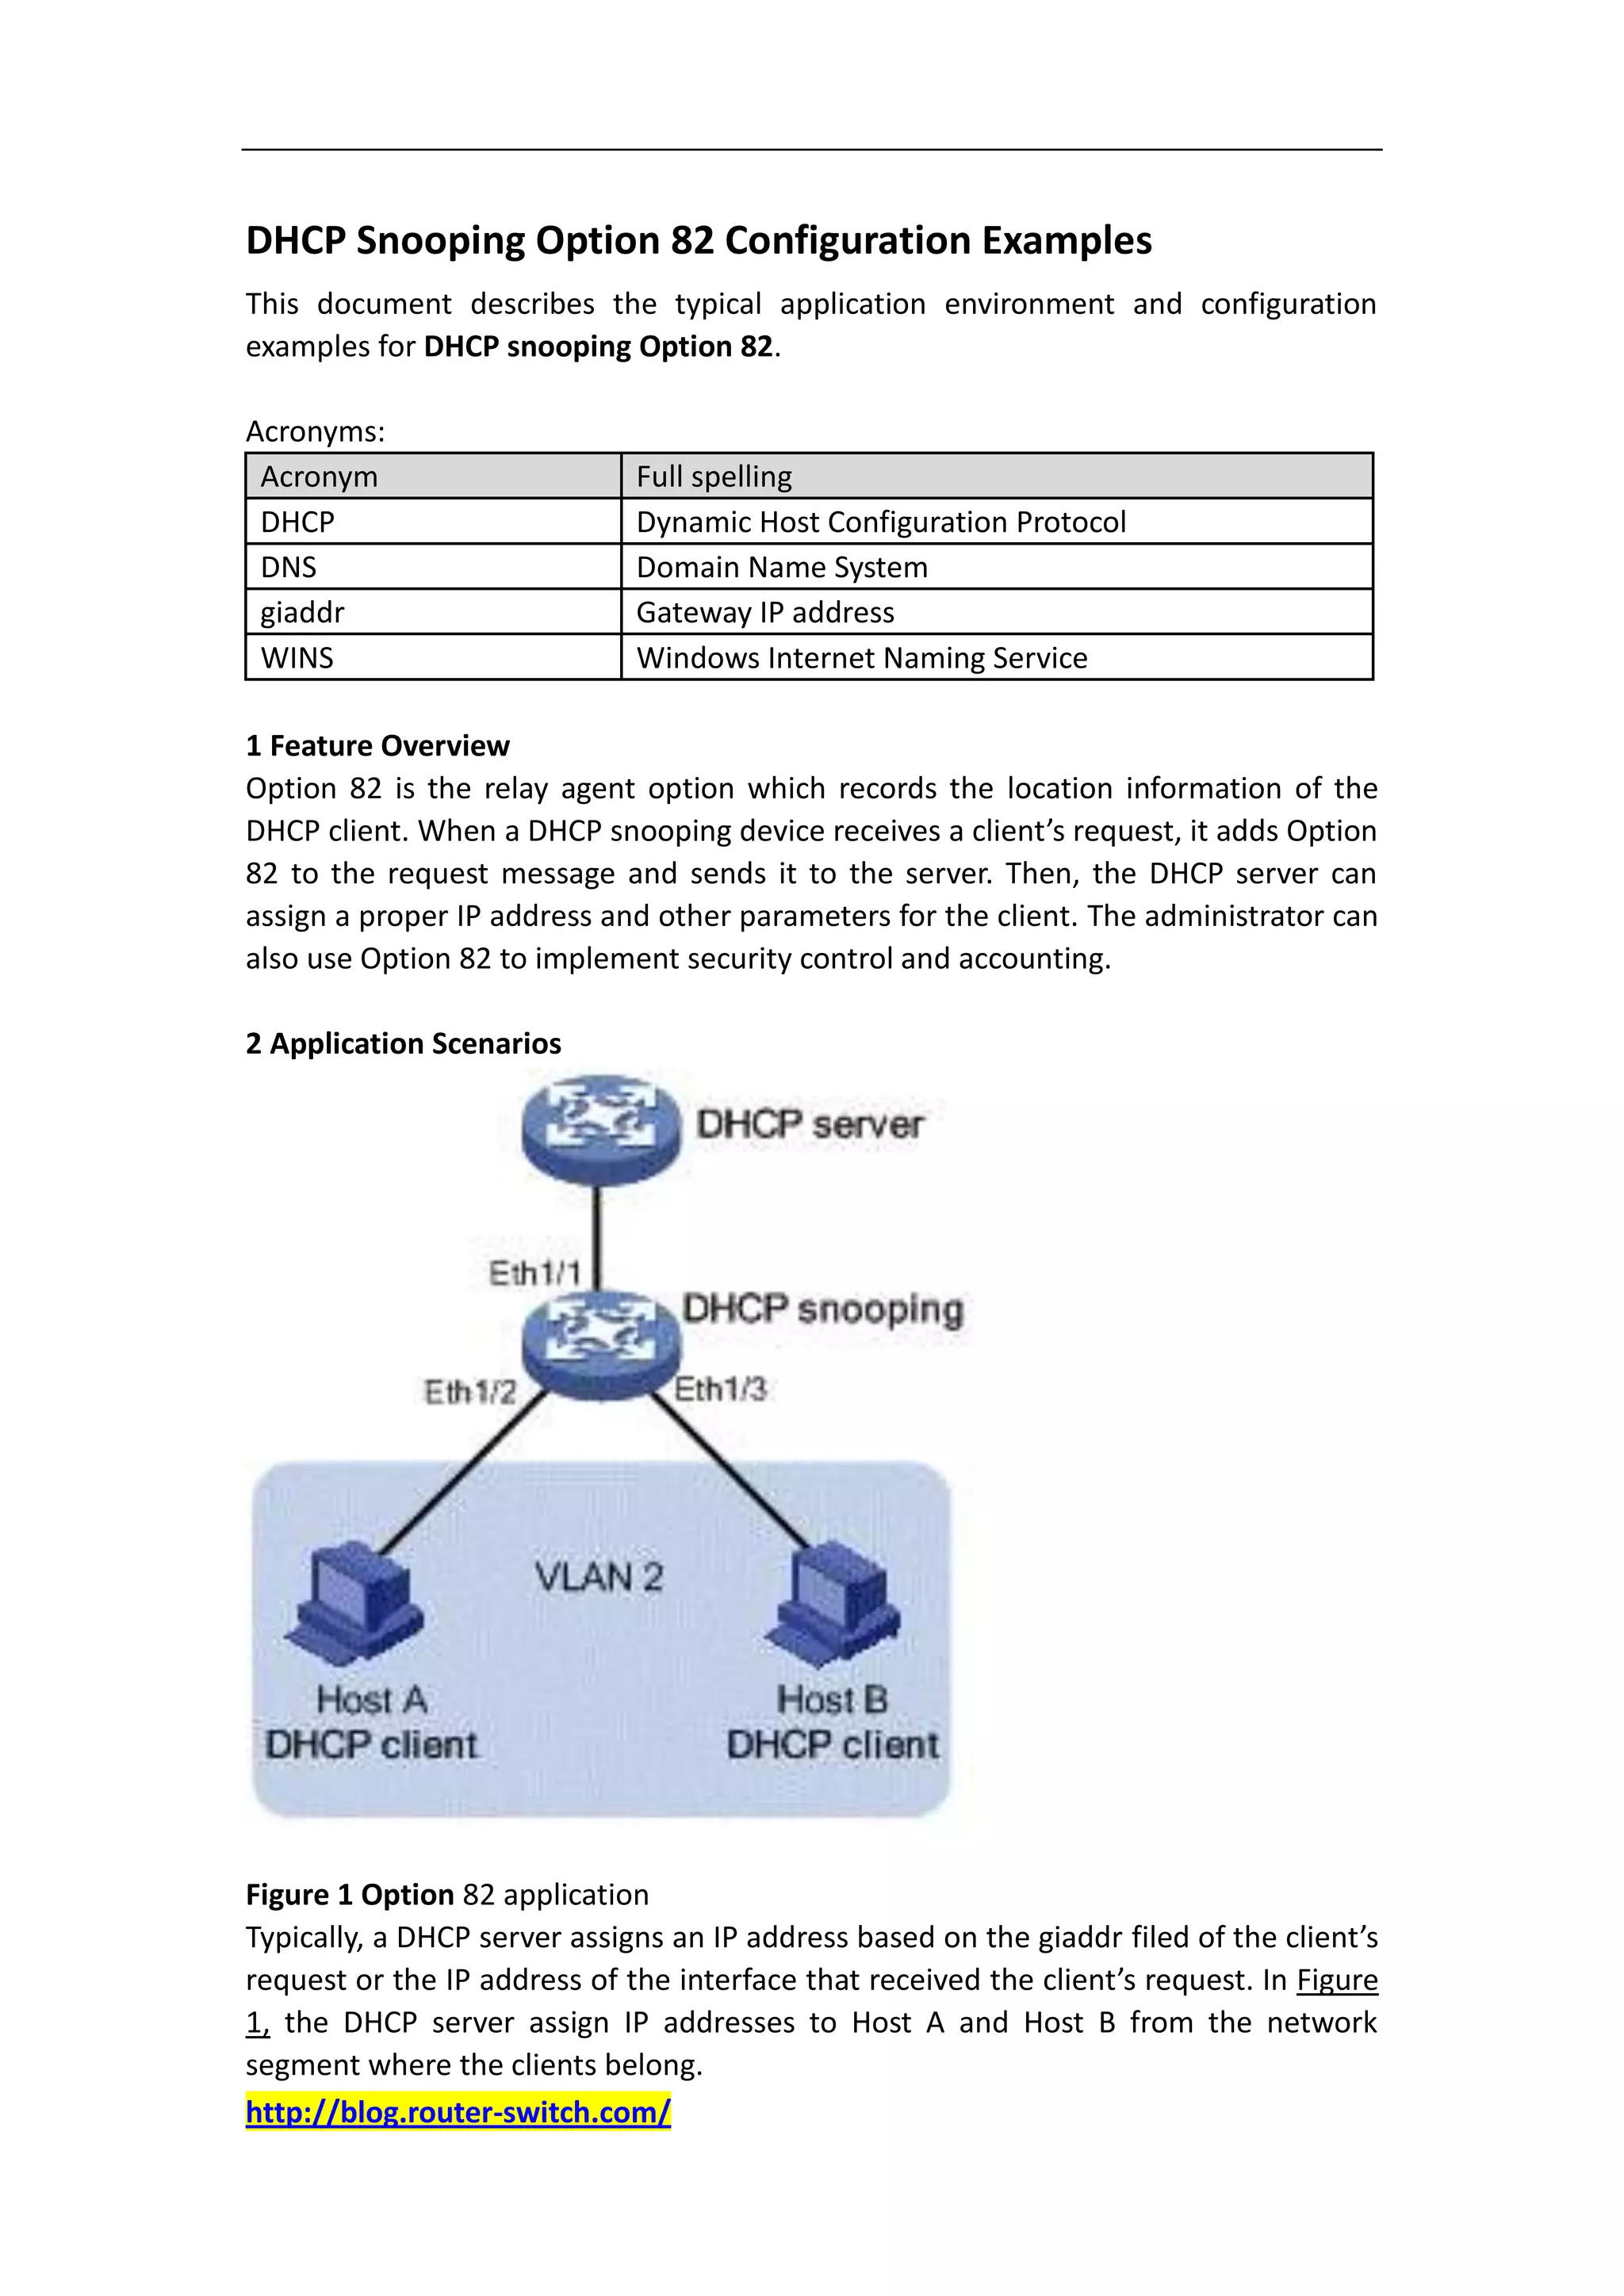
![ranging from 192.168.10.151 to 192.168.10.200 to clients in group 3.
Figure 2 Network diagram for DHCP snooping
4.2 Configuration Considerations
Enable Option 82 support on the DHCP snooping device.
Configure the Option 82 sub-option, so that the clients in different groups can
send packets carrying different Option 82 information. To do so, you can
manually specify the circuit ID sub-option.
Configure IP address assignment policy on the DHCP server, so that the DHCP
server can assign proper IP addresses to the DHCP clients according to Option
82.
4.3 Software Version Used
This example is configured and verified on Comware V500R002B42D001.
4.4 Configuration Procedures
Note:The following configurations are made on devices that are using default
settings and verified in a lab environment. When using the following configurations
on your devices in a live network, make sure they do not conflict with your current
configurations to prevent potential negative impact on your network.
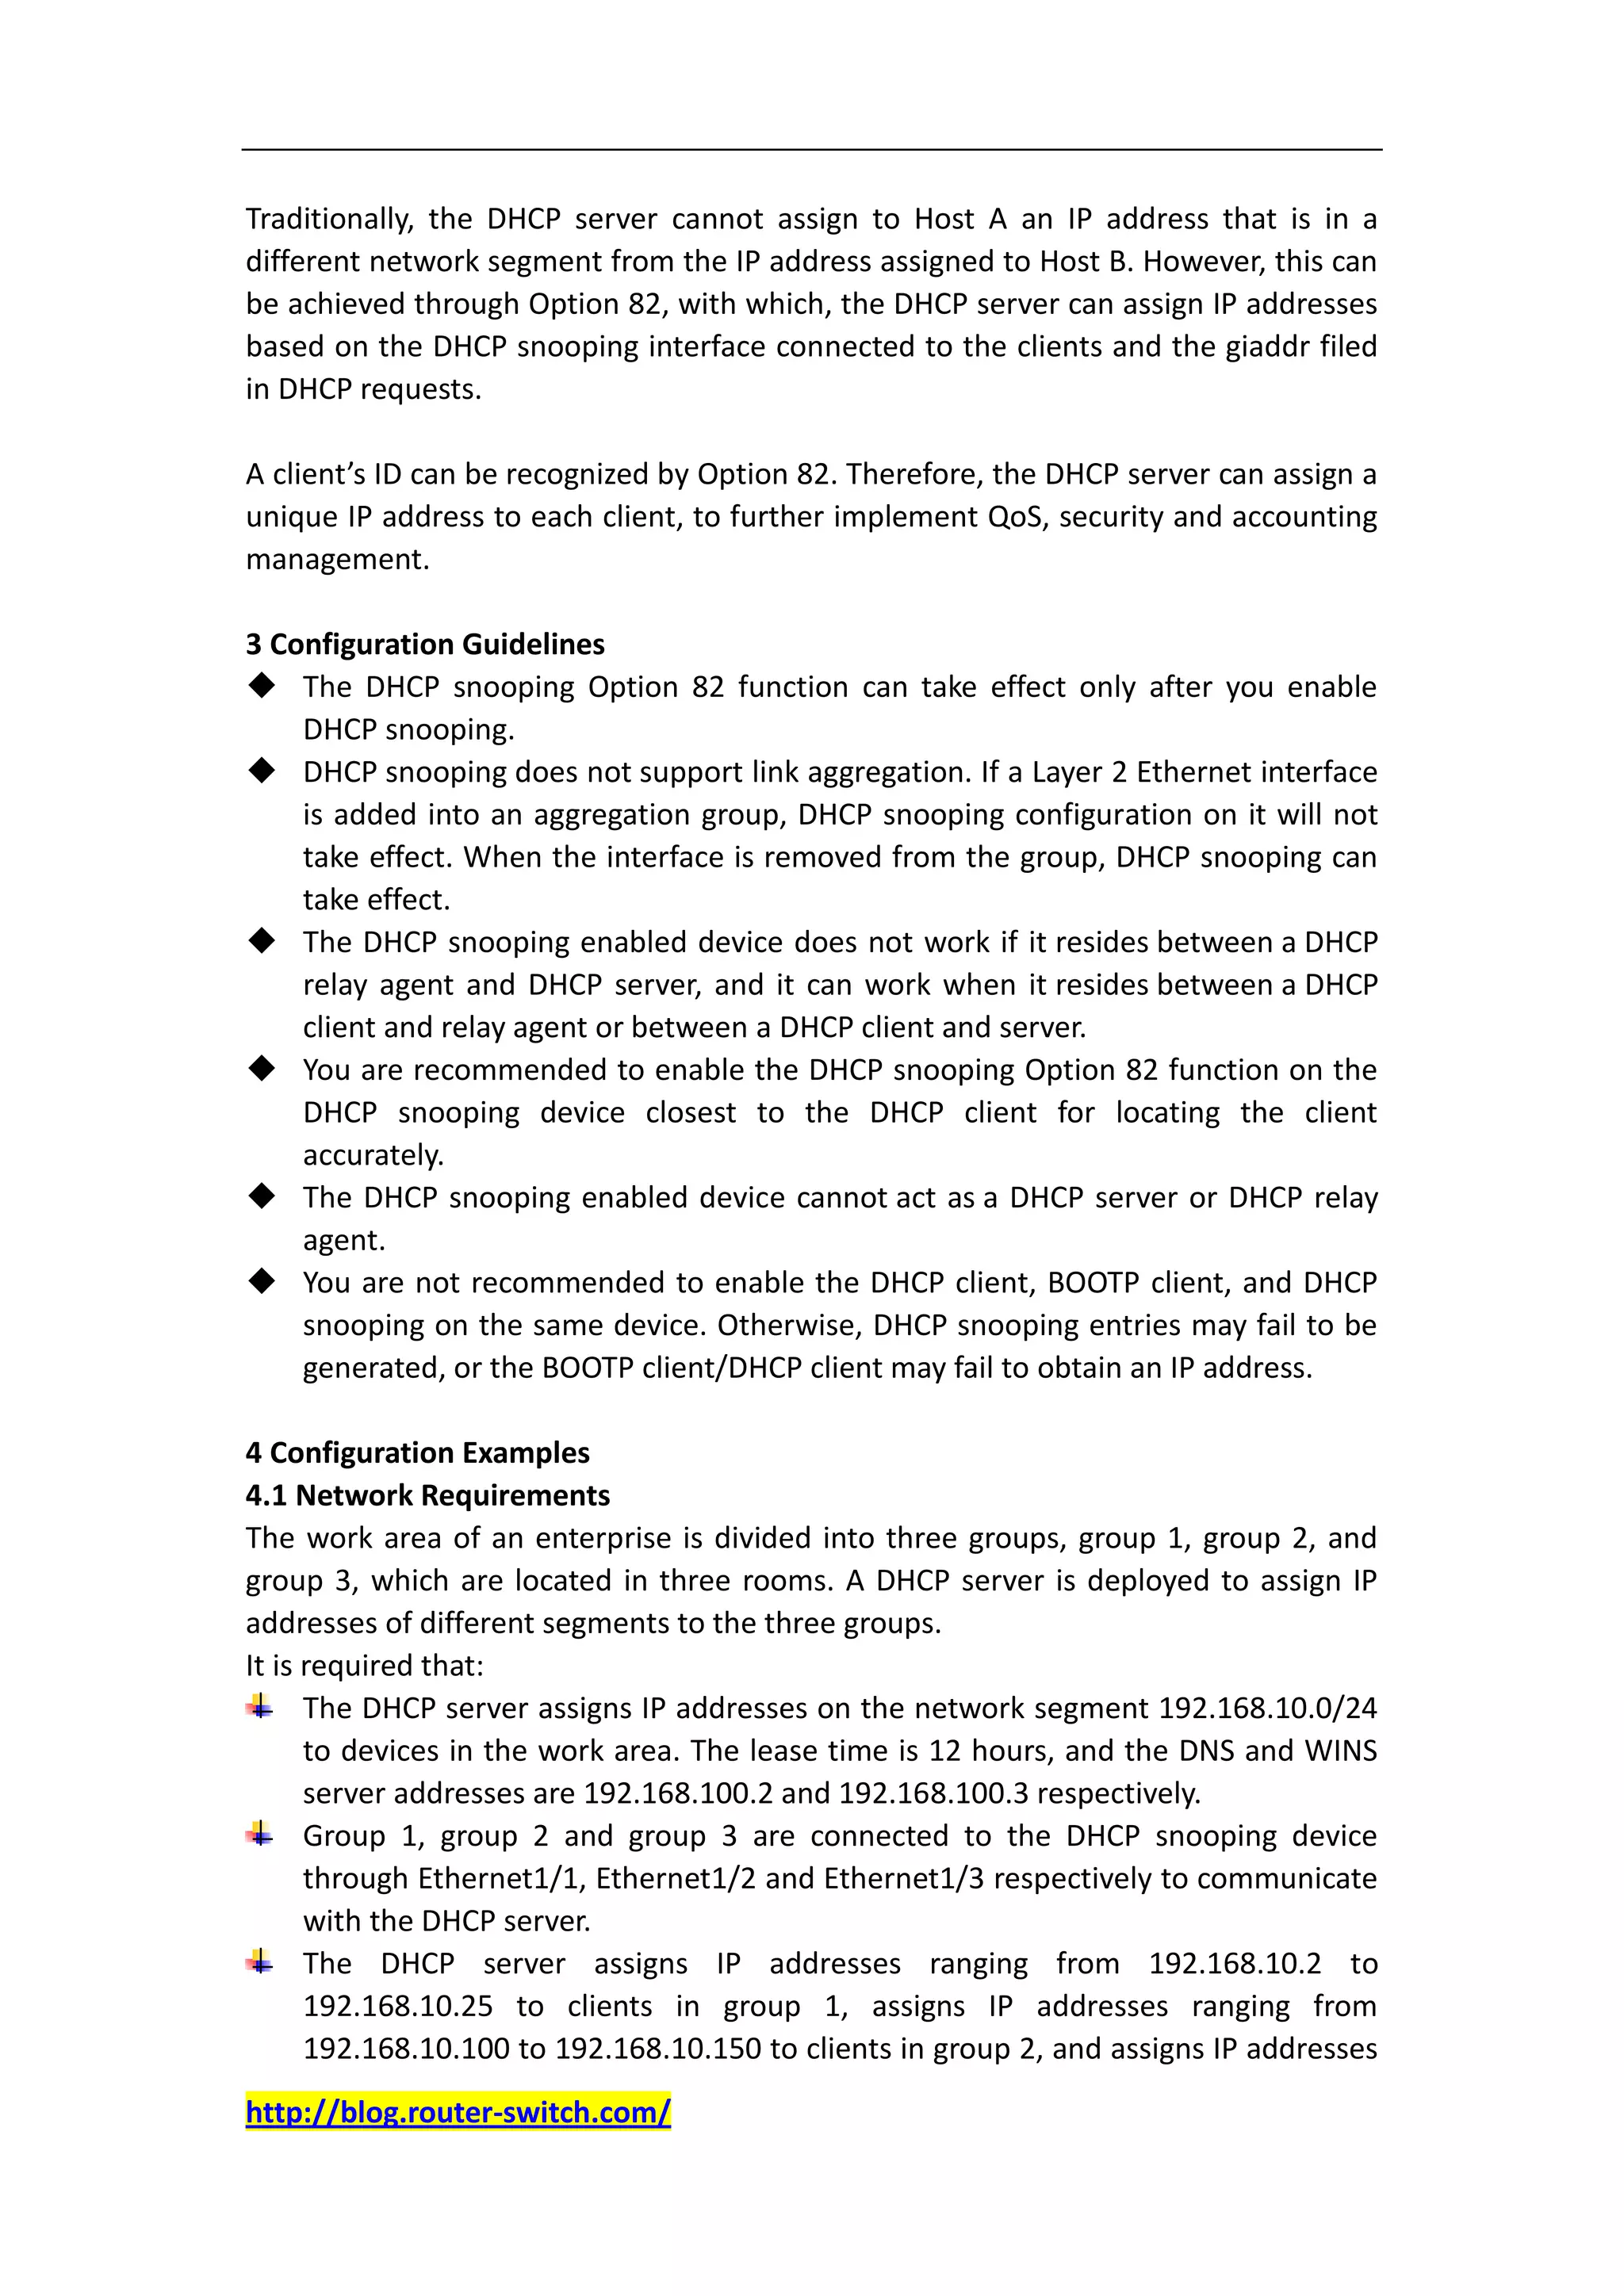
4.4.1 Configuration on the DHCP Snooping Device
I. Configuration steps
# Enable DHCP snooping.
<Switch> system-view
[Switch] dhcp-snooping
# Configure Ethernet 1/4 as a DHCP snooping trusted port.
[Switch] interface ethernet 1/4
http://blog.router-switch.com/](https://image.slidesharecdn.com/dhcpsnoopingoption82configuration-120829020703-phpapp01/75/Dhcp-snooping-option-82-configuration-3-2048.jpg)
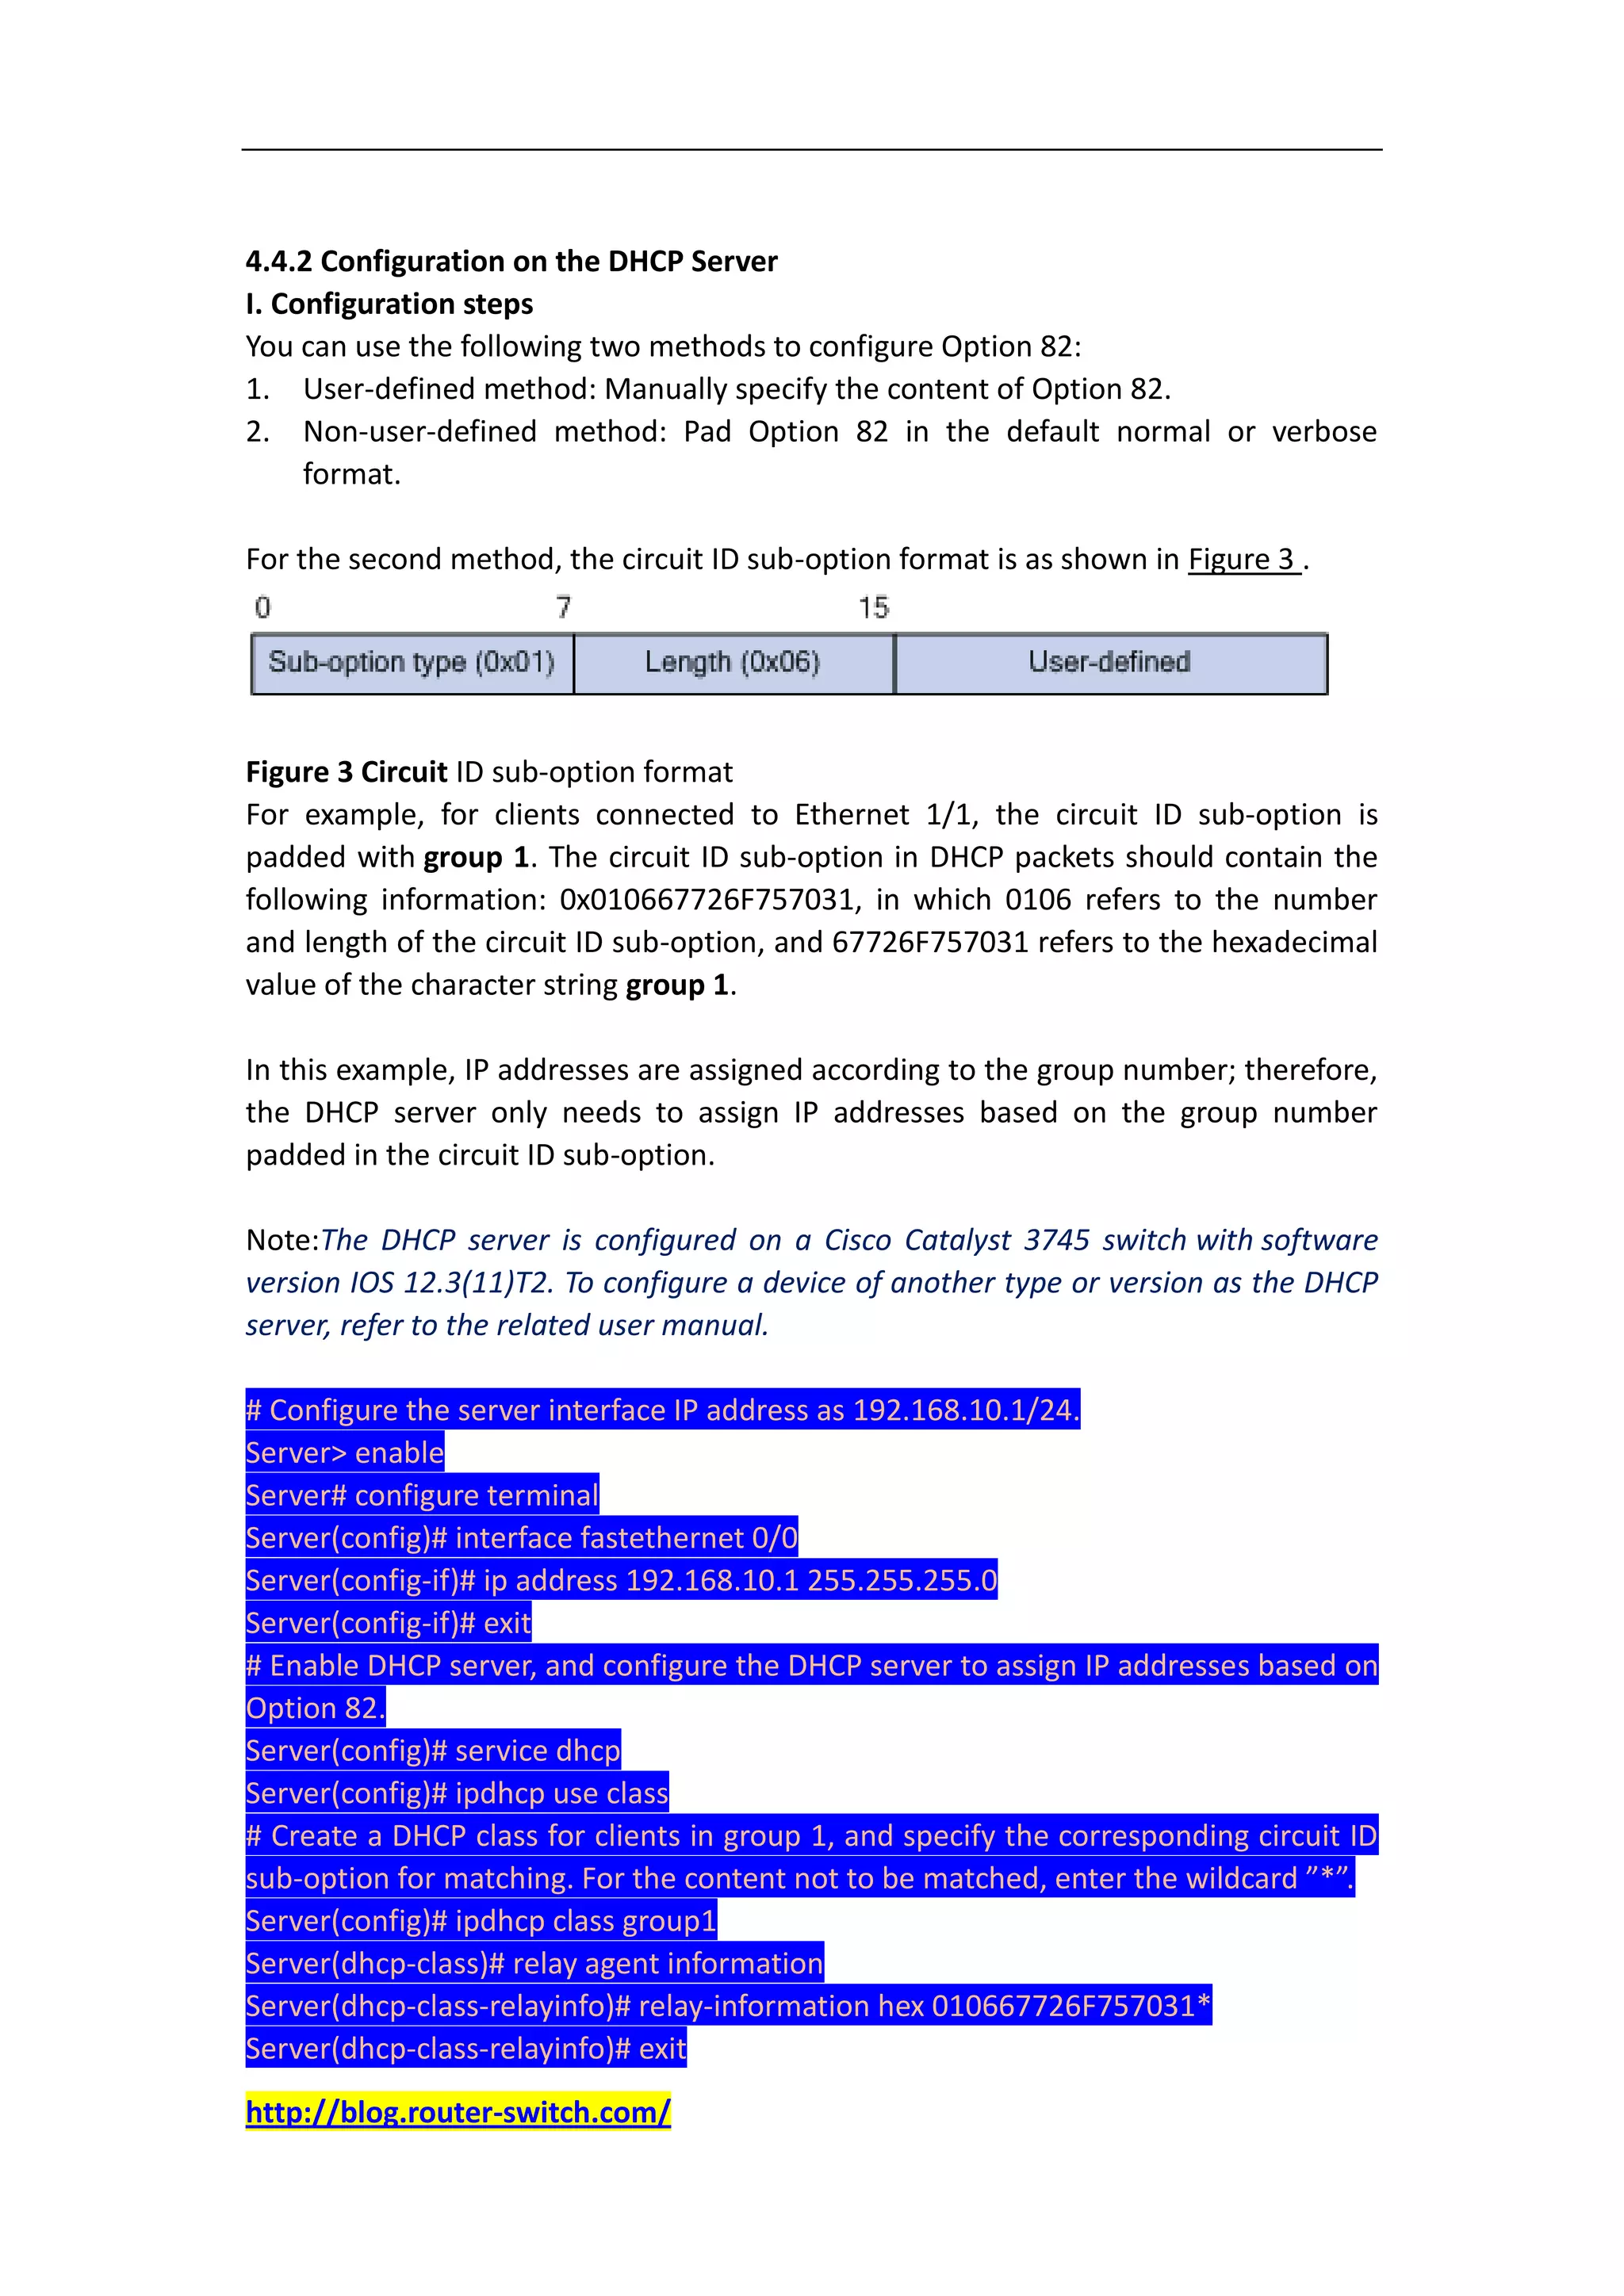
![[Switch-Ethernet1/4] dhcp-snooping trust
[Switch-Ethernet1/4] quit
# Enable Ethernet 1/1 to support Option 82.
[Switch] interface ethernet 1/1
[Switch-Ethernet1/1] dhcp-snooping information enable
# Pad the Option 82 circuit ID sub-option with group 1.
[Switch-Ethernet1/1] dhcp-snooping information circuit-id string group1
[Switch-Ethernet1/1] quit
# Enable Ethernet 1/2 to support Option 82.
[Switch] interface ethernet 1/2
[Switch-Ethernet1/2] dhcp-snooping information enable
# Pad the Option 82 circuit ID sub-option with group 2.
[Switch-Ethernet1/2] dhcp-snooping information circuit-id string group2
[Switch-Ethernet1/2] quit
# Enable Ethernet 1/3 to support Option 82.
[Switch] interface ethernet 1/3
[Switch-Ethernet1/3] dhcp-snooping information enable
[Switch-Ethernet1/3] quit
# Pad the Option 82 circuit ID sub-option with group 3.
[Switch-Ethernet1/3] dhcp-snooping information circuit-id string group3
[Switch-Ethernet1/3] quit
II. Configuration file
<Switch> display current-configuration
#
interface Ethernet1/1
port link-mode bridge
dhcp-snooping information enable
dhcp-snooping information circuit-id string group1
#
interface Ethernet1/2
port link-mode bridge
dhcp-snooping information enable
dhcp-snooping information circuit-id string group2
#
interface Ethernet1/3
port link-mode bridge
dhcp-snooping information enable
dhcp-snooping information circuit-id string group3
#
interface Ethernet1/4
port link-mode bridge
dhcp-snooping trust
#
http://blog.router-switch.com/](https://image.slidesharecdn.com/dhcpsnoopingoption82configuration-120829020703-phpapp01/75/Dhcp-snooping-option-82-configuration-4-2048.jpg)


The document describes DHCP snooping Option 82 configuration examples. It provides an overview of Option 82, which allows DHCP servers to assign IP addresses based on location information added to client requests. It then gives an example configuration where a DHCP snooping device adds unique Option 82 information to requests from three client groups, allowing the DHCP server to assign each group a separate address range from the 192.168.10.0/24 network. The DHCP snooping device and server are configured to implement this address assignment based on Option 82.


![Vibe Coding vs. Spec-Driven Development [Free Meetup]](https://cdn.slidesharecdn.com/ss_thumbnails/vibecodingvsspecdrivendevelopment-251209105622-43f455e7-thumbnail.jpg?width=640&height=640&fit=bounds)


