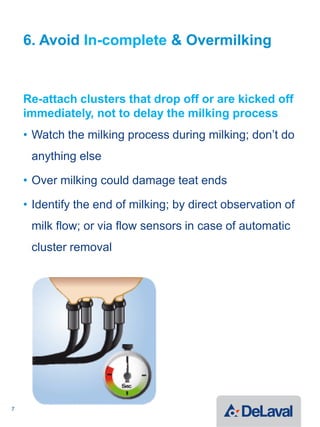
12 Golden Rules
For Milking
1
1. Check milking system at each start
of milking
Make sure all material needed is available
(towels, fresh teat dip etc) before the first cows
are allowed to enter the parlour
• Check Vacuum level and stability
• Check Pulsation rate of each pulsator
• Inspect tubes for leaking
• Check air inlet of the cluster for blockages
2
2. Foremilk each teat (Strip)
Foremilking is essential for detecting abnormal
milk and for stimulating complete letdown of the
milk. Insufficient pre milking results in poor
milk letdown.
3
• Strip 3-4 milk jets from each teat into a strip cup
(Never strip milk onto the floor)
• Examine the milk for flocculation, colour changes
or other inconsistencies
• Buffalo in general let down milk less well and more
care and stimulation is needed.
3. Disinfect teats
Disinfection of dirty teats is not effective.
Wipe off dirt from teats before pre dipping.
• Dip teats directly after foremilking
• Pre dip, using approved pre-milking teat
disinfectants
• Leave the teat dip minimal 30 sec to disinfect the
teat skin.
4
4. Clean and Dry Teats before milking
Any dirt remaining on the teat skin and teat can
contaminate the milk and lead to high bacteria
count of the milk. Any water on the udder will
run down and contaminate milk and increases
risk on mastitis infections
• Use disposable paper or udder towels to clean off
and dry each teat carefully
• Never use paper or towels for more than one cow
• Also wipe off the teat end carefully to remove dirt
around the teat opening
• Make sure no water
is remaining on the
udder
5
5. Attach Cluster and check cluster
position
• Always make sure the cluster is clean before
attaching to the udder
• Attach milking cluster within 60-90 seconds after
starting teat preparation
• Avoid air entry during cluster attachment
• Check cluster positioning, make sure that long
milk tubes are aligned with pulse tube,
avoiding twisting of tubes
6
6. Avoid In-complete & Overmilking
Re-attach clusters that drop off or are kicked off
immediately, not to delay the milking process
• Watch the milking process during milking; don’t do
anything else
• Over milking could damage teat ends
• Identify the end of milking; by direct observation of
milk flow; or via flow sensors in case of automatic
cluster removal
7
7. Detach milking Cluster correctly
Take off level, post miliking duration and Take
off delay settings effect the take off. Use proper
settings for the production level of the herd!
• Shut off vacuum to the cluster when milking
completed (manually or automatically)
• Allow claw vacuum to decline fully before
removing cluster
• Do not squeeze the udder
• Take off cluster after vacuum shut-off
8
8. Disinfect teats Immediately
The most essential feature of post dip is to
support healing of the teat skin. Teat skin
disinfection is the second important feature.
• Dip or spray teats as soon as the milking cluster
has been removed
• Use an approved post milking teat disinfectant
• Do not spray water while the cows are still in the
parlour.
9
9. Bring the cows back to the barn
Minimize the risk of manure and water splashing
on the teats directly after milking.
• The return lane should be dry and not slippery
• Make sure the cows have fresh water available
after milking
• Feeding keeps the cows standing up for 20-30
minutes, giving the teat opening time to close
10
10. Check milk is cold when finish
milking
Cooling the milk as quickly and as efficiently as
possible is essential for milk quality.
• Milk temperature should be below 4 degrees
within 2 hours after milking is completed
11
11. Clean and disinfect milking equipment
• Clean outside milking units and all surfaces in the
parlour
• After each milking rinse and clean internal milking
system, either manually or automatically
• Use approved detergents, follow dose, routine and
temperature instructions on the label
• When required disinfect the milking system: use
approved sanitizers, follow label instructions
• Remove clusters from cluster cleaners and allow
milking system and milking units to dry
12
12. Be Consistent
• Dip cows first, or directly after pre milking
• Dip Contact Time of 30-40 seconds.
• Stimulate for 10-15 seconds
• Time interval between stimulation and attachment to
be 1-2 minutes
• Milk only Clean and Dry Teats
• Record data and calculate essential KPI’s
13

Delaval milking routine

  • 1.
  • 2.
    1. Check milkingsystem at each start of milking Make sure all material needed is available (towels, fresh teat dip etc) before the first cows are allowed to enter the parlour • Check Vacuum level and stability • Check Pulsation rate of each pulsator • Inspect tubes for leaking • Check air inlet of the cluster for blockages 2
  • 3.
    2. Foremilk eachteat (Strip) Foremilking is essential for detecting abnormal milk and for stimulating complete letdown of the milk. Insufficient pre milking results in poor milk letdown. 3 • Strip 3-4 milk jets from each teat into a strip cup (Never strip milk onto the floor) • Examine the milk for flocculation, colour changes or other inconsistencies • Buffalo in general let down milk less well and more care and stimulation is needed.
  • 4.
    3. Disinfect teats Disinfectionof dirty teats is not effective. Wipe off dirt from teats before pre dipping. • Dip teats directly after foremilking • Pre dip, using approved pre-milking teat disinfectants • Leave the teat dip minimal 30 sec to disinfect the teat skin. 4
  • 5.
    4. Clean andDry Teats before milking Any dirt remaining on the teat skin and teat can contaminate the milk and lead to high bacteria count of the milk. Any water on the udder will run down and contaminate milk and increases risk on mastitis infections • Use disposable paper or udder towels to clean off and dry each teat carefully • Never use paper or towels for more than one cow • Also wipe off the teat end carefully to remove dirt around the teat opening • Make sure no water is remaining on the udder 5
  • 6.
    5. Attach Clusterand check cluster position • Always make sure the cluster is clean before attaching to the udder • Attach milking cluster within 60-90 seconds after starting teat preparation • Avoid air entry during cluster attachment • Check cluster positioning, make sure that long milk tubes are aligned with pulse tube, avoiding twisting of tubes 6
  • 7.
    6. Avoid In-complete& Overmilking Re-attach clusters that drop off or are kicked off immediately, not to delay the milking process • Watch the milking process during milking; don’t do anything else • Over milking could damage teat ends • Identify the end of milking; by direct observation of milk flow; or via flow sensors in case of automatic cluster removal 7
  • 8.
    7. Detach milkingCluster correctly Take off level, post miliking duration and Take off delay settings effect the take off. Use proper settings for the production level of the herd! • Shut off vacuum to the cluster when milking completed (manually or automatically) • Allow claw vacuum to decline fully before removing cluster • Do not squeeze the udder • Take off cluster after vacuum shut-off 8
  • 9.
    8. Disinfect teatsImmediately The most essential feature of post dip is to support healing of the teat skin. Teat skin disinfection is the second important feature. • Dip or spray teats as soon as the milking cluster has been removed • Use an approved post milking teat disinfectant • Do not spray water while the cows are still in the parlour. 9
  • 10.
    9. Bring thecows back to the barn Minimize the risk of manure and water splashing on the teats directly after milking. • The return lane should be dry and not slippery • Make sure the cows have fresh water available after milking • Feeding keeps the cows standing up for 20-30 minutes, giving the teat opening time to close 10
  • 11.
    10. Check milkis cold when finish milking Cooling the milk as quickly and as efficiently as possible is essential for milk quality. • Milk temperature should be below 4 degrees within 2 hours after milking is completed 11
  • 12.
    11. Clean anddisinfect milking equipment • Clean outside milking units and all surfaces in the parlour • After each milking rinse and clean internal milking system, either manually or automatically • Use approved detergents, follow dose, routine and temperature instructions on the label • When required disinfect the milking system: use approved sanitizers, follow label instructions • Remove clusters from cluster cleaners and allow milking system and milking units to dry 12
  • 13.
    12. Be Consistent •Dip cows first, or directly after pre milking • Dip Contact Time of 30-40 seconds. • Stimulate for 10-15 seconds • Time interval between stimulation and attachment to be 1-2 minutes • Milk only Clean and Dry Teats • Record data and calculate essential KPI’s 13