4. Install andconfigure Windows Server OS.
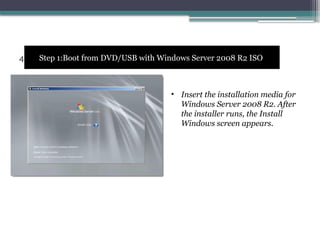
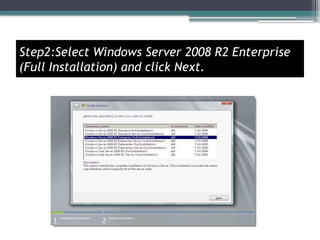
Step 1:Boot from DVD/USB with Windows Server 2008 R2 ISO
• Insert the installation media for
Windows Server 2008 R2. After
the installer runs, the Install
Windows screen appears.
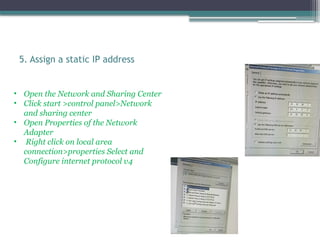
5. Assign astatic IP address
• Open the Network and Sharing Center
• Click start >control panel>Network
and sharing center
• Open Properties of the Network
Adapter
• Right click on local area
connection>properties Select and
Configure internet protocol v4
11.
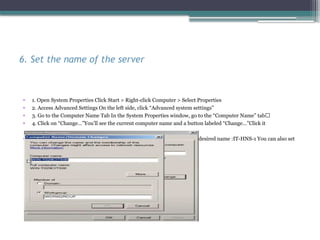
6. Set thename of the server
• 1. Open System Properties Click Start > Right-click Computer > Select Properties
• 2. Access Advanced Settings On the left side, click “Advanced system settings”
• 3. Go to the Computer Name Tab In the System Properties window, go to the “Computer Name” tab🔹
• 4. Click on “Change…”You’ll see the current computer name and a button labeled “Change…”Click it
• 5. Enter the New Server Name In the Computer Name field, enter your desired name :IT-HNS-1 You can also set
the domain later after configuring ADDS
12.
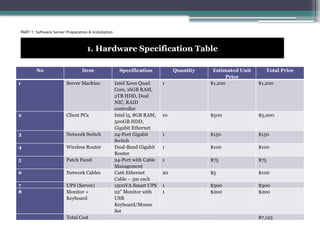
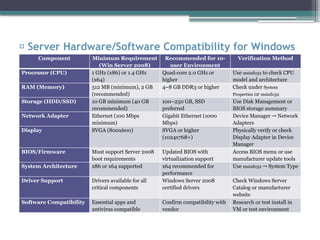
✅ Server Hardware/SoftwareCompatibility for Windows
Server 2008
Component Minimum Requirement
(Win Server 2008)
Recommended for 10-
user Environment
Verification Method
Processor (CPU) 1 GHz (x86) or 1.4 GHz
(x64)
Quad-core 2.0 GHz or
higher
Use msinfo32 to check CPU
model and architecture
RAM (Memory) 512 MB (minimum), 2 GB
(recommended)
4–8 GB DDR3 or higher Check under System
Properties or msinfo32
Storage (HDD/SSD) 10 GB minimum (40 GB
recommended)
100–250 GB, SSD
preferred
Use Disk Management or
BIOS storage summary
Network Adapter Ethernet (100 Mbps
minimum)
Gigabit Ethernet (1000
Mbps)
Device Manager Network
→
Adapters
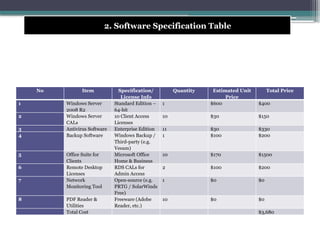
Display SVGA (800x600) SVGA or higher
(1024x768+)
Physically verify or check
Display Adapter in Device
Manager
BIOS/Firmware Must support Server 2008
boot requirements
Updated BIOS with
virtualization support
Access BIOS menu or use
manufacturer update tools
System Architecture x86 or x64 supported x64 recommended for
performance
Use msinfo32 System Type
→
Driver Support Drivers available for all
critical components
Windows Server 2008
certified drivers
Check Windows Server
Catalog or manufacturer
website
Software Compatibility Essential apps and
antivirus compatible
Confirm compatibility with
vendor
Research or test install in
VM or test environment
13.
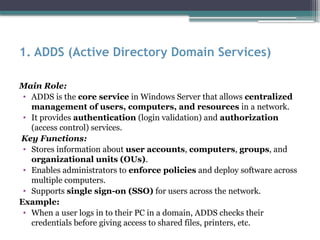
1. ADDS (ActiveDirectory Domain Services)
Main Role:
• ADDS is the core service in Windows Server that allows centralized
management of users, computers, and resources in a network.
• It provides authentication (login validation) and authorization
(access control) services.
Key Functions:
• Stores information about user accounts, computers, groups, and
organizational units (OUs).
• Enables administrators to enforce policies and deploy software across
multiple computers.
• Supports single sign-on (SSO) for users across the network.
Example:
• When a user logs in to their PC in a domain, ADDS checks their
credentials before giving access to shared files, printers, etc.
14.
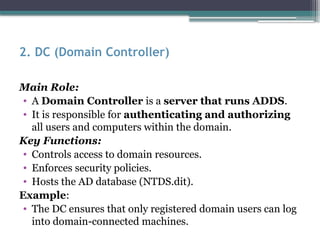
2. DC (DomainController)
Main Role:
• A Domain Controller is a server that runs ADDS.
• It is responsible for authenticating and authorizing
all users and computers within the domain.
Key Functions:
• Controls access to domain resources.
• Enforces security policies.
• Hosts the AD database (NTDS.dit).
Example:
• The DC ensures that only registered domain users can log
into domain-connected machines.
15.
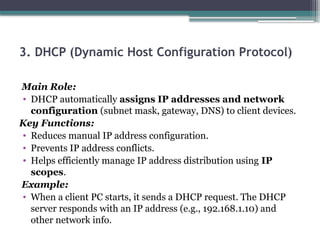
3. DHCP (DynamicHost Configuration Protocol)
Main Role:
• DHCP automatically assigns IP addresses and network
configuration (subnet mask, gateway, DNS) to client devices.
Key Functions:
• Reduces manual IP address configuration.
• Prevents IP address conflicts.
• Helps efficiently manage IP address distribution using IP
scopes.
Example:
• When a client PC starts, it sends a DHCP request. The DHCP
server responds with an IP address (e.g., 192.168.1.10) and
other network info.
16.
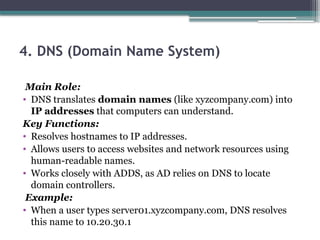
4. DNS (DomainName System)
Main Role:
• DNS translates domain names (like xyzcompany.com) into
IP addresses that computers can understand.
Key Functions:
• Resolves hostnames to IP addresses.
• Allows users to access websites and network resources using
human-readable names.
• Works closely with ADDS, as AD relies on DNS to locate
domain controllers.
Example:
• When a user types server01.xyzcompany.com, DNS resolves
this name to 10.20.30.1
17.
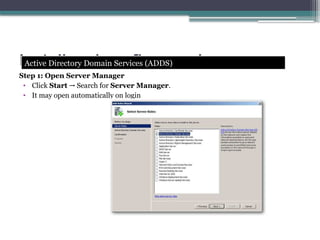
Install and configureroles:
Step 1: Open Server Manager
• Click Start Search for
→ Server Manager.
• It may open automatically on login
Active Directory Domain Services (ADDS)
ADDS
18.
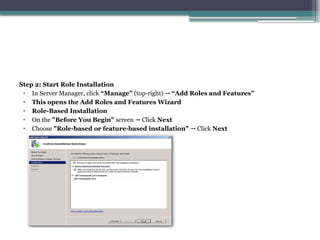
Step 2: StartRole Installation
• In Server Manager, click “Manage” (top-right) → “Add Roles and Features”
• This opens the Add Roles and Features Wizard
• Role-Based Installation
• On the "Before You Begin" screen Click
→ Next
• Choose "Role-based or feature-based installation" Click
→ Next
19.
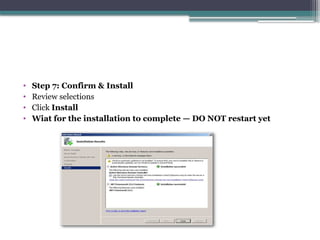
• Step 7:Confirm & Install
• Review selections
• Click Install
• Wiat for the installation to complete — DO NOT restart yet
20.
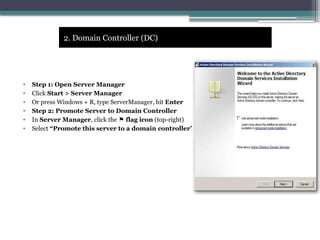
• Step 1:Open Server Manager
• Click Start > Server Manager
• Or press Windows + R, type ServerManager, hit Enter
• Step 2: Promote Server to Domain Controller
• In Server Manager, click the flag icon
⚑ (top-right)
• Select “Promote this server to a domain controller”
2. Domain Controller (DC)
21.
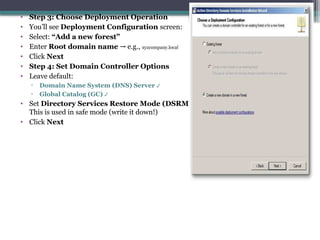
• Step 3:Choose Deployment Operation
• You’ll see Deployment Configuration screen:
• Select: “Add a new forest”
• Enter Root domain name e.g.,
→ xyzcompany.local
• Click Next
• Step 4: Set Domain Controller Options
• Leave default:
▫ Domain Name System (DNS) Server ✔
▫ Global Catalog (GC) ✔
• Set Directory Services Restore Mode (DSRM) password
This is used in safe mode (write it down!)
• Click Next
22.
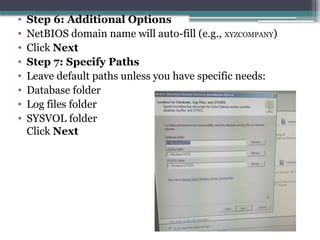
• Step 6:Additional Options
• NetBIOS domain name will auto-fill (e.g., XYZCOMPANY)
• Click Next
• Step 7: Specify Paths
• Leave default paths unless you have specific needs:
• Database folder
• Log files folder
• SYSVOL folder
Click Next
23.
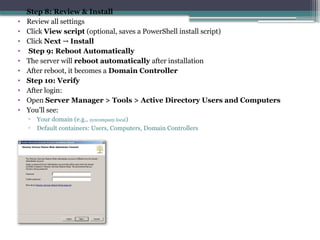
• Step 8:Review & Install
• Review all settings
• Click View script (optional, saves a PowerShell install script)
• Click Next → Install
• Step 9: Reboot Automatically
• The server will reboot automatically after installation
• After reboot, it becomes a Domain Controller
• Step 10: Verify
• After login:
• Open Server Manager > Tools > Active Directory Users and Computers
• You’ll see:
▫ Your domain (e.g., xyzcompany.local)
▫ Default containers: Users, Computers, Domain Controllers
24.
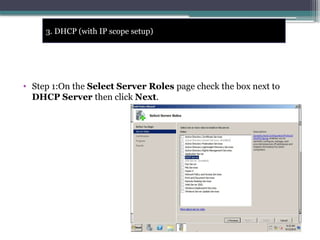
• Step 1:Onthe Select Server Roles page check the box next to
DHCP Server then click Next.
3. DHCP (with IP scope setup)
25.
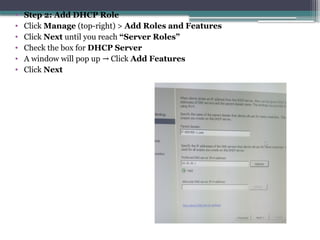
• Step 2:Add DHCP Role
• Click Manage (top-right) > Add Roles and Features
• Click Next until you reach “Server Roles”
• Check the box for DHCP Server
• A window will pop up Click
→ Add Features
• Click Next
26.
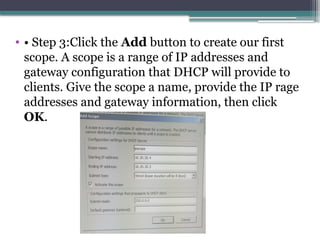
• • Step3:Click the Add button to create our first
scope. A scope is a range of IP addresses and
gateway configuration that DHCP will provide to
clients. Give the scope a name, provide the IP rage
addresses and gateway information, then click
OK.
27.
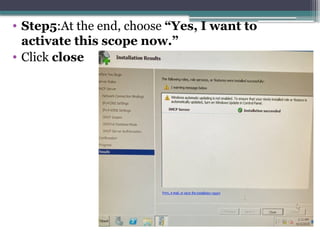
• Step5:At theend, choose “Yes, I want to
activate this scope now.”
• Click close
28.
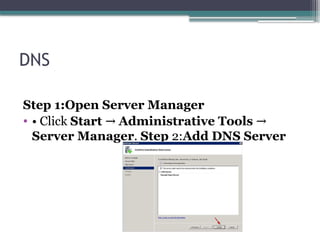
DNS
Step 1:Open ServerManager
• • Click Start → Administrative Tools →
Server Manager. Step 2:Add DNS Server
29.
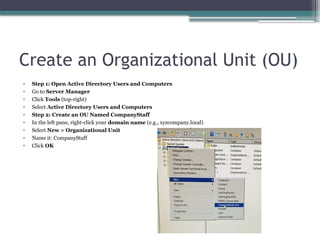
Create an OrganizationalUnit (OU)
• Step 1: Open Active Directory Users and Computers
• Go to Server Manager
• Click Tools (top-right)
• Select Active Directory Users and Computers
• Step 2: Create an OU Named CompanyStaff
• In the left pane, right-click your domain name (e.g., xyzcompany.local)
• Select New > Organizational Unit
• Name it: CompanyStaff
• Click OK
30.
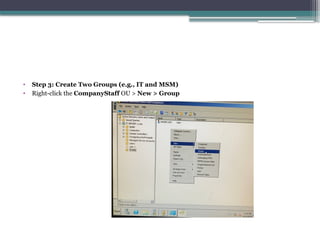
• Step 3:Create Two Groups (e.g., IT and MSM)
• Right-click the CompanyStaff OU > New > Group
31.
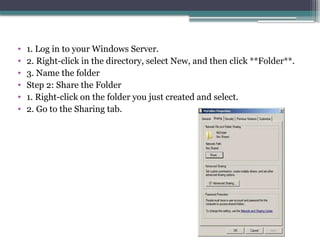
• 1. Login to your Windows Server.
• 2. Right-click in the directory, select New, and then click **Folder**.
• 3. Name the folder
• Step 2: Share the Folder
• 1. Right-click on the folder you just created and select.
• 2. Go to the Sharing tab.
32.
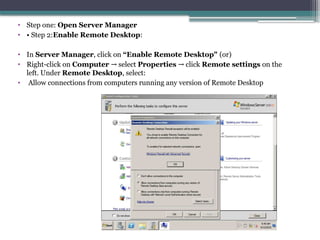
• Step one:Open Server Manager
• • Step 2:Enable Remote Desktop:
• In Server Manager, click on “Enable Remote Desktop" (or)
• Right-click on Computer select
→ Properties click
→ Remote settings on the
left. Under Remote Desktop, select:
• Allow connections from computers running any version of Remote Desktop
34.
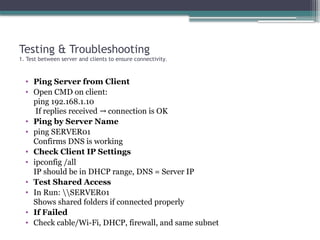
Testing & Troubleshooting
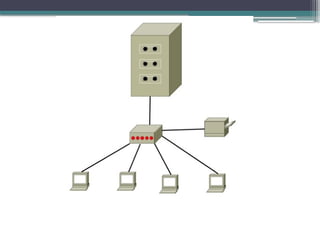
1.Test between server and clients to ensure connectivity.
• Ping Server from Client
• Open CMD on client:
ping 192.168.1.10
If replies received connection is OK
→
• Ping by Server Name
• ping SERVER01
Confirms DNS is working
• Check Client IP Settings
• ipconfig /all
IP should be in DHCP range, DNS = Server IP
• Test Shared Access
• In Run: SERVER01
Shows shared folders if connected properly
• If Failed
• Check cable/Wi-Fi, DHCP, firewall, and same subnet
35.
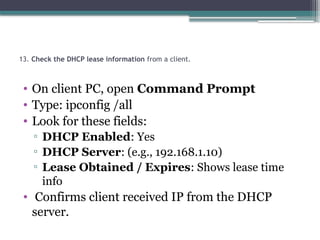
13. Check theDHCP lease information from a client.
• On client PC, open Command Prompt
• Type: ipconfig /all
• Look for these fields:
▫ DHCP Enabled: Yes
▫ DHCP Server: (e.g., 192.168.1.10)
▫ Lease Obtained / Expires: Shows lease time
info
• Confirms client received IP from the DHCP
server.
36.
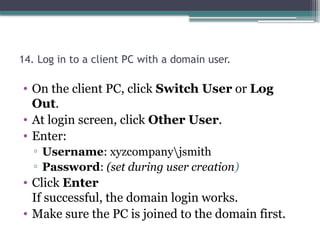
14. Log into a client PC with a domain user.
• On the client PC, click Switch User or Log
Out.
• At login screen, click Other User.
• Enter:
▫ Username: xyzcompanyjsmith
▫ Password: (set during user creation)
• Click Enter
If successful, the domain login works.
• Make sure the PC is joined to the domain first.
37.
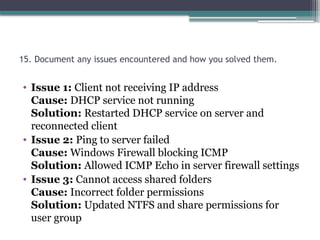
15. Document anyissues encountered and how you solved them.
• Issue 1: Client not receiving IP address
Cause: DHCP service not running
Solution: Restarted DHCP service on server and
reconnected client
• Issue 2: Ping to server failed
Cause: Windows Firewall blocking ICMP
Solution: Allowed ICMP Echo in server firewall settings
• Issue 3: Cannot access shared folders
Cause: Incorrect folder permissions
Solution: Updated NTFS and share permissions for
user group