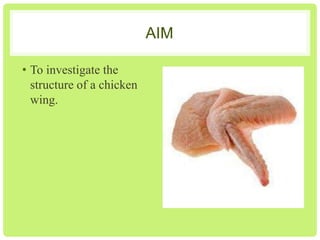
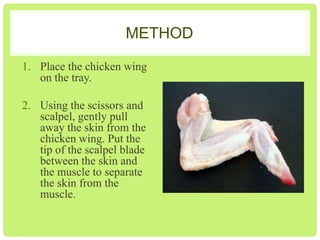
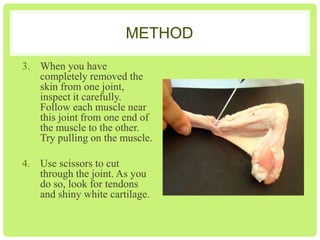
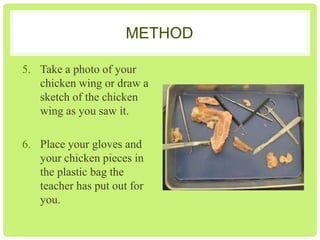
CHICKEN WING DISSECTION
YEAR 8 – BODY SYSTEMS
AIM
• To investigate the
structure of a chicken
wing.
EQUIPMENT
• Chicken Wing
• Dissecting Tray
• Newspapers
• Scalpel
• Scissors
• Forceps
• Rubbish Bag
RISK ASSESSMENT
Risk

Injury

Prevention

Fill out a risk assessment for your experiment
METHOD
1. Place the chicken wing
on the tray.
2. Using the scissors and
scalpel, gently pull
away the skin from the
chicken wing. Put the
tip of the scalpel blade
between the skin and
the muscle to separate
the skin from the
muscle.
METHOD
3. When you have
completely removed the
skin from one joint,
inspect it carefully.
Follow each muscle near
this joint from one end of
the muscle to the other.
Try pulling on the muscle.
4. Use scissors to cut
through the joint. As you
do so, look for tendons
and shiny white cartilage.
METHOD
5. Take a photo of your
chicken wing or draw a
sketch of the chicken
wing as you saw it.

6. Place your gloves and
your chicken pieces in
the plastic bag the
teacher has put out for
you.
RESULTS
• Write your observations here and display any photos
here.
DISCUSSION
1. Sketch one of the joints in the chicken wing. Label the
bones, the tendons and the muscles. Show clearly
where the muscle inserts (attaches to the bones). Use
arrows to show how the bones move when the muscle
is shortened.
2. Feel the cartilage with a gloved hand. Does the
cartilage feel rough or slippery? Why does it need to be
slippery?
3. Is cartilage harder or softer than bone?
CONCLUSION
• Write a conclusion for your experiment here.

Chickenwingdissection

  • 1.
    CHICKEN WING DISSECTION YEAR8 – BODY SYSTEMS
  • 2.
    AIM • To investigatethe structure of a chicken wing.
  • 3.
    EQUIPMENT • Chicken Wing •Dissecting Tray • Newspapers • Scalpel • Scissors • Forceps • Rubbish Bag
  • 4.
    RISK ASSESSMENT Risk Injury Prevention Fill outa risk assessment for your experiment
  • 5.
    METHOD 1. Place thechicken wing on the tray. 2. Using the scissors and scalpel, gently pull away the skin from the chicken wing. Put the tip of the scalpel blade between the skin and the muscle to separate the skin from the muscle.
  • 6.
    METHOD 3. When youhave completely removed the skin from one joint, inspect it carefully. Follow each muscle near this joint from one end of the muscle to the other. Try pulling on the muscle. 4. Use scissors to cut through the joint. As you do so, look for tendons and shiny white cartilage.
  • 7.
    METHOD 5. Take aphoto of your chicken wing or draw a sketch of the chicken wing as you saw it. 6. Place your gloves and your chicken pieces in the plastic bag the teacher has put out for you.
  • 8.
    RESULTS • Write yourobservations here and display any photos here.
  • 9.
    DISCUSSION 1. Sketch oneof the joints in the chicken wing. Label the bones, the tendons and the muscles. Show clearly where the muscle inserts (attaches to the bones). Use arrows to show how the bones move when the muscle is shortened. 2. Feel the cartilage with a gloved hand. Does the cartilage feel rough or slippery? Why does it need to be slippery? 3. Is cartilage harder or softer than bone?
  • 10.
    CONCLUSION • Write aconclusion for your experiment here.