Download to read offline


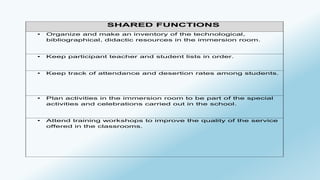
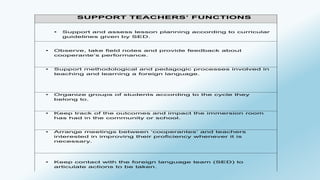
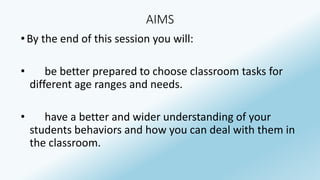
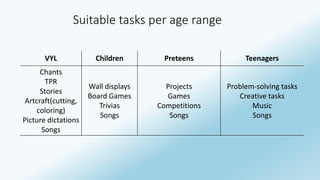


This document contains resources and guidelines for various roles involved in the LINGUAVENTURAS ESL Project from SED. It outlines the functions of cooperantes (teachers), shared functions for organizing resources and student data, and functions of support teachers. It provides guidance on lesson planning, assessment, methodology, and improving language proficiency. Other sections discuss suitable classroom tasks for different age groups, methods for presenting vocabulary, and tips for giving clear instructions and providing feedback to teachers to improve their practice.


