Chapter 8 of 'Beginning iOS 7 Development' focuses on understanding and implementing table views in iOS applications, which are essential for displaying lists of data. The chapter covers the structure and configuration of table views, including their styles (grouped and plain), as well as the required delegate and data source protocols. Examples are provided to demonstrate creating a simple table view application using Xcode and managing data display efficiently with reusable table view cells.
![Beginning iOS 7 Development: Exploring the iOS SDK
by Jack Nutting, Fredrik Olsson, David Mark and Jeff LaMarche
Apress. (c) 2014. Copying Prohibited.
Reprinted for Personal Account, American Public University
System
[email protected]
Reprinted with permission as a subscription benefit of Skillport,
All rights reserved. Reproduction and/or distribution in whole
or in part in electronic,paper or other forms without written
permission is prohibited.
Chapter 8: Introduction to Table Views
Overview
In this chapter, we're going to build a hierarchical navigation-
based application similar to the Mail application that ships on
iOS devices. Our application will allow the user to drill
down into nested lists of data and edit that data. But before we
can build that application, you need to master the concept of
table views. And that's the goal of this chapter.
Table views are the most common mechanism used to display
lists of data to the user. They are highly configurable objects](https://image.slidesharecdn.com/beginningios7developmentexploringtheiossdkbyjack-221101013452-a078f068/75/Beginning-iOS-7-Development-Exploring-the-iOS-SDKby-Jack-docx-1-2048.jpg)
![@property (copy, nonatomic) NSArray *dwarves;
@end
@implementation BIDViewController
- (void)viewDidLoad
{
[super viewDidLoad];
// Do any additional setup after loading the view, typically
from a nib.
self.dwarves = @[@"Sleepy", @"Sneezy", @"Bashful",
@"Happy",
@"Doc", @"Grumpy", @"Dopey",
@"Thorin", @"Dorin", @"Nori", @"Ori",
@"Balin", @"Dwalin", @"Fili", @"Kili",
@"Oin", @"Gloin", @"Bifur", @"Bofur",
@"Bombur"];
UITableView *tableView = (id)[self.view viewWithTag:1];
UIEdgeInsets contentInset = tableView.contentInset;
contentInset.top = 20;
[tableView setContentInset:contentInset];
}
Finally, add the following code at the end of the file:
- (NSInteger)tableView:(UITableView *)tableView
numberOfRowsInSection:(NSInteger)section
{
return [self.dwarves count];
Beginning iOS 7 Development: Exploring the iOS SDK
Reprinted for ZU7S5/5738005, American Public University](https://image.slidesharecdn.com/beginningios7developmentexploringtheiossdkbyjack-221101013452-a078f068/75/Beginning-iOS-7-Development-Exploring-the-iOS-SDKby-Jack-docx-9-2048.jpg)
![System Apress, Jack Nutting, Fredrik Olsson, David Mark, and
Jeff LaMarche (c) 2014, Copying Prohibited
Page 5 of 26
}
- (UITableViewCell *)tableView:(UITableView *)tableView
cellForRowAtIndexPath:(NSIndexPath *)indexPath
{
static NSString *SimpleTableIdentifier =
@"SimpleTableIdentifier";
UITableViewCell *cell = [tableView
dequeueReusableCellWithIdentifier:
SimpleTableIdentifier];
if (cell == nil) {
cell = [[UITableViewCell alloc]
initWithStyle:UITableViewCellStyleDefault
reuseIdentifier:SimpleTableIdentifier];
}
cell.textLabel.text = self.dwarves[indexPath.row];
return cell;
}
@end
First, we declared an array that will hold the data to be
displayed. And finally, we added three methods to the
controller. You should be comfortable with the first one,
viewDidLoad, since we've done similar things in the past. We're
simply creating an array of data to display in the table. In a real
application, this array would likely come from
another source, such as a text file, property list, or a web](https://image.slidesharecdn.com/beginningios7developmentexploringtheiossdkbyjack-221101013452-a078f068/75/Beginning-iOS-7-Development-Exploring-the-iOS-SDKby-Jack-docx-10-2048.jpg)

![SimpleTableIdentifier];
Now, it's completely possible that the table view won't have any
spare cells (e.g., when it's being initially populated), so we
check the cell after the call to see whether it's nil. If
it is, we manually create a new table view cell using that
identifier string. At some point, we'll inevitably reuse one of the
cells we create here, so we need to make sure that we
create it using SimpleTableIdentifier:
if (cell == nil) {
cell = [[UITableViewCell alloc]
initWithStyle:UITableViewCellStyleDefault
reuseIdentifier:SimpleTableIdentifier];
}
Curious about UITableViewCellStyleDefault? Hold that
thought. We'll get to it when we look at the table view cell
styles.
We now have a table view cell that we can return for the table
view to use. So, all we need to do is place whatever information
we want displayed in this cell. Displaying text in a
row of a table is a very common task, so the table view cell
provides a UILabel property called textLabel that we can set to
display strings. That just requires getting the correct
string from our listData array and using it to set the cell's
textLabel.
To get the correct value, however, we need to know which row
the table view is asking for. We get that information from the
indexPath's row property. We use the row number
of the table to get the corresponding string from the array,
assign it to the cell's textLabel.text property, and then return the
cell:](https://image.slidesharecdn.com/beginningios7developmentexploringtheiossdkbyjack-221101013452-a078f068/75/Beginning-iOS-7-Development-Exploring-the-iOS-SDKby-Jack-docx-13-2048.jpg)
![cell.textLabel.text = self.dwarves[indexPath.row];
return cell;
That wasn't so bad, was it?
Compile and run your application, and you should see the array
values displayed in a table view (see Figure 8-6).
Beginning iOS 7 Development: Exploring the iOS SDK
Reprinted for ZU7S5/5738005, American Public University
System Apress, Jack Nutting, Fredrik Olsson, David Mark, and
Jeff LaMarche (c) 2014, Copying Prohibited
Page 6 of 26
Figure 8-6: The Simple Table application, in all its dwarven
glory
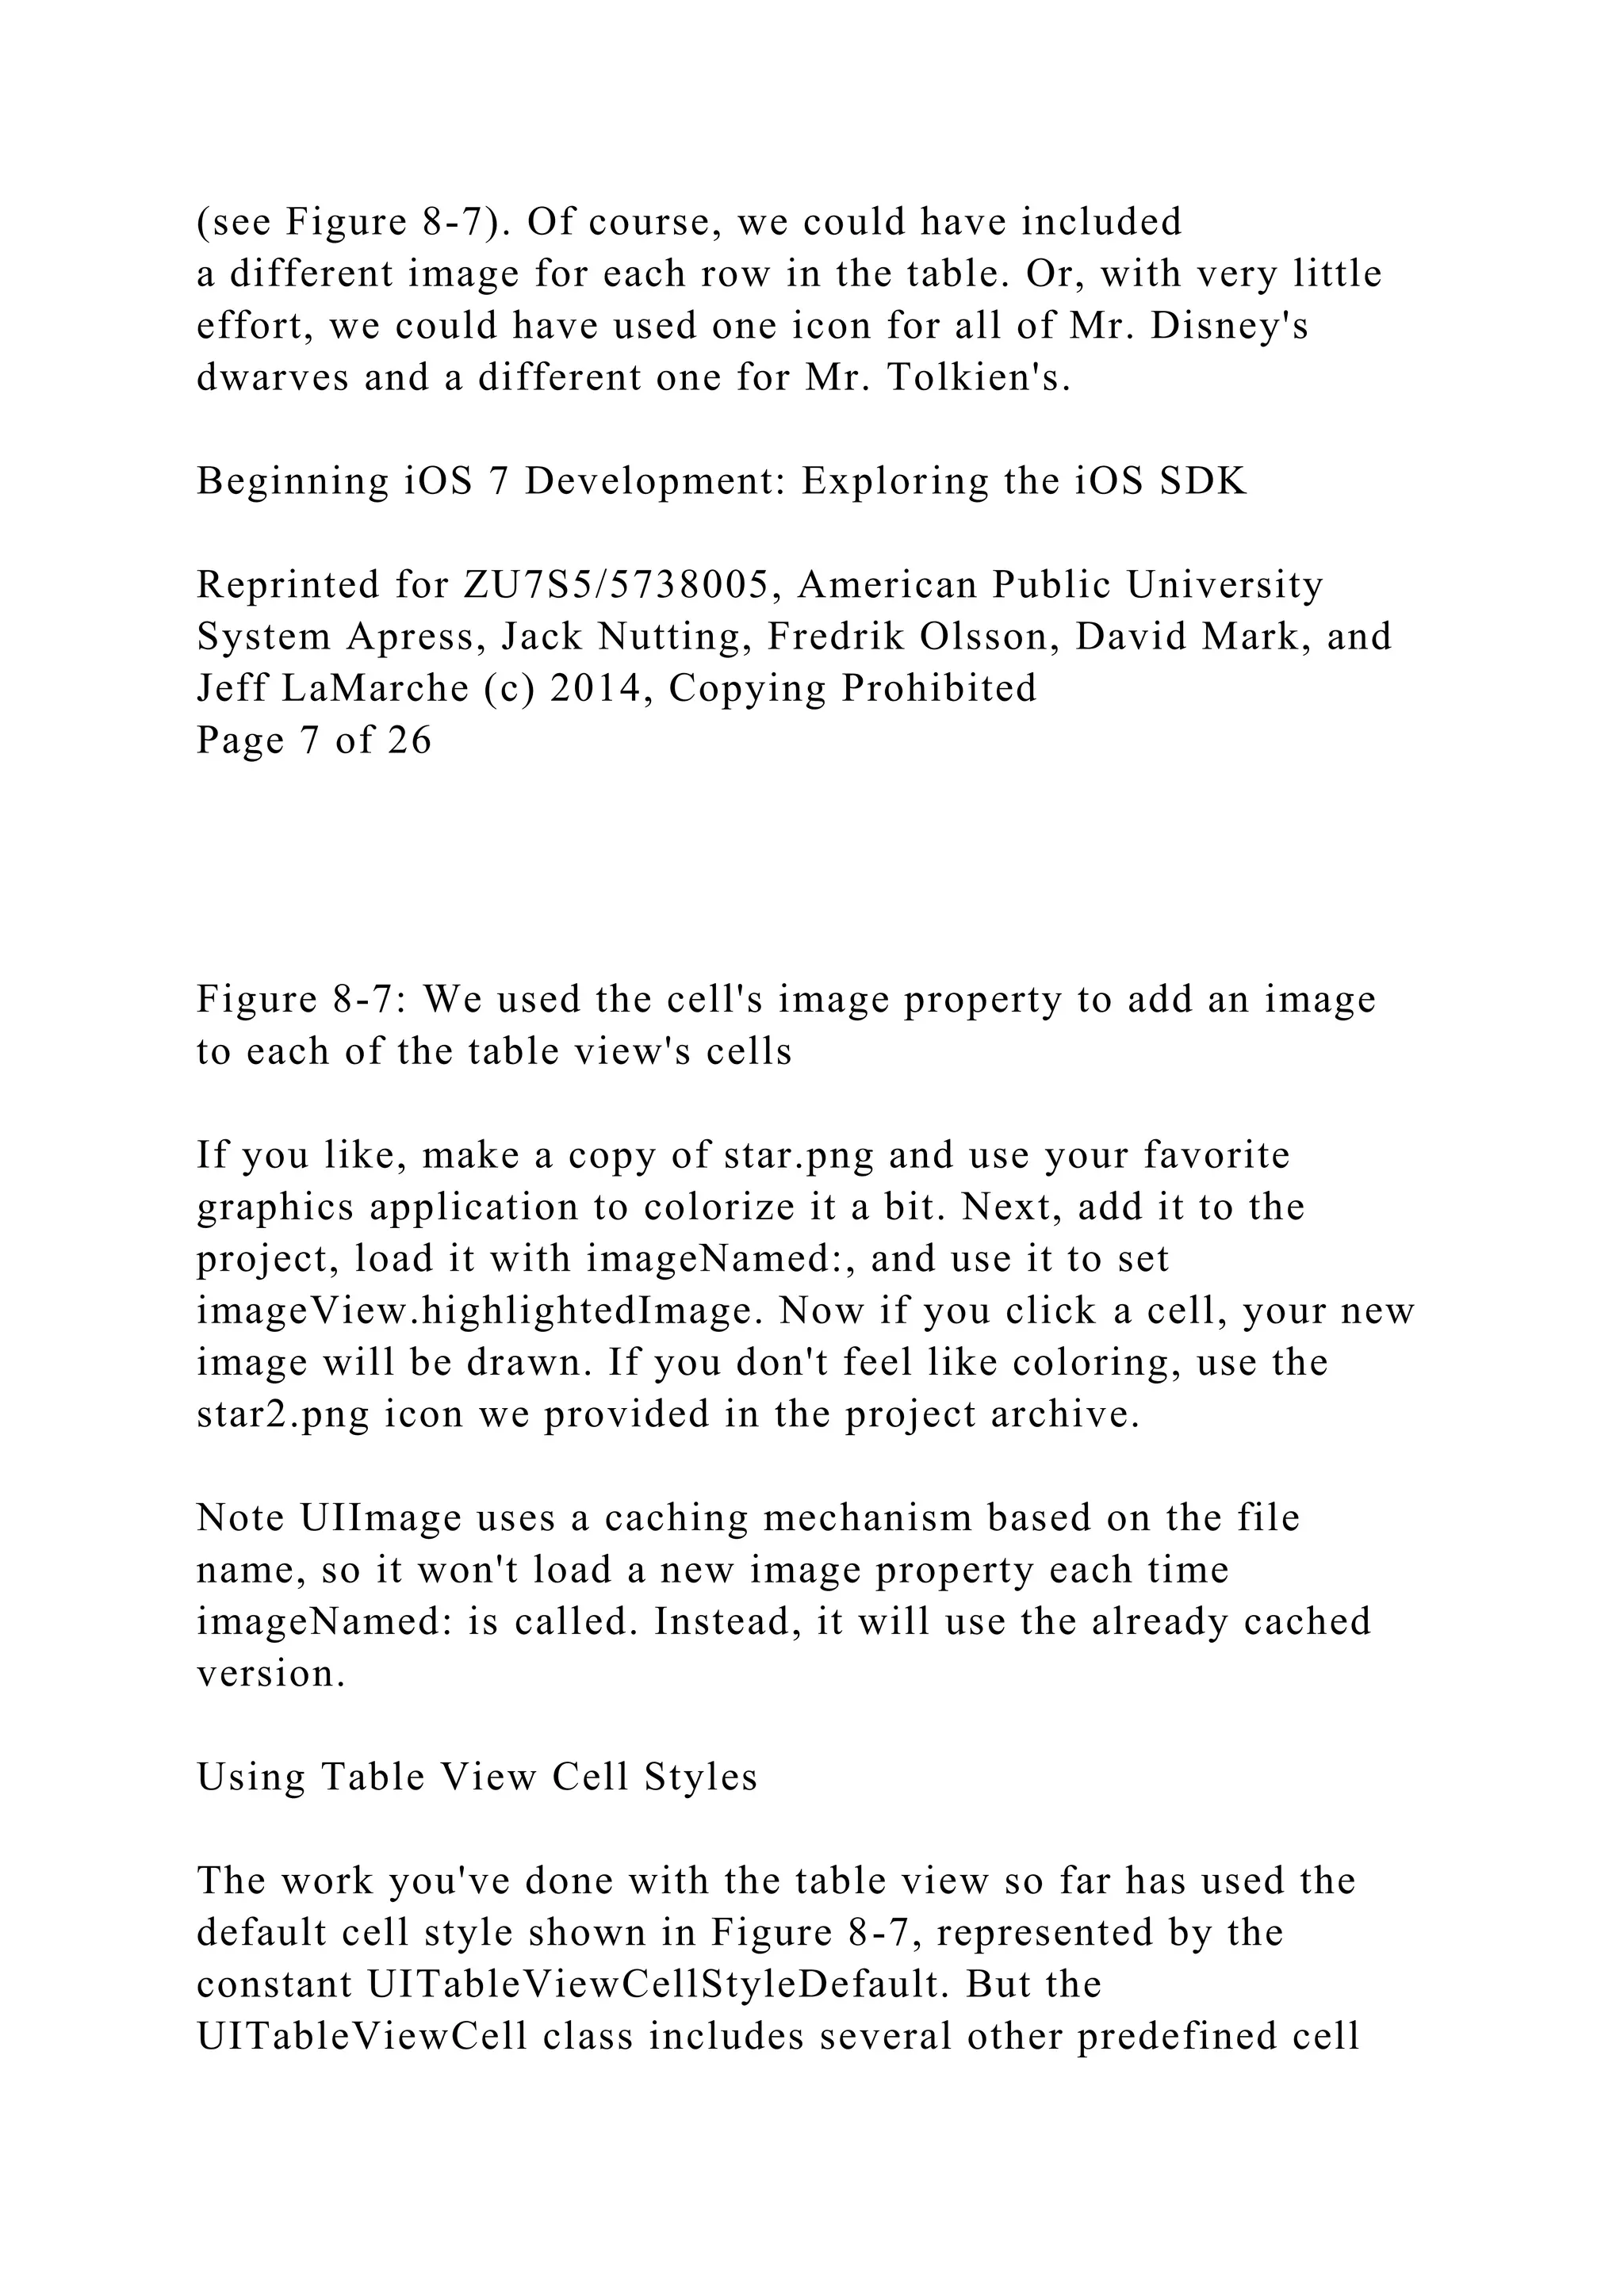
Adding an Image
It would be nice if we could add an image to each row. Guess
we would need to create a subclass of UITableViewCell or add
subviews to do that, huh? Actually, no, not if you
can live with the image being on the left side of each row. The
default table view cell can handle that situation just fine. Let's
check it out.
In the project archive, in the 08 - Simple Table folder, grab the
file called star.png and add it to your project's Images.assets.
star.png is a small icon that was prepared just for
this project.
Next, let's get to the code. In the file BIDViewController.m, add](https://image.slidesharecdn.com/beginningios7developmentexploringtheiossdkbyjack-221101013452-a078f068/75/Beginning-iOS-7-Development-Exploring-the-iOS-SDKby-Jack-docx-14-2048.jpg)
![the following code to the tableView:cellForRowAtIndexPath:
method:
- (UITableViewCell *)tableView:(UITableView *)tableView
cellForRowAtIndexPath:(NSIndexPath *)indexPath
{
static NSString *SimpleTableIdentifier =
@"SimpleTableIdentifier";
UITableViewCell *cell = [tableView
dequeueReusableCellWithIdentifier:
SimpleTableIdentifier];
if (cell == nil) {
cell = [[UITableViewCell alloc]
initWithStyle:UITableViewCellStyleDefault
reuseIdentifier:SimpleTableIdentifier];
}
UIImage *image = [UIImage imageNamed:@"star"];
cell.imageView.image = image;
cell.textLabel.text = self.dwarves[indexPath.row];
return cell;
}
Yep, that's it. Each cell has an imageView property. Each
imageView has an image property, as well as a
highlightedImage property. The image appears to the left of the
cell's text
and is replaced by the highlightedImage, if one is provided,
when the cell is selected. You just set the cell's
imageView.image property to whatever image you want to
display.
If you compile and run your application now, you should get a
list with a bunch of nice little star icons to the left of each row](https://image.slidesharecdn.com/beginningios7developmentexploringtheiossdkbyjack-221101013452-a078f068/75/Beginning-iOS-7-Development-Exploring-the-iOS-SDKby-Jack-docx-15-2048.jpg)
![styles that let you easily add a bit more variety to your table
views. These cell styles use three different cell
elements:
Image: If an image is part of the specified style, the image is
displayed to the left of the cell's text.
Text label: This is the cell's primary text. In the
UITableViewCellStyleDefault style we used earlier, the text
label is the only text shown in the cell.
Detail text label: This is the cell's secondary text, usually used
as an explanatory note or label.
To see what these new style additions look like, add the
following code to tableView:cellForRowAtIndexPath: in
BIDViewController.m:
- (UITableViewCell *)tableView:(UITableView *)tableView
cellForRowAtIndexPath:(NSIndexPath *)indexPath
{
static NSString *SimpleTableIdentifier =
@"SimpleTableIdentifier";
UITableViewCell *cell = [tableView
dequeueReusableCellWithIdentifier:
SimpleTableIdentifier];
if (cell == nil) {
cell = [[UITableViewCell alloc]
initWithStyle:UITableViewCellStyleDefault
reuseIdentifier:SimpleTableIdentifier];
}
UIImage *image = [UIImage imageNamed:@"star.png"];
cell.imageView.image = image;](https://image.slidesharecdn.com/beginningios7developmentexploringtheiossdkbyjack-221101013452-a078f068/75/Beginning-iOS-7-Development-Exploring-the-iOS-SDKby-Jack-docx-17-2048.jpg)
![cell.textLabel.text = self.dwarves[indexPath.row];
if (indexPath.row < 7) {
cell.detailTextLabel.text = @"Mr. Disney";
} else {
cell.detailTextLabel.text = @"Mr. Tolkien";
}
return cell;
}
All we've done here is set the cell's detail text. We use the
string @"Mr. Disney" for the first seven rows and the string
@"Mr. Tolkien" for the rest. When you run this code, each
cell will look just as it did before (see Figure 8-8). That's
because we are using the style UITableViewCellStyleDefault,
which does not use the detail text.
Figure 8-8: The default cell style shows the image and text label
in a straight row
Now change UITableViewCellStyleDefault to
UITableViewCellStyleSubtitle and run the app again. With the
subtitle style, both text elements are shown, one below the other
Beginning iOS 7 Development: Exploring the iOS SDK
Reprinted for ZU7S5/5738005, American Public University
System Apress, Jack Nutting, Fredrik Olsson, David Mark, and
Jeff LaMarche (c) 2014, Copying Prohibited
Page 8 of 26
(see Figure 8-9).](https://image.slidesharecdn.com/beginningios7developmentexploringtheiossdkbyjack-221101013452-a078f068/75/Beginning-iOS-7-Development-Exploring-the-iOS-SDKby-Jack-docx-18-2048.jpg)
![to be selected. If the row is the first row, which is
always index zero, then it returns nil, which indicates that no
row should actually be selected. Otherwise, it returns indexPath,
which is how we indicate that it's OK for the
selection to proceed.
Before you compile and run, you should also implement the
delegate method that is called after a row has been selected,
which is typically where you'll actually handle the
selection. This is where you take whatever action is appropriate
when the user selects a row. In the next chapter, we'll use this
method to handle the drill-downs; but in this
chapter, we'll just put up an alert to show that the row was
selected. Add the following method to the bottom of
BIDViewController.m, just before the @end declaration again:
- (void)tableView:(UITableView *)tableView
didSelectRowAtIndexPath:(NSIndexPath *)indexPath
{
NSString *rowValue = self.dwarves[indexPath.row];
NSString *message = [[NSString alloc] initWithFormat:
@"You selected %@", rowValue];
UIAlertView *alert = [[UIAlertView alloc]
initWithTitle:@"Row Selected!"
message:message
delegate:nil
cancelButtonTitle:@"Yes I Did"
otherButtonTitles:nil];
[alert show];
[tableView deselectRowAtIndexPath:indexPath
animated:YES];
}
Once you've added this method, compile and run the app, and
then take it for a spin. For example, see whether you can select](https://image.slidesharecdn.com/beginningios7developmentexploringtheiossdkbyjack-221101013452-a078f068/75/Beginning-iOS-7-Development-Exploring-the-iOS-SDKby-Jack-docx-22-2048.jpg)
![- (UITableViewCell *)tableView:(UITableView *)tableView
cellForRowAtIndexPath:(NSIndexPath *)indexPath
{
static NSString *SimpleTableIdentifier =
@"SimpleTableIdentifier";
UITableViewCell *cell = [tableView
dequeueReusableCellWithIdentifier:
SimpleTableIdentifier];
if (cell == nil) {
cell = [[UITableViewCell alloc]
initWithStyle:UITableViewCellStyleDefault
reuseIdentifier:SimpleTableIdentifier];
}
UIImage *image = [UIImage imageNamed:@"star.png"];
cell.imageView.image = image;
cell.textLabel.text = self.dwarves[indexPath.row];
cell.textLabel.font = [UIFont boldSystemFontOfSize:50];
if (indexPath.row < 7) {
cell.detailTextLabel.text = @"Mr. Disney";
} else {
cell.detailTextLabel.text = @"Mr. Tolkien";
}
return cell;
}
When you run the application now, the values in your list are
drawn in a really large font size, but they don't exactly fit in the
row (see Figure 8-14).
Figure 8-14: Look how nice and big! But, um, it would be even](https://image.slidesharecdn.com/beginningios7developmentexploringtheiossdkbyjack-221101013452-a078f068/75/Beginning-iOS-7-Development-Exploring-the-iOS-SDKby-Jack-docx-24-2048.jpg)
![@property (strong, nonatomic) UILabel *nameLabel;
@property (strong, nonatomic) UILabel *colorLabel;
@end
Here, we've added a class extension defining two properties that
we'll use to access some of the subviews we'll be adding to our
cell. Our cell will contain four subviews, two of
which are labels where the content will be changed for every
row, so we created a pair of properties to attach to those labels.
Those are all the properties we need to add, so let's move onto
the @implementation section. We're going to add some code to
the initWithStyle:reuseIdentifier: method to
Beginning iOS 7 Development: Exploring the iOS SDK
Reprinted for ZU7S5/5738005, American Public University
System Apress, Jack Nutting, Fredrik Olsson, David Mark, and
Jeff LaMarche (c) 2014, Copying Prohibited
Page 13 of 26
create the views that we'll need to display:
- (id)initWithStyle:(UITableViewCellStyle)style
reuseIdentifier:(NSString *)reuseIdentifier
{
self = [super initWithStyle:style
reuseIdentifier:reuseIdentifier];
if (self) {
// Initialization code
CGRect nameLabelRect = CGRectMake(0, 5, 70, 15);
UILabel *nameMarker = [[UILabel alloc]
initWithFrame:nameLabelRect];](https://image.slidesharecdn.com/beginningios7developmentexploringtheiossdkbyjack-221101013452-a078f068/75/Beginning-iOS-7-Development-Exploring-the-iOS-SDKby-Jack-docx-29-2048.jpg)
![nameMarker.textAlignment = NSTextAlignmentRight;
nameMarker.text = @"Name:";
nameMarker.font = [UIFont boldSystemFontOfSize:12];
[self.contentView addSubview:nameMarker];
CGRect colorLabelRect = CGRectMake(0, 26, 70, 15);
UILabel *colorMarker = [[UILabel alloc]
initWithFrame:colorLabelRect];
colorMarker.textAlignment = NSTextAlignmentRight;
colorMarker.text = @"Color:";
colorMarker.font = [UIFont boldSystemFontOfSize:12];
[self.contentView addSubview:colorMarker];
CGRect nameValueRect = CGRectMake(80, 5, 200, 15);
_nameLabel = [[UILabel alloc] initWithFrame:
nameValueRect];
[self.contentView addSubview:_nameLabel];
CGRect colorValueRect = CGRectMake(80, 25, 200, 15);
_colorLabel = [[UILabel alloc] initWithFrame:
colorValueRect];
[self.contentView addSubview:_colorLabel];
}
return self;
}
That should be pretty straightforward. We create four UILabels
and add them to the table view cell. The table view cell already
has a UIView subview called contentView, which
it uses to group all of its subviews, much as we grouped those
two switches inside a UIView back in Chapter 4. As a result, we
don't add the labels as subviews directly to the
table view cell, but rather to its contentView.
Two of these labels contain static text. The label nameMarker
contains the text Name:, and the label colorMarker contains the](https://image.slidesharecdn.com/beginningios7developmentexploringtheiossdkbyjack-221101013452-a078f068/75/Beginning-iOS-7-Development-Exploring-the-iOS-SDKby-Jack-docx-30-2048.jpg)
![text Color:. Those are just labels that we won't
change. Both these labels have right-aligned text using
NSTextAlignmentRight.
We'll use the other two labels to display our row-specific data.
Remember that we need some way of retrieving these fields
later, so we keep references to both of them in the
properties that we declared earlier.
Now let's put the finishing touches on the
BIDNameAndColorCell class by adding these two setter
methods just before the @end:
- (void)setName:(NSString *)n
{
if (![n isEqualToString:_name]) {
_name = [n copy];
self.nameLabel.text = _name;
}
}
- (void)setColor:(NSString *)c
{
if (![c isEqualToString:_color]) {
_color = [c copy];
self.colorLabel.text = _color;
}
}
You already know that using @property, as we did in the header
file, implicitly creates getter and setter methods for each
property. Yet, here we're defining our own setters for
both name and color! As it turns out, this is just fine. Any time
a class defines its own getters or setters, those will be used
instead of the default methods. In this class, we're
using the default, synthesized getters, but defining our own](https://image.slidesharecdn.com/beginningios7developmentexploringtheiossdkbyjack-221101013452-a078f068/75/Beginning-iOS-7-Development-Exploring-the-iOS-SDKby-Jack-docx-31-2048.jpg)

![{
[super viewDidLoad];
// Do any additional setup after loading the view, typically
from a nib.
self.computers = @[@{@"Name" : @"MacBook Air",
@"Color" : @"Silver"},
@{@"Name" : @"MacBook Pro", @"Color" :
@"Silver"},
Beginning iOS 7 Development: Exploring the iOS SDK
Reprinted for ZU7S5/5738005, American Public University
System Apress, Jack Nutting, Fredrik Olsson, David Mark, and
Jeff LaMarche (c) 2014, Copying Prohibited
Page 14 of 26
@{@"Name" : @"iMac", @"Color" :
@"Silver"},
@{@"Name" : @"Mac Mini", @"Color" :
@"Silver"},
@{@"Name" : @"Mac Pro", @"Color" :
@"Black"}];
UITableView *tableView = (id)[self.view viewWithTag:1];
[tableView registerClass:[BIDNameAndColorCell class]
forCellReuseIdentifier:CellTableIdentifier];
UIEdgeInsets contentInset = tableView.contentInset;
contentInset.top = 20;
[tableView setContentInset:contentInset];
}](https://image.slidesharecdn.com/beginningios7developmentexploringtheiossdkbyjack-221101013452-a078f068/75/Beginning-iOS-7-Development-Exploring-the-iOS-SDKby-Jack-docx-33-2048.jpg)
![This version of viewDidLoad assigns an array of dictionaries to
the computers property. Each dictionary contains the name and
color information for one row in the table. The
name for that row is held in the dictionary under the key Name,
and the color is held under the key Color. At the end, it also
uses a tag number to find the tableView, and then
registers our cell class for future reuse. More on that, soon!
Note Remember when Macs came in different colors, like beige,
platinum, black, and white? And that's not to mention the
original iMac and iBook series, with their beautiful assortment
of rainbow hues.
Now, except for the newest Mac Pro, there's just one color:
silver. Harrumph. Well, at least we can now comfort ourselves
with colorful iPhones.
Now add this code at the end of the file, above the @end
declaration:
- (NSInteger)tableView:(UITableView *)tableView
numberOfRowsInSection:(NSInteger)section
{
return [self.computers count];
}
- (UITableViewCell *)tableView:(UITableView *)tableView
cellForRowAtIndexPath:(NSIndexPath *)indexPath
{
BIDNameAndColorCell *cell = [tableView
dequeueReusableCellWithIdentifier:
CellTableIdentifier
forIndexPath:indexPath];
NSDictionary *rowData = self.computers[indexPath.row];
cell.name = rowData[@"Name"];](https://image.slidesharecdn.com/beginningios7developmentexploringtheiossdkbyjack-221101013452-a078f068/75/Beginning-iOS-7-Development-Exploring-the-iOS-SDKby-Jack-docx-34-2048.jpg)
![cell.color = rowData[@"Color"];
return cell;
}
@end
Let's focus on tableView:cellForRowWithIndexPath: since that's
where we're really getting into some new stuff. Here we're using
an interesting feature: a table view can use a
sort of registry to create a new cell when needed. That means
that as long as we've registered all the reuse identifiers we're
going to use for a table view, we can always get
access to an available cell. In our previous example, we did
something similar using the
dequeueReusableCellWithIdentifier: method, which also uses
the registry but returns
nil if the identifier isn't already in the registry. Now, with the
dequeueReusableCellWithIdentifier:forIndexPath: method,
things are a little bit different because this method
never returns nil. If we happen to pass it an identifier that isn't
registered, the method crashes instead of returning nil. Crashing
sounds bad; but in this case, it's the result of a
small bug that you'll discover right away during development.
Therefore, we can remove the lines that check for a nil cell
value since that will never happen.
Once we've got our new cell, we use the indexPath argument
that was passed in to determine which row the table is
requesting a cell for, and then use that row value to grab
the correct dictionary for the requested row. Remember that the
dictionary has two key/value pairs: one with name and another
with color:
NSDictionary *rowData = self.computers[indexPath.row];](https://image.slidesharecdn.com/beginningios7developmentexploringtheiossdkbyjack-221101013452-a078f068/75/Beginning-iOS-7-Development-Exploring-the-iOS-SDKby-Jack-docx-35-2048.jpg)
![Now, all that's left to do is populate the cell with data from the
chosen row, using the properties we defined in our subclass:
cell.name = rowData[@"Name"];
cell.color = rowData[@"Color"];
Compile and run your application. You should see a table of
rows, each with two lines of data, as shown earlier in Figure 8-
16.
Being able to add views to a table view cell provides a lot more
flexibility than using the standard table view cell alone, but it
can get a little tedious creating, positioning, and
adding all the subviews programmatically. Gosh, it sure would
be nice if we could design the table view cell graphically, using
Xcode's GUI editing tools. Well, we're in luck. As we
mentioned earlier, you can use Interface Builder to design your
table view cells, and then simply load the views from a nib file
when you create a new cell.
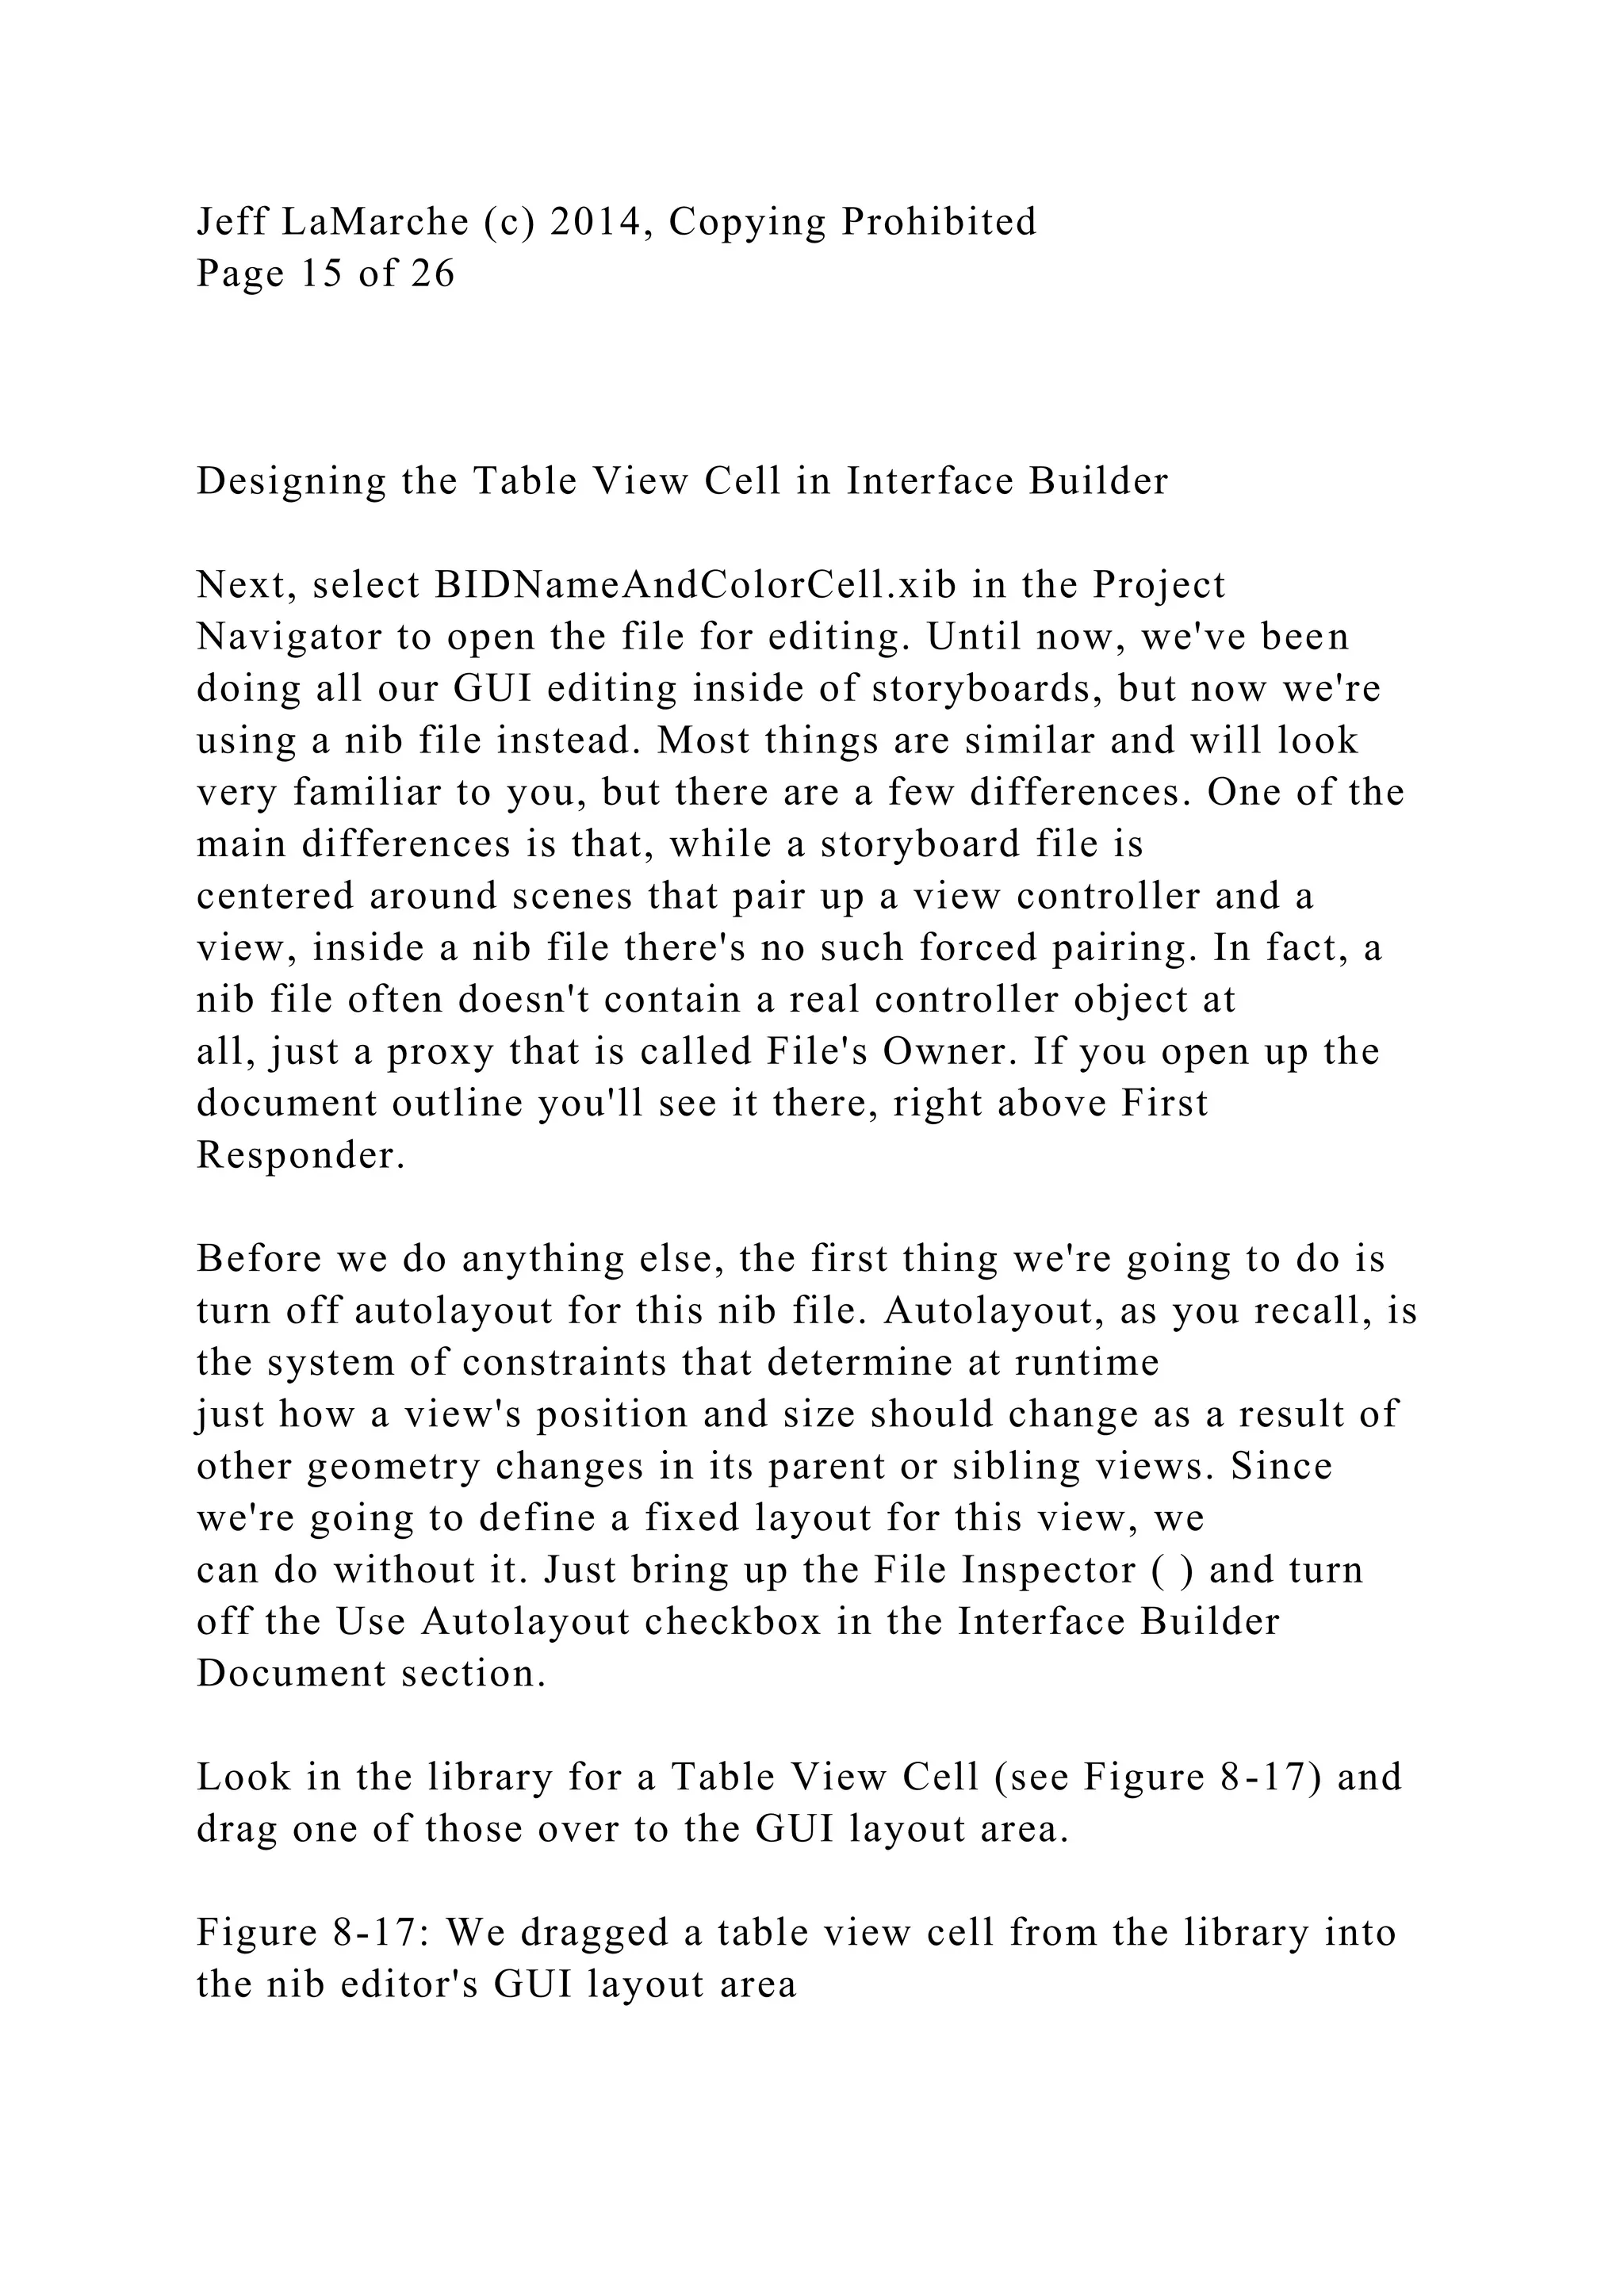
Loading a UITableViewCell from a Nib
We're going to re-create that same two-line interface we just
built in code using the visual layout capabilities that Xcode
provides in Interface Builder. To do this, we'll create a
new nib file that will contain the table view cell and lay out its
views using Interface Builder. Then, when we need a table view
cell to represent a row, instead of creating a
standard table view cell, we'll just load the nib file and use the
properties we already defined in our cell class to set the name
and color. In addition to using Interface Builder's
visual layout, we'll also simplify our code in a few other places.
First, we'll make a few changes to the BIDNameAndColorCell
class, inside BIDNameAndColorCell.m. The first step is to mark
up our properties as outlets, so we can use them in](https://image.slidesharecdn.com/beginningios7developmentexploringtheiossdkbyjack-221101013452-a078f068/75/Beginning-iOS-7-Development-Exploring-the-iOS-SDKby-Jack-docx-36-2048.jpg)
![cell isn't just a normal cell, but our special subclass. Otherwise,
we wouldn't be able to connect our outlets to the
relevant labels. Select the table view cell, bring up the Identity
Inspector by pressing , and choose BIDNameAndColorCell from
the Class control.
Next, switch to the Connections Inspector ( ), where you'll see
the colorLabel and nameLabel outlets. Drag each of them to its
corresponding label in the GUI.
Using the New Table View Cell
Beginning iOS 7 Development: Exploring the iOS SDK
Reprinted for ZU7S5/5738005, American Public University
System Apress, Jack Nutting, Fredrik Olsson, David Mark, and
Jeff LaMarche (c) 2014, Copying Prohibited
Page 17 of 26
To use the cell we designed, we just need to make a few pretty
simple changes to the viewDidLoad: method in
BIDViewController.m:
- (void)viewDidLoad
{
[super viewDidLoad];
// Do any additional setup after loading the view, typically
from a nib.
self.computers = @[@{@"Name" : @"MacBook Air",
@"Color" : @"Silver"},
@{@"Name" : @"MacBook Pro", @"Color" :
@"Silver"},
@{@"Name" : @"iMac", @"Color" :](https://image.slidesharecdn.com/beginningios7developmentexploringtheiossdkbyjack-221101013452-a078f068/75/Beginning-iOS-7-Development-Exploring-the-iOS-SDKby-Jack-docx-41-2048.jpg)
![@"Silver"},
@{@"Name" : @"Mac Mini", @"Color" :
@"Silver"},
@{@"Name" : @"Mac Pro", @"Color" :
@"Black"}];
UITableView *tableView = (id)[self.view viewWithTag:1];
[tableView registerClass:[BIDNameAndColorCell class]
forCellReuseIdentifier:CellTableIdentifier];
tableView.rowHeight = 65;
UINib *nib = [UINib
nibWithNibName:@"BIDNameAndColorCell" bundle:nil];
[tableView registerNib:nib
forCellReuseIdentifier:CellTableIdentifier];
UIEdgeInsets contentInset = tableView.contentInset;
contentInset.top = 20;
[tableView setContentInset:contentInset];
}
The first change you see is that we tell the table view to use a
row height of 65. We already changed the height of our table
view cell from the default value in CustomCell.xib,
but that's not quite enough. We also need to inform the table
view of that fact; otherwise, it won't leave enough space for the
cell to display properly. The value of the rowHeight
property is used for all rows unless you implement the
tableView:heightForRowAtIndexPath: delegate method. The
delegate method allows individual heights for each row, but
that's not what we're interested in right now, so we use the
rowHeight property to quickly change all row heights.
Just as it can associate a class with a reuse identifier, a table
view can keep track of which nib files are meant to be
associated with particular reuse identifiers. This allows you
to register cells for each row type you have using classes or nib](https://image.slidesharecdn.com/beginningios7developmentexploringtheiossdkbyjack-221101013452-a078f068/75/Beginning-iOS-7-Development-Exploring-the-iOS-SDKby-Jack-docx-42-2048.jpg)
![- (void)viewDidLoad
{
[super viewDidLoad];
// Do any additional setup after loading the view, typically
from a nib.
UITableView *tableView = (id)[self.view viewWithTag:1];
[tableView registerClass:[UITableViewCell class]
forCellReuseIdentifier:SectionsTableIdentifier];
NSString *path = [[NSBundle mainBundle]
pathForResource:@"sortednames"
ofType:@"plist"];
self.names = [NSDictionary
dictionaryWithContentsOfFile:path];
self.keys = [[self.names allKeys] sortedArrayUsingSelector:
@selector(compare:)];
}
Now add the following code at the end of the file, just above the
@end declaration:
#pragma mark -
#pragma mark Table View Data Source Methods
- (NSInteger)numberOfSectionsInTableView:(UITableView
*)tableView
{
return [self.keys count];
}
- (NSInteger)tableView:(UITableView *)tableView
numberOfRowsInSection:(NSInteger)section
{
NSString *key = self.keys[section];
NSArray *nameSection = self.names[key];](https://image.slidesharecdn.com/beginningios7developmentexploringtheiossdkbyjack-221101013452-a078f068/75/Beginning-iOS-7-Development-Exploring-the-iOS-SDKby-Jack-docx-46-2048.jpg)
![return [nameSection count];
}
- (NSString *)tableView:(UITableView *)tableView
titleForHeaderInSection:(NSInteger)section
{
return self.keys[section];
}
- (UITableViewCell *)tableView:(UITableView *)tableView
cellForRowAtIndexPath:(NSIndexPath *)indexPath
{
Beginning iOS 7 Development: Exploring the iOS SDK
Reprinted for ZU7S5/5738005, American Public University
System Apress, Jack Nutting, Fredrik Olsson, David Mark, and
Jeff LaMarche (c) 2014, Copying Prohibited
Page 19 of 26
UITableViewCell *cell =
[tableView
dequeueReusableCellWithIdentifier:SectionsTableIdentifier
forIndexPath:indexPath];
NSString *key = self.keys[indexPath.section];
NSArray *nameSection = self.names[key];
cell.textLabel.text = nameSection[indexPath.row];
return cell;
}
@end
Most of this isn't too different from what you've seen before. In](https://image.slidesharecdn.com/beginningios7developmentexploringtheiossdkbyjack-221101013452-a078f068/75/Beginning-iOS-7-Development-Exploring-the-iOS-SDKby-Jack-docx-47-2048.jpg)
![the class extension at the top, we added property declarations
for both an NSDictionary and an NSArray. The
dictionary will hold all of our data, while the array will hold the
sections sorted in alphabetical order. In the viewDidLoad
method, we registered the default table view cell class
that should be displayed for each row, using our declared
identifier. After that, we created an NSDictionary instance from
the property list we added to our project and assigned
it to the names property. Next we grabbed all the keys from that
dictionary and sorted them to give us an ordered NSArray with
all the key values in the dictionary in alphabetical
order. Remember that the NSDictionary uses the letters of the
alphabet as its keys, so this array will have 26 letters sorted
from A to Z, and we'll use the array to help us keep
track of the sections.
You might notice one thing we didn't do this time that we did
for the previous table view examples: we didn't set a special
offset for the top edge of the table. That's because,
when you're using a grouped table view (as we are), Apple
automatically shifts everything down a little bit, so you don't
need to worry about the initial table view contents
interfering with the status bar.
Scroll down to the data source methods. The first one we added
to our class specifies the number of sections. We didn't
implement this method in the earlier examples because
we were happy with the default setting of 1. This time, we're
telling the table view that we have one section for each key in
our dictionary:
- (NSInteger)numberOfSectionsInTableView:(UITableView
*)tableView
{
return [self.keys count];
}](https://image.slidesharecdn.com/beginningios7developmentexploringtheiossdkbyjack-221101013452-a078f068/75/Beginning-iOS-7-Development-Exploring-the-iOS-SDKby-Jack-docx-48-2048.jpg)
![The next method calculates the number of rows in a specific
section. In the previous example, we had only one section, so
we just returned the number of rows in our array. This
time, we need to break it down by section. We can do this by
retrieving the array that corresponds to the section in question
and returning the count from that array:
- (NSInteger)tableView:(UITableView *)tableView
numberOfRowsInSection:(NSInteger)section
{
NSString *key = self.keys[section];
NSArray *nameSection = self.names[key];
return [nameSection count];
}
The method tableView:titleForHeaderInSection allows you to
specify an optional header value for each section, and we
simply return the letter for this group:
- (NSString *)tableView:(UITableView *)tableView
titleForHeaderInSection:(NSInteger)section
{
return self.keys[section];
}
In our tableView:cellForRowAtIndexPath: method, we need to
extract both the section key and the names array using the
section and row properties from the index path, andIn our
tableView:cellForRowAtIndexPath: method, we need to extract
both the section key and the names array using the section and
row properties from the index path, and
then use those to determine which value to use. The section will
tell us which array to pull out of the names dictionary, and then
we can use the row to figure out which value from
that array to use. Everything else in that method is basically the](https://image.slidesharecdn.com/beginningios7developmentexploringtheiossdkbyjack-221101013452-a078f068/75/Beginning-iOS-7-Development-Exploring-the-iOS-SDKby-Jack-docx-49-2048.jpg)
![[super viewDidLoad];
// Do any additional setup after loading the view, typically
from a nib.
UITableView *tableView = (id)[self.view viewWithTag:1];
[tableView registerClass:[UITableViewCell class]
forCellReuseIdentifier:SectionsTableIdentifier];
NSString *path = [[NSBundle mainBundle]
pathForResource:@"sortednames"
ofType:@"plist"];
self.names = [NSDictionary
dictionaryWithContentsOfFile:path];
self.keys = [[self.names allKeys] sortedArrayUsingSelector:
@selector(compare:)];
if (tableView.style == UITableViewStylePlain) {
UIEdgeInsets contentInset = tableView.contentInset;
contentInset.top = 20;
[tableView setContentInset:contentInset];
}
}
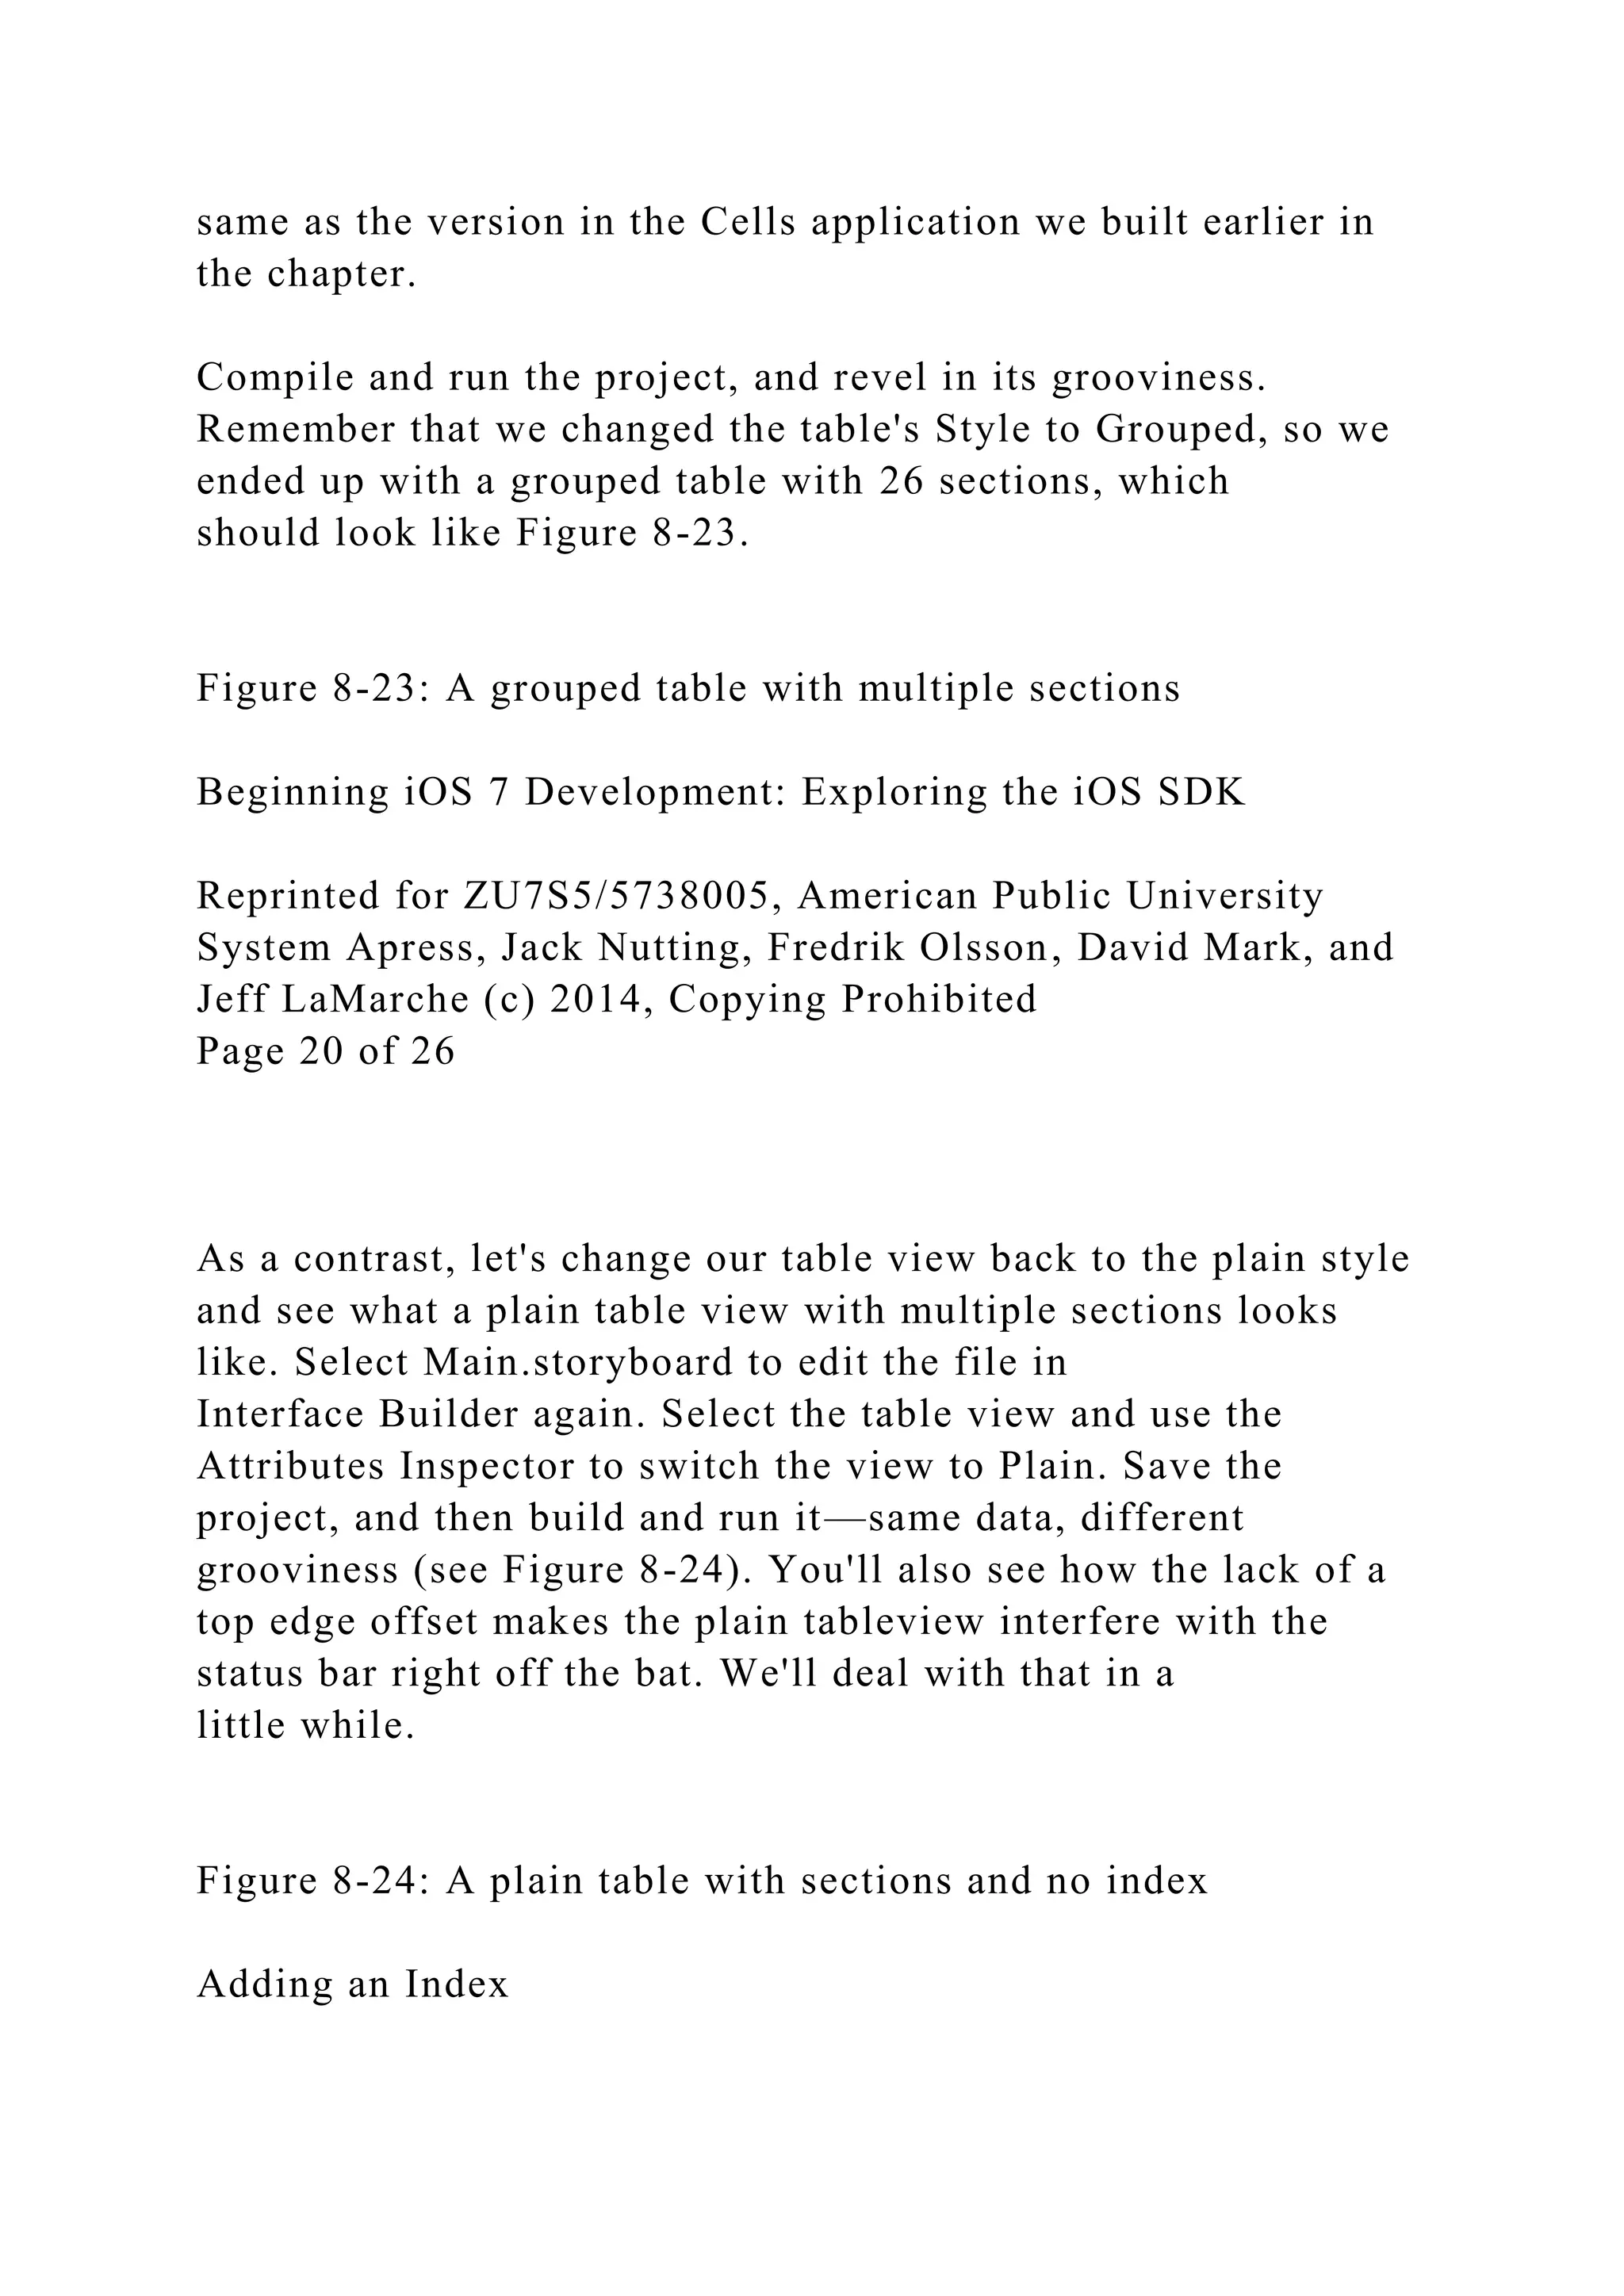
Compile and run the app again, and you'll have yourself a nice
index (see Figure 8-25).
Beginning iOS 7 Development: Exploring the iOS SDK
Reprinted for ZU7S5/5738005, American Public University
System Apress, Jack Nutting, Fredrik Olsson, David Mark, and
Jeff LaMarche (c) 2014, Copying Prohibited
Page 21 of 26](https://image.slidesharecdn.com/beginningios7developmentexploringtheiossdkbyjack-221101013452-a078f068/75/Beginning-iOS-7-Development-Exploring-the-iOS-SDKby-Jack-docx-52-2048.jpg)
![Figure 8-25: The table view with an index
Reducing Status Bar Interference
When trying this out, you're bound to notice one glaring
problem: even though the table view's top edge is offset, as
soon as you start scrolling, the contents of the table view
start interfering with the status bar. This has actually been a
problem with all the table view apps we've built so far. But now
that there's an opaque section header always stuck
to the top of the display, it's even more jarring. As soon as you
start scrolling, text starts rolling past the section header and
sliding up behind the status bar. This is really ugly!
In the next chapter, you'll see how Apple deals with this
situation in a nice, automatic way using something called a
Navigation Controller; but for the moment we're doing
without, so we're going to look at a simple way to make this a
little easier on the eyes. The following addition to viewDidLoad
will create a simple UIView instance the same size
as the status bar, make it white but mostly transparent, and add
it to our view. Since we only want to do this for a non-grouped
table view, we put it inside the if section we
added recently:
if (tableView.style == UITableViewStylePlain) {
UIEdgeInsets contentInset = tableView.contentInset;
contentInset.top = 20;
[tableView setContentInset:contentInset];
UIView *barBackground = [[UIView alloc]
initWithFrame:CGRectMake(0, 0, 320, 20)];
barBackground.backgroundColor = [UIColor
colorWithWhite:1.0 alpha:0.9];
[self.view addSubview:barBackground];
}](https://image.slidesharecdn.com/beginningios7developmentexploringtheiossdkbyjack-221101013452-a078f068/75/Beginning-iOS-7-Development-Exploring-the-iOS-SDKby-Jack-docx-53-2048.jpg)
![protocol:
#import <UIKit/UIKit.h>
@interface BIDViewController : UIViewController
<UITableViewDataSource, UITableViewDelegate,
UISearchDisplayDelegate>
@end
Next, we need to add two instance variables to our view
controller, one to hold a list of only the names matching our
filtered search and one for the UISearchDisplayController.
Add this code to BIDViewController.m:
@implementation BIDViewController {
NSMutableArray *filteredNames;
UISearchDisplayController *searchController;
}
Next, we need to make another set of changes at the end of
viewDidLoad, as shown here:
- (void)viewDidLoad
{
[super viewDidLoad];
// Do any additional setup after loading the view, typically
from a nib.
UITableView *tableView = (id)[self.view viewWithTag:1];
[tableView registerClass:[UITableViewCell class]
forCellReuseIdentifier:SectionsTableIdentifier];
NSString *path = [[NSBundle mainBundle]
pathForResource:@"sortednames"
ofType:@"plist"];
self.names = [NSDictionary](https://image.slidesharecdn.com/beginningios7developmentexploringtheiossdkbyjack-221101013452-a078f068/75/Beginning-iOS-7-Development-Exploring-the-iOS-SDKby-Jack-docx-55-2048.jpg)
![dictionaryWithContentsOfFile:path];
self.keys = [[self.names allKeys] sortedArrayUsingSelector:
@selector(compare:)];
if (tableView.style == UITableViewStylePlain) {
UIEdgeInsets contentInset = tableView.contentInset;
contentInset.top = 20;
[tableView setContentInset:contentInset];
UIView *barBackground = [[UIView alloc]
initWithFrame:CGRectMake(0, 0, 320, 20)];
barBackground.backgroundColor = [UIColor
colorWithWhite:1.0 alpha:0.9];
[self.view addSubview:barBackground];
}
filteredNames = [NSMutableArray array];
UISearchBar *searchBar = [[UISearchBar alloc]
initWithFrame:CGRectMake(0, 0, 320,
44)];
tableView.tableHeaderView = searchBar;
searchController = [[UISearchDisplayController alloc]
initWithSearchBar:searchBar
contentsController:self];
searchController.delegate = self;
searchController.searchResultsDataSource = self;
}
First, we initialize our filteredNames to an empty array. Later,
that variable will be used to contain the filtered results based on
the user's search criteria. After that, we create a
UISearchBar and add it as a header view to the table. The
header view acts as a special row that is always displayed at the
top of the table. Next we create a search display
controller for showing the contents of a search. We initialize it](https://image.slidesharecdn.com/beginningios7developmentexploringtheiossdkbyjack-221101013452-a078f068/75/Beginning-iOS-7-Development-Exploring-the-iOS-SDKby-Jack-docx-56-2048.jpg)
![using the search bar for input and the view controller itself as
owner. We also set our view controller as the
delegate for the search display controller to act on changes to
the search criteria. Finally, we display the search results by
setting our view controller as the data source for the
search results.
Beginning iOS 7 Development: Exploring the iOS SDK
Reprinted for ZU7S5/5738005, American Public University
System Apress, Jack Nutting, Fredrik Olsson, David Mark, and
Jeff LaMarche (c) 2014, Copying Prohibited
Page 23 of 26
The search display controller will provide its own table, but we
are responsible for providing it with table view cells to display.
We need to register a table view cell class to create
in the
searchDisplayController:didLoadSearchResultsTableView:
delegate method. Add this code just above the @end
declaration:
- (void)searchDisplayController:(UISearchDisplayController
*)controller
didLoadSearchResultsTableView:(UITableView *)tableView
{
[tableView registerClass:[UITableViewCell class]
forCellReuseIdentifier:SectionsTableIdentifier];
}
Both the search display controller and our own table will use
our view controller as the data source to populate a table view,
calling on the same data source methods. If the
caller is our own table we should act just as we do now; and if](https://image.slidesharecdn.com/beginningios7developmentexploringtheiossdkbyjack-221101013452-a078f068/75/Beginning-iOS-7-Development-Exploring-the-iOS-SDKby-Jack-docx-57-2048.jpg)
![the caller is the table for the search display controllers, we
should instead display the filtered names. We need to
use the table's tag property to determine which table is calling
us, and then do the right thing. Update all data source methods
like this:
- (NSInteger)numberOfSectionsInTableView:(UITableView
*)tableView
{
if (tableView.tag == 1) {
return [self.keys count];
} else {
return 1;
}
}
- (NSInteger)tableView:(UITableView *)tableView
numberOfRowsInSection:(NSInteger)section
{
if (tableView.tag == 1) {
NSString *key = self.keys[section];
NSArray *nameSection = self.names[key];
return [nameSection count];
} else {
return [filteredNames count];
}
}
- (NSString *)tableView:(UITableView *)tableView
titleForHeaderInSection:(NSInteger)section
{
if (tableView.tag == 1) {
return self.keys[section];
} else {
return nil;
}](https://image.slidesharecdn.com/beginningios7developmentexploringtheiossdkbyjack-221101013452-a078f068/75/Beginning-iOS-7-Development-Exploring-the-iOS-SDKby-Jack-docx-58-2048.jpg)
![}
- (UITableViewCell *)tableView:(UITableView *)tableView
cellForRowAtIndexPath:(NSIndexPath *)indexPath
{
UITableViewCell *cell = [tableView
dequeueReusableCellWithIdentifier:
SectionsTableIdentifier
forIndexPath:indexPath];
if (tableView.tag == 1) {
NSString *key = self.keys[indexPath.section];
NSArray *nameSection = self.names[key];
cell.textLabel.text = nameSection[indexPath.row];
} else {
cell.textLabel.text = filteredNames[indexPath.row];
}
return cell;
}
- (NSArray *)sectionIndexTitlesForTableView:(UITableView
*)tableView
{
if (tableView.tag == 1) {
return self.keys;
} else {
return nil;
}
}
As the last piece of the puzzle, we must respond to changes to
the search criteria made by the user by implementing the
searchDisplayController:shouldReloadTableForSearchString:
delegate method. Add this code just before the @end
declaration:](https://image.slidesharecdn.com/beginningios7developmentexploringtheiossdkbyjack-221101013452-a078f068/75/Beginning-iOS-7-Development-Exploring-the-iOS-SDKby-Jack-docx-59-2048.jpg)
![- (BOOL)searchDisplayController:(UISearchDisplayController
*)controller
shouldReloadTableForSearchString:(NSString *)searchString
{
[filteredNames removeAllObjects];
if (searchString.length > 0) {
NSPredicate *predicate =
[NSPredicate
predicateWithBlock:^BOOL(NSString *name,
NSDictionary *b) {
NSRange range = [name rangeOfString:searchString
options:NSCaseInsensitiveSearch];
return range.location != NSNotFound;
}];
for (NSString *key in self.keys) {
NSArray *matches = [self.names[key]
filteredArrayUsingPredicate: predicate];
[filteredNames addObjectsFromArray:matches];
}
}
return YES;
}
This delegate method is called whenever the user edits the
search criteria in the search bar to ask if the display of matching
results should be reloaded. We always return "yes"
to reload for now, but we could add more logic to reload the
result table only if the new search criteria results in an actual
change.
First, we clear any previous search result:
[filteredNames removeAllObjects];
Next, we check that the search criteria string is not empty. Do](https://image.slidesharecdn.com/beginningios7developmentexploringtheiossdkbyjack-221101013452-a078f068/75/Beginning-iOS-7-Development-Exploring-the-iOS-SDKby-Jack-docx-60-2048.jpg)
![not display any matching results for an empty search string:
Beginning iOS 7 Development: Exploring the iOS SDK
Reprinted for ZU7S5/5738005, American Public University
System Apress, Jack Nutting, Fredrik Olsson, David Mark, and
Jeff LaMarche (c) 2014, Copying Prohibited
Page 24 of 26
if (searchString.length > 0) {
Now we define a predicate for matching names against the
search string. A predicate is an object that tests an input value,
returning "yes" if the value matches and "no" if there's
no match. Our test is to search for the range of the search string
in a name. If the start of the search string is found, we have a
match:
NSPredicate *predicate =
[NSPredicate
predicateWithBlock:^BOOL(NSString *name,
NSDictionary *b) {
NSRange range = [name rangeOfString:searchString
options:NSCaseInsensitiveSearch];
return range.location != NSNotFound;
}];
Finally, we iterate over all the keys. For each key, we use the
predicate to get a filtered array of matching names that we add
to the filtered names array:
for (NSString *key in self.keys) {
NSArray *matches = [self.names[key]
filteredArrayUsingPredicate:predicate];](https://image.slidesharecdn.com/beginningios7developmentexploringtheiossdkbyjack-221101013452-a078f068/75/Beginning-iOS-7-Development-Exploring-the-iOS-SDKby-Jack-docx-61-2048.jpg)
![[filteredNames addObjectsFromArray:matches];
}
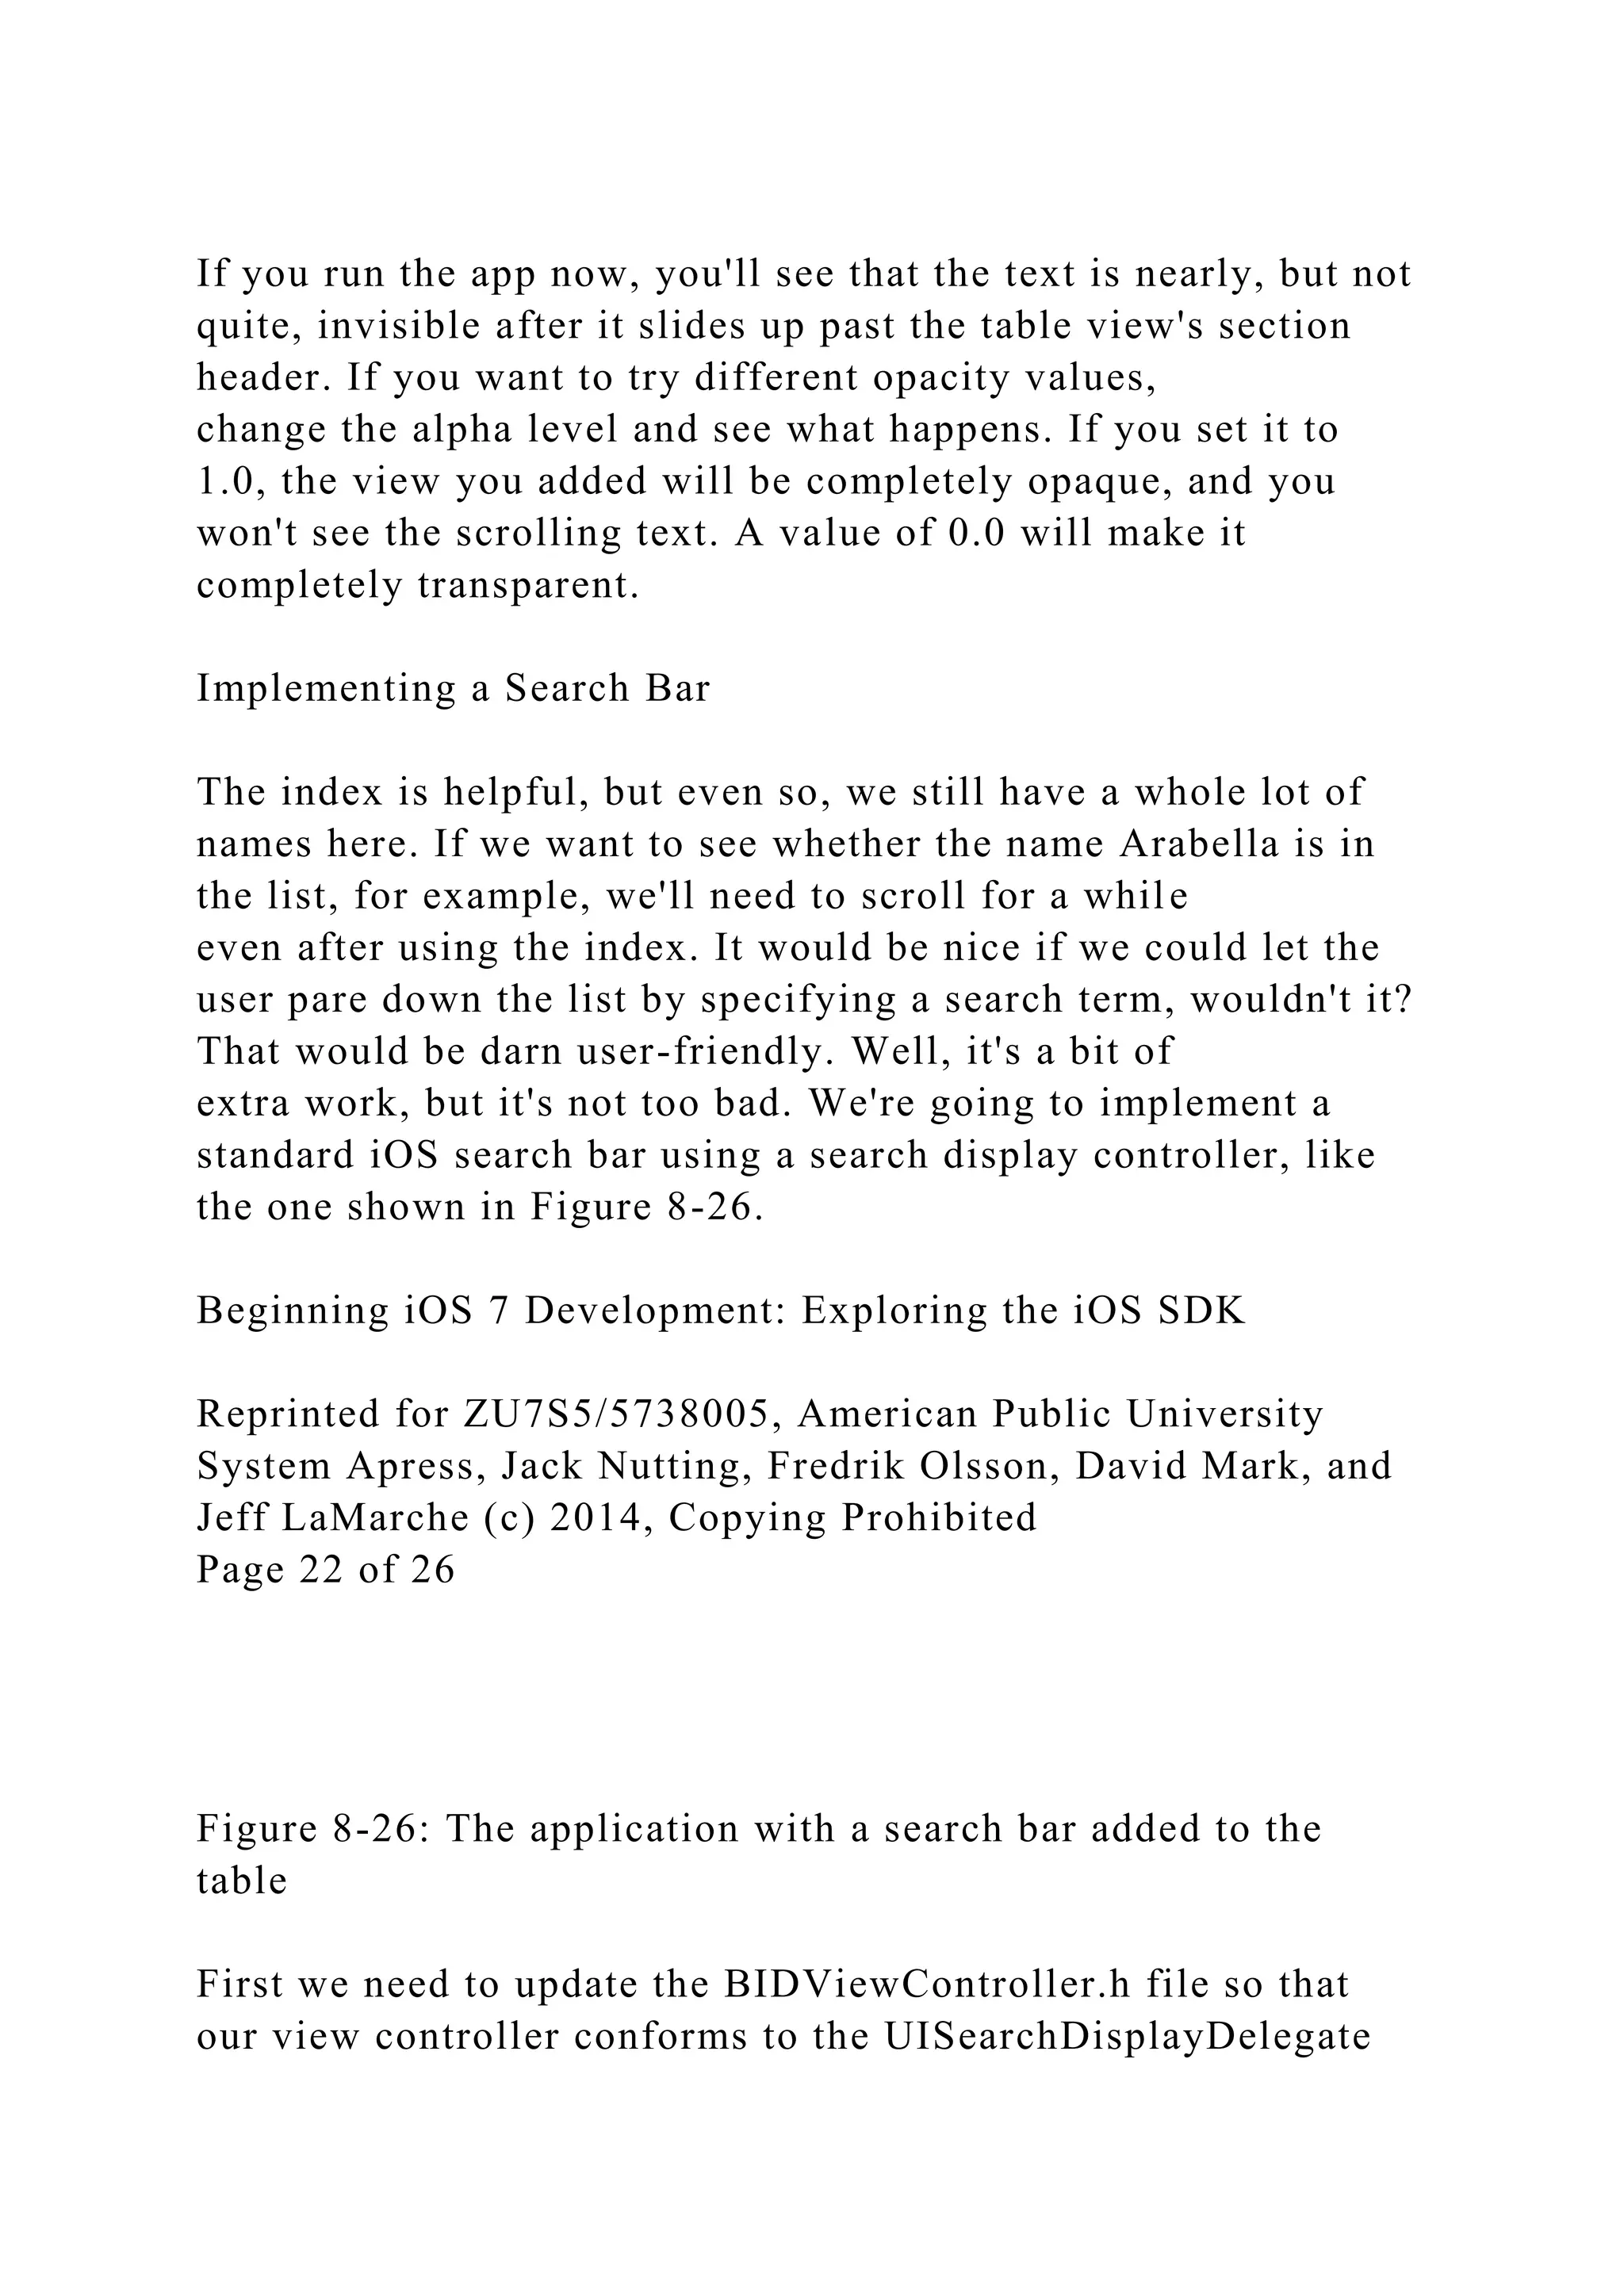
You can now run the app and try to filter the names with a
result like the one shown in Figure 8-27.
Figure 8-27: The application with a search bar added to the
table. Note that before tapping the search bar, it appears
truncated on the right side of the screen
As you can see, there is on visual "glitch" here: the search bar
seems to be mysteriously chopped off near the right edge. In
fact, what you're seeing is the upper end of the
vertical section index bar on the right. Our search bar is a part
of the table view (since we set it up to be the header view).
When a table view shows a section index, it
automatically squashes all its other views in from the right.
Since the default section index background color is white, it
pretty much blends in with the rows of the table view,
which makes its appearance next to the search bar stick out like
a sore thumb!
To remedy this, let's set some colors on the section index. We'll
use a contrasting color to make it stick out like a sore thumb the
whole way up and down the table, so that users
can see what's going on more clearly. Just add these lines to the
bottom of the viewDidLoad method:
tableView.sectionIndexBackgroundColor = [UIColor
blackColor];
tableView.sectionIndexTrackingBackgroundColor = [UIColor
darkGrayColor];
tableView.sectionIndexColor = [UIColor whiteColor];
First, we set the main background color for the section index,](https://image.slidesharecdn.com/beginningios7developmentexploringtheiossdkbyjack-221101013452-a078f068/75/Beginning-iOS-7-Development-Exploring-the-iOS-SDKby-Jack-docx-62-2048.jpg)


![three credible references. Students will base research on facts
from credible sources. (Examples
of non-credible sources include the dictionary, Wikipedia, and
about.com.) Per the APA, “each
reference cited in text must appear in the reference list, and
each entry in the reference list must
be cited in text [emphasis added]” (p.174).
9. Similarity index provided from Turnitin cannot exceed 25%,
excluding references.
10. Write the essay in the third person (i.e., use he, she, they,
them, his, her . . . instead of I, me,
my, we, our, us, let’s, you, your…).
11. The essay must follow the model described in required
reading 2.01a Three-Part
Communications. Recall that there are three parts to an essay:
introduction, body, and
conclusion. For the body, use main points: Problem, Discussion,
and Recommendation.
Remember to include a transition sentence between main points.
The essay MUST use the main
points as described and in the order presented below.
A. Main point (1): Problem. States the problem the student
identified. The problem lays](https://image.slidesharecdn.com/beginningios7developmentexploringtheiossdkbyjack-221101013452-a078f068/75/Beginning-iOS-7-Development-Exploring-the-iOS-SDKby-Jack-docx-67-2048.jpg)
![present.
Similarity Index exceeds authorized limit, minus
31 points.
Similarity Index Limit:
Similarity Index
Results:
Total points deducted
SCORE
Content 40%
Organization 25%
Style/Mechanics 35%
Similarity Index Points Lost
Final Score 100%
FA: Student:
RateName: CommentsRow1: CommentsRow1_2:
CommentsRow1_3: Lesson: [30]Combo Box2: [Blue]Date: Key
elements 5: OffKey elements 4: OffKey elements 3: OffKey
elements 2: OffContent 5: OffContent 4: OffContent 3:
OffContent 2: OffUnderstanding 5: OffUnderstanding 4:
OffUnderstanding 3: OffUnderstanding 2: OffDetails 5:
OffDetails 4: OffDetails 3: OffDetails 2: OffResearch 5:
OffResearch 4: OffResearch 3: OffResearch 2: OffOpinions 5:](https://image.slidesharecdn.com/beginningios7developmentexploringtheiossdkbyjack-221101013452-a078f068/75/Beginning-iOS-7-Development-Exploring-the-iOS-SDKby-Jack-docx-73-2048.jpg)