Download to read offline
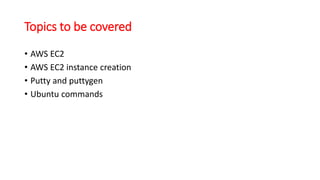

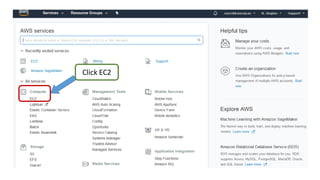
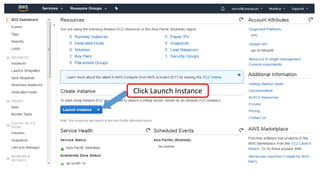
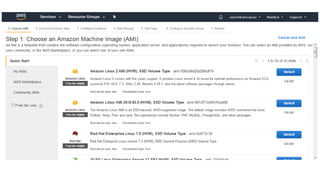
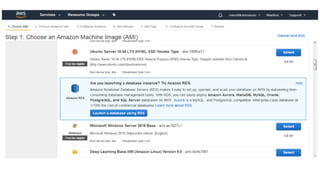
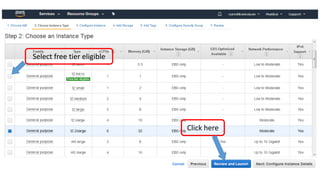
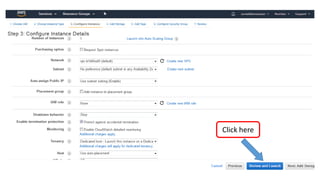

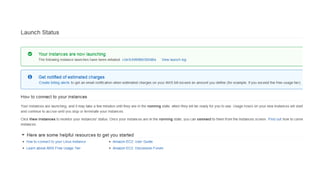
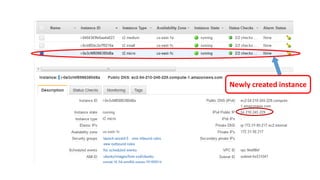

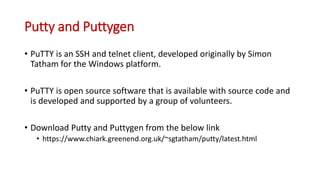
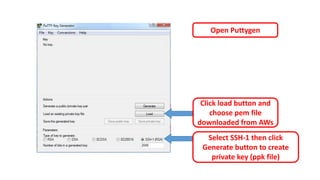
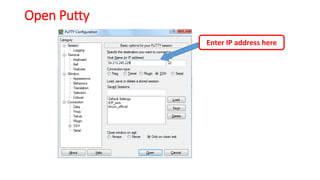
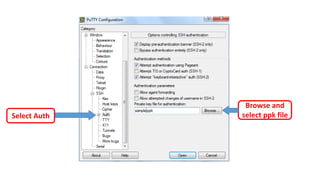
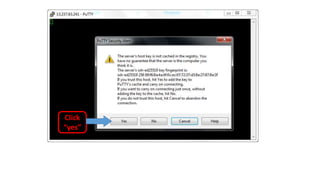

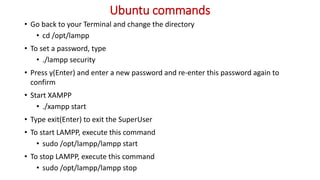
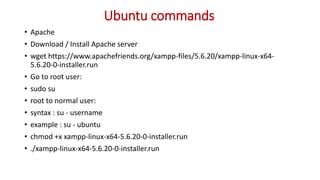


The document discusses Amazon Web Services (AWS) Elastic Compute Cloud (EC2). It covers how to create and configure an EC2 instance on AWS, download and use Putty and Puttygen to connect to the instance securely, and provides commands to use and manage software like LAMPP on the Ubuntu server instance.