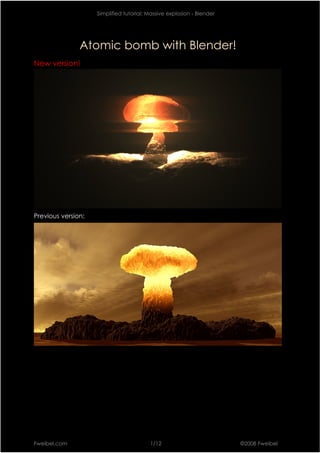
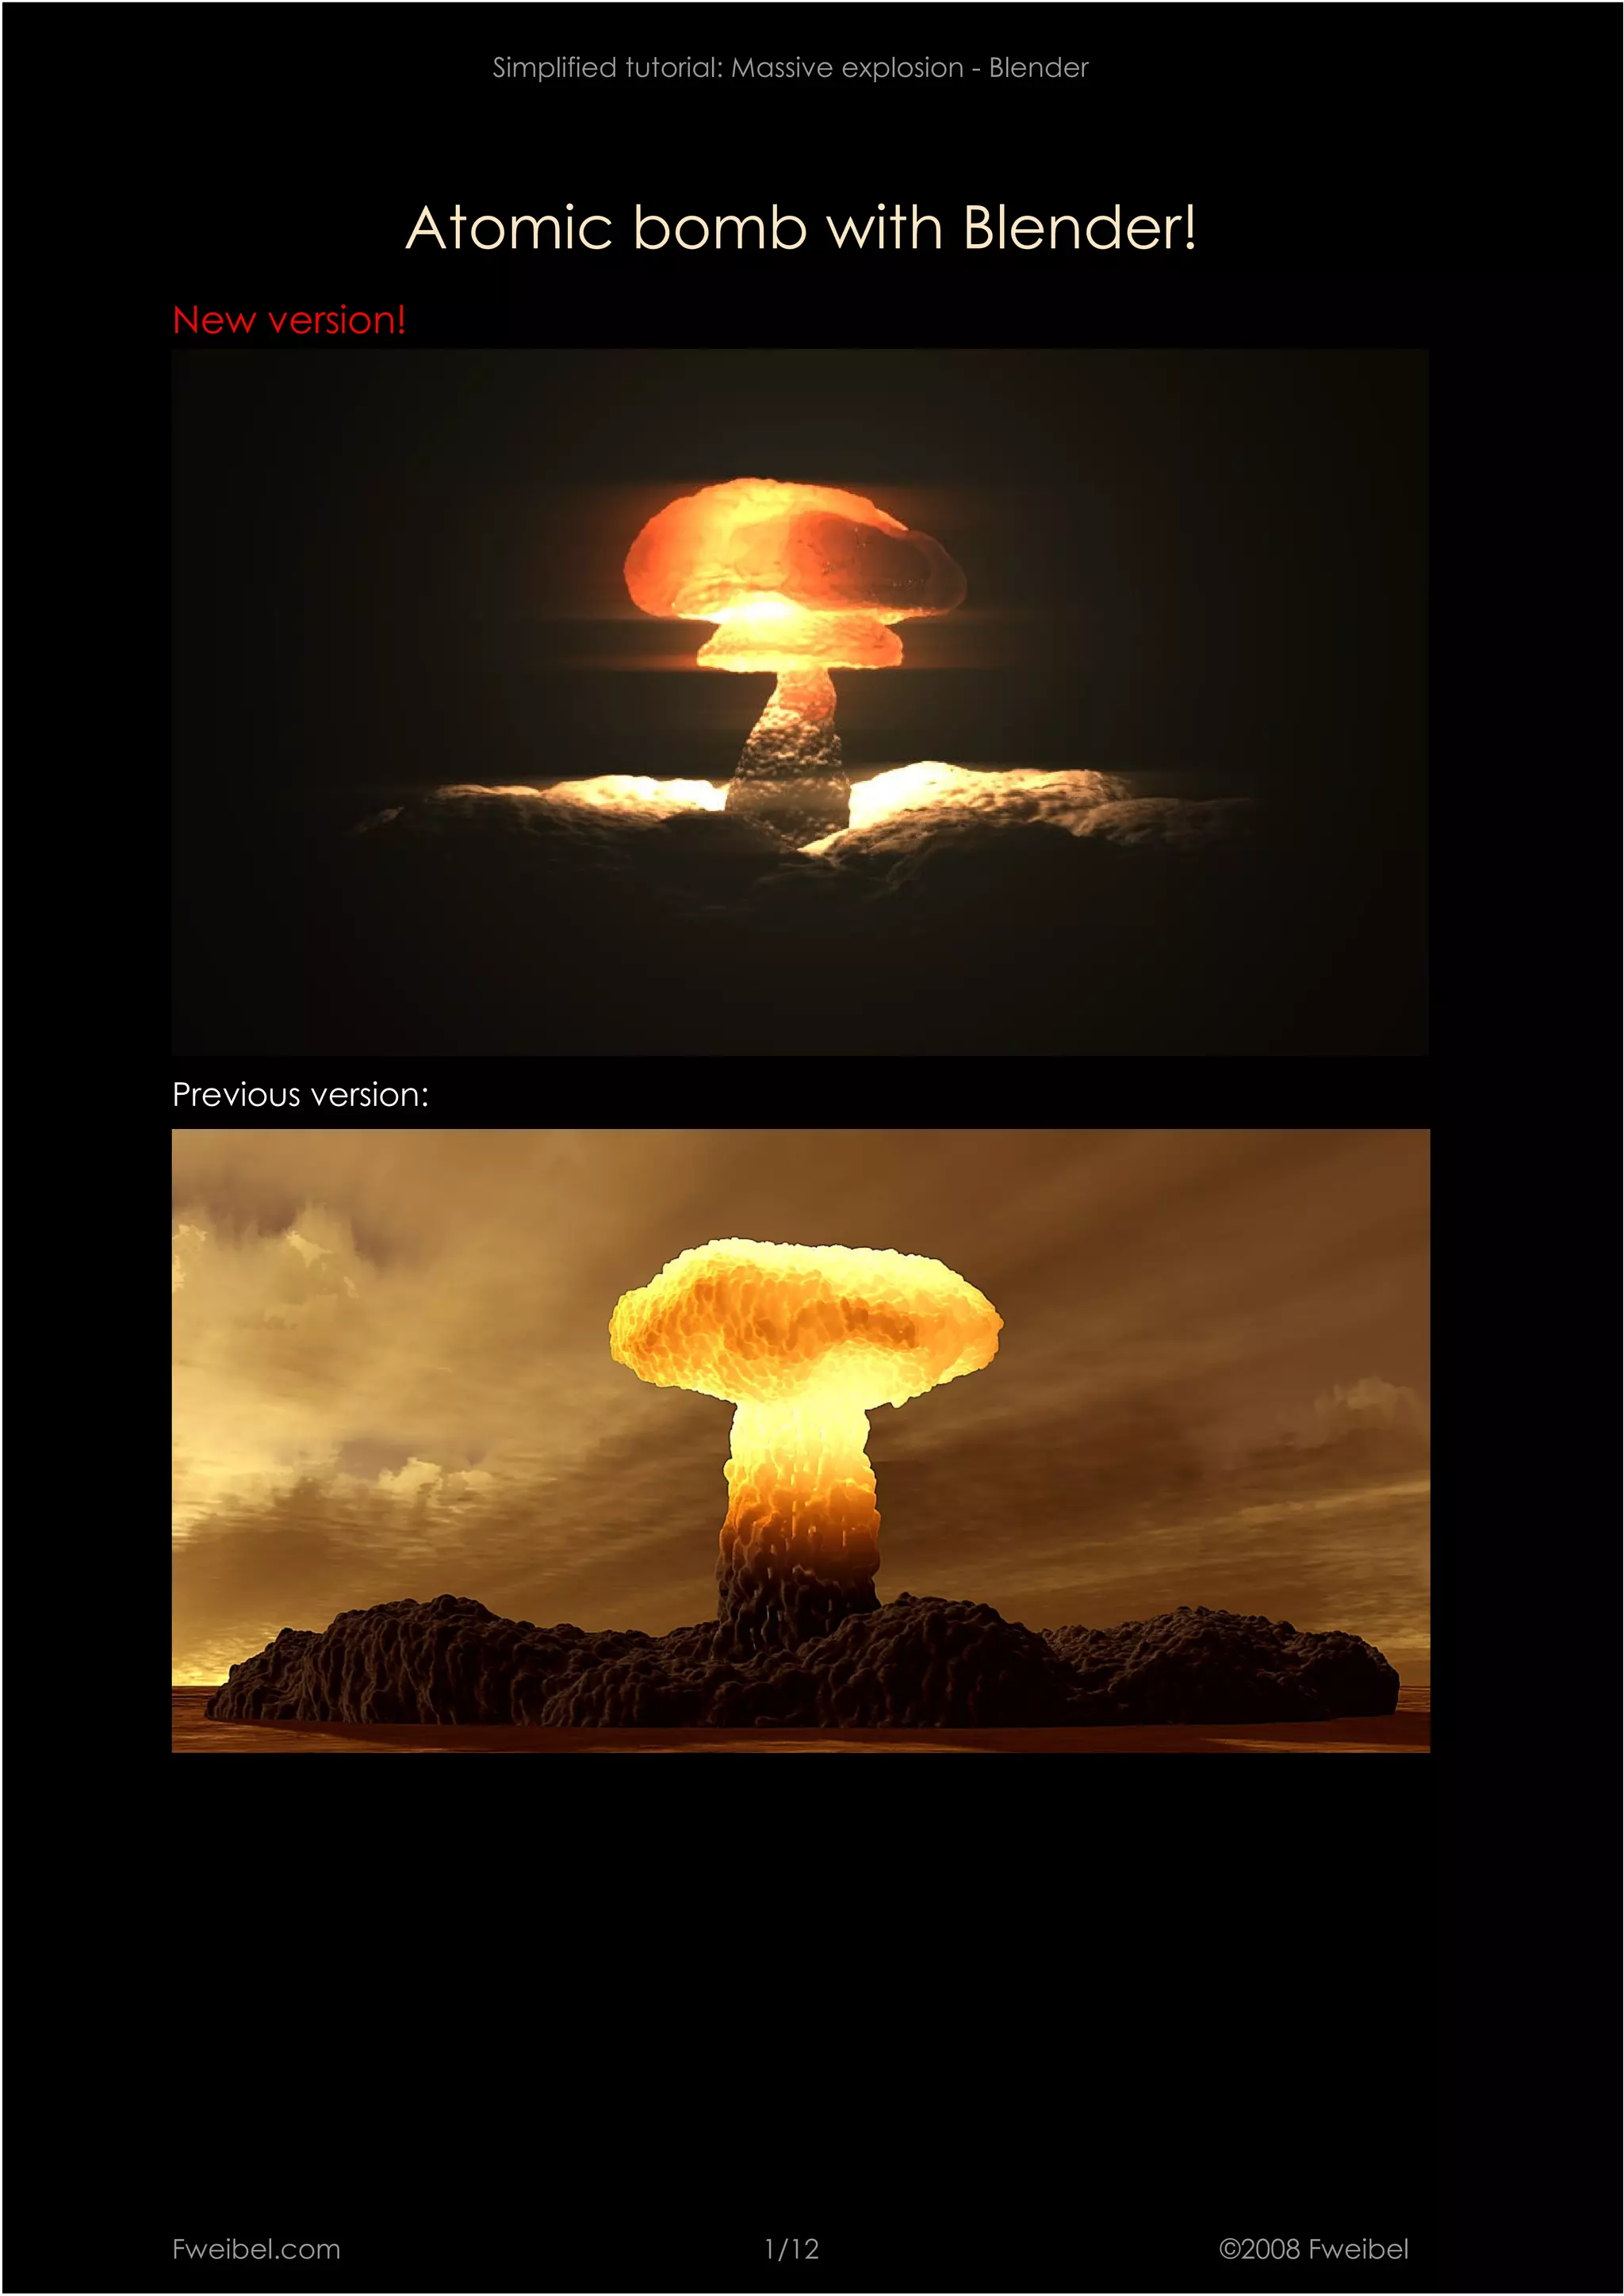
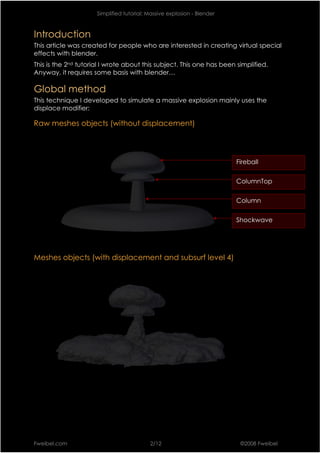
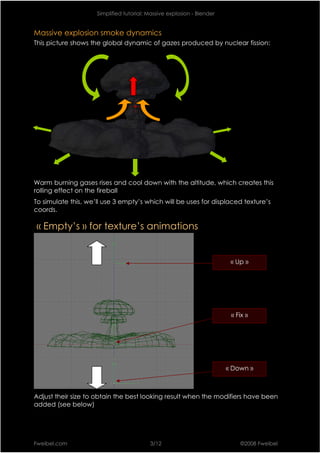
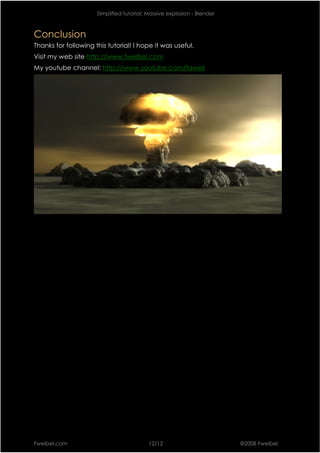
Simplified tutorial: Massive explosion - Blender


               Atomic bomb with Blender!
New version!


Previous version:


Fweibel.com                              1/12                          ©2008 Fweibel
Simplified tutorial: Massive explosion - Blender


Introduction
This article was created for people who are interested in creating virtual special
effects with blender.
This is the 2nd tutorial I wrote about this subject. This one has been simplified.
Anyway, it requires some basis with blender…

Global method
This technique I developed to simulate a massive explosion mainly uses the
displace modifier:

Raw meshes objects (without displacement)


                                                                         Fireball

                                                                         ColumnTop


                                                                         Column

                                                                         Shockwave


Meshes objects (with displacement and subsurf level 4)


Fweibel.com                                2/12                           ©2008 Fweibel
Simplified tutorial: Massive explosion - Blender


Massive explosion smoke dynamics
This picture shows the global dynamic of gazes produced by nuclear fission:


Warm burning gases rises and cool down with the altitude, which creates this
rolling effect on the fireball
To simulate this, we’ll use 3 empty’s which will be uses for displaced texture’s
coords.

« Empty’s » for texture’s animations


                                                                         « Up »


                                                                         « Fix »


                                                                        « Down »


Adjust their size to obtain the best looking result when the modifiers have been
added (see below)


Fweibel.com                               3/12                              ©2008 Fweibel
Simplified tutorial: Massive explosion - Blender


IPOs: « Up »                                    « Down »


Textures used for displacement
“Displ 1”


Large noise, this texture will be used to change the global aspect of each
mesh objects.

“Displ 2”


“Displ 3”


Small noise, for more details…


Fweibel.com                              4/12                          ©2008 Fweibel
Simplified tutorial: Massive explosion - Blender


Meshes: Shockwave
Animation
IPO keys (scale): Frame 100 : X,Y,Z = 0.0
                  Frame 500 : X, Y = 2.0 ; Z = 1.5


                                                   The shape of the curves are important, it
                                                   will give the damping effect : Quick
                                                   growth at the begining, then slowing
                                                   down
                                                   Note : Shockwave grew less in height
                                                   than in width


Modifiers

                                                   Subsurf : Here you can change the level
                                                   of details.
                                                   High values will increase the render time


                                                   1st deformation level:
                                                   Make the global shape of the object
                                                   changes


                                                   2nd deformation level:
                                                   More detailed. I used vertex groups to
                                                   randomize the displacement level over
                                                   the object’s surface.

                                                   3rd deformation level:
                                                   Also use of vertex groups


Fweibel.com                              5/12                               ©2008 Fweibel
Simplified tutorial: Massive explosion - Blender


Mesh : Column
Animation
IPO keys (scale) : Frame 100 : X,Y,Z = 0.0
                   Frame 500 : X,Y,Z = 1.2


                                                    Curve of Z axis is different. You’ll need to
                                                    adjust it depending of the rising speed
                                                    of the fireball object


Modifiers


                                                    This will give the sensation that hot gases
                                                    are rising up…


Fweibel.com                               6/12                             ©2008 Fweibel
Simplified tutorial: Massive explosion - Blender


Mesh : ColumnTop
Animation
IPO keys (scale) : Frame 100 : X,Y,Z = 0.0
                   Frame 500 : X,Y,Z = 1.5
IPO keys (loc) :   Frame 100 : Z = 0.0
                   Frame 500 : Z= 10.0


                                                    Z loc, to make the object rising


Modifiers


Fweibel.com                               7/12                            ©2008 Fweibel
Simplified tutorial: Massive explosion - Blender


Mesh : Fireball
Animation
IPO keys (scale) : Same than the previous object
IPO keys (loc) :   Same than the previous object


                                                   Same IPO block than the ColumnTop
                                                   object


Modifiers


                                                   Important : For the « rolling » gases effect


Fweibel.com                              8/12                             ©2008 Fweibel
Simplified tutorial: Massive explosion - Blender


Materials :
Here we are going to see how to create the burning in the core of the fireball.
For this we’ll use 4 times ONE texture which will react to the lighting of 4 lamps.
Each texture will be linked to one lamp.


Creating the 4 lamps
Add 4 lamps (renamed to “FireBallL 1,2,3,4”) and linked them to the object
fireball (parent)


                                                    Place the lamps randomly in the
                                                    fireball.


Lamp settings:


Fweibel.com                               9/12                          ©2008 Fweibel
Simplified tutorial: Massive explosion - Blender


                                                    Add an IPO curve for th lamp’s power
                                                    (combustion attenuates)


Material


It will be used for shockwave, column, columnTop and fireball (actually, every
objects…)

Texture


Assign 4 times this texture to the material (in 4 different channels)


Every texture will have a linked lamp :
Tex in channel 1: FIreBallL1, Tex in channel 1: FireBallL2, Tex in channel 1:
FireBallL3, Tex in channel 1: FireBallL4
Activate « Emit » and « TransLu ».


Fweibel.com                               10/12                         ©2008 Fweibel
Simplified tutorial: Massive explosion - Blender


Halos
First, put the 3d cursor on the fireball. Then add 4 spots.
For each one, add a constraint “track to”, to direct them to the active
camera:


The glare comes mainly from the fireball, this is why the spots must be parented
to the object “fireball”.
Spots settings


Add an IPO curve the control the spot size (for the attenuation)


Fweibel.com                               11/12                         ©2008 Fweibel
Simplified tutorial: Massive explosion - Blender


Conclusion
Thanks for following this tutorial! I hope it was useful.
Visit my web site http://www.fweibel.com
My youtube channel: http://www.youtube.com/faweil


Fweibel.com                                12/12                         ©2008 Fweibel

Atomic Bomb Tutorial En

  • 1.
    Simplified tutorial: Massiveexplosion - Blender Atomic bomb with Blender! New version! Previous version: Fweibel.com 1/12 ©2008 Fweibel
  • 2.
    Simplified tutorial: Massiveexplosion - Blender Introduction This article was created for people who are interested in creating virtual special effects with blender. This is the 2nd tutorial I wrote about this subject. This one has been simplified. Anyway, it requires some basis with blender… Global method This technique I developed to simulate a massive explosion mainly uses the displace modifier: Raw meshes objects (without displacement) Fireball ColumnTop Column Shockwave Meshes objects (with displacement and subsurf level 4) Fweibel.com 2/12 ©2008 Fweibel
  • 3.
    Simplified tutorial: Massiveexplosion - Blender Massive explosion smoke dynamics This picture shows the global dynamic of gazes produced by nuclear fission: Warm burning gases rises and cool down with the altitude, which creates this rolling effect on the fireball To simulate this, we’ll use 3 empty’s which will be uses for displaced texture’s coords. « Empty’s » for texture’s animations « Up » « Fix » « Down » Adjust their size to obtain the best looking result when the modifiers have been added (see below) Fweibel.com 3/12 ©2008 Fweibel
  • 4.
    Simplified tutorial: Massiveexplosion - Blender IPOs: « Up » « Down » Textures used for displacement “Displ 1” Large noise, this texture will be used to change the global aspect of each mesh objects. “Displ 2” “Displ 3” Small noise, for more details… Fweibel.com 4/12 ©2008 Fweibel
  • 5.
    Simplified tutorial: Massiveexplosion - Blender Meshes: Shockwave Animation IPO keys (scale): Frame 100 : X,Y,Z = 0.0 Frame 500 : X, Y = 2.0 ; Z = 1.5 The shape of the curves are important, it will give the damping effect : Quick growth at the begining, then slowing down Note : Shockwave grew less in height than in width Modifiers Subsurf : Here you can change the level of details. High values will increase the render time 1st deformation level: Make the global shape of the object changes 2nd deformation level: More detailed. I used vertex groups to randomize the displacement level over the object’s surface. 3rd deformation level: Also use of vertex groups Fweibel.com 5/12 ©2008 Fweibel
  • 6.
    Simplified tutorial: Massiveexplosion - Blender Mesh : Column Animation IPO keys (scale) : Frame 100 : X,Y,Z = 0.0 Frame 500 : X,Y,Z = 1.2 Curve of Z axis is different. You’ll need to adjust it depending of the rising speed of the fireball object Modifiers This will give the sensation that hot gases are rising up… Fweibel.com 6/12 ©2008 Fweibel
  • 7.
    Simplified tutorial: Massiveexplosion - Blender Mesh : ColumnTop Animation IPO keys (scale) : Frame 100 : X,Y,Z = 0.0 Frame 500 : X,Y,Z = 1.5 IPO keys (loc) : Frame 100 : Z = 0.0 Frame 500 : Z= 10.0 Z loc, to make the object rising Modifiers Fweibel.com 7/12 ©2008 Fweibel
  • 8.
    Simplified tutorial: Massiveexplosion - Blender Mesh : Fireball Animation IPO keys (scale) : Same than the previous object IPO keys (loc) : Same than the previous object Same IPO block than the ColumnTop object Modifiers Important : For the « rolling » gases effect Fweibel.com 8/12 ©2008 Fweibel
  • 9.
    Simplified tutorial: Massiveexplosion - Blender Materials : Here we are going to see how to create the burning in the core of the fireball. For this we’ll use 4 times ONE texture which will react to the lighting of 4 lamps. Each texture will be linked to one lamp. Creating the 4 lamps Add 4 lamps (renamed to “FireBallL 1,2,3,4”) and linked them to the object fireball (parent) Place the lamps randomly in the fireball. Lamp settings: Fweibel.com 9/12 ©2008 Fweibel
  • 10.
    Simplified tutorial: Massiveexplosion - Blender Add an IPO curve for th lamp’s power (combustion attenuates) Material It will be used for shockwave, column, columnTop and fireball (actually, every objects…) Texture Assign 4 times this texture to the material (in 4 different channels) Every texture will have a linked lamp : Tex in channel 1: FIreBallL1, Tex in channel 1: FireBallL2, Tex in channel 1: FireBallL3, Tex in channel 1: FireBallL4 Activate « Emit » and « TransLu ». Fweibel.com 10/12 ©2008 Fweibel
  • 11.
    Simplified tutorial: Massiveexplosion - Blender Halos First, put the 3d cursor on the fireball. Then add 4 spots. For each one, add a constraint “track to”, to direct them to the active camera: The glare comes mainly from the fireball, this is why the spots must be parented to the object “fireball”. Spots settings Add an IPO curve the control the spot size (for the attenuation) Fweibel.com 11/12 ©2008 Fweibel
  • 12.
    Simplified tutorial: Massiveexplosion - Blender Conclusion Thanks for following this tutorial! I hope it was useful. Visit my web site http://www.fweibel.com My youtube channel: http://www.youtube.com/faweil Fweibel.com 12/12 ©2008 Fweibel