Download to read offline
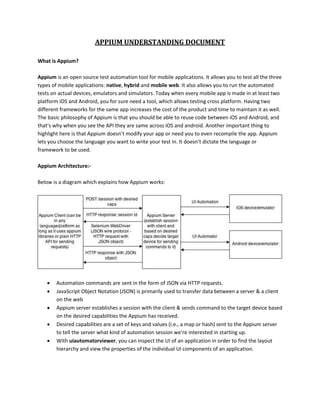


Appium is an open source test automation tool that allows testing of native, hybrid and mobile web applications on actual devices, emulators and simulators. It uses the same API across iOS and Android platforms so test code is reusable. Appium communicates with devices by sending JSON commands via HTTP and establishes test sessions based on desired capabilities. It supports automating common gestures like taps, swipes and scrolling.


![[Srijan Wednesday Webinar] Mastering Mobile Test Automation with Appium](https://cdn.slidesharecdn.com/ss_thumbnails/srijan-webinar-161103125140-thumbnail.jpg?width=640&height=640&fit=bounds)


