Downloaded 4,508 times

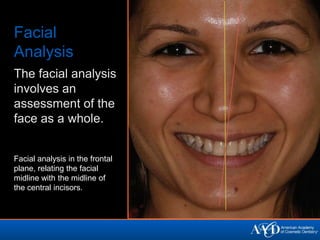
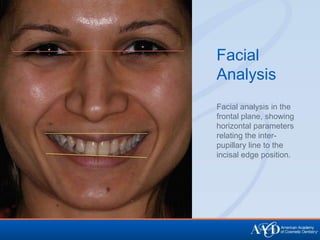
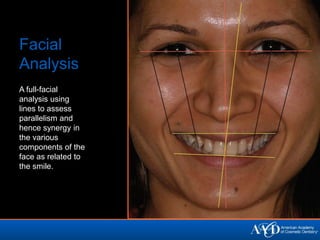


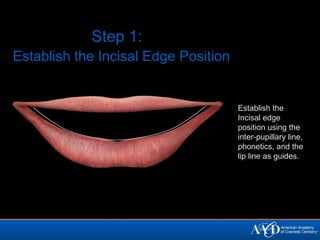


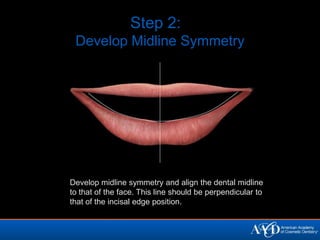

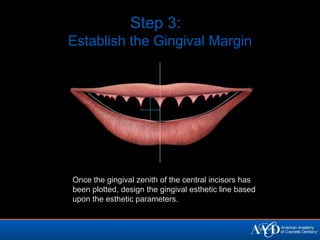


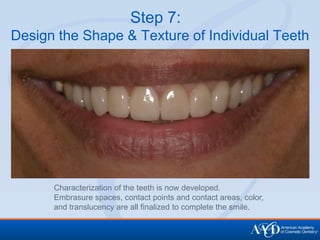


The document outlines the principles of smile design, emphasizing the importance of facial and smile analysis in creating aesthetically pleasing smiles. It details a systematic approach that includes establishing incisal edge positions, midline symmetry, gingival margins, and teeth proportions to achieve harmony and beauty. Ultimately, it suggests that by using collected data effectively, predictable and successful smile designs can be accomplished.


