Downloaded 32 times
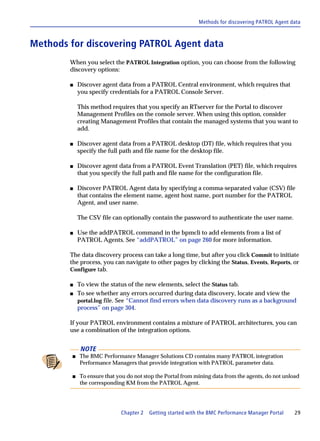


![Using the installation wizard to install the RSM program
10 In Properties, double click sSubKeyName, select Not NULL, enter
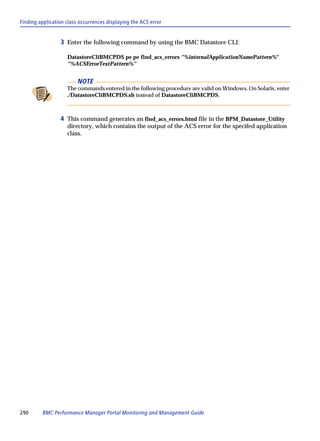
"SYSTEMCurrentControlSetServicesTcpipParameters", and click Save
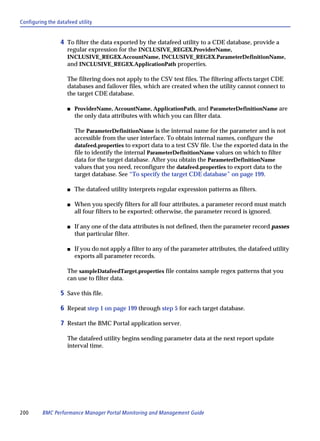
Property.
11 Double click sValueName, select Not NULL, enter "Hostname", and click Save
Property… .
12 Click Save Object.
13 Click Execute.
14 Click Edit Out Parameter.
15 In Properties, check the value for sValue. It should be the name of the host to which
we have connected from RSM.
16 Click Close.
17 Click Exit.
NOTE
The StdRegProv class contains methods that manipulate system registry keys and
values. StdRegProv is available only in rootdefault name space.
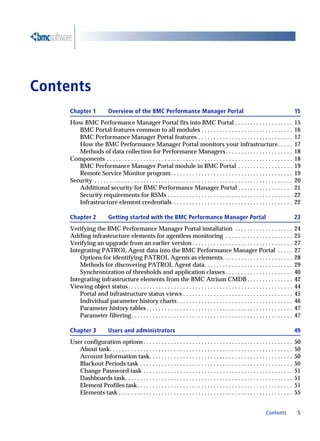
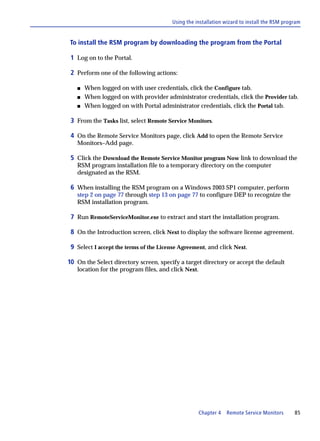
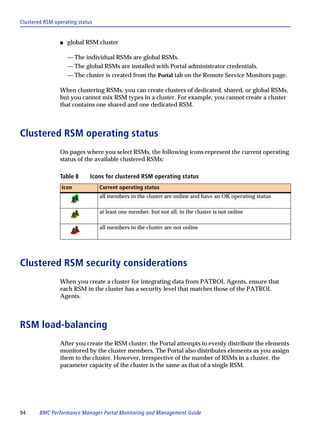
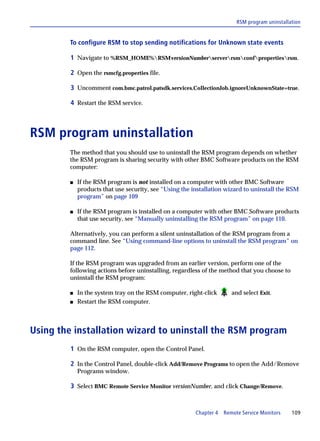
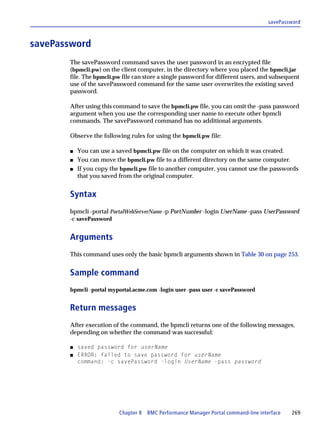
Using the installation wizard to install the RSM program
This procedure describes how to install the RSM program on a Windows computer.
When you install the RSM program, the installation program requires that you enter
credentials that the RSM uses to authenticate itself with the Portal. These credentials
also determine the RSM type and how the users on the Portal can use the RSM to
monitor their accounts.
You can install the RSM program by downloading the installation program file from
the Portal or by copying it from the installation media.
NOTE
Ensure that the SystemDrive where you have installed the operating system, such as the C:
drive has 2 GB or more of free space, even if the directory where you want to install RSM is on
another drive. Otherwise, on completion of the RSM installation, the RSM installation log file
may display an exception as follows:
THROWABLE EVENT {Description=[Failed to get product
registry],Detail=[C:WindowsProductRegistry.xml]}
84 BMC Performance Manager Portal Monitoring and Management Guide](https://image.slidesharecdn.com/51822208-bpm-portal-agentless-monitoring-v2-8-120203225024-phpapp02/85/51822208-bpm-portal-agentless-monitoring-v2-8-84-320.jpg)
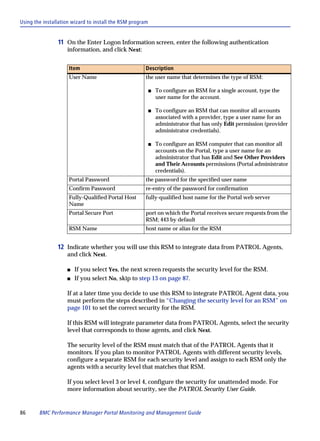
![Using a silent installation to install the RSM program
s You want to maintain consistent installation configuration values across multiple
computers.
You specify the command-line options in a text file, and then specify that file when
you launch the installation program from the command line.
Before you begin
s Copy RemoteServiceMonitor.exe from one of the following locations to a temporary
directory:
— RSM folder on the Windows BMC Portal DVD
— BMCPortalKitdisk1RSM on Windows BMC Portal DVD
— folder to which you downloaded files from the EPD website
s Configure DEP to recognize the RSM installation program.
s In silent installations, passwords are displayed in plain text. If you want to encrypt
the passwords, run the encryption utility as described in “To encrypt RSM
passwords for use in a silent installation” on page 89.
s Ensure that the SystemDrive where you have installed the operating system, such
as the C: drive has 2 GB or more of free space, even if the directory where you
want to install RSM is on another drive. Otherwise, on completion of the RSM
installation, the RSM installation log file may display an exception as follows:
THROWABLE EVENT {Description=[Failed to get product
registry],Detail=[C:WindowsProductRegistry.xml]}
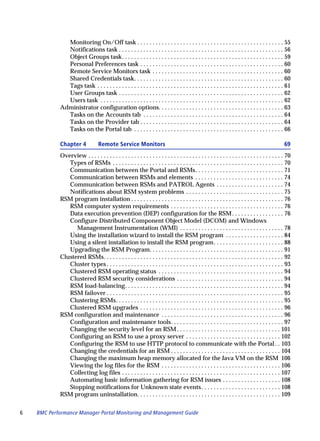
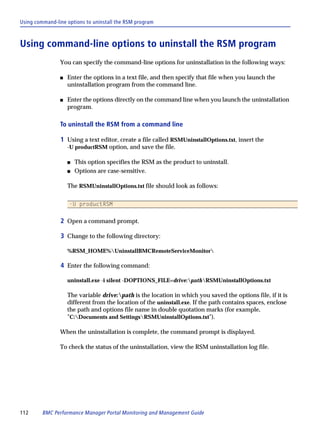
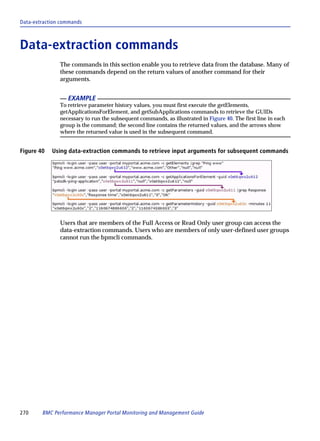
To encrypt RSM passwords for use in a silent installation
1 Launch the RSM maintenance tool.
See “To launch the Remote Service Monitor Maintenance Tool” on page 98.
2 Select the Encrypt tab.
3 In Password, type the password for the RSM.
4 In Confirm password, retype the password.
5 Click Encrypt.
The encrypted value is displayed in Encrypted password.
Chapter 4 Remote Service Monitors 89](https://image.slidesharecdn.com/51822208-bpm-portal-agentless-monitoring-v2-8-120203225024-phpapp02/85/51822208-bpm-portal-agentless-monitoring-v2-8-89-320.jpg)

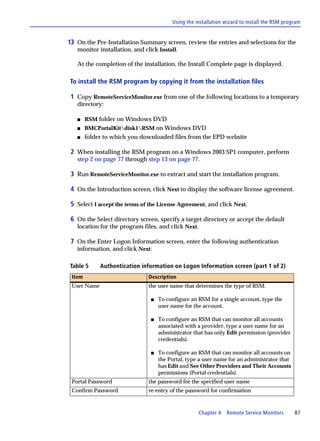
![Configuration and maintenance tools
EXAMPLE
If you get the following warning exception as an e-mail notification, copy and paste all
the contents of the notification in the Enter string to search solution text box:
<R [RSMScheduler_Worker-67],04/17/09 00:05:50 UTC,STDERR> Apr 17,
2009 12:05:50 AM executeParamletArgs
com.bmc.patrol.patsdk.paramlet.container.simple.SimpleParamletCo
ntainer
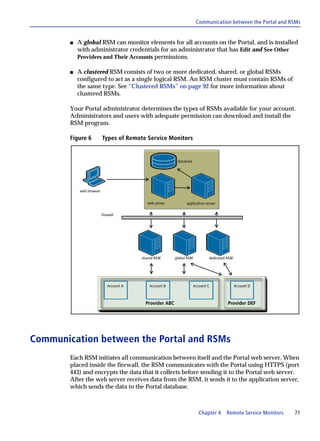
WARNING: Unexpected error while executing job.
java.lang.OutOfMemoryError: unable to create new native thread
at java.lang.Thread.start0(Native Method)
at java.lang.Thread.start(Thread.java:574)
2. Click Search Solution for the tool to find the corresponding solution, if it is a
known issue.
B. To navigate to the rsm.log file that contains the error:
1. In the Logs tab, from the RSM Log Monitor pane, click RSM Log Monitor.
2. Click Browse to RSM Log and navigate to the log file such as rsm.log.
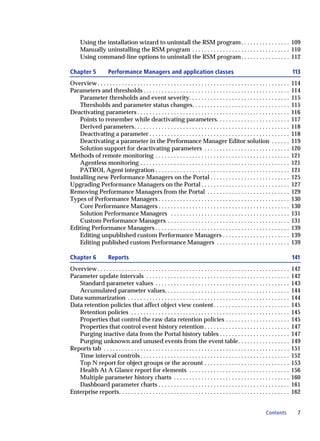
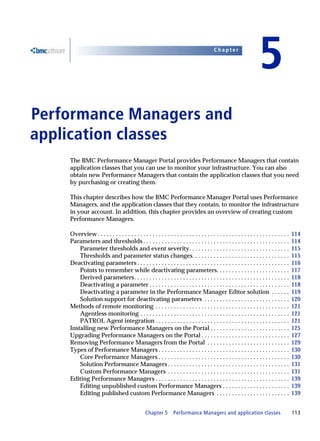
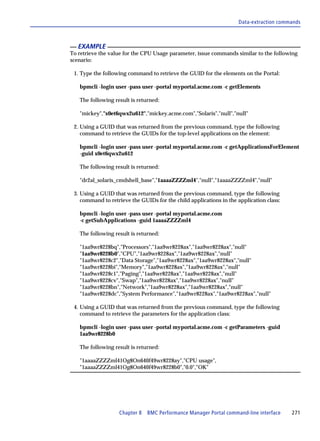
3 The file opens in the rsmlogFileName log viewer window with two panels. The
upper panel displays the error messages color-coded based on the type of error
such as SEVERE, WARNING, and so on.
4 The lower panel of the log viewer window displays the following information:
s Time - the date and time of the recorded exception
s Severity - the severity of the exception
s Source - the source class of the file from which the exception is recorded
s Details - the details about the exception and an existing solution for the
exception, if available
s Exception - the exception stack trace
100 BMC Performance Manager Portal Monitoring and Management Guide](https://image.slidesharecdn.com/51822208-bpm-portal-agentless-monitoring-v2-8-120203225024-phpapp02/85/51822208-bpm-portal-agentless-monitoring-v2-8-100-320.jpg)

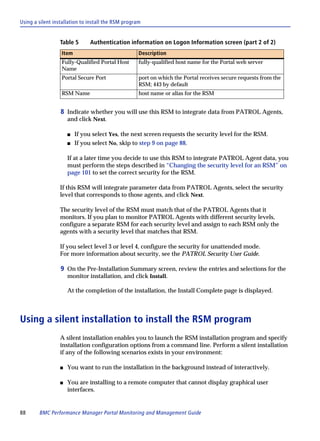
![Manually uninstalling the RSM program
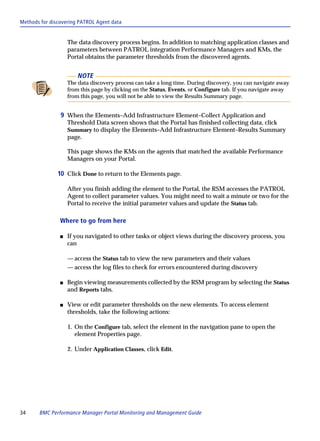
4 On the first page of the uninstallation wizard, click Next.
5 Select BMC Remote Service Monitor, and click Next.
6 On the Summary page, review the messages for any errors, and click Next.
7 Using the credentials for the deleted RSM, log on to the Portal and delete the RSM:
A Perform one of the following actions:
s When logged on with user credentials, click the Configure tab.
s When logged on with provider administrator credentials, click the Provider
tab.
s When logged on with Portal administrator credentials, click the Portal tab.
B From the Tasks list, select Remote Service Monitors.
C In the list of RSMs, select the RSM that corresponds to the uninstalled RSM
program, and click Delete.
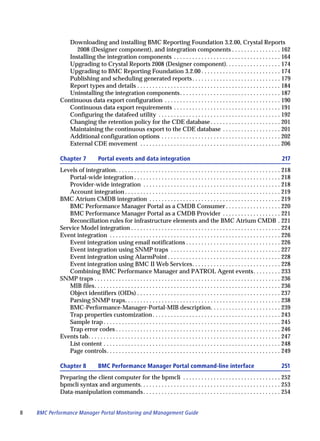
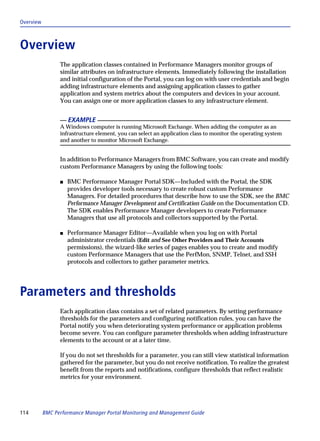
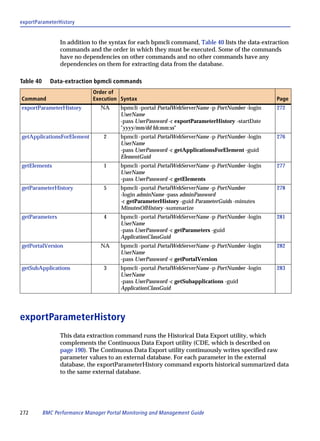
Manually uninstalling the RSM program
1 Stop the BMC Remote Service Monitor service:
A On the RSM computer, open the Control Panel, open Administrative Tools, and
then open Services.
B Select the BMC Remote Service Monitor service, and stop it.
2 Save the following text in a file called DeleteRSM.reg, right-click on that file, and
select Merge to clean up the registry:
REGEDIT4
[-HKEY_LOCAL_MACHINESOFTWAREMicrosoftWindowsCurrentVersionUninstallaecf247c9581b1d626129c65a6
c804dd]
[-HKEY_LOCAL_MACHINESYSTEMControlSet001ServicesBMC Remote Service Monitor]
[-HKEY_LOCAL_MACHINESYSTEMControlSet002ServicesBMC Remote Service Monitor]
[-HKEY_LOCAL_MACHINESYSTEMControlSet003ServicesBMC Remote Service Monitor]
[-HKEY_LOCAL_MACHINESYSTEMCurrentControlSetServicesBMC Remote Service Monitor]
[HKEY_LOCAL_MACHINESYSTEMControlSet001ControlSession ManagerEnvironment]
"RSM_HOME"=-
[HKEY_LOCAL_MACHINESYSTEMControlSet002ControlSession ManagerEnvironment]
"RSM_HOME"=-
[HKEY_LOCAL_MACHINESYSTEMControlSet003ControlSession ManagerEnvironment]
"RSM_HOME"=-
[HKEY_LOCAL_MACHINESYSTEMCurrentControlSetControlSession ManagerEnvironment]
"RSM_HOME"=-
110 BMC Performance Manager Portal Monitoring and Management Guide](https://image.slidesharecdn.com/51822208-bpm-portal-agentless-monitoring-v2-8-120203225024-phpapp02/85/51822208-bpm-portal-agentless-monitoring-v2-8-110-320.jpg)
![Manually uninstalling the RSM program
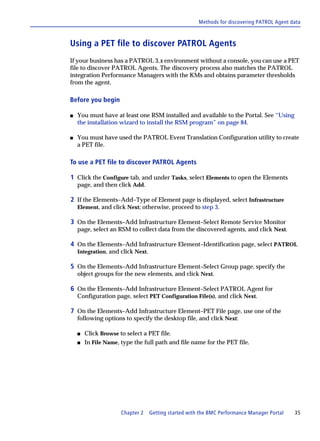
3 If security is no longer being used by any other programs on this computer,
perform the following actions; otherwise, skip to step 4:
A Delete the following directory: %BMC_ROOT%...CI.
B Save the following text in a file called DeleteRSMSecurity.reg, right-click that file,
and select Merge to clean up the registry:
REGEDIT4
[-HKEY_LOCAL_MACHINESOFTWAREBMC SoftwarePatrolSecurityPolicy_v3.0]
[-HKEY_LOCAL_MACHINESOFTWAREBMC SoftwarePATROL Agent]
[-HKEY_LOCAL_MACHINESOFTWAREBMC SoftwarePATROL Security]
[-HKEY_LOCAL_MACHINESOFTWAREMicrosoftWindowsCurrentVersionUninstallBMC Software]
[HKEY_LOCAL_MACHINESYSTEMControlSet001ControlSession ManagerEnvironment]
"BMC_ROOT"=-
[HKEY_LOCAL_MACHINESYSTEMControlSet002ControlSession ManagerEnvironment]
"BMC_ROOT"=-
[HKEY_LOCAL_MACHINESYSTEMControlSet003ControlSession ManagerEnvironment]
"BMC_ROOT"=-
[HKEY_LOCAL_MACHINESYSTEMCurrentControlSetControlSession ManagerEnvironment]
"BMC_ROOT"=-
4 Perform the following actions to delete unnecessary files and directories:
A Delete the following directories:
s installationDirectoryRSMversionNumber
s installationDirectoryBMCRemoteServiceMonitorInstallJVM
s installationDirectoryUninstallBMCRemoteServiceMonitor
s installationDirectoryInstallationTaskConfiguration.xsd
s installationDirectoryRSMInstalledConfiguration.xml
If the installation directory is now empty, you can delete it too.
B Delete the following file: %windir%vpd.properties.
5 Using the process described in step 7 on page 110, delete the RSM from the Portal.
Chapter 4 Remote Service Monitors 111](https://image.slidesharecdn.com/51822208-bpm-portal-agentless-monitoring-v2-8-120203225024-phpapp02/85/51822208-bpm-portal-agentless-monitoring-v2-8-111-320.jpg)


![Installing the integration components
8 Select the root level of the hierarchy.
The root level of the hierarchy has the form CMSserverName [userName].
9 Confirm that the Preserve CUID when importing objects option is selected.
10 Select the Overwrite if CUID exists option.
11 Click OK.
12 In the confirmation dialog box, click Yes.
The BMC_PM-BusinessView.xml file is imported and the following message is
displayed:
Business views have been imported successfully
13 Click OK to close the dialog box.
The BMC_PM folder is created in the Repository Explorer pane of the Business View
Manager.
14 (optional) Confirm that the following components are displayed under the
BMC_PM folder:
s DROCR_BPMAccountElements
s DROCR_BPMAccountElements - Prompt Group
s DROCR_BPMAccountElements - Prompt Group 2
s DROCR_BPMConnection
s DROCR_BPMElements
s DROCR_BPMFoundation
s DROCR_BPMPromptElements
s DROCR_BPMView
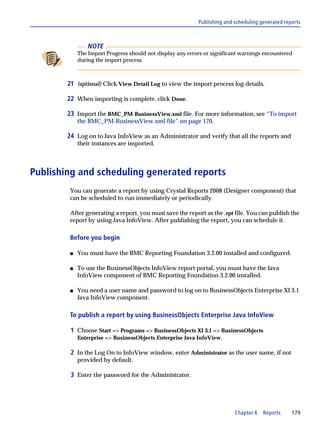
To modify the business view to point to the CDE database
1 Choose Start => Programs => BusinessObjects XI 3.1 => BusinessObjects
Enterprise => Business View Manager.
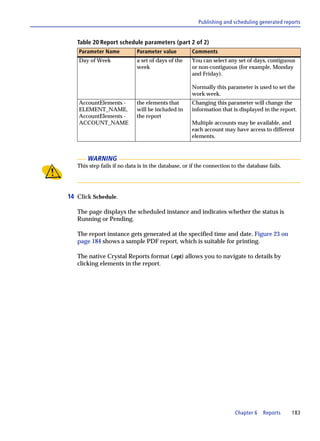
2 Log on to the BusinessObjects Enterprise XI 3.1 computer where you have
imported the .biar and .xml files.
3 In the Business View Manager, in the Repository Explorer pane, expand the
BMC_PM folder.
4 Double-click DROCR_BPMConnection.
Chapter 6 Reports 171](https://image.slidesharecdn.com/51822208-bpm-portal-agentless-monitoring-v2-8-120203225024-phpapp02/85/51822208-bpm-portal-agentless-monitoring-v2-8-171-320.jpg)


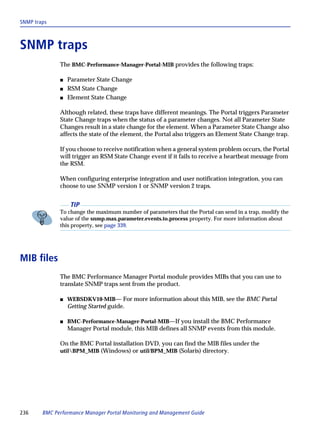
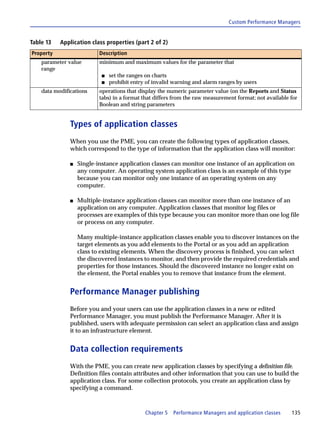
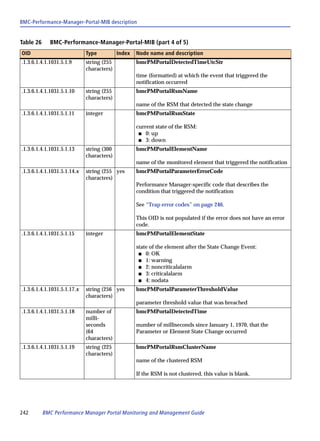
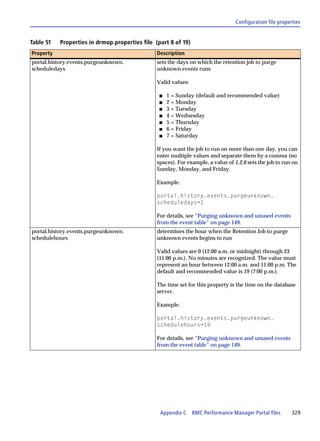
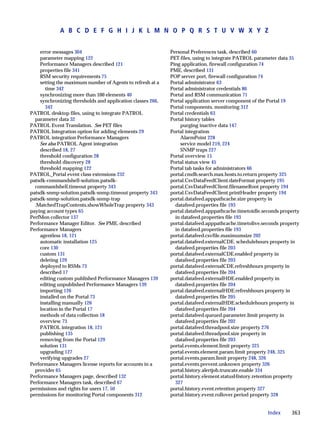
![Object identifiers (OIDs)
Following installation, you can find the MIB files at the following locations on the
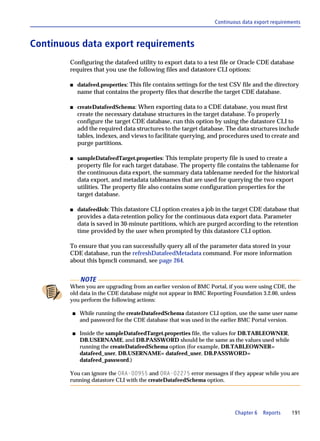
Portal application server:
s On Windows: %BMC_PORTAL_KIT_HOME%appserverutilBPM_MIB
s On Solaris: $BMC_PORTAL_KIT_HOME/appserver/util/BPM_MIB
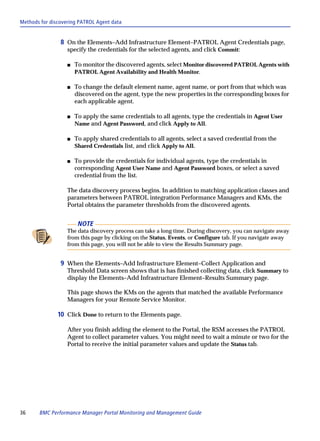
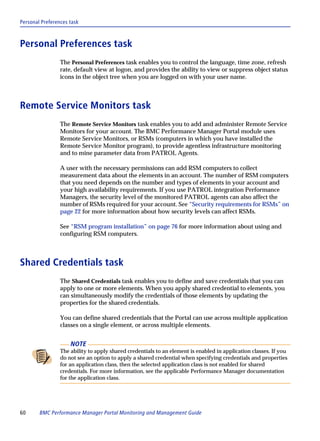
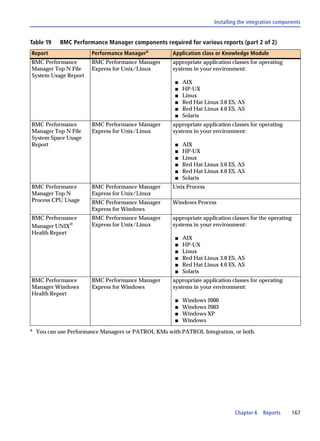
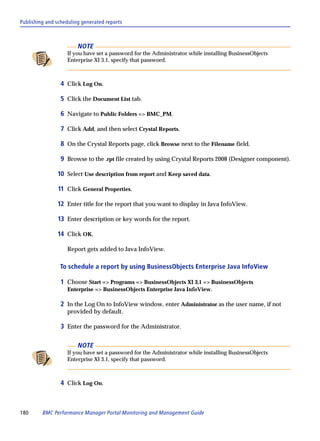
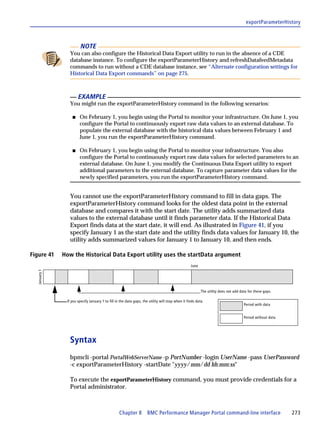
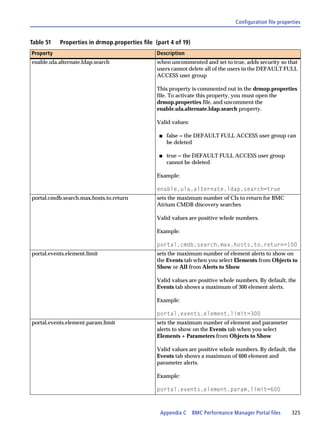
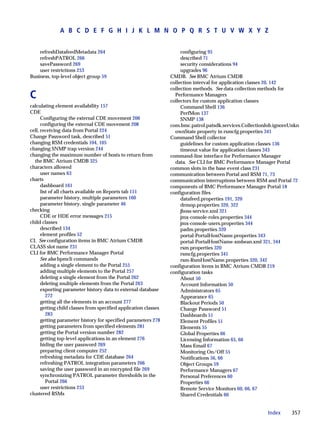
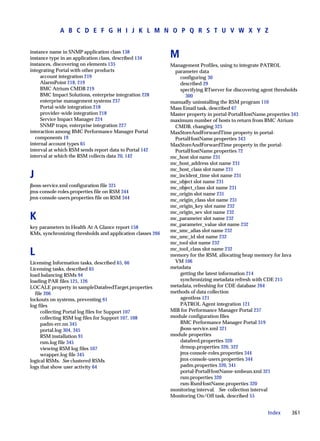
Object identifiers (OIDs)
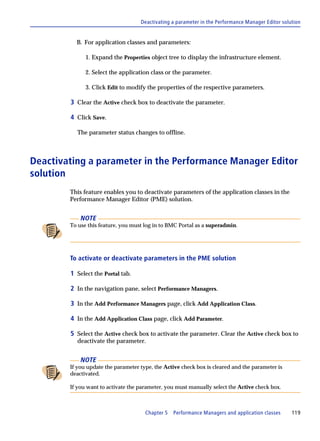
OIDs are used by SNMP queries to identify individual pieces of data and are
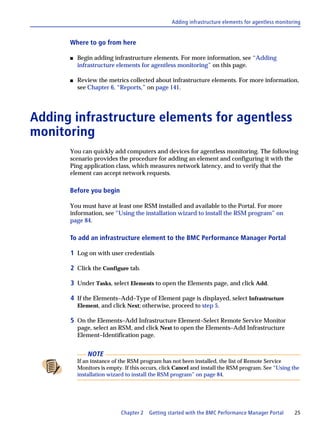
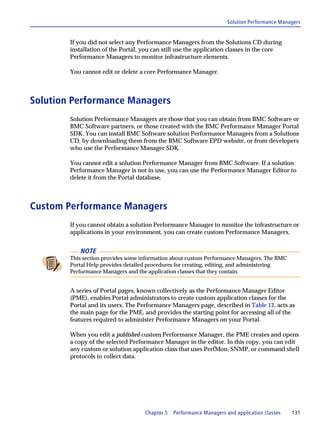
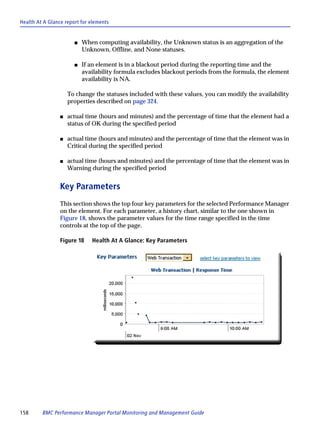
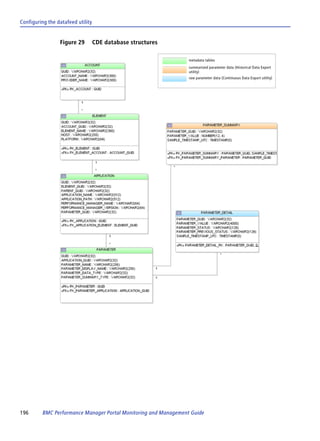
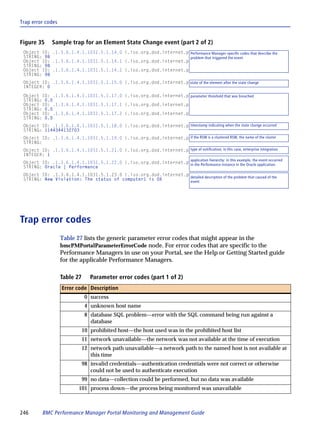
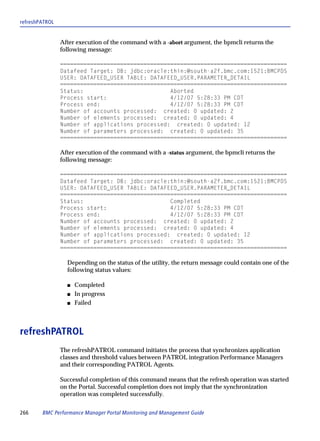
identified in the MIB file. Figure 34 provides an overview of the general structure of a
BMC Performance Manager Portal OID.
Figure 34 OID structure in BMC-Performance-Manager-Portal-MIB
. 1 . 3 . 6 . 1 . 4 . 1 . 1031 . 5 . { 0 | 1 } . { 1–3 | 1–n } . [0...n]
indicates that the trap originated
from a BMC Software product
If the previous digit is 0, the possible
values for this digit are 1, 2, or 3.
A value of 5 in this position indicates that the OID is from
the BMC-Performance-Manager-Portal-MIB.
If the previous digit is 1, the possible
values for this digit are 1–n.
A value of 7 indicates that the OID is from the
WEBSDK10-MIB. See BMC Portal Getting Started.
indicates the type of value that this OID represents: This number increments for
0 represents notification nodes that contain multiple
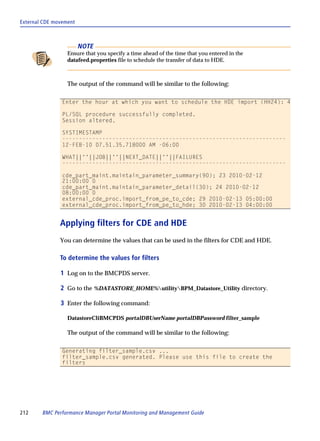
1 represents object instances for an OID.
Chapter 7 Portal events and data integration 237](https://image.slidesharecdn.com/51822208-bpm-portal-agentless-monitoring-v2-8-120203225024-phpapp02/85/51822208-bpm-portal-agentless-monitoring-v2-8-237-320.jpg)

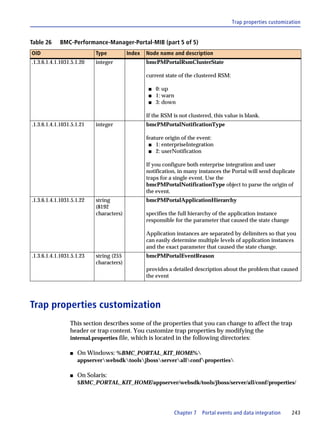


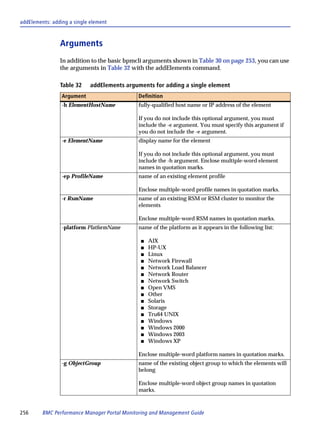
![addElements: adding multiple elements
Sample command
The following command adds a single element that has the following properties:
s web server name of the Portal: myportal.acme.com
s user name: user
s password for user: user
s host name of the element: databaseserver.acme.com
s element name: DatabaseServer
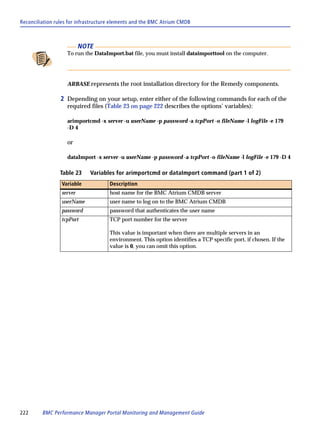
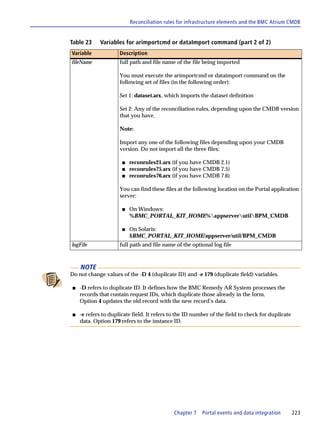
s element profile name: Databases
s RSM: Portal RSM
s platform: Windows 2000
s object group name: Databases
bpmcli -portal myportal.acme.com -login user -pass user -c addElements
-h databaseserver.acme.com -e DatabaseServer -ep Databases -platform "Windows 2000"
-r "Portal RSM" -g Databases
The port is not specified, so the bpmcli assumes that the port is the default, 443.
Return messages
After execution of the command, one of the following messages is displayed,
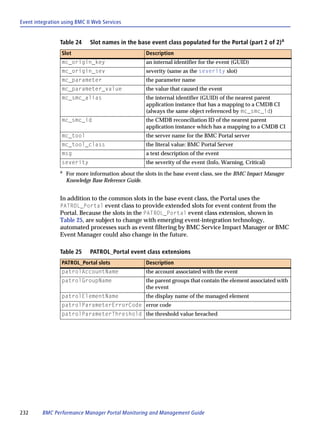
depending on whether the addition was successful:
s SUCCESS, msg [added element], user [UserName], element
[ElementName], group [GroupName], platform [PlatformName],
rsm [RsmName], host [HostName], profile [ProfileName]
s FAILURE, msg [ReasonForFailure], user [UserName], element
[ElementName], group [GroupName], platform [PlatformName],
rsm [RsmName], host [HostName], profile [ProfileName]
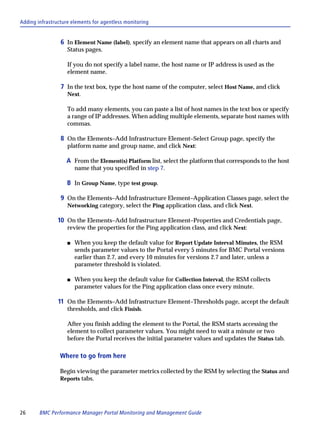
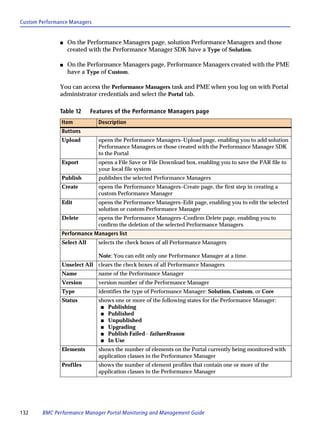
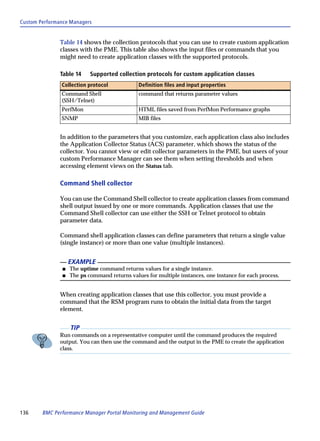
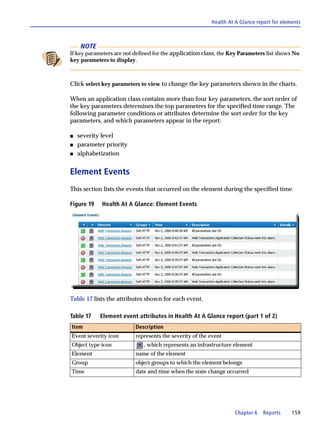
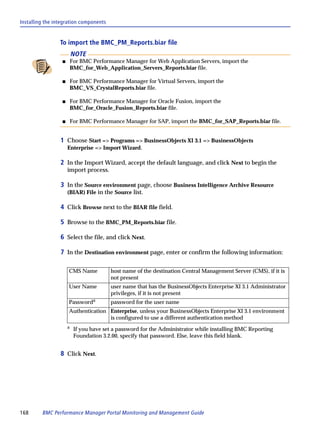
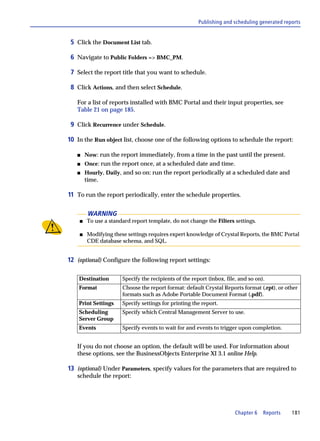
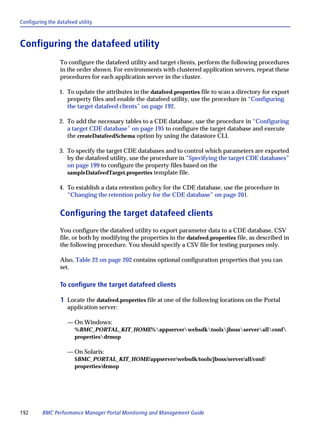
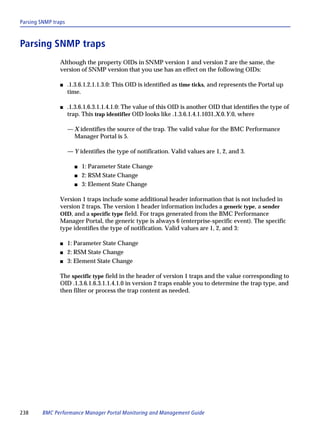
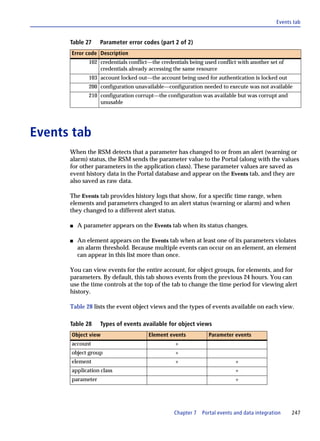
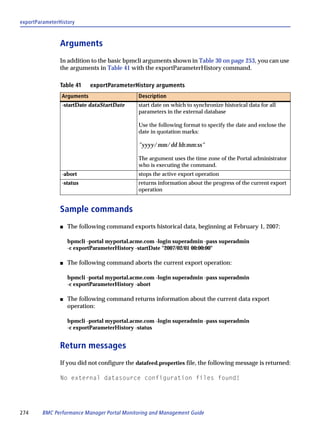
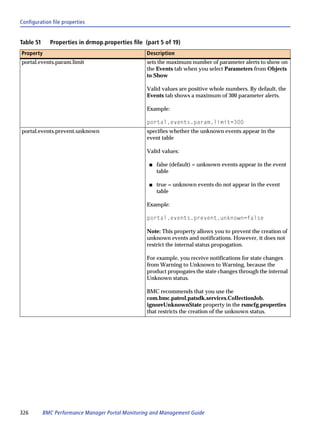
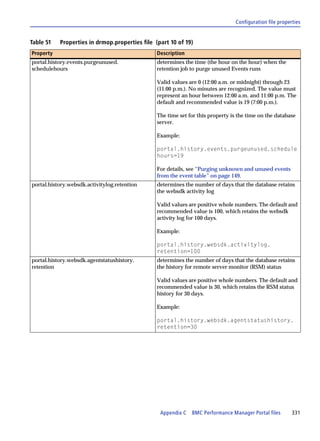
addElements: adding multiple elements
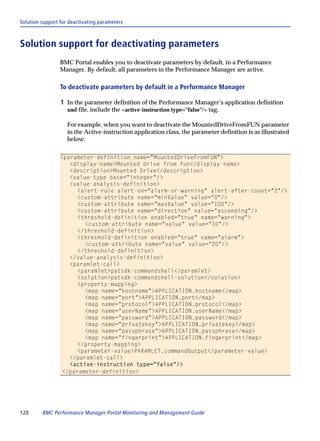
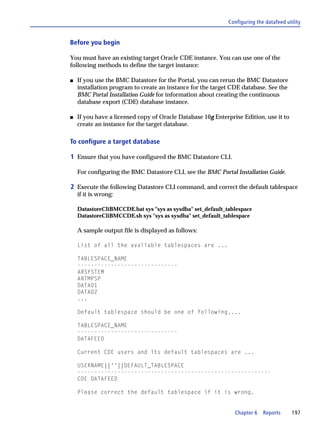
To add multiple elements, you must first list each element’s properties in a comma-
separated value (CSV) file, using the following format, and then specify that file name
in the command:
HostName or IPAddress, [ElementDisplayName], ObjectGroupName, RsmName,
ElementProfileName, PlatformName
Figure 38 on page 258 contains an example of valid content for the CSV file.
Chapter 8 BMC Performance Manager Portal command-line interface 257](https://image.slidesharecdn.com/51822208-bpm-portal-agentless-monitoring-v2-8-120203225024-phpapp02/85/51822208-bpm-portal-agentless-monitoring-v2-8-257-320.jpg)
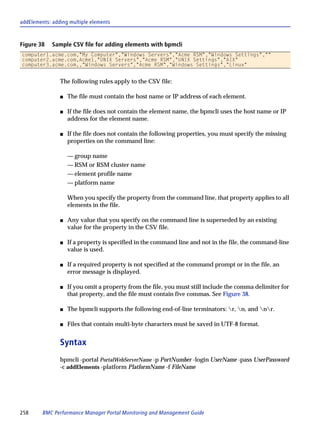
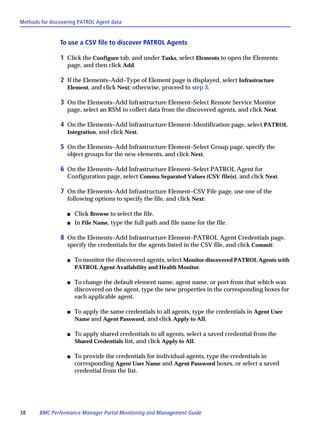
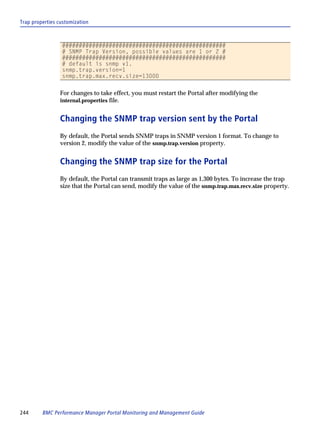
![addElements: adding multiple elements
Arguments
In addition to the basic bpmcli arguments shown in Table 30 on page 253, you can use
the arguments in Table 33 with the addElements command.
Table 33 addElements arguments for adding multiple elements
-f CsvFileName name of the CSV file that contains the element properties
Files that contain multi-byte characters must be saved in
UTF-8 format.
-h ElementHostName fully-qualified host name or IP address of the element
-ep ProfileName name of an existing element profile
Enclose multiple-word profile names in quotation marks.
-r RsmName name of an existing RSM or RSM cluster to monitor the
elements (if not specified in the file)
Enclose multiple-word RSM names in quotation marks.
-platform PlatformName name of the platform as it appears in Table 32 on page 256
Enclose multiple-word platform names in quotation marks.
-g ObjectGroup name of the existing object group to which the elements will
belong (if not specified in the file)
Enclose multiple-word object group names in quotation
marks.
Sample command
bpmcli -portal myportal.acme.com -login user -pass user -c addElements -platform AIX
-f NewElements.txt
Return messages
After execution of the command, the bpmcli returns one of the following messages
for each element specified in the CSV file, depending on whether the addition was
successful:
s SUCCESS, msg [added element], user [UserName], element
[ElementName], group [GroupName], platform [PlatformName],
rsm [RsmName], host [HostName], profile [ProfileName]
s FAILURE, msg [ReasonForFailure], user [UserName], element
[ElementName], group [GroupName], platform [PlatformName],
rsm [RsmName], host [HostName], profile [ProfileName]
Chapter 8 BMC Performance Manager Portal command-line interface 259](https://image.slidesharecdn.com/51822208-bpm-portal-agentless-monitoring-v2-8-120203225024-phpapp02/85/51822208-bpm-portal-agentless-monitoring-v2-8-259-320.jpg)
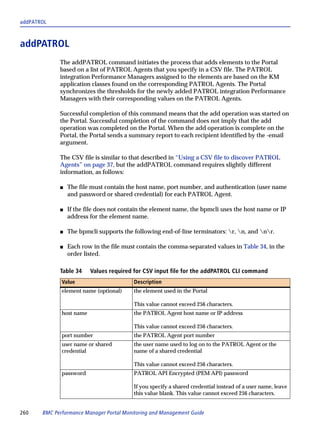
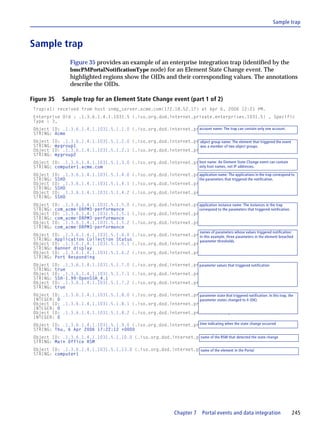
![deleteElements: deleting multiple elements
Argument
In addition to the basic bpmcli arguments shown in Table 30 on page 253, you can use
the argument in Table 35 on page 261 with the deleteElements command.
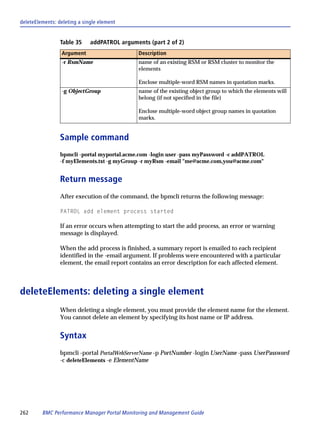
Table 36 deleteElements argument for deleting a single element
Argument Description
-e ElementName element to delete
Enclose multiple-word element names in quotation marks.
Sample command
bpmcli -portal myportal.acme.com -login user -pass user -c deleteElements -e MyElement
Return messages
After execution of the command, one of the following messages is displayed,
depending on whether the addition was successful:
s SUCCESS, msg [deleted element], user [UserName], element
[ElementName]
s FAILURE, msg [ReasonForFailure], user [UserName], element
[ElementName]
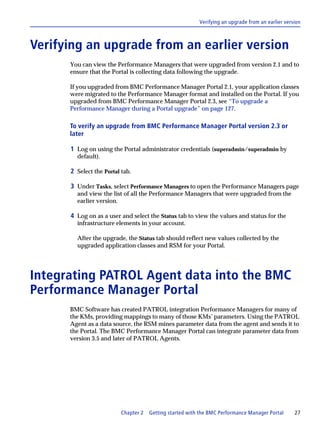
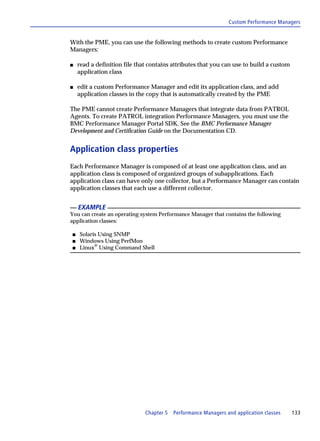
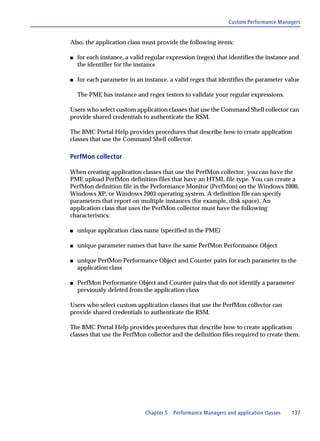
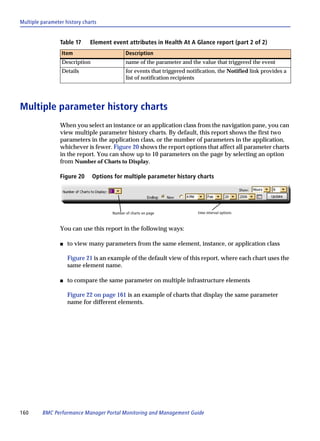
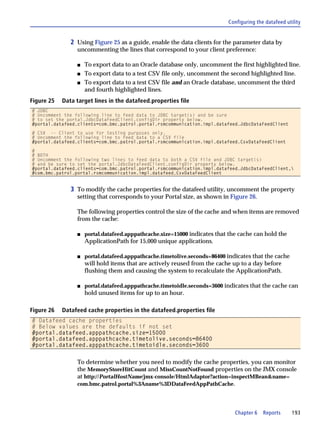
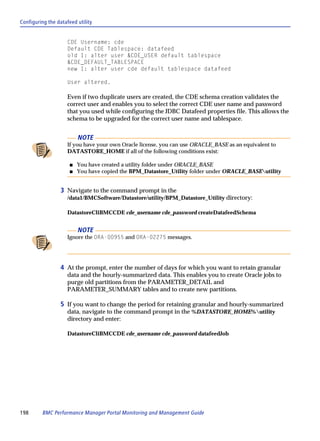
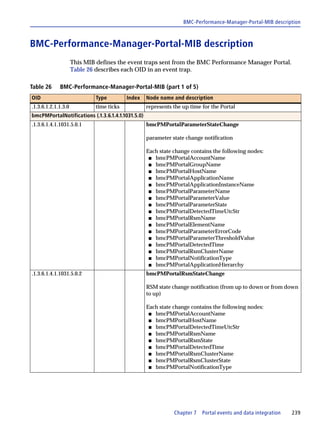
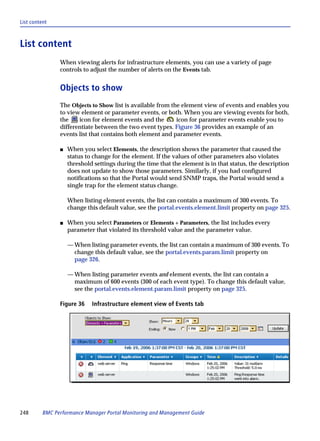
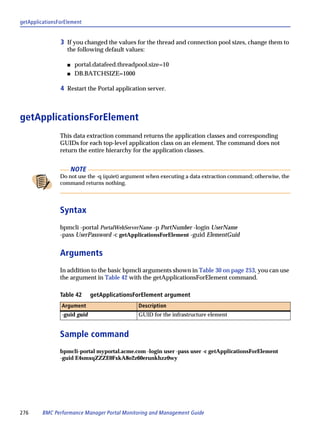
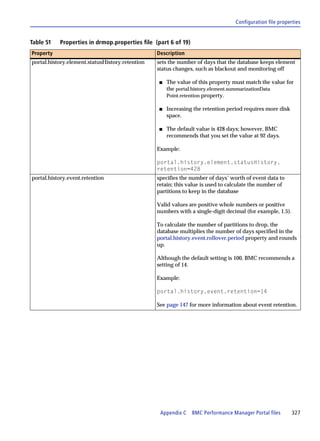
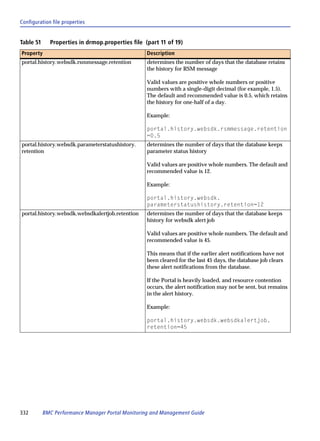
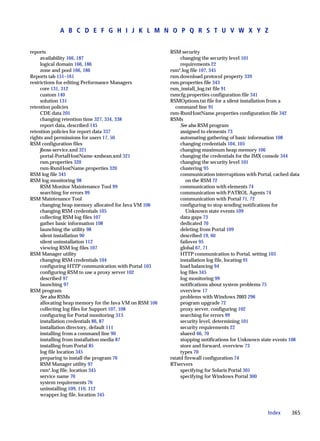
deleteElements: deleting multiple elements
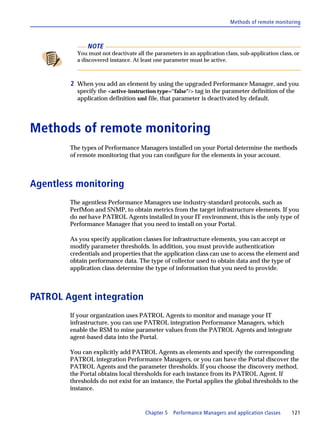
To delete multiple elements, you must provide a CSV file that contains the element
name for each element to delete. The CSV file cannot contain host names or IP
addresses.
Figure 39 Sample CSV file for deleting elements with bpmcli
"My Computer"
Acme1
computer3.acme.com
The bpmcli supports the following end-of-line terminators: r, n, nr.
Chapter 8 BMC Performance Manager Portal command-line interface 263](https://image.slidesharecdn.com/51822208-bpm-portal-agentless-monitoring-v2-8-120203225024-phpapp02/85/51822208-bpm-portal-agentless-monitoring-v2-8-263-320.jpg)
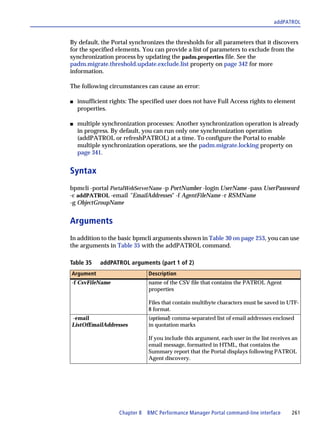
![refreshDatafeedMetadata
Syntax
bpmcli -portal PortalWebServerName -p PortNumber -login UserName -pass UserPassword
-c deleteElements -f FileName
Arguments
In addition to the basic bpmcli arguments shown in Table 30 on page 253, you can use
the argument in Table 37 with the deleteElements command.
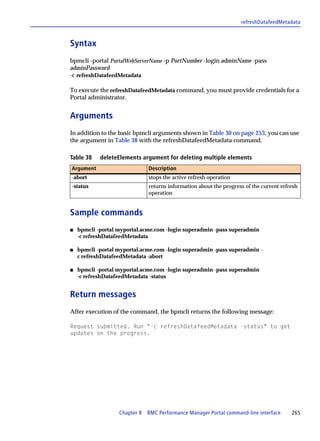
Table 37 deleteElements argument for deleting multiple elements
Argument Description
-f FileName file that contains names of element to delete
Sample command
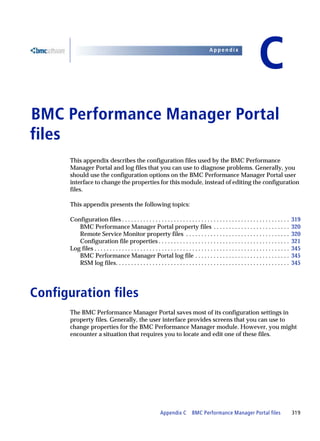
bpmcli -portal myportal.acme.com -login user -pass user -c deleteElements -f Elements.txt
Return messages
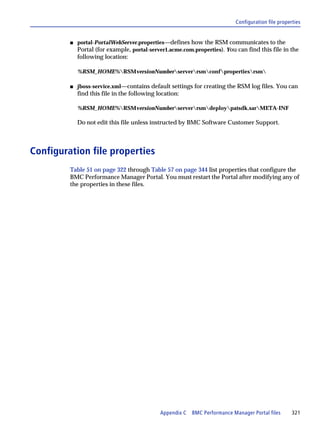
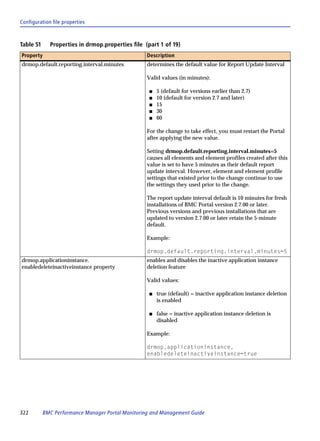
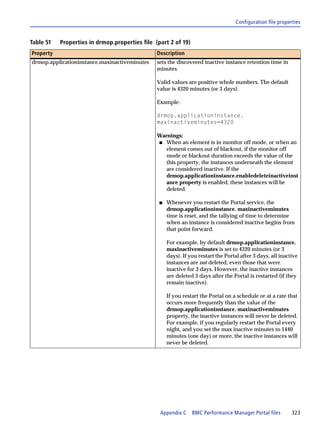
After execution of the command, the bpmcli returns one of the following messages
for each element in the CSV file, depending on whether the deletion was successful:
s SUCCESS, msg [deleted element], user [UserName], element
[ElementName]
s FAILURE, msg [ReasonForFailure], user [UserName], element
[ElementName]
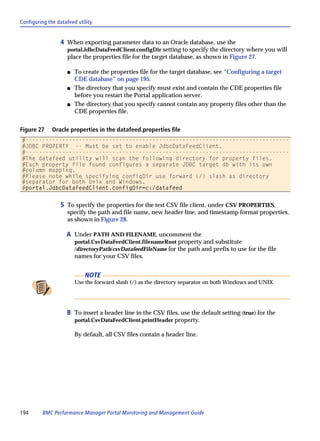
refreshDatafeedMetadata
This command initiates the process that updates the Continuous Data Export (CDE)
metadata tables with new element and parameter data. The metadata tables include
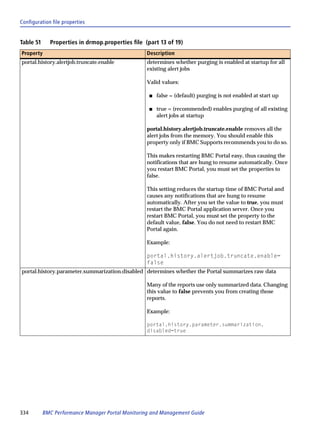
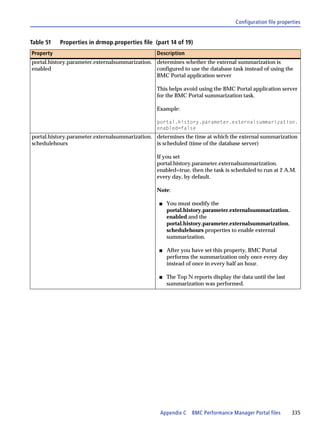
the account name, element names, application classes, and parameters that
correspond to the data exported by the Continuous Data Export utility, described on
page 190. Run this command as often as necessary to keep the metadata tables current
with the Portal.
TIP
To ensure that you capture all changes, run a nightly script that executes this command.
264 BMC Performance Manager Portal Monitoring and Management Guide](https://image.slidesharecdn.com/51822208-bpm-portal-agentless-monitoring-v2-8-120203225024-phpapp02/85/51822208-bpm-portal-agentless-monitoring-v2-8-264-320.jpg)


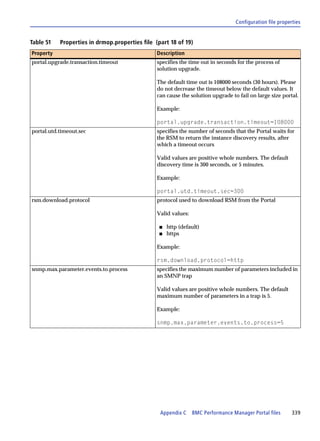


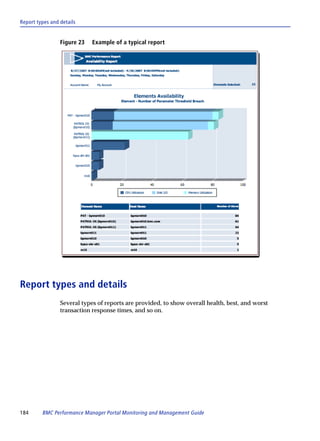
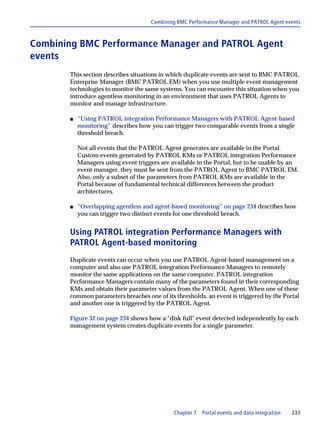
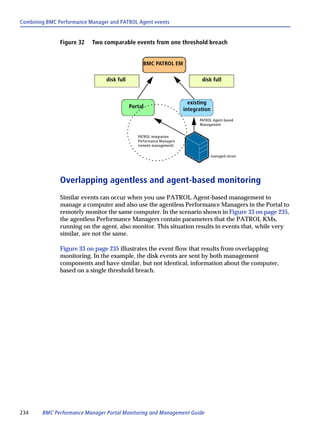
This document provides a monitoring and management guide for the BMC Performance Manager Portal version 2.8. It describes how the portal fits into the BMC Portal product and its key features for monitoring infrastructure. It also covers the components involved, including the portal module and Remote Service Monitor program. The document provides guidance on getting started with the portal for agentless monitoring, integrating PATROL agent data, viewing object status, configuring users and administrators, and details on the Remote Service Monitors.


![Audience research[1]](https://cdn.slidesharecdn.com/ss_thumbnails/audienceresearch1-130208082702-phpapp02-thumbnail.jpg?width=640&height=640&fit=bounds)


