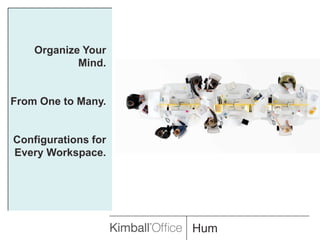
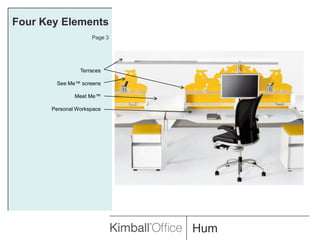
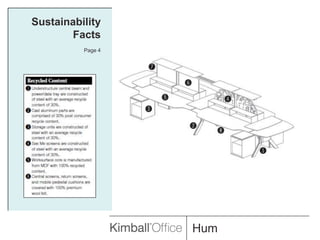
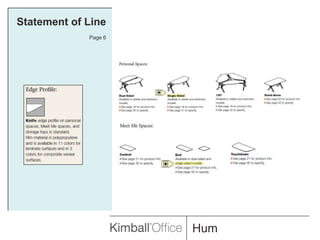
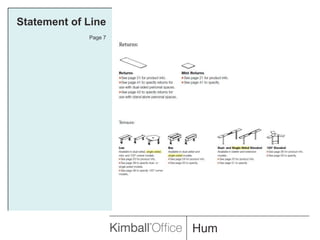
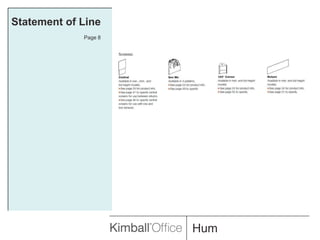
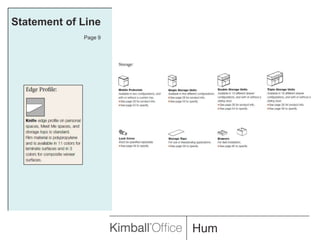
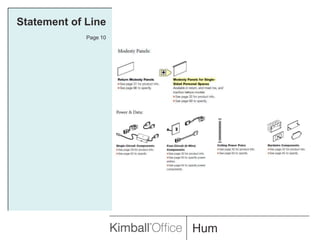
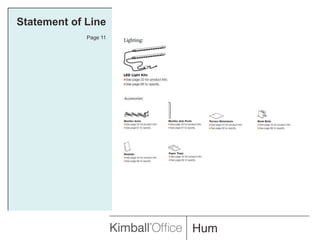
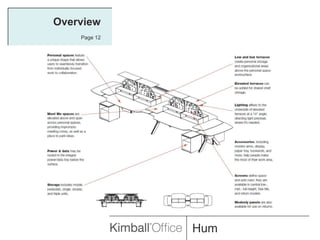
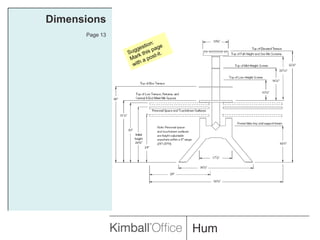
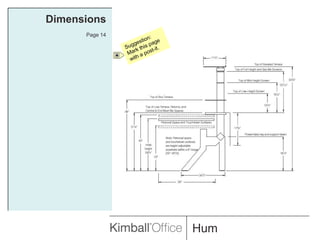
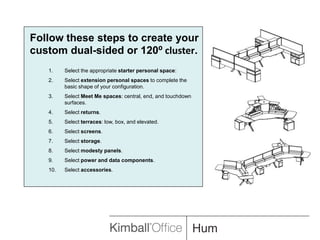
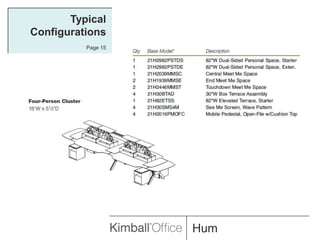
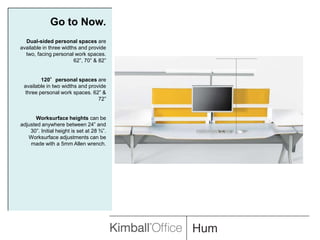
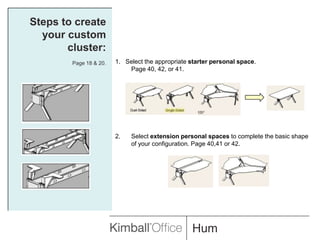
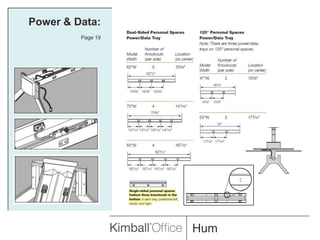
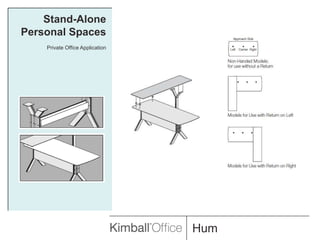
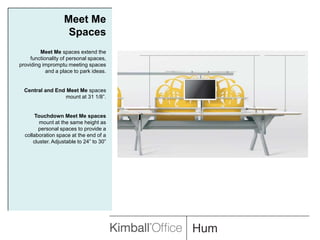
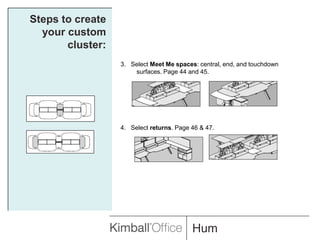
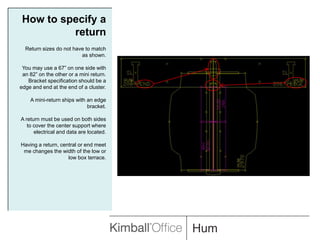
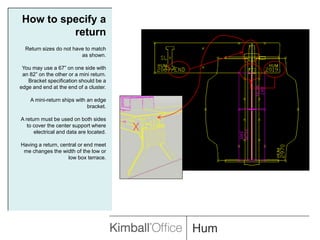
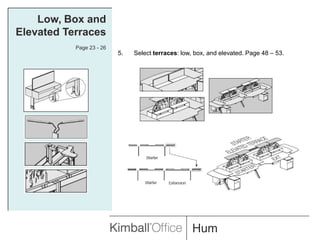
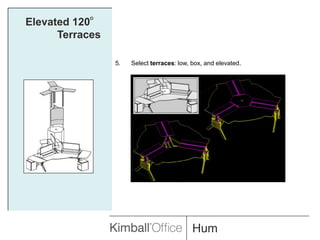
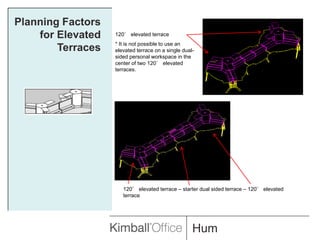
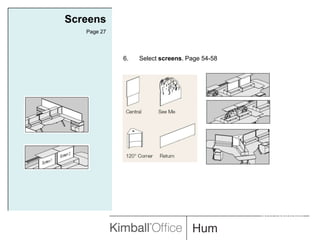
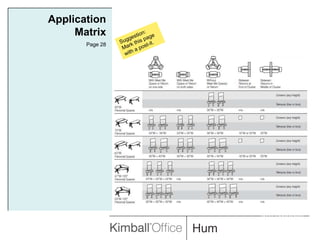
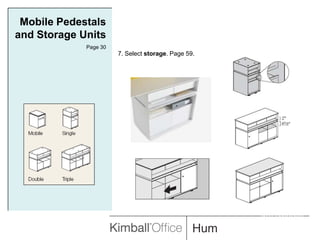
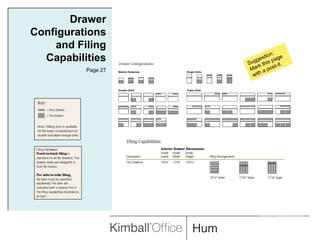
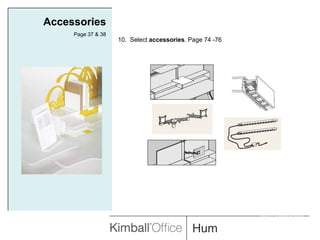
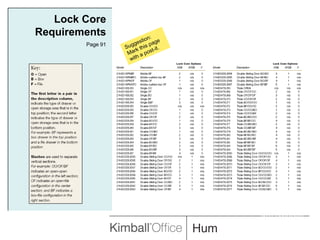
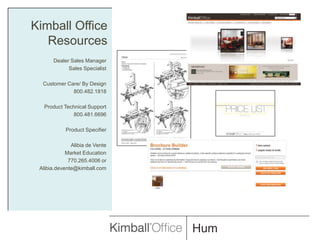
We will be starting momentarily.For Audio Please Dial:Conference  Call 888.481.3032Passcode 75892620#Press *6 to mute phone on/off
Hum works the way minds work, Hum works for the environment.
Organize Your Mind.From One to Many.Configurations for Every Workspace.
Four Key ElementsPage 3TerracesSee Me™ screensMeet Me™Personal Workspace
Sustainability FactsPage 4
Statement of LinePage 6
Statement of LinePage 7
Statement of LinePage 8
Statement of LinePage 9
Statement of LinePage 10
Statement of LinePage 11
OverviewPage 12
DimensionsPage 13Suggestion:Mark this page with a post-it.
DimensionsPage 14Suggestion:Mark this page with a post-it.
Follow these steps to create your custom dual-sided or 120⁰ cluster.Select the appropriate starter personal space:Select extension personal spaces to complete the basic shape of your configuration.Select Meet Me spaces: central, end, and touchdown surfaces.Select returns.Select terraces: low, box, and elevated.Select screens.Select storage.Select modesty panels.Select power and data components.Select accessories.
Typical ConfigurationsPage 15
Go to Now.Dual-sided personal spaces are available in three widths and provide two, facing personal work spaces. 62”, 70” & 82”120°personal spaces are available in two widths and provide three personal work spaces. 62” & 72”Worksurface heights can be adjusted anywhere between 24” and 30”. Initial height is set at 28 ¾”. Worksurface adjustments can be made with a 5mm Allen wrench.
Steps to create your custom cluster:Page 18 & 20.1.   Select the appropriate starter personal space. 	Page 40, 42, or 41.Select extension personal spaces to complete the basic shape of your configuration. Page 40,41 or 42.
Power & Data:Page 19
Stand-Alone Personal SpacesPrivate Office Application
Meet Me SpacesMeet Me spaces extend the functionality of personal spaces, providing impromptu meeting spaces and a place to park ideas.Central and End Meet Me spaces mount at 31 1/8”. Touchdown Meet Me spaces mount at the same height as personal spaces to provide a collaboration space at the end of a cluster. Adjustable to 24” to 30”
Steps to create your custom cluster:3.   Select Meet Me spaces: central, end, and touchdown surfaces. Page 44and 45.4.   Select returns. Page 46 & 47.
How to specify a returnReturn sizes do not have to match as shown.You may use a 67” on one side with an 82” on the other or a mini return. Bracket specification should be a edge and end at the end of a cluster.A mini-return ships with an edge bracket.A return must be used on both sides to cover the center support where electrical and data are located.Having a return, central or end meet me changes the width of the low or low box terrace.
Go to Soon.
Low, Box and Elevated TerracesPage 23 - 26Select terraces: low, box, and elevated. Page 48 – 53.
Elevated 120° TerracesSelect terraces: low, box, and elevated.
Planning Factors for Elevated Terraces120° elevated terrace* It is not possible to use an elevated terrace on a single dual-sided personal workspace in the center of two 120° elevated terraces.120° elevated terrace – starter dual sided terrace – 120° elevated terrace
See me Screen
ScreensPage 27Select screens. Page 54-58.INTERWORKS
Application MatrixPage 28Suggestion:Mark this page with a post-it.INTERWORKS
Mobile Pedestals and Storage UnitsPage 307. Select storage. Page 59.INTERWORKS
Drawer Configurations and Filing CapabilitiesPage 27Suggestion:Mark this page with a post-it.INTERWORKS
Modesty PanelsPage 31Suggestion:Mark this page with a post-it.8.   Select modesty panels.INTERWORKS
Modesty PanelsPage 32Suggestion:Mark this page with a post-it.8.   Select modesty panels for single sided.INTERWORKS
Single-Circuit ElectricalPage 33Select power and data components. Page 70INTERWORKS
Four-Circuit ElectricalPage 35Select power and data components. Page 71INTERWORKS
AccessoriesPage 37 & 3810.  Select accessories. Page 74 -76INTERWORKS
Lock Core RequirementsPage 91Suggestion:Mark this page with a post-it.INTERWORKS
Kimball Office ResourcesDealer Sales ManagerSales SpecialistCustomer Care/ By Design800.482.1818 Product Technical Support800.481.6696Product SpecifierAlibia de VenteMarket Education770.265.4006 orAlibia.devente@kimball.com
Planning and Staging importantGood plans/drawings
Proper tools (5 & 3 mm Hex and PoziDrive bit)
Proper sequence
Installation Video and Instructions are available
Reconfigure (sequence)

2010 Hum

Editor's Notes

  • #4 Sustainability Facts:
  • #6 Wool Felt coordinates are available on page 74, addition to 19 to the code.
  • #7 Wool Felt coordinates are available on page 74, addition to 19 to the code.
  • #8 Wool Felt coordinates are available on page 74, addition to 19 to the code.
  • #9 Wool Felt coordinates are available on page 74, addition to 19 to the code.
  • #10 Wool Felt coordinates are available on page 74, addition to 19 to the code.
  • #11 Wool Felt coordinates are available on page 74, addition to 19 to the code.
  • #12 Wool Felt coordinates are available on page 74, addition to 19 to the code.
  • #13 Wool Felt coordinates are available on page 74, addition to 19 to the code.
  • #14 Wool Felt coordinates are available on page 74, addition to 19 to the code.
  • #15 Wool Felt coordinates are available on page 74, addition to 19 to the code.
  • #17 Wool Felt coordinates are available on page 74, addition to 19 to the code.
  • #19 Wool Felt coordinates are available on page 74, addition to 19 to the code.
  • #20 Wool Felt coordinates are available on page 74, addition to 19 to the code.
  • #21 Wool Felt coordinates are available on page 74, addition to 19 to the code.
  • #23 Single-sided has a left or right designation.
  • #27 Single or dual-sided low terrace.Single-sided mini low terrace
  • #28 Wool Felt coordinates are available on page 74, addition to 19 to the code.
  • #29 Start here and go back and update the page number references for specking the 10 points.
  • #41 Assembly instructions will be available in July. Symbols area available either online as a download or with the June set of CD’s. Your regional product specification team or myself will be happy to review a typical that is specified. You can request a recorded copy of this session if needed.