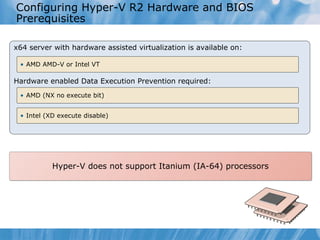
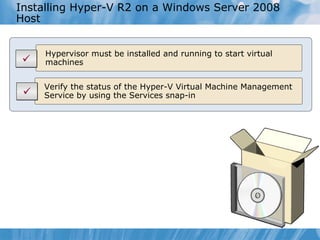
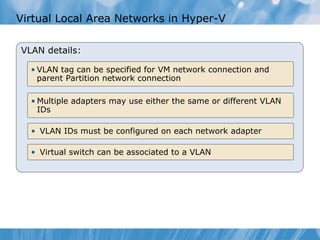
SlideShare a Scribd company logo
Module   2 Installing and Configuring the Hyper-V R2 Server Role
Module Overview ,[object Object],[object Object]
Lesson  1 : Installing the Hyper-V Server Role  ,[object Object],[object Object],[object Object],[object Object],[object Object]
Configuring Hyper-V R2 Hardware and BIOS Prerequisites Hyper-V does not support Itanium (IA-64) processors x64 server with hardware assisted virtualization is available on: Hardware enabled Data Execution Prevention required: ,[object Object],[object Object],[object Object]
Installing Hyper-V R2 on a Windows Server 2008 Host Verify the status of the Hyper-V Virtual Machine Management Service by using the Services snap-in Hypervisor must be installed and running to start virtual machines  
Tools Used to Manage the Hyper-V R2 Role  Management tools: Virtual Machine Connection Remote Desktop Protocol Windows Vista SP2: Download available Windows 7: Download available Windows Server 2008 R2: Add feature using Server Manager     
Demonstration: Installing Hyper-V on a Server Core Installation  ,[object Object]
Demonstration: Remote Administration ,[object Object],[object Object],[object Object],[object Object]
Lesson  2 : Configuring Hyper-V Settings and Virtual Networks  ,[object Object],[object Object],[object Object],[object Object],[object Object],[object Object],[object Object],[object Object],[object Object]
Overview of Hyper-V R2 Settings Hyper-V Servers Listing of Virtual Machines Hyper-V Server Actions Virtual Machine Actions
Considerations for Choosing Default Folders Locations File storage: Considerations: ,[object Object],[object Object],[object Object],[object Object],[object Object],[object Object],[object Object]
Overview of User Settings for Hyper-V R2 Default Folder Locations User Settings Keyboard Actions
Demonstration: Configuring Hyper-V User Settings  ,[object Object],[object Object],[object Object],[object Object],[object Object]
Overview of Virtual Network Settings for Hyper-V R2 Virtual Network Adapters Types of Network Connections
Demonstration: Configuring Virtual Networks with Virtual Network Manager  ,[object Object],[object Object],[object Object],[object Object]
Design Considerations for External, Internal, and Private Virtual Networks  There are three types of virtual networks: ,[object Object],[object Object],[object Object]
Virtual Local Area Networks in Hyper-V  VLAN details: ,[object Object],[object Object],[object Object],[object Object]
Demonstration: Configuring Hyper-V to Support Virtual Local Area Networks ,[object Object]
L ab : Installing and Configuring the Hyper-V Server Role  ,[object Object],[object Object],[object Object],Logon information Estimated time:  45  minutes NYC-Host1, NYC-Host2 Host machines User name Administrator Password Pa$$w0rd
Lab Scenario ,[object Object]
Lab Review ,[object Object],[object Object],[object Object],[object Object]
Module Summary  ,[object Object],[object Object],[object Object],[object Object],[object Object]
Module Review and Takeaways ,[object Object],[object Object],[object Object],[object Object],[object Object]

More Related Content

What's hot

CCNA (R & S) Module 03 - Routing & Switching Essentials - Chapter 10
CCNA (R & S) Module 03 - Routing & Switching Essentials - Chapter 10CCNA (R & S) Module 03 - Routing & Switching Essentials - Chapter 10
CCNA (R & S) Module 03 - Routing & Switching Essentials - Chapter 10
Waqas Ahmed Nawaz
 
3 cucm database
3 cucm database3 cucm database
3 cucm database
pasabakac
 
VMworld 2013: vCloud Hybrid Service Jump Start Part Two of Five: vCloud Hybri...
VMworld 2013: vCloud Hybrid Service Jump Start Part Two of Five: vCloud Hybri...VMworld 2013: vCloud Hybrid Service Jump Start Part Two of Five: vCloud Hybri...
VMworld 2013: vCloud Hybrid Service Jump Start Part Two of Five: vCloud Hybri...
VMworld
 
CCNA (R & S) Module 02 - Connecting Networks - Chapter 4
CCNA (R & S) Module 02 - Connecting Networks - Chapter 4CCNA (R & S) Module 02 - Connecting Networks - Chapter 4
CCNA (R & S) Module 02 - Connecting Networks - Chapter 4
Waqas Ahmed Nawaz
 
Day 13.1 startingaswitch
Day 13.1 startingaswitchDay 13.1 startingaswitch
Day 13.1 startingaswitch
CYBERINTELLIGENTS
 
Troubleshooting Provisioning Services Target Boot Processes
Troubleshooting Provisioning Services Target Boot ProcessesTroubleshooting Provisioning Services Target Boot Processes
Troubleshooting Provisioning Services Target Boot Processes
David McGeough
 
Mikrotik
MikrotikMikrotik
Mikrotik
hzcom
 
Unattended Deployment with Zero Touch Provisioning (ZTP)
Unattended Deployment with Zero Touch Provisioning (ZTP)Unattended Deployment with Zero Touch Provisioning (ZTP)
Unattended Deployment with Zero Touch Provisioning (ZTP)
Cumulus Networks
 
CCNA Icnd110 s04l10
CCNA Icnd110 s04l10CCNA Icnd110 s04l10
CCNA Icnd110 s04l10
computerlenguyen
 
CCNA4 Verson6 Chapter7
CCNA4 Verson6 Chapter7CCNA4 Verson6 Chapter7
CCNA4 Verson6 Chapter7
Chaing Ravuth
 
CCNA Icnd110 s05l01
CCNA Icnd110 s05l01CCNA Icnd110 s05l01
CCNA Icnd110 s05l01
computerlenguyen
 
CCNA (R & S) Module 01 - Introduction to Networks - Chapter 8
CCNA (R & S) Module 01 - Introduction to Networks - Chapter 8CCNA (R & S) Module 01 - Introduction to Networks - Chapter 8
CCNA (R & S) Module 01 - Introduction to Networks - Chapter 8
Waqas Ahmed Nawaz
 
CM_SME revised bc635_637PCI_V2_Linux_SDK
CM_SME revised bc635_637PCI_V2_Linux_SDKCM_SME revised bc635_637PCI_V2_Linux_SDK
CM_SME revised bc635_637PCI_V2_Linux_SDK
Chris Muntzer
 
Chapter 3
Chapter 3Chapter 3
Chapter 3
ali raza
 
Setup guide nos-v3_5
Setup guide nos-v3_5Setup guide nos-v3_5
Setup guide nos-v3_5
Ploynatcha Akkaraputtipat
 

What's hot (15)

CCNA (R & S) Module 03 - Routing & Switching Essentials - Chapter 10
CCNA (R & S) Module 03 - Routing & Switching Essentials - Chapter 10CCNA (R & S) Module 03 - Routing & Switching Essentials - Chapter 10
CCNA (R & S) Module 03 - Routing & Switching Essentials - Chapter 10
 
3 cucm database
3 cucm database3 cucm database
3 cucm database
 
VMworld 2013: vCloud Hybrid Service Jump Start Part Two of Five: vCloud Hybri...
VMworld 2013: vCloud Hybrid Service Jump Start Part Two of Five: vCloud Hybri...VMworld 2013: vCloud Hybrid Service Jump Start Part Two of Five: vCloud Hybri...
VMworld 2013: vCloud Hybrid Service Jump Start Part Two of Five: vCloud Hybri...
 
CCNA (R & S) Module 02 - Connecting Networks - Chapter 4
CCNA (R & S) Module 02 - Connecting Networks - Chapter 4CCNA (R & S) Module 02 - Connecting Networks - Chapter 4
CCNA (R & S) Module 02 - Connecting Networks - Chapter 4
 
Day 13.1 startingaswitch
Day 13.1 startingaswitchDay 13.1 startingaswitch
Day 13.1 startingaswitch
 
Troubleshooting Provisioning Services Target Boot Processes
Troubleshooting Provisioning Services Target Boot ProcessesTroubleshooting Provisioning Services Target Boot Processes
Troubleshooting Provisioning Services Target Boot Processes
 
Mikrotik
MikrotikMikrotik
Mikrotik
 
Unattended Deployment with Zero Touch Provisioning (ZTP)
Unattended Deployment with Zero Touch Provisioning (ZTP)Unattended Deployment with Zero Touch Provisioning (ZTP)
Unattended Deployment with Zero Touch Provisioning (ZTP)
 
CCNA Icnd110 s04l10
CCNA Icnd110 s04l10CCNA Icnd110 s04l10
CCNA Icnd110 s04l10
 
CCNA4 Verson6 Chapter7
CCNA4 Verson6 Chapter7CCNA4 Verson6 Chapter7
CCNA4 Verson6 Chapter7
 
CCNA Icnd110 s05l01
CCNA Icnd110 s05l01CCNA Icnd110 s05l01
CCNA Icnd110 s05l01
 
CCNA (R & S) Module 01 - Introduction to Networks - Chapter 8
CCNA (R & S) Module 01 - Introduction to Networks - Chapter 8CCNA (R & S) Module 01 - Introduction to Networks - Chapter 8
CCNA (R & S) Module 01 - Introduction to Networks - Chapter 8
 
CM_SME revised bc635_637PCI_V2_Linux_SDK
CM_SME revised bc635_637PCI_V2_Linux_SDKCM_SME revised bc635_637PCI_V2_Linux_SDK
CM_SME revised bc635_637PCI_V2_Linux_SDK
 
Chapter 3
Chapter 3Chapter 3
Chapter 3
 
Setup guide nos-v3_5
Setup guide nos-v3_5Setup guide nos-v3_5
Setup guide nos-v3_5
 

Viewers also liked

10215 A 11
10215 A 1110215 A 11
10215 A 11
Juanchi_43
 
10215 A 07
10215 A 0710215 A 07
10215 A 07
Juanchi_43
 
10215 A 13
10215 A 1310215 A 13
10215 A 13
Juanchi_43
 
10215 A 06
10215 A 0610215 A 06
10215 A 06
Juanchi_43
 
10215 A 01
10215 A 0110215 A 01
10215 A 01
Juanchi_43
 
10215 A 12
10215 A 1210215 A 12
10215 A 12
Juanchi_43
 
10215 A 03
10215 A 0310215 A 03
10215 A 03
Juanchi_43
 
10215 A 04
10215 A 0410215 A 04
10215 A 04
Juanchi_43
 
10215 A 10
10215 A 1010215 A 10
10215 A 10
Juanchi_43
 
10215 A 08
10215 A 0810215 A 08
10215 A 08
Juanchi_43
 
10215 A 05
10215 A 0510215 A 05
10215 A 05
Juanchi_43
 
10215 A 09
10215 A 0910215 A 09
10215 A 09
Juanchi_43
 
Stratejik İnsan Kaynakları Yönetimi
Stratejik İnsan Kaynakları Yönetimi Stratejik İnsan Kaynakları Yönetimi
Stratejik İnsan Kaynakları Yönetimi
Ipek Aral
 

Viewers also liked (13)

10215 A 11
10215 A 1110215 A 11
10215 A 11
 
10215 A 07
10215 A 0710215 A 07
10215 A 07
 
10215 A 13
10215 A 1310215 A 13
10215 A 13
 
10215 A 06
10215 A 0610215 A 06
10215 A 06
 
10215 A 01
10215 A 0110215 A 01
10215 A 01
 
10215 A 12
10215 A 1210215 A 12
10215 A 12
 
10215 A 03
10215 A 0310215 A 03
10215 A 03
 
10215 A 04
10215 A 0410215 A 04
10215 A 04
 
10215 A 10
10215 A 1010215 A 10
10215 A 10
 
10215 A 08
10215 A 0810215 A 08
10215 A 08
 
10215 A 05
10215 A 0510215 A 05
10215 A 05
 
10215 A 09
10215 A 0910215 A 09
10215 A 09
 
Stratejik İnsan Kaynakları Yönetimi
Stratejik İnsan Kaynakları Yönetimi Stratejik İnsan Kaynakları Yönetimi
Stratejik İnsan Kaynakları Yönetimi
 

Similar to 10215 A 02

Virtualization & tipping point
Virtualization & tipping pointVirtualization & tipping point
Virtualization & tipping point
Finto Thomas , CISSP, TOGAF, CCSP, ITIL. JNCIS
 
Hyper-V Networking
Hyper-V NetworkingHyper-V Networking
Hyper-V Networking
Paulo Freitas
 
Microsoft Hyper-V
Microsoft Hyper-VMicrosoft Hyper-V
Microsoft Hyper-V
Davoud Teimouri
 
Kl 031.30 eng_class_setup_guide_1.2
Kl 031.30 eng_class_setup_guide_1.2Kl 031.30 eng_class_setup_guide_1.2
Kl 031.30 eng_class_setup_guide_1.2
Freddy Ortiz
 
Security best practices for hyper v and server virtualisation [svr307]
Security best practices for hyper v and server virtualisation [svr307]Security best practices for hyper v and server virtualisation [svr307]
Security best practices for hyper v and server virtualisation [svr307]
Louis Göhl
 
Cisco SDWAN - Components Deployment Workflow
Cisco SDWAN - Components Deployment WorkflowCisco SDWAN - Components Deployment Workflow
Cisco SDWAN - Components Deployment Workflow
Farooq Khan
 
Workstation pro-12 guía
Workstation pro-12 guíaWorkstation pro-12 guía
Workstation pro-12 guía
fhsjyjtyjit
 
Windows Server 2016 First Look (Part 1)
Windows Server 2016 First Look (Part 1)Windows Server 2016 First Look (Part 1)
Windows Server 2016 First Look (Part 1)
Tuan Yang
 
Lessons On Hyper V
Lessons On Hyper VLessons On Hyper V
Lessons On Hyper V
Aidan Finn
 
Fiware cloud developers week brussels
Fiware cloud developers week brusselsFiware cloud developers week brussels
Fiware cloud developers week brussels
Fernando Lopez Aguilar
 
SharePoint 2010’s Virtual Reality - SharePoint Saturday Vietnam
SharePoint 2010’s Virtual Reality - SharePoint Saturday VietnamSharePoint 2010’s Virtual Reality - SharePoint Saturday Vietnam
SharePoint 2010’s Virtual Reality - SharePoint Saturday Vietnam
Officience
 
VMworld Europe 204: Technical Deep Dive on EVO: RAIL, the new VMware Hyper-Co...
VMworld Europe 204: Technical Deep Dive on EVO: RAIL, the new VMware Hyper-Co...VMworld Europe 204: Technical Deep Dive on EVO: RAIL, the new VMware Hyper-Co...
VMworld Europe 204: Technical Deep Dive on EVO: RAIL, the new VMware Hyper-Co...
VMworld
 
SharePoint 2010 Virtualisation - SharePoint Saturday UK
SharePoint 2010 Virtualisation - SharePoint Saturday UKSharePoint 2010 Virtualisation - SharePoint Saturday UK
SharePoint 2010 Virtualisation - SharePoint Saturday UK
Michael Noel
 
Sql server 2008 best practices
Sql server 2008 best practicesSql server 2008 best practices
Sql server 2008 best practices
Klaudiia Jacome
 
Hyper-V Networking
Hyper-V NetworkingHyper-V Networking
Hyper-V Networking
Paulo Freitas
 
Top Issues For Microsoft Support For Windows Server
Top Issues For Microsoft Support For Windows ServerTop Issues For Microsoft Support For Windows Server
Top Issues For Microsoft Support For Windows Server
Blauge
 
Running Sql2008 In Hyper V2008
Running Sql2008 In Hyper V2008Running Sql2008 In Hyper V2008
Running Sql2008 In Hyper V2008
Eduardo Castro
 
Comparação Hyper-V Windows 2008 R2 e Windows 2012
Comparação Hyper-V Windows 2008 R2 e Windows 2012Comparação Hyper-V Windows 2008 R2 e Windows 2012
Comparação Hyper-V Windows 2008 R2 e Windows 2012
grvalle_
 
Comando kvm terminal
Comando kvm terminalComando kvm terminal
Comando kvm terminal
Carlos Eduardo
 
VMWARE Professionals - Security, Multitenancy and Flexibility
VMWARE Professionals -  Security, Multitenancy and FlexibilityVMWARE Professionals -  Security, Multitenancy and Flexibility
VMWARE Professionals - Security, Multitenancy and Flexibility
Paulo Freitas
 

Similar to 10215 A 02 (20)

Virtualization & tipping point
Virtualization & tipping pointVirtualization & tipping point
Virtualization & tipping point
 
Hyper-V Networking
Hyper-V NetworkingHyper-V Networking
Hyper-V Networking
 
Microsoft Hyper-V
Microsoft Hyper-VMicrosoft Hyper-V
Microsoft Hyper-V
 
Kl 031.30 eng_class_setup_guide_1.2
Kl 031.30 eng_class_setup_guide_1.2Kl 031.30 eng_class_setup_guide_1.2
Kl 031.30 eng_class_setup_guide_1.2
 
Security best practices for hyper v and server virtualisation [svr307]
Security best practices for hyper v and server virtualisation [svr307]Security best practices for hyper v and server virtualisation [svr307]
Security best practices for hyper v and server virtualisation [svr307]
 
Cisco SDWAN - Components Deployment Workflow
Cisco SDWAN - Components Deployment WorkflowCisco SDWAN - Components Deployment Workflow
Cisco SDWAN - Components Deployment Workflow
 
Workstation pro-12 guía
Workstation pro-12 guíaWorkstation pro-12 guía
Workstation pro-12 guía
 
Windows Server 2016 First Look (Part 1)
Windows Server 2016 First Look (Part 1)Windows Server 2016 First Look (Part 1)
Windows Server 2016 First Look (Part 1)
 
Lessons On Hyper V
Lessons On Hyper VLessons On Hyper V
Lessons On Hyper V
 
Fiware cloud developers week brussels
Fiware cloud developers week brusselsFiware cloud developers week brussels
Fiware cloud developers week brussels
 
SharePoint 2010’s Virtual Reality - SharePoint Saturday Vietnam
SharePoint 2010’s Virtual Reality - SharePoint Saturday VietnamSharePoint 2010’s Virtual Reality - SharePoint Saturday Vietnam
SharePoint 2010’s Virtual Reality - SharePoint Saturday Vietnam
 
VMworld Europe 204: Technical Deep Dive on EVO: RAIL, the new VMware Hyper-Co...
VMworld Europe 204: Technical Deep Dive on EVO: RAIL, the new VMware Hyper-Co...VMworld Europe 204: Technical Deep Dive on EVO: RAIL, the new VMware Hyper-Co...
VMworld Europe 204: Technical Deep Dive on EVO: RAIL, the new VMware Hyper-Co...
 
SharePoint 2010 Virtualisation - SharePoint Saturday UK
SharePoint 2010 Virtualisation - SharePoint Saturday UKSharePoint 2010 Virtualisation - SharePoint Saturday UK
SharePoint 2010 Virtualisation - SharePoint Saturday UK
 
Sql server 2008 best practices
Sql server 2008 best practicesSql server 2008 best practices
Sql server 2008 best practices
 
Hyper-V Networking
Hyper-V NetworkingHyper-V Networking
Hyper-V Networking
 
Top Issues For Microsoft Support For Windows Server
Top Issues For Microsoft Support For Windows ServerTop Issues For Microsoft Support For Windows Server
Top Issues For Microsoft Support For Windows Server
 
Running Sql2008 In Hyper V2008
Running Sql2008 In Hyper V2008Running Sql2008 In Hyper V2008
Running Sql2008 In Hyper V2008
 
Comparação Hyper-V Windows 2008 R2 e Windows 2012
Comparação Hyper-V Windows 2008 R2 e Windows 2012Comparação Hyper-V Windows 2008 R2 e Windows 2012
Comparação Hyper-V Windows 2008 R2 e Windows 2012
 
Comando kvm terminal
Comando kvm terminalComando kvm terminal
Comando kvm terminal
 
VMWARE Professionals - Security, Multitenancy and Flexibility
VMWARE Professionals -  Security, Multitenancy and FlexibilityVMWARE Professionals -  Security, Multitenancy and Flexibility
VMWARE Professionals - Security, Multitenancy and Flexibility
 

More from Juanchi_43

System Center 2012
System Center 2012System Center 2012
System Center 2012
Juanchi_43
 
Configurando Private Cloud con System Center 2012
Configurando Private Cloud con System Center 2012Configurando Private Cloud con System Center 2012
Configurando Private Cloud con System Center 2012
Juanchi_43
 
10215 A 14
10215 A 1410215 A 14
10215 A 14
Juanchi_43
 
10215 A 00
10215 A 0010215 A 00
10215 A 00
Juanchi_43
 
VDI Infraestructure
VDI InfraestructureVDI Infraestructure
VDI Infraestructure
Juanchi_43
 
020811 Introduction To Virtualization 279337
020811 Introduction To Virtualization 279337020811 Introduction To Virtualization 279337
020811 Introduction To Virtualization 279337
Juanchi_43
 
Mof
MofMof
ITIL FOUNDATION
ITIL FOUNDATIONITIL FOUNDATION
ITIL FOUNDATION
Juanchi_43
 

More from Juanchi_43 (8)

System Center 2012
System Center 2012System Center 2012
System Center 2012
 
Configurando Private Cloud con System Center 2012
Configurando Private Cloud con System Center 2012Configurando Private Cloud con System Center 2012
Configurando Private Cloud con System Center 2012
 
10215 A 14
10215 A 1410215 A 14
10215 A 14
 
10215 A 00
10215 A 0010215 A 00
10215 A 00
 
VDI Infraestructure
VDI InfraestructureVDI Infraestructure
VDI Infraestructure
 
020811 Introduction To Virtualization 279337
020811 Introduction To Virtualization 279337020811 Introduction To Virtualization 279337
020811 Introduction To Virtualization 279337
 
Mof
MofMof
Mof
 
ITIL FOUNDATION
ITIL FOUNDATIONITIL FOUNDATION
ITIL FOUNDATION
 

10215 A 02

  • 1. Module 2 Installing and Configuring the Hyper-V R2 Server Role
  • 2.
  • 3.
  • 4.
  • 5. Installing Hyper-V R2 on a Windows Server 2008 Host Verify the status of the Hyper-V Virtual Machine Management Service by using the Services snap-in Hypervisor must be installed and running to start virtual machines  
  • 6. Tools Used to Manage the Hyper-V R2 Role Management tools: Virtual Machine Connection Remote Desktop Protocol Windows Vista SP2: Download available Windows 7: Download available Windows Server 2008 R2: Add feature using Server Manager     
  • 7.
  • 8.
  • 9.
  • 10. Overview of Hyper-V R2 Settings Hyper-V Servers Listing of Virtual Machines Hyper-V Server Actions Virtual Machine Actions
  • 11.
  • 12. Overview of User Settings for Hyper-V R2 Default Folder Locations User Settings Keyboard Actions
  • 13.
  • 14. Overview of Virtual Network Settings for Hyper-V R2 Virtual Network Adapters Types of Network Connections
  • 15.
  • 16.
  • 17.
  • 18.
  • 19.
  • 20.
  • 21.
  • 22.
  • 23.

Editor's Notes

  1. Presentation: 60 minutes Lab: 30 minutes After completing this module, students will be able to: Explain how to install the Hyper-V™ Server Role. Explain how to configure Hyper-V settings and virtual networks.. Required materials To teach this module, you need the Microsoft® Office PowerPoint® file 10215A_02.ppt. Important: It is recommended that you use PowerPoint 2002 or a later version to display the slides for this course. If you use PowerPoint Viewer or an earlier version of PowerPoint, all the features of the slides might not be displayed correctly. Preparation tasks To prepare for this module: Read all of the materials for this module. Practice performing the demonstrations and the lab exercises. Work through the Module Review and Takeaways section, and determine how you will use this section to reinforce student learning and promote knowledge transfer to on-the-job performance. Make sure that students are aware that Course Companion CD has additional information and resources for the module. Module 2: Installing and Configuring the Hyper-V R2 Server Role Implementing and Managing Microsoft Server Virtualization
  2. Module 2: Installing and Configuring the Hyper-V R2 Server Role Implementing and Managing Microsoft Server Virtualization
  3. Module 2: Installing and Configuring the Hyper-V R2 Server Role Implementing and Managing Microsoft Server Virtualization
  4. Hyper-V runs on a x64 server platform and requires support of either AMD64 or Intel x64 processors with hardware-assisted virtualization support. Hyper-V does not support Itanium (IA-64) processors. For the virtual machines, Hyper-V supports both x32 and x64 systems as guest operating systems. Your system may require an update to the latest available BIOS version for your server hardware. Note: You can install the Hyper-V Role, but the virtual machines will not run if you disable virtualization. Module 2: Installing and Configuring the Hyper-V R2 Server Role Implementing and Managing Microsoft Server Virtualization
  5. You must install, and begin running, the hypervisor before you can start any virtual machine. The Hyper-V Virtual Machine Management Service must be running to manage virtual machines. You can verify the status of the Hyper-V Virtual Machine Management Service by using the Services snap-in located in Administrative Tools. Two additional services are also started including the Hyper-V Image Management Service and the Hyper-V Networking Management Service. Module 2: Installing and Configuring the Hyper-V R2 Server Role Implementing and Managing Microsoft Server Virtualization
  6. Remote Server Administration Tools (RSAT) is one of several methods that you can use to manage Hyper-V servers remotely. To install the Remote Server Administration Tools, the host must be running Windows Server® 2008, Windows Vista® SP1 or newer, or Windows® 7. You perform the installation of the Remote Server Administration Tools on Windows Server 2008 by using the same method as you would to add the feature by using Server Manager. However, the installation on a Windows Vista SP1 requires downloading a separate package for installation (KB952627). Module 2: Installing and Configuring the Hyper-V R2 Server Role Implementing and Managing Microsoft Server Virtualization
  7. Demonstration steps: Use Deployment Image Servicing and Management (DISM.exe) to install the Hyper-V server role 1. On NYC-Host1, ensure that the NYC-DC1 virtual machine is running. 2. Ensure that the NYC-SVR2 virtual machine is running. 3. Connect to NYC-SVR2. Log on to NYC-SVR2 as Contoso\\Administrator with the password Pa$$W0rd . 4. At the command prompt, type Dism /online /get-features /Format:table and press ENTER. This command displays the roles installed on the server. 5. At the command prompt, type Dism /online /enable-feature /featurename:Microsoft-Hyper-V and press ENTER. 6. Type Y to restart the computer. Use netsh to review the Windows Firewall configuration after the installation 1. After the server restarts, log on to NYC-SVR2 as Contoso\\Administrator with the password Pa$$W0rd . 2. At the command prompt, type netsh advfirewall firewall show rule name=all dir=in > rules.txt and press ENTER 3. At the command prompt, type notepad rules.txt. Scroll to the top of the Notepad file and show the Hyper-V firewall rules that have been enabled. 4. Close Notepad. Module 2: Installing and Configuring the Hyper-V R2 Server Role Implementing and Managing Microsoft Server Virtualization
  8. Demonstration steps: 1. On NYC-Host1, ensure that the NYC-DC1 virtual machine is running. 2. Ensure that the NYC-SVR2 and NYC-CL1 virtual machines are running. Use Connection Manager to connect to a Hyper-V Server 2008 R2 1. On NYC-Host1, click Start , point to Administrative Tools and then click Hyper-V Manager . 2. In Hyper-V Manager , right-click Hyper-V Manager , and then click Connect to Server . 3. Click Another computer , type NYC-SVR2 , and click OK . Verify that you can connect to the Hyper-V server. Install and use RSAT Note: The installation of the RSAT takes about 5 minutes. Consider starting the installation earlier in the module presentation. 1. Connect to NYC-CL1. Log on to NYC-CL1 as Contoso\\Administrator with the password Pa$$W0rd . 2. On NYC-CL1, open Windows Explorer and browse to E:\\Labfiles . 3. Double-click x86fre_GR MRSATX_MSU . In the Windows Update Standalone Installer dialog box, click Yes , and then click I accept . 4 . Wait for the installation to complete, and then click Close . 5. Close the Windows 7 Remote Administration window. 6. Click Start , click Control Panel , and then click Programs . In Programs , click Turn Windows features on and off . 7. In the Windows Features window, expand Remote Server Administration Tools , and then expand Role Administration Tools . 8. Check the check box next to Hyper-V Tools , and then click OK . 9. Click Control Panel , and then click System and Security . In System and Security , click Administrative Tools . 10. In the Administrative Tools window, double-click the Hyper-V Manager shortcut. 11. In the Hyper-V Manager , right-click Hyper-V Manager , and click Connect to Server . 12. In the Select Computer window, click Another Computer , and then in the box, type NYC-Host1 , and then click OK . Verify that you can connect to the Hyper-V server. Use RDP to manage the Hyper-V Server 2008 R2 1. On NYC-CLI, click Start . In the Search box, type mstsc.exe . 2. In the Remote Desktop Connection box, type LON-SRV3 , and then click Connect . 3. In the Windows Security window, type Contoso\\administrator for the user and Pa$$w0rd for the password. Click OK . Verify that you can connect to the Hyper V server. 4. In the NYC-Host1 window, click Start , and click Log off . Question : What tools would you use from a Windows 7 client to manage a Hyper-V Server 2008 R2? Answer : The Remote Server Administration Tools or Remote Desktop. Module 2: Installing and Configuring the Hyper-V R2 Server Role Implementing and Managing Microsoft Server Virtualization
  9. Module 2: Installing and Configuring the Hyper-V R2 Server Role Implementing and Managing Microsoft Server Virtualization
  10. Cover each of the panes, their purpose, and what is found in each location. Let students know that later sections will provide more detail on these subjects. Module 2: Installing and Configuring the Hyper-V R2 Server Role Implementing and Managing Microsoft Server Virtualization
  11. Remind students that virtual machines can take a lot of space, especially if they use snapshots. You need to set permissions for the virtual machines so that they are not compromised. Placing the virtual machines on separate physical drives will improve performance. Move the location of the virtual hard disks, and configuration files and folders, to a separate drive, and then control them by using permissions. Module 2: Installing and Configuring the Hyper-V R2 Server Role Implementing and Managing Microsoft Server Virtualization
  12. Cover each of the panes, and discuss the following: Server settings for default locations. User settings for keyboard, mouse, user credentials, and the reset check box. Module 2: Installing and Configuring the Hyper-V R2 Server Role Implementing and Managing Microsoft Server Virtualization
  13. Keyboard On NYC-Host1, ensure that the Hyper-V Manager is open. Keyboard 1. In Hyper-V Manager , click NYC-HOST1 2. In the Actions pane, under NYC-HOST1 , click Hyper-V Settings . 3. Under User , click Keyboard . Describe the configuration options. Configure Mouse Release Keys Under User , click Mouse Release Key . Describe the configuration options. Manage User Credentials Under User , click User Credentials . Describe the configuration option. Reset Check Boxes Under User , click Reset Check Boxes . Describe the configuration option. Question: When might you choose to reset the Hyper-V check boxes? Answer: Most of the wizards in Hyper-V provide an introductory page that provides an overview of the task that the wizard will perform and often provides a link to the Help files for the specific task. On the introductory page, you have the option of selecting a check box that will result in the page not being displayed again. If you want to see the page after you have selected the check box, you can reset the check boxes. Module 2: Installing and Configuring the Hyper-V R2 Server Role Implementing and Managing Microsoft Server Virtualization
  14. Discuss the use of virtual networks. Also, discuss the Global Network Settings and the media access control (MAC) address ranges. Module 2: Installing and Configuring the Hyper-V R2 Server Role Implementing and Managing Microsoft Server Virtualization
  15. Demonstration steps: Create a new internal virtual network 1. On NYC-Host1, ensure that the NYC-DC1 virtual machine is running. 2. Ensure that the NYC-SVR2 and NYC-CL1 virtual machines are running. Create a new internal virtual network 1. On NYC-Host1, in Hyper-V Manager , in the Actions pane, click Virtual Network Manager . 2. In the Virtual Network Manger window, click Internal . Internal networks are used to communicate between the host computer and virtual machines on the host computer. 3. In the Name field, type Internal Network and then click OK . 4. Click Start , right-click Network , and click Properties . 5. On the Network and Sharing Center window, click Change adapter settings . 6. Right-click the Local Area Connection that is connected to the Internal Network, and click Properties . 7. Click Internet Protocol Version 4 (TCP/IPv4) , and click Properties . Verify that no IP address is configured and click Cancel . In order for the host computer to communicate with the virtual machines using this network, the network adapter would need to be configured with an IP address configuration that is able to communicate with the virtual machines. 8. Close the Local Area Connection dialog box, and close the Network Connections window. Configure the MAC address range 1. In Hyper-V Manager , in the Actions pane, click Virtual Network Manager . 2. In the Virtual Network Manger window, click MAC Address Range . 3. Beside Maximum, change the value of the fifth pane by one, and click OK . Modify an existing external virtual network 1. In Hyper-V Manager , in the Actions pane, click Virtual Network Manager . 2. In the Virtual Network Manger window, click External Network . 3. In the Virtual Network Properties pane, change the Notes information to External network connection used by all virtual machines .4. Click OK . Question : When would use a private, internal, and external network? Answer : You would use a private network when the virtual machines on the host need to communicate with other virtual machines on the host only. An internal network is used to allow the virtual machines to communicate with each other and with the host computer. External networks enable the virtual machines to communicate with other hosts on the network. Module 2: Installing and Configuring the Hyper-V R2 Server Role Implementing and Managing Microsoft Server Virtualization
  16. You can configure three types of networks by using the Virtual Network Manager Tool: External: This network binds to a physical network adapter on the Hyper-V server, so that the virtual machine can access a physical network or can be accessed from within the corporate network or outside the corporate network Internal: This network is for use by the virtual machines that are running on the Hyper-V Server. Virtual machines on this network can communicate with each other and with the Parent Partition, but not external to the physical machine. Can be used for a training environment or to simulate a network. Private: Only virtual machines can use this network. There is no association with any physical network adapter in the Parent Partition. Used when the virtual machines will never access or be accessed by either the base system or beyond. Great for secure segments and R&D. The Virtual Network Manager also provides for Virtual Local Access Network (VLAN) isolation on External and Internal networks, but not on Private networks. If you are using an External network configuration, which maps to a physical network adapter in the Parent Partition, you must configure the physical network adapter for VLAN support on the physical network. Module 2: Installing and Configuring the Hyper-V R2 Server Role Implementing and Managing Microsoft Server Virtualization
  17. The Hyper-V role of Windows Server 2008 can specify a VLAN ID for the virtual machine network connection and for the parent partition network connection. To enable VLAN ID for a parent partition, click to select the Enable virtual LAN identification check box to enable VLAN ID and to specify an ID. You specify an ID under Virtual Network Properties on the Virtual Network Manager page in the Hyper-V Manager. To enable VLAN ID for a virtual machine, access the properties of the virtual machine, and then select the virtual network adapter. Click to select the Enable virtual LAN identification check box to enable VLAN tagging and to specify an ID that you want the virtual machine connection to use. A virtual machine may have multiple network adapters, and all these adapters may use either the same or different VLAN IDs. Therefore, you must perform this action on each network adapter. Module 2: Installing and Configuring the Hyper-V R2 Server Role Implementing and Managing Microsoft Server Virtualization
  18. Demonstration steps: 1. On NYC-Host1, ensure that the NYC-DC1 virtual machine is running. 2. Ensure that the NYC-SVR2 and NYC-CL1 virtual machines are running. Configure an additional internal virtual network 1. In Hyper-V Manager , in the Actions pane, click Virtual Network Manager . 2. In the Virtual Network Manger window, click Internal , and then click Add . 3. In the New Virtual Network pane, under Name , type Internal-One , and then click OK . Configure different VLAN IDs for each internal virtual network 1. In Hyper-V Manager , in the Actions pane, click Virtual Network Manager . 2. In the Virtual Networks window, click Internal-One . 3. In the New Virtual Network pane, check the Enable virtual LAN identification for management operating system box. 4. Change the VLAN ID to 3 , and then click OK . 5. In Hyper-V Manager , in the Actions pane, click Virtual Network Manager . 6. In the Virtual Networks window, click Internal Network . 7. In the New Virtual Network pane, check the Enable virtual LAN identification for management operating system box. 8. Change the VLAN ID to 4 , and then click OK . 9. In the New Virtual Network pane, under Name , type Internal-One , and then click OK . Show that two virtual machines cannot communicate with each other 1. Connect to NYC-CL1. Open a command prompt, type Ping NYC-DC1 and press ENTER. Verify that NYC-CL1 is able to communicate with NYC-DC1. 2. In Hyper-V Manager , right-click NYC-CL1, and click Settings . 3. In Settings for NYC-CL1 , click the Network Adapter . In the Network list, click InternalOne . Click OK . 4. In Hyper-V Manager , right-click NYC-DC1, and click Settings . 5. In Settings for NYC-CL1 , click the Network Adapter . In the Network list, click Internal Network . Click OK . 6. On NYC-CL1, at the command prompt, type Ping NYC-DC1 and press ENTER. Verify that NYC-CL1 is not able to communicate with NYC-DC1 7. Change the network settings for both NYC-DC1 and NYC-CL1 to use the External Network again. Question : When would you use VLAN ID on a network? Answer : You use a VLAN ID on a network when you have more than one VLANs. Module 2: Installing and Configuring the Hyper-V R2 Server Role Implementing and Managing Microsoft Server Virtualization
  19. Lab: Implementing Inheritance (45 minutes) Lab Goal: Students will create an inheritance structure that includes polymorphic methods. Students also will use the inheritance structure to implement the business scenario. Lab Objectives: Install the Hyper-V Role. Determine configuration settings for the virtual network based on organizational requirements. Configure virtual network settings using Virtual Network Manager. Installing (remote management tools). Exercise 1: Installing the Hyper-V Role The student will install the Hyper-V Role. Exercise 2: Determining Virtual Network Configuration Settings The student will determine configuration settings for the virtual network. Exercise 3: Configuring Virtual Network Settings Using Virtual Network Manager The student will configure virtual network settings by using Virtual Network Manager. Module 2: Installing and Configuring the Hyper-V R2 Server Role Implementing and Managing Microsoft Server Virtualization
  20. Module 2: Installing and Configuring the Hyper-V R2 Server Role Implementing and Managing Microsoft Server Virtualization
  21. Module 2: Installing and Configuring the Hyper-V R2 Server Role Implementing and Managing Microsoft Server Virtualization
  22. Module 2: Installing and Configuring the Hyper-V R2 Server Role Implementing and Managing Microsoft Server Virtualization
  23. Review Questions 1. What are the hardware and BIOS prerequisites to install the Hyper-V Role? Answer: 64-bit hardware, hardware DEP, and hardware-assisted virtualization. 2. What are the differences between External, Internal, and Private network connection types? Answer: You use an external connection type to communicate beyond the virtual machine and the host. An external connection type gives access to the physical network. An internal allows the virtual machines and the host operating system to communicate. A private network allows only the virtual machines to communicate with each other. 3. Where is the option to change the location of the .VHD and virtual machines? Answer: It is on the Server Settings tab. 4. What does it mean when the mouse pointer displays as a small dot in a virtual machine window? Answer: The mouse has not been released from the virtual machine. Implementing and Managing Microsoft Server Virtualization Module 2: Installing and Configuring the Hyper-V R2 Server Role