Canatal modulo web m52 web-interface_datasheet
•
0 likes•110 views

The document provides instructions for configuring the network and web interface settings of ClimateWorx air conditioning control systems. It describes connecting the web interface to the network using a crossover cable and default IP address of 10.0.0.188. The instructions explain how to access the web interface and change the IP address if needed. Additional sections cover configuring system settings like temperature units and clock, assigning addresses to individual units, monitoring unit data and alarms, and setting up email alerts.

Recommended
Recommended
More Related Content
What's hot
What's hot (20)
Similar to Canatal modulo web m52 web-interface_datasheet
Similar to Canatal modulo web m52 web-interface_datasheet (20)
Recently uploaded
Recently uploaded (20)
Canatal modulo web m52 web-interface_datasheet
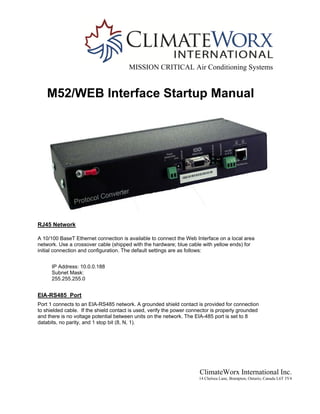
- 1. MISSION CRITICAL Air Conditioning Systems ClimateWorx International Inc. 14 Chelsea Lane, Brampton, Ontario, Canada L6T 3Y4 M52/WEB Interface Startup Manual RJ45 Network A 10/100 BaseT Ethernet connection is available to connect the Web Interface on a local area network. Use a crossover cable (shipped with the hardware; blue cable with yellow ends) for initial connection and configuration. The default settings are as follows: IP Address: 10.0.0.188 Subnet Mask: 255.255.255.0 EIA-RS485 Port Port 1 connects to an EIA-RS485 network. A grounded shield contact is provided for connection to shielded cable. If the shield contact is used, verify the power connector is properly grounded and there is no voltage potential between units on the network. The EIA-485 port is set to 8 databits, no parity, and 1 stop bit (8, N, 1).
- 2. ClimateWorx International Inc. 14 Chelsea Lane, Brampton, Ontario, Canada L6T 3Y4 WEB INTERFACE The Web Interface network connection allows users to configure and view current information from the hardware. When logging on to the Web interface, navigate to the unit’s IP address in a Web browser. A prompt will ask for a username and password. Enter in the appropriate information. Default Settings: IP: 10.0.0.188 Username: fds Password: - none/blank- Figure 1: Log in Page Once you login using the default IP settings, you can assign a new IP address if required. Configuring Communication: The Web interface will not communicate over a user’s network the first time it is connected to the network. At the factory, the Web interface is set with a default IP address of 10.0.0.188 and Subnet Mask: 255.255.255.0 You must change this default address to an IP address that corresponds with your network before the Web interface can communicate over the network. Unless you are familiar with setting the IP address, consult your IT department before attempting this procedure. To use a Web browser to set the Web Interface’s IP address:
- 3. ClimateWorx International Inc. 14 Chelsea Lane, Brampton, Ontario, Canada L6T 3Y4 1. Plug a crossover network cable into the laptop or workstation that will be used to configure the Web Interface. 2. Write down the computer’s current IP address and Subnet Mask. IMPORTANT you will need to change the computer's IP address and Subnet Mask back to the original settings after changing the IP address and Subnet Mask for the Web Interface. 3. Change the IP address and Subnet Mask of the computer from its existing address to one that will allow it to communicate with the Web Interface, such as 10.0.0.180. Note: It may be beneficial to set the IP address to one that is one number different from the Web Interface IP address. Consult the computer's manual or your IT department before attempting this procedure. 4. Connect the other end of the network cable to the Ethernet port on the back of the Web Interface. 5. Access the Web Interface through a Web browser by typing the IP address (10.0.0.188) into the location bar. To change the IP Address Go to Configuration -> Network Settings Enter New IP Address; Net Mask and Def Route -> Click on submit changes Figure 2: ClimateWorx Network Settings page
- 4. ClimateWorx International Inc. 14 Chelsea Lane, Brampton, Ontario, Canada L6T 3Y4 Web Configuration: Figure 3: ClimateWorx Web Settings page System Name: You can give a name to the Web Interface. Web Password Read Only: An alphanumeric value of 16 characters maximum. Enter a password so you can access the Web interface and view the conditions. Web Password Read/Write: An alphanumeric value of 16 characters maximum. Enter a password so you can view the conditions and make changes to the Web interface configuration. Web Refresh Rate: This integer value represents how long the system waits until it updates the Web interface with current data. To change the rate, click in the field and type the desired amount of time (in seconds). The default refresh rate is set to 0, which means the Web interface will not refresh at all. If you want the system to automatically refresh, set the refresh rate to a positive number greater than 0. The minimum recommended refresh rate is five seconds. A slower rate could cause errors that prevent the system from functioning properly.
- 5. ClimateWorx International Inc. 14 Chelsea Lane, Brampton, Ontario, Canada L6T 3Y4 Clock Configuration: Go to Configuration -> Clock Configuration Enter Date; Time and Day -> Click on submit changes Figure 4: ClimateWorx Clock Configuration Page To configure ClimateWorx units, click on ClimateWorx unit’s link as in figure 5. Figure 5: ClimateWorx Configuration Page The ClimateWorx configuration screen allows you to set the parameters for each unit and up to a maximum of 8 units.
- 6. ClimateWorx International Inc. 14 Chelsea Lane, Brampton, Ontario, Canada L6T 3Y4 Figure 5: ClimateWorx Unit Configuration Page Select the EIA- 485 Comm Type and set EIA- 485 Baud Rate to “9600” Note: To avoid the timeouts on the labels, you can set the Serial Master Poll timeout to more than3 seconds, Serial master poll internal when left at 0 defaults to 250ms. You can set the Comm Loss Alarm timeout on the ClimateWorx Configuration page to 1 or greater. Click on the number below Unit# to assign the values/ text and hit submit changes. Return to the configuration screen pick the next Unit# and continue the steps to assign the values/ text for the rest of the units. Click on the number below Unit# to get the below screen – Figure 7.1 Figure 7.0: ClimateWorx Unit Configuration page
- 7. ClimateWorx International Inc. 14 Chelsea Lane, Brampton, Ontario, Canada L6T 3Y4 Assign the ClimateWorx unit address (Network Address) Assign the Duty unit number Pick the ClimateWorx series – Series 6 or 8 or 9 or P from drop down Assign a Text label to ClimateWorx unit i.e. CRAC 1 or AC1 Figure 7.1: ClimateWorx Unit Configuration page Network Address: The RS485 address ClimateWorx will use to identify a unique unit in a BMS network. Must be 01 to 63. Please refer to M52 user manual to set the address on the machine(s). Temperature Units To change display Temperature Units - Go to Configuration -> Temperature Display Units. Selectable deg °C or °F and Click on submit changes to take effect. Figure 8: ClimateWorx Temperature Units
- 8. ClimateWorx International Inc. 14 Chelsea Lane, Brampton, Ontario, Canada L6T 3Y4 When all the units are assigned with the addresses, go back to Home page and click on the ClimateWorx units link you will see the summary of all units with the unit text label as in figure 9. The summary page gives us a snap shot status of the units. To view data of each specific unit click on the unit label and this takes you to new screen where you will see the mapped points with values from this specific unit label as in figure 10 and 10.1. Figure 9: ClimateWorx Unit Summary Page
- 9. ClimateWorx International Inc. 14 Chelsea Lane, Brampton, Ontario, Canada L6T 3Y4 Figure 10: ClimateWorx Unit Data Page Figure 10.1: ClimateWorx Unit Component RunTime Data Page
- 10. ClimateWorx International Inc. 14 Chelsea Lane, Brampton, Ontario, Canada L6T 3Y4 Alarms: Active alarms are displayed on the data point view screen as below as in figure 11. Figure 11: Active Alarm Page Alarms: Value represents the alarm status as follows: No Alarm: Active Alarm: Active Alarm Acknowledged: Figure 11.1: Active Alarm Point Value
- 11. ClimateWorx International Inc. 14 Chelsea Lane, Brampton, Ontario, Canada L6T 3Y4 Email Configuration: Use the SMTP configuration section to set up the Web interface’s communication to email recipients. The Web interface can send email to up to four recipients. Recipients can include an exchange server using a distribution list, an email account, or a cell phone. The Web interface can also communicate via ESMTP (Authenticated) to mail servers requiring a login name and password. Sample screen for reference as in figure 12. Figure 12: ClimateWorx Unit Email Configuration Example Page Email Text of Active Alarm: Will send out email with Unit tag as assigned, Date and Time Alarm logged with the Alarm description. Web Interface Gateway AH007-24905-ALM -02/06/13 14:12:48 CRAC-2 Filter Dirty Web Interface Gateway AH006-14902-ALM -02/06/13 11:51:19 pseries Low Airflow