Low Row Tunnels for Season Extension; Gardening Guidebook for Oregon

Low Row Tunnels for Season Extension; Gardening Guidebook for Oregon ~ Oregon Rural Action ~ For more information, Please see websites below: ` Organic Edible Schoolyards & Gardening with Children = http://scribd.com/doc/239851214 ~ ` Double Food Production from your School Garden with Organic Tech = http://scribd.com/doc/239851079 ~ ` Free School Gardening Art Posters = http://scribd.com/doc/239851159 ~ ` Increase Food Production with Companion Planting in your School Garden = http://scribd.com/doc/239851159 ~ ` Healthy Foods Dramatically Improves Student Academic Success = http://scribd.com/doc/239851348 ~ ` City Chickens for your Organic School Garden = http://scribd.com/doc/239850440 ~ ` Huerto Ecológico, Tecnologías Sostenibles, Agricultura Organica http://scribd.com/doc/239850233 ` Simple Square Foot Gardening for Schools - Teacher Guide = http://scribd.com/doc/239851110

Recommended
Recommended
More Related Content
What's hot
What's hot (20)
Viewers also liked
Similar to Low Row Tunnels for Season Extension; Gardening Guidebook for Oregon
Similar to Low Row Tunnels for Season Extension; Gardening Guidebook for Oregon (20)
More from School Vegetable Gardening - Victory Gardens
More from School Vegetable Gardening - Victory Gardens (20)
Recently uploaded
Recently uploaded (20)
Low Row Tunnels for Season Extension; Gardening Guidebook for Oregon
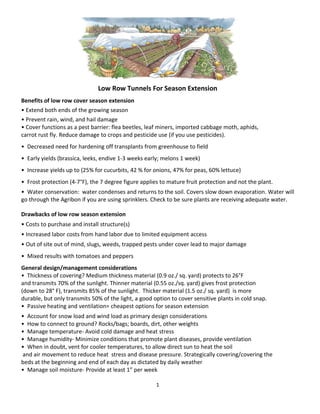
- 1. 1 Low Row Tunnels For Season Extension Benefits of low row cover season extension • Extend both ends of the growing season • Prevent rain, wind, and hail damage • Cover functions as a pest barrier: flea beetles, leaf miners, imported cabbage moth, aphids, carrot rust fly. Reduce damage to crops and pesticide use (if you use pesticides). • Decreased need for hardening off transplants from greenhouse to field • Early yields (brassica, leeks, endive 1‐3 weeks early; melons 1 week) • Increase yields up to (25% for cucurbits, 42 % for onions, 47% for peas, 60% lettuce) • Frost protection (4‐7°F), the 7 degree figure applies to mature fruit protection and not the plant. • Water conservation: water condenses and returns to the soil. Covers slow down evaporation. Water will go through the Agribon if you are using sprinklers. Check to be sure plants are receiving adequate water. Drawbacks of low row season extension • Costs to purchase and install structure(s) • Increased labor costs from hand labor due to limited equipment access • Out of site out of mind, slugs, weeds, trapped pests under cover lead to major damage • Mixed results with tomatoes and peppers General design/management considerations • Thickness of covering? Medium thickness material (0.9 oz./ sq. yard) protects to 26°F and transmits 70% of the sunlight. Thinner material (0.55 oz./sq. yard) gives frost protection (down to 28° F), transmits 85% of the sunlight. Thicker material (1.5 oz./ sq. yard) is more durable, but only transmits 50% of the light, a good option to cover sensitive plants in cold snap. • Passive heating and ventilation= cheapest options for season extension • Account for snow load and wind load as primary design considerations • How to connect to ground? Rocks/bags; boards, dirt, other weights • Manage temperature‐ Avoid cold damage and heat stress • Manage humidity‐ Minimize conditions that promote plant diseases, provide ventilation • When in doubt, vent for cooler temperatures, to allow direct sun to heat the soil and air movement to reduce heat stress and disease pressure. Strategically covering/covering the beds at the beginning and end of each day as dictated by daily weather • Manage soil moisture‐ Provide at least 1” per week
- 2. 2 • Keep the structure as cool and dry as possible. • How long to cover? 4‐5 weeks for cool‐weather crops; longer for warm season. • Remove covers periodically for pollination. For crops requiring bee pollination, the covers are removed about the time of the appearance of the first female flowers. For wind pollinated crops (tomato, pepper, eggplant), time of removal is somewhat temperature dependent since temperatures should not exceed 90o F at the late bud to open flower stage for more than a few hours. Setting up your Low Row Cover Beds Materials: 20 feet of Agribon row cover 82 inches wide; 6 wire hoops made of No. 9 wire cut to lengths of 80 inches inches; 24 metal rings (washers); needle and thread for sewing rings to row cover; optional – fabric interfacing to reinforce rings when sewn to the agribon; optional - sand and sandbags or other materials such as poles for weights to hold the sides of the covers down. 1) Select your location. Mark your growing bed spaces 4 ft wide and as long as your row cover (20 feet). Leave walkway space on either side of tunnel. Prepare your garden beds by tilling and amending the soil as needed. 2) Prepare covers by sewing on rings: Mark the center of your Agribon (41 inches from the side – as it is 82 inches wide). Starting two feet and a half feet from the end of your Agribon, for each hoop, sew four rings onto the Agribon, every twelve inches, either reinforcing the Agribon with a small piece of interfacing, or reinforcing it by doubling a small section before sewing on each ring. Position two rings on each side of center, about ten inches apart. 3) Thread the wire hoops into the washer rings, starting at one end of the 20 foot piece of Agribon, and continuing until all the hoops are threaded through rings. 4) Insert ends of the wire hoops 6 to 8 inches into the soil on each side of the row so that the width of the hoop at the base is 24 to 36 inches and the height at the apex of the hoop is 14 to 18 inches. Space hoops about 4 feet apart in the row. 5) The cover should be taut to prevent flapping in the wind. Secure sides of the row covers by burying the edges with soil or placing sand bags (5 to 7 pounds each) or other weights along the edges. To secure the ends, leave about 2 ½ feet of Agribon and fold closed and put a weight on it. Resources: http://www.catawbalandcare.org/wp-content/uploads/2011/04/Low-Tunnels-revised-version_v2.pdf http://smallfarms.oregonstate.edu/sites/default/files/season_extension_for_vegetable_production.pdf http://extension.oregonstate.edu/catalog/pdf/pnw/pnw548.pdf • Four Season Harvest‐ Eliot Coleman • Grow Food in Your Polytunnel‐Mark Gatter and Andy McKee • Gardening Under Cover‐ William Head