
Recommended
More Related Content
Similar to Measure Concentration of Vinegar Using Baking Soda
Similar to Measure Concentration of Vinegar Using Baking Soda (20)
More from johnwest
More from johnwest (20)
Recently uploaded
Recently uploaded (20)
Measure Concentration of Vinegar Using Baking Soda
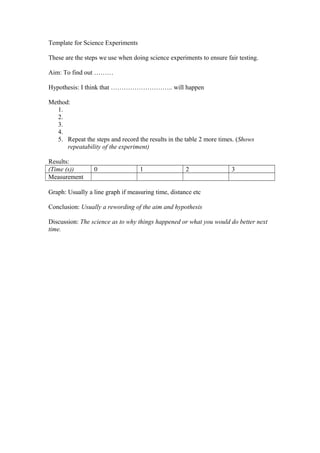
- 1. Template for Science Experiments These are the steps we use when doing science experiments to ensure fair testing. Aim: To find out ……… Hypothesis: I think that ……………………….. will happen Method: 1. 2. 3. 4. 5. Repeat the steps and record the results in the table 2 more times. (Shows repeatability of the experiment) Results: (Time (s)) 0 1 2 3 Measurement Graph: Usually a line graph if measuring time, distance etc Conclusion: Usually a rewording of the aim and hypothesis Discussion: The science as to why things happened or what you would do better next time.
- 2. Measuring concentration – Forensics Possible scenario: A wrapper that had been on some hot chips was found at the scene that appears to belong to the perpetrators of the crime. They had vinegar on their chips. The local take-away shops all use different brands on vinegar so if you can narrow down the type of vinegar you may get a lead from the takeaway shops. Concentration may be a good way to do this but first you must devise a reliable method to measure concentration of vinegar. Part 1 Aim: To measure the concentration of vinegar reliably. Hypothesis: I think that (the number of spoonfuls of baking soda will help to find the concentration of vinegar) Method: 1. Measure exactly 10ml (or 1 tablespoon, or 1 container) of vinegar into a beaker (or cup) (It will be important to keep the volume of vinegar the same throughout so you get reliable results) 2. Add 1 teaspoon of baking soda and wait 1 minute 3. Keep adding teaspoons of baking soda 1 at a time until there is no more reaction. Don’t forget to count the number of teaspoons you add and record it on the table. 4. wash out all your containers in water and repeat the whole experiment 2 more times. Results: Trial number 1 2 3 Average Number of teaspoons Draw a bar graph of results (not including the average) Conclusion: Did you get similar results each time you did the experiment? What could you do to improve your results? Discussion: The baking soda reacts with the acid in the vinegar. The stronger the concentration of vinegar then the longer the reaction will go on for and the more baking soda you will need to add. Repeat this experiment until you get reliable results. Further Experiments: • Change the brands of vinegar (dilute the other brands with water to make sure you get different results for different brands) • Change the volumes of vinegar to baking soda (use something smaller than a teaspoon?) Volumes must be equal! • Make your own indicator using red cabbage (just boil it up and filter it) and measure the number of drops of vinegar added to indicator to change its colour (measuring pH)
- 3. Experiment 2 Scenario: Some shoe prints were found at the scene of the crime but there were several different sorts. To get away from the scene of the crime the burglars had to run up a steep grassy hill in the rain. To do this they would need shoes with good grip. From the shoe prints at the scene we can identify 2 different types of shoe – a lady’s smooth soul shoe and a sports type shoe. We need to prove that the lady’s shoe could not have been worn by the burglars because they do not have enough grip. Aim: To test the which shoe has the most grip Hypothesis: I think that the burglars wore the sport shoes because they would not be able to get up the hill in the lady’s shoes. Method: 1. Take a piece of board and put the lady’s shoe on one end. 2. Raise the other end of board until the shoe slips 3. Measure the height of the board when the shoe started to slip and record in the table. 4. repeat with the lady’s shoe 2 more times 5. repeat with the sport shoe 3 times Results: Shoe type Trial 1 Trials 2 Trial 3 Average Lady’s shoe Sport shoe Conclusion: The shoe with the most grip was ………. Therefore the burglar could not have worn the ………… shoe Shoes with tread have more grip than shoes with no tread. Tread increases the friction between the sole and the ground, reducing slippage. Possible further experiments: • different types of shoe • different surfaces (add sandpaper, wire netting, lino or carpet to the board to change the ground surface) • different lengths of board (a longer board will give a greater slope) • measure the angle using trigonometry • compare wet and dry surfaces
- 4. Experiment 3 Scenario: The suspect was seen at the other end of the school 5 minutes after the crime was committed. How long could he have taken to get there. Aim: to measure the speed of the suspect Method: 1. work out the different routes from the crime scene to the point of sighting of the suspect. 2. measure the distance each route would take 3. time how long it takes you to run each route and work out the speed you went 4. repeat each route three times and record your time in the table Results: Route number Distance of route (m) Time to run the route (s) Speed (m.s-1 ) = distance ÷ time Average speed 1 2 Draw a bar graph of averages for each route Conclusion: The suspect could (not) have committed the crime because………… Possible further experiments • change the sightings between different suspects (different suspects sighted at different places around the school – eliminate those who couldn’t possibly have done it) • run, walk, use skateboards and bikes to get between sites