1. Creating Personalised Printing using Adobe Lightroom 4
(recoded by Jamsari aka Jam Jam)
1. Selecting the printer to be printed on (in this case Canon Selphy 800)
a. Click the Print option from the menu ribbon
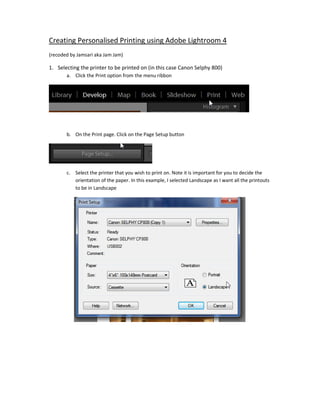
b. On the Print page. Click on the Page Setup button
c. Select the printer that you wish to print on. Note it is important for you to decide the
orientation of the paper. In this example, I selected Landscape as I want all the printouts
to be in Landscape
2. d. In the Layout Style, click on Single Image/Contact Sheet.
- Check both the Zoom to Fill & Rotate to Fit
- In Margins - ensure all are values are all zero
e. Cell Size values must also be to the maximum
3. f. Select the photo to be printed
g. In the Page Section
- Ensure page background color is not check. Leave it unless you want to waste your
ink
- Check on the Identity Plate checkbox. Ensure the Rotate Identity Plate is set to no
o
rotation (O )
4. h. Click in the Main Identity plate. Once the option window is displayed, Click on Edit
i. Type in the message that you want to print. Select font, font color, size and etc as you
desired and click on the OK button
5. j. Once the OK button is Click you will see the final product. Adjust the font to you desired
size
6. 2. Converting To template (so that it can be reused)
a. Click on the + sign in the template browser
b. A New Template window will pop-up. Type in something meaningful. In this example I use
Selphy - Landscape; Selphy the printer model and Landscape the orientation of the photo to
be printed. Click the Create button to complete the task
c. To print other photos, click on the Library menu. Choose the photo you want to print. If
needed, perform some touch- up using the Develop module. Click on Print once you are
ready to print