
Recommended
More Related Content
Similar to CSS-PPT-W1-D1.pdf
Similar to CSS-PPT-W1-D1.pdf (20)
More from ivy buncaras
More from ivy buncaras (11)
Recently uploaded
Recently uploaded (20)
CSS-PPT-W1-D1.pdf
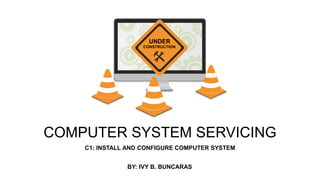
- 1. C1: INSTALL AND CONFIGURE COMPUTER SYSTEM COMPUTER SYSTEM SERVICING UNDER CONSTRUCTION BY: IVY B. BUNCARAS
- 2. CORE COMPETENCIES INSTALLING AND CONFIGURING COMPUTER SYSTEM
- 3. LEARNING CONTENT Install I/O devices 01 Create portable boot devices. 02 Customize Installer 03 Install Operating System 04 Install application software, and; 05 Conduct Testing and Documentation. 06
- 4. COMPUTER REPAIR & SUPPORT INSTALL I/O DEVICES INSTALLING KEYBOARD INSTALLING THE MOUSE INSTALLING THE MONITOR INSTALLING THE SPEAKER INSTALLING THE WEB CAM INSTALLING THE PRINTER
- 5. Make sure to read the instruction manual of your keyboard first. INSTALLING THE KEYBOARD Check whether the keyboard has a USB (flat, rectangular shape) or PS/ 2 (typically round and purple colored) connector Install the keyboard by connecting it to its proper port. Do not install the keyboard while the computer is powered on. Do not remove the keyboard while the computer is running.
- 6. The process to installing this device is like that of the keyboard. Check whether your mouse is using a PS/2 Connector, or a USB connector then connect it to its proper port. INSTALLING THE MOUSE
- 7. Identify the connection type that will connect the monitor to the motherboard or the graphics card. INSTALLING THE MONITOR A DVI, VGA, or HDMI are common ports in the monitor and used to produce best picture qualities. Once the display is plugged to its proper connector on the video card or the motherboard, the display is ready. Most of the time, drivers are not required but it should be downloaded to utilize a maximum resolution.
- 8. Common webcams can be simply plugged into the USB port, and you will be prompted to install their drivers. Some webcams would need to have its driver installed first. Make sure to read the manufacturer’s instruction manual first. INSTALLING THE WEB CAM
- 9. 1. Make sure to have the printer and power cable. 2. Connect the printer connector to the unit. 3. Insert the ink or toner cartridge to the printer. 4. Turn the printer on. 5. Power the computer. 6. Start the Printer Install Wizard. 7. Follow the instructions to install the Printer Driver. 8. Run a test print to check if the printer is installed correctly. INSTALLING THE PRINTTER
- 10. QUIZ 1
- 11. COMPUTER REPAIR & SUPPORT CONFIGURING BIOS UNDERSTANDING THE BIOS CONFIGURING THE BIOS CREATING A BOOTABLE DEVICE
- 12. COMPUTER REPAIR & SUPPORT UNDERSTANDING THE BIOS The BIOS is a software usually built onto the motherboard that show s the major hardware components of your computer with the opera ting system. It is usually stored on a Flash memory chip on the motherboard, but sometimes the chip is another type of ROM. When you turn on your computer, the BIOS does several things. Th e sequence is as follows: 1. Check the CMOS Setup for custom settings 2. Load the interrupt handlers and device drivers 3. Initialize registers and power management 4. Perform the power-on self-test (POST) 5. Display system settings 6. Determine which devices are bootable 7. Initiate the bootstrap sequence
- 13. COMPUTER REPAIR & SUPPORT CONFIGURING THE BIOS Running the BIOS Upon turning the computer on, press the keys that would run Setup. On most computers, it would be keys: ESC, DEL, F1, F2, F12, Ctrl-Esc, or Ctrl-Alt-Esc to enter setup. There is usually a line of text at the botto m of the display that tells you "Press ___ to Enter Setup." BIOS setup would depend on the motherboard manufacturer. Howe ver, these are the common, standard options you may see in the BI OS setup: 1. If you would like to boot from a certain device, say a USB Flash D rive to install an Operating System (which we will demonstrate l ater), click advanced set-up and look for the first, second, and t hird boot device. 2. Select first boot device. By default, it would be the hard drive on the installed computer. 3. Make sure to choose "Save Changes" when you are changing se ttings in the BIOS. Afterwards, this will restart the computer, so th e new settings take effect.
- 14. COMPUTER REPAIR & SUPPORT CONFIGURING THE BIOS • System Time/Date - Set the system time and date • Boot Sequence - The order that BIOS will try to load the operating system • Plug and Play - A standard for auto-detecting connect ed devices; should be set to "Yes" if your computer and operating system both support it • Mouse/Keyboard - "Enable Num Lock," "Enable the Keyb oard," "Auto-Detect Mouse"... • Drive Configuration - Configure hard drives, CD-ROM a nd floppy drives • Memory - Direct the BIOS to shadow to a specific mem ory address • Security - Set a password for accessing the computer • <p • Exit - Save your changes, discard your changes or resto re default settings
- 15. COMPUTER REPAIR & SUPPORT CONFIGURING THE BIOS
- 16. COMPUTER REPAIR & SUPPORT CREATING BOOTABLE DEVICE WHY IS BOOTING REQUIRED? • Hardware doesn’t know where the operating system resides and how to load it. • Need a special program to do this job – Bootstrap loader. (e.g. BIOS – Boot Input Output System) • Bootstrap loader locates the kernel, loads it into main memory and starts its execution. • In some systems, a simple bootstrap loader fetches a more complex boot program from disk, which in turn loads the kernel.
- 17. COMPUTER REPAIR & SUPPORT CREATING BOOTABLE DEVICE • Booting is a startup sequence that launches the operating system of a computer when it is turned on. • A boot sequence is the initial set of operations that the computer performs when it is switched on. Every computer has a boot sequence. • A boot device is any device or drive that has the required boot files that allows the computer to start. • A boot drive commonly used is the hard drive. Usually, an operating system like Microsoft Windows is installed in a hard drive to load Windows.
- 18. COMPUTER REPAIR & SUPPORT
- 19. COMPUTER REPAIR & SUPPORT INSTALL OPERATING SYSTEM DIFFERENT OPERATING SYSTEM INSTALLING OPERATING SYSTEM COMMON OPERATING SYSTEM
- 20. COMPUTER REPAIR & SUPPORT DIFFERENT OPERATING SYSTEM The three most popular operating systems are Windows, MAC, and Linux. •Windows is the dominant over the other two. 90% of computer users use Windows operating system. •Windows and MAC are expensive operating systems however, MAC OS requires the users to buy the MAC systems (Macbook, Mac) built by Apple. •On the other hand, Linux is a free operating system.
- 21. COMPUTER REPAIR & SUPPORT DIFFERENT OPERATING SYSTEM The three most popular operating systems are Windows, MAC, and Linux. •Windows and MAC have similar file structures while Linux has a different code base (single file tree compared to Windows and MAC's many directories) •Windows interface has a Start menu, Taskbar, System Tray, and the Windows Explore while Linux has easy to switch interfaces. •Linux is most preferred by programmers, MAC is preferred by graphic artists, and Windows is perferred by gamers.
- 22. COMPUTER REPAIR & SUPPORT INSTALL OPERATING SYSTEM
- 23. COMPUTER REPAIR & SUPPORT COMMON OPERATING SYSTEM
- 24. COMPUTER REPAIR & SUPPORT INSTALLING DEVICE DRIVERS Drivers – small software programs that help the operating system use the device. When a device is malfunctioning, one should ask whether the right driver has been installed. There are several ways to install device drivers for your newly installed components: 1. Manufacturer’s DVD Installer – Provided upon buying a computer, laptop, device
- 25. COMPUTER REPAIR & SUPPORT INSTALLING DEVICE DRIVERS Drivers – small software programs that help the operating system use the device. When a device is malfunctioning, one should ask whether the right driver has been installed. There are several ways to install device drivers for your newly installed components: 2. Driverpack Solution – A free tool which automatically finds proper drivers for a computer, then downloads and installs it without wizards or installation prompts.
- 26. COMPUTER REPAIR & SUPPORT INSTALLING DEVICE DRIVERS Drivers – small software programs that help the operating system use the device. When a device is malfunctioning, one should ask whether the right driver has been installed. There are several ways to install device drivers for your newly installed components: 3. Device Manager (Driver Update) – Can be accessed by clicking Start > Computer > Manage > Device Manager. From here, each component can have the option to install a driver through a CD or through searching automatically online.
- 27. COMPUTER REPAIR & SUPPORT INSTALLING DEVICE DRIVERS Drivers – small software programs that help the operating system use the device. When a device is malfunctioning, one should ask whether the right driver has been installed. There are several ways to install device drivers for your newly installed components: 4. Download Online – Look for unit’s Model Name and Number
- 28. COMPUTER REPAIR & SUPPORT INSTALLING DEVICE DRIVERS
- 29. COMPUTER REPAIR & SUPPORT CHECKING DEVICE DRIVERS' INSTALLATION After installation, you would want to see if you've installed the correct device drivers to avoid any issues that may hinder the component from running in its full performance. In this simple procedure, we are looking if there, drivers are already installed. If the device driver is installed, updating it through the device manager would prompt to say that the drivers are installed. 1. Open the Control Panel. 2. Select System and Security. 3. Click System and select Device Manager from the left side. 4. Click “Monitor” and you will see that a genetic monitor is installed.
- 30. COMPUTER REPAIR & SUPPORT CHECKING DEVICE DRIVERS' INSTALLATION
- 31. COMPUTER REPAIR & SUPPORT INSTALLING SOFTWARE Software is basically the instructions and programs that tells the computer to run different tasks. It can be categorized into system or OS, application, and programming. • System/Operating System - tells the CPU what to do. The most common types of operating systems are MS DOS Windows, MAC OS, and Corel Linux. • Application - assigned to perform specific functions / tasks on the computer. • Programming - it is development of various sets of instructions for a computer to do a task. Different programming languages can be used to carry out a certain task and to let the computer operate smoothly.
- 32. COMPUTER REPAIR & SUPPORT ESTABLISHING INSTALLATION PROCEDURE Installer - computer program that installs files, such as applications, drivers, software onto a computer. Installation (setup) of a computer program is making a program ready for execution or user access. This process may vary depending on the program, type of computer, computer operating system, etc. Common Windows Installer File Extension: 1.Executable - .exe 2.Microsoft Windows Installation - .msi 3.Compressed Zip File - .zip 4.ISO image - .iso
- 33. COMPUTER REPAIR & SUPPORT TYPES OF SOFTWARE System Software Also known as Operating System. It tells the CPU what to do. Most common examples include Windows, MAC OS, MS-DOS and Linux. Application Software It accomplishes specific tasks intended for personal, business, or scientific purposes. Example tasks include inventory management, payroll processing, human resource management, etc. Common Application Software: • Word Processor • Spreadsheets • Database Programs • Presentation Software • Desktop Publishing Software • Reference Software • Graphics Programs • Educational Software • Computer Games • Network Software • Language Software
- 34. COMPUTER REPAIR & SUPPORT TYPES OF SOFTWARE Programming Software Used to make computer programs. Programming language is used to create computer programs. • Eclipse • Coda • Notepad ++ • Sublime Text
- 35. COMPUTER REPAIR & SUPPORT FILE SYSTEM TYPES AND FORMATTING File System – A program used by the operating system to organize data or application files. The type of file system is used to determine how data and programs will be accessed. In addition to that, it can also control what data or programs will be available to users. Types of File System 1. FAT File System File Allocation Table Type allows the operating system to look for files on a disk. 2. FAT32 File System More advanced version of the FAT File System. It can partition size as well as access speed. Because of this, FAT32 allows users to have better disk space utilization. 3. ExFAT Stands for Extended File Allocation Table. A file system type that can be used for memory sticks and SD cards. 4. NTFS File System New Technology File System. Compared to FAT and FAT32, NTFS has a much bigger partition and file size. It is a highly reliable file system type because it is recoverable. It also has fault tolerance which means that logged transactions can be used to recover data.
- 36. COMPUTER REPAIR & SUPPORT FILE SYSTEM TYPES AND FORMATTING Follow the guidelines to format the file system in a storage. 1. By default, formatting is set to FAT. – If you try to format an internal hard disk that is smaller than 32 GB, you will see the options for NTFS, FAT and FAT32. – If you try to format an internal hard disk that is larger than 32 GB, you will only see the option for NTFS. – If you try to format an external USB device smaller than 32 GB, you will see all the options. – If you try to format and external USB device larger than 32 GB, you will only see NTFS and exFAT. 2. Devices smaller than 32 GB should be formatted in FAT or FAT32 for more reliability and less disk space wastage. 3. Files larger than 32GB should be formatted in exFAT for latest operating systems. 4. For other compatible devices and other operating systems, files larger than 32 GB should be formatted using NFTS.
- 37. COMPUTER REPAIR & SUPPORT FILE SYSTEM TYPES AND FORMATTING The following are the most common file formats that you will encounter when working in a computer.
- 38. COMPUTER REPAIR & SUPPORT CONDUCTING TEST TOPIC 1: Software Tools/Disk Management Tools The following are different disk management tools and procedures that can optimize a PC to its full performance as well as check errors/issues along the way. fDisk A command-line tool that creates and deletes partitions on a hard drive. It is available from Windows 2002 onwards. For newer units (from Windows XP onwards) the disk management tool is used.
- 39. COMPUTER REPAIR & SUPPORT CONDUCTING TEST TOPIC 1: Software Tools/Disk Management Tools The following are different disk management tools and procedures that can optimize a PC to its full performance as well as check errors/issues along the way. Disk Management Tool This is used to manage disks and drives (like internal and external hard drives), create partitions, and format devices. This is used on newer versions of Microsoft Windows.
- 40. COMPUTER REPAIR & SUPPORT CONDUCTING TEST TOPIC 1: Software Tools/Disk Management Tools The following are different disk management tools and procedures that can optimize a PC to its full performance as well as check errors/issues along the way. Format It is the process of preparing a data storage device (i.e. hard drive, USB drive, solid-state drive) to store information.
- 41. COMPUTER REPAIR & SUPPORT CONDUCTING TEST TOPIC 1: Software Tools/Disk Management Tools The following are different disk management tools and procedures that can optimize a PC to its full performance as well as check errors/issues along the way. ScanDisk or CHKDSK Used to check integrity of files and folders in your unit. This can also be used to check the disk surface for physical errors.
- 42. COMPUTER REPAIR & SUPPORT CONDUCTING TEST TOPIC 1: Software Tools/Disk Management Tools The following are different disk management tools and procedures that can optimize a PC to its full performance as well as check errors/issues along the way. Defrag It optimizes space on hard drive and allow faster access to programs and data.
- 43. COMPUTER REPAIR & SUPPORT CONDUCTING TEST TOPIC 1: Software Tools/Disk Management Tools The following are different disk management tools and procedures that can optimize a PC to its full performance as well as check errors/issues along the way. Disk Cleanup A software utility for Windows that lets users remove files and speed up computer performance.
- 44. COMPUTER REPAIR & SUPPORT CONDUCTING TEST TOPIC 1: Software Tools/Disk Management Tools The following are different disk management tools and procedures that can optimize a PC to its full performance as well as check errors/issues along the way. System File Checker (SFC) A tool in Microsoft Windows that allows users to scan and restore corrupt Windows system files. This is available in Windows 98 and later.
- 45. COMPUTER REPAIR & SUPPORT TESTING PROCEDURE This is the basic testing procedure you will follow throughout. 1.Gathering test information. 2.Validating test information. 3.Responding to rest information. 4.Checking specification.
- 46. COMPUTER REPAIR & SUPPORT TESTING PROCEDURE Observing the Boot Routine 1. If you have turned off the computer, power it on including all peripherals and devices 2. Examine the power supply fan. Is the fan running normally? > If YES, proceed to Step 3. ➢ If NOT, troubleshoot the system power. 3. Watch the NUM LOCK, CAPS LOCK, and SCROLL LOCK keys light in the keyboard.
- 47. COMPUTER REPAIR & SUPPORT TESTING PROCEDURE Internal Visual Inspection Before performing Internal Visual Inspection, make sure that all open files were saved and running application programs were closed. 4. To ensure that chips are fully seated in their sockets, press firmly on the top of each chip. 5. Check whether all jumpers are set correctly. 6. Check whether all cable connectors inside the computer to verify that they are firmly attached to its right connection. 7. Reinstall the computer cover. Reconnect the computer and any attached peripherals to their power sources, and turn them on.
- 48. COMPUTER REPAIR & SUPPORT TESTING PROCEDURE Internal Visual Inspection Before performing Internal Visual Inspection, make sure that all open files were saved and running application programs were closed. 1. Like in conducting external visual inspection, make sure that you have turned off the computer including its devices and peripherals. Disconnect all power cables and electrical outlets. 2. Remove the computer’s right-side cover. 3. Examine whether all chips, expansion cards, and SEC cartridge and heat sink assembly or assemblies are fully seated in their sockets or connectors.
- 49. COMPUTER REPAIR & SUPPORT CONDUCTING STRESS TEST Stress testing is a form of software testing that determines a system’s stability, availability, and reliability. It is used to determine the speed and effectiveness of a computer, network, software, or device. Performance testing is checking the software whether it can cope up with the current system performance.
- 50. COMPUTER REPAIR & SUPPORT CONDUCTING STRESS TEST You can conduct stress test by monitoring your computer performance through the Task Manager (Just press CTRL + ALT + DEL keys to launch the Task Manager). 1. Close all open programs and launch the Task Manager. 2. Select "Performance" from the tabs. 3. Open as many applications as you can or perform many tasks. 4. Observe the computer's CPU Usage and Memory. The more RAM you have, the smoother it is to access programs.
- 51. Thank You CU1: INSTALL AND CONFIGURE COMPUTER SYSTEM