
Recommended
More Related Content
What's hot
What's hot (20)
Similar to 59948408 ee-2304-pe-lab-manual-final2011
Similar to 59948408 ee-2304-pe-lab-manual-final2011 (20)
More from homeworkping4
More from homeworkping4 (20)
Recently uploaded
Recently uploaded (20)
59948408 ee-2304-pe-lab-manual-final2011
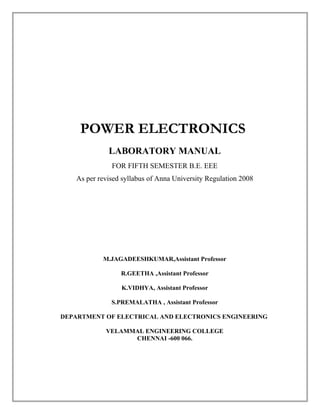
- 1. POWER ELECTRONICS LABORATORY MANUAL FOR FIFTH SEMESTER B.E. EEE As per revised syllabus of Anna University Regulation 2008 M.JAGADEESHKUMAR,Assistant Professor R.GEETHA ,Assistant Professor K.VIDHYA, Assistant Professor S.PREMALATHA , Assistant Professor DEPARTMENT OF ELECTRICAL AND ELECTRONICS ENGINEERING VELAMMAL ENGINEERING COLLEGE CHENNAI -600 066.
- 2. 2
- 3. EE2304 -POWER ELECTRONICS LABORATORY List of experiments 1. Characteristics of SCR 2. Characteristics of TRIAC 3. Characteristics of MOSFET and IGBT 4. Transient characteristics of SCR and MOSFET 5. AC to DC fully controlled converter 6. AC to DC half-controlled converter 7. Step down and step up MOSFET based choppers 8. IGBT based single-phase PWM inverter 9. IGBT based three-phase PWM inverter 10. Resonant dc-to-dc converter 3
- 4. 4
- 5. CONTENTS EXPT.NO. NAME OF THE EXPT PAGE NO. 1A. CHARACTERISTICS OF SCR 7 1B. AC PHASE CONTROL USING SCR 11 2A. CHARACTERISTICS OF TRIAC 13 2B. AC PHASE CONTROL USING TRIAC 17 3A. CHARACTERISTICS OF MOSFET 19 3B. CHARACTERISTICS OF IGBT 25 4A. TRANSIENT OR SWITCHING CHARACTERISTICS OF SCR 31 4B. TRANSIENT OR SWITCHING CHARACTERISTICS OF MOSFET 35 5. AC TO DC FULLY CONTROLLED BRIDGE CONVERTER 39 6. AC TO DC HALF CONTROLLED BRIDGE CONVERTER 47 7A. MOSFET BASED STEP DOWN CHOPPER 53 7B. MOSFET BASED STEP UP CHOPPER 57 8. IGBT BASED SINGLE-PHASE PWM INVERTER 63 9. IGBT BASED THREE-PHASE PWM INVERTER 67 10. RESONANT DC-TO-DC CONVERTER 71 5
- 6. Circuit Diagram - V-I Characteristic of SCR V-I Characteristic of SCR 6
- 7. EXPERIMENT NO.1A CHARACTERISTICS OF SCR Aim To obtain the forward conduction characteristics of the SCR and to measure holding and latching currents Apparatus Required Sl.No Name of the Equipment Quantity 1 SCR study module 1 no 2 Ammeter (0-10mA)MC 1 no 3 Ammeter (0-100mA)MC 1 no 4 Voltmeter (0-30V)MC 1 no 5 Patch chords as required Precautions 1. Check all fuses 2. Check the working condition of SCR 3. Avoid loose connections 4. Avoid short circuits Theory A SCR is a four layer three terminal semiconductor switching device of PNPN structure with three PN junctions. The three terminals are anode, cathode and gate. SCRs are manufactured by diffusion. When the anode voltage is made positive with respect to cathode, the junctions J1 and J3 are forward biased and junction J2 is reverse biased. A small leakage current flows from anode to cathode. The thyristor is then said to be in forward blocking or OFF state condition. If VAK is increased to a sufficient larger value, the reverse biased junction J2 will break. This is known as avalanche breakdown and corresponding voltage is called forward breakdown voltage (VBO). Now the device is in ON state. Latching current is defined as the minimum amount of anode current required to maintain the thyristor in ON state immediately after the thyristor has been turned ON and the gate signal has been removed. However, if the forward anode current is reduced below a level known as holding current (IH), a depletion region will develop around junction J2 due to the reduced number of carriers and the thyristor will be in the blocking state. Holding current is the minimum anode current required to maintain the thyristor in ON state. Holding current is less than latching current. When the cathode is positive with respect to anode, junction J2 is forward biased but junction J1 and J3 are reverse biased. Now the thyristor will be in reverse blocking state and reverse leakage current known as reverse current known as IR would flow through the device. 7
- 8. CIRCUIT DIAGRAM Tabular Column Sl.No IG = (mA) IG = (mA) VAK (V) IA (mA) VAK (V) IA (mA) 8
- 9. Procedure 1. Connect the circuit as shown in figure. 2. Switch on the main AC supply 3. Vary the pot3 and set the gate current (4 mA to 5 mA) 4. Slowly increase VAK by varying pot4 till the thyristor gets turned ON. Note down the ammeter (IA) and voltmeter (VAK) readings. 5. Now note down the forward breakdown voltage and latching current. 6. Further increase VAK and note the anode current 7. Now reduce VAK till the thyristor turned OFF and note down the holding current 8. For various gate current take the readings and tabulate. 9. Plot the graph VAK versus IA. Viva Questions 1. Define Latching and holding current 2. Explain the operation of SCR 3. Define forward breakdown voltage 4. Define forward blocking state 5. Define reverse blocking state 6. What are the different types of firing circuits? 7. What are the different turn-on methods for SCR? 8. Draw the two transistor model of SCR. Result 9
- 10. AC PHASE CONTROL USING SCR 10
- 11. EXPERIMENT NO.1B AC PHASE CONTROL USING SCR Aim To study the operation of AC phase control using SCR for illumination control Apparatus Required Sl.No. Name of the Equipment Quantity 1 AC phase control module 1 no 2 Lamp 60 W 1 no 3 Patch chords as required Precautions 1. Check all fuses 2. Check the working condition of SCR 3. Avoid loose connections 4. Avoid short circuits Theory AC regulator is used to convert fixed AC to Variable AC with fixed frequency. It consists of two SCRs connected in anti-parallel. For power transfer, two types of control are normally used: 1. Phase angle control 2. On-off control. In phase control, thyristor switches connect the load to the AC source for a portion of each cycle of input voltage. In on-off control, thyristor switches connect the load to the AC source for a few cycles of input voltage and then disconnect it for another few cycles. Single phase AC regulators are used in fan control, illumination control and heating control etc. Since the input power is AC, thyristors are line commutated. Phase control thyristors, which are relatively inexpensive and slower than fast switching thyristors. Due to line or natural commutation, there is no need of extra commutation circuitry and the circuits for AC voltage controllers are very simple. Procedure 1. Connect the circuit as shown in figure. 2. Connect the lamp across the load terminals 3. Switch on the main AC supply 4. Vary the firing angle and observe the brightness of the lamp. It varies for different fining angles. Viva Question 1. Explain the operation of single phase AC regulator using SCR with Circuit diagram and draw the waveform Result 11
- 12. Circuit Diagram - V-I Characteristic of TRIAC V-I Characteristic of TRIAC 12
- 13. EXPERIMENT NO.2A CHARACTERISTICS OF TRIAC Aim To obtain the forward and reverse conduction characteristics of TRIAC and to plot its characteristic curve Apparatus Required Sl.No Name of the Equipment Quantity 1 SCR study module 1 no 2 Ammeter (0-100mA)MC 1 no 3 Ammeter (0-20mA)MC 1 no 4 Voltmeter (0-30V)MC 1 no 5 Patch chords as required Precautions 1. Check all fuses 2. Check the working condition of TRIAC 3. Avoid loose connections 4. Avoid short circuits Theory A SCR is a unidirectional device as it conducts from anode to cathode only and not from cathode to anode. A TRIAC can conduct in both directions. A TRIAC is a bidirectional thyristor with three terminals. It is used extensively for control of power in AC circuits. When in operation, a TRIAC is equivalent to two SCRs connected in anti-parallel. As the TRIAC can conduct in both directions, the term anode and cathode are not applicable to TRIAC. Its three terminals are usually designated as MT1 (main terminal 1), MT2 (main terminal 2) and gate. With no signal in the gate, TRIAC will block both half cycles of applied voltage in case peak value of the voltage is less than the break over voltage of the TRIAC. The TRIAC can however be turned ON in each half cycle of the applied voltage by applying a positive or negative voltage to MT2 with respect to MT1. Procedure 1. Connect the circuit as shown in figure. 13
- 14. 2. Connect MT2 terminal of the TRIAC to positive with respect to MT1 with positive gate current 3. Switch on the main AC supply 4. Vary the pot3 and set the gate current (12 mA to 15 mA) CIRCUIT DIAGRAM Tabular Column Sl.No MT2 is positive w.r.t MT1 MT2 is negative w.r.t MT1 IG = (mA) IG = (mA) VAK (V) IA (mA) VAK (V) IA (mA) 14
- 15. 5. Slowly increase VAK by varying pot4 till the TRIAC gets turned ON. Note down the ammeter (IA) and voltmeter (VAK) readings. 6. Now note down the forward breakdown voltage. 7. Further increase VAK and note the anode current 8. Now tabulate the readings. 9. Plot the graph VAK versus IA. 10. Connect MT2 terminal of the TRIAC to negative with respect to MT1 with positive gate current. 11. Repeat the procedure from step 3 to 9 Viva Questions 1. Explain the operation of TRIAC 2. What is the different between TRAIC and SCR 3. What are the different types of firing circuits? 4. Explain different turn on processes of TRIAC? Result 15
- 16. AC PHASE CONTROL USING TRIAC 16
- 17. EXPERIMENT NO.2B AC PHASE CONTROL USING TRIAC Aim To study the operation of AC phase control using TRIAC for illumination control Apparatus Required Sl.No Name of the Equipment Quantity 1 AC phase control module 1 no 2 Lamp 60 W 1 no 3 Patch chords as required Precautions 1. Check all fuses 2. Check the working condition of TRIAC 3. Avoid loose connections 4. Avoid short circuits Theory AC regulator is used to convert fixed AC to Variable AC with fixed frequency. A TRIAC can conduct in both directions. A TRIAC is a bidirectional thyristor with three 17
- 18. terminals. It is used extensively used for control of power in AC circuits. When in operation, a TRIAC is equivalent to two SCRs connected in anti-parallel. In AC regulator, two SCRs are replaced by a single TRIAC. Single phase AC regulators are used in fan control and heating control etc. TRIAC is preferred for low power applications. Procedure 1. Connect the circuit as shown in figure. 2. Connect the lamp across the load terminals 3. Switch on the main AC supply 4. Vary the firing angle and observe the brightness of the lamp. It varies for different fining angles. Viva Question 1. Explain the different control techniques of single phase AC regulator with waveform Result Circuit Diagram - Characteristics of MOSFET Output Characteristics of MOSFET 18
- 19. Transfer Characteristics of MOSFET EXPERIMENT NO.3A CHARACTERISTICS OF MOSFET Aim To obtain the steady state output and transfer characteristics of MOSFET and to plot the same Apparatus Required Sl.No Name of the Equipment Quantity 1 MOSFET study module 1 no 2 Ammeter (0-100mA)MC 1 no 3 Ammeter (0-50mA)MC 1 no 4 Voltmeter (0-30V)MC 2 nos 19
- 20. 5 Patch chords as required Precautions 1. Check all fuses 2. Check the working condition of MOSFET 3. Avoid loose connections 4. Avoid short circuits Theory A power MOSFET has three terminals called drain, source and gate in place of corresponding three terminals collector, emitter and base for BJT. A BJT is a current controlled device whereas power MOSFET is a voltage controlled device. The control signals are base current in BJT is much larger than the control signal or gate current required in a MOSFET. This is because of the fact that gate circuit impedance in MOSFET is extremely high of the order of 109 ohms. This large impedance permits the MOSFET gate to drive directly from microelectronics circuits. BJT suffers from secondary breakdown voltage whereas MOSFET is free from this problem. Power MOSFETs finds application in low power high frequency converters. Two types of power MOSFETs are there. 1. Enhancement MOSFET 2. Depletion MOSFET. Out of these two types, n-channel enhancement MOSFET is more common because of high mobility of electrons. CIRCUIT DIAGRAM 20
- 21. Tabular Column Output Characteristics Sl.No VGS = (V) VGS = (V) VDS (V) ID (mA) VDS (V) ID (mA) Out put Characteristics 1. Connect the circuit as shown in figure. 2. Switch on the main AC supply 3. Vary the pot1 and set the gate source voltage (VGS) 4. Slowly increase VDS by varying pot2 till the MOSFET gets turned ON. Note down the ammeter (ID) and voltmeter (VDS) readings. 5. Further increase VDS and note down the drain current 6. For different values of gate source voltage (VGS), note down VDS and ID. 7. Plot the graph VDS versus ID for various VGS. Transfer Characteristics 1. Connect the circuit as shown in figure. 2. Switch on the main AC supply 3. Vary pot2 and set the drain source voltage (VDS) 21
- 22. 4. Slowly increase VGS by varying pot1 till the MOSFET gets turned ON. Note down the ammeter (ID) and voltmeter (VGS) readings. 5. Further increase VGS and note down the drain current 6. For different values of drain source voltage (VDS), note down VGS and ID. 7. Plot the graph VGS versus ID for various VDS. Transfer Characteristics Sl.No VDS = (V) VDS = (V) VGS (V) ID (mA) VGS (V) ID (mA) 22
- 23. Viva Questions 1. Compare BJT with MOSFET 2. Explain the operation of MOSFET 3. What are the different types of MOSFET? 4. What do you infer from the output characteristics? 5. Define transconductance 6. Write the applications of MOSFET 7. Define secondary breakdown and why it is absent in power MOSFET? 23
- 24. Result Circuit Diagram - Characteristics of IGBT Output Characteristics of IGBT 24
- 25. Transfer Characteristics of IGBT EXPERIMENT NO.3B CHARACTERISTICS OF IGBT Aim To obtain the steady state output and transfer characteristics of IGBT and to plot the same Apparatus Required Sl.No Name of the Equipment Quantity 1 IGBT study module 1 no 2 Ammeter (0-100mA)MC 1 no 25
- 26. 3 Ammeter (0-50mA)MC 1 no 4 Voltmeter (0-30V)MC 2 nos 5 Patch chords as required Precautions 1. Check all fuses 2. Check the working condition of IGBT 3. Avoid loose connections 4. Avoid short circuits Theory A power IGBT has terminals called emitter, collector and gate. This device combines into it the advantages of both MOSFET and BJT. So an IGBT has high impedance like MOSFET and low on state power loss like BJT. Further IGBT is free from secondary breakdown problem present in BJT. IGBT is also known as Metal Oxide Insulated Gate Transistor (MOIGT) or Conductively Modulated Field Transistor (COMFET). In forward direction, the shape of the output characteristics is similar to that of BJT. But here the controlling parameter is the gate emitter voltage (VGE) because IGBT is a voltage controlled device. The transfer characteristic of IGBT is identical to that of power MOSFET. Procedure Out put Characteristics 1. Connect the circuit as shown in figure. 2. Switch on the main AC supply 3. Vary pot1 and set the gate emitter voltage (VGE) CIRCUIT DIAGRAM 26
- 27. Tabular Column Output Characteristics Sl.No VGE = (V) VGE = (V) VCE (V) IC (mA) VCE (V) IC (mA) 4. Slowly increase VCE by varying pot2 till the IGBT gets turned ON. Note down the ammeter (IC) and voltmeter (VCE) readings. 5. Further increase VCE and note down the collector current 6. For different values of gate emitter voltage (VGE), note down VCE and IC. 7. Plot the graph VCE versus IC for various values ofVGE. Transfer Characteristics 1. Connect the circuit as shown in figure. 2. Switch on the main AC supply 3. Vary pot2 and set the collector emitter voltage (VCE) 4. Slowly increase VGE by varying pot1 till the IGBT gets turned ON. Note down the ammeter (IC) and voltmeter (VGE) readings. 27
- 28. 5. Further increase VGE and note down the collector current 6. For different values of collector emitter voltage (VCE), note down VGE and IC. 7. Plot the graph VGE versus IC for various values of VCE. Transfer Characteristics Sl.No VCE = (V) VCE = (V) VGE (V) IC (mA) VGE (V) IC (mA) 28
- 29. Viva Questions 1. Compare BJT, MOSFET and IGBT 2. Explain the operation of IGBT 3. What do you infer from the output characteristics? 4. Define transconductance 5. Write the applications of IGBT 6. Define secondary breakdown and why it is absent in power IGBT? 29
- 30. Result 30
- 31. EXPERIMENT NO. 4A TRANSIENT OR SWITCHING CHARACTERISTICS OF SCR Aim To obtain the transient characteristics of SCR Apparatus Required Sl.No Name of the Equipment Quantity 1 SCR switching characteristic study module 1 no 31
- 32. 2 CRO 1 no 3 Patch chords as required 4 5 Precautions 1. Check all fuses 2. Check the working condition of SCR 3. Avoid loose connections 4. Avoid short circuits 5. Check CRO probe 6. Calibrate the CRO properly Theory A forward biased thyristor is usually turned ON by applying a positive gate voltage between gate and cathode. There is, however, a transition time from forward OFF state to forward ON state. This transition time called thyristor turn-on time is defined as the time during which it changes from forward blocking state to final ON state. Total turn ON time can be divided into three intervals: 1. Delay time 2. Rise time 3. Spread time. Thyristor turn-off means that it has changed from on to off state and is capable of blocking the forward voltage. This dynamic process of the SCR from conduction state to forward blocking state is called commutation process or turn off process. Turn off time of a thyristor is defined as the time between the instant anode current becomes zero and the instant SCR regains forward blocking capability. 32
- 33. Procedure Turn off Characteristic 1. Connect the circuit as shown in figure. 2. Switch on the main AC supply 3. Switch on the CRO with ×10 mode operation 4. observe the following waveforms i) Input square waveform ii) View the gate voltage by connecting the CRO between gate and cathode iii) View the output voltage across the load resistor. 33
- 34. 5. Note down the turn off time and turn off voltage drop from output voltage waveform 6. Plot the graph between voltage or current and time Turn on Characteristic 1. Connect the circuit as shown in figure 2. Switch on the main AC supply 3. Switch on the CRO with ×10 mode operation 4. observe the following waveforms i) Input square waveform ii) View the gate voltage by connecting the CRO between gate and cathode iii) View the output voltage across the load resistor 5. Note down the turn on time and turn on voltage drop from output voltage waveform 6. Plot the graph between voltage or current and time Viva Questions 1. Define delay time 2. Define rise time 3. Define spread time 4. Define reverse recovery time 5. Define gate recovery time 6. Explain the switching characteristics of SCR 7. Draw the switching characteristics of SCR Result 34
- 35. Circuit Diagram EXPERIMENT NO. 4B TRANSIENT OR SWITCHING CHARACTERISTICS OF MOSFET Aim To obtain the transient characteristics of power MOSFET Apparatus Required Sl.No Name of the Equipment Quantity 1 MOSFET switching characteristic study module 1 no 2 CRO 1 no 3 Patch chords as required 4 35
- 36. 5 Precautions 1. Check all fuses 2. Check the working condition of MOSFET 3. Avoid loose connections 4. Avoid short circuits 5. Check CRO probe 6. Calibrate the CRO properly Theory The switching characteristics of the power MOSFET are influenced to a large extent by the internal capacitance of the device and the internal impedance of the gate drive circuit. Turn on time is divided into turn on delay time and rise time. During delay time the input capacitance charges to gate threshold voltage and drain current is zero. In rise time, drain current rises from zero to on state current. MOSFET is a majority carrier device and turn off process is initiated soon after removal of gate voltage. Turn off time is divided into turn off delay time and fall time. During turn off delay time drain current is constant and during fall time, Id decreases to zero and the input capacitance discharges fully. Procedure 1. Connect the circuit as shown in figure. 2. Switch on the main AC supply 3. Switch on the CRO with ×10 mode operation 4. observe the following waveforms iv) Input square waveform v) View the gate voltage by connecting the CRO between gate and cathode vi) View the output voltage across the load resistor. 36
- 37. 5. Note down the turn on time and turn off time from output voltage waveform 6. Plot the graph between voltage or current and time Viva Questions 1. Define turn on delay time 2. Define rise time 3. Define turn off delay time 4. Define fall time 5. Explain the switching characteristics of power MOSFET 6. Draw the switching characteristics of power MOSFET 37
- 38. Result FULLY CONTROLLED BRIDGE CONVERTER R-LOAD 38
- 39. Input Voltage Waveform Output Voltage Waveform EXPERIMENT NO.5 39
- 40. AC TO DC FULLY CONTROLLED BRIDGE CONVERTER Aim To study the operation of single phase fully controlled bridge converter with R and RL load and to determine rectification ratio, form factor and ripple factor Apparatus Required Sl.No Name of the Equipment Quantity 1. Single phase SCR module 1 no 2. Firing module 1 no 3. CRO 1 no Formulae R-Load 1. Average output voltage )cos1( α π += m dc V V V 2. RMS output voltage 2/1 2 2sin 2 1 +−= α απ π mrms VV V 3. Rectification ratio = π/2 m dc V V 4. Form Factor (FF) = dc rms V V 5. Ripple factor = 12 −FF RL-Load 1. Average output voltage )cos(cos βα π −= m dc V V V 2. RMS output voltage 2/1 )2sin2(sin 2 1 )( 2 −−−= αβαβ π m rms V V V 3. Rectification ratio = π/2 m dc V V 4. Form Factor (FF) = dc rms V V 5. Ripple factor = 12 −FF FULLY CONTROLLED BRIDGE CONVERTER RL-LOAD 40
- 41. Input Voltage Waveform Output Voltage Waveform Where, Vm – Maximum value of supply input voltage 41
- 42. 2sm VV = volt Vs – Supply RMS voltage α- Firing angle in degrees β – Extinction angle in degrees Note: the values of α, β and Л are in radians in the places (β-α) and Л-α Precautions 1. Check all fuses 2. Check the working conditions of all SCRs 3. Avoid loose connections 4. Check CRO probe 5. Calibrate the CRO properly 6. Avoid short circuits Theory Diode rectifiers provide a fixed DC output voltage and controlled rectifiers give a variable DC output voltage from a fixed AC supply. The output voltage of the phase controlled rectifiers is varied by varying the firing angle of thyristors. A phase controlled thyristor is turned on by applying a short pulse to its gate and turned off due to natural commutation. Phase controlled rectifiers are simple and less expensive and the efficiency of these rectifiers are normally above 90%. Phase controlled rectifiers can be classified into two types depending on the supply: 1. Single phase converters 2. Three phase converters. Each type can be subdivided into a) semi converter b) full converter c) dual converter. A full converter is a two quadrant converter and the polarity of the output voltage can be either positive or negative. However, the polarity of the output current is always positive. During the positive half cycle, thyristors T1 and T2 are forward biased and when these two thyristors are fired simultaneously at αω =t , the load is connected to the input supply through T1 and T2. During the negative half cycle, thyristors T3 and T4 are forward biased and when these two thyristors are fired simultaneously at απω +=t , the load is connected to the input supply through T3 and T4. Procedure R-Load 1. Connect the circuit as shown in figure. 2. Give the firing pulses to all the four SCRs. 3. Give the input power supply to the bridge rectifier. 4. Vary the firing angle by adjusting the potentiometer in the firing circuit. 5. Observe the load voltage waveform using CRO. 6. Note down the peak value of output voltage and firing angle. Circuit Diagram 42
- 43. Tabular Column Sl.No. Firing Angle (degrees) Average Voltage (V) RMS Voltage (V) Rectification Ratio Form Factor Ripple Factor 7. Calculate the average, RMS, rectification ratio, form factor and ripple factor. 8. Repeat procedure 4 to 7 for various firing angles. 43
- 44. RL-Load 1. Connect the circuit as shown in figure. 2. Give the firing pulses to all the four SCRs. 3. Give the input power supply to the bridge rectifier. 4. Vary the firing angle by adjusting the potentiometer in the firing circuit. 5. Observe the load voltage waveform using CRO. 6. Note down the peak value of output voltage, firing angle and extinction angle. 7. Calculate the average, RMS, rectification ratio, form factor and ripple factor. 8. Repeat procedure 4 to 7 for various firing angles. Model Calculation 44
- 45. 45
- 46. Viva Questions 1. Explain the operation of single phase half controlled converter with waveform. 2. Define rectification ratio 3. Define ripple factor and form factor 4. Define distortion factor 5. Define pulse number 6. Define extinction angle 7. Define firing angle. Result HALF CONTROLLED BRIDGE CONVERTER R-LOAD 46
- 47. HALF CONTROLLED BRIDGE CONVERTER RL-LOAD EXPERIMENT NO.6 47
- 48. AC TO DC HALF CONTROLLED BRIDGE CONVERTER Aim To study the operation of single phase half controlled bridge converter with R and RL load and to determine rectification ratio, form factor and ripple factor Apparatus Required Sl.No Name of the Equipment Quantity 1. Single phase SCR module 1 no 2. Firing module 1 no 3. CRO 1 no Formulae R-Load & RL-Load 1. Average output voltage )cos1( α π += m dc V V V 2. RMS output voltage 2/1 2 2sin 2 1 +−= α απ π mrms VV V 3. Rectification ratio = π/2 m dc V V 4. Form Factor (FF) = dc rms V V 5. Ripple factor = 12 −FF Where, Vm – Maximum value of supply input voltage (V) 2sm VV = volt Vs – Supply RMS voltage (V) α- firing angle in degree Note: the values of α and Л are in radians in the place Л-α Precautions 1. Check all fuses. 2. Check the working conditions of all SCRs and diodes 3. Avoid loose connections CIRCUIT DIAGRAM 48
- 49. Input Voltage Waveform Output Voltage waveform 4. Check CRO probe 49
- 50. 5. Calibrate the CRO properly 6. Avoid short circuits Theory Diode rectifiers provide a fixed DC output voltage and controlled rectifiers give a variable DC output voltage from a fixed AC supply. The output voltage of the phase controlled rectifiers is varied by varying the firing angle of thyristors. A phase controlled thyristor is turned on by applying a short pulse to its gate and turned off due to natural commutation. Phase controlled rectifiers are simple and less expensive and the efficiency of these rectifiers are normally above 90%. Phase controlled rectifiers can be classified into two types depending on the supply: 1. Single phase converters 2. Three phase converters. Each type can be subdivided into a) semi converter b) full converter c) dual converter. A half controlled bridge converter is a single quadrant converter and the polarity of the output voltage and output current are always positive. During the positive half cycle, thyristor T1 and diode D1 are forward biased and when thyristor T1 is fired at αω =t , the load is connected to the input supply through T1 andD1. During the negative half cycle, thyristor T2 and diode D2 are forward biased and when thyristor T2 is fired at απω +=t , the load is connected to the input supply through T2 and D2. Freewheeling diode is not required. Power factor of half controlled bridge converter is better than fully controlled bridge converter. Procedure R-Load 1. Connect the circuit as shown in figure. 2. Give the firing pulses to the two SCRs. 3. Give the input power supply to the bridge rectifier. 4. Vary the firing angle by adjusting the potentiometer in the firing circuit. 5. Observe the load voltage waveform using CRO. 6. Note down the peak value of output voltage and firing angle. 7. Calculate the average, RMS, rectification ratio, form factor and ripple factor. 8. Repeat procedure 4 to 7 for various firing angles. RL-Load 1. Connect the circuit as shown in figure. 2. Give the firing pulses to the two SCRs. 3. Give the input power supply to the bridge rectifier. 4. Vary the firing angle by adjusting the potentiometer in the firing circuit. 5. Observe the load voltage waveform using CRO. 6. Note down the peak value of output voltage, firing angle 7. Calculate the average, RMS, rectification ratio, form factor and ripple factor. 8. Repeat procedure 4 to 7 for various firing angles. Tabular Column 50
- 52. Viva Questions 1. What are the differences between half controlled and fully controlled bridge converter? 2. What are the advantages of half controlled bridge converter? 3. What are the disadvantages of half controlled bridge converter? 4. Define freewheeling diode 5. What are the advantages of freewheeling diode? Result Step down Chopper (Buck Converter) 52
- 53. Input and Output Voltage Waveforms Circuit Diagram EXPERIMENT NO 7A 53
- 54. MOSFET BASED STEP DOWN CHOPPER Aim To obtain the gain characteristics of MOSFET based Buck Converter or Step-down Chopper. Apparatus Required Sl.No Name of the Equipment Quantity 1 MOSFET based buck-boost converter study module 1 no 2 CRO 1 no 3 Patch chords as required 4 5 Formulae 1. Duty cycle ratio δ = TON / T 2. Output Voltage Vo = δ Vs (V) Where, T- total time for a cycle T = TON + TOFF (ms) Vs = Supply DC voltage (V) Precautions 1. Check all fuses. 2. Check the working condition of converter. 3. Avoid loose connections. 4. Avoid short circuits. 5. Check CRO probe. 6. Calibrate the CRO properly. Theory In Buck converter the output voltage is always less than the input voltage in the same polarity and is not isolated from the input. The input current for a buck converter is discontinuous or pulsating due to power switch current that pulses from zero to I0 every switching cycle. The output current for a buck power stage is continuous or non pulsating because the output current is supplied by the output inductor /capacitor combination; the output current never supplies the entire load current. It’s main applications are in regulated DC power supplies and DC motor speed control. 54
- 56. Input Voltage = 24V DC Sl.No. TON (S) TOFF(S) Duty Cycle Ratio Output Voltage (V) Procedure 1. Connect the circuit as shown in figure. 2. Initially keep all the switches (S1,S2,S3,S4) in off position. 3. Initially keep Duty cycle Pot in minimum position. 4. Connect banana connector 24V DC source to 24V DC input. 5. Connect the driver pulse output to MOSFET input.(G to G, S toS) 6. Switch on the main supply. 7. Check the test point waveforms with respect to ground. 8. Switch on the S1 switch and then switch ON S2. (S2=1) 9. Vary the duty cycle Pot and tabulate the TON, TOFF values and output voltage. 10. Draw the graph output voltage Vs duty cycle ratio. Viva Questions 1. Define Duty cycle. 2. What are the two control strategies employed in DC choppers? 3. Mention the applications of DC choppers 4. Explain the principle of operation of step down chopper. 5. What are the classifications of choppers? Explain any one type of chopper Result Step up Chopper (Boost Converter) 56
- 57. Input and Output Voltage Waveforms Buck-Boost Converter EXPERIMENT NO 7B 57
- 58. MOSFET BASED STEP UP CHOPPER Aim To obtain the gain characteristics of MOSFET based Boost Converter or Step up Chopper. Apparatus Required Sl.No Name of the Equipment Quantity 1 MOSFET based buck-boost converter study module 1 no 2 CRO 1 no 3 Patch chords as required 4 5 Formulae 3. Duty cycle ratio δ = TON / T 4. Output Voltage Vo = Vs / (1- δ) (V) where, T- Total time for a cycle T = TON + TOFF (ms) Vs = Supply DC voltage (V) Precautions 1. Check all fuses. 2. Check the working condition of converter. 3. Avoid loose connections. 4. Avoid short circuits. 5. Check CRO probe. 6. Calibrate the CRO properly. Theory In boost converter the output voltage is always higher than the input voltage in the same polarity and is not isolated from the input. The input current for a buck power stage is continuous or non pulsating because the input current is the same as the inductor current. The output current for a boost power stage is discontinuous or pulsating because the output diode conducts only during a portion of the switching cycle. The output capacitor supplies the entire load current for the rest of the switching cycle. CIRCUIT DIAGRAM 58
- 59. Procedure 59
- 60. 1. Connect the circuit as shown in figure 2. Initially keep all the switches (S1,S2,S3,S4) in off position. 3. Initially keep Duty cycle Pot in minimum position. 4. Connect banana connector 24V DC source to 24V DC input. 5. Connect the driver pulse output to MOSFET input.(G to G,Sto S). 6. Switch on the main supply. 7. Check the test point waveforms with respect to ground. 8. Switch on the S1 switch and then switch ON S2. (S2=1) 9. Set the output voltage at above 24V by using duty cycle Pot. 10. Again increase the duty cycle up to maximum and tabulate theTON, TOFF values and output voltage. 11. Draw the graph output voltage Vs duty cycle ratio. Tabular Column Input Voltage = 24V DC, Output Voltage = 40V Max. Sl.No. TON (S) TOFF(S) Duty Cycle Ratio Output Voltage (V) 60
- 61. 61
- 62. Viva Questions 1. Define duty cycle 2. What are the two control strategies employed in DC choppers? Explain. 3. Mention the applications of DC choppers 4. Explain the principle of operation of step up chopper. 5. What are the classifications of choppers? Explain any one type of chopper 6. Compare step up chopper with step down chopper. Result Circuit Diagram -Single Phase IGBT Inverter 62
- 63. Carrier and Reference signal Control Signals for IGBTs EXPERIMENT NO. 8 63
- 64. IGBT BASED SINGLE-PHASE PWM INVERTER Aim To study the operation of single-phase bridge inverter with sinusoidal pulse width modulation method Apparatus Required Sl.No Name of the Equipment Quantity 1 MOSFET /IGBT study module 1 no 2 Inverter control module 1 no. 3 CRO 1 no 4 R-L Load 1 no. 5 Patch chords as required Formulae 1. Modulation Index r c A A m = 2. Output voltage so mVV = V Where, Vs = input DC voltage (V) Ar – Amplitude of reference signal Ac – Amplitude of carrier signal Precautions 1. Check all fuses. 2. Check the working condition of Modules. 3. Check whether the AC main switch is OFF condition in both the trainer. 4. Check whether control module mode selector switches in first mode(sine wave) 5. Check whether control module pulse release switch SW4 in control module is in OFF condition. 6. Check whether 24V AC SW1 is in OFF condition. 7. Avoid loose connections. 8. Avoid short circuits. 9. Check CRO probe. 10. Calibrate the CRO properly. CIRCUIT DIAGRAM 64
- 65. Tabular Column Sl.No. Carrier Wave Reference Wave Modulation Index Output Voltage(V)Amplitude(V) Freq.(Hz) Amplitude(V) Freq.(Hz) Theory 65
- 66. DC to AC converters is known as inverters. The function of an inverter is to change a DC input voltage to a symmetrical ac output voltage of desired magnitude and frequency. The output voltage could be variable or fixed frequency. A variable output voltage can be obtained by varying the input DC voltage and maintaining the gain of the inverter constant. On the other hand, if the DC input voltage is fixed and it is not controllable, a variable voltage can be obtained by varying the gain of the inverter, which is normally accomplished by pulse-width- modulation (PWM) control with in the inverter. The inverter gain can be defined as the ratio of the AC output voltage to DC input voltage. Inverters are broadly classified into two types (1) Single-phase inverters, and (2) three –phase inverters. These inverters use PWM control signals for producing the AC output voltage. An inverter is called voltage –fed inverter (VFI or VSI) if the input Voltage remains constant, a current-fed inverter (CFI or CSI) if the input current is maintained constant. A Single-phase bridge inverter consists of four switching devices T1, T2, T3, T4 and the four inverse parallel diodes D1, D2, D3, D4.The diodes are essential to conduct the reactive current and thereby to feedback the stored energy in the inductor to the dc source. These diodes are known as feedback diodes. Procedure 1. Connect the circuit as shown in figure. 2. Connect R-L Load as shown in the figure. 3. Connect the gating signals from the inverter control module to the inverter module through signal cable provided. 4. Connect 24V AC voltage to MOSFET/IGBT trainer. 5. Switch ON the main in both the trainer. 6. Measure the amplitude and frequency of sine wave and carrier triangular wave and tabulate it. And also adjust sine wave frequency about 50Hz. 7. Connect CRO probe to observe the load voltage and load current waveforms. 8. Draw the graph Vo Vs versus time period. Viva Questions 1. What do you mean by inverter? 2. What are the classifications of inverters? Explain 3. Mention the applications of inverters. 4. What are the various PWM techniques? 5. Define modulation index. 6. Explain the principle of operation single-phase bridge inverter. Result 66
- 67. Output Phase Voltage Waveforms 67
- 68. EXPERIMENT NO. 9 IGBT BASED THREE-PHASE PWM INVERTER Aim To control the speed of three phase induction motor by v/f control Apparatus Required Sl.No Name of the Equipment Quantity 1 IGBT based 3 phase PWM inverter-triggering module 1 no 2 IGBT based 3 phase PWM inverter-power module 1 no. 3 CRO 1 no 4 3 phase induction motor 1 no. 5 Patch chords as required 6 Tachometer 1 no Precautions 1. Check all fuses. 2. Check the working condition of Modules. 3. Check Whether the AC main Switch is OFF condition. 4. Avoid loose connections. 5. Avoid short circuits. 6. Keep the MCB in off position 7. keep the frequency pot and amplitude pot in minimum position Theory DC to AC converter is known as inverter. For providing adjustable frequency power to industrial applications, three phase inverters are common than single-phase inverters. Three phase inverters like single-phase inverters, take their DC supply from a battery or more usually from a rectifier. Basic three-phase inverters are a six-step bridge inverter. It uses a minimum of six thyristors. In inverter terminology a step is defined as a change in firing from one thyristor to the next thyristor in proper sequence. For one cycle of 360° each step would be of 60° intervals for a six-step inverter. This means that thyristor would be gated at regular intervals of 60° in proper sequence so that a 3-phase voltage is synthesized at the output terminals of a six-step inverter. 68
- 69. CIRCUIT DIAGRAM Tabular Column Sl.No. Voltage (VL) Voltage(VPh) Speed (rpm) 69
- 70. The power circuit of a three-phase bridge inverter has six thyristors and six diodes. Presently, the use of IGBTs in single-phase and three-phase inverters is on the rise. A large capacitor is connected at the input terminals tends to make the input DC voltage constant. This capacitor also suppresses the harmonics fed back to the source. There are two possible patterns of gating the thyristors.In one pattern, each thyristor conducts for180° and in the other, each thyristor conducts for 120°, but in both these patterns, gating signals are applied and removed at 60° intervals of the output voltage waveforms. Therefore both these modes require a six-step bridge inverter. Procedure 1. Switch on the MCB 2. Switch on the main supply 3. Switch on the pulse release switch 4. Vary the frequency pot and amplitude pot simultaneously. 5. Note down the output voltage and speed of the motor 6. tabulate the values 7. Plot the graph between output voltage and speed Output Line Voltage Waveforms Viva Questions 1. What are the different modes of operation of three phase inverter? 2. Explain the operation of three phase inverter. 3. What are the different speed control methods for induction motor? Result 70
- 71. Series Resonant Converter Parallel Resonant Converter 71
- 72. EXPERIMENT NO 10 RESONANT DC-TO-DC CONVERTER Aim To study the operation of series loaded and parallel loaded resonant converter. Apparatus Required Sl.No Name of the Equipment Quantity 1 Series, parallel resonant converter study module 1 no 2 Ammeter (0-100mA) MC 1 no. 3 Voltmeter (0-30V) MC 1 no 4 CRO 1 no 4 R Load (220ohms) 1 no. 5 Patch chords as required Precautions 1. Check all fuses. 2. Check the working condition of modules. 3. Avoid loose connections. 4. Avoid short circuits. 5. Check CRO probe. 6. Calibrate the CRO properly. 7. Initially keep all switches in OFF position. 8. Initially keep frequency adjustment POT in minimum position. Theory The name load resonant converter refers to the fact that for this type of converters, the load is part of the resonant circuit. There are basically two different types, the series and parallel resonant converters. Series Resonant Converter The series resonant converter consists of one or two half bridges forming a half or full bridge converter. Between the output terminals, a series resonant circuit is connected. This series resonant circuit consists of an inductor, a capacitor and a resistor, with one or more of these elements actually being part of the load. Usually, at least the resistor is part of the load.However, for this basic circuit only AC-power can be delivered to the load, 72
- 74. due to the resonant behavior of the circuit. If a DC –load is used, the resistor can be replaced by a rectifier connected to the DC load If the load is directly connected to the resonant circuit, i.e,without a rectifier in between it is referred to as a series resonant DC to AC converter. If the load is connected to the converter via a rectifier, it is referred to as a series resonant DC to DC converter. The series resonant circuit is operated well below resonant frequency and with discontinuous resonant current. . Parallel Resonant converter The parallel load resonant converter is similar to series resonant converter. However, in case of a parallel resonant converter, the output rectifier is connected in parallel with the resonant capacitor. Since the resonant capacitor represents a voltage source to the rectifier, the output filter of the rectifier must be a current source; i.e.inductive.The rectifier represents a non linear load in this case. Usually, a transformer is connected between the resonant circuit and the rectifier in order to adapt the load voltage to the DC link voltage. Unlike the case with the series resonant converter, the resonant inductor current is not determined by the rectifier output current for the parallel resonant converter. On the other hand, the rectifier output voltage is dependant on the capacitor voltage for the parallel resonant converter. Procedure Series Loaded Resonant Converter 1. Connect the circuit as shown in figure. 2. Switch ON the main supply. 3. Switch ON the switch ‘S1’ 4. Adjust the frequency POT and note down the switching frequency. 5. Now note down the output voltage and current values. 6. The values of current and voltages are increases gradually for increase in frequency and reach their maximum value at resonance condition. Further increase in frequency decreases the voltage and current magnitude. 7. At maximum value of current and voltage magnitude, note down the switching frequency and output voltage frequency. Parallel Loaded Resonant Converter 1. Connect the circuit as shown in figure. (parallel connection) 2. Switch ON the main supply. 3. Switch ON the switch ‘S1’ 4. Adjust the frequency POT and note down the switching frequency. 5. Now note down the output voltage and current values. 6. The values of current and voltages are increases gradually for increase in frequency and reach their maximum value at resonance condition. Further increase in frequency decreases the voltage and current magnitude. 7. At maximum value of current and voltage magnitude, note down the switching frequency and output voltage frequency. 74
- 75. Tabular Column Series Loaded Resonant Converter Resonant frequency= Sl.No. Switching Frequency fs Output Voltage (V) Current (A) 1. 2. 3. 4. 5. 50 kHz 40 kHz 30 kHz 20 kHz 12.5 kHz Parallel Loaded Resonant Converter Resonant frequency = Sl.No. Switching Frequency fs Output Voltage (V) Current (A) 1. 2. 3. 4. 5. 50 kHz 40 kHz 30 kHz 20 kHz 12.5 kHz 75
- 76. Viva Questions 1. Define resonant frequency 2. Explain the operation of series resonant converter. 3. Explain the operation of parallel resonant converter. 4. Explain ZCS and ZVS conditions of resonant converters. 5. Mention the applications of resonant DC-DC converters. Result 76