SlideShare a Scribd company logo
1 of 17
Download to read offline
1997-98 ENGINES
3.0L V6
ENGINE IDENTIFICATION
Engine serial number is stamped on rear of cylinder block. See Fig. 1 .
ENGINE IDENTIFICATION CODE
NOTE: For engine repair procedures not covered in this article, see ENGINE
OVERHAUL PROCEDURES - GENERAL INFORMATION article in the GENERAL
INFORMATION.
NOTE: When servicing engine, reference to right and left refers to engine sides as
viewed from rear of engine (drive plate end).
Engine Code
3.0L V6 1MZ-FE
1998 Toyota Avalon XLS
1997-98 ENGINES 3.0L V6
1998 Toyota Avalon XLS
1997-98 ENGINES 3.0L V6
Helpmelearn
November-03-08 10:08:23 AM Page 1 © 2005 Mitchell Repair Information Company, LLC.
Helpmelearn
November-03-08 10:08:29 AM Page 1 © 2005 Mitchell Repair Information Company, LLC.
Fig. 1: Locating Engine Serial Number
Courtesy of TOYOTA MOTOR SALES, U.S.A., INC.
ADJUSTMENTS
VALVE CLEARANCE ADJUSTMENT
1. Disconnect negative battery cable. Drain cooling system. On Sienna, remove outer cowl top panel
assembly, including wiper arms and ventilator louver. See Fig. 2 . Remove right fender apron seal.
NOTE: Adjust valve clearance with engine cold.
WARNING: To prevent air bag deployment, disconnect negative battery cable at least
90 seconds before working on vehicle.
1998 Toyota Avalon XLS
1997-98 ENGINES 3.0L V6
Helpmelearn
November-03-08 10:08:23 AM Page 2 © 2005 Mitchell Repair Information Company, LLC.
Fig. 2: Removing Outer Cowl Top Panel Assembly (Sienna)
Courtesy of TOYOTA MOTOR SALES, U.S.A., INC.
2. On all models, disconnect control cables from throttle body (if necessary). Disconnect upper radiator hose
at coolant outlet housing. Remove air cleaner cap and airflow meter with air intake hose. Remove nuts
and intake manifold cover located above intake manifold.
3. Disconnect necessary electrical connections and vacuum hoses from vacuum switching valve assembly
located above intake manifold. Remove nuts and vacuum switching valve assembly.
4. Disconnect necessary electrical connections, coolant hoses and vacuum hoses for removal of air intake
chamber located above valve cover. Remove No. 1 engine hanger, air intake chamber support, and EGR
pipe as necessary.
5. Remove bolts/nuts, air intake chamber and gasket. Disconnect electrical connectors for removal of wiring
assemblies located above valve covers. Remove bolts and wiring assemblies.
NOTE: Vacuum switching valve assembly may be referred to as emission control
valve set.
1998 Toyota Avalon XLS
1997-98 ENGINES 3.0L V6
Helpmelearn
November-03-08 10:08:23 AM Page 3 © 2005 Mitchell Repair Information Company, LLC.
6. Remove bolts and ignition coil assemblies. Mark ignition coil installation location for reassembly
reference. Remove spark plugs. Remove bolts, valve covers and gaskets. Rotate crankshaft clockwise
(viewed from front of engine) so cylinder No. 1 is at TDC on compression stroke. Cylinder No. 1 is front
cylinder on right side when viewed from rear of engine. See Fig. 3 .
7. Ensure timing mark on crankshaft pulley aligns with "0" mark on timing belt cover. Ensure intake and
exhaust valve lifters on cylinder No. 1 are loose. If conditions are not as described, rotate crankshaft
clockwise one complete revolution.
8. Using feeler gauge, measure and record valve clearance between valve lifter and camshaft on intake
valves of cylinders No. 1 and 6 and exhaust valves on cylinders No. 2 and 3. Perform STEP 1. See Fig.
3 .
Fig. 3: Identifying Valve & Cylinder Arrangement
Courtesy of TOYOTA MOTOR SALES, U.S.A., INC.
9. Rotate crankshaft clockwise an additional 2/3 turn (240 degrees). Measure and record valve clearance
between valve lifter and camshaft on intake valves of cylinders No. 2 and 3 and exhaust valves on
cylinders No. 4 and 5. Perform STEP 2. See Fig. 3 .
10. Rotate crankshaft clockwise an additional 2/3 turn (240 degrees). Measure and record valve clearance
between valve lifter and camshaft on intake valves of cylinders No. 4 and 5 and exhaust valves on
cylinders No. 1 and 6. Perform STEP 3. See Fig. 3 . Ensure valve clearance is within specification. See
VALVE CLEARANCE SPECIFICATIONS .
VALVE CLEARANCE SPECIFICATIONS (1)
Application In. (mm)
Exhaust Valve .010-.014 (.25-.35)
Intake Valve .006-.010 (.15-.25)
(1) Adjust valve clearance with engine cold.
1998 Toyota Avalon XLS
1997-98 ENGINES 3.0L V6
Helpmelearn
November-03-08 10:08:23 AM Page 4 © 2005 Mitchell Repair Information Company, LLC.
11. If valve clearance requires adjustment, rotate camshaft so lobe on valve to be adjusted is facing upward,
away from valve lifter. Position notch on valve lifter perpendicular to the camshaft. Ensure notch is not
aligned with the camshaft.
12. Valve Clearance Adjuster (SST 09248-55040) is used to remove adjusting shim. Using SST "A" of valve
clearance adjuster, push downward on valve lifter. See Fig. 4 . Place SST "B" between camshaft and
valve lifter with the side marked with a "7" or "9" in the right location, depending on cylinder application.
Side marked with "7" should be used on front valves on No. 1 and 2 cylinders only. Remove SST "A".
13. Using small screwdriver and magnet, remove adjusting shim. Measure and record thickness of removed
adjusting shim. Using measured clearance and adjusting shim thickness, select proper replacement
adjusting shim. See Fig. 5 and Fig. 6 .
14. Install replacement adjusting shim with imprinted number on adjusting shim facing the valve lifter.
Recheck valve clearance. Before installing valve cover and gasket, apply sealant at front and rear areas of
cylinder head. See Fig. 7 .
15. Using NEW gasket, install valve cover. Install and tighten valve cover bolts to specification in several
steps. See TORQUE SPECIFICATIONS . To install remaining components, reverse removal
procedure. Use NEW gaskets. Tighten all fasteners to specification. Fill cooling system and adjust control
cables (if necessary).
1998 Toyota Avalon XLS
1997-98 ENGINES 3.0L V6
Helpmelearn
November-03-08 10:08:23 AM Page 5 © 2005 Mitchell Repair Information Company, LLC.
Fig. 4: Adjusting Valve Clearance
Courtesy of TOYOTA MOTOR SALES, U.S.A., INC.
1998 Toyota Avalon XLS
1997-98 ENGINES 3.0L V6
Helpmelearn
November-03-08 10:08:23 AM Page 6 © 2005 Mitchell Repair Information Company, LLC.
Fig. 5: Exhaust Valve Adjusting Shim Selection Chart
Courtesy of TOYOTA MOTOR SALES, U.S.A., INC.
1998 Toyota Avalon XLS
1997-98 ENGINES 3.0L V6
Helpmelearn
November-03-08 10:08:23 AM Page 7 © 2005 Mitchell Repair Information Company, LLC.
Fig. 6: Intake Valve Adjusting Shim Selection Chart
Courtesy of TOYOTA MOTOR SALES, U.S.A., INC.
1998 Toyota Avalon XLS
1997-98 ENGINES 3.0L V6
Helpmelearn
November-03-08 10:08:23 AM Page 8 © 2005 Mitchell Repair Information Company, LLC.
Fig. 7: Identifying Cylinder Head Sealant Application Areas
Courtesy of TOYOTA MOTOR SALES, U.S.A., INC.
REMOVAL & INSTALLATION
FUEL PRESSURE RELEASE
With ignition off, disconnect negative battery cable. Place an approved gasoline container under fuel line. Cover
fuel line connection with shop towel. Slowly loosen fuel line connection to release fuel pressure. Once fuel
pressure is released, fuel system components may be serviced.
ENGINE
CAUTION: When battery is disconnected, vehicle computer and memory systems
may lose memory data. Driveability problems may exist until computer
systems have completed a relearn cycle.
NOTE: For reassembly reference, label all electrical connectors, vacuum hoses and
fuel lines before removal. Also place mating marks on engine hood and other
major assemblies before removal.
WARNING: To prevent air bag deployment, disconnect negative battery cable at least
90 seconds before working on vehicle.
NOTE: Remove engine and transaxle as an assembly.
1998 Toyota Avalon XLS
1997-98 ENGINES 3.0L V6
Helpmelearn
November-03-08 10:08:23 AM Page 9 © 2005 Mitchell Repair Information Company, LLC.
Removal (Avalon & Camry)
1. Release fuel pressure. See FUEL PRESSURE RELEASE . Drain cooling system and engine oil.
Remove hood, battery and battery tray. Disconnect control cables from throttle body (if necessary).
Remove air cleaner cap and airflow meter with air cleaner hose. Remove air filter and air cleaner case.
2. Remove cruise control actuator and bracket. Remove radiator and coolant reservoir tank. Remove relay
box from left front corner of engine compartment and disconnect electrical connectors. Disconnect
electrical connections at ignitor and noise filter near left strut tower.
3. Disconnect necessary coolant hoses, electrical connections, fuel lines and vacuum hoses. To disassemble
quick disconnect fuel fittings, remove fuel line-to-intake manifold clamp bolt at rear of intake manifold.
Remove fuel pipe clamp from No. 1 fuel pipe at fuel filter. Perform STEP 1. See Fig. 8 . Ensure area
around No. 1 fuel pipe and fuel filter is clean. Depress both sides of retainer and pull No. 1 fuel pipe with
disconnect fitting from fuel filter. Perform STEP 2. See Fig. 8 .
CAUTION: Use care when disconnecting No. 1 fuel pipe from fuel filter, as some
residual fuel pressure may still exist in the fuel system.
1998 Toyota Avalon XLS
1997-98 ENGINES 3.0L V6
Helpmelearn
November-03-08 10:08:23 AM Page 10 © 2005 Mitchell Repair Information Company, LLC.
Fig. 8: Disconnecting No. 1 Fuel Pipe From Fuel Filter (Avalon & Camry)
Courtesy of TOYOTA MOTOR SALES, U.S.A., INC.
4. Remove lower panel on passenger's side of instrument panel. Remove glove box. Disconnect necessary
electrical connections so engine wiring can be pulled out through firewall. Remove nuts and pull engine
wiring through firewall.
5. Remove A/C compressor and power steering pump with hoses attached and secure aside. Raise and
support vehicle. Remove lower engine cover. Remove front exhaust pipe that fits between exhaust
1998 Toyota Avalon XLS
1997-98 ENGINES 3.0L V6
Helpmelearn
November-03-08 10:08:23 AM Page 11 © 2005 Mitchell Repair Information Company, LLC.
manifolds and catalytic converter.
6. Disconnect electrical connections, control cables and oil cooler lines from transaxle. Using Wrench (SST
09631-22020), disconnect pressure hose from hydraulic cooling fan pump. Remove fender apron from
inside fenderwell for axle shaft removal.
7. Remove front wheels. Remove cotter pin and retainer from end of axle shaft. Apply brakes and remove
axle shaft nut. Drain transaxle fluid. Remove nut and separate tie rod from steering knuckle.
8. Remove nut and separate stabilizer bar link from lower control arm. Remove ball joint-to-lower control
arm bolts/nuts. Separate lower control arm from ball joint.
9. Cover axle shaft boot with shop towel. Using soft-faced hammer, tap axle shaft from hub assembly. Push
hub assembly outward and separate axle shaft from hub assembly.
10. To remove left (driver's side) axle shaft, pry axle shaft from transaxle and remove. See Fig. 9 . To remove
right (passenger's side) axle shaft, remove axle shaft bearing retainer bolt. Remove snap ring and axle
shaft. See Fig. 9 .
11. Support engine with hoist. Remove engine mount-to-transaxle bolts. Remove engine mount bolts/nuts.
Remove bolts and engine mount absorber, located on front of engine, near exhaust manifold.
12. Remove engine stabilizer rod, engine mounting bracket and right engine mount brace, located near timing
belt cover. Lift engine and transaxle from vehicle.
1998 Toyota Avalon XLS
1997-98 ENGINES 3.0L V6
Helpmelearn
November-03-08 10:08:23 AM Page 12 © 2005 Mitchell Repair Information Company, LLC.
Thank you very much for
your reading. Please Click
Here. Then Get COMPLETE
MANUAL. NO WAITING
NOTE:
If there is no response to
click on the link above,
please download the PDF
document first and then
click on it.
Fig. 9: Removing Axle Shafts
Courtesy of TOYOTA MOTOR SALES, U.S.A., INC.
Installation
1. To install, reverse removal procedure. Tighten all fasteners to specification. See TORQUE
SPECIFICATIONS .
2. When installing axle shafts, install NEW snap ring on end of axle shaft. Coat axle shaft splines and
sliding surfaces with gear oil. Install axle shafts in transaxle with opening of snap ring facing downward.
3. Ensure left (driver's side) axle shaft will move inward and outward about .079-.118" (2.00-3.00 mm) after
being installed. Ensure axle shaft cannot be pulled from transaxle.
4. When installing right (passenger's side) axle shaft, install NEW snap ring and NEW axle shaft bearing
retainer bolt. Tighten axle shaft bearing retainer bolt to specification. See TORQUE
SPECIFICATIONS .
5. To install remaining components, reverse removal procedure. Adjust fluid levels and control cables (if
1998 Toyota Avalon XLS
1997-98 ENGINES 3.0L V6
Helpmelearn
November-03-08 10:08:23 AM Page 13 © 2005 Mitchell Repair Information Company, LLC.
necessary).
Removal (Sienna)
1. Release fuel pressure. See FUEL PRESSURE RELEASE . Drain cooling system and engine oil.
Remove hood, battery and battery tray. Remove cowl top panel assembly. See Fig. 2 . Remove heater air
duct. Remove air cleaner cap and airflow meter with air cleaner hose. Remove air filter and air cleaner
case.
2. Remove cruise control actuator and bracket. Remove radiator and coolant reservoir tank. Disconnect A/T
oil cooler pipe. Disconnect necessary A/C lines, coolant hoses, electrical connections, fuel lines and
vacuum hoses. Disconnect shift control cable from transaxle. Remove front exhaust pipe.
3. Remove fender apron seals. Raise and support vehicle. Remove axle shafts. Disconnect stabilizer bar
links and intermediate shaft assembly. Disconnect power steering hose from power steering reservoir and
reservoir pipe. Remove cover under engine. Attach Engine Hangers (SST 12282-20020). Attach sling
device to hangers.
4. Remove right engine mount. Remove engine mount control rod and No. 2 right engine mount bracket.
Remove 4 lower braces from underneath vehicle. Lower engine, transaxle, and front suspension assembly
from vehicle.
Installation
To install, reverse removal procedure. Tighten all fasteners to specification. See TORQUE
SPECIFICATIONS .
CYLINDER HEAD & MANIFOLDS
Removal (Avalon & Camry)
1. Release fuel pressure. See FUEL PRESSURE RELEASE . Disconnect negative battery cable. Drain
cooling system.
2. Disconnect control cables from throttle body (if necessary). Remove battery and battery tray (if
necessary). Drain cooling system.
3. Remove air cleaner cap and airflow meter with air cleaner hose. Remove cruise control actuator and
bracket. Disconnect necessary electrical connections, ground straps, coolant hoses, fuel lines and vacuum
hoses for removal of air intake chamber and cylinder head.
4. Remove right engine mount brace, located near timing belt cover. Remove nuts and "V" bank cover,
located above intake manifold. See Fig. 10 . Disconnect necessary electrical connectors and vacuum
hoses from vacuum switching valve assembly located above intake manifold. Remove vacuum switching
valve assembly.
5. Disconnect brackets and hoses from air intake chamber. Remove No. 1 engine hanger and air intake
chamber support. See Fig. 10 . Remove EGR pipe and gaskets (if necessary).
WARNING: To prevent air bag deployment, disconnect negative battery cable at least
90 seconds before working on vehicle.
1998 Toyota Avalon XLS
1997-98 ENGINES 3.0L V6
Helpmelearn
November-03-08 10:08:24 AM Page 14 © 2005 Mitchell Repair Information Company, LLC.
6. Remove bolts/nuts, air intake chamber and gasket. Disconnect electrical connectors for removal of engine
wiring located above valve covers. Remove nuts and engine wiring.
7. Remove ignition coils and spark plugs. Mark ignition coil installation location for reassembly reference.
Raise and support vehicle. Remove front exhaust pipe that fits between exhaust manifolds and catalytic
converter.
8. Remove timing belt, camshaft sprockets and No. 2 idler pulley. See TIMING BELT . Remove No. 3
timing belt cover from front of cylinder heads. See Fig. 17 .
9. Remove cylinder head rear plate, coolant inlet pipe and air assist hose. See Fig. 10 . Remove intake
manifold bolts/nuts, washers and intake manifold along with delivery pipes and injectors.
10. If removing delivery pipe and injectors from intake manifold, remove No. 2 fuel pipe from delivery pipe.
See Fig. 10 . Remove pressure regulator and pulsation damper (if necessary).
11. To disassemble quick disconnect fuel fittings, remove fuel line-to-intake manifold clamp bolt at rear of
intake manifold. Remove fuel pipe clamp from No. 1 fuel pipe at fuel filter. Perform STEP 1. See Fig. 8 .
Ensure area around No. 1 fuel pipe and fuel filter is clean. Depress both sides of retainer and pull No. 1
fuel pipe with disconnect fitting from fuel filter. Perform STEP 2. See Fig. 8 .
CAUTION: DO NOT allow injectors to fall from delivery pipe when removing from
intake manifold.
CAUTION: Use care when disconnecting No. 1 fuel pipe from fuel filter, as some
residual fuel pressure may still exist in the fuel system.
1998 Toyota Avalon XLS
1997-98 ENGINES 3.0L V6
Helpmelearn
November-03-08 10:08:24 AM Page 15 © 2005 Mitchell Repair Information Company, LLC.
Fig. 10: Exploded View Of Intake Manifold & Components (Avalon & Camry Shown; Sienna Is
Similar)
Courtesy of TOYOTA MOTOR SALES, U.S.A., INC.
1998 Toyota Avalon XLS
1997-98 ENGINES 3.0L V6
Helpmelearn
November-03-08 10:08:24 AM Page 16 © 2005 Mitchell Repair Information Company, LLC.

More Related Content

What's hot

Aplikasi radiofarmasi dalam dunia kesehatan
Aplikasi radiofarmasi dalam dunia kesehatan Aplikasi radiofarmasi dalam dunia kesehatan
Aplikasi radiofarmasi dalam dunia kesehatan Winniey Tillich Wahyuni
 
Fármacos antineoplásicos
Fármacos antineoplásicos Fármacos antineoplásicos
Fármacos antineoplásicos Safia Naser
 
Peran Apoteker AoC Program Kesehatan
Peran Apoteker AoC Program KesehatanPeran Apoteker AoC Program Kesehatan
Peran Apoteker AoC Program KesehatanSugiyantiyanti2
 
Lei 6360/1976 - Normas para Registro de medicamentos no Brasil
Lei 6360/1976 - Normas para Registro de medicamentos no BrasilLei 6360/1976 - Normas para Registro de medicamentos no Brasil
Lei 6360/1976 - Normas para Registro de medicamentos no BrasilMarcelo Polacow Bisson
 
Sulfonamidas e tetraciclinas
Sulfonamidas e tetraciclinasSulfonamidas e tetraciclinas
Sulfonamidas e tetraciclinasLucas Fontes
 
Farmakope dan nama obat monografi - sediaan umum
Farmakope dan nama obat   monografi - sediaan umumFarmakope dan nama obat   monografi - sediaan umum
Farmakope dan nama obat monografi - sediaan umumAmanyMufida
 
Rani anggraini hikmah (manajemen farmasi)
Rani anggraini hikmah (manajemen farmasi)Rani anggraini hikmah (manajemen farmasi)
Rani anggraini hikmah (manajemen farmasi)ranianggrainihikmah
 
Kel 9 kelas m preparat kebersihan badan
Kel 9 kelas m preparat kebersihan badanKel 9 kelas m preparat kebersihan badan
Kel 9 kelas m preparat kebersihan badandanyindriawaty
 
268935256 optalmik
268935256 optalmik268935256 optalmik
268935256 optalmikLina Nandala
 
A importância do farmacêutico no sus
A importância do farmacêutico no susA importância do farmacêutico no sus
A importância do farmacêutico no susDESENVOLVA CONSULTORIA
 
KOSMETIKA (SHAMPOO/SAMPO)
KOSMETIKA (SHAMPOO/SAMPO)KOSMETIKA (SHAMPOO/SAMPO)
KOSMETIKA (SHAMPOO/SAMPO)Dessypsd1296
 
Calculation of pharmacokinetic parameters from a given data .pptx
Calculation of pharmacokinetic parameters from a given data .pptxCalculation of pharmacokinetic parameters from a given data .pptx
Calculation of pharmacokinetic parameters from a given data .pptxsampharma12584
 
Opinionway pour CEWE - Les Français et l’impression de photos numériques / Oc...
Opinionway pour CEWE - Les Français et l’impression de photos numériques / Oc...Opinionway pour CEWE - Les Français et l’impression de photos numériques / Oc...
Opinionway pour CEWE - Les Français et l’impression de photos numériques / Oc...contactOpinionWay
 
Kelompok 7 farmakologi
Kelompok 7 farmakologiKelompok 7 farmakologi
Kelompok 7 farmakologiAnis Solihah
 
Invivo evaluation techniques
Invivo evaluation techniquesInvivo evaluation techniques
Invivo evaluation techniquesAnushma Chorsiya
 
Konseling farmasi (1)
Konseling farmasi (1)Konseling farmasi (1)
Konseling farmasi (1)Yusuf Himawan
 

What's hot (16)

Aplikasi radiofarmasi dalam dunia kesehatan
Aplikasi radiofarmasi dalam dunia kesehatan Aplikasi radiofarmasi dalam dunia kesehatan
Aplikasi radiofarmasi dalam dunia kesehatan
 
Fármacos antineoplásicos
Fármacos antineoplásicos Fármacos antineoplásicos
Fármacos antineoplásicos
 
Peran Apoteker AoC Program Kesehatan
Peran Apoteker AoC Program KesehatanPeran Apoteker AoC Program Kesehatan
Peran Apoteker AoC Program Kesehatan
 
Lei 6360/1976 - Normas para Registro de medicamentos no Brasil
Lei 6360/1976 - Normas para Registro de medicamentos no BrasilLei 6360/1976 - Normas para Registro de medicamentos no Brasil
Lei 6360/1976 - Normas para Registro de medicamentos no Brasil
 
Sulfonamidas e tetraciclinas
Sulfonamidas e tetraciclinasSulfonamidas e tetraciclinas
Sulfonamidas e tetraciclinas
 
Farmakope dan nama obat monografi - sediaan umum
Farmakope dan nama obat   monografi - sediaan umumFarmakope dan nama obat   monografi - sediaan umum
Farmakope dan nama obat monografi - sediaan umum
 
Rani anggraini hikmah (manajemen farmasi)
Rani anggraini hikmah (manajemen farmasi)Rani anggraini hikmah (manajemen farmasi)
Rani anggraini hikmah (manajemen farmasi)
 
Kel 9 kelas m preparat kebersihan badan
Kel 9 kelas m preparat kebersihan badanKel 9 kelas m preparat kebersihan badan
Kel 9 kelas m preparat kebersihan badan
 
268935256 optalmik
268935256 optalmik268935256 optalmik
268935256 optalmik
 
A importância do farmacêutico no sus
A importância do farmacêutico no susA importância do farmacêutico no sus
A importância do farmacêutico no sus
 
KOSMETIKA (SHAMPOO/SAMPO)
KOSMETIKA (SHAMPOO/SAMPO)KOSMETIKA (SHAMPOO/SAMPO)
KOSMETIKA (SHAMPOO/SAMPO)
 
Calculation of pharmacokinetic parameters from a given data .pptx
Calculation of pharmacokinetic parameters from a given data .pptxCalculation of pharmacokinetic parameters from a given data .pptx
Calculation of pharmacokinetic parameters from a given data .pptx
 
Opinionway pour CEWE - Les Français et l’impression de photos numériques / Oc...
Opinionway pour CEWE - Les Français et l’impression de photos numériques / Oc...Opinionway pour CEWE - Les Français et l’impression de photos numériques / Oc...
Opinionway pour CEWE - Les Français et l’impression de photos numériques / Oc...
 
Kelompok 7 farmakologi
Kelompok 7 farmakologiKelompok 7 farmakologi
Kelompok 7 farmakologi
 
Invivo evaluation techniques
Invivo evaluation techniquesInvivo evaluation techniques
Invivo evaluation techniques
 
Konseling farmasi (1)
Konseling farmasi (1)Konseling farmasi (1)
Konseling farmasi (1)
 

Similar to 1998 toyota avalon service repair manual

1999 toyota corolla service repair manual
1999 toyota corolla service repair manual1999 toyota corolla service repair manual
1999 toyota corolla service repair manualfujsejfkskemem
 
1999 TOYOTA COROLLA Service Repair Manual
1999 TOYOTA COROLLA Service Repair Manual1999 TOYOTA COROLLA Service Repair Manual
1999 TOYOTA COROLLA Service Repair Manualjksmemd eudkmmd
 
1998 toyota corolla service repair manual
1998 toyota corolla service repair manual1998 toyota corolla service repair manual
1998 toyota corolla service repair manualfujjsekfkksekm
 
2001 TOYOTA COROLLA Service Repair Manual
2001 TOYOTA COROLLA Service Repair Manual2001 TOYOTA COROLLA Service Repair Manual
2001 TOYOTA COROLLA Service Repair Manualjkndhjsnhd
 
2002 toyota corolla service repair manual
2002 toyota corolla service repair manual2002 toyota corolla service repair manual
2002 toyota corolla service repair manualjknsmmem
 
2001 toyota corolla service repair manual
2001 toyota corolla service repair manual2001 toyota corolla service repair manual
2001 toyota corolla service repair manualjksnmdms
 
2000 toyota corolla service repair manual
2000 toyota corolla service repair manual2000 toyota corolla service repair manual
2000 toyota corolla service repair manualjkmsedopl
 
1999 toyota corolla service repair manual
1999 toyota corolla service repair manual1999 toyota corolla service repair manual
1999 toyota corolla service repair manualfujjsefkksemmm
 
2002 TOYOTA COROLLA Service Repair Manual
2002 TOYOTA COROLLA Service Repair Manual2002 TOYOTA COROLLA Service Repair Manual
2002 TOYOTA COROLLA Service Repair Manualjnsekmdmm
 
2001 pontiac grand am service repair manual
2001 pontiac grand am service repair manual2001 pontiac grand am service repair manual
2001 pontiac grand am service repair manualfhsejkdkmem
 
2005 pontiac grand am service repair manual
2005 pontiac grand am service repair manual2005 pontiac grand am service repair manual
2005 pontiac grand am service repair manualjkmsedopl
 
1999 pontiac grand am service repair manual
1999 pontiac grand am service repair manual1999 pontiac grand am service repair manual
1999 pontiac grand am service repair manualfjjskekmdmme
 
2002 pontiac grand am service repair manual
2002 pontiac grand am service repair manual2002 pontiac grand am service repair manual
2002 pontiac grand am service repair manualfhsejkdkme
 
2000 pontiac grand am service repair manual
2000 pontiac grand am service repair manual2000 pontiac grand am service repair manual
2000 pontiac grand am service repair manualfjjsekdmme
 
2003 pontiac grand am service repair manual
2003 pontiac grand am service repair manual2003 pontiac grand am service repair manual
2003 pontiac grand am service repair manualfjsekkxszdmmem
 
Civic-Si-1999-1.6L (1).pdf
Civic-Si-1999-1.6L (1).pdfCivic-Si-1999-1.6L (1).pdf
Civic-Si-1999-1.6L (1).pdf100 octanos
 
Volvo L120E Wheel Loader Service Repair Manual Instant Download.pdf
Volvo L120E Wheel Loader Service Repair Manual Instant Download.pdfVolvo L120E Wheel Loader Service Repair Manual Instant Download.pdf
Volvo L120E Wheel Loader Service Repair Manual Instant Download.pdftepu22753653
 
Volvo L120E Wheel Loader Service Repair Manual Instant Download.pdf
Volvo L120E Wheel Loader Service Repair Manual Instant Download.pdfVolvo L120E Wheel Loader Service Repair Manual Instant Download.pdf
Volvo L120E Wheel Loader Service Repair Manual Instant Download.pdffijsekkkdmdm3e
 
Volvo L120E Wheel Loader Service Repair Manual Instant Download.pdf
Volvo L120E Wheel Loader Service Repair Manual Instant Download.pdfVolvo L120E Wheel Loader Service Repair Manual Instant Download.pdf
Volvo L120E Wheel Loader Service Repair Manual Instant Download.pdflunrizan628
 

Similar to 1998 toyota avalon service repair manual (20)

1999 toyota corolla service repair manual
1999 toyota corolla service repair manual1999 toyota corolla service repair manual
1999 toyota corolla service repair manual
 
1999 TOYOTA COROLLA Service Repair Manual
1999 TOYOTA COROLLA Service Repair Manual1999 TOYOTA COROLLA Service Repair Manual
1999 TOYOTA COROLLA Service Repair Manual
 
1998 toyota corolla service repair manual
1998 toyota corolla service repair manual1998 toyota corolla service repair manual
1998 toyota corolla service repair manual
 
2001 TOYOTA COROLLA Service Repair Manual
2001 TOYOTA COROLLA Service Repair Manual2001 TOYOTA COROLLA Service Repair Manual
2001 TOYOTA COROLLA Service Repair Manual
 
2002 toyota corolla service repair manual
2002 toyota corolla service repair manual2002 toyota corolla service repair manual
2002 toyota corolla service repair manual
 
2001 toyota corolla service repair manual
2001 toyota corolla service repair manual2001 toyota corolla service repair manual
2001 toyota corolla service repair manual
 
2000 toyota corolla service repair manual
2000 toyota corolla service repair manual2000 toyota corolla service repair manual
2000 toyota corolla service repair manual
 
1999 toyota corolla service repair manual
1999 toyota corolla service repair manual1999 toyota corolla service repair manual
1999 toyota corolla service repair manual
 
2002 TOYOTA COROLLA Service Repair Manual
2002 TOYOTA COROLLA Service Repair Manual2002 TOYOTA COROLLA Service Repair Manual
2002 TOYOTA COROLLA Service Repair Manual
 
2001 pontiac grand am service repair manual
2001 pontiac grand am service repair manual2001 pontiac grand am service repair manual
2001 pontiac grand am service repair manual
 
2005 pontiac grand am service repair manual
2005 pontiac grand am service repair manual2005 pontiac grand am service repair manual
2005 pontiac grand am service repair manual
 
1999 pontiac grand am service repair manual
1999 pontiac grand am service repair manual1999 pontiac grand am service repair manual
1999 pontiac grand am service repair manual
 
2002 pontiac grand am service repair manual
2002 pontiac grand am service repair manual2002 pontiac grand am service repair manual
2002 pontiac grand am service repair manual
 
2000 pontiac grand am service repair manual
2000 pontiac grand am service repair manual2000 pontiac grand am service repair manual
2000 pontiac grand am service repair manual
 
2003 pontiac grand am service repair manual
2003 pontiac grand am service repair manual2003 pontiac grand am service repair manual
2003 pontiac grand am service repair manual
 
Civic-Si-1999-1.6L (1).pdf
Civic-Si-1999-1.6L (1).pdfCivic-Si-1999-1.6L (1).pdf
Civic-Si-1999-1.6L (1).pdf
 
Motor 4.0l Wagoneer
Motor 4.0l WagoneerMotor 4.0l Wagoneer
Motor 4.0l Wagoneer
 
Volvo L120E Wheel Loader Service Repair Manual Instant Download.pdf
Volvo L120E Wheel Loader Service Repair Manual Instant Download.pdfVolvo L120E Wheel Loader Service Repair Manual Instant Download.pdf
Volvo L120E Wheel Loader Service Repair Manual Instant Download.pdf
 
Volvo L120E Wheel Loader Service Repair Manual Instant Download.pdf
Volvo L120E Wheel Loader Service Repair Manual Instant Download.pdfVolvo L120E Wheel Loader Service Repair Manual Instant Download.pdf
Volvo L120E Wheel Loader Service Repair Manual Instant Download.pdf
 
Volvo L120E Wheel Loader Service Repair Manual Instant Download.pdf
Volvo L120E Wheel Loader Service Repair Manual Instant Download.pdfVolvo L120E Wheel Loader Service Repair Manual Instant Download.pdf
Volvo L120E Wheel Loader Service Repair Manual Instant Download.pdf
 

More from fujjsefkksemmm

2006 toyota celica service repair manual
2006 toyota celica service repair manual2006 toyota celica service repair manual
2006 toyota celica service repair manualfujjsefkksemmm
 
2006 kawasaki ex650 b6f service repair manual
2006 kawasaki ex650 b6f service repair manual2006 kawasaki ex650 b6f service repair manual
2006 kawasaki ex650 b6f service repair manualfujjsefkksemmm
 
2006 honda trx500 fe fourtrax foreman 4x4 es service repair manual
2006 honda trx500 fe fourtrax foreman 4x4 es service repair manual2006 honda trx500 fe fourtrax foreman 4x4 es service repair manual
2006 honda trx500 fe fourtrax foreman 4x4 es service repair manualfujjsefkksemmm
 
2003 yamaha rxw10 j rxw10sj rx10k snowmobile service repair manual
2003 yamaha rxw10 j  rxw10sj  rx10k snowmobile service repair manual2003 yamaha rxw10 j  rxw10sj  rx10k snowmobile service repair manual
2003 yamaha rxw10 j rxw10sj rx10k snowmobile service repair manualfujjsefkksemmm
 
2003 lexus gx470 service repair manual
2003 lexus gx470 service repair manual2003 lexus gx470 service repair manual
2003 lexus gx470 service repair manualfujjsefkksemmm
 
2003 gmc sonoma service repair manual
2003 gmc sonoma service repair manual2003 gmc sonoma service repair manual
2003 gmc sonoma service repair manualfujjsefkksemmm
 
2001 iveco daily 3 service repair manual
2001 iveco daily 3 service repair manual2001 iveco daily 3 service repair manual
2001 iveco daily 3 service repair manualfujjsefkksemmm
 
2000 yamaha srx700 d snowmobile service repair manual
2000 yamaha srx700 d snowmobile service repair manual2000 yamaha srx700 d snowmobile service repair manual
2000 yamaha srx700 d snowmobile service repair manualfujjsefkksemmm
 
1997 toyota avensis service repair manual
1997 toyota avensis service repair manual1997 toyota avensis service repair manual
1997 toyota avensis service repair manualfujjsefkksemmm
 
1996 polaris indy storm snowmobile service repair manual
1996 polaris indy storm snowmobile service repair manual1996 polaris indy storm snowmobile service repair manual
1996 polaris indy storm snowmobile service repair manualfujjsefkksemmm
 
1992 yamaha vmx1200 dc v max service repair manual
1992 yamaha vmx1200 dc v max service repair manual1992 yamaha vmx1200 dc v max service repair manual
1992 yamaha vmx1200 dc v max service repair manualfujjsefkksemmm
 
1992 lexus es 300 es300 service repair manual
1992 lexus es 300 es300 service repair manual1992 lexus es 300 es300 service repair manual
1992 lexus es 300 es300 service repair manualfujjsefkksemmm
 
1988 polaris star snowmobile service repair manual
1988 polaris star snowmobile service repair manual1988 polaris star snowmobile service repair manual
1988 polaris star snowmobile service repair manualfujjsefkksemmm
 
1988 jaguar xj6 service repair manual
1988 jaguar xj6 service repair manual1988 jaguar xj6 service repair manual
1988 jaguar xj6 service repair manualfujjsefkksemmm
 
Perkins 3000 series 3012 cv12 12 cylinder diesel engine service repair manual
Perkins 3000 series 3012 cv12 12 cylinder diesel engine service repair manualPerkins 3000 series 3012 cv12 12 cylinder diesel engine service repair manual
Perkins 3000 series 3012 cv12 12 cylinder diesel engine service repair manualfujjsefkksemmm
 
Perkins 3000 series 3008 cv8 8 cylinder diesel engine service repair manual
Perkins 3000 series 3008 cv8 8 cylinder diesel engine service repair manualPerkins 3000 series 3008 cv8 8 cylinder diesel engine service repair manual
Perkins 3000 series 3008 cv8 8 cylinder diesel engine service repair manualfujjsefkksemmm
 
Perkins 2800 series 2806 c e18 tag2 diesel engine service repair manual
Perkins 2800 series 2806 c e18 tag2 diesel engine service repair manualPerkins 2800 series 2806 c e18 tag2 diesel engine service repair manual
Perkins 2800 series 2806 c e18 tag2 diesel engine service repair manualfujjsefkksemmm
 
Perkins 2500 series 2506 15 industrial engine (mga ) service repair manual
Perkins 2500 series 2506 15 industrial engine (mga ) service repair manualPerkins 2500 series 2506 15 industrial engine (mga ) service repair manual
Perkins 2500 series 2506 15 industrial engine (mga ) service repair manualfujjsefkksemmm
 
Perkins 1300 series wg diesel engine service repair manual
Perkins 1300 series wg diesel engine service repair manualPerkins 1300 series wg diesel engine service repair manual
Perkins 1300 series wg diesel engine service repair manualfujjsefkksemmm
 
Perkins 700 series ub four cylinder diesel engine service repair manual
Perkins 700 series ub four cylinder diesel engine service repair manualPerkins 700 series ub four cylinder diesel engine service repair manual
Perkins 700 series ub four cylinder diesel engine service repair manualfujjsefkksemmm
 

More from fujjsefkksemmm (20)

2006 toyota celica service repair manual
2006 toyota celica service repair manual2006 toyota celica service repair manual
2006 toyota celica service repair manual
 
2006 kawasaki ex650 b6f service repair manual
2006 kawasaki ex650 b6f service repair manual2006 kawasaki ex650 b6f service repair manual
2006 kawasaki ex650 b6f service repair manual
 
2006 honda trx500 fe fourtrax foreman 4x4 es service repair manual
2006 honda trx500 fe fourtrax foreman 4x4 es service repair manual2006 honda trx500 fe fourtrax foreman 4x4 es service repair manual
2006 honda trx500 fe fourtrax foreman 4x4 es service repair manual
 
2003 yamaha rxw10 j rxw10sj rx10k snowmobile service repair manual
2003 yamaha rxw10 j  rxw10sj  rx10k snowmobile service repair manual2003 yamaha rxw10 j  rxw10sj  rx10k snowmobile service repair manual
2003 yamaha rxw10 j rxw10sj rx10k snowmobile service repair manual
 
2003 lexus gx470 service repair manual
2003 lexus gx470 service repair manual2003 lexus gx470 service repair manual
2003 lexus gx470 service repair manual
 
2003 gmc sonoma service repair manual
2003 gmc sonoma service repair manual2003 gmc sonoma service repair manual
2003 gmc sonoma service repair manual
 
2001 iveco daily 3 service repair manual
2001 iveco daily 3 service repair manual2001 iveco daily 3 service repair manual
2001 iveco daily 3 service repair manual
 
2000 yamaha srx700 d snowmobile service repair manual
2000 yamaha srx700 d snowmobile service repair manual2000 yamaha srx700 d snowmobile service repair manual
2000 yamaha srx700 d snowmobile service repair manual
 
1997 toyota avensis service repair manual
1997 toyota avensis service repair manual1997 toyota avensis service repair manual
1997 toyota avensis service repair manual
 
1996 polaris indy storm snowmobile service repair manual
1996 polaris indy storm snowmobile service repair manual1996 polaris indy storm snowmobile service repair manual
1996 polaris indy storm snowmobile service repair manual
 
1992 yamaha vmx1200 dc v max service repair manual
1992 yamaha vmx1200 dc v max service repair manual1992 yamaha vmx1200 dc v max service repair manual
1992 yamaha vmx1200 dc v max service repair manual
 
1992 lexus es 300 es300 service repair manual
1992 lexus es 300 es300 service repair manual1992 lexus es 300 es300 service repair manual
1992 lexus es 300 es300 service repair manual
 
1988 polaris star snowmobile service repair manual
1988 polaris star snowmobile service repair manual1988 polaris star snowmobile service repair manual
1988 polaris star snowmobile service repair manual
 
1988 jaguar xj6 service repair manual
1988 jaguar xj6 service repair manual1988 jaguar xj6 service repair manual
1988 jaguar xj6 service repair manual
 
Perkins 3000 series 3012 cv12 12 cylinder diesel engine service repair manual
Perkins 3000 series 3012 cv12 12 cylinder diesel engine service repair manualPerkins 3000 series 3012 cv12 12 cylinder diesel engine service repair manual
Perkins 3000 series 3012 cv12 12 cylinder diesel engine service repair manual
 
Perkins 3000 series 3008 cv8 8 cylinder diesel engine service repair manual
Perkins 3000 series 3008 cv8 8 cylinder diesel engine service repair manualPerkins 3000 series 3008 cv8 8 cylinder diesel engine service repair manual
Perkins 3000 series 3008 cv8 8 cylinder diesel engine service repair manual
 
Perkins 2800 series 2806 c e18 tag2 diesel engine service repair manual
Perkins 2800 series 2806 c e18 tag2 diesel engine service repair manualPerkins 2800 series 2806 c e18 tag2 diesel engine service repair manual
Perkins 2800 series 2806 c e18 tag2 diesel engine service repair manual
 
Perkins 2500 series 2506 15 industrial engine (mga ) service repair manual
Perkins 2500 series 2506 15 industrial engine (mga ) service repair manualPerkins 2500 series 2506 15 industrial engine (mga ) service repair manual
Perkins 2500 series 2506 15 industrial engine (mga ) service repair manual
 
Perkins 1300 series wg diesel engine service repair manual
Perkins 1300 series wg diesel engine service repair manualPerkins 1300 series wg diesel engine service repair manual
Perkins 1300 series wg diesel engine service repair manual
 
Perkins 700 series ub four cylinder diesel engine service repair manual
Perkins 700 series ub four cylinder diesel engine service repair manualPerkins 700 series ub four cylinder diesel engine service repair manual
Perkins 700 series ub four cylinder diesel engine service repair manual
 

Recently uploaded

Charging Forward: Bringing Electric Vehicle Charging Infrastructure to Rural ...
Charging Forward: Bringing Electric Vehicle Charging Infrastructure to Rural ...Charging Forward: Bringing Electric Vehicle Charging Infrastructure to Rural ...
Charging Forward: Bringing Electric Vehicle Charging Infrastructure to Rural ...Forth
 
一比一原版(CCA毕业证书)加利福尼亚艺术学院毕业证成绩单原件一模一样
一比一原版(CCA毕业证书)加利福尼亚艺术学院毕业证成绩单原件一模一样一比一原版(CCA毕业证书)加利福尼亚艺术学院毕业证成绩单原件一模一样
一比一原版(CCA毕业证书)加利福尼亚艺术学院毕业证成绩单原件一模一样zovambe
 
Mercedes Check Engine Light Solutions Precision Service for Peak Performance
Mercedes Check Engine Light Solutions Precision Service for Peak PerformanceMercedes Check Engine Light Solutions Precision Service for Peak Performance
Mercedes Check Engine Light Solutions Precision Service for Peak PerformanceMotronix
 
John Deere 990 Compact Utility Tractor Shop Manual.pdf
John Deere 990 Compact Utility Tractor Shop Manual.pdfJohn Deere 990 Compact Utility Tractor Shop Manual.pdf
John Deere 990 Compact Utility Tractor Shop Manual.pdfExcavator
 
EV Charging Resources and Technical Assistance for Rural Communities and Trib...
EV Charging Resources and Technical Assistance for Rural Communities and Trib...EV Charging Resources and Technical Assistance for Rural Communities and Trib...
EV Charging Resources and Technical Assistance for Rural Communities and Trib...Forth
 
Preparing for Transportation Electrification: The Electric Coop Perspective
Preparing for Transportation Electrification: The Electric Coop PerspectivePreparing for Transportation Electrification: The Electric Coop Perspective
Preparing for Transportation Electrification: The Electric Coop PerspectiveForth
 
一比一原版(Auburn毕业证书)奥本大学毕业证原件一模一样
一比一原版(Auburn毕业证书)奥本大学毕业证原件一模一样一比一原版(Auburn毕业证书)奥本大学毕业证原件一模一样
一比一原版(Auburn毕业证书)奥本大学毕业证原件一模一样AS
 
How Do I Know If My Volvo Has Throttle Position Sensor Problems
How Do I Know If My Volvo Has Throttle Position Sensor ProblemsHow Do I Know If My Volvo Has Throttle Position Sensor Problems
How Do I Know If My Volvo Has Throttle Position Sensor ProblemsHeynneman European
 
Effortless Driving Experience Premier Mercedes Sprinter Suspension Service
Effortless Driving Experience Premier Mercedes Sprinter Suspension ServiceEffortless Driving Experience Premier Mercedes Sprinter Suspension Service
Effortless Driving Experience Premier Mercedes Sprinter Suspension ServiceSprinter Gurus
 
如何办理英国埃塞克斯大学毕业证(Essex毕业证书)毕业证成绩单原版一比一
如何办理英国埃塞克斯大学毕业证(Essex毕业证书)毕业证成绩单原版一比一如何办理英国埃塞克斯大学毕业证(Essex毕业证书)毕业证成绩单原版一比一
如何办理英国埃塞克斯大学毕业证(Essex毕业证书)毕业证成绩单原版一比一avy6anjnd
 
Auto Glass Repair in Redwood City What to Do When Disaster Strikes.pdf
Auto Glass Repair in Redwood City What to Do When Disaster Strikes.pdfAuto Glass Repair in Redwood City What to Do When Disaster Strikes.pdf
Auto Glass Repair in Redwood City What to Do When Disaster Strikes.pdfDuran's Auto Glass
 
uipath-interview-questions.pdf it was productive
uipath-interview-questions.pdf it was productiveuipath-interview-questions.pdf it was productive
uipath-interview-questions.pdf it was productivesfvfmbgpq2
 
如何办理(爱大毕业证书)爱丁堡大学毕业证成绩单留信学历认证真实可查
如何办理(爱大毕业证书)爱丁堡大学毕业证成绩单留信学历认证真实可查如何办理(爱大毕业证书)爱丁堡大学毕业证成绩单留信学历认证真实可查
如何办理(爱大毕业证书)爱丁堡大学毕业证成绩单留信学历认证真实可查huxs9sacp
 
What Does It Mean When Mercedes Says 'ESP Inoperative See Owner's Manual'
What Does It Mean When Mercedes Says 'ESP Inoperative See Owner's Manual'What Does It Mean When Mercedes Says 'ESP Inoperative See Owner's Manual'
What Does It Mean When Mercedes Says 'ESP Inoperative See Owner's Manual'Euromotive Performance
 
Seamless Driving Experience Premier Mini Cooper Clutch Solutions
Seamless Driving Experience Premier Mini Cooper Clutch SolutionsSeamless Driving Experience Premier Mini Cooper Clutch Solutions
Seamless Driving Experience Premier Mini Cooper Clutch SolutionsAbsolute Auto Care Inc
 
一比一原版(Rutgers毕业证书)罗格斯大学毕业证成绩单原件一模一样
一比一原版(Rutgers毕业证书)罗格斯大学毕业证成绩单原件一模一样一比一原版(Rutgers毕业证书)罗格斯大学毕业证成绩单原件一模一样
一比一原版(Rutgers毕业证书)罗格斯大学毕业证成绩单原件一模一样A
 
Exploring the Heart of Alberta: A Journey from Calgary to Edmonton
Exploring the Heart of Alberta: A Journey from Calgary to EdmontonExploring the Heart of Alberta: A Journey from Calgary to Edmonton
Exploring the Heart of Alberta: A Journey from Calgary to EdmontonTheCanada BUS
 
mechanical vibrations pebbles.pptbbbbbbbbx
mechanical vibrations pebbles.pptbbbbbbbbxmechanical vibrations pebbles.pptbbbbbbbbx
mechanical vibrations pebbles.pptbbbbbbbbxjoshuaclack73
 
原版定做(ncl学位证书)英国纽卡斯尔大学毕业证文凭学历证书-国外学历学位认证
原版定做(ncl学位证书)英国纽卡斯尔大学毕业证文凭学历证书-国外学历学位认证原版定做(ncl学位证书)英国纽卡斯尔大学毕业证文凭学历证书-国外学历学位认证
原版定做(ncl学位证书)英国纽卡斯尔大学毕业证文凭学历证书-国外学历学位认证eehzz
 
在线定制(UBC毕业证书)英属哥伦比亚大学毕业证成绩单留信学历认证原版一比一
在线定制(UBC毕业证书)英属哥伦比亚大学毕业证成绩单留信学历认证原版一比一在线定制(UBC毕业证书)英属哥伦比亚大学毕业证成绩单留信学历认证原版一比一
在线定制(UBC毕业证书)英属哥伦比亚大学毕业证成绩单留信学历认证原版一比一qh1ao5mm
 

Recently uploaded (20)

Charging Forward: Bringing Electric Vehicle Charging Infrastructure to Rural ...
Charging Forward: Bringing Electric Vehicle Charging Infrastructure to Rural ...Charging Forward: Bringing Electric Vehicle Charging Infrastructure to Rural ...
Charging Forward: Bringing Electric Vehicle Charging Infrastructure to Rural ...
 
一比一原版(CCA毕业证书)加利福尼亚艺术学院毕业证成绩单原件一模一样
一比一原版(CCA毕业证书)加利福尼亚艺术学院毕业证成绩单原件一模一样一比一原版(CCA毕业证书)加利福尼亚艺术学院毕业证成绩单原件一模一样
一比一原版(CCA毕业证书)加利福尼亚艺术学院毕业证成绩单原件一模一样
 
Mercedes Check Engine Light Solutions Precision Service for Peak Performance
Mercedes Check Engine Light Solutions Precision Service for Peak PerformanceMercedes Check Engine Light Solutions Precision Service for Peak Performance
Mercedes Check Engine Light Solutions Precision Service for Peak Performance
 
John Deere 990 Compact Utility Tractor Shop Manual.pdf
John Deere 990 Compact Utility Tractor Shop Manual.pdfJohn Deere 990 Compact Utility Tractor Shop Manual.pdf
John Deere 990 Compact Utility Tractor Shop Manual.pdf
 
EV Charging Resources and Technical Assistance for Rural Communities and Trib...
EV Charging Resources and Technical Assistance for Rural Communities and Trib...EV Charging Resources and Technical Assistance for Rural Communities and Trib...
EV Charging Resources and Technical Assistance for Rural Communities and Trib...
 
Preparing for Transportation Electrification: The Electric Coop Perspective
Preparing for Transportation Electrification: The Electric Coop PerspectivePreparing for Transportation Electrification: The Electric Coop Perspective
Preparing for Transportation Electrification: The Electric Coop Perspective
 
一比一原版(Auburn毕业证书)奥本大学毕业证原件一模一样
一比一原版(Auburn毕业证书)奥本大学毕业证原件一模一样一比一原版(Auburn毕业证书)奥本大学毕业证原件一模一样
一比一原版(Auburn毕业证书)奥本大学毕业证原件一模一样
 
How Do I Know If My Volvo Has Throttle Position Sensor Problems
How Do I Know If My Volvo Has Throttle Position Sensor ProblemsHow Do I Know If My Volvo Has Throttle Position Sensor Problems
How Do I Know If My Volvo Has Throttle Position Sensor Problems
 
Effortless Driving Experience Premier Mercedes Sprinter Suspension Service
Effortless Driving Experience Premier Mercedes Sprinter Suspension ServiceEffortless Driving Experience Premier Mercedes Sprinter Suspension Service
Effortless Driving Experience Premier Mercedes Sprinter Suspension Service
 
如何办理英国埃塞克斯大学毕业证(Essex毕业证书)毕业证成绩单原版一比一
如何办理英国埃塞克斯大学毕业证(Essex毕业证书)毕业证成绩单原版一比一如何办理英国埃塞克斯大学毕业证(Essex毕业证书)毕业证成绩单原版一比一
如何办理英国埃塞克斯大学毕业证(Essex毕业证书)毕业证成绩单原版一比一
 
Auto Glass Repair in Redwood City What to Do When Disaster Strikes.pdf
Auto Glass Repair in Redwood City What to Do When Disaster Strikes.pdfAuto Glass Repair in Redwood City What to Do When Disaster Strikes.pdf
Auto Glass Repair in Redwood City What to Do When Disaster Strikes.pdf
 
uipath-interview-questions.pdf it was productive
uipath-interview-questions.pdf it was productiveuipath-interview-questions.pdf it was productive
uipath-interview-questions.pdf it was productive
 
如何办理(爱大毕业证书)爱丁堡大学毕业证成绩单留信学历认证真实可查
如何办理(爱大毕业证书)爱丁堡大学毕业证成绩单留信学历认证真实可查如何办理(爱大毕业证书)爱丁堡大学毕业证成绩单留信学历认证真实可查
如何办理(爱大毕业证书)爱丁堡大学毕业证成绩单留信学历认证真实可查
 
What Does It Mean When Mercedes Says 'ESP Inoperative See Owner's Manual'
What Does It Mean When Mercedes Says 'ESP Inoperative See Owner's Manual'What Does It Mean When Mercedes Says 'ESP Inoperative See Owner's Manual'
What Does It Mean When Mercedes Says 'ESP Inoperative See Owner's Manual'
 
Seamless Driving Experience Premier Mini Cooper Clutch Solutions
Seamless Driving Experience Premier Mini Cooper Clutch SolutionsSeamless Driving Experience Premier Mini Cooper Clutch Solutions
Seamless Driving Experience Premier Mini Cooper Clutch Solutions
 
一比一原版(Rutgers毕业证书)罗格斯大学毕业证成绩单原件一模一样
一比一原版(Rutgers毕业证书)罗格斯大学毕业证成绩单原件一模一样一比一原版(Rutgers毕业证书)罗格斯大学毕业证成绩单原件一模一样
一比一原版(Rutgers毕业证书)罗格斯大学毕业证成绩单原件一模一样
 
Exploring the Heart of Alberta: A Journey from Calgary to Edmonton
Exploring the Heart of Alberta: A Journey from Calgary to EdmontonExploring the Heart of Alberta: A Journey from Calgary to Edmonton
Exploring the Heart of Alberta: A Journey from Calgary to Edmonton
 
mechanical vibrations pebbles.pptbbbbbbbbx
mechanical vibrations pebbles.pptbbbbbbbbxmechanical vibrations pebbles.pptbbbbbbbbx
mechanical vibrations pebbles.pptbbbbbbbbx
 
原版定做(ncl学位证书)英国纽卡斯尔大学毕业证文凭学历证书-国外学历学位认证
原版定做(ncl学位证书)英国纽卡斯尔大学毕业证文凭学历证书-国外学历学位认证原版定做(ncl学位证书)英国纽卡斯尔大学毕业证文凭学历证书-国外学历学位认证
原版定做(ncl学位证书)英国纽卡斯尔大学毕业证文凭学历证书-国外学历学位认证
 
在线定制(UBC毕业证书)英属哥伦比亚大学毕业证成绩单留信学历认证原版一比一
在线定制(UBC毕业证书)英属哥伦比亚大学毕业证成绩单留信学历认证原版一比一在线定制(UBC毕业证书)英属哥伦比亚大学毕业证成绩单留信学历认证原版一比一
在线定制(UBC毕业证书)英属哥伦比亚大学毕业证成绩单留信学历认证原版一比一
 

1998 toyota avalon service repair manual

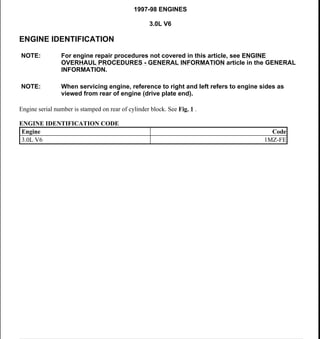
  • 1. 1997-98 ENGINES 3.0L V6 ENGINE IDENTIFICATION Engine serial number is stamped on rear of cylinder block. See Fig. 1 . ENGINE IDENTIFICATION CODE NOTE: For engine repair procedures not covered in this article, see ENGINE OVERHAUL PROCEDURES - GENERAL INFORMATION article in the GENERAL INFORMATION. NOTE: When servicing engine, reference to right and left refers to engine sides as viewed from rear of engine (drive plate end). Engine Code 3.0L V6 1MZ-FE 1998 Toyota Avalon XLS 1997-98 ENGINES 3.0L V6 1998 Toyota Avalon XLS 1997-98 ENGINES 3.0L V6 Helpmelearn November-03-08 10:08:23 AM Page 1 © 2005 Mitchell Repair Information Company, LLC. Helpmelearn November-03-08 10:08:29 AM Page 1 © 2005 Mitchell Repair Information Company, LLC.
  • 2. Fig. 1: Locating Engine Serial Number Courtesy of TOYOTA MOTOR SALES, U.S.A., INC. ADJUSTMENTS VALVE CLEARANCE ADJUSTMENT 1. Disconnect negative battery cable. Drain cooling system. On Sienna, remove outer cowl top panel assembly, including wiper arms and ventilator louver. See Fig. 2 . Remove right fender apron seal. NOTE: Adjust valve clearance with engine cold. WARNING: To prevent air bag deployment, disconnect negative battery cable at least 90 seconds before working on vehicle. 1998 Toyota Avalon XLS 1997-98 ENGINES 3.0L V6 Helpmelearn November-03-08 10:08:23 AM Page 2 © 2005 Mitchell Repair Information Company, LLC.
  • 3. Fig. 2: Removing Outer Cowl Top Panel Assembly (Sienna) Courtesy of TOYOTA MOTOR SALES, U.S.A., INC. 2. On all models, disconnect control cables from throttle body (if necessary). Disconnect upper radiator hose at coolant outlet housing. Remove air cleaner cap and airflow meter with air intake hose. Remove nuts and intake manifold cover located above intake manifold. 3. Disconnect necessary electrical connections and vacuum hoses from vacuum switching valve assembly located above intake manifold. Remove nuts and vacuum switching valve assembly. 4. Disconnect necessary electrical connections, coolant hoses and vacuum hoses for removal of air intake chamber located above valve cover. Remove No. 1 engine hanger, air intake chamber support, and EGR pipe as necessary. 5. Remove bolts/nuts, air intake chamber and gasket. Disconnect electrical connectors for removal of wiring assemblies located above valve covers. Remove bolts and wiring assemblies. NOTE: Vacuum switching valve assembly may be referred to as emission control valve set. 1998 Toyota Avalon XLS 1997-98 ENGINES 3.0L V6 Helpmelearn November-03-08 10:08:23 AM Page 3 © 2005 Mitchell Repair Information Company, LLC.
  • 4. 6. Remove bolts and ignition coil assemblies. Mark ignition coil installation location for reassembly reference. Remove spark plugs. Remove bolts, valve covers and gaskets. Rotate crankshaft clockwise (viewed from front of engine) so cylinder No. 1 is at TDC on compression stroke. Cylinder No. 1 is front cylinder on right side when viewed from rear of engine. See Fig. 3 . 7. Ensure timing mark on crankshaft pulley aligns with "0" mark on timing belt cover. Ensure intake and exhaust valve lifters on cylinder No. 1 are loose. If conditions are not as described, rotate crankshaft clockwise one complete revolution. 8. Using feeler gauge, measure and record valve clearance between valve lifter and camshaft on intake valves of cylinders No. 1 and 6 and exhaust valves on cylinders No. 2 and 3. Perform STEP 1. See Fig. 3 . Fig. 3: Identifying Valve & Cylinder Arrangement Courtesy of TOYOTA MOTOR SALES, U.S.A., INC. 9. Rotate crankshaft clockwise an additional 2/3 turn (240 degrees). Measure and record valve clearance between valve lifter and camshaft on intake valves of cylinders No. 2 and 3 and exhaust valves on cylinders No. 4 and 5. Perform STEP 2. See Fig. 3 . 10. Rotate crankshaft clockwise an additional 2/3 turn (240 degrees). Measure and record valve clearance between valve lifter and camshaft on intake valves of cylinders No. 4 and 5 and exhaust valves on cylinders No. 1 and 6. Perform STEP 3. See Fig. 3 . Ensure valve clearance is within specification. See VALVE CLEARANCE SPECIFICATIONS . VALVE CLEARANCE SPECIFICATIONS (1) Application In. (mm) Exhaust Valve .010-.014 (.25-.35) Intake Valve .006-.010 (.15-.25) (1) Adjust valve clearance with engine cold. 1998 Toyota Avalon XLS 1997-98 ENGINES 3.0L V6 Helpmelearn November-03-08 10:08:23 AM Page 4 © 2005 Mitchell Repair Information Company, LLC.
  • 5. 11. If valve clearance requires adjustment, rotate camshaft so lobe on valve to be adjusted is facing upward, away from valve lifter. Position notch on valve lifter perpendicular to the camshaft. Ensure notch is not aligned with the camshaft. 12. Valve Clearance Adjuster (SST 09248-55040) is used to remove adjusting shim. Using SST "A" of valve clearance adjuster, push downward on valve lifter. See Fig. 4 . Place SST "B" between camshaft and valve lifter with the side marked with a "7" or "9" in the right location, depending on cylinder application. Side marked with "7" should be used on front valves on No. 1 and 2 cylinders only. Remove SST "A". 13. Using small screwdriver and magnet, remove adjusting shim. Measure and record thickness of removed adjusting shim. Using measured clearance and adjusting shim thickness, select proper replacement adjusting shim. See Fig. 5 and Fig. 6 . 14. Install replacement adjusting shim with imprinted number on adjusting shim facing the valve lifter. Recheck valve clearance. Before installing valve cover and gasket, apply sealant at front and rear areas of cylinder head. See Fig. 7 . 15. Using NEW gasket, install valve cover. Install and tighten valve cover bolts to specification in several steps. See TORQUE SPECIFICATIONS . To install remaining components, reverse removal procedure. Use NEW gaskets. Tighten all fasteners to specification. Fill cooling system and adjust control cables (if necessary). 1998 Toyota Avalon XLS 1997-98 ENGINES 3.0L V6 Helpmelearn November-03-08 10:08:23 AM Page 5 © 2005 Mitchell Repair Information Company, LLC.
  • 6. Fig. 4: Adjusting Valve Clearance Courtesy of TOYOTA MOTOR SALES, U.S.A., INC. 1998 Toyota Avalon XLS 1997-98 ENGINES 3.0L V6 Helpmelearn November-03-08 10:08:23 AM Page 6 © 2005 Mitchell Repair Information Company, LLC.
  • 7. Fig. 5: Exhaust Valve Adjusting Shim Selection Chart Courtesy of TOYOTA MOTOR SALES, U.S.A., INC. 1998 Toyota Avalon XLS 1997-98 ENGINES 3.0L V6 Helpmelearn November-03-08 10:08:23 AM Page 7 © 2005 Mitchell Repair Information Company, LLC.
  • 8. Fig. 6: Intake Valve Adjusting Shim Selection Chart Courtesy of TOYOTA MOTOR SALES, U.S.A., INC. 1998 Toyota Avalon XLS 1997-98 ENGINES 3.0L V6 Helpmelearn November-03-08 10:08:23 AM Page 8 © 2005 Mitchell Repair Information Company, LLC.
  • 9. Fig. 7: Identifying Cylinder Head Sealant Application Areas Courtesy of TOYOTA MOTOR SALES, U.S.A., INC. REMOVAL & INSTALLATION FUEL PRESSURE RELEASE With ignition off, disconnect negative battery cable. Place an approved gasoline container under fuel line. Cover fuel line connection with shop towel. Slowly loosen fuel line connection to release fuel pressure. Once fuel pressure is released, fuel system components may be serviced. ENGINE CAUTION: When battery is disconnected, vehicle computer and memory systems may lose memory data. Driveability problems may exist until computer systems have completed a relearn cycle. NOTE: For reassembly reference, label all electrical connectors, vacuum hoses and fuel lines before removal. Also place mating marks on engine hood and other major assemblies before removal. WARNING: To prevent air bag deployment, disconnect negative battery cable at least 90 seconds before working on vehicle. NOTE: Remove engine and transaxle as an assembly. 1998 Toyota Avalon XLS 1997-98 ENGINES 3.0L V6 Helpmelearn November-03-08 10:08:23 AM Page 9 © 2005 Mitchell Repair Information Company, LLC.
  • 10. Removal (Avalon & Camry) 1. Release fuel pressure. See FUEL PRESSURE RELEASE . Drain cooling system and engine oil. Remove hood, battery and battery tray. Disconnect control cables from throttle body (if necessary). Remove air cleaner cap and airflow meter with air cleaner hose. Remove air filter and air cleaner case. 2. Remove cruise control actuator and bracket. Remove radiator and coolant reservoir tank. Remove relay box from left front corner of engine compartment and disconnect electrical connectors. Disconnect electrical connections at ignitor and noise filter near left strut tower. 3. Disconnect necessary coolant hoses, electrical connections, fuel lines and vacuum hoses. To disassemble quick disconnect fuel fittings, remove fuel line-to-intake manifold clamp bolt at rear of intake manifold. Remove fuel pipe clamp from No. 1 fuel pipe at fuel filter. Perform STEP 1. See Fig. 8 . Ensure area around No. 1 fuel pipe and fuel filter is clean. Depress both sides of retainer and pull No. 1 fuel pipe with disconnect fitting from fuel filter. Perform STEP 2. See Fig. 8 . CAUTION: Use care when disconnecting No. 1 fuel pipe from fuel filter, as some residual fuel pressure may still exist in the fuel system. 1998 Toyota Avalon XLS 1997-98 ENGINES 3.0L V6 Helpmelearn November-03-08 10:08:23 AM Page 10 © 2005 Mitchell Repair Information Company, LLC.
  • 11. Fig. 8: Disconnecting No. 1 Fuel Pipe From Fuel Filter (Avalon & Camry) Courtesy of TOYOTA MOTOR SALES, U.S.A., INC. 4. Remove lower panel on passenger's side of instrument panel. Remove glove box. Disconnect necessary electrical connections so engine wiring can be pulled out through firewall. Remove nuts and pull engine wiring through firewall. 5. Remove A/C compressor and power steering pump with hoses attached and secure aside. Raise and support vehicle. Remove lower engine cover. Remove front exhaust pipe that fits between exhaust 1998 Toyota Avalon XLS 1997-98 ENGINES 3.0L V6 Helpmelearn November-03-08 10:08:23 AM Page 11 © 2005 Mitchell Repair Information Company, LLC.
  • 12. manifolds and catalytic converter. 6. Disconnect electrical connections, control cables and oil cooler lines from transaxle. Using Wrench (SST 09631-22020), disconnect pressure hose from hydraulic cooling fan pump. Remove fender apron from inside fenderwell for axle shaft removal. 7. Remove front wheels. Remove cotter pin and retainer from end of axle shaft. Apply brakes and remove axle shaft nut. Drain transaxle fluid. Remove nut and separate tie rod from steering knuckle. 8. Remove nut and separate stabilizer bar link from lower control arm. Remove ball joint-to-lower control arm bolts/nuts. Separate lower control arm from ball joint. 9. Cover axle shaft boot with shop towel. Using soft-faced hammer, tap axle shaft from hub assembly. Push hub assembly outward and separate axle shaft from hub assembly. 10. To remove left (driver's side) axle shaft, pry axle shaft from transaxle and remove. See Fig. 9 . To remove right (passenger's side) axle shaft, remove axle shaft bearing retainer bolt. Remove snap ring and axle shaft. See Fig. 9 . 11. Support engine with hoist. Remove engine mount-to-transaxle bolts. Remove engine mount bolts/nuts. Remove bolts and engine mount absorber, located on front of engine, near exhaust manifold. 12. Remove engine stabilizer rod, engine mounting bracket and right engine mount brace, located near timing belt cover. Lift engine and transaxle from vehicle. 1998 Toyota Avalon XLS 1997-98 ENGINES 3.0L V6 Helpmelearn November-03-08 10:08:23 AM Page 12 © 2005 Mitchell Repair Information Company, LLC.
  • 13. Thank you very much for your reading. Please Click Here. Then Get COMPLETE MANUAL. NO WAITING NOTE: If there is no response to click on the link above, please download the PDF document first and then click on it.
  • 14. Fig. 9: Removing Axle Shafts Courtesy of TOYOTA MOTOR SALES, U.S.A., INC. Installation 1. To install, reverse removal procedure. Tighten all fasteners to specification. See TORQUE SPECIFICATIONS . 2. When installing axle shafts, install NEW snap ring on end of axle shaft. Coat axle shaft splines and sliding surfaces with gear oil. Install axle shafts in transaxle with opening of snap ring facing downward. 3. Ensure left (driver's side) axle shaft will move inward and outward about .079-.118" (2.00-3.00 mm) after being installed. Ensure axle shaft cannot be pulled from transaxle. 4. When installing right (passenger's side) axle shaft, install NEW snap ring and NEW axle shaft bearing retainer bolt. Tighten axle shaft bearing retainer bolt to specification. See TORQUE SPECIFICATIONS . 5. To install remaining components, reverse removal procedure. Adjust fluid levels and control cables (if 1998 Toyota Avalon XLS 1997-98 ENGINES 3.0L V6 Helpmelearn November-03-08 10:08:23 AM Page 13 © 2005 Mitchell Repair Information Company, LLC.
  • 15. necessary). Removal (Sienna) 1. Release fuel pressure. See FUEL PRESSURE RELEASE . Drain cooling system and engine oil. Remove hood, battery and battery tray. Remove cowl top panel assembly. See Fig. 2 . Remove heater air duct. Remove air cleaner cap and airflow meter with air cleaner hose. Remove air filter and air cleaner case. 2. Remove cruise control actuator and bracket. Remove radiator and coolant reservoir tank. Disconnect A/T oil cooler pipe. Disconnect necessary A/C lines, coolant hoses, electrical connections, fuel lines and vacuum hoses. Disconnect shift control cable from transaxle. Remove front exhaust pipe. 3. Remove fender apron seals. Raise and support vehicle. Remove axle shafts. Disconnect stabilizer bar links and intermediate shaft assembly. Disconnect power steering hose from power steering reservoir and reservoir pipe. Remove cover under engine. Attach Engine Hangers (SST 12282-20020). Attach sling device to hangers. 4. Remove right engine mount. Remove engine mount control rod and No. 2 right engine mount bracket. Remove 4 lower braces from underneath vehicle. Lower engine, transaxle, and front suspension assembly from vehicle. Installation To install, reverse removal procedure. Tighten all fasteners to specification. See TORQUE SPECIFICATIONS . CYLINDER HEAD & MANIFOLDS Removal (Avalon & Camry) 1. Release fuel pressure. See FUEL PRESSURE RELEASE . Disconnect negative battery cable. Drain cooling system. 2. Disconnect control cables from throttle body (if necessary). Remove battery and battery tray (if necessary). Drain cooling system. 3. Remove air cleaner cap and airflow meter with air cleaner hose. Remove cruise control actuator and bracket. Disconnect necessary electrical connections, ground straps, coolant hoses, fuel lines and vacuum hoses for removal of air intake chamber and cylinder head. 4. Remove right engine mount brace, located near timing belt cover. Remove nuts and "V" bank cover, located above intake manifold. See Fig. 10 . Disconnect necessary electrical connectors and vacuum hoses from vacuum switching valve assembly located above intake manifold. Remove vacuum switching valve assembly. 5. Disconnect brackets and hoses from air intake chamber. Remove No. 1 engine hanger and air intake chamber support. See Fig. 10 . Remove EGR pipe and gaskets (if necessary). WARNING: To prevent air bag deployment, disconnect negative battery cable at least 90 seconds before working on vehicle. 1998 Toyota Avalon XLS 1997-98 ENGINES 3.0L V6 Helpmelearn November-03-08 10:08:24 AM Page 14 © 2005 Mitchell Repair Information Company, LLC.
  • 16. 6. Remove bolts/nuts, air intake chamber and gasket. Disconnect electrical connectors for removal of engine wiring located above valve covers. Remove nuts and engine wiring. 7. Remove ignition coils and spark plugs. Mark ignition coil installation location for reassembly reference. Raise and support vehicle. Remove front exhaust pipe that fits between exhaust manifolds and catalytic converter. 8. Remove timing belt, camshaft sprockets and No. 2 idler pulley. See TIMING BELT . Remove No. 3 timing belt cover from front of cylinder heads. See Fig. 17 . 9. Remove cylinder head rear plate, coolant inlet pipe and air assist hose. See Fig. 10 . Remove intake manifold bolts/nuts, washers and intake manifold along with delivery pipes and injectors. 10. If removing delivery pipe and injectors from intake manifold, remove No. 2 fuel pipe from delivery pipe. See Fig. 10 . Remove pressure regulator and pulsation damper (if necessary). 11. To disassemble quick disconnect fuel fittings, remove fuel line-to-intake manifold clamp bolt at rear of intake manifold. Remove fuel pipe clamp from No. 1 fuel pipe at fuel filter. Perform STEP 1. See Fig. 8 . Ensure area around No. 1 fuel pipe and fuel filter is clean. Depress both sides of retainer and pull No. 1 fuel pipe with disconnect fitting from fuel filter. Perform STEP 2. See Fig. 8 . CAUTION: DO NOT allow injectors to fall from delivery pipe when removing from intake manifold. CAUTION: Use care when disconnecting No. 1 fuel pipe from fuel filter, as some residual fuel pressure may still exist in the fuel system. 1998 Toyota Avalon XLS 1997-98 ENGINES 3.0L V6 Helpmelearn November-03-08 10:08:24 AM Page 15 © 2005 Mitchell Repair Information Company, LLC.
  • 17. Fig. 10: Exploded View Of Intake Manifold & Components (Avalon & Camry Shown; Sienna Is Similar) Courtesy of TOYOTA MOTOR SALES, U.S.A., INC. 1998 Toyota Avalon XLS 1997-98 ENGINES 3.0L V6 Helpmelearn November-03-08 10:08:24 AM Page 16 © 2005 Mitchell Repair Information Company, LLC.