

Recommended
Recommended
More Related Content
What's hot
What's hot (17)
Viewers also liked
Viewers also liked (15)
Similar to Plantronics b230 user guide
Similar to Plantronics b230 user guide (19)
More from best4systems
More from best4systems (20)
Recently uploaded
Recently uploaded (20)
Plantronics b230 user guide
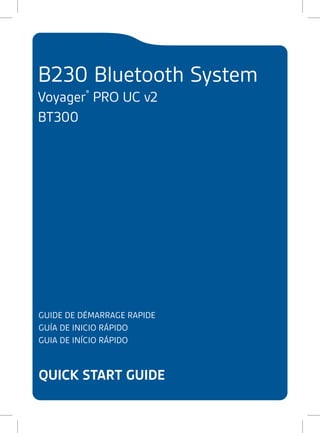
- 1. B230 Bluetooth System Voyager® PRO UC v2 BT300 GUIDE DE DÉMARRAGE RAPIDE GUÍA DE INICIO RÁPIDO GUIA DE INÍCIO RÁPIDO quick start guide
- 2. What’s in the box Voyager PRO UC BT300 USB Adapter Soft Gel Eartips (Small & Large) and Foam Eartip Covers Carry Case en Micro USB Charger USB Charging Cable
- 3. Headset controls Smart Sensor Features Auto Answer Call: When you are not wearing your headset. 3 1 2 4 5 When you have an incoming call on your mobile or softphone, put on the headset and the call will be answered automatically. You do not have to press the call button. Auto Pause Media: When you are listening to streaming audio. When you are streaming audio from your mobile phone or PC. Remove the headset and the streaming audio pauses. Place your headset back on and the audio resumes. Note If the media player has been playing less than 10 seconds you will have to manually restart the media player. Auto Transfer Call: Whether you are wearing your headset or not. If you are not wearing your headset and there is an incoming call on your mobile phone, the audio will be routed to the mobile phone. When you put the headset on, the audio will be automatically transferred to the headset and will auto answer. If you are already wearing your headset and there is an incoming call, the audio will be routed to the headset and you will need to press the call button to answer the call. Auto Lock Call Button: When you are not wearing your headset Prevents accidental dialling from your mobile phone. Auto call answer: automatically answer a mobile or softphone call by putting on the headset. You do not have to press the call button. See Smart Sensor Features. nge 1 Volume/Mute button Increase/decrease volume Mute mic during a call Pause/Play streaming audio Tap + or – button per level change 1-second press of both + and – buttons 1-second press of both + and – buttons 2 Call button Take a call or end it Call back last call Initiate phone’s voice-dialing Reconnect lost connection 1 tap 2 taps 2-second press until tone heard 1 tap 3 Micro USB charging port 90 minutes for full charge en 2-second press 1 tap With headset off press until LED flashes red/blue 5 LED Charging Battery status Pairing mode Solid red. When fully charged, LED is off. Low = 2 red flashes, Recharge = 3 red flashes Flashes red/blue Note These features are enabled by default and can be disabled in the Plantronics Control Panel: Devices>Device Settings>Headset Tab. Changes to the device settings requires that you are connected and within range of the USB adapter. The Plantronics software must be downloaded to access the Control Panel. Refer to Step 1 Set up your headset and computer. #3 c #4 en 4 Power button On or off Talk time voice alert Activate pairing mode #2
- 4. Step 1 Set up your headset and computer Step 2 Connect your headset and USB adapter Install the software Pair your headset Download and install the Plantronics software at plantronics.com/software. Note You must be connected to the internet in order to access the software. VoyagerPRO UC v2 Once the software is installed, Windows users can access the utility by selecting Start > Programs > Plantronics > Plantronics Control Panel. Charge your headset To calibrate your headset and provide optimal performance fully charge the headset before using. The headset LED will be solid red to indicate that the headset battery is charging. When fully charged the LED goes off. charging time 30 min ............................ Minimum charge before first use 1.5 hours ....................................... charge Full Note To charge the headset with USB charging cable the PC must be on and in an active state. ready set connect 1 Ready Activate the Bluetooth feature on your phone, then use the phone’s settings to add/search/discover new Bluetooth devices. BlackBerry® Settings/options Bluetooth: On Search for devices. iPhone Settings General Bluetooth On (starts the search for devices) Android Phone Settings Wireless Bluetooth: On Scan for devices Reset Smart Sensors hange To reset the Smart Sensors, connect the headset to the charger and place the headset on a flat nonmetallic surface for 10 seconds. 2 Set To activate Bluetooth pairing mode, press and hold the power button until LED flashes red/blue to indicate pairing mode. 3 Connect • Select Voyager PRO UC from the list of Bluetooth devices shown on your phone. • If phone asks for a passcode, enter four zeros 0000. You may see **** on screen. • Headset LED will stop flashing red/blue once your phone and headset are successfully paired/connected. en en • Some phones also ask to confirm headset connection after pairing.
- 5. USB adapter set-up Step 3 Fit your headset Your Bluetooth adapter is pre-paired to your headset. Note refer to the complete user guide located at plantronics.com/support if you need to re-pair. On the support page, click the Product Documentation tab and then enter the model number or product name in the search field. The headset comes configured for the right ear, with the medium eartip installed, however you can replace it with the small or large eartip provided. For the best sound clarity and comfort, make sure you have a secure fit. Replace the eartip for a better fit 1 Power on the headset 2 Insert the USB adapter directly into the laptop or PC. Note Do not insert directly into a docking station. 1 Grip the eartip and gently push it into the speaker housing. 2 Rotate it a quarter turn to the left to unlock. 3 Pull the eartip away from the headset. 2 3 1 Attach a new eartip The LED will become solid blue to indicate the adapter is powered on and is connected to the headset. 4 Align the tabs on the eartip with the slots on the speaker housing. USB Adapter LED indicators 5 Gently push the eartip into housing while turning it a quarter turn to the right. The eartip will stop rotating when it is locked. Headset powered off None Paired/connected Solid blue Active call Flashing blue Streaming audio You may want to add a foam eartip cover for additional comfort. Flashing blue 4 en en 5 4
- 6. Step 4 Making calls with your softphone Wearing the headset 1 Guide the earloop behind your ear and position the headset so that the speaker and eartip rest comfortably in your ear. 2 Pivot the boom up to point the microphone toward the corner of your mouth. You can make softphone calls with your computer using your Bluetooth adapter which comes automatically paired with your headset. 1 Ensure the headset is powered on. 2 Insert the USB adapter into USB Port on the PC. The LED on the adapter will flash blue to indicate the adapter is connecting to the headset. The LED will become solid blue to indicate the adapter is powered on and is connected to the headset. 1 3 Check the audio settings in the softphone application to make sure that the speaker and microphone are set to the BT300 adapter. 2 Quick-turn adjustment for the left ear 1 Pivot the boom into an upright position. 2 Rotate the boom and speaker to the other side of the headset and lower it before fitting your other ear. 1 4 To place a call using your softphone, dial the number or choose a contact using your softphone program. The audio connection to your headset will activate automatically when your recipient’s phone begins to ring. The LED on the adapter will slowly flash blue while you are on an active call. Learn More To learn more about your system features, change default settings or read troubleshooting tips, refer to the user guide online at plantronics.com/ documentation. You can also view online FAQ at plantronics.com/support. Technical support is available at USA: 1.866.363.BLUE (2583). #6 en en 2