Enhancing Worker Digital Experience: A Hands-on Workshop for Partners
Wmic2 a usermanual
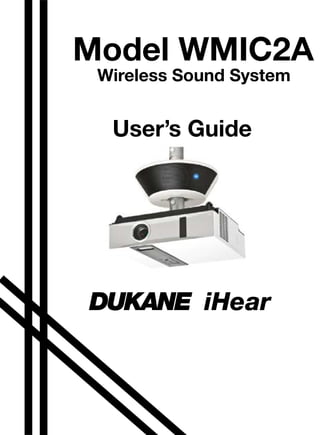
1. Model WMIC2A
Wireless Sound System
User’s Guide
DUKANE iHear
12-00015-00
DUKANE CORP AV SERVICE DEPT
2900 Dukane Drive
St Charles, IL 60174
800-676-2487
Fax 630-584-5156
avservice@dukane.com
www.dukane.com/av/service
13-00032 v01
2. Troubleshooting
1. Q: The mic transmitter is ON but no sound is heard.
A: 1. Please make sure the mic transmitter is within 10 feet of the
speaker unit..
2. Please make sure the mic transmitter has power. The LED
signal lights flash.
3. Please make sure the speaker has power.
2. Q: No signal light on the mic transmitter after it has been turned ON.
A: Please charge the mic transmitter.
3. Q: Low voice (sound) when using the mic transmitter.
A: Manually adjust the volume button to increase volume.
4. Q: The mic transmitter doesn’t work when charging is attempted.
A: Please check to see if the power adapter is plugged in.
5. Q: The system can’t complete matching process.
A: 1. Please make sure the mic distance is within 10 feet of the
speaker.
2. Please make sure the power is ON.
6. Q: How long can the mic be used?
A: The complete charging process requires at least 4 hours of
continuous charging. The mic can be used at least at least
8 hours. The mic transmitter red LED will begin to slowly flash
( every 2 seconds) once there is less than 1 hour of operating
time remaining.
3. 21
DUKANE CORP AV SERVICE DEPT
2900 Dukane Drive
St Charles, IL 60174
800-676-2487
Fax 630-584-5156
avservice@dukane.com
www.dukane.com/av/service
Introduction
Thank you for buying this product.
• If you need service contact your dealer or call
Dukane.
• Please read the User’s Manual before using.
• Receiver Amp: Electronic equipment specification:
Input: DC19V 2A – +
Rating: 110V - 240V
• MIC Tx: Electronic equipment specification:
Input: USB DC 5V to charge the transmitter.
Danger
3. Don’t modify this product in any way. Such action could cause
a fire, electric shock, serious personal injuries or product
damage. Only a distributor or service center can provide
maintenance and repair.
4. Please keep away from flammable or explosive gases when
using this product.
5. If any liquid or object enters the product, stop use of the
product. Please contact the distributor or a service center, and
don’t continue to use the product.
6. Operating this product with wet hands could cause electric
shock.
7. Don’t use this product while in an aircraft.
4. 21
DUKANE CORP AV SERVICE DEPT
2900 Dukane Drive
St Charles, IL 60174
800-676-2487
Fax 630-584-5156
avservice@dukane.com
www.dukane.com/av/service
Introduction
Thank you for buying this product.
• If you need service contact your dealer or call
Dukane.
• Please read the User’s Manual before using.
• Receiver Amp: Electronic equipment specification:
Input: DC12V 2A – +
Rating: 110V - 240V
• MIC Tx: Electronic equipment specification:
Input: USB DC 5V to charge the transmitter.
Danger
3. Don’t modify this product in any way. Such action could cause
a fire, electric shock, serious personal injuries or product
damage. Only a distributor or service center can provide
maintenance and repair.
4. Please keep away from flammable or explosive gases when
using this product.
5. If any liquid or object enters the product, stop use of the
product. Please contact the distributor or a service center, and
don’t continue to use the product.
6. Operating this product with wet hands could cause electric
shock.
7. Don’t use this product while in an aircraft.
5. 3
Warning
1. For safety reasons, please keep the product and accessories
out of reach of small children or animals to avoid accidents
such as:
– swallowing the product or accessories. If this happens please
see a doctor immediately.
– Some small parts of product could cause personal injuries.
2. Do not place this product in a high temperature environment,
high or low temperature environments may negatively effect the
internal parts, or even result in fire.
Do not place in: microwave oven, radiator, or refrigerator, since
this may cause the product battery to explode.
Caution
1. If a credit card is held near the speaker, it will be demagnetized.
Please keep credit cards away from this product.
2. A malfunction of this product will occur if using a power
adapter that doesn’t match the one supplied with the product.
3. Painting this product is prohibited. Do not paint this product.
Painting will affect it’s normal use.
4. Do not hit or drop the product.
Speaker – Receiver
Foam
Lanyard Collar Clip Mic
Transmitter
Guide
6. 3
Warning
1. For safety reasons, please keep the product and accessories
out of reach of small children or animals to avoid accidents
such as:
– swallowing the product or accessories. If this happens please
see a doctor immediately.
– Some small parts of product could cause personal injuries.
2. Do not place this product in a high temperature environment,
high or low temperature environments may negatively effect the
internal parts, or even result in fire.
Do not place in: microwave oven, radiator, or refrigerator, since
this may cause the product battery to explode.
Caution
1. If a credit card is held near the speaker, it will be demagnetized.
Please keep credit cards away from this product.
2. A malfunction of this product will occur if using a power
adapter that doesn’t match the one supplied with the product.
3. Painting this product is prohibited. Do not paint this product.
Painting will affect it’s normal use.
4. Do not hit or drop the product.
Speaker – Receiver
Foam
Lanyard Collar Clip Mic
Transmitter
Guide
8. Instruction
(to other module)
Signal lights
Special note: The center button on the mic transmitter switches the
audio between the AUDIO IN port and the MIC IN port. This could be
the reason that the Mic is not heard.
9. Installation
Put the foam pads on the inner side of speaker.
Connect main module and auxiliary module by
metal hooks and locate on the pole.
10. Installation
Put the foam pads on the inner side of speaker.
Connect main module and auxiliary module by
metal hooks and locate on the pole.
11. Audio Source Connection Power Connection
Audio Cable
Connect main engine and
auxiliary engine by audio cable.
Connec main engine and projector by audio cable.
power cord
power cord
adapter
power cord
Y-Cable
adapter
9 10
Connect main module and
auxiliary module audio cables.
Connect main module and projector by audio cable.
12. Audio Source Connection Power Connection
Audio Cable
Connect main engine and
auxiliary engine by audio cable.
Connec main engine and projector by audio cable.
power cord
power cord
adapter
9 10
Connect main module and
auxiliary module audio cables.
Connect main module and projector by audio cable.
Charging the MIC TRANSMITTER Battery
The miniature MIC TRANSMITTER is charged using the
cable with the USB connector and the small DC power
connector pin which inserts into the top of the
TRANSMITTER. The USB end is plugged into a powered
USB port such as on a computer. A constant on red LED
indicates the battery is charging.
Please be sure the USB port remains active. If the computer
goes to sleep the port will go OFF and the port will discharge
or drain the TRANSMITTER battery
13. Connecting Components
Small
Power or
Adapter
Collar Mic
Clip the collar mic to the necktie or collar
and point the mic toward the throat.
Matching Procedure
1. Turn on the mic, frequency matching procedure needs 3 seconds.
2. After the mic Red/Blue LED’s are alternately flashing a
“Beep - Beep” sound will be heard. This means the mic and
speaker–receiver are paired (matched).
3. Matching distance is under 10 feet between mic and speaker.
4. Make sure the bottom of mic transmitter is
not blocked.
(seeking)
14. Connecting Components
Small
Power or
Adapter
Collar Mic
Clip the collar mic to the necktie or collar
and point the mic toward the throat.
Matching Procedure
1. Turn on the mic, frequency matching procedure needs 3 seconds.
2. After the mic Red/Blue LED’s are alternately flashing a
“Beep - Beep” sound will be heard. This means the mic and
speaker–receiver are paired (matched).
3. Matching distance is under 10 feet between mic and speaker.
4. Make sure the bottom of mic transmitter is
not blocked.
(seeking)
5. If the matching (pairing) of the system does not occur the MIC
TRASMITTER may need to be reset. Turn the MIC TRANSMITTER
OFF. Then press and hold a button on the multifunction switch and turn
ON the MIC TRANSMITTER. Release the button after the red LED
comes ON.
15. 13 14
Mode Setup – Settings for the AUX AUDIO INPUT on the Speaker
There are 3 modes of operation for the AUX AUDIO input on the top
of the speaker unit. This Input is located next to the DC INPUT. The
audio entering this port can be set to operate in one of 3 ways.
Mode 1. MIC Only: Only sound from the Miniature MIC
TRANSMITTER is amplified. No AUDIO AUX (it is turned Off)
Mode 2. Mixed audio; The MIC TRANSMITTER and AUX AUDIO
INPUT are mixed.
Mode 3. MIC priority operation; The MIC audio, when present, will
have the priority and turn off the AUX AUDIO.
Setting the mode. The MIC TRANSMITTER is used to set the mode.
Start with it OFF.
Mode 1. Hold the MIC TRANSMITTER key1 (Volume up) button and
turn ON the power.
Mode 2. Hold the MIC TRANSMITTER key2 (Right key ) button and
turn ON the power
Mode 3. Hold the MIC TRANSMITTER key3 (Volume down) button
and turn ON the power.
See the figure.
Speaker Top View connections
MIC TRANSMITTER
16. Model iHear1
Wireless Sound System
User’s Guide
DUKANE iHear1
DUKANE CORP AV SERVICE DEPT
2900 Dukane Drive
St Charles, IL 60174
800-676-2487
Fax 630-584-5156
avservice@dukane.com
www.dukane.com/av/service
Troubleshooting
1. Q: The mic transmitter is ON but no sound is heard.
A: 1. Please make sure the mic transmitter is within 10 feet of the
speaker unit..
2. Please make sure the mic transmitter has power. The LED
signal lights flash.
3. Please make sure the speaker has power.
2. Q: No signal light on the mic transmitter after it has been turned ON.
A: Please charge the mic transmitter.
3. Q: Low voice (sound) when using the mic transmitter.
A: Manually adjust the volume button to increase volume.
4. Q: The mic transmitter doesn’t work when charging is attempted.
A: Please check to see if the power adapter is plugged in.
5. Q: The system can’t complete matching process.
A: 1. Please make sure the mic distance is within 10 feet of the
speaker.
2. Please make sure the power is ON.
6. Q: How long can the mic be used?
A: The complete charging process requires at least 4 hours of
continuous charging. The mic can be used at least at least
8 hours. The mic transmitter red LED will begin to slowly flash
( every 2 seconds) once there is less than 1 hour of operating
time remaining.
Special note: The center button on the mic transmitter switches the
audio between the AUDIO IN port and the MIC IN port. This could be
the reason that the Mic is not heard.