Week 1 homework for Peer Assessment Project Introduction to Music Production Under by Loudon Stearns Of the Berklee College of Music An Online offering of coursera.org
•
1 like•1,258 views


Recommended
Recommended
More Related Content
What's hot
Similar to Week 1 homework for Peer Assessment Project Introduction to Music Production Under by Loudon Stearns Of the Berklee College of Music An Online offering of coursera.org
Similar to Week 1 homework for Peer Assessment Project Introduction to Music Production Under by Loudon Stearns Of the Berklee College of Music An Online offering of coursera.org (20)
More from Jong Azores
More from Jong Azores (9)
Recently uploaded
Recently uploaded (20)
Week 1 homework for Peer Assessment Project Introduction to Music Production Under by Loudon Stearns Of the Berklee College of Music An Online offering of coursera.org
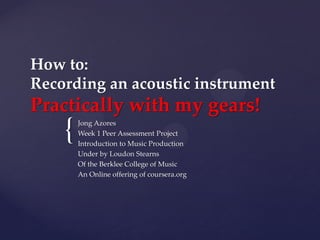
- 1. { How to: Recording an acoustic instrument Practically with my gears! Jong Azores Week 1 Peer Assessment Project Introduction to Music Production Under by Loudon Stearns Of the Berklee College of Music An Online offering of coursera.org
- 2. I am Jong Azores from Olongapo City, Philippines, an indie acoustic alternative artist, who also teach Music Business Management. Introduction
- 3. I have no access to a recording studio but I believe I can record decently with the humble tools I have at the moment and show how to practically use the basic principles in recording a good acoustic guitar signal. Maximizing with available technology
- 4. Acoustic / electric guitar TS cord with adaptor to smaller jack Creative USB Sound Blaster USB cable Samsung notebook Creative monitor speakers Tools:
- 5. When starting to connect the guitar into an interface, be sure to reduce the input gain of the interface all the way down to avoid the possibly of damaging the equipment. Whenever the speakers are on, attenuate the input levels of the interface to zero before connecting the microphone, to get rid of any loud pop or click that would run through the computer to the speakers. A Safety Standard Practice before this guitar session:
- 6. Connect the electric/ acoustic guitar to interface using a quarter inch TS cable. Its signal coming in is a line level which is otherwise known as an instrument input, a direct input or a HI-Z, high impedance input. Here starts the guitar’s connection to the interface
- 7. The TS cord needs an adapter to be plugged on interface’s Line In. The guitar is connected to the interface
- 8. The guitar is plugged into Mic In. The guitar’s output becomes the set input gain level that would go to the analog digital converter wherein the analog signal is converted digitally in a language read with 1’s & 0’s by the computer. LineIn
- 9. Dynamic range is the distance from the quietest things we can hear called the noise floor to the peak or point of distortion. The signal level of the guitar is set on the interface where it “should be” in the final recording. A good signal never goes over distortion level. It is easy to bring the level up a bit in the computer if needed.
- 10. USB cable connects the interface & computer
- 11. My USB interface doesn’t have meters so the signal can only be monitored and adjusted on the computer. Now, we are ready to record! Practical level monitoring
- 12. The delay or latency of the guitar sound is not really a big issue. In this set up we hear the acoustic guitar as it is played along and recorded with those other sounds recorded earlier. Latency free
- 13. Good housekeeping: Turn off the monitors or turn down your output volume before disconnecting anything. The turn down the gain knob on the interface before disconnecting the guitar. As the guitar session is closed:
- 14. Creativity calls for the kind of achievable output. I believe, in spite of these limitations… We can give birth to a HIT!