1. 1. I started off with my original
Image. I then duplicated it and
decreased the opacity of the new
layer. I places the new layer on top
of my background layer and moved it
to the left slightly. I then masked the
new layer and removed the
background. I then merged the
layers in order for them to become
on image.
3. I used the first image and layer masked
it I rubbed out the background and used
the normal tool to find the right filter in so
the image can blend into the background.
I used the pin light option and duplicated
the layer four times. I changed the size of
each layer making sure that they get
smaller as the go back. I used the
adjustment option to change some
aspects of the background image. I then
merged the layers once I finished working
on them. I will present my work on A3
piece of photo paper.
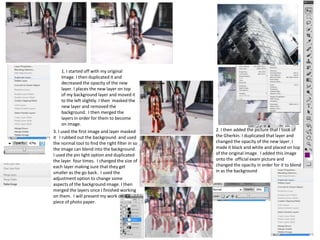
2. I then added the picture that I took of
the Gherkin. I duplicated that layer and
changed the opacity of the new layer. I
made it black and white and placed on top
of the original image. I added this image
onto the official exam picture and
changed the opacity in order for it to blend
in as the background
2. 1. I took this picture and chose it out of
other pictures that I had on a contact sheet.
This is the main background image. I then
used my other images and chose a position
of each person and layer masked the image.
I removed the unwanted background and
left the person in the image. I did this three
times to three of my images on my contact
sheet.
2. I used the background image twice and
changed the photo filter. I used purple
and pink. I places these filters behind my
original background and used the eraser
tool to erase parts of my background in
order to see the layers behind it.
3. Once I had finished working on
the background I worked on the
mask layers using the adjustment
tool to edit it. I then merged the
layers once I finished working on
them . I will present my work in an
A3 piece of paper.